


High Performance 4L60E Build Thread
Thread Starter
Teching In
Joined: Aug 2016
Posts: 32
Likes: 1
From: Allen, TX
First, I have limited transmission experience so the information you see here may very well be incorrect. However, I wanted to share this thread so other members could see what it takes to build a moderately heavy duty 4L60E. So if you follow along, do so at your own risk.
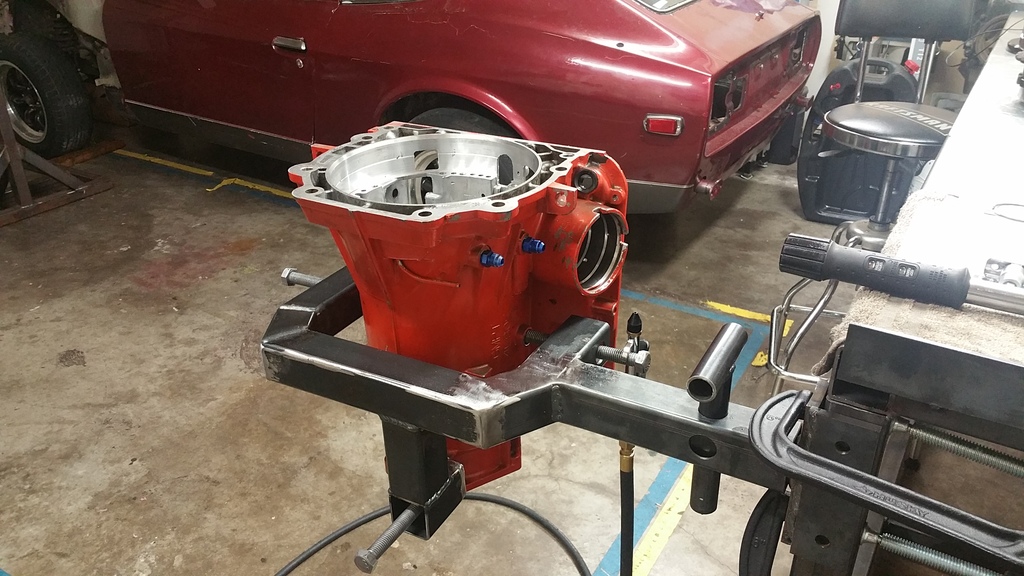
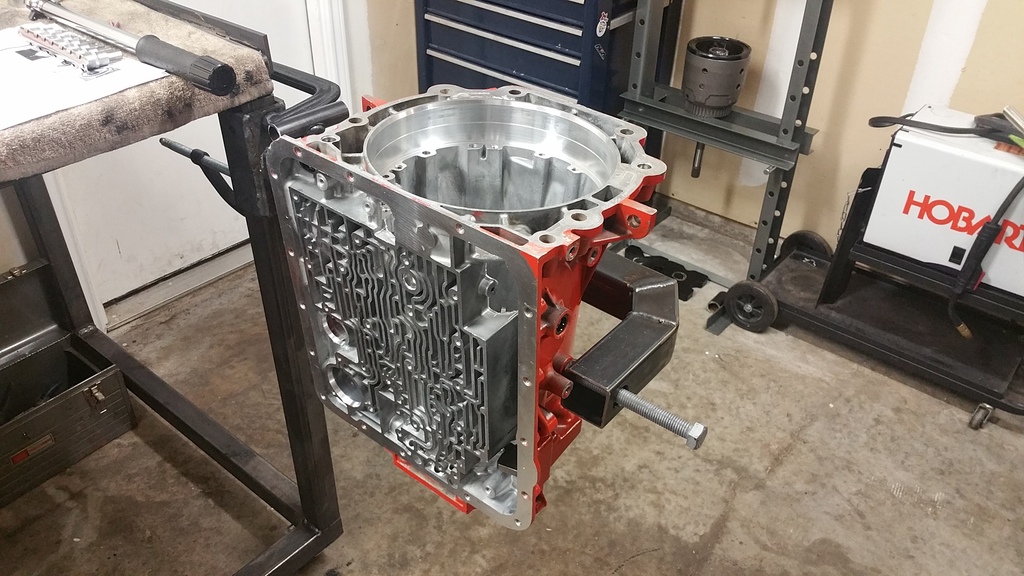
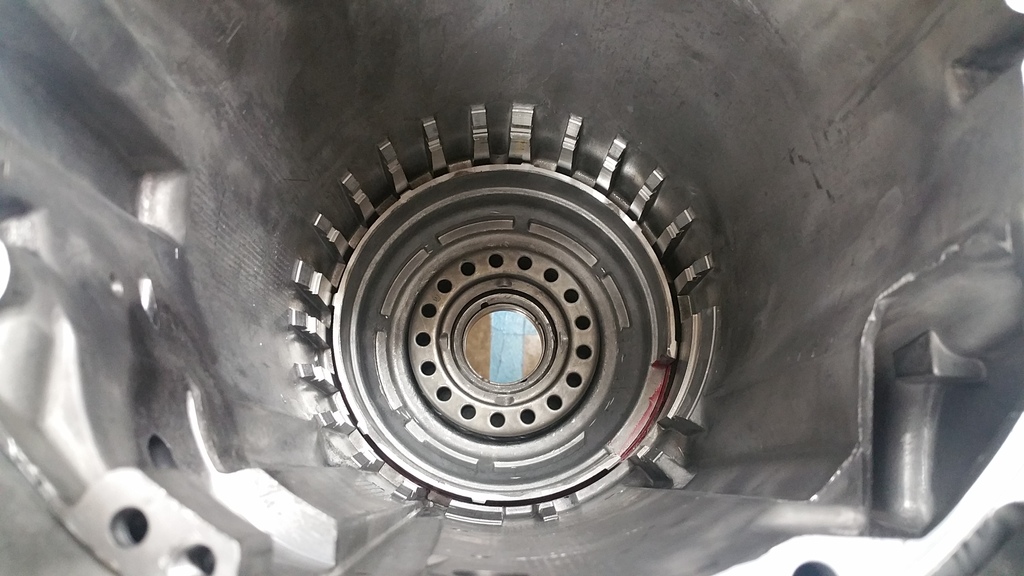
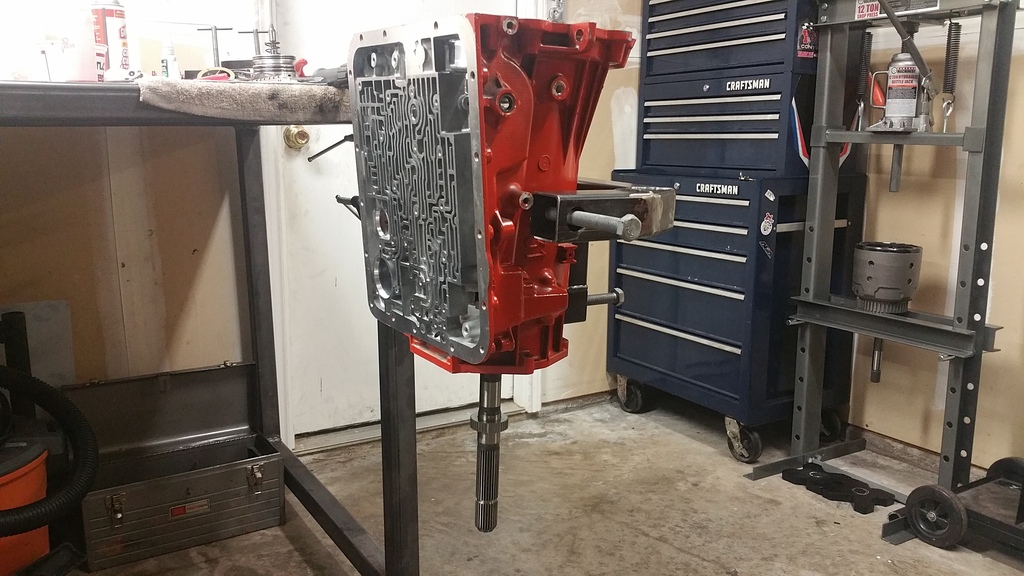
Let's get started... Here is my dirty garage where I play with cool stuff. You can see the orange 4l60e case on the trans fixture. There are plenty of good resources which show in detail how to tear down the 4l60e transmission so this thread will only show the build up.
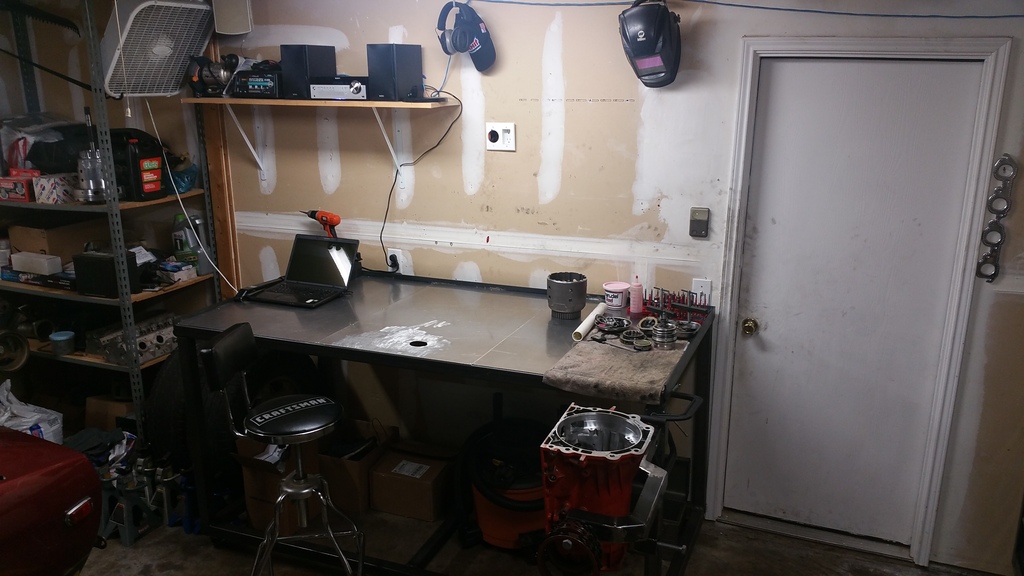
Here are some pictures of my homemade transmission fixture. So far it has worked very well. I would be happy to share the prints for this fixture if anyone would like to build their own.
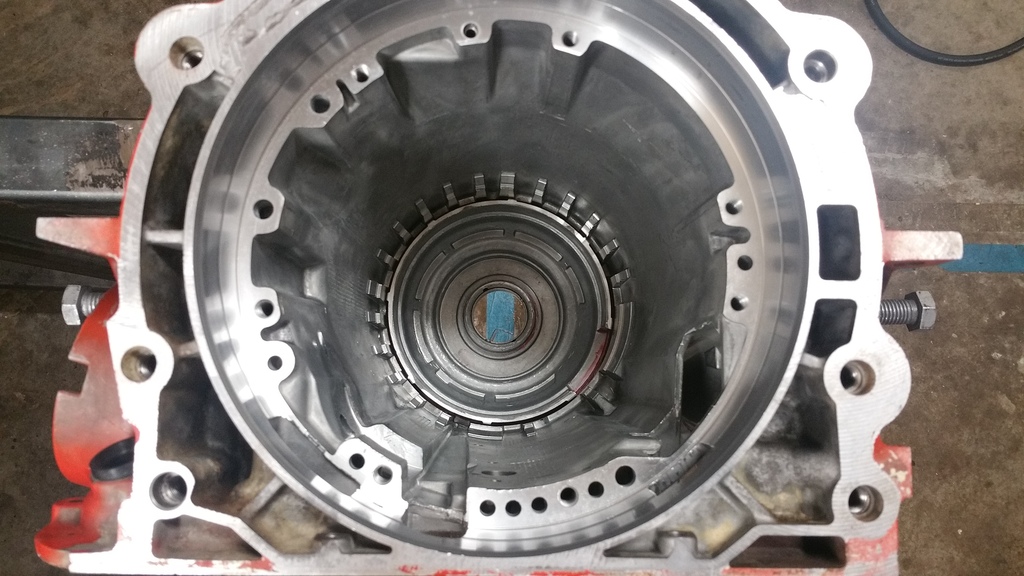
This is the case right after it was cleaned in the parts washer with solvent. Then dried with compressed air. Paint job sucks huh?
Low/Reverse Piston goes in first, light coat of trans gel. There is a tab on the backside of the piston which keys into the receiving notch in the transmission case.
Low/Reverse Piston installed. It takes some pressure to seat but I was able to apply steady pressure and the piston finally clunked into place. You will know when the piston is seated, there is a positive stop when the piston slides into place.
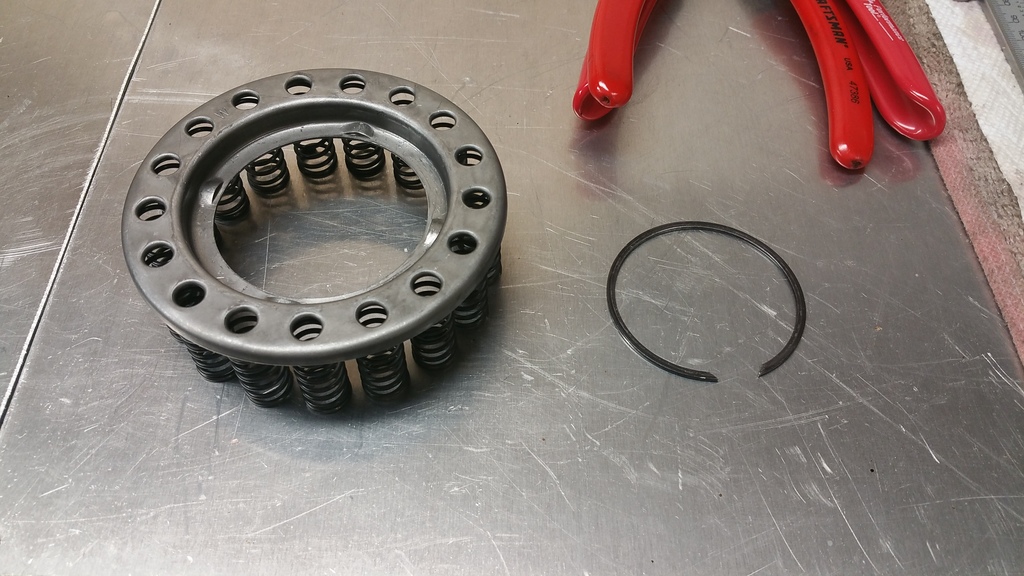
Piston return spring cage and snap ring:
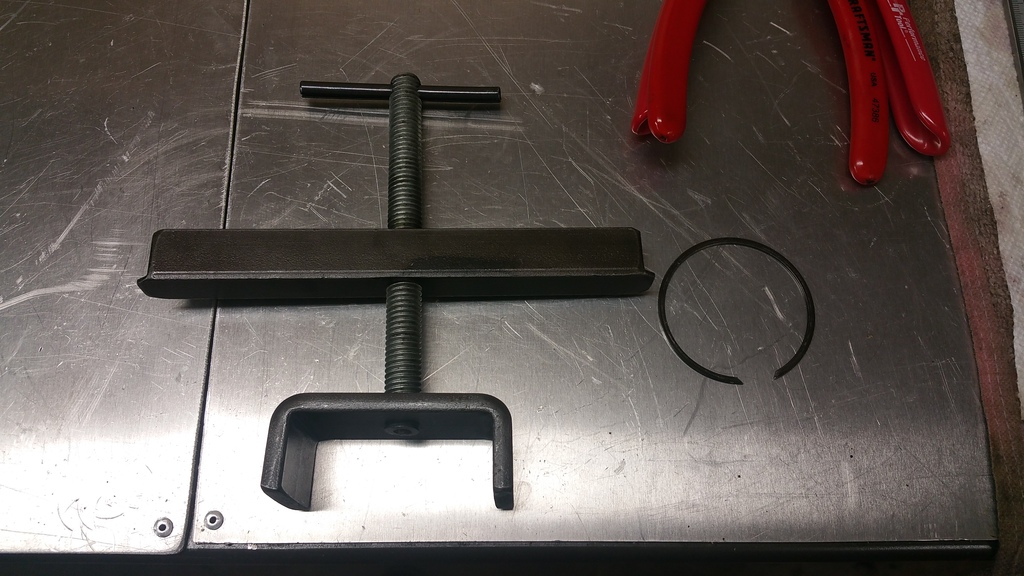
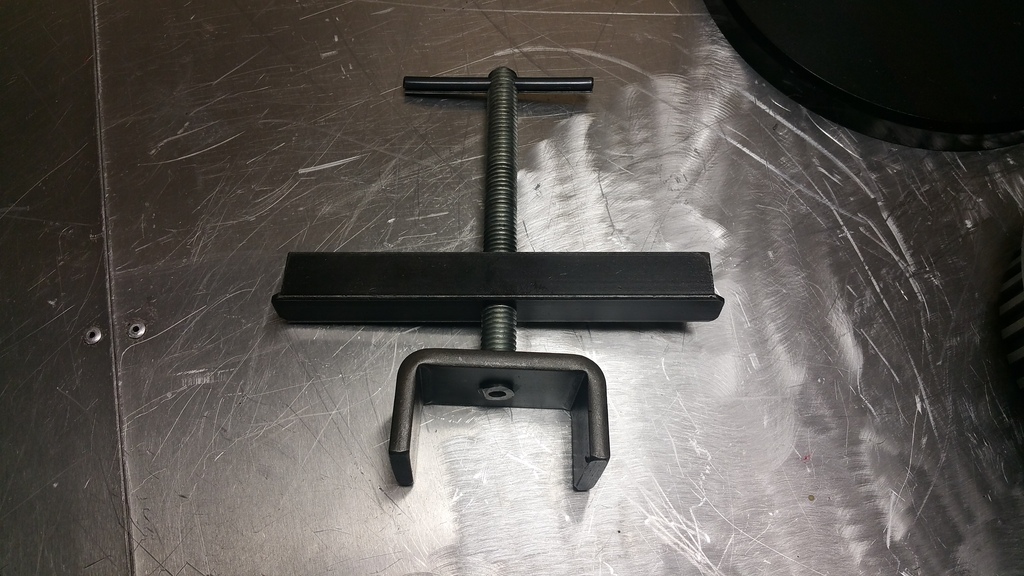
Spring cage compressor tool:
Spring cage in place before being compressed:
Spring cage compressor tool in the case, this allows you to install the snap ring which retains the piston and spring cage in the case.
It is very difficult to see but the snap ring is installed and fully seated in the cage.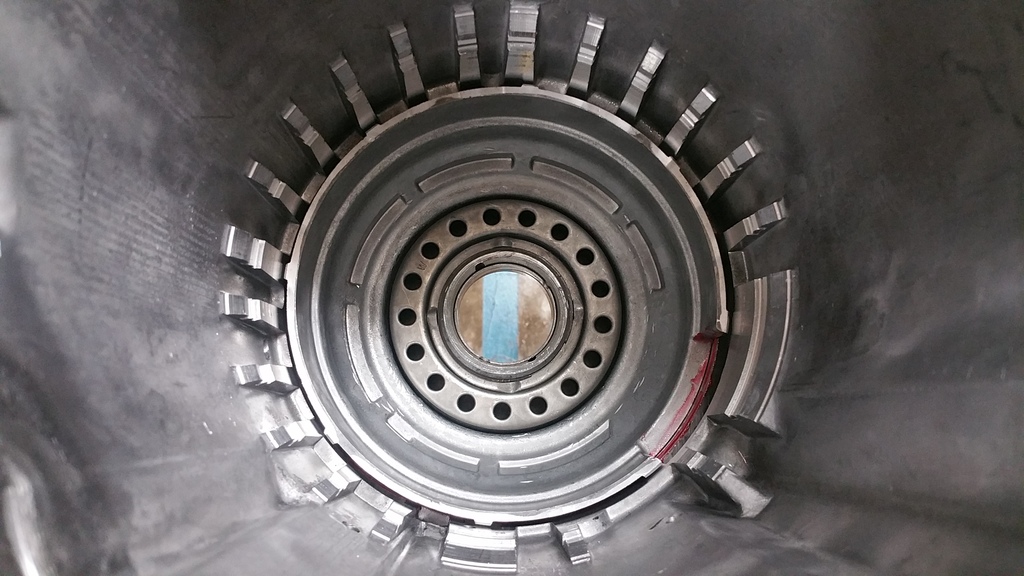
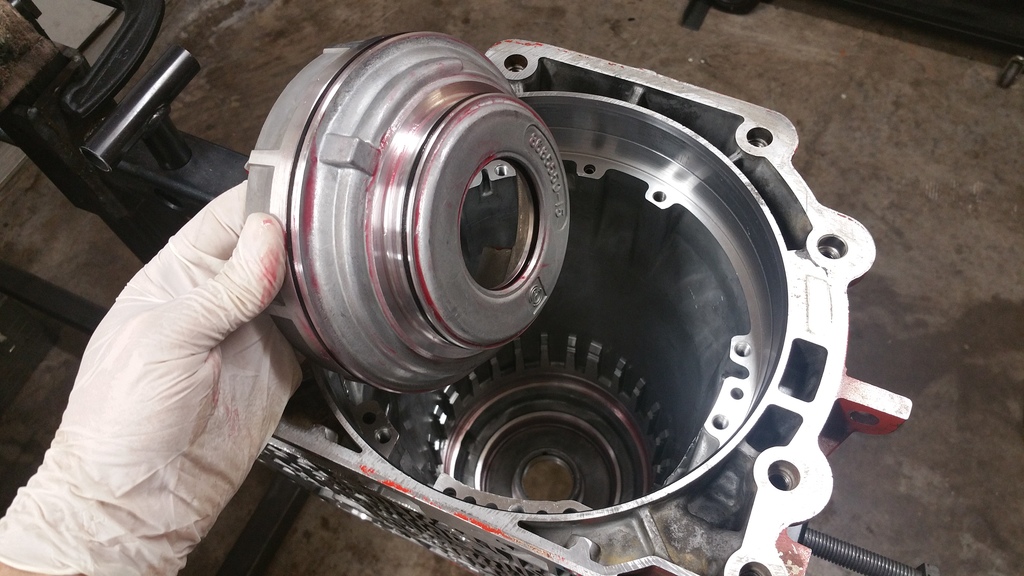
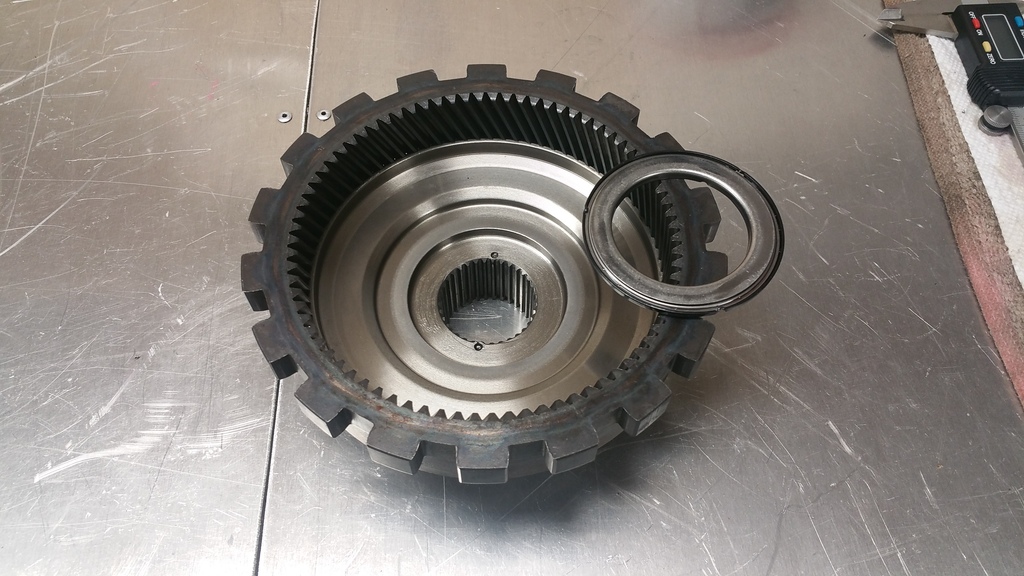
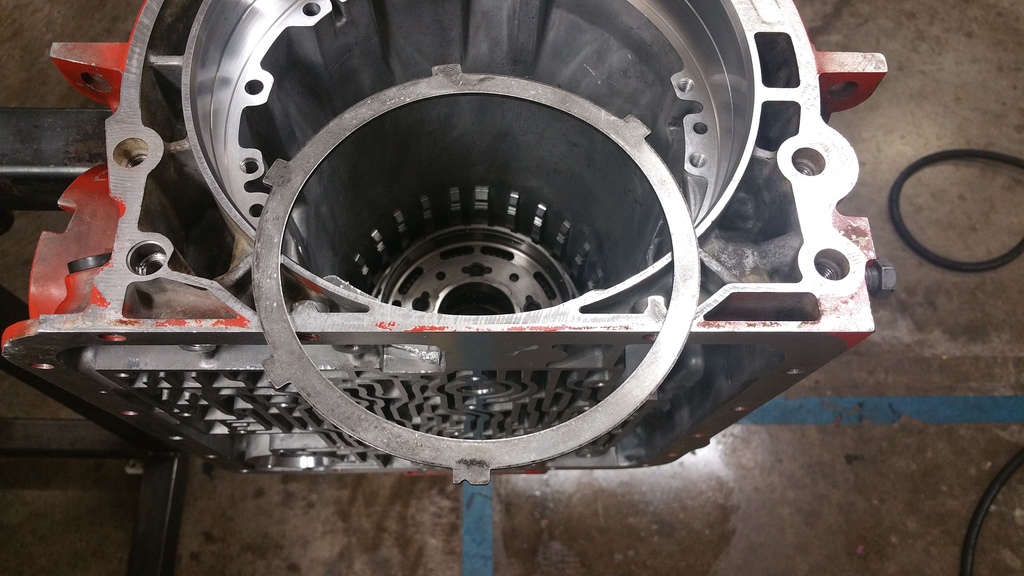
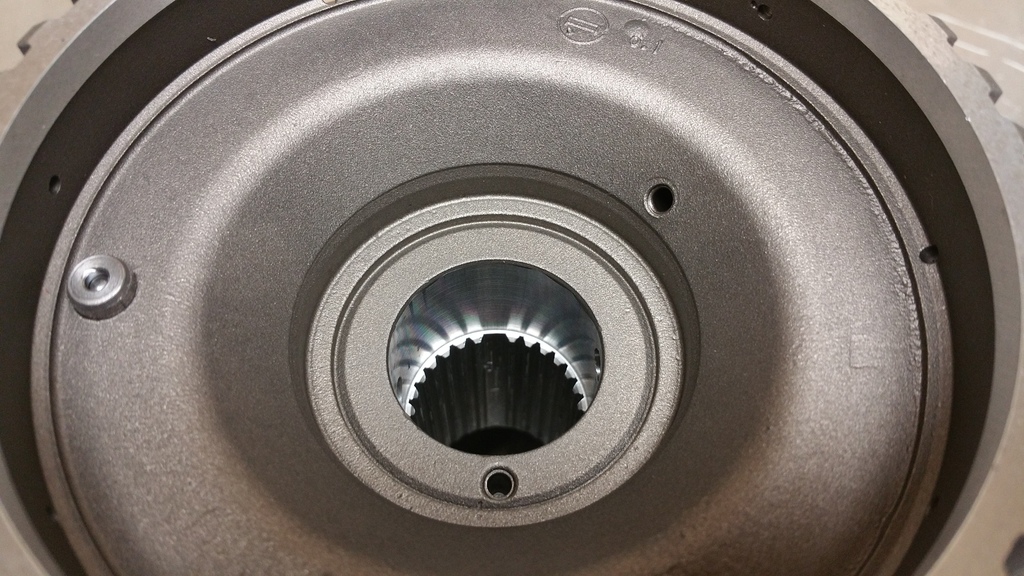
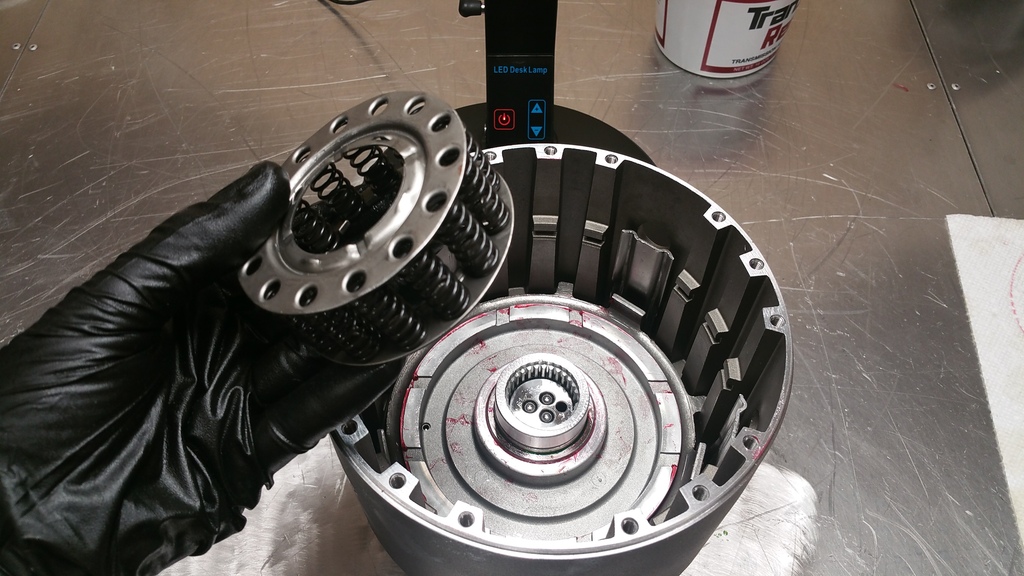
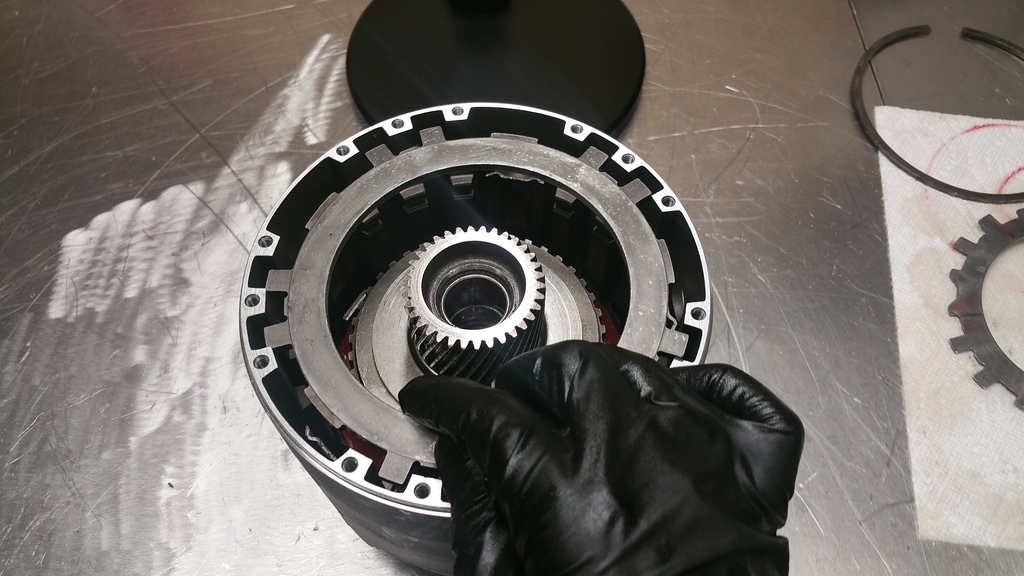
Output ring gear, hub, and bearing go in next.
Place the bearing in the case, make sure the orientation of the bearing is correct.
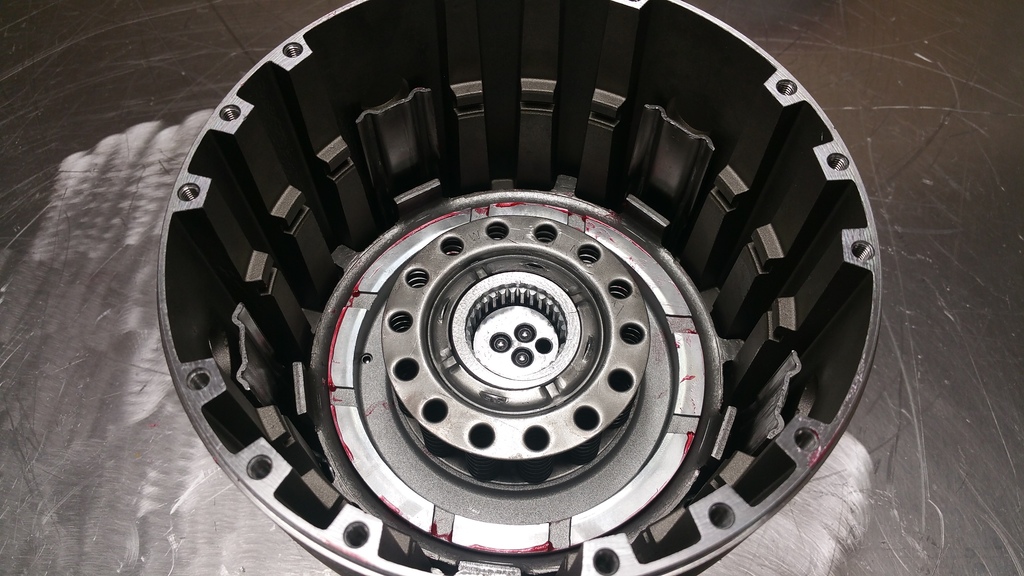
Output ring gear installed and spins nicely:
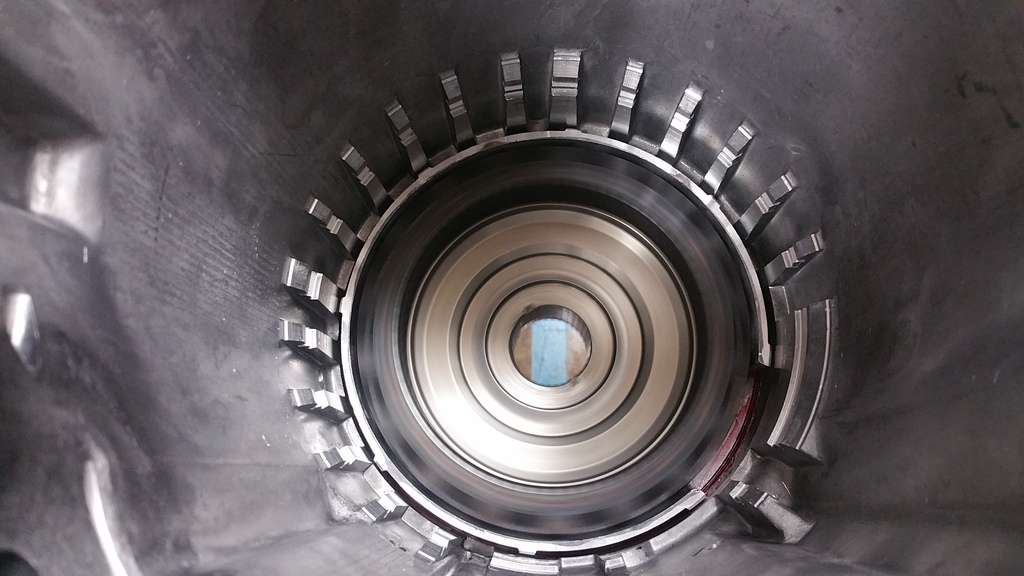
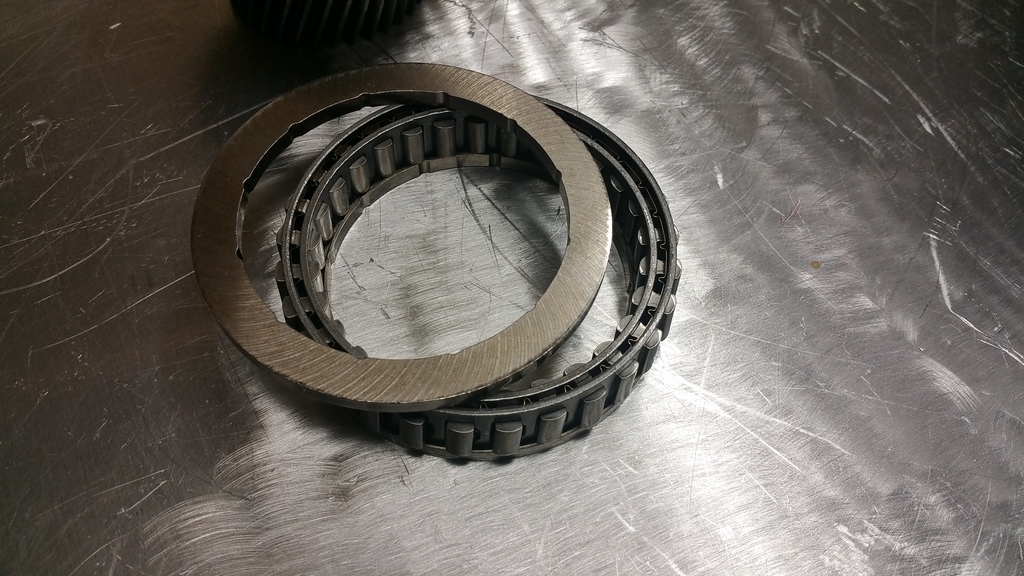
5 Pinion rear planetary and bearing:
Set the bearing on the output hub, and drop in the planetary gear set:
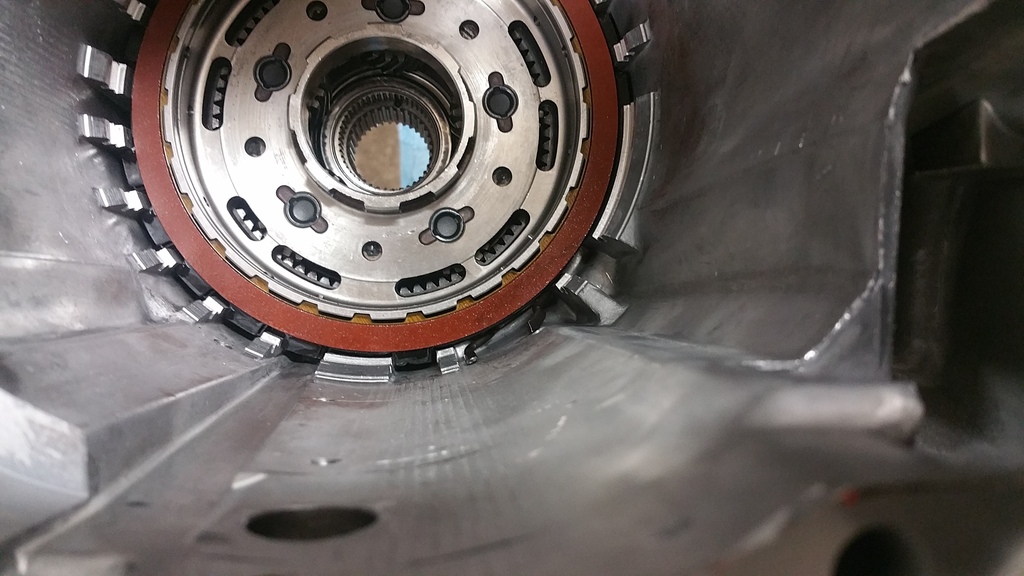
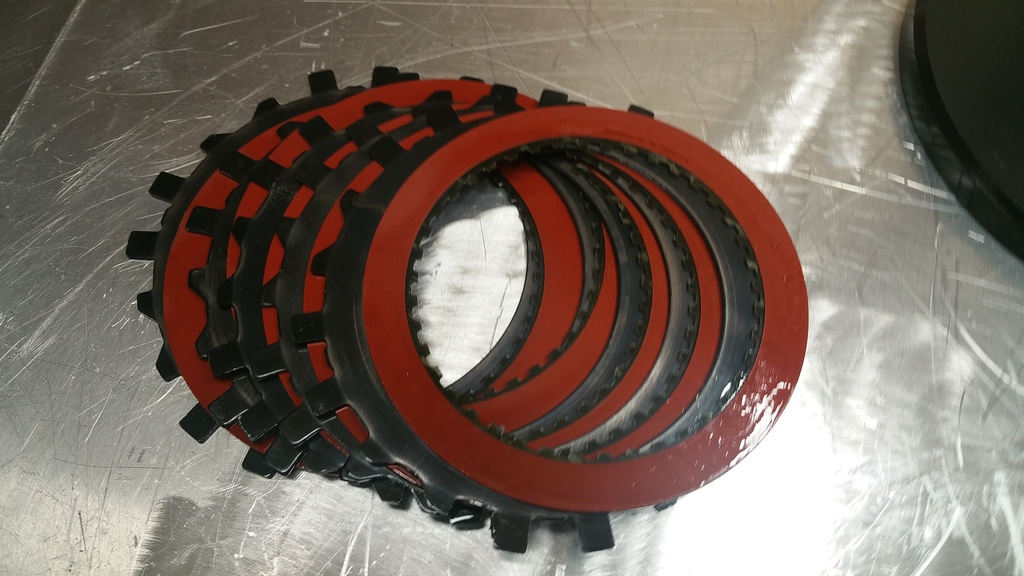
Low/Reverse clutch installation, wavy steel goes in first:
Begin with a steel, alternate with frictions until stack is complete:
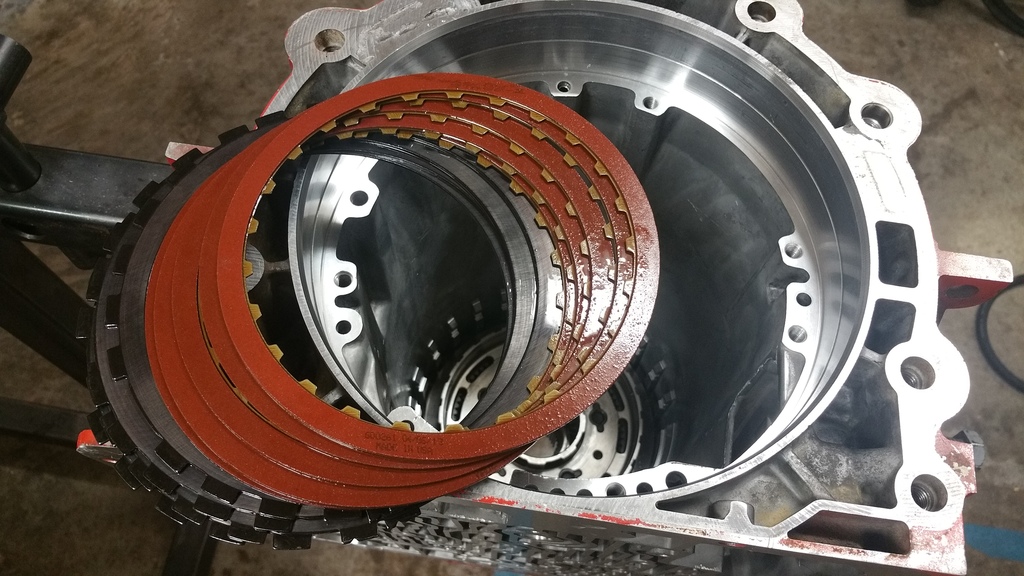
Last plate should be a friction:
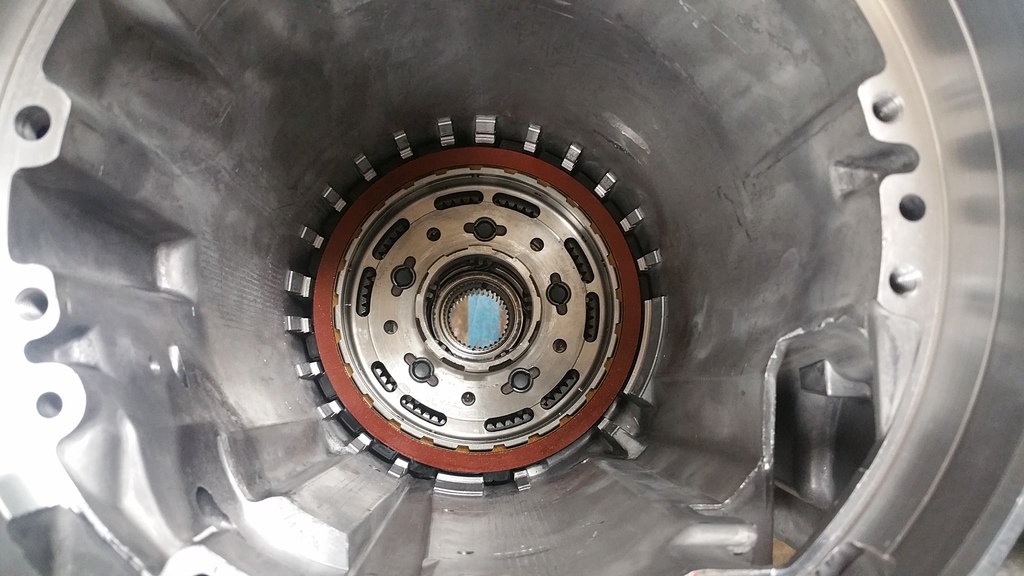
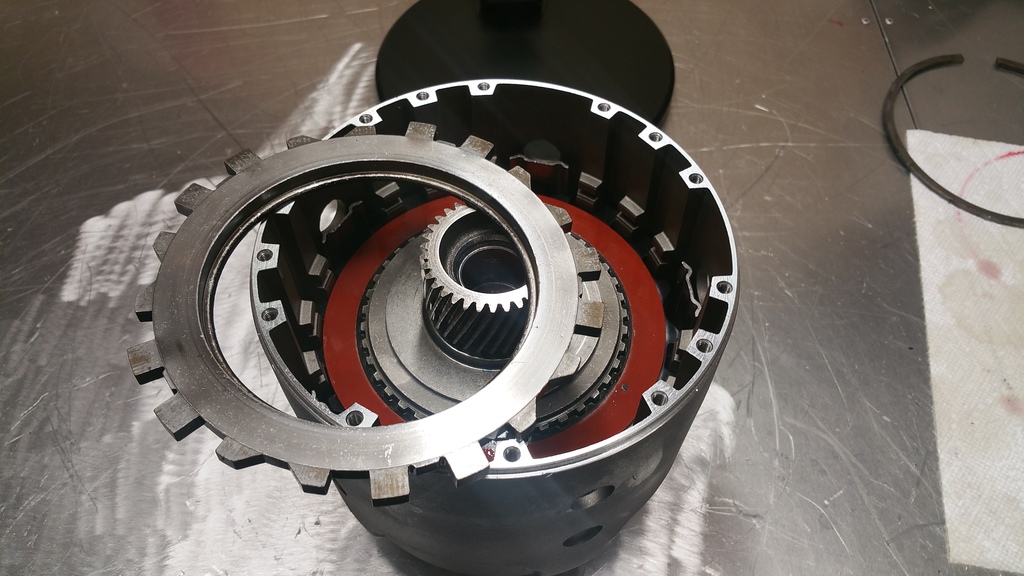
Case Silencer install:
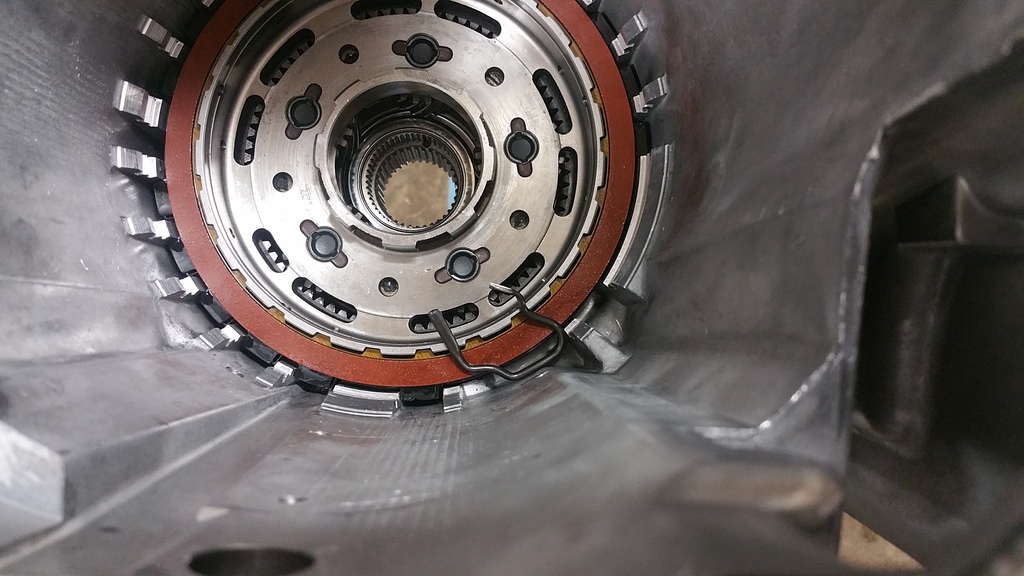
Low roller clutch housing with heavy duty borg warner sprag. Notice the inner race of the roller clutch, this part is included with the Sonnax smart shell kit.
Indexed with the case and installed:
Case snap ring installed:
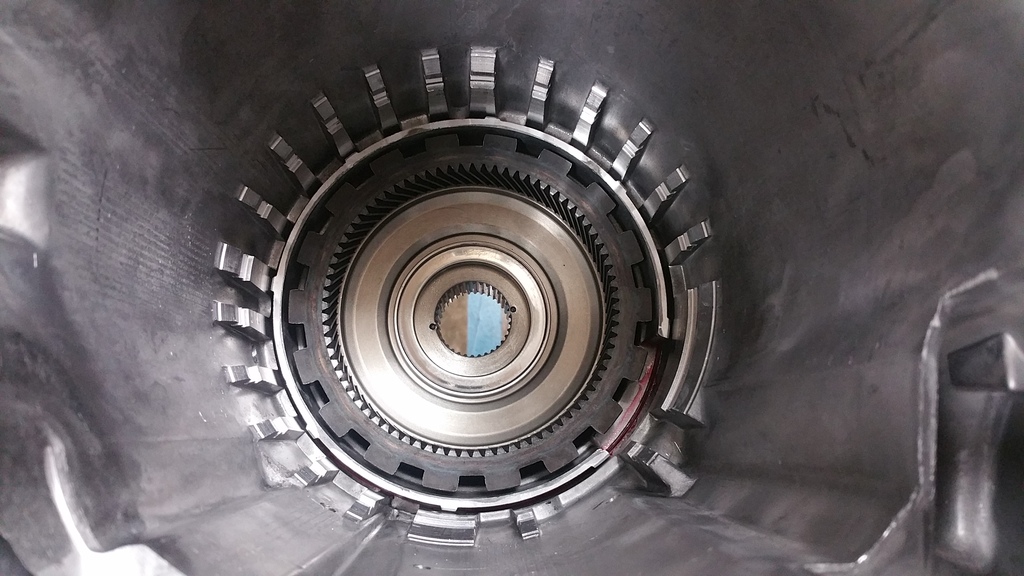
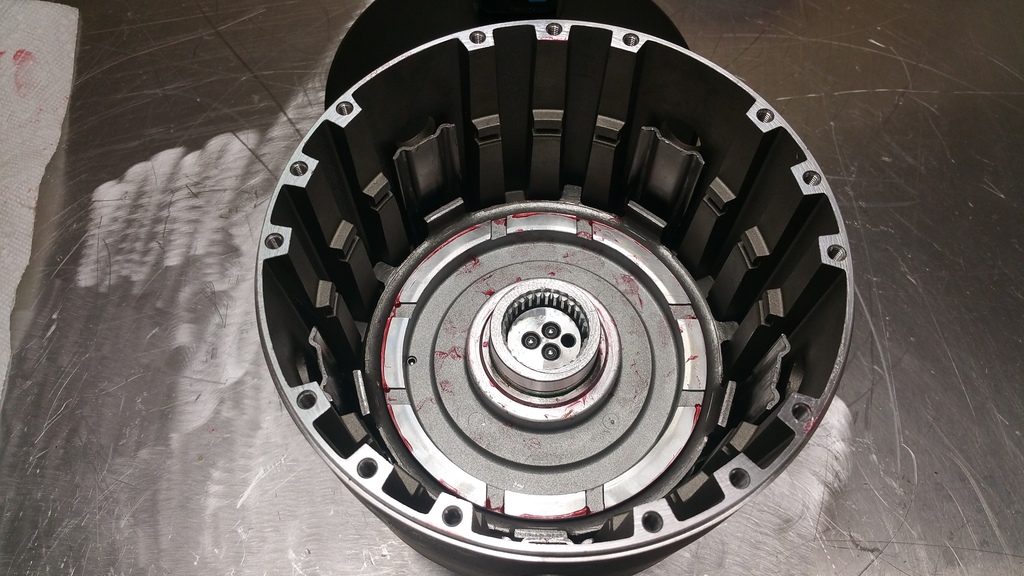
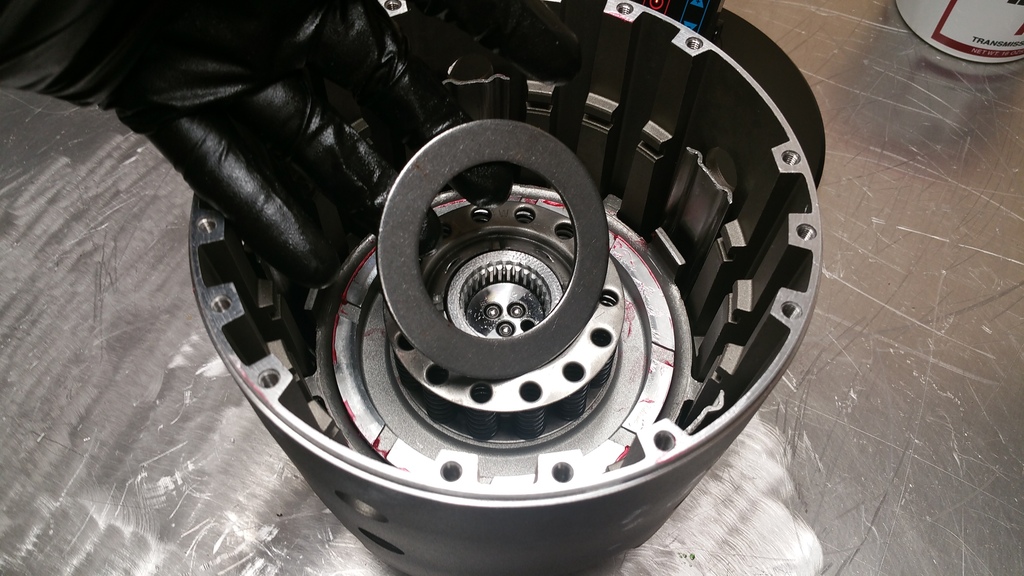
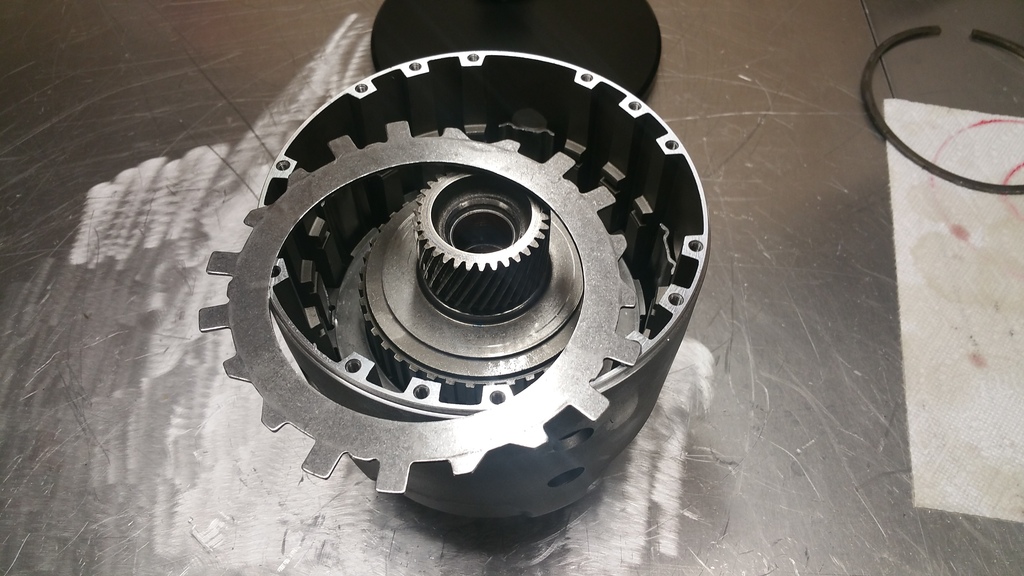
Drop in the rear sun gear:
Sonnax Smart Shell and bearing:
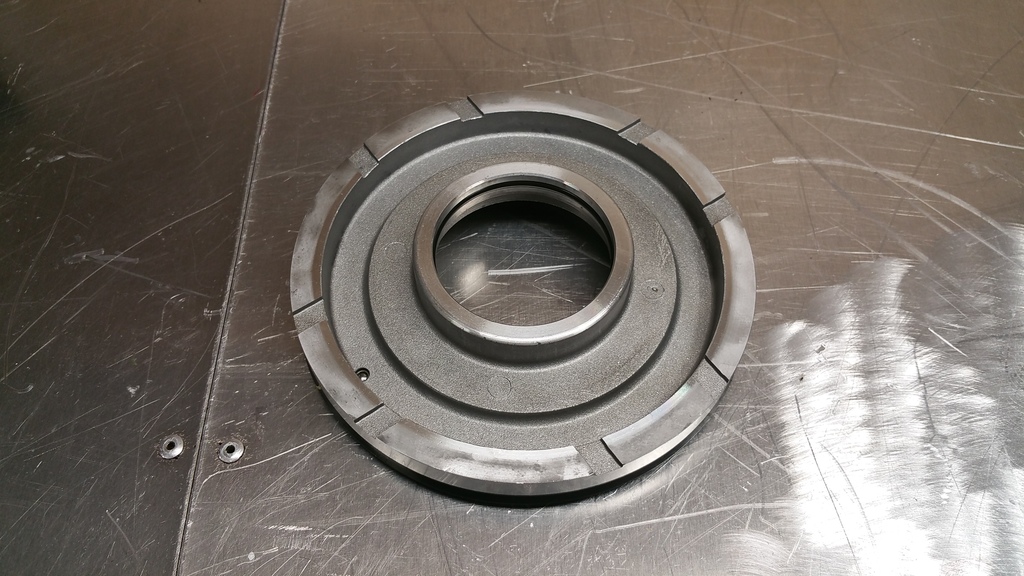
Old washer style reaction shaft upgraded to bearing style:
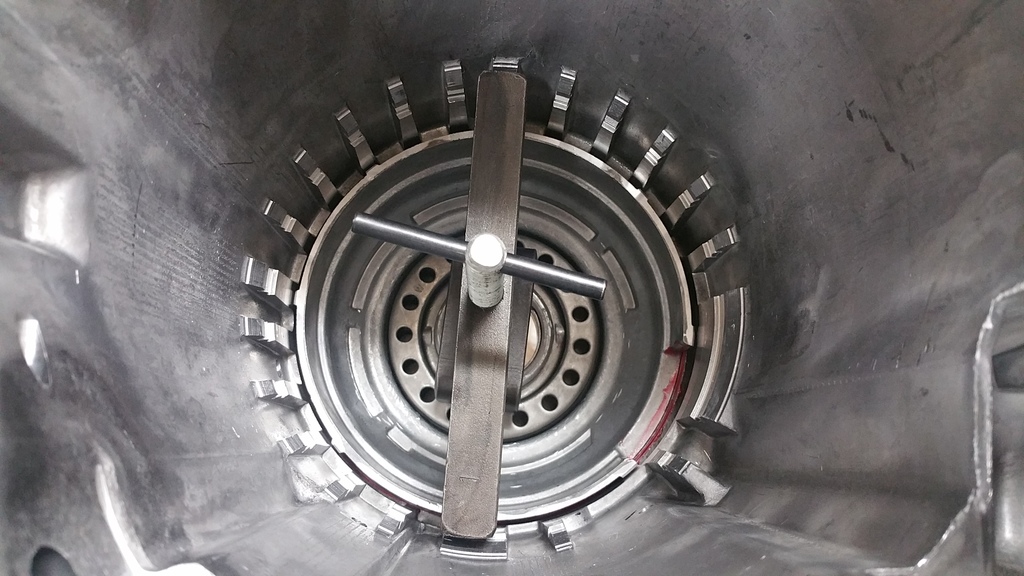
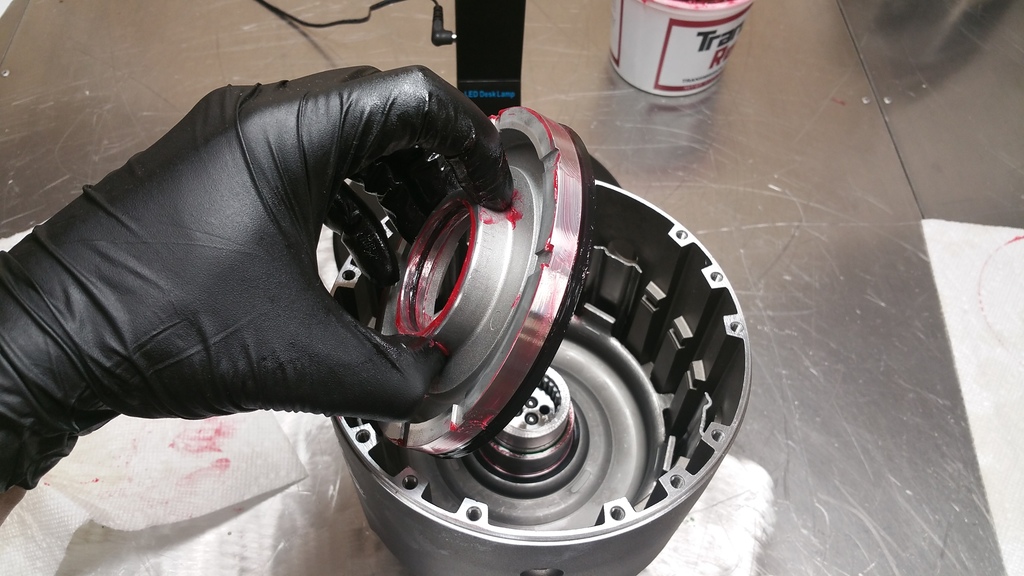
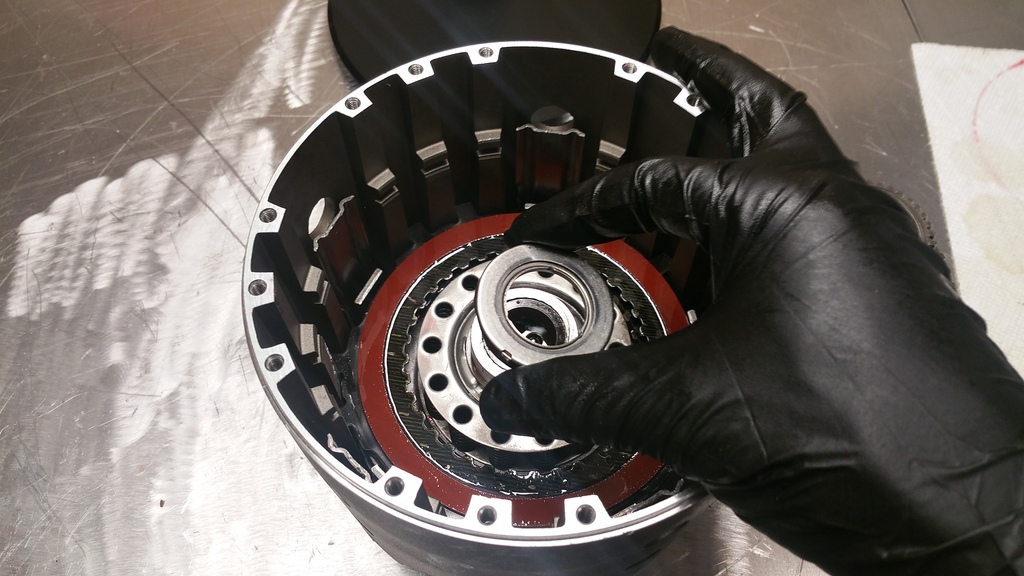
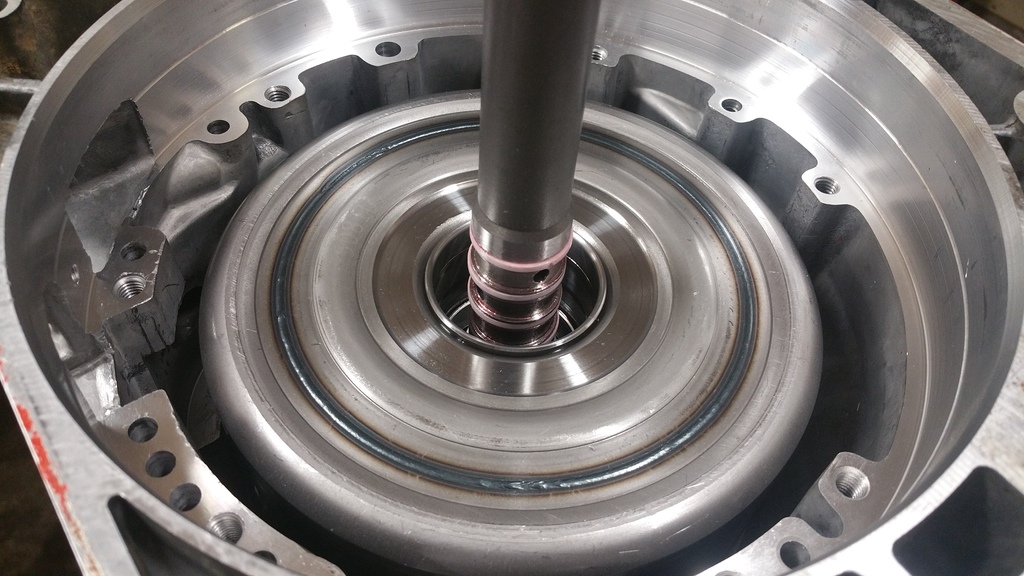
Dropping in the reaction shaft and ring gear:
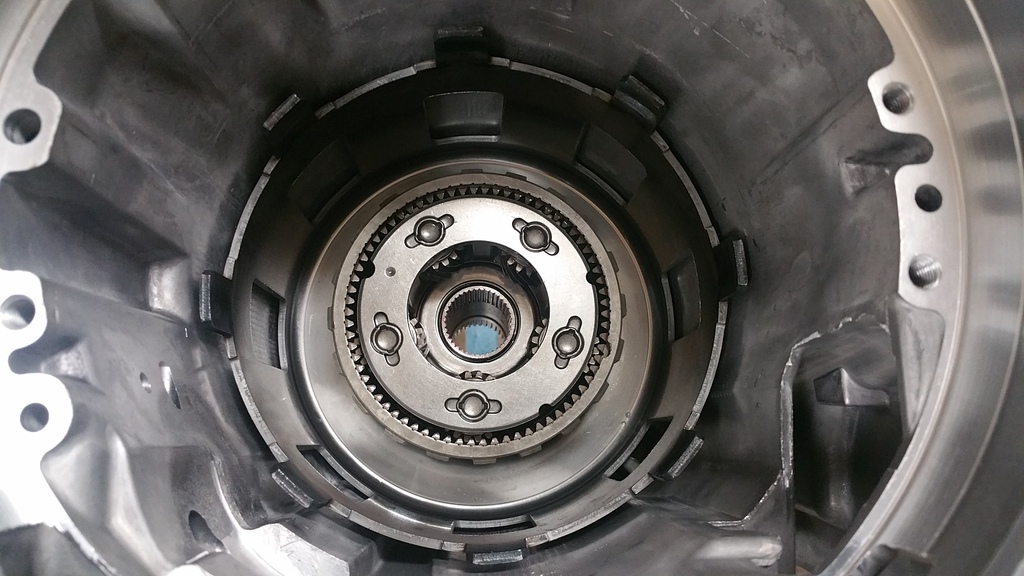
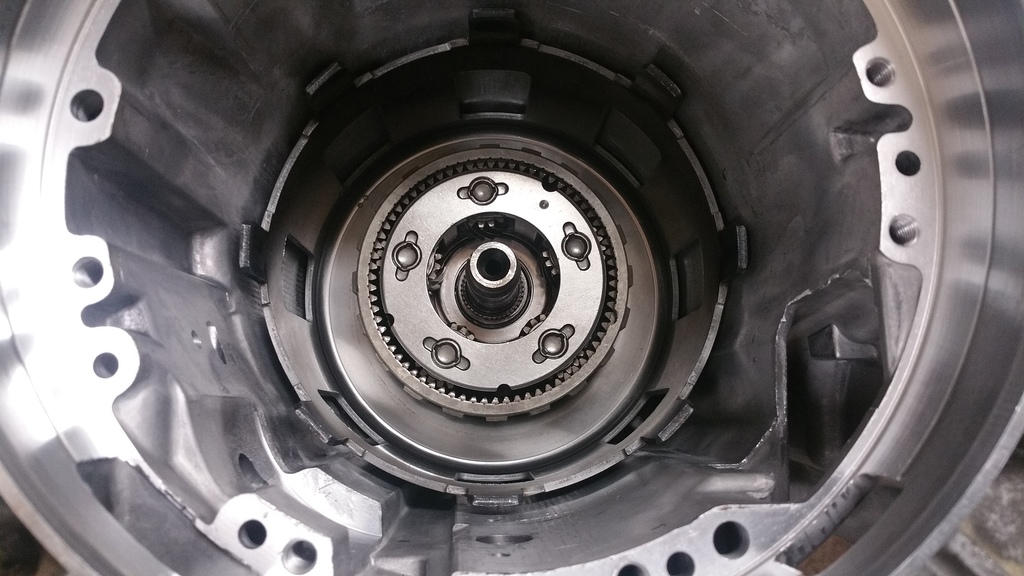
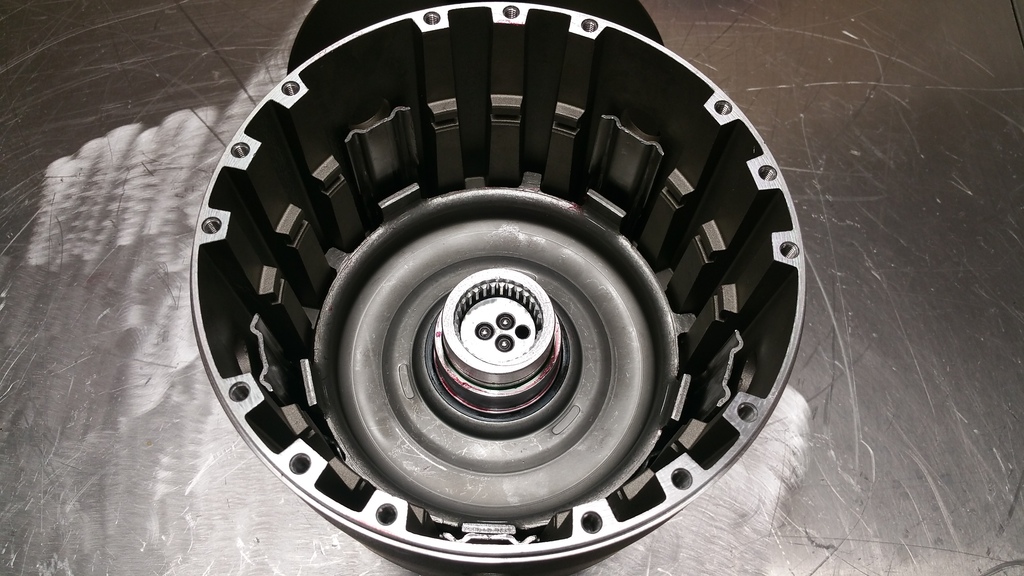
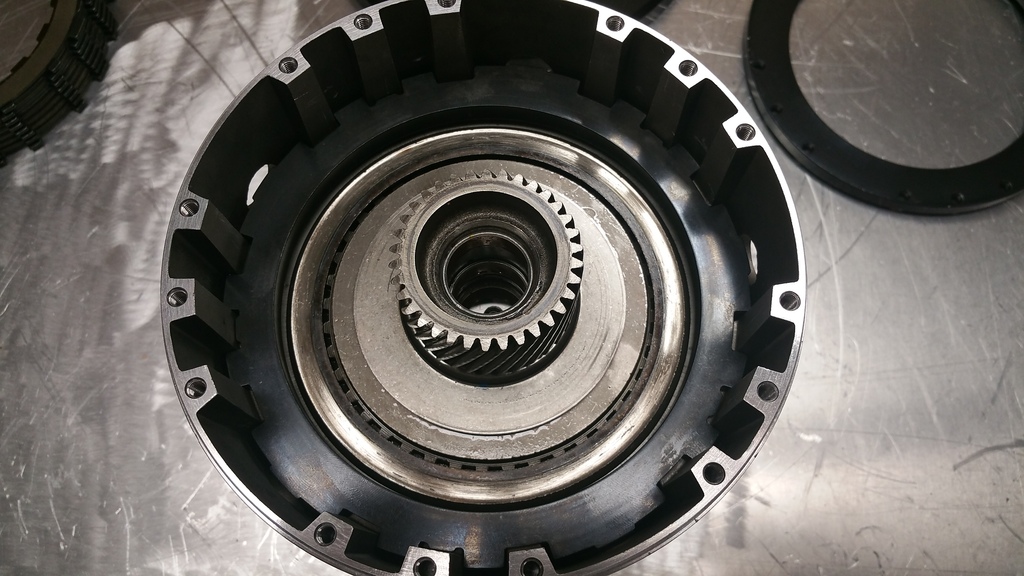
Installed reaction shaft and ring gear, ready for front planetary gear set:

5 Pinion front planetary gear set(early style to match reaction shaft):
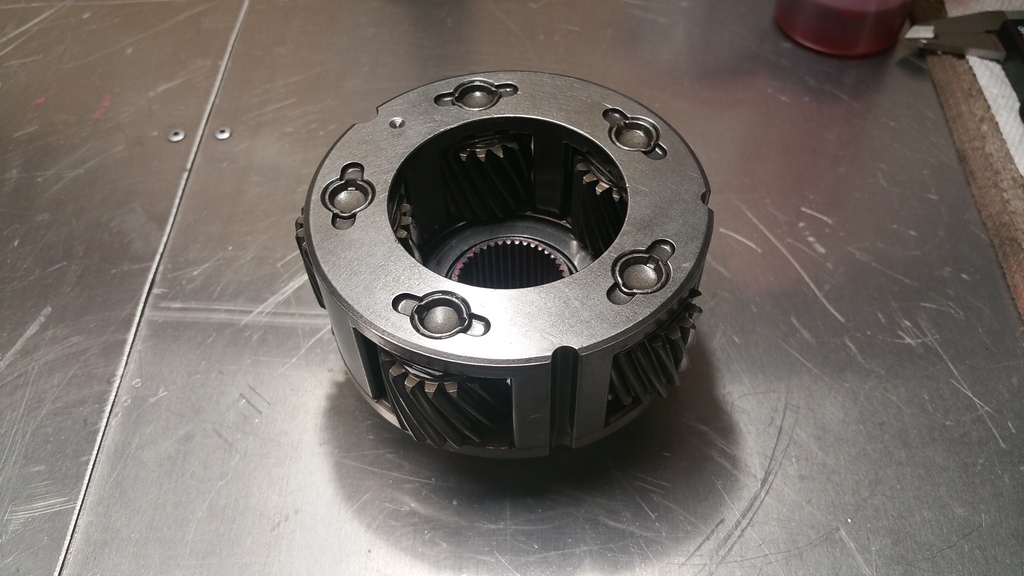
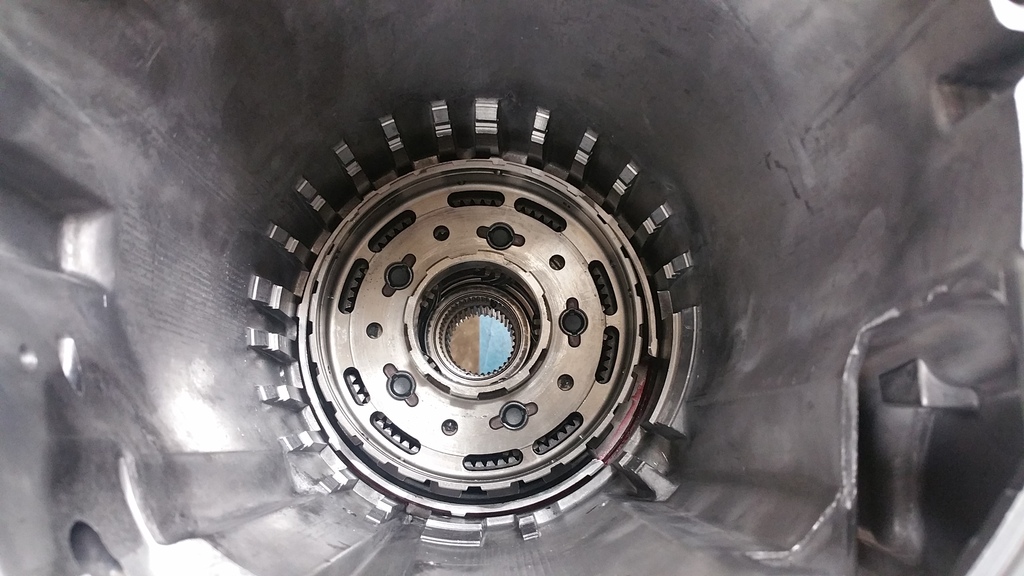
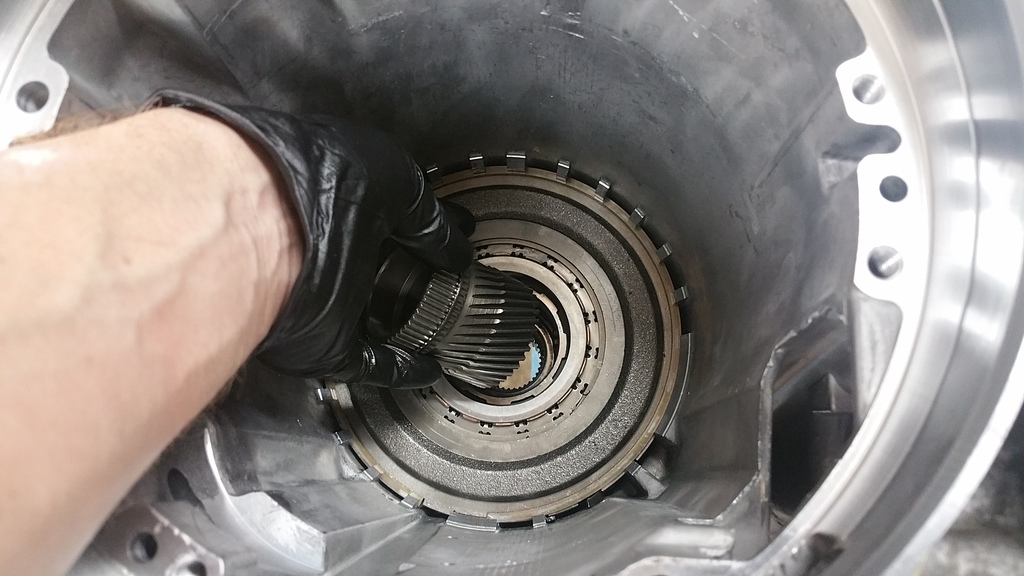
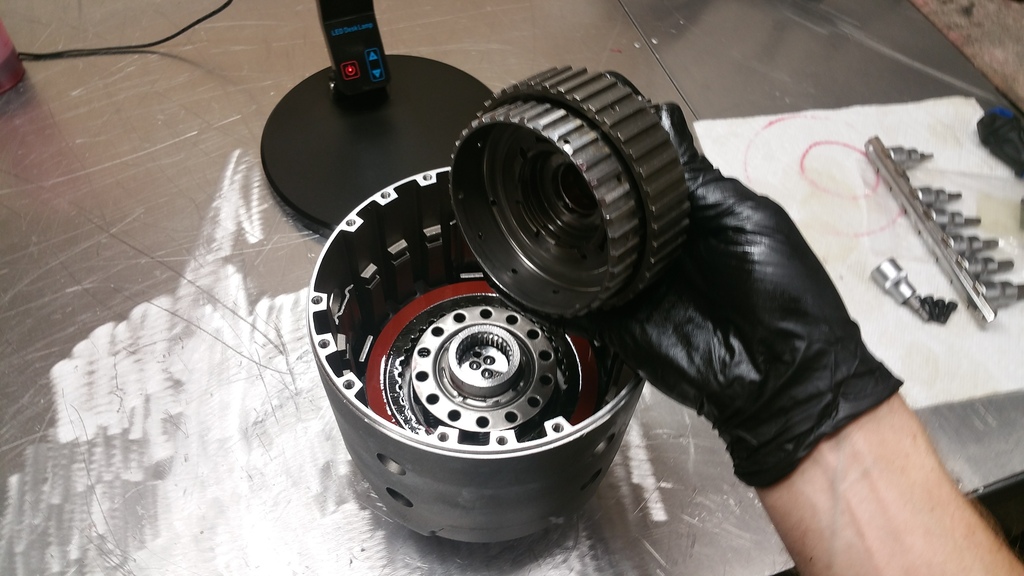
Installed front planetary:
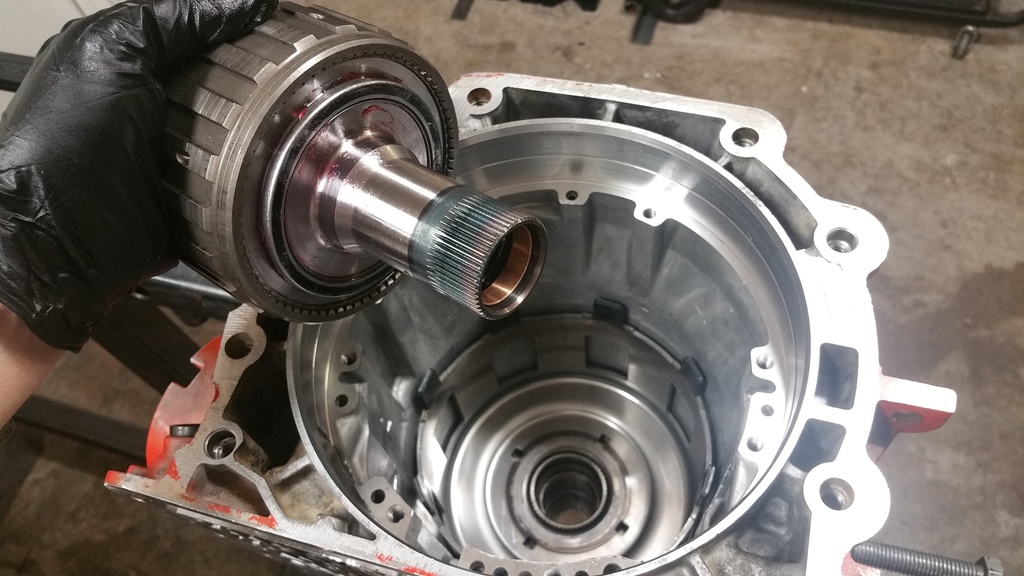
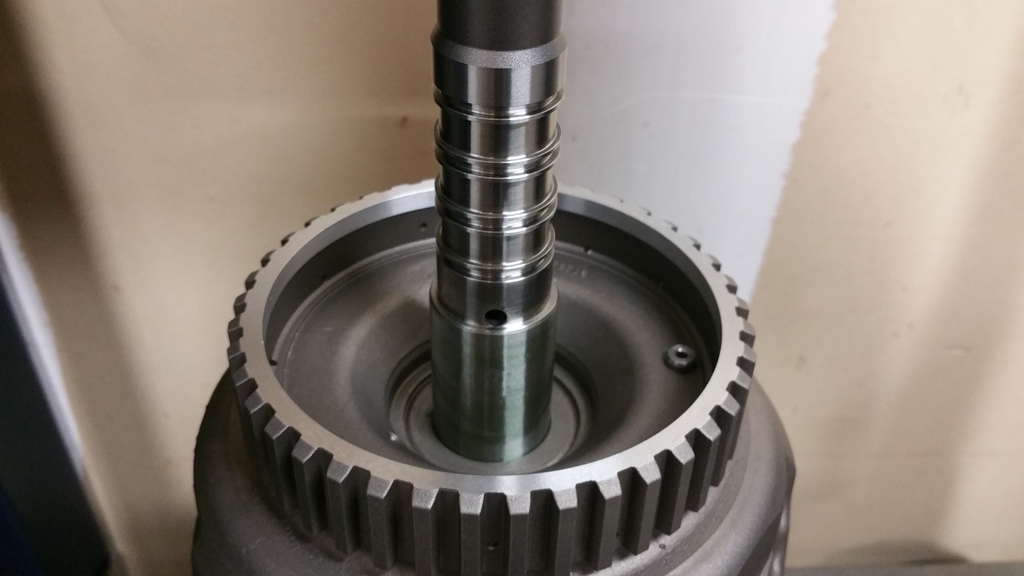
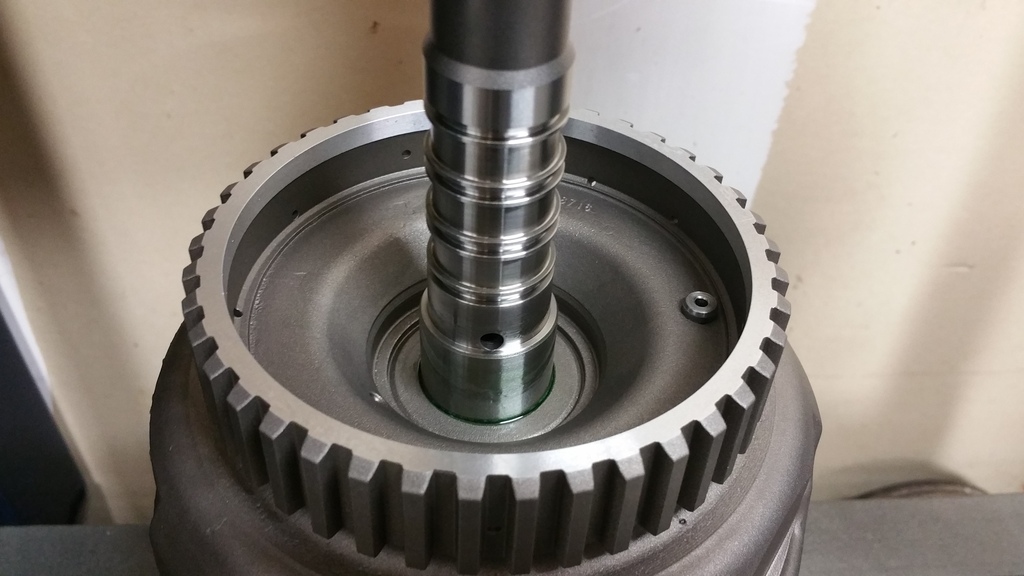
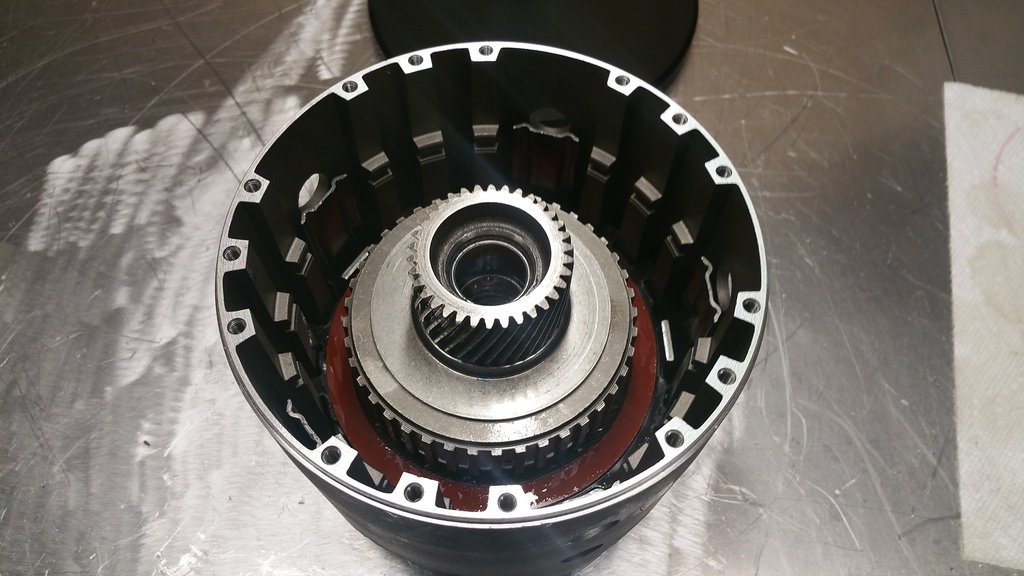
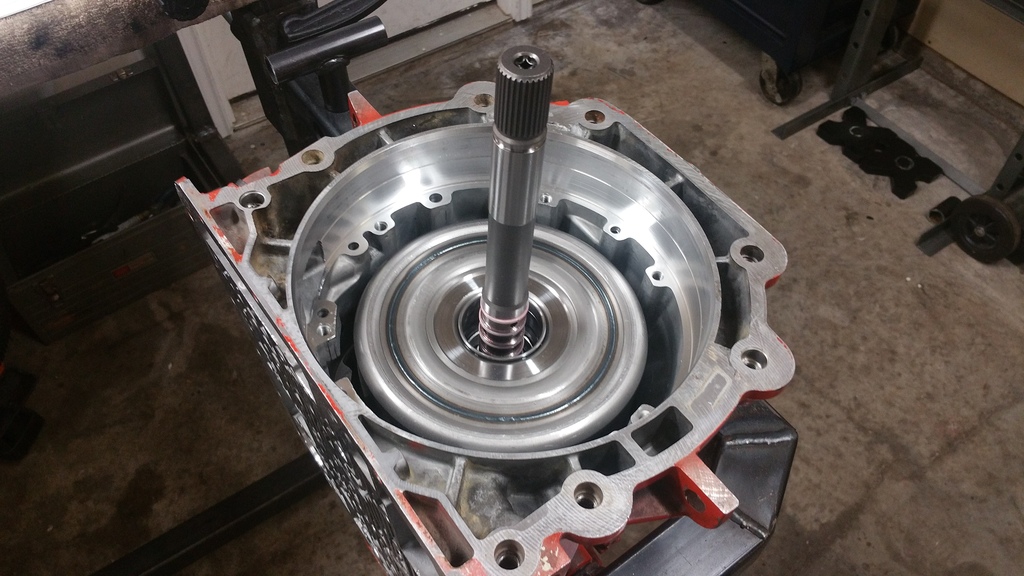
Time to install the output shaft:
Output shaft installed with snap ring:
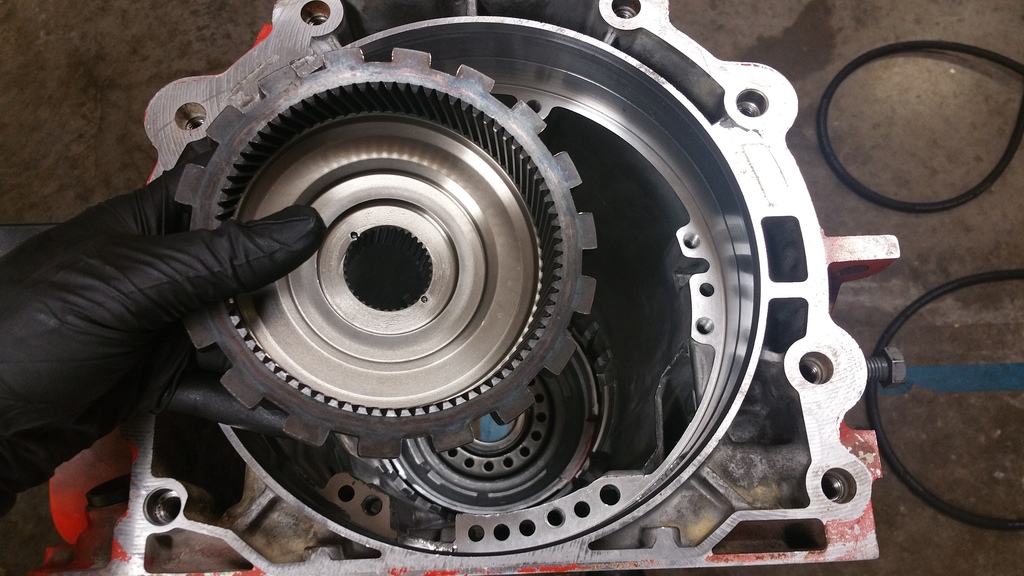
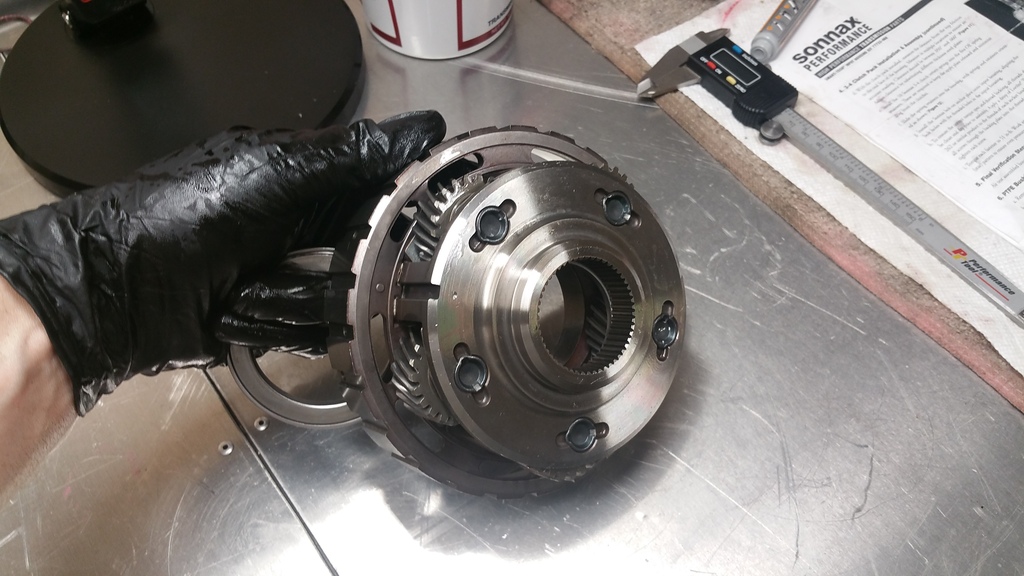
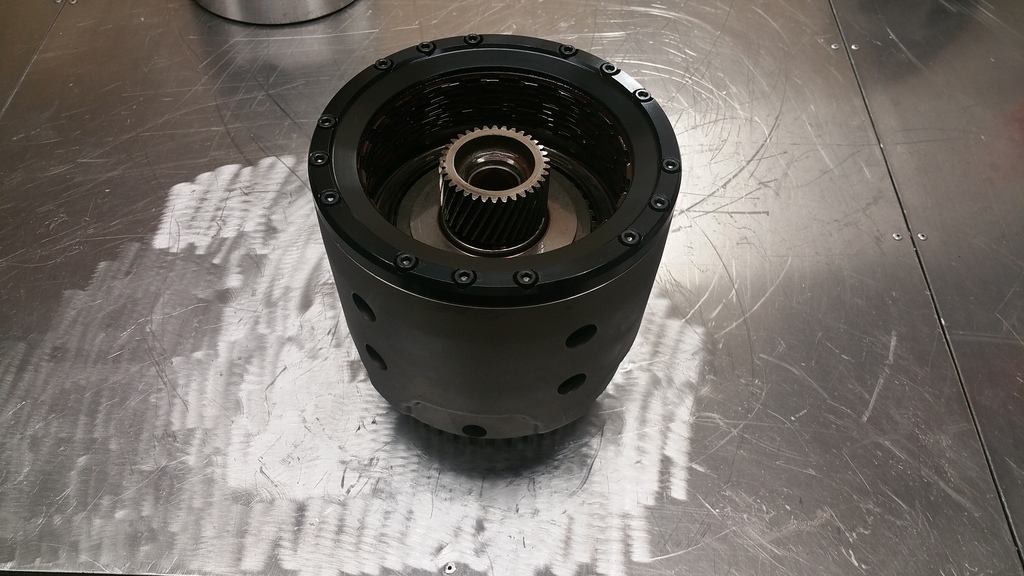
Now on to assembling the Sonnax Smart-Tech input drum...
Let's get started... Here is my dirty garage where I play with cool stuff. You can see the orange 4l60e case on the trans fixture. There are plenty of good resources which show in detail how to tear down the 4l60e transmission so this thread will only show the build up.
Here are some pictures of my homemade transmission fixture. So far it has worked very well. I would be happy to share the prints for this fixture if anyone would like to build their own.
This is the case right after it was cleaned in the parts washer with solvent. Then dried with compressed air. Paint job sucks huh?
Low/Reverse Piston goes in first, light coat of trans gel. There is a tab on the backside of the piston which keys into the receiving notch in the transmission case.
Low/Reverse Piston installed. It takes some pressure to seat but I was able to apply steady pressure and the piston finally clunked into place. You will know when the piston is seated, there is a positive stop when the piston slides into place.
Piston return spring cage and snap ring:
Spring cage compressor tool:
Spring cage in place before being compressed:
Spring cage compressor tool in the case, this allows you to install the snap ring which retains the piston and spring cage in the case.
It is very difficult to see but the snap ring is installed and fully seated in the cage.
Output ring gear, hub, and bearing go in next.
Place the bearing in the case, make sure the orientation of the bearing is correct.
Output ring gear installed and spins nicely:
5 Pinion rear planetary and bearing:
Set the bearing on the output hub, and drop in the planetary gear set:
Low/Reverse clutch installation, wavy steel goes in first:
Begin with a steel, alternate with frictions until stack is complete:
Last plate should be a friction:
Case Silencer install:
Low roller clutch housing with heavy duty borg warner sprag. Notice the inner race of the roller clutch, this part is included with the Sonnax smart shell kit.
Indexed with the case and installed:
Case snap ring installed:
Drop in the rear sun gear:
Sonnax Smart Shell and bearing:
Old washer style reaction shaft upgraded to bearing style:
Dropping in the reaction shaft and ring gear:
Installed reaction shaft and ring gear, ready for front planetary gear set:
5 Pinion front planetary gear set(early style to match reaction shaft):
Installed front planetary:
Time to install the output shaft:
Output shaft installed with snap ring:
Now on to assembling the Sonnax Smart-Tech input drum...
Last edited by Texas Patriot; Sep 14, 2016 at 04:19 PM.
Thread Starter
Teching In
Joined: Aug 2016
Posts: 32
Likes: 1
From: Allen, TX
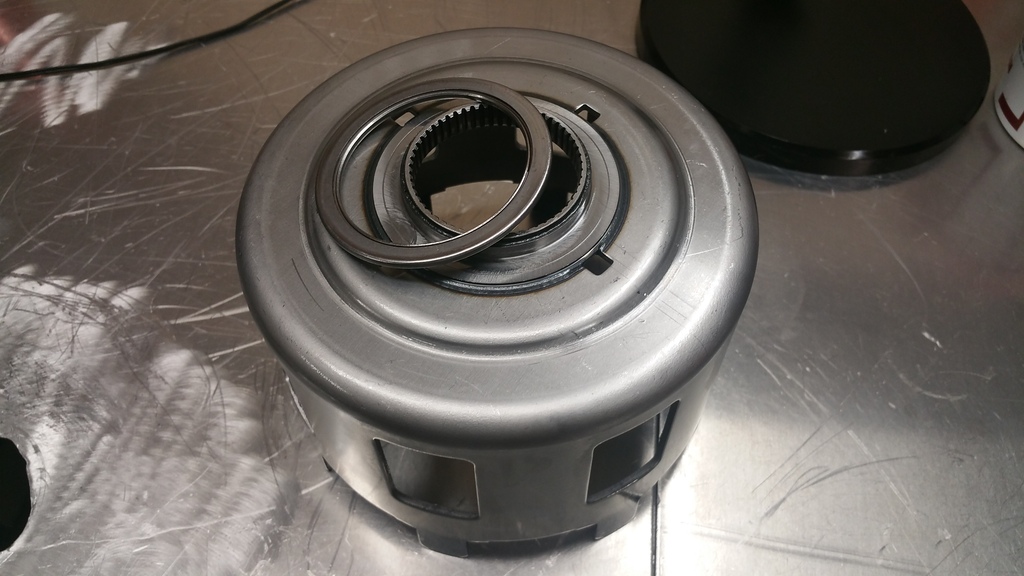
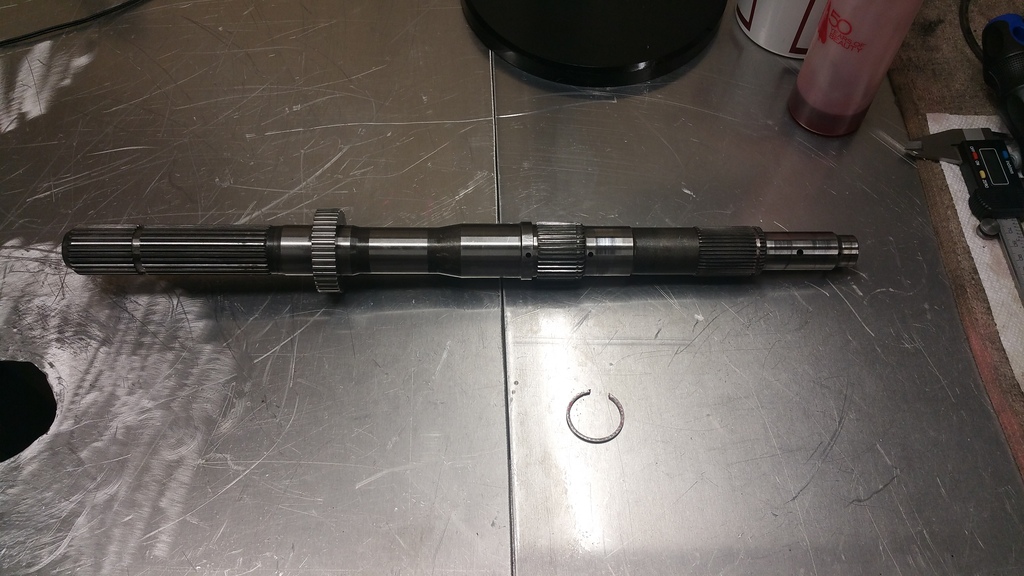
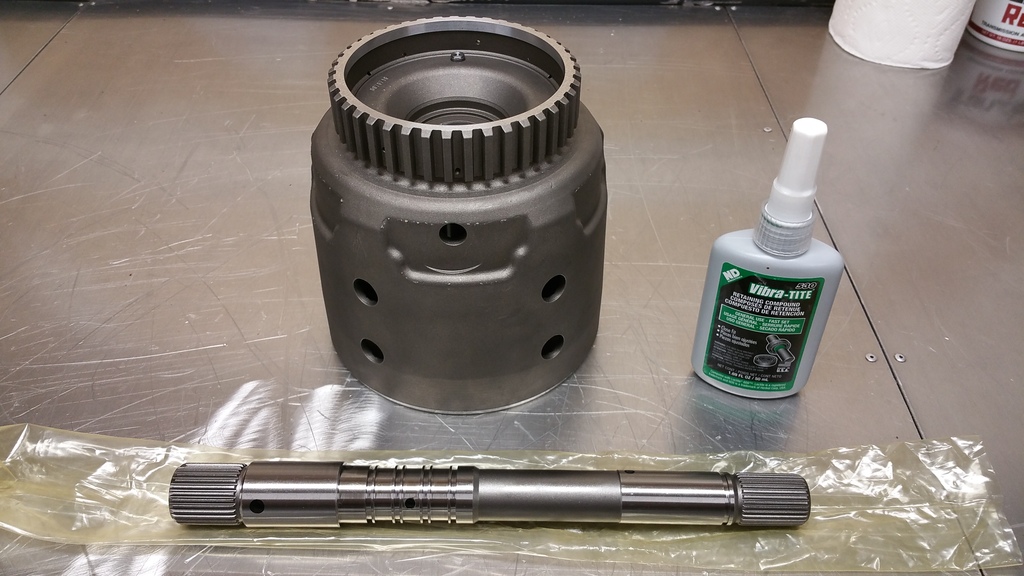
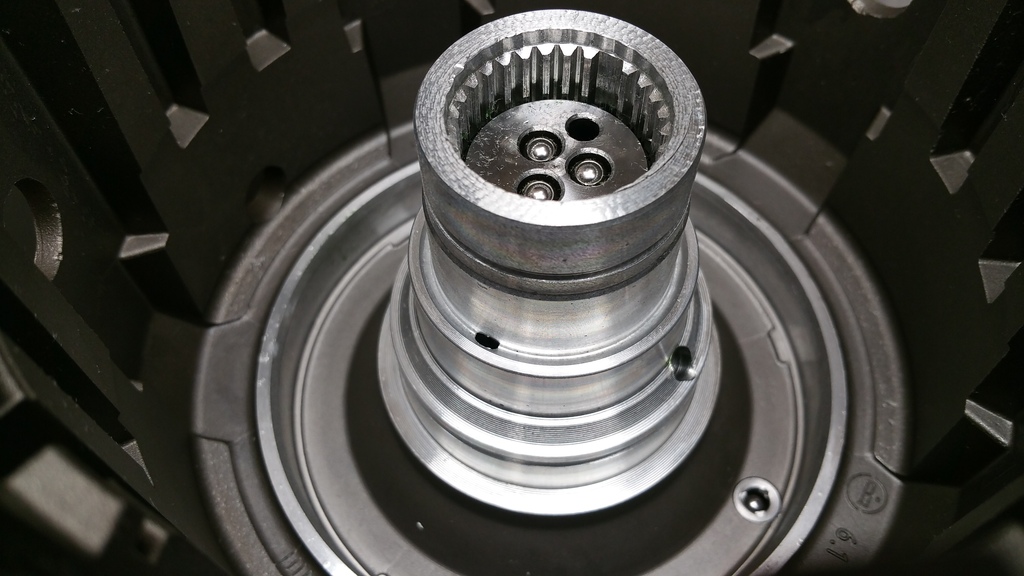
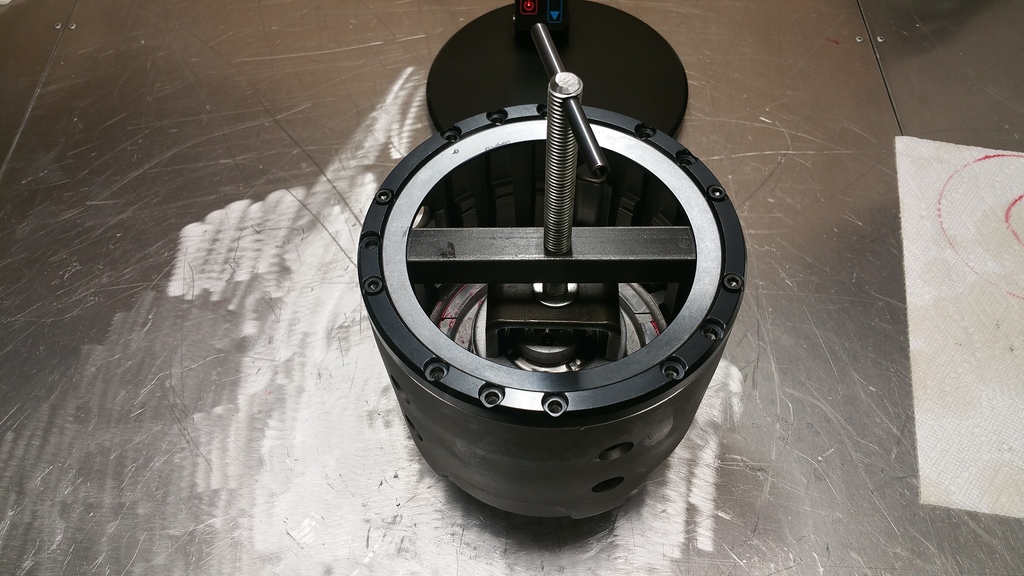
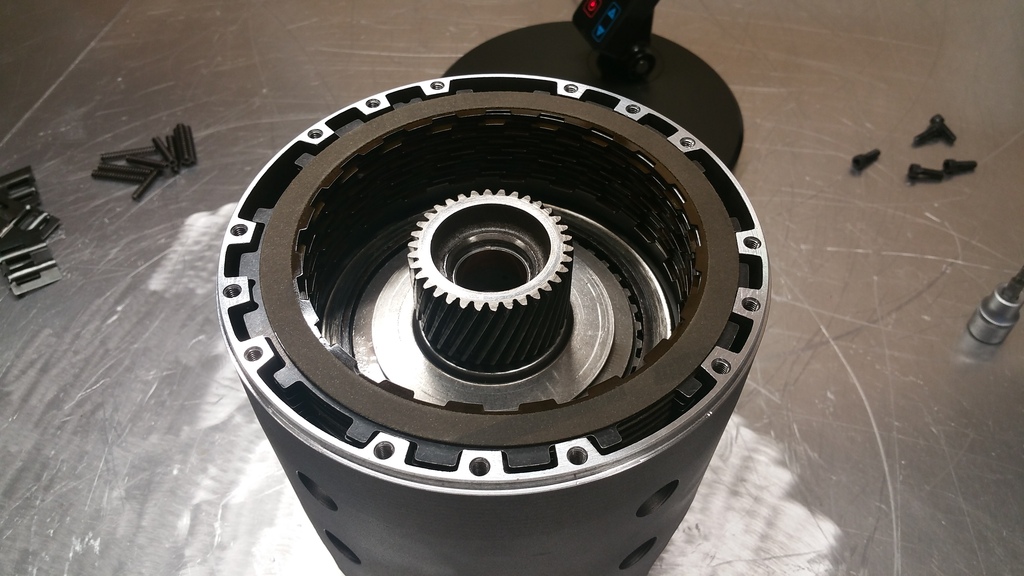
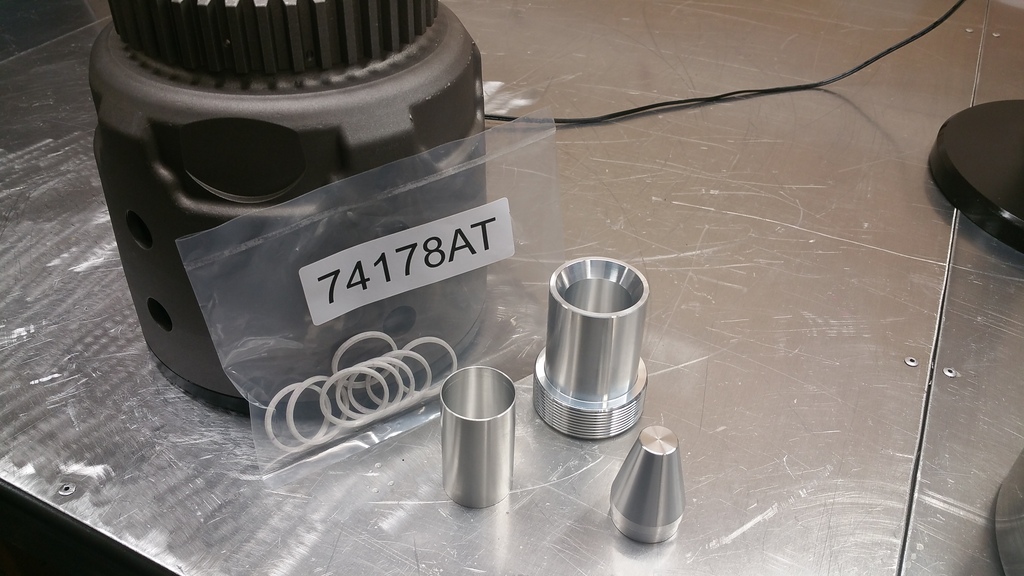
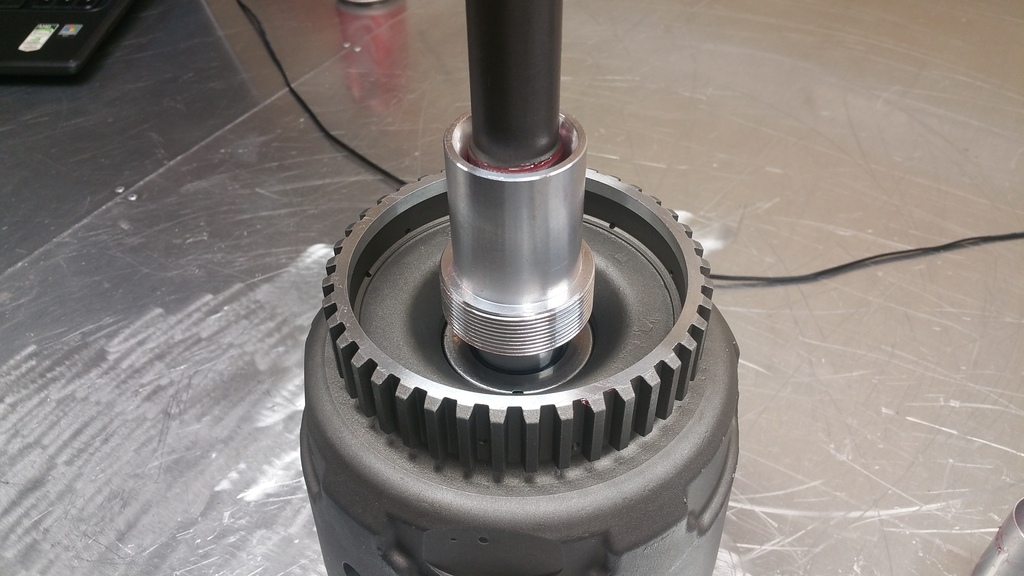
Sonnax Smart-Tech Input Drum, new 300mm input shaft and sleeve retainer compound:
Input shaft has a double spline to align the shaft and drum properly:
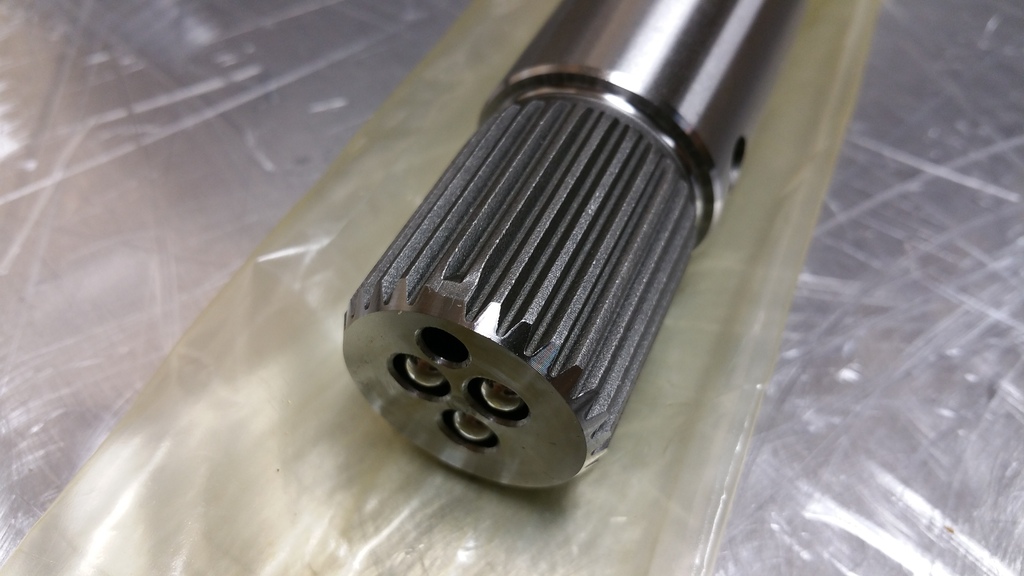
Here you can see where it keys into the input drum:
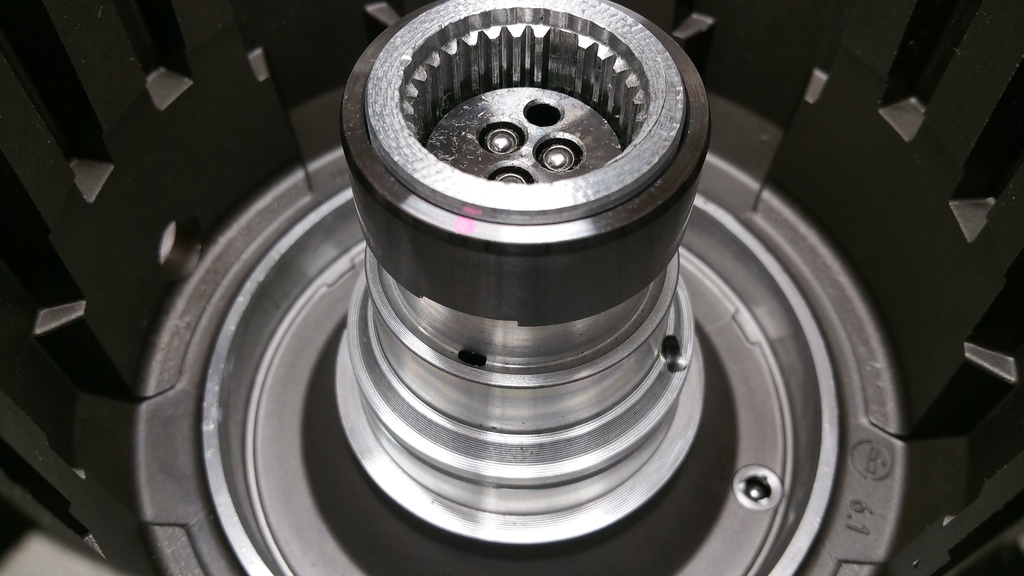
Sleeve retainer applied, shaft keyed into place and sitting on the hydraulic press:
Input shaft fully seated into the drum:
Input shaft has a double spline to align the shaft and drum properly:
Here you can see where it keys into the input drum:
Sleeve retainer applied, shaft keyed into place and sitting on the hydraulic press:
Input shaft fully seated into the drum:
Thread Starter
Teching In
Joined: Aug 2016
Posts: 32
Likes: 1
From: Allen, TX
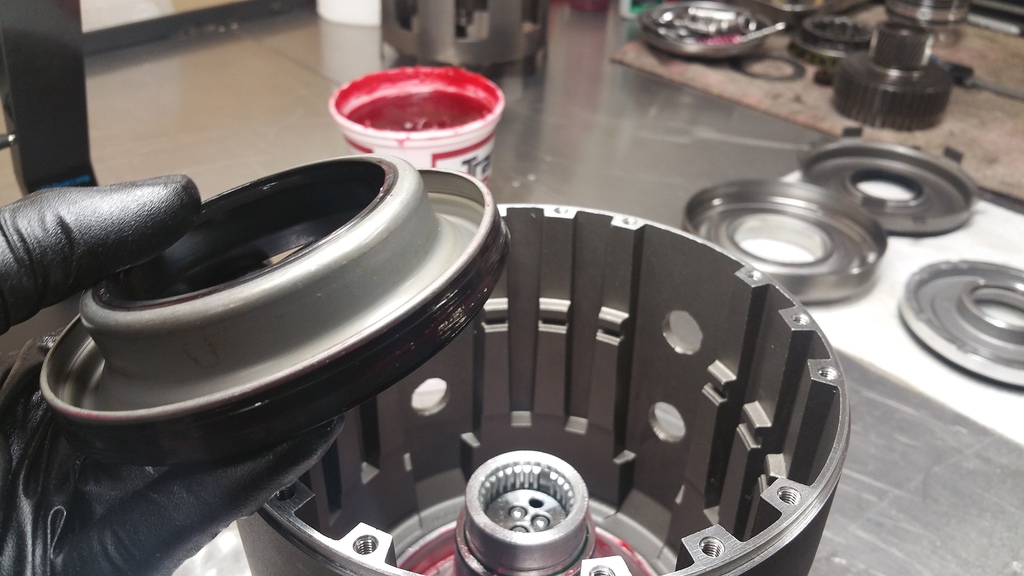
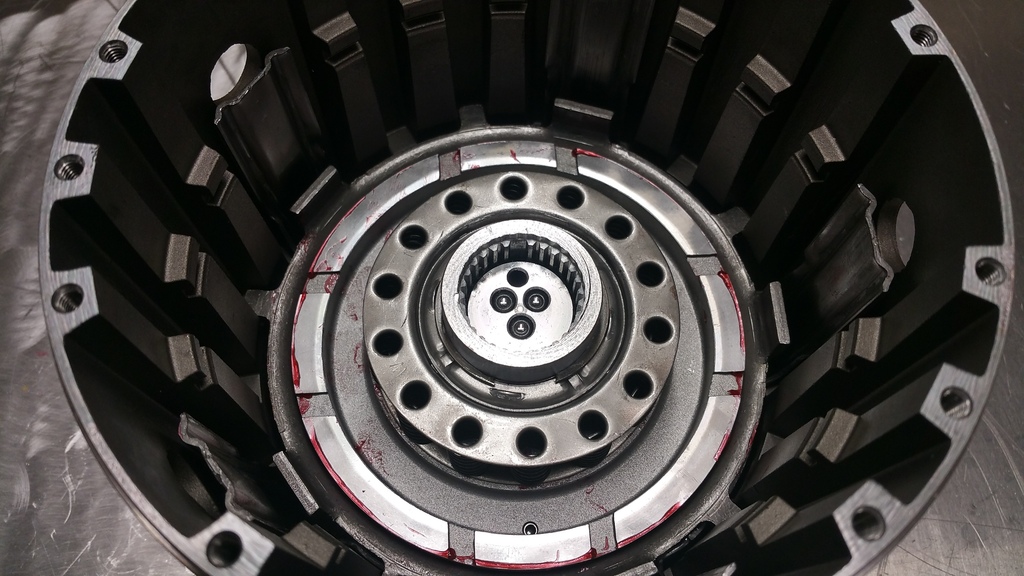
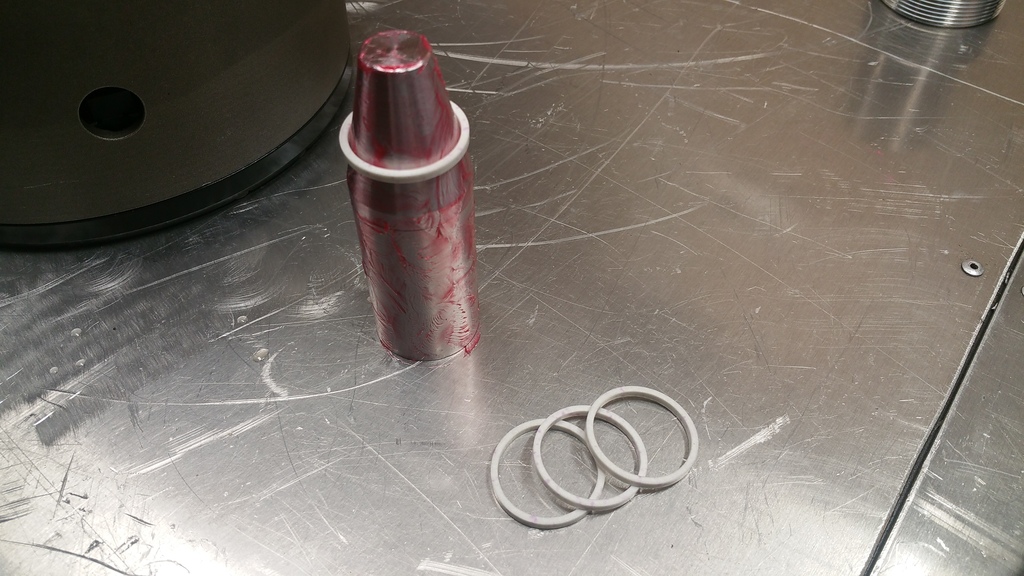
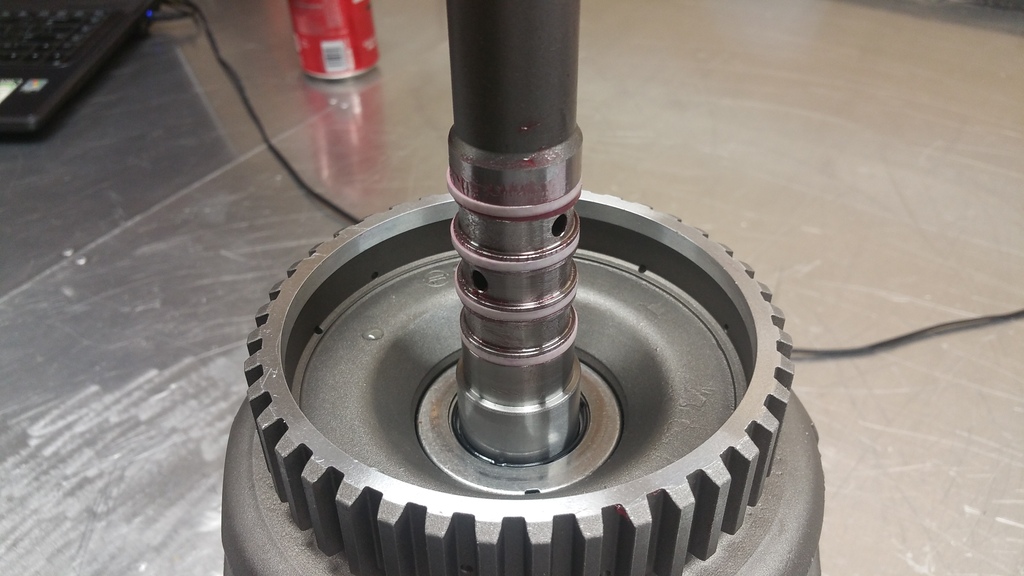
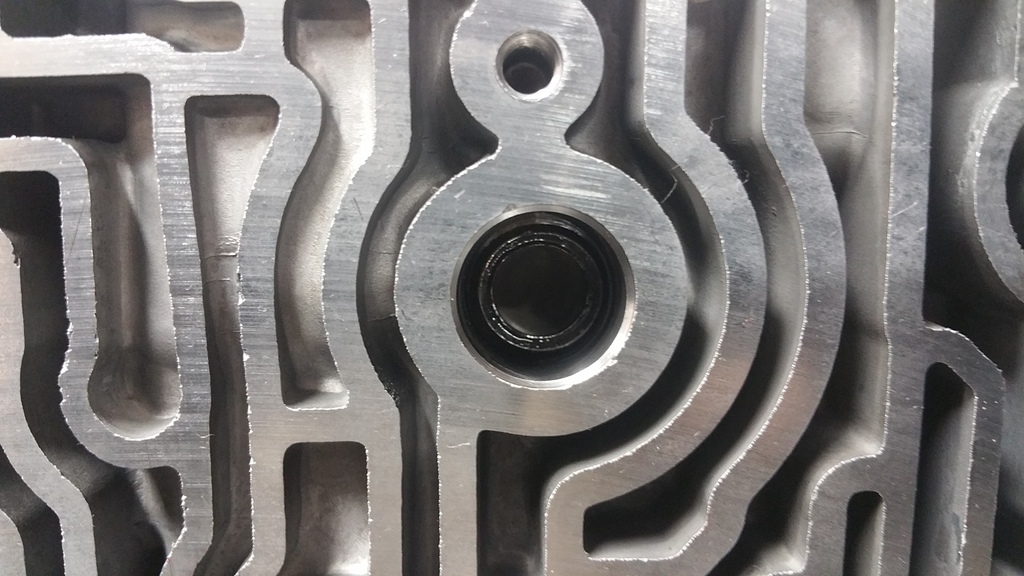
Input drum reinforcement sleeve with alignment dot for over run feed relief:
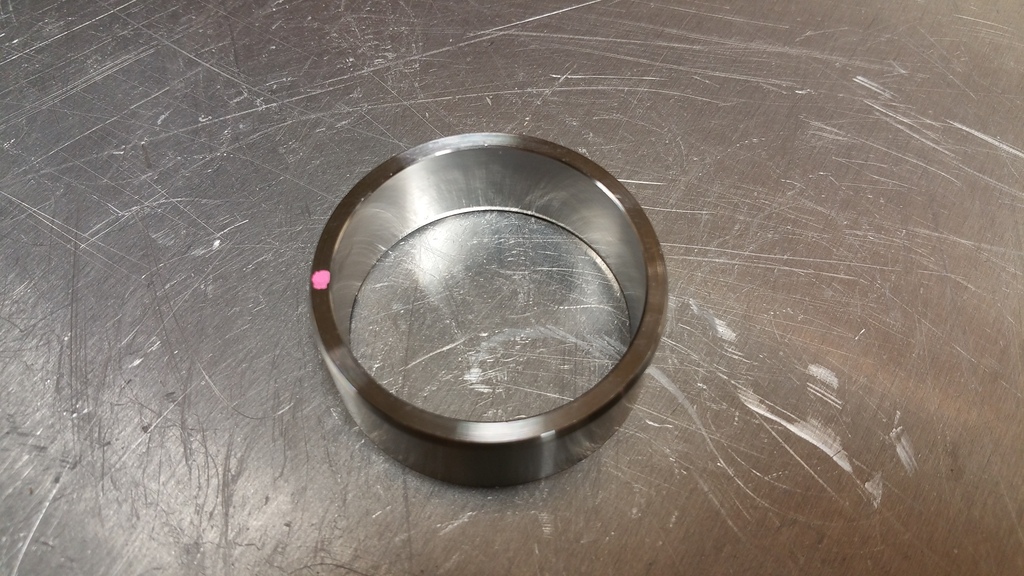

Here you can see the over run clutch feed hole, this is where the notch in the sleeve sits:
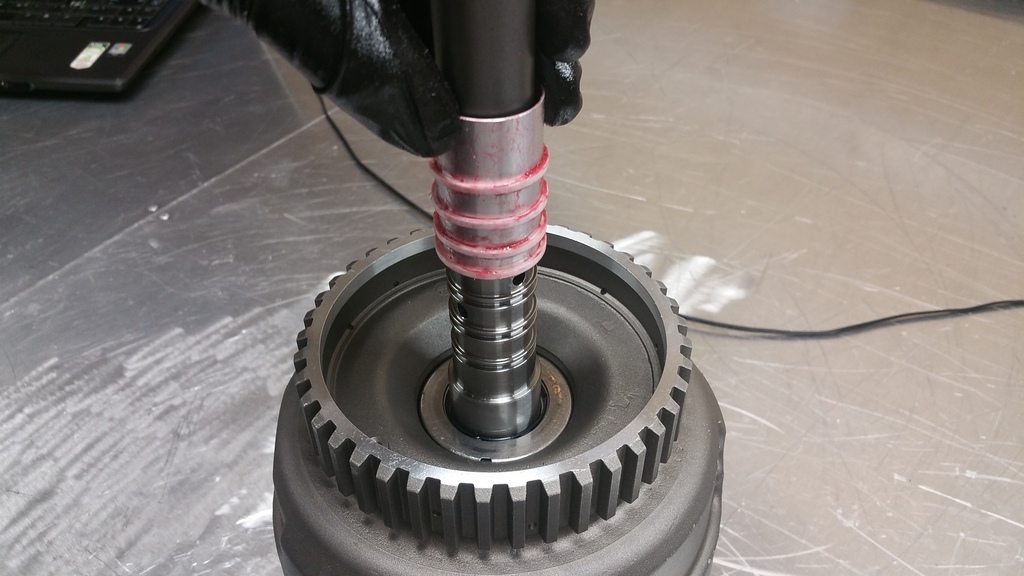
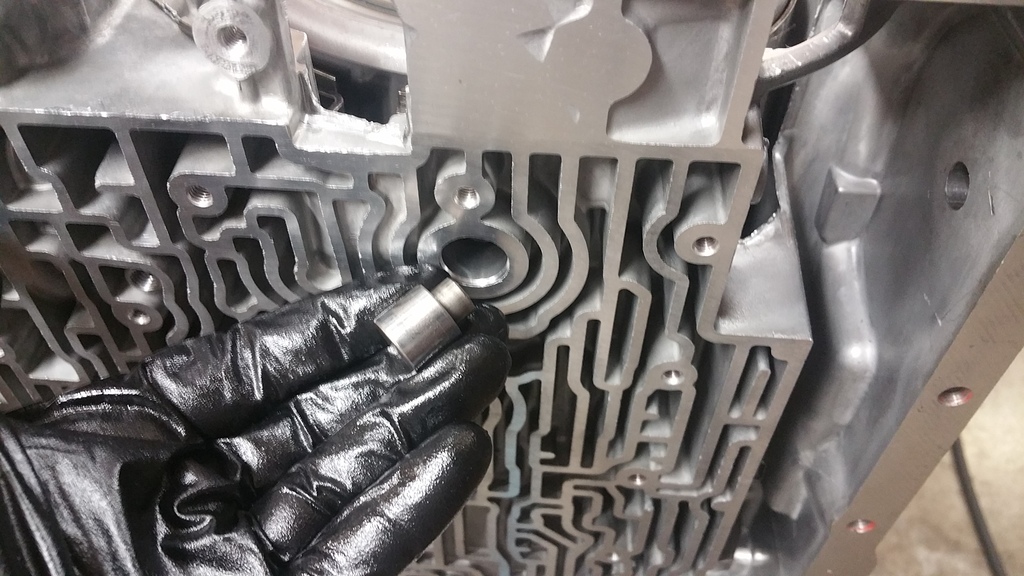
Sleeve aligned before being pressed onto the drum:
Sleeve I made to support the input drum properly on the press:
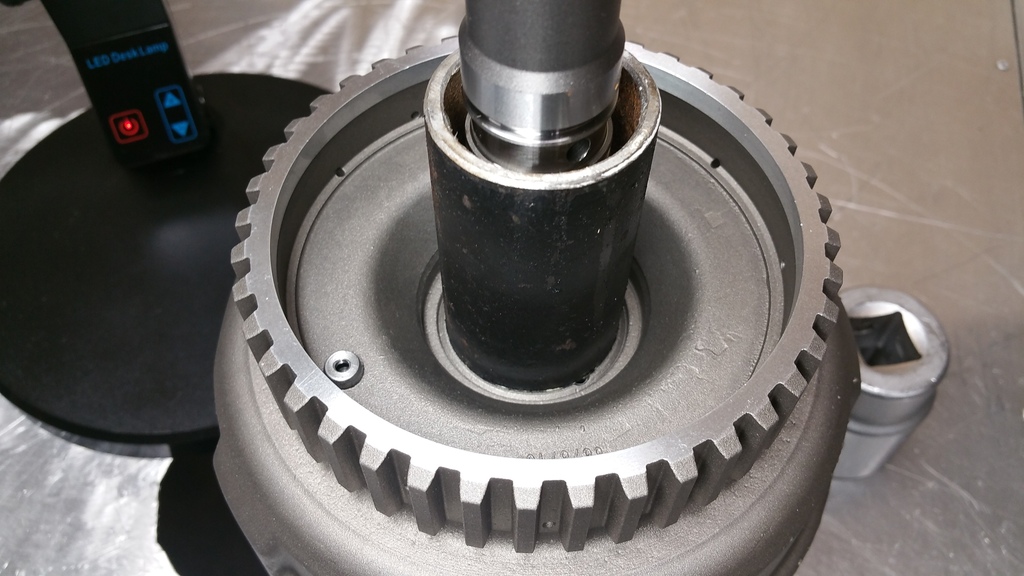
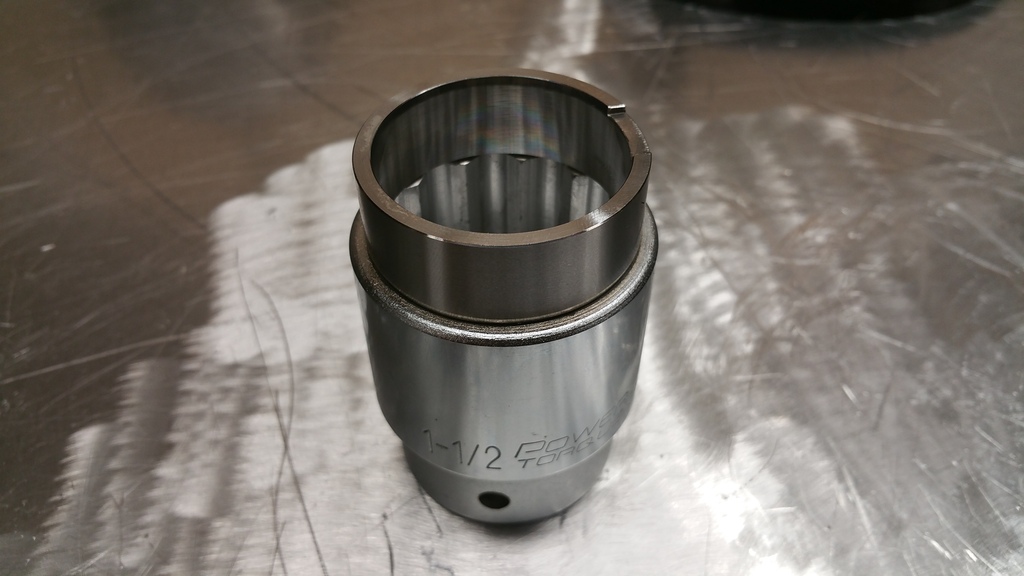
1-1/2" 12pt socket works perfect to press the sleeve on:
Sleeve pressed onto the drum with green loctite:
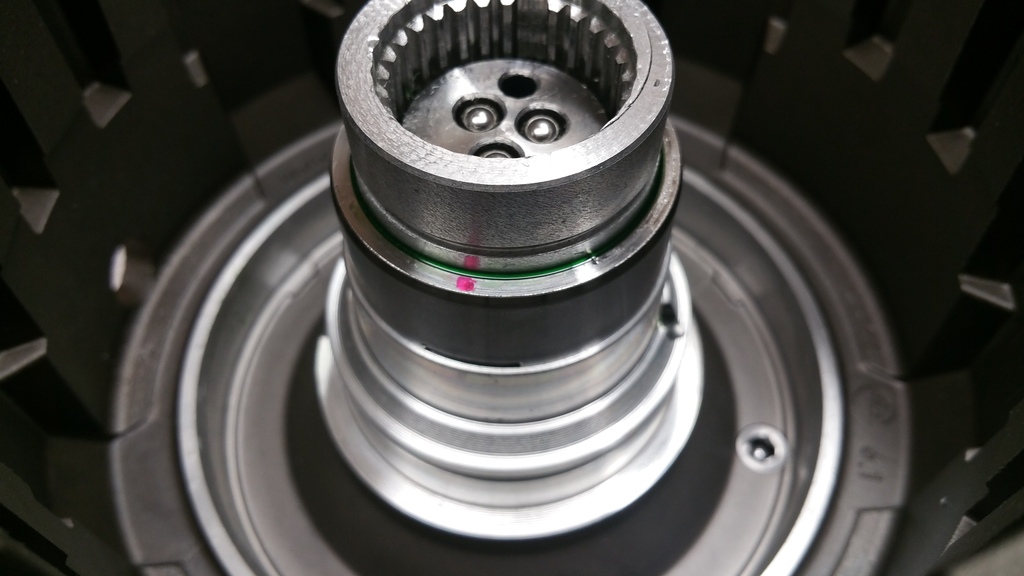
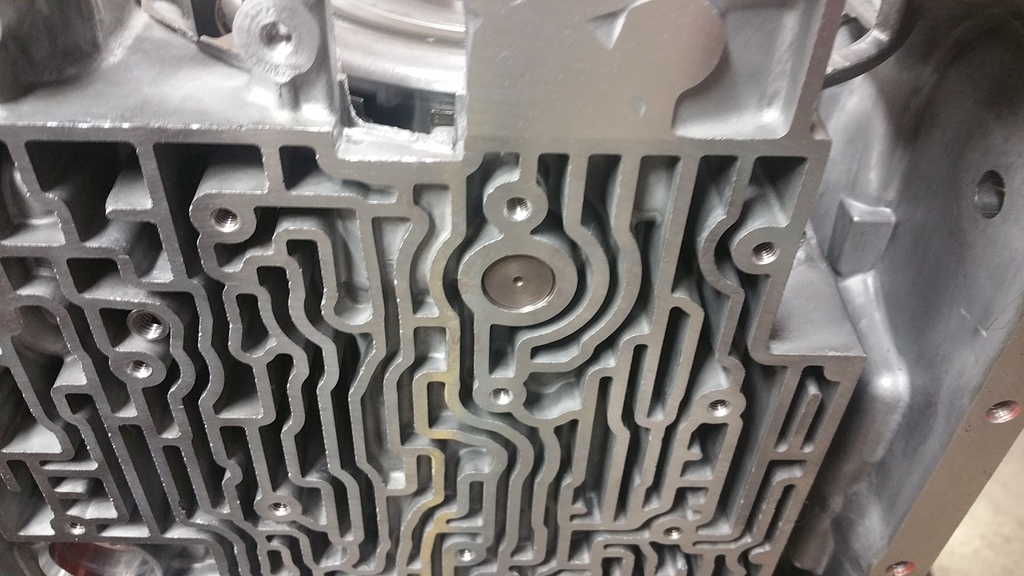
New input drum O-ring:
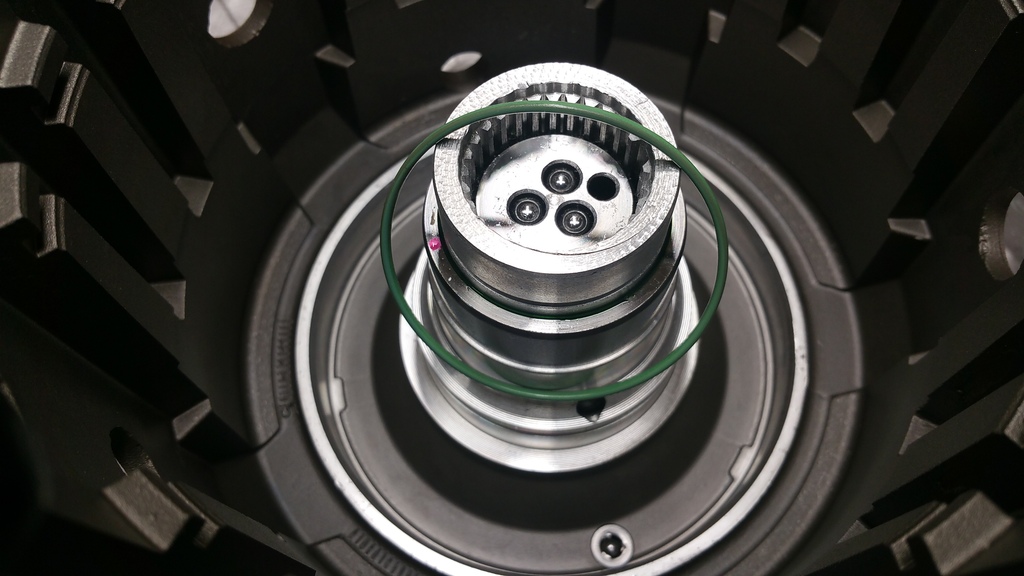
Input drum pre lubed with trans gel before pistons go in:
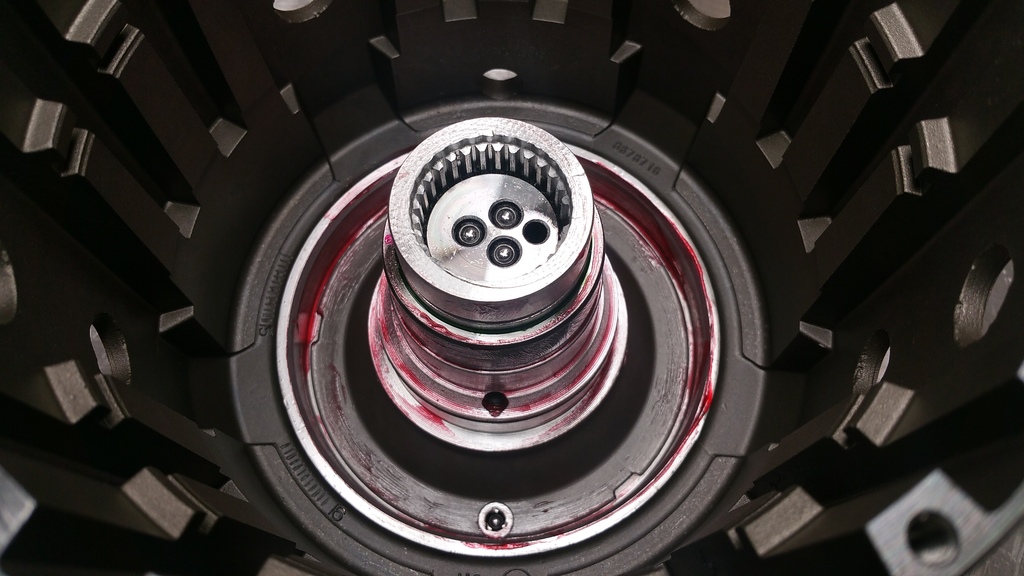
3-4 piston:
3-4 piston installed:
Forward piston and housing:

3-4 Apply basket and return spring cage with transgo yellow springs. Spring cage tabs removed:
Entire assembly ready to drop into the input drum:
Sonnax billet over run piston:
Over run return spring cage:
Install tool needed for stiffer transgo springs:
Spring cage compressor:
With the cage compressed, install the snap ring:

Make sure the snap ring is seated fully and sits inside the retaining bosses on the spring cage face:
Here you can see the over run clutch feed hole, this is where the notch in the sleeve sits:
Sleeve aligned before being pressed onto the drum:
Sleeve I made to support the input drum properly on the press:
1-1/2" 12pt socket works perfect to press the sleeve on:
Sleeve pressed onto the drum with green loctite:
New input drum O-ring:
Input drum pre lubed with trans gel before pistons go in:
3-4 piston:
3-4 piston installed:
Forward piston and housing:
3-4 Apply basket and return spring cage with transgo yellow springs. Spring cage tabs removed:
Entire assembly ready to drop into the input drum:
Sonnax billet over run piston:
Over run return spring cage:
Install tool needed for stiffer transgo springs:
Spring cage compressor:
With the cage compressed, install the snap ring:
Make sure the snap ring is seated fully and sits inside the retaining bosses on the spring cage face:
Last edited by Texas Patriot; Sep 13, 2016 at 11:59 PM.
Thread Starter
Teching In
Joined: Aug 2016
Posts: 32
Likes: 1
From: Allen, TX
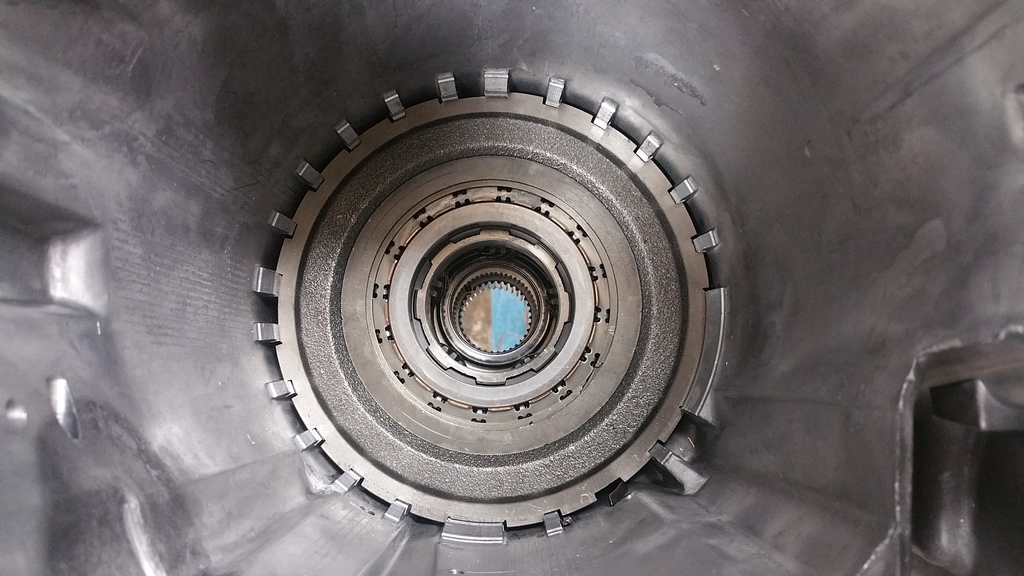
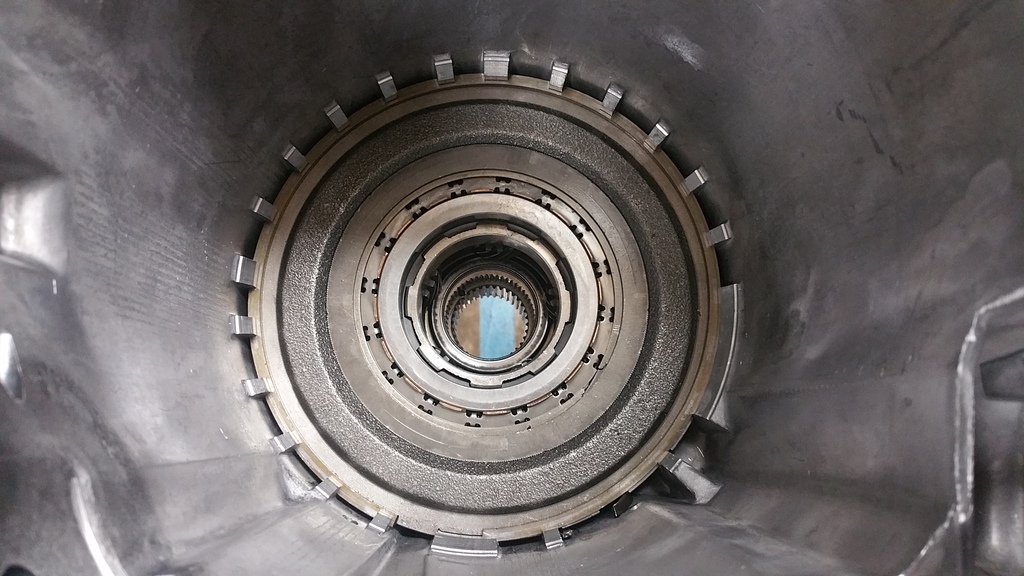
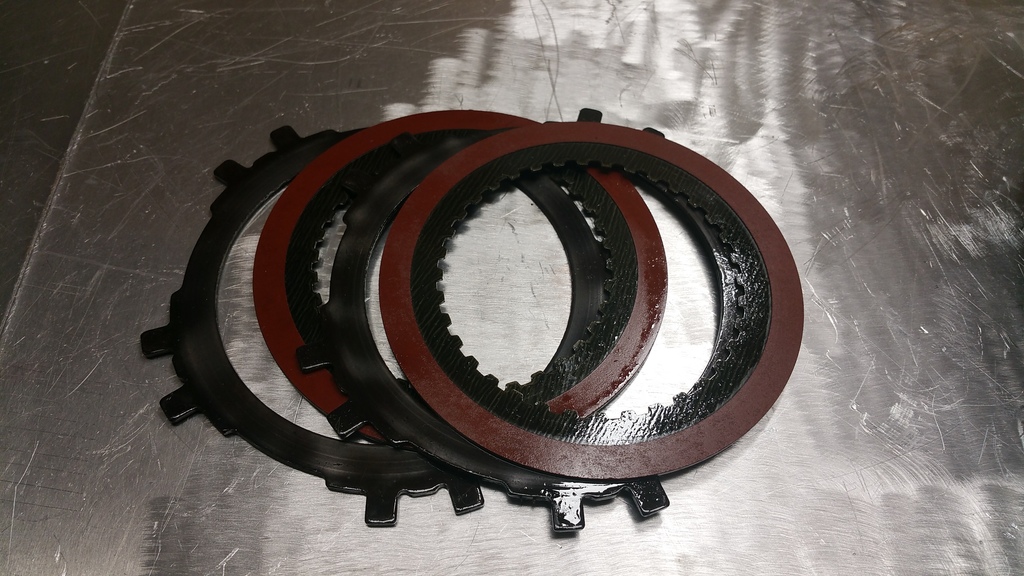
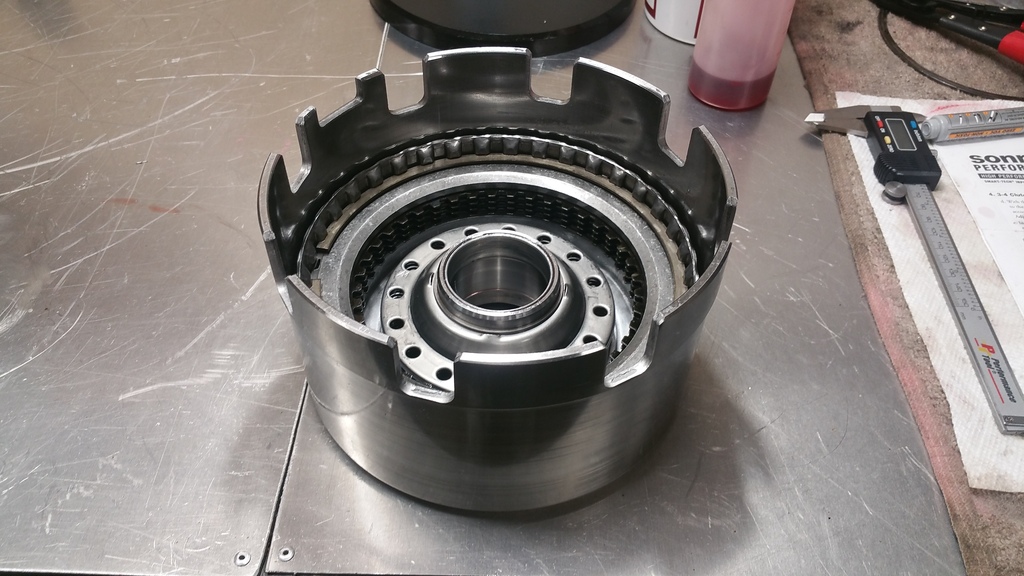
Over run clutches, steel goes first then alternate frictions and steels:
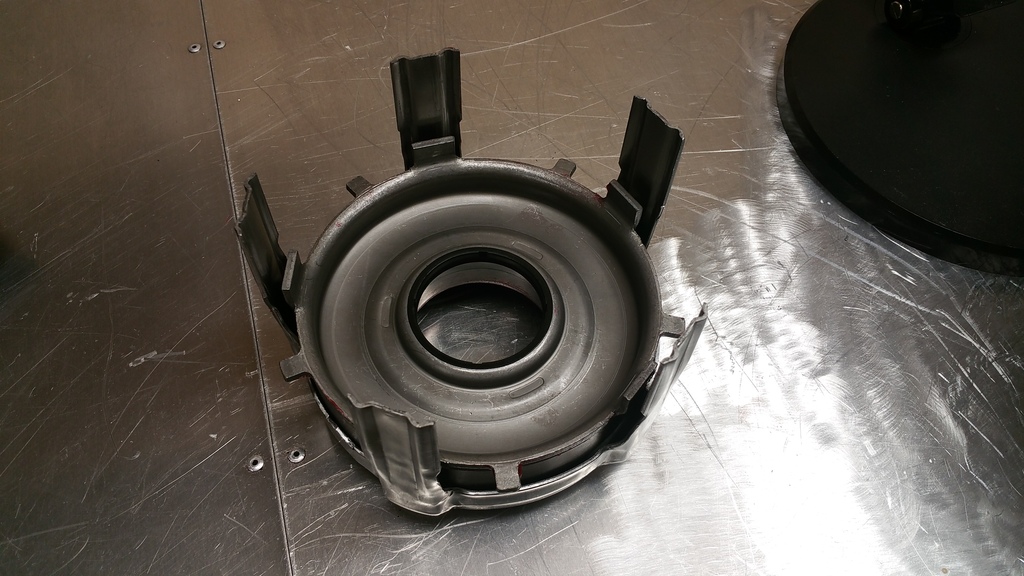
Install the drum sealing ring and bearing:
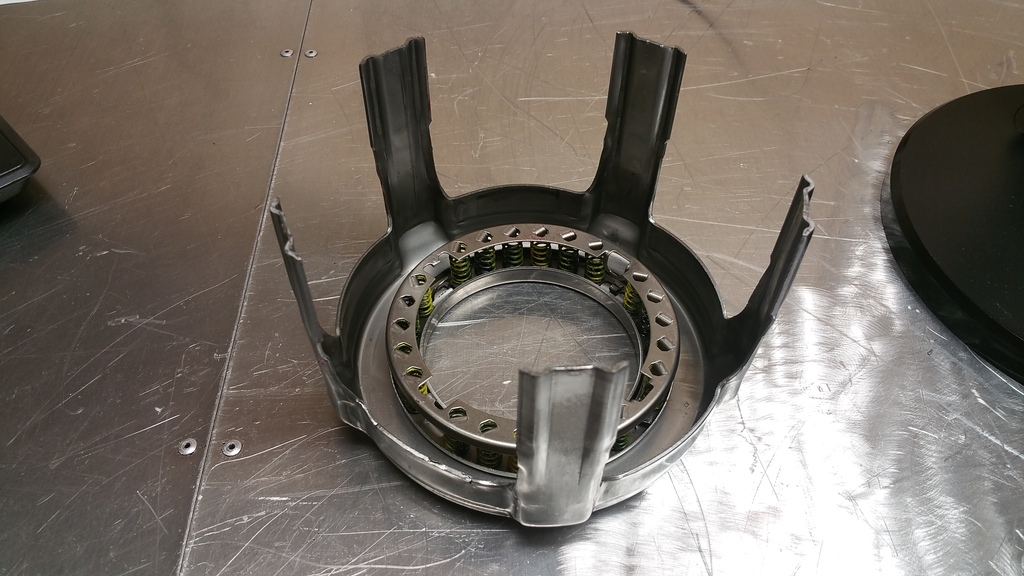
Borg warner 29 element dual cage forward sprag:
Forward sprag assembly:
Forward clutch apply plate:
Forward clutch wavy steel first:
Forward clutch stack up, steel first then alternate frictions:
Forward clutch pressure plate:
Sonnax billet 3-4 clutch apply ring:
(9).067" BW high energy frictions and (8).078" steels in the drum to check clearance:
When testing the drum the clearance of the 3-4 clutch pack was .030" dry(yes I am aware this clearance is tight):
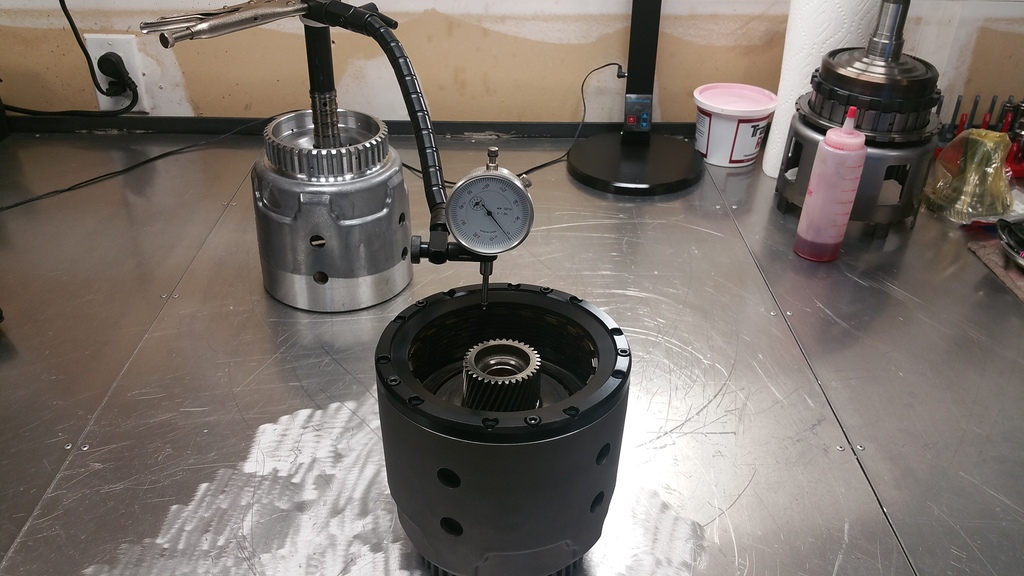
Load release boost springs from Sonnax:
Adjusted the clearance with two .062" BW frictions, for .040" clearance dry. Completed input drum:
Install the drum sealing ring and bearing:
Borg warner 29 element dual cage forward sprag:
Forward sprag assembly:
Forward clutch apply plate:
Forward clutch wavy steel first:
Forward clutch stack up, steel first then alternate frictions:
Forward clutch pressure plate:
Sonnax billet 3-4 clutch apply ring:
(9).067" BW high energy frictions and (8).078" steels in the drum to check clearance:
When testing the drum the clearance of the 3-4 clutch pack was .030" dry(yes I am aware this clearance is tight):
Load release boost springs from Sonnax:
Adjusted the clearance with two .062" BW frictions, for .040" clearance dry. Completed input drum:
Last edited by Texas Patriot; Sep 14, 2016 at 12:22 AM.
Thread Starter
Teching In
Joined: Aug 2016
Posts: 32
Likes: 1
From: Allen, TX
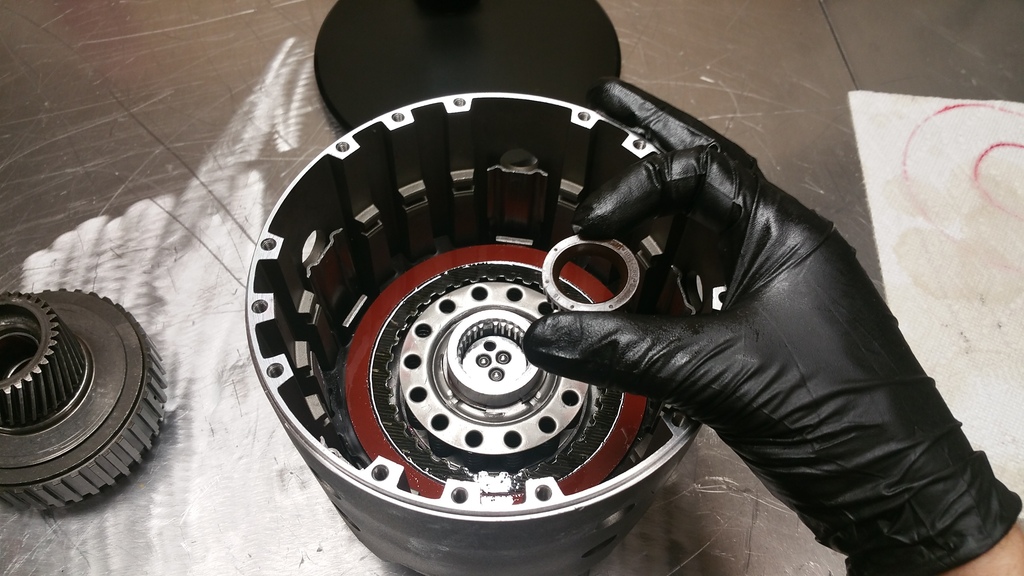
Input shaft solid teflon sealing ring installation:
Resizing tool:
New teflon seals installed: **NOTE: The torington bearing seen here is sitting upside down, the black bearing face should be sitting up**
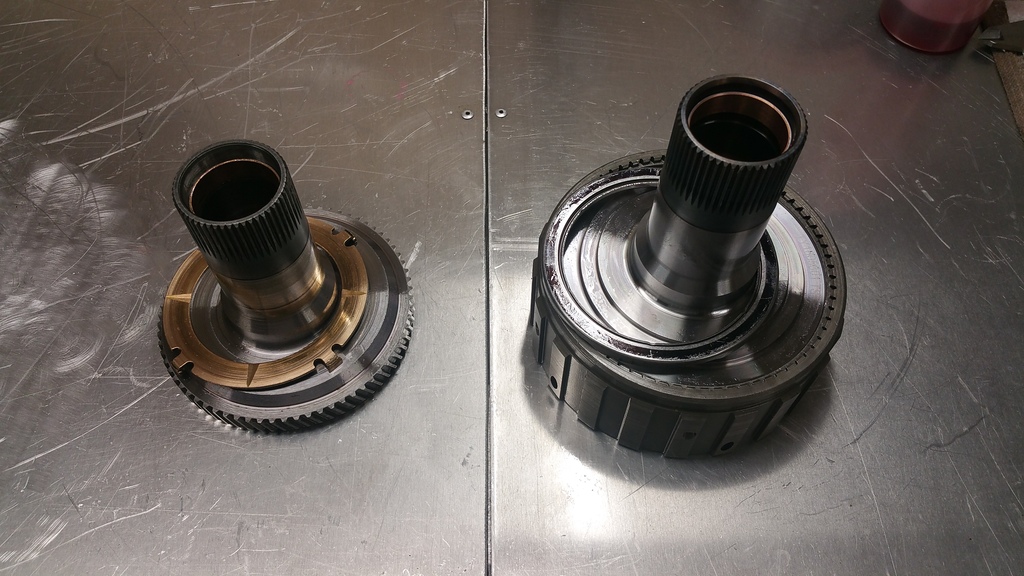
Going to skip the reverse input drum, I had no reason to disassemble mine, this drum is brand new since the installation of the kevlar wide band:
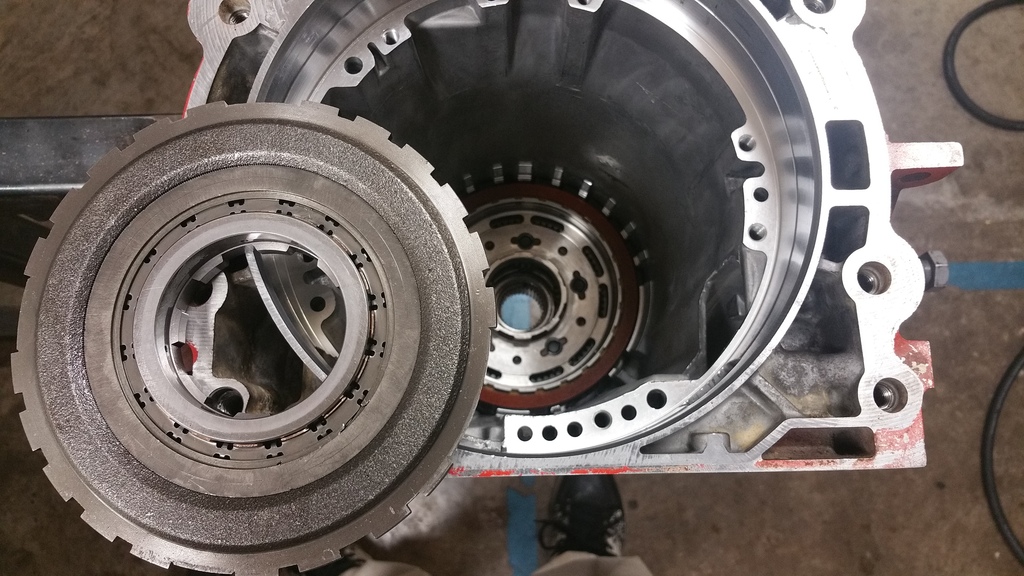
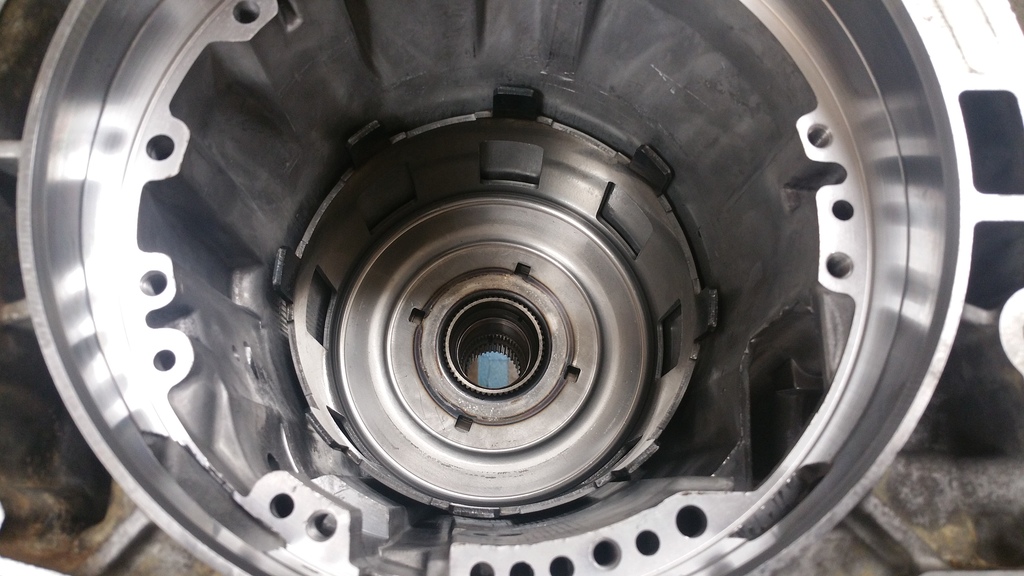
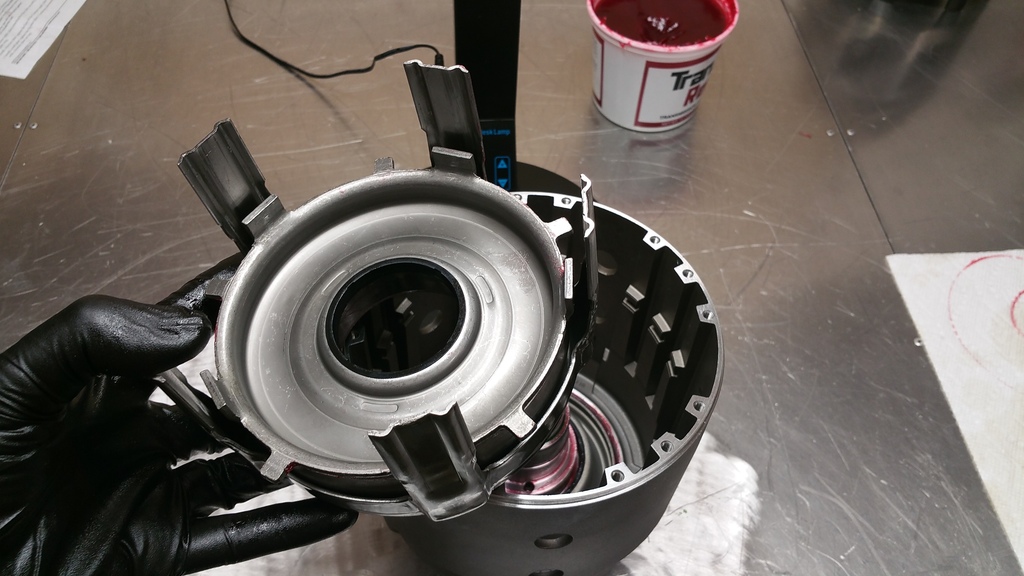
Completed drum assembly:
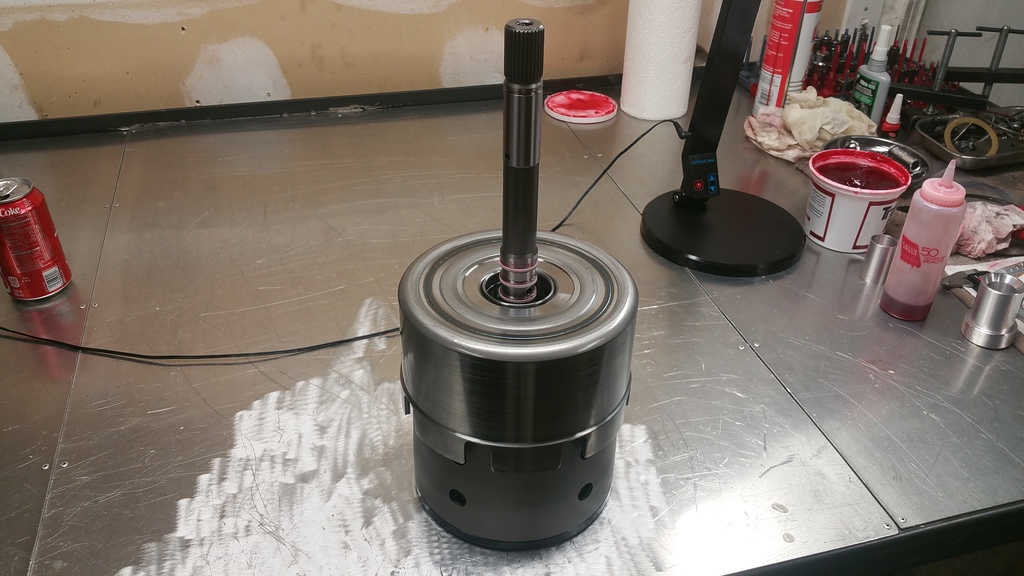
Drums sitting in the case:
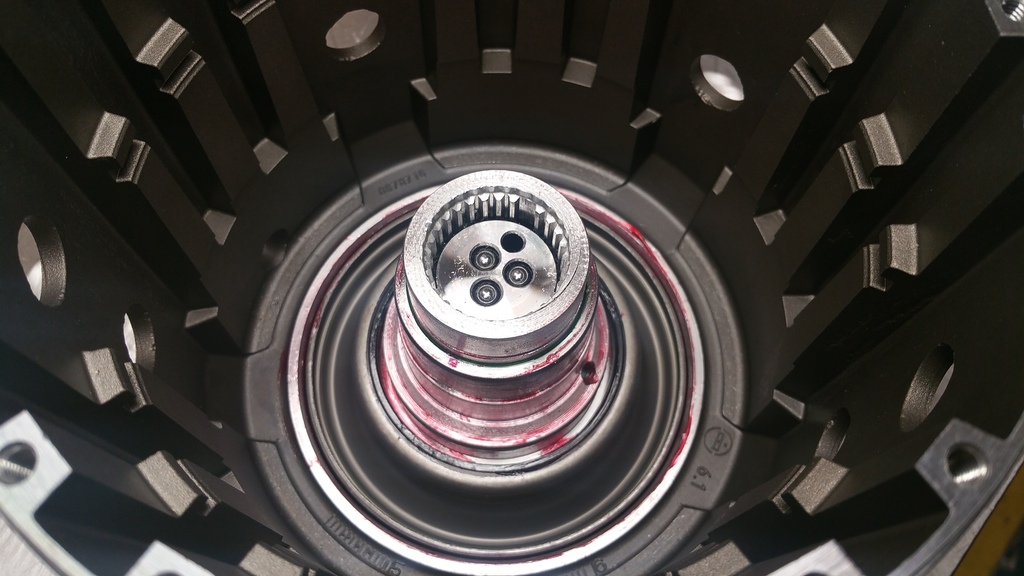
Reverse input drum height when 3-4 clutches are fully splined on the ring gear:
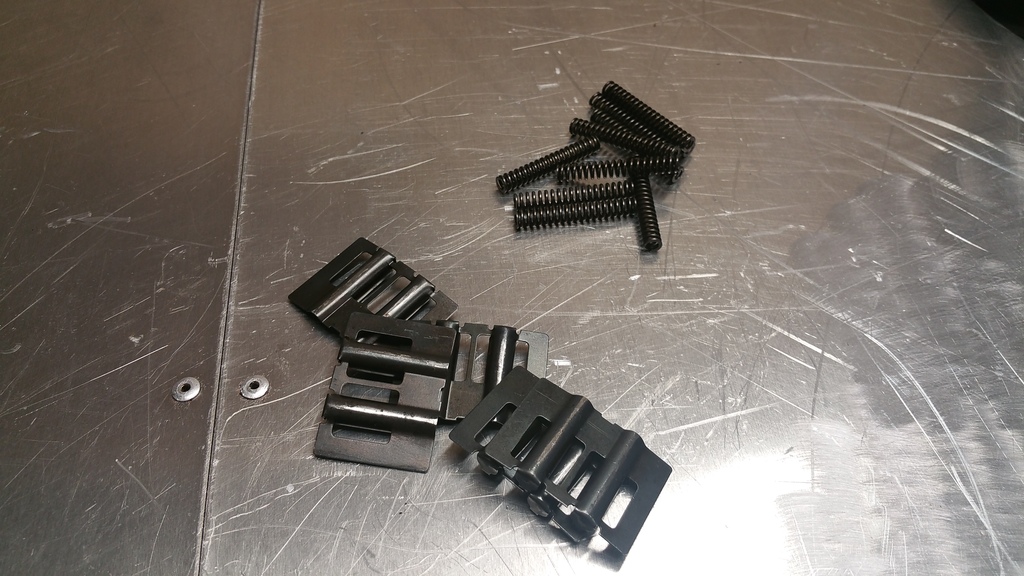
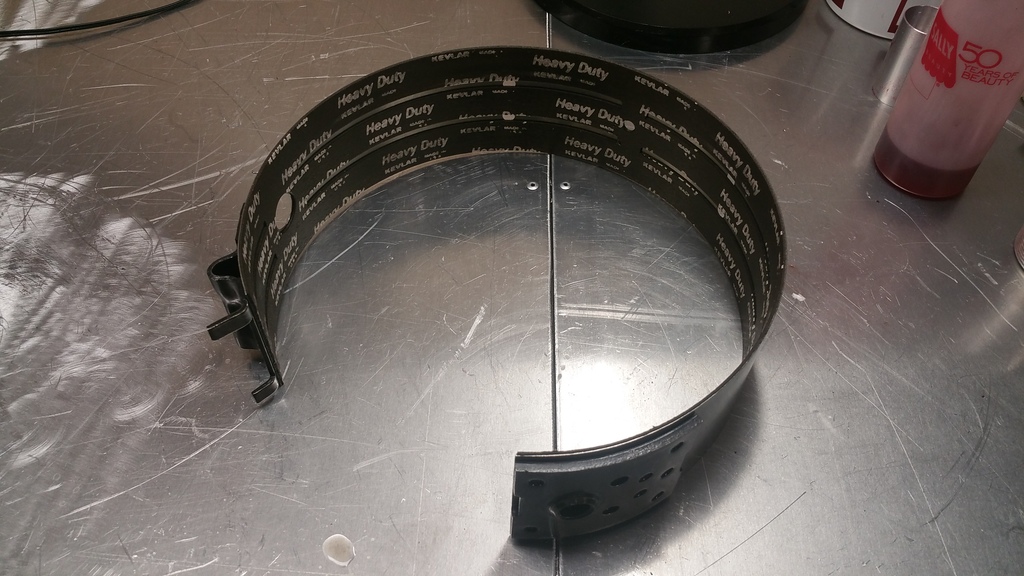
Sonnax Kevlar Wide Band:
Band installed but not anchored yet:

Band anchor hole, you can see it is not aligned yet:
Now the band anchor hole is lined up:
Install the band anchor:
Band anchor fully seated:
Band fully installed without servos:
Thats it for tonight guys, still waiting on pump and valve body gaskets to get here. I will continue as the parts arrive. Next I will show the pump assembly with Sonnax boost valve, hardened pump rings, pump alignment, pump install, valve body install with separator plate drilling and pinless accumulator pistons, check ***** and whatever else I forgot... Cya then.
Resizing tool:
New teflon seals installed: **NOTE: The torington bearing seen here is sitting upside down, the black bearing face should be sitting up**
Going to skip the reverse input drum, I had no reason to disassemble mine, this drum is brand new since the installation of the kevlar wide band:
Completed drum assembly:
Drums sitting in the case:
Reverse input drum height when 3-4 clutches are fully splined on the ring gear:
Sonnax Kevlar Wide Band:
Band installed but not anchored yet:
Band anchor hole, you can see it is not aligned yet:
Now the band anchor hole is lined up:
Install the band anchor:
Band anchor fully seated:
Band fully installed without servos:
Thats it for tonight guys, still waiting on pump and valve body gaskets to get here. I will continue as the parts arrive. Next I will show the pump assembly with Sonnax boost valve, hardened pump rings, pump alignment, pump install, valve body install with separator plate drilling and pinless accumulator pistons, check ***** and whatever else I forgot... Cya then.
Trending Topics
Thread Starter
Teching In
Joined: Aug 2016
Posts: 32
Likes: 1
From: Allen, TX
LS1 Tech Stories
The Best V8 Stories One Small Block at Time

Topdon ONE vs. Artidiag 800 BT2: Which is the Diagnostic Tablet For You?
Pouria Savadkouei
Gas Monkey Built a 6-Wheel Ferrari Testarossa With a Corvette LT4 Engine
Verdad Gallardo
7 Most Reliable High-Performance Engines GM Has Ever Built
Verdad Gallardo
Amazing '71 Camaro Restomod Is Modern Muscle Car Under the Skin
Verdad Gallardo
6 Common C5 Corvette Failures and What's Involved In Repairing Them
Pouria Savadkouei
Retro Modern Bandit Pontiac Trans AM Comes With Burt Reynolds' Autograph
Verdad Gallardo
Top 10 Greatest Cadillac V Series Performance Models Ever, Ranked
Pouria Savadkouei
Top 10 Most Powerful Chevy Trucks Ever Made!

Hennessey's New Supercharged Silverado ZR2 Has 700 HP
Verdad GallardoModerator


Joined: Aug 2010
Posts: 7,323
Likes: 529
From: Ann Arbor, MI
Wow!
Thank you so much for the great pictures; its something I wanted to do and never got to.
What camera did you use.
I'll definitely make this a sticky when I have some time to reorganize things next week.
Thank you so much for the great pictures; its something I wanted to do and never got to.
What camera did you use.
I'll definitely make this a sticky when I have some time to reorganize things next week.
TECH Junkie


Joined: Nov 2013
Posts: 3,913
Likes: 366
From: White Bear, Mn
Good luck dude

Is this your first rebuild? ( Does not seem like it )
Thread Starter
Teching In
Joined: Aug 2016
Posts: 32
Likes: 1
From: Allen, TX
Thanks guys for the positive feed back... this is my 3rd 4l60e rebuild so I am comfortable with this platform. My gaskets will be here friday so I will update this thread with the pump and valve body info then.
Thread Starter
Teching In
Joined: Aug 2016
Posts: 32
Likes: 1
From: Allen, TX
Ted, believe it or not these pics came from my cell phone. Its a samsung galaxy note 4.


Thread Starter
Teching In
Joined: Aug 2016
Posts: 32
Likes: 1
From: Allen, TX
To answer your question directly, I have not run them together before. This may not be the best idea, but they're just clutches. If they burn up they can be replaced.
Moderator
Joined: Aug 2010
Posts: 7,323
Likes: 529
From: Ann Arbor, MI
I estimate the 3/4 return springs only reduces the piston pressure by about 5 lbs, but lets say 10 lbs.
I also estimate the 3/4 piston area at 4 sq in, which when multiplied by even a 200 psi line pressure means the piston has 800 lbs of force, minus the return cage pressure (stock of 50 lbs ??) and the 3/4 return springs of 10 lbs.
The stiff Transgo return-cage springs more than double the pressure (100+ lbs ??), but as Texas says, the TG/Sonnax boost valve increases the line pressure by more than enough to overcome the stiffer springs. Nonetheless I use only half of the stiffer Transgo return-cage spring and half stock springs. The pros all find that a bit odd, but it has worked for me.
Also the Sonnax Smart Tech input drum instructions not only say to use the 3/4 return springs, but it comes with special longer ones to fit the drum.
IMHO the 3/4 return springs don't reduce the piston pressure enough to worry about, but might reduce dragging between tight frictions.


This thread is exactly what I have been looking for as far as assembly goes. It also has just about 100% of the same parts I want to use if I do go forward and build a 60. I am trying to decide if I should do this, or just rebuild my 80, and go that route. Thanks for such a detailed build!
Nice thread!!!
It's nice to see detailed pictures with modern parts too!
The pictures in some of the old threads have disappeared as members have moved on. Keep up the great work!
It's nice to see detailed pictures with modern parts too!
The pictures in some of the old threads have disappeared as members have moved on. Keep up the great work!