
Building up dad's camaro.


 12-24-2019, 09:48 AM
#63
TECH Addict
Thread Starter
....guess what my awesome gf bought me for Christmas 
�preciate ya!
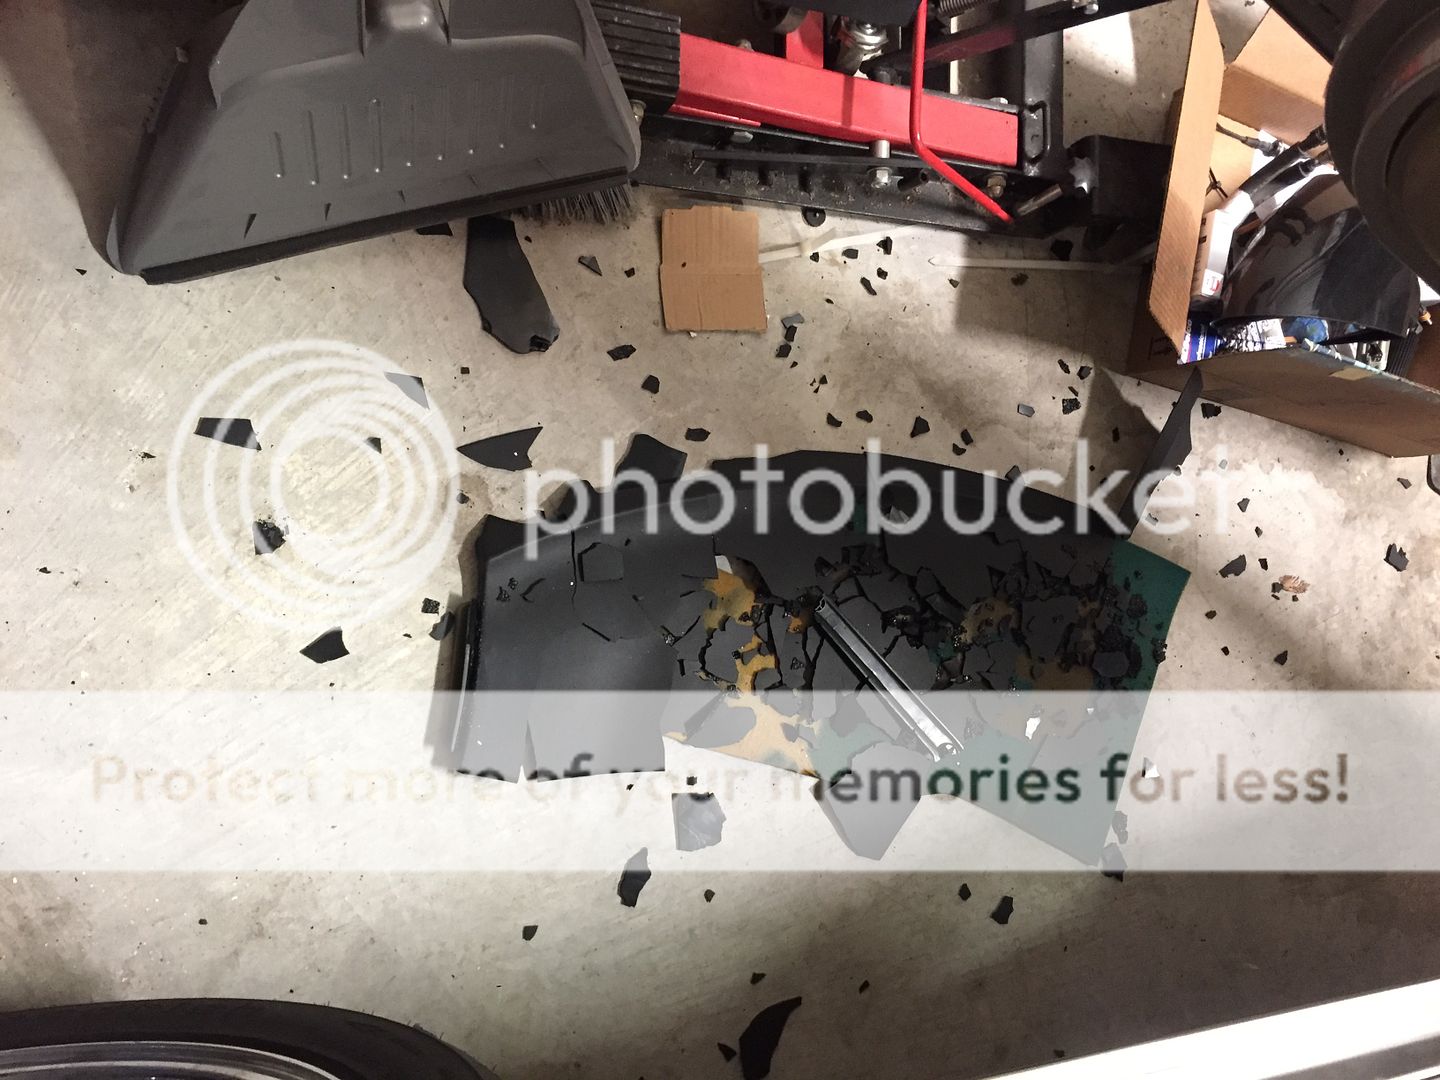
Also I just picked up a good used tail light to replace my broken drivers side housing and just replaced my broken passenger side mirror housing. So with the dash pad done that pretty much takes care of all the broken cosmetic stuff. I�m so ready for this thing to be back on the road!
�preciate ya!
Also I just picked up a good used tail light to replace my broken drivers side housing and just replaced my broken passenger side mirror housing. So with the dash pad done that pretty much takes care of all the broken cosmetic stuff. I�m so ready for this thing to be back on the road!
12-24-2019, 09:55 AM
#64
You have done an amazing amount of work. After you go through something this in-depth it does feel real good to finally get to drive it. It actually beats the feel you get when you drive a brand new car. Just think, everything that you have done was accomplished at the factory in 2 days. It’s truly amazing.
01-05-2020, 05:04 PM
#65
TECH Addict
Thread Starter
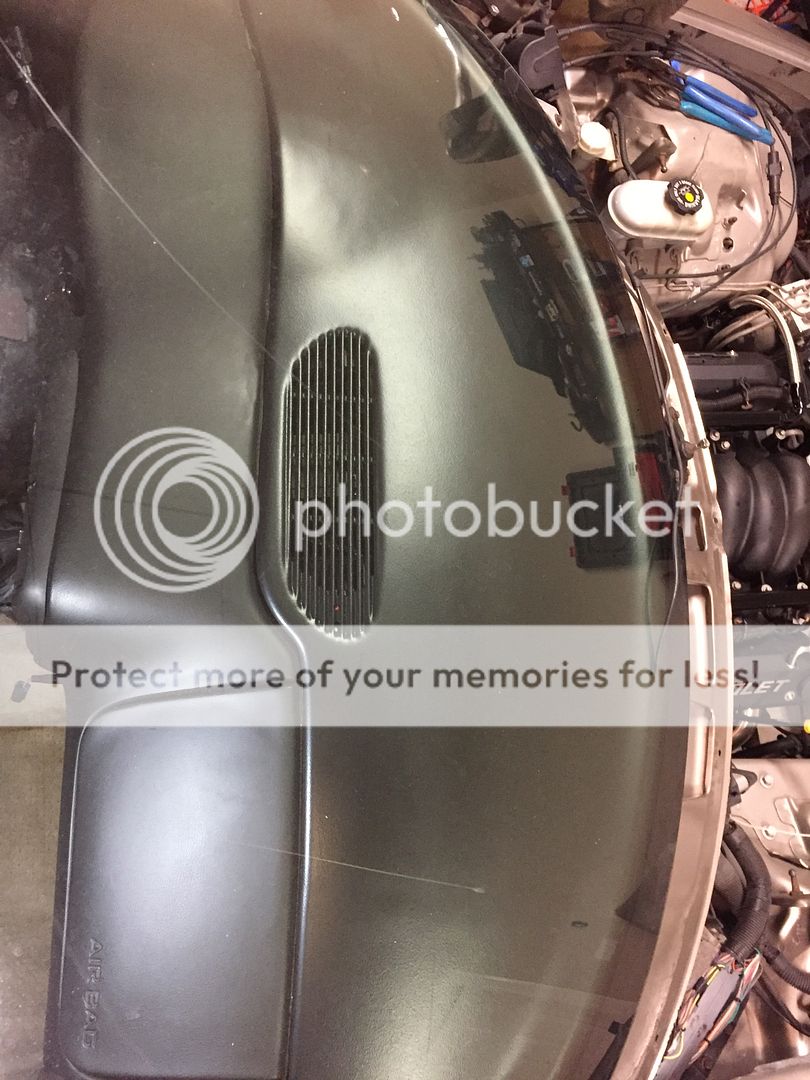
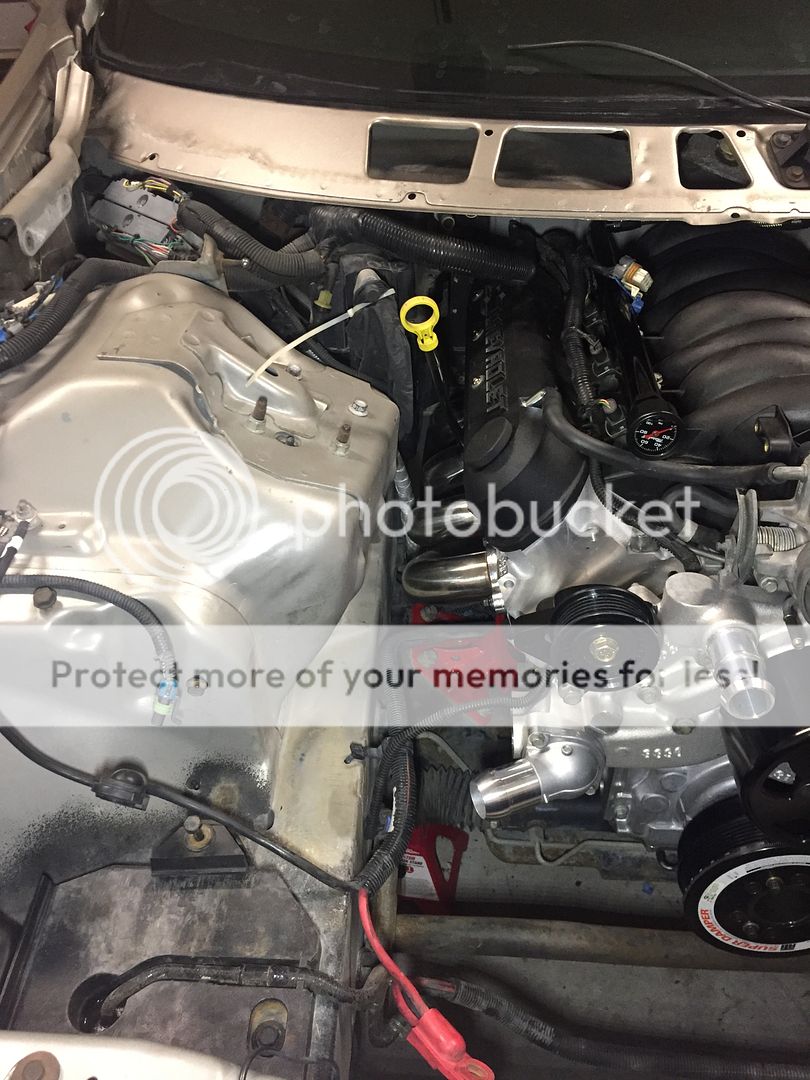
Weekend update: dash pad is in! Was super easy to install. Wish i had done it years ago. As mentioned in a previous post my coils/wires were interfering with the heater hoses. So I made an executive decision and deleted the heater hoses and removed my a/c compressor and brackets. The a/c is temporary, I just took it out because the compressor really looked like it was scavenged off the ocean floor and I have very little faith in it actually working. Thirdly I went to go install the battery after routing the harness and was screwing the new posts in that were supplied by racetronix and one snapped off in the battery. I barely applied any torque to it and it just snapped like it was made of plastic or something. I was super pissed. If any body knows where to get new screw posts that aren't complete garbage let me know. I need the ones that have the accessory bolt/hole so I can add the extra battery ground from the racetronix kit.

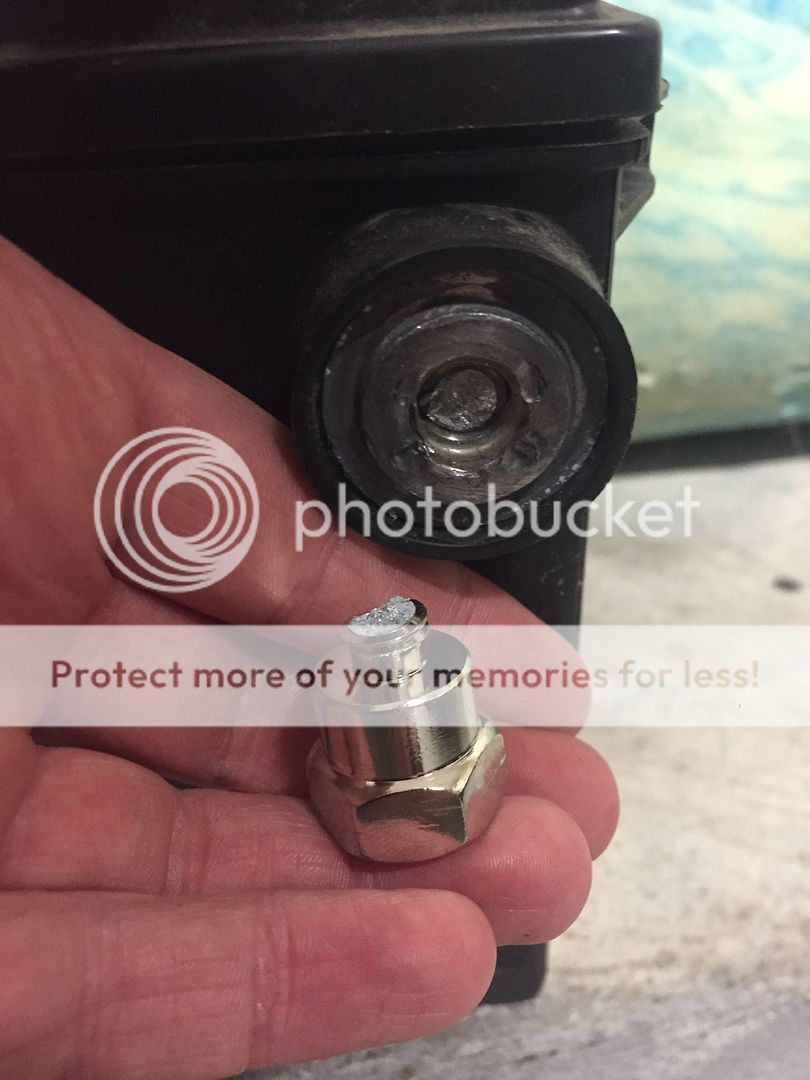
Edit: never mind looks like racetronix started using different terminals. Only $2.50 each.
https://www.racetronix.biz/product.a...SABEgIv4vD_BwE
Edit: never mind looks like racetronix started using different terminals. Only $2.50 each.
https://www.racetronix.biz/product.a...SABEgIv4vD_BwE
Last edited by brian_rs/ss; 01-05-2020 at 05:20 PM.
 01-09-2020, 12:27 PM
#68
TECH Addict
Thread Starter
Next issue: went to go prime my fuel pump and nothing happened. Pump won�t turn on. After doing a little research I have seen that in certain applications with the racetronix kit the red/black wires are not necessarily indicative of pos/neg polarity. I thought I was doing things correctly per the instructions but maybe not? I also am not getting a reading from my level sensor. Not sure if that�s related or not.
01-10-2020, 09:50 AM
#70
TECH Addict
Thread Starter
01-20-2020, 03:03 PM
#71
TECH Addict
Thread Starter
Ok so my neighbor came over with his test light and voltmeter and we started doing a little basic trouble shooting. We found that on the hot wire harness I had good power going to the racetronix relay but no power coming out of the relay. So then we started testing the factory fuel pump harness and found that we had power coming from two of the terminals on the square, male fuel pump connector. Which I believe were both from the two purple wires. Now, when plugging the factory male connector in to the racetronix female connector we noticed that both harnesses utilize the same(or similar) color wires. Two purple, one grey and one black. However, when you follow the wires they do not correspond to the colors like you would assume they would. This is where I'm at so far, I'm about to post this and go look up wire diagrams to try and figure this out a little more. If anybody has advice I'm all ears.
EDIT: Ok we figured it out, after the above trouble shooting we found that there was no voltage at the gray wire at the bulkhead connector where there should've been. We went up to the fuel pump relay, pulled it and measured voltage there. Only one terminal had 12v so we were lacking the 5v signal from the pcm. Jumped the relay and the pump fired right up. After some searching I had found a few people with my issue. Apparently the way the pcm works, if there is a sensor shorted to ground it will stop the fuel and ign signal. Everybody said to start with the ect and sure enough I unplugged it and the pump came alive. Doesn't surprise me now that I think about it, I had the ect rolling around in a box of bolts for the last year. Oops, oh well lesson learned.
EDIT: Ok we figured it out, after the above trouble shooting we found that there was no voltage at the gray wire at the bulkhead connector where there should've been. We went up to the fuel pump relay, pulled it and measured voltage there. Only one terminal had 12v so we were lacking the 5v signal from the pcm. Jumped the relay and the pump fired right up. After some searching I had found a few people with my issue. Apparently the way the pcm works, if there is a sensor shorted to ground it will stop the fuel and ign signal. Everybody said to start with the ect and sure enough I unplugged it and the pump came alive. Doesn't surprise me now that I think about it, I had the ect rolling around in a box of bolts for the last year. Oops, oh well lesson learned.
Last edited by brian_rs/ss; 01-20-2020 at 06:16 PM.
01-20-2020, 06:33 PM
#72
Teching In
Sounds like the attached is the area you need to double check the bulkhead connector / pump polarity.
I had to read over the directions a couple times.
hope this helps.
I had to read over the directions a couple times.
hope this helps.
01-20-2020, 07:24 PM
#74
TECH Addict
Thread Starter
I'm close!
So second issue, my coils/brackets are interfering with ******* everything. I'm looking into relocating them but it seems that the stock ls1 coils are the biggest most awkward ones. ICT billet makes an ls1 bracket set that also works with the ls3 coils but I think I have to have a conversion harness to make them work?
So second issue, my coils/brackets are interfering with ******* everything. I'm looking into relocating them but it seems that the stock ls1 coils are the biggest most awkward ones. ICT billet makes an ls1 bracket set that also works with the ls3 coils but I think I have to have a conversion harness to make them work?
01-21-2020, 08:58 PM
#75
TECH Addict
Thread Starter
Well I thought I was home free but it�s back to not priming again. I installed plugs, wires, coils, maf and O2�s. Reached in the car to key on and no pump. So then I was like ok well probably just another bad sensor and started unplugging everything I had just plugged in. Still nothing. Jumpered the pump relay again just to make sure and it does still run off the jumper. Maybe I have a ground issue somewhere? Or should I keep trying different sensors?
The following users liked this post:
v6buick (02-13-2020)
