
My guide to installing a mech coolant guage on the car. PICS!!!
 05-12-2011, 09:18 PM
#1
TECH Resident
Thread Starter
iTrader: (23)
Join Date: Oct 2008
Posts: 895
Likes: 0
Received 0 Likes
on
0 Posts

You will need:
1: Gauge
2: Drill
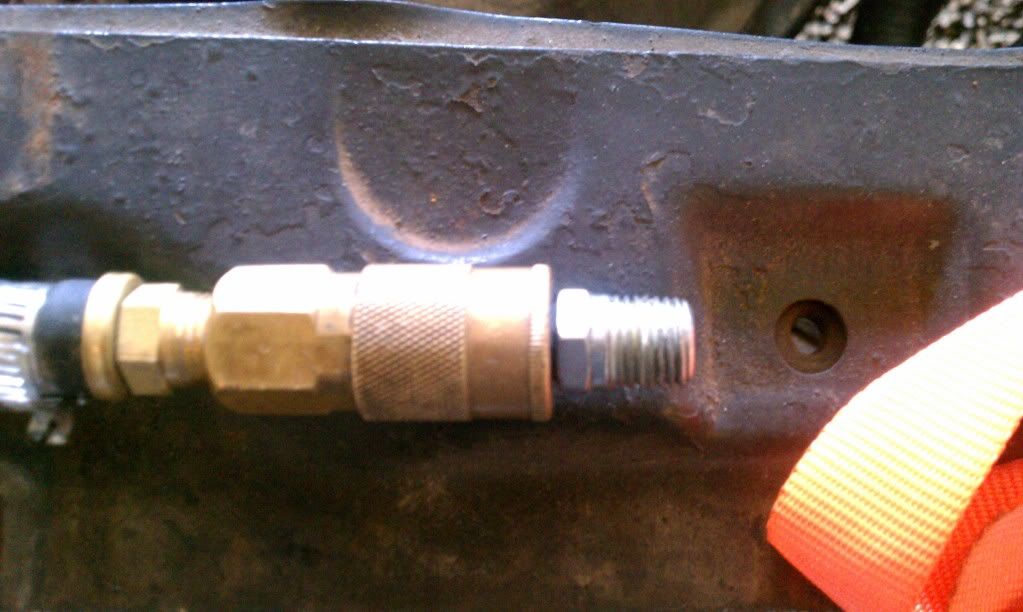
3: Drill bit 7/16 (37/64)
4: Tap 1/4-18 npt (3/8-? Npt)
5: Allen wrench 8mm
6: Box end wrench 1/2-12pt
7: Socket for your fitting may vary by manufacturer. My was 3/4
8: Compressor
9: Air hose
10: Extra quick connect air fitting
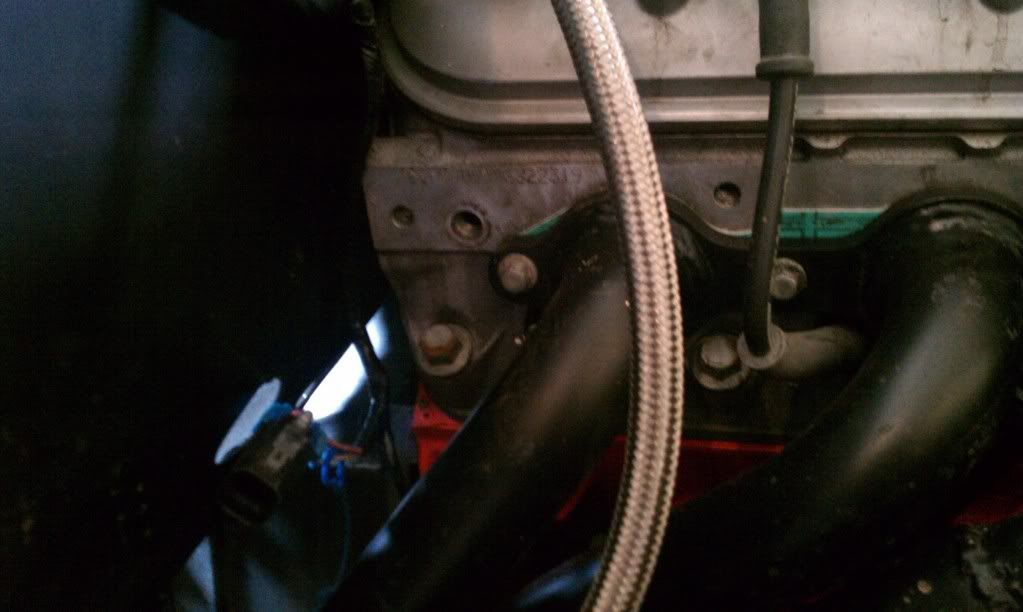
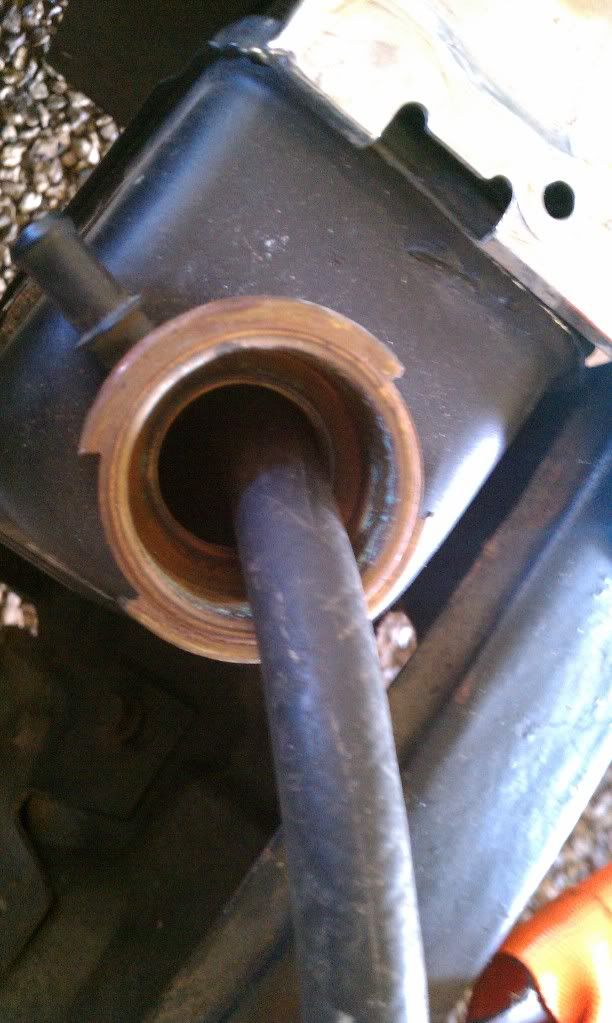
1. Drain the coolant.
2. Remove the #8 plug wire.

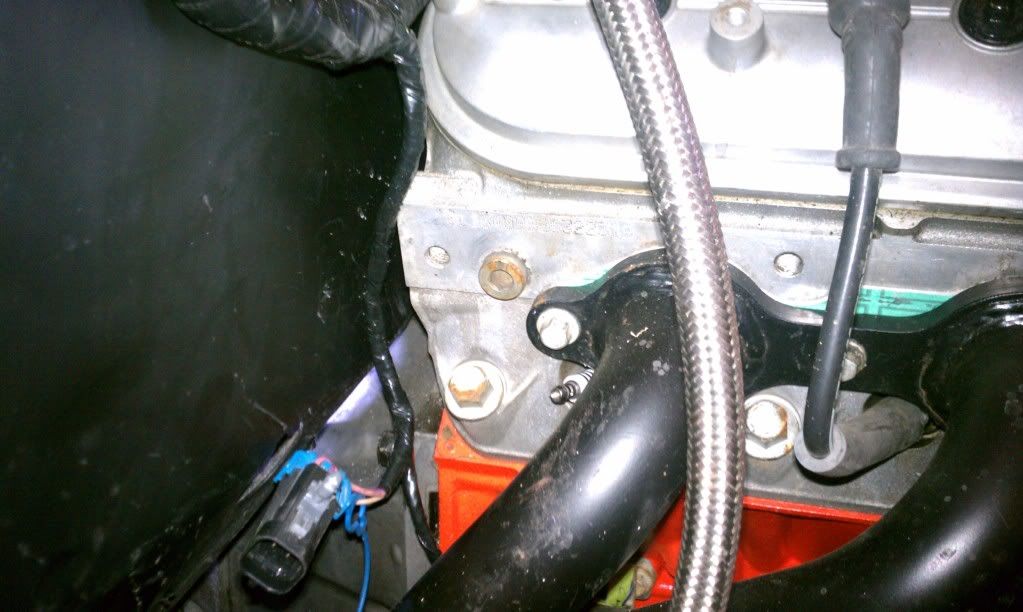
3. Remove the plug under the #8 coil.
4. Turn the pressure reg on air compressor down to about 15psi.
5. Install an air fitting on the air hose.
6. Place air hose in the top of the radiator and block off around the hose with a rag.
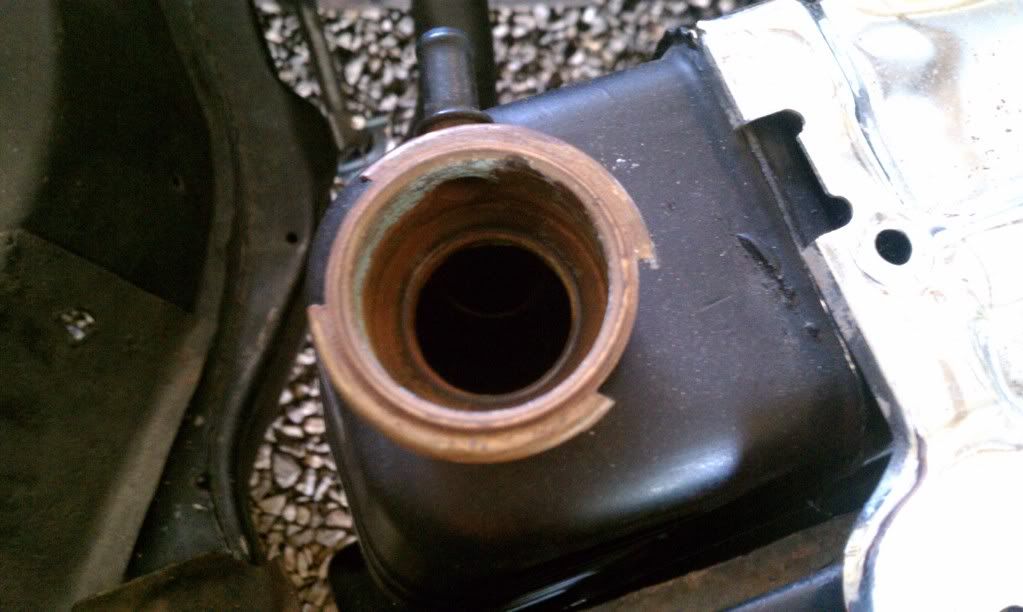
7. Drill the hole for the fitting. Be sure to drill a straight as possible. WEAR SAFETY GLASSES the air will blow the shavings out.
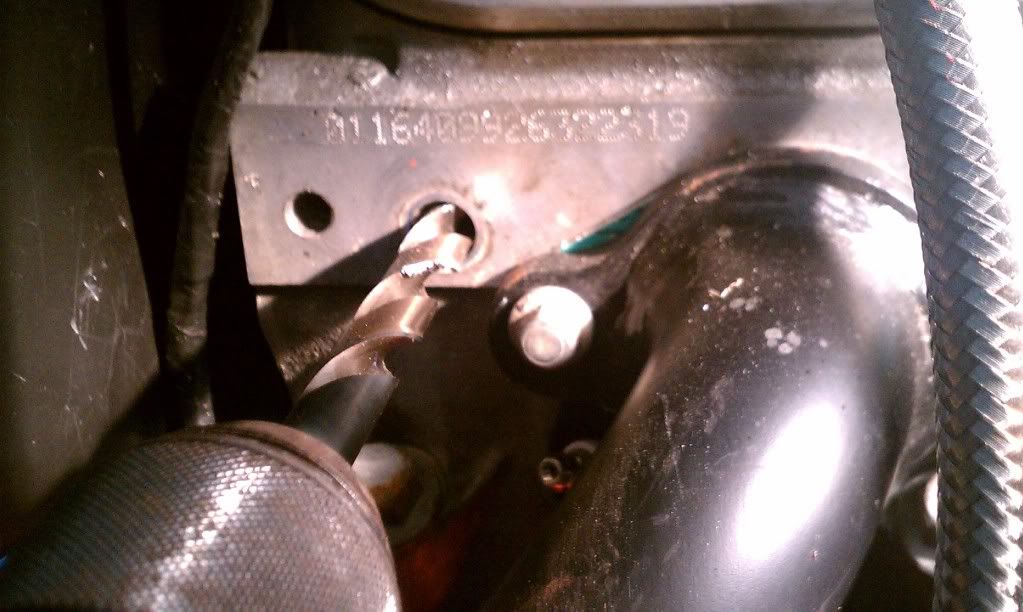
8. Tap the hole. WEAR SAFETY GLASSES the air will blow the chips out.
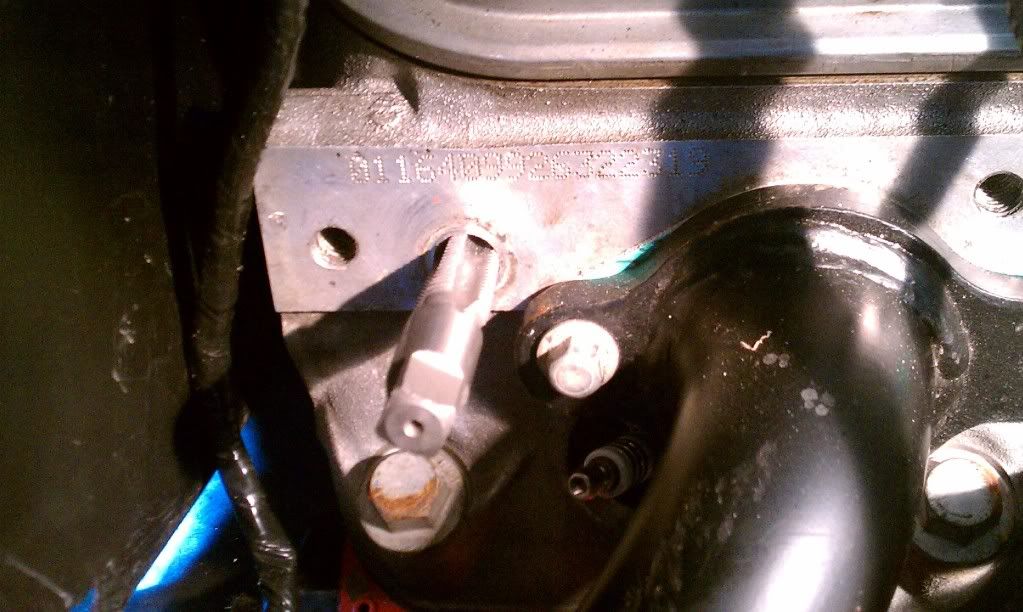
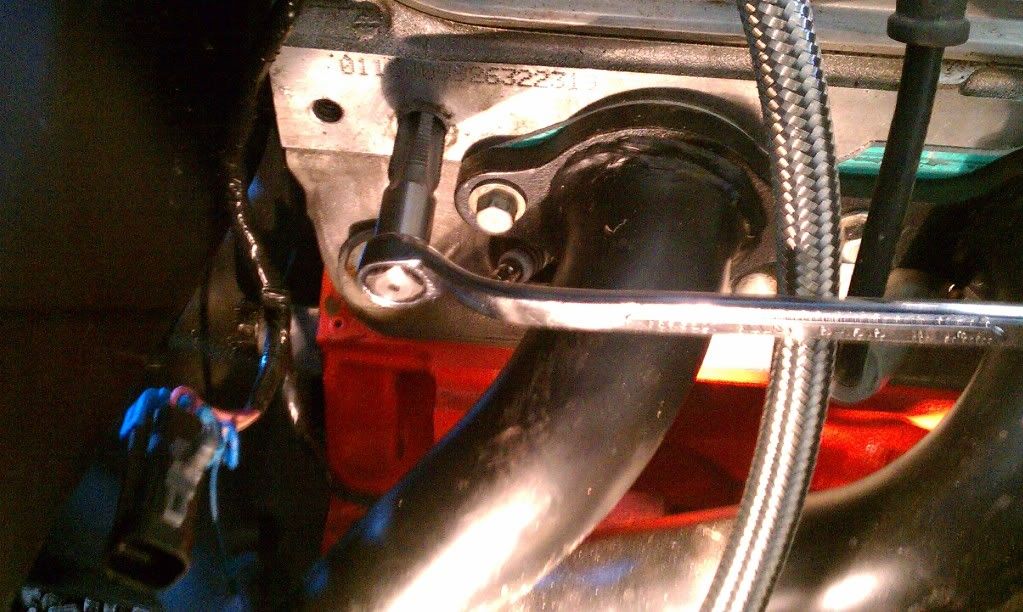
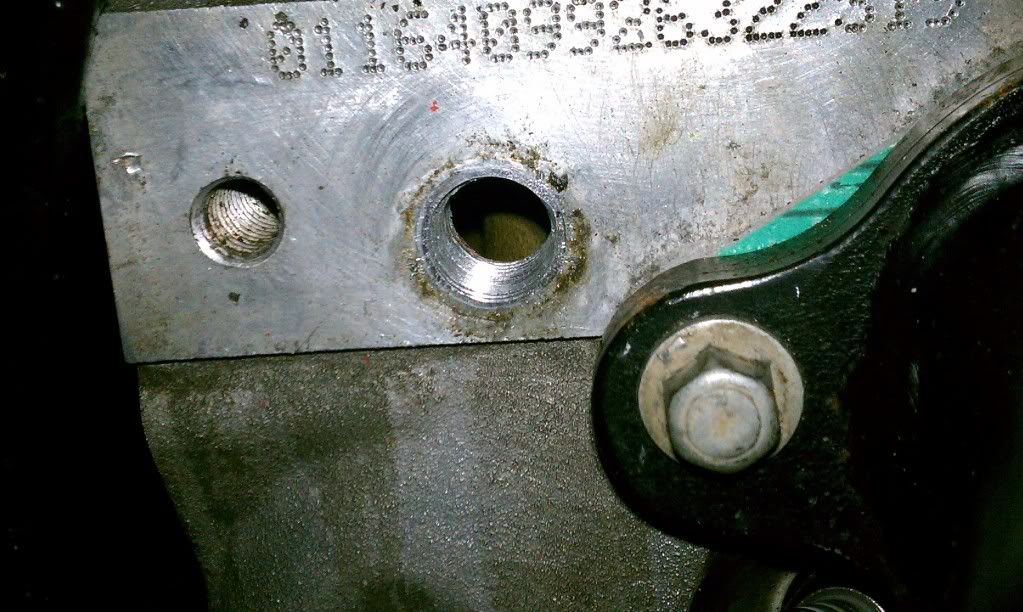
9. Thread in fitting with sealant.
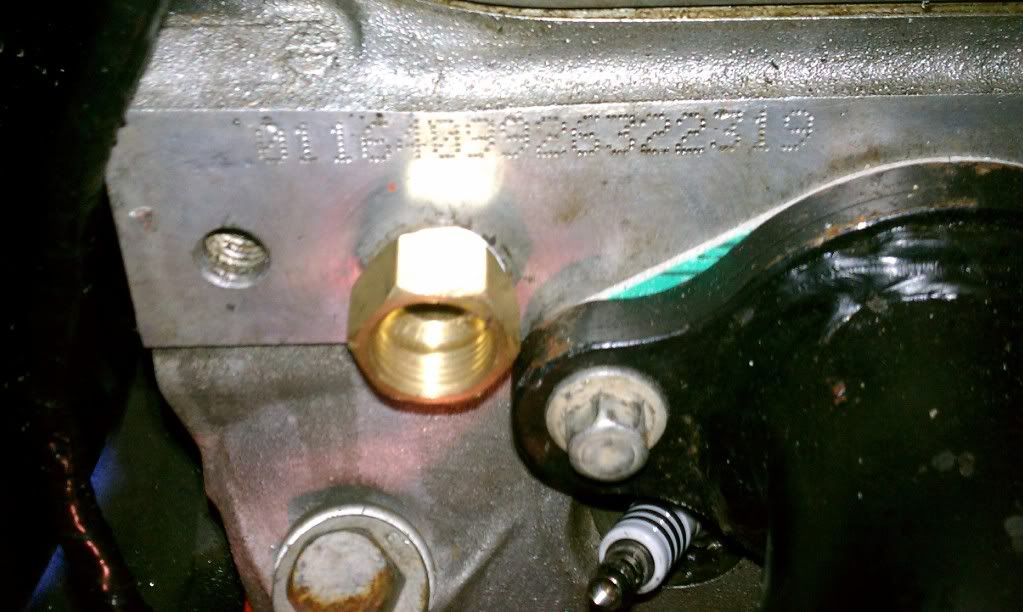
10. Install gauge probe.
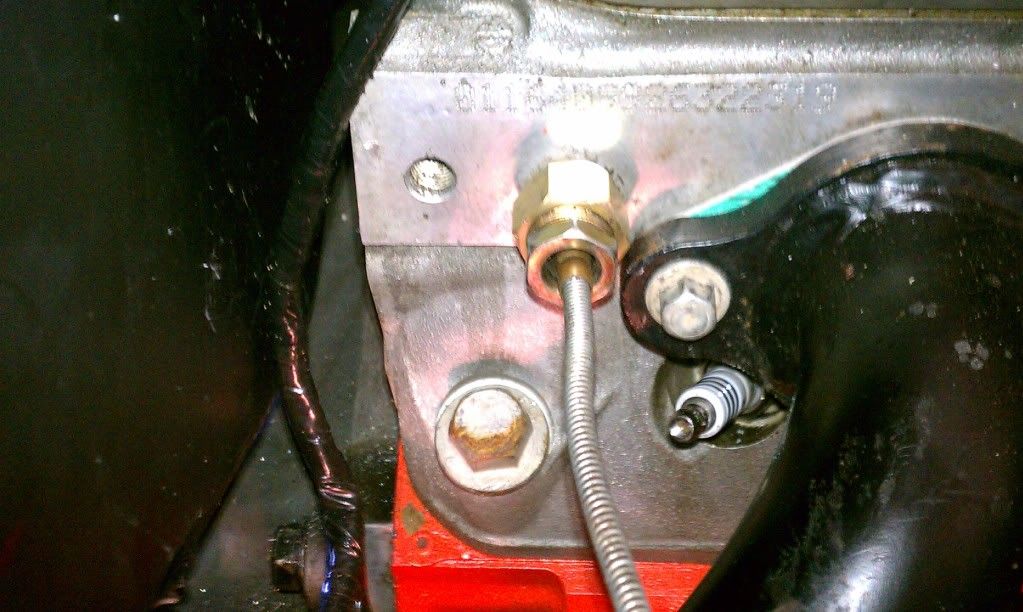
11. Fill coolant and check for leaks.
Mounting of the gauge and running of the capilary tube is on you guys.
1: Gauge
2: Drill
3: Drill bit 7/16 (37/64)
4: Tap 1/4-18 npt (3/8-? Npt)
5: Allen wrench 8mm
6: Box end wrench 1/2-12pt
7: Socket for your fitting may vary by manufacturer. My was 3/4
8: Compressor
9: Air hose
10: Extra quick connect air fitting
1. Drain the coolant.
2. Remove the #8 plug wire.
3. Remove the plug under the #8 coil.
4. Turn the pressure reg on air compressor down to about 15psi.
5. Install an air fitting on the air hose.
6. Place air hose in the top of the radiator and block off around the hose with a rag.
7. Drill the hole for the fitting. Be sure to drill a straight as possible. WEAR SAFETY GLASSES the air will blow the shavings out.
8. Tap the hole. WEAR SAFETY GLASSES the air will blow the chips out.
9. Thread in fitting with sealant.
10. Install gauge probe.
11. Fill coolant and check for leaks.
Mounting of the gauge and running of the capilary tube is on you guys.
Last edited by 71ANTICARB; 06-06-2011 at 01:38 AM.
 04-09-2012, 10:49 PM
#7
Tip.. if you dip your drill bit and tap in grease. The Grease will collect the chips and shaving while drilling and using the tap. Allso slow down the speed a bit to let the grease do its job of collecting the chips/shavings.
Clean and reapply fresh grease to the drill bit / Tap if it gets loaded up.
I have and others have used this, it works well..
BC
Clean and reapply fresh grease to the drill bit / Tap if it gets loaded up.
I have and others have used this, it works well..
BC
Trending Topics
04-11-2013, 01:44 PM
#10

Why not use a temp sensor from a 1998 ls1? I know it will read a bit higher on the guage (10-15 degrees) but it will give the PCM the correct reading for the fans and you can easily adjust to the higher temps on the guage. It bolts right in without any drilling.
04-12-2013, 06:29 AM
#11
TECH Fanatic
I used the sensor on the driver front head for the PCM, but my car doesn't have a guage(too old). I put the mechanical guage in so I have a guage.