

2010 LS3 and TR6060 in a 68 Camaro
 08-09-2011 | 12:11 AM
#1

Thread Starter
Staging Lane
Joined: Aug 2011
Posts: 57
Likes: 0
Hello, first post here. I've started down the path of bringing my baby back to life. This was my first car. I bought it when I was 14 years old because it was the only car I wanted. It needed everything done to it and I did it myself. My dad kept a spreadsheet of every penny he had loaned me and I paid him back with interest by the time I was 17 (even restored and sold a 67 Firebird as part of that). About 12 years ago I moved back east and left the car in AZ with my parents because I didn't want to expose it to east coast weather. At the time they didn't have the garage space to keep it indoors, and when my dad got his 01 Vette, outdoors it went to rot. The time has now come to bring it back to life, and I'm making trips back to AZ every couple months and working remotely in the morning then working on it during the afternoon/evening. So far it's had the roof, rear quarters and tail panel replaced, painted, and the front subframe powdercoated and all new bushings and steering components installed. From this point on, I'm taking over and doing everything myself again.
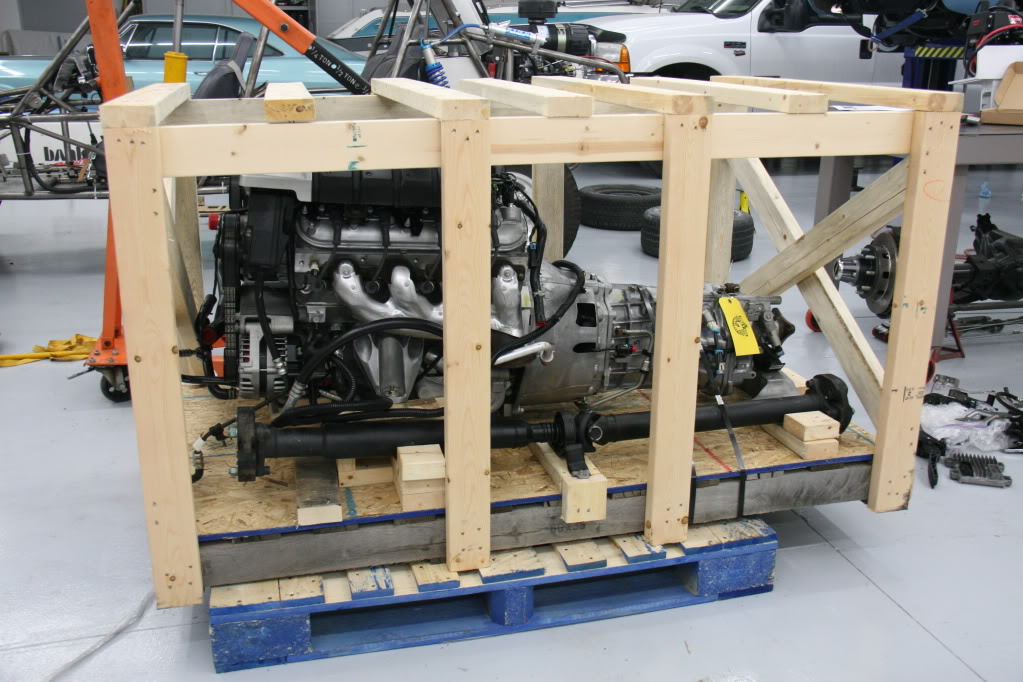
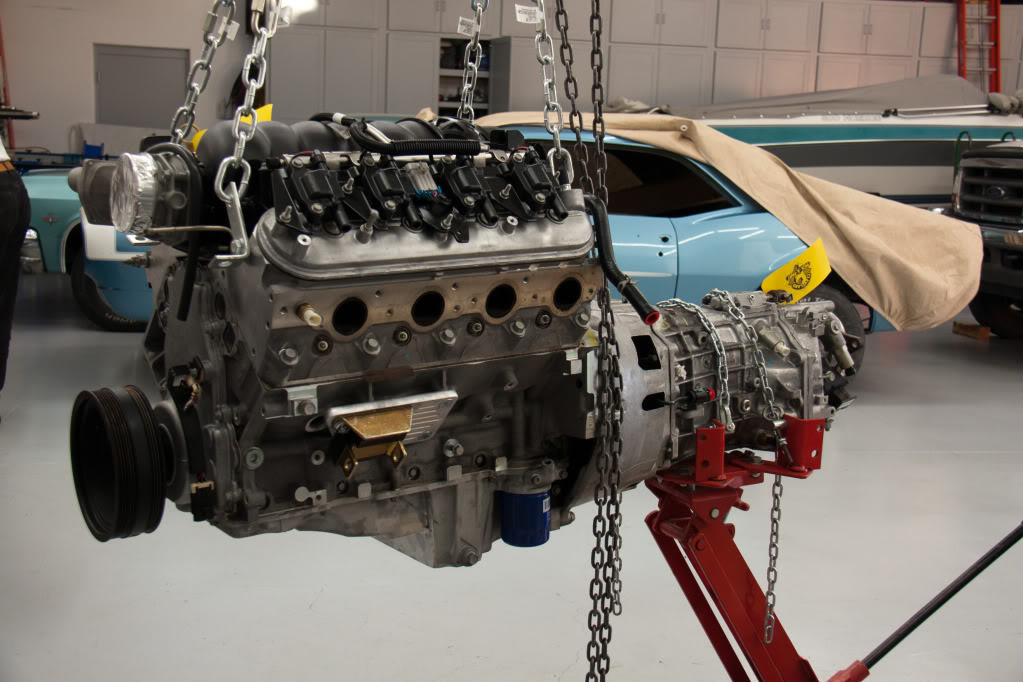
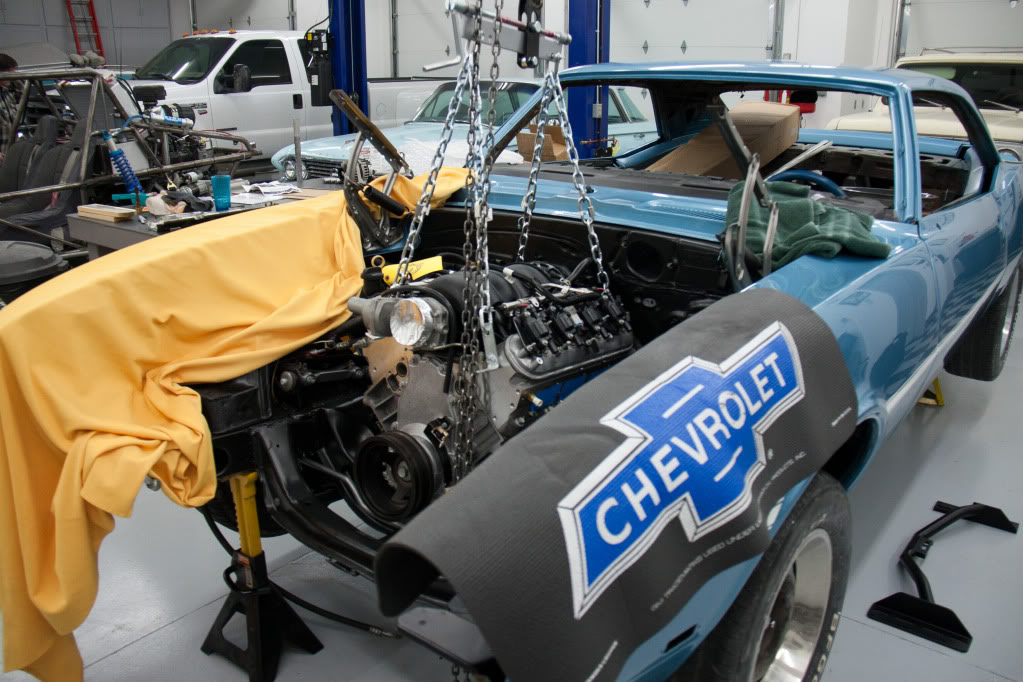
I bought a 2010 Camaro drivetrain, computer, harness, driveshaft, pedals (all 3) shifter and MAF for it. The drivetrain has 19K on it and was a pull out of a crashed car. I've ordered the engine mount plates, clutch adaptor plate and transmission crossmember from S&P, but that's about all I've ordered for the engine stuff.
I've been reading this forum and am a little overwhelmed with info right now. Most of the swaps I've been following have been LS1 and LS2 swaps, but I haven't seen anyone attempt this particular combo. All of the LS3 related threads I've seen relate to the Corvette LS3, and not this one, so I'm not sure if there are differences. If I've missed it, please tell me to shut up and link me to it I have a few questions if you don't mind.
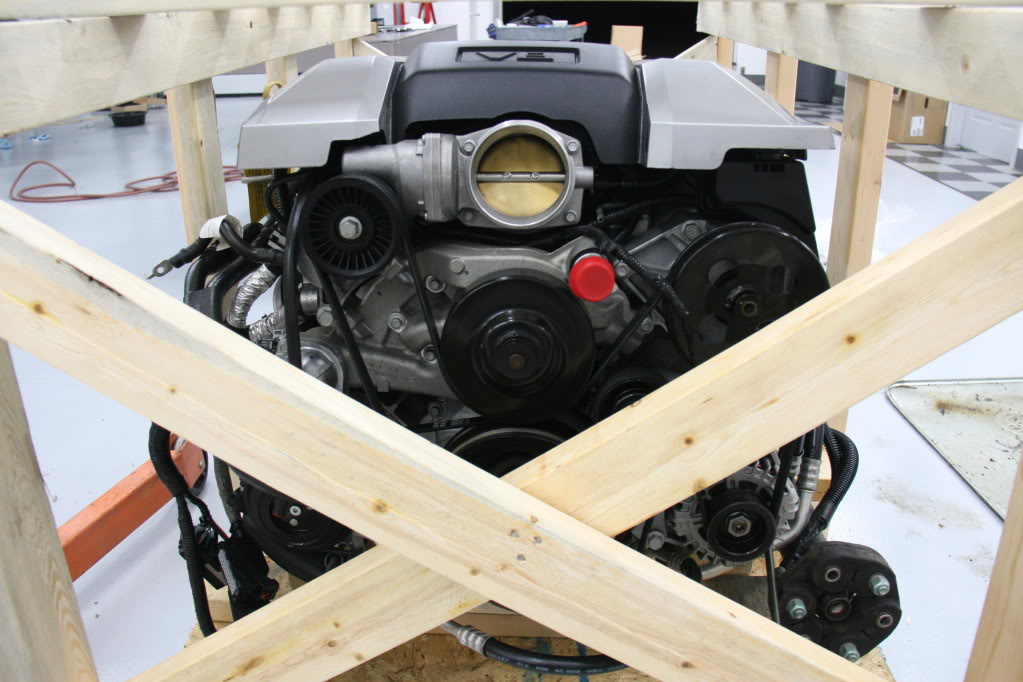
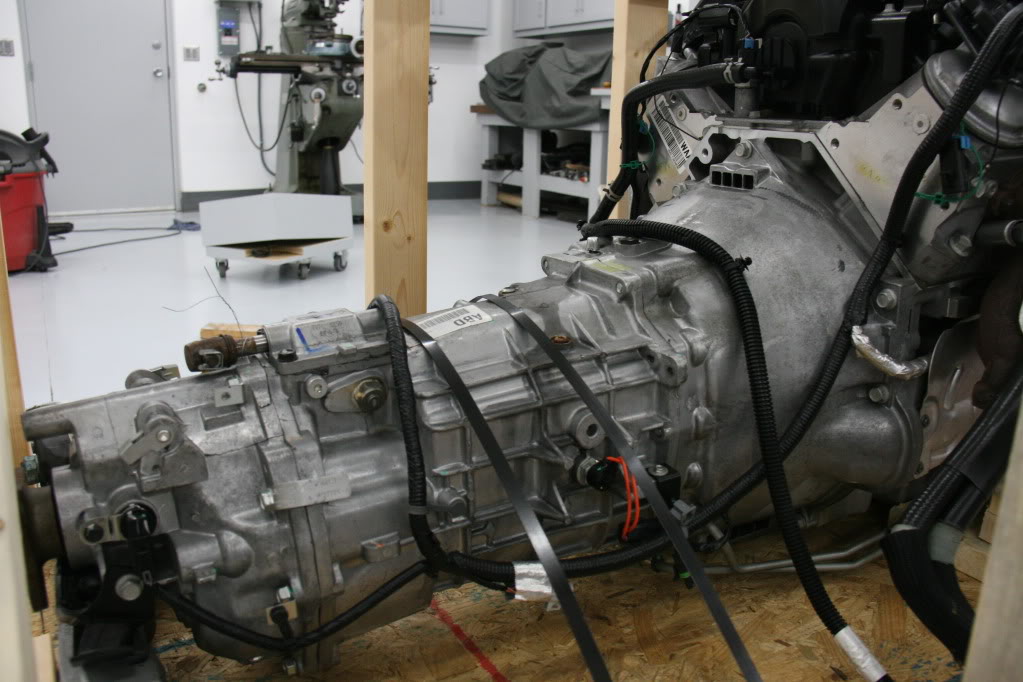
This engine has the low mount alternator and AC Compressor. Will this drop in as-is with the accessories pictured below or am I going to need to reconfigure things?
Will the Stock AC Compressor work in place of the Sanden compressor I had on the vintage air system?
Will any LS pan bolt to this? I'm leaning towards the Autokraft pan. Of all of the pans I've seen, it appears to be the nicest. The S&P pan looks a little hacky to me for what they want for it, especially considering they wont take my LS3 pan as a core. The reason I ask is this particular pan has an oil cooler built-in. The Autokraft pan looks like a quality piece, but my major concern with it is oil leakage. It's a stamped pan like the old Gen II small blocks, which always seemed to leak after a while. I like the Cast pan that comes stock on the LS, they really dont seem to leak at all, at least the one on my dad's LS1 in his 01 vette hasn't.
I spent only brief time with this engine before I left AZ a few days ago, so I'm not all that familiar with it, that should change over time, so please excuse my ignorance.
Anyways, I guess that's enough questions for now, how about some car ****?
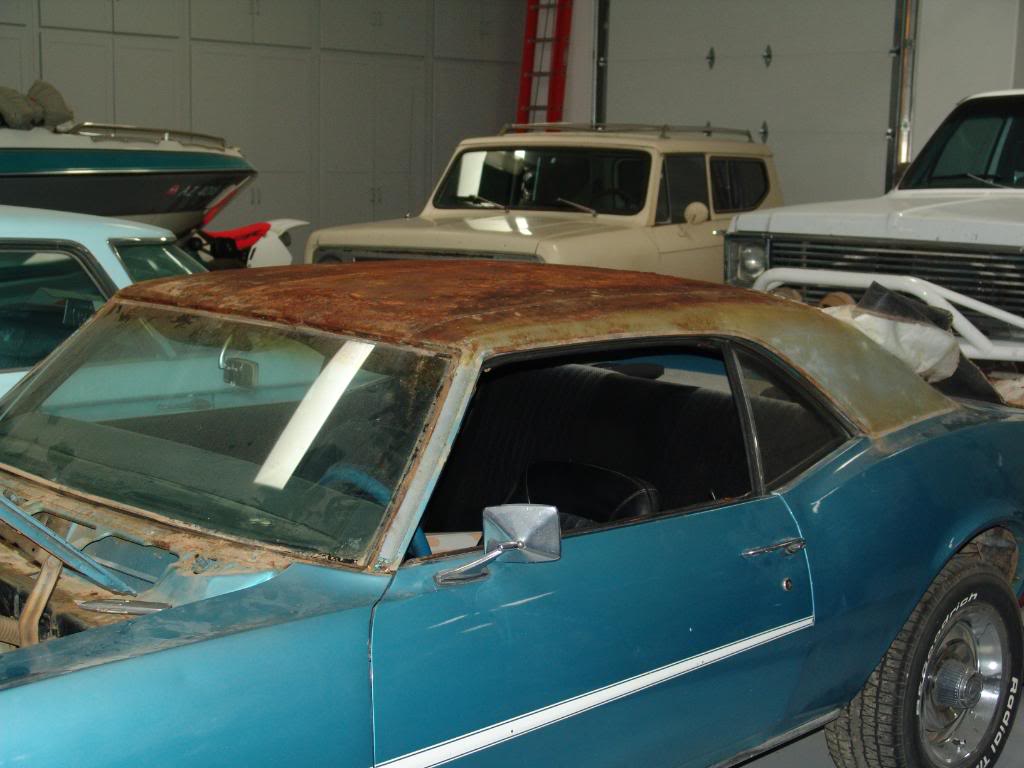
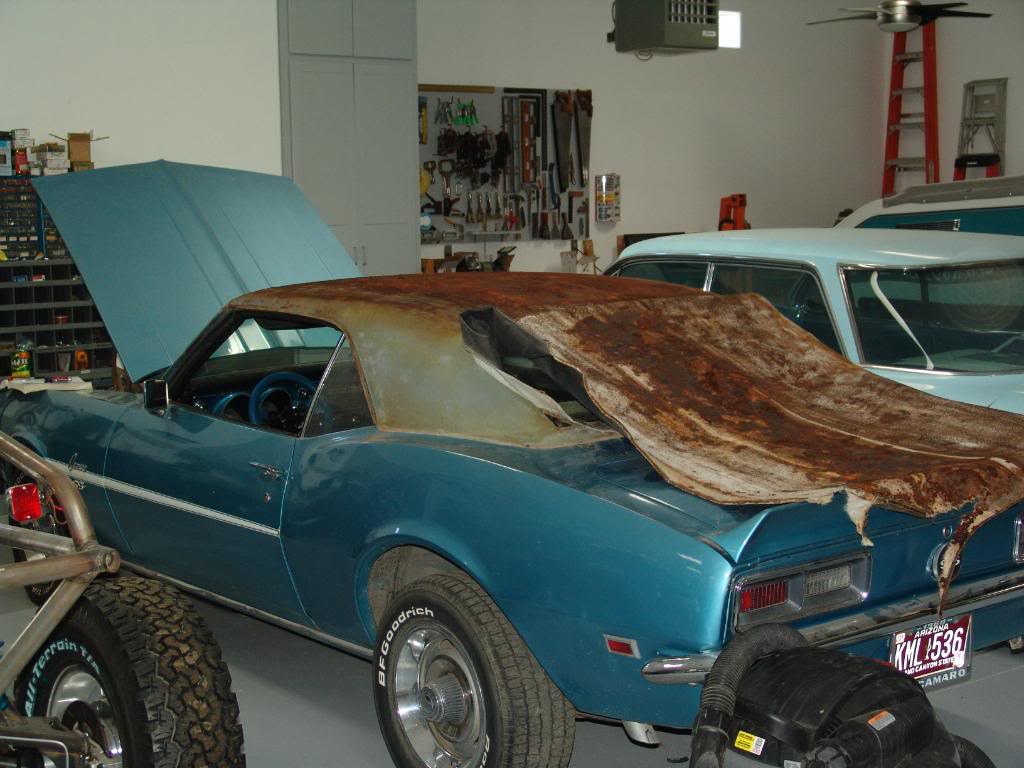
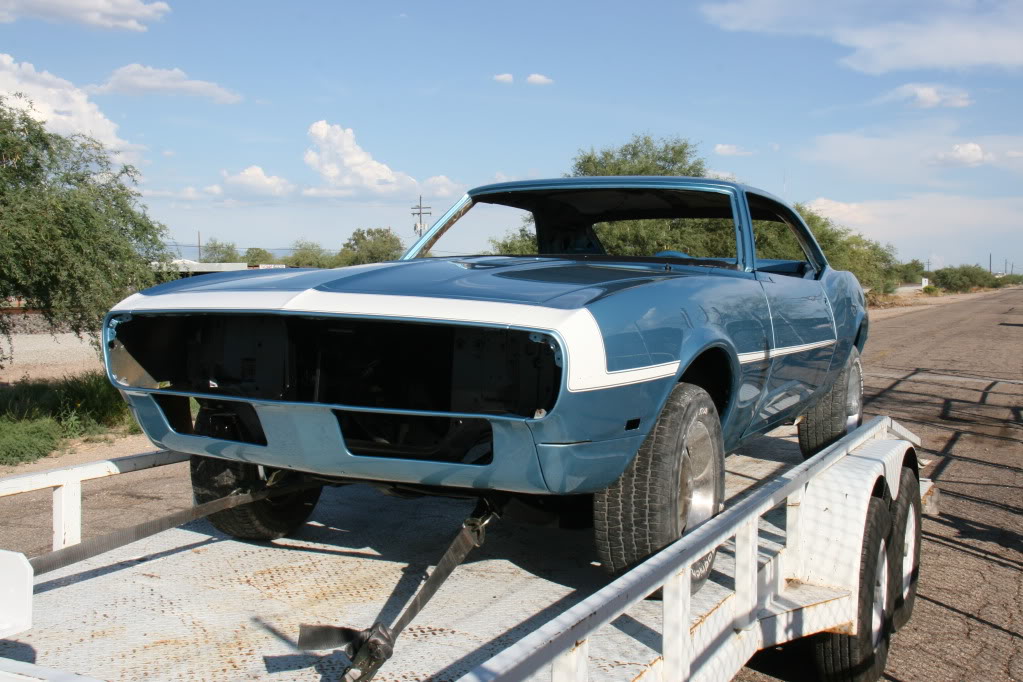
Here's the car when I finally had enough and decided it was time to restore. The Vinyl top had completely killed the roof, even stored indoors in AZ.
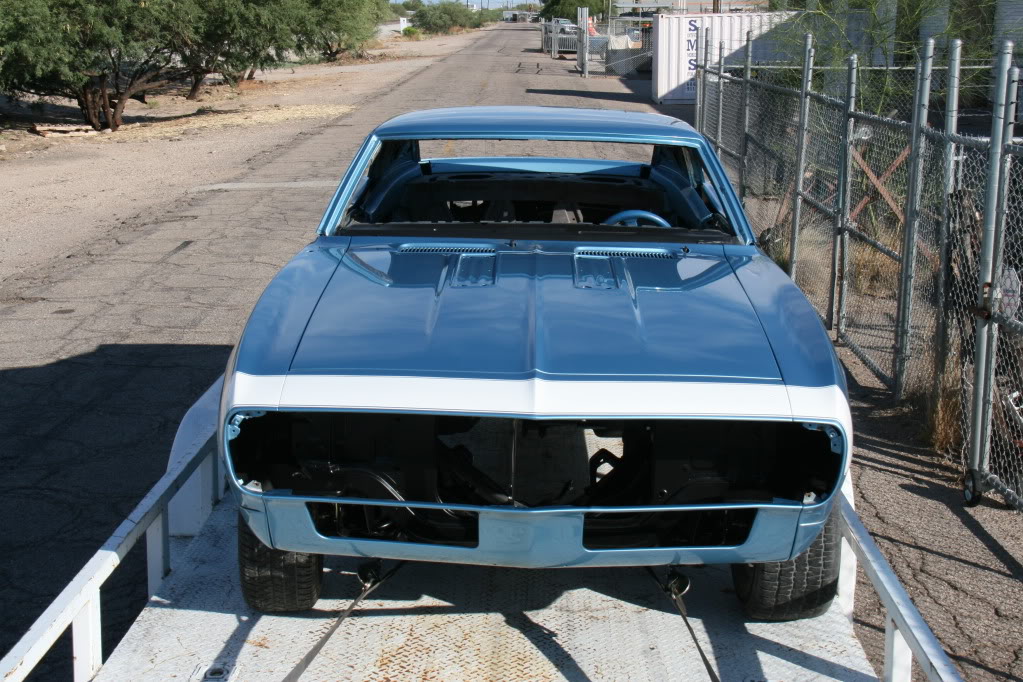
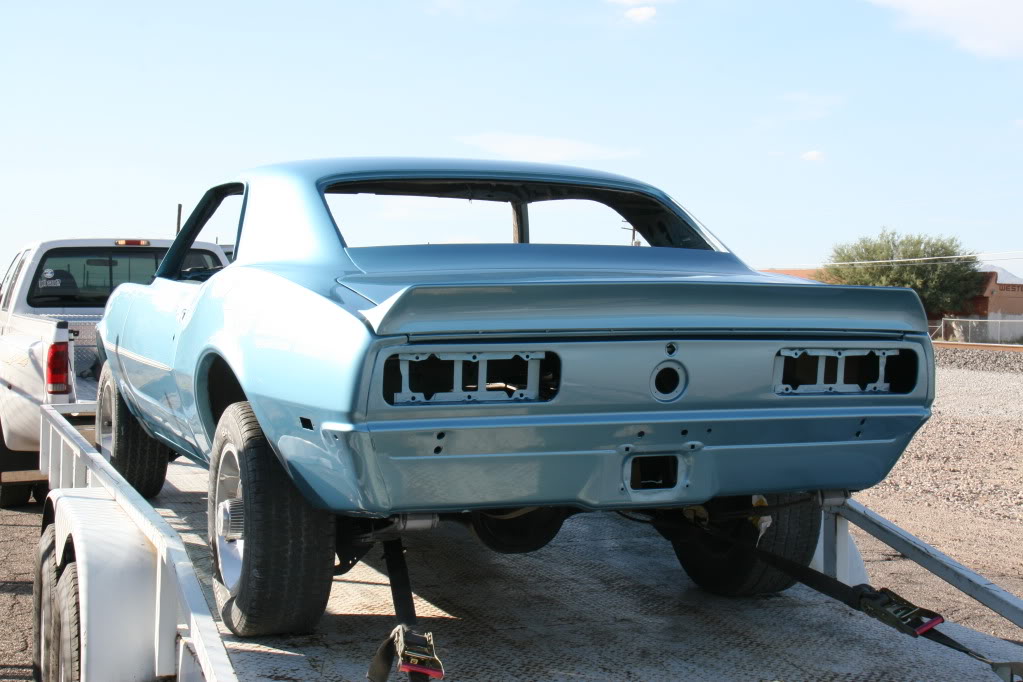
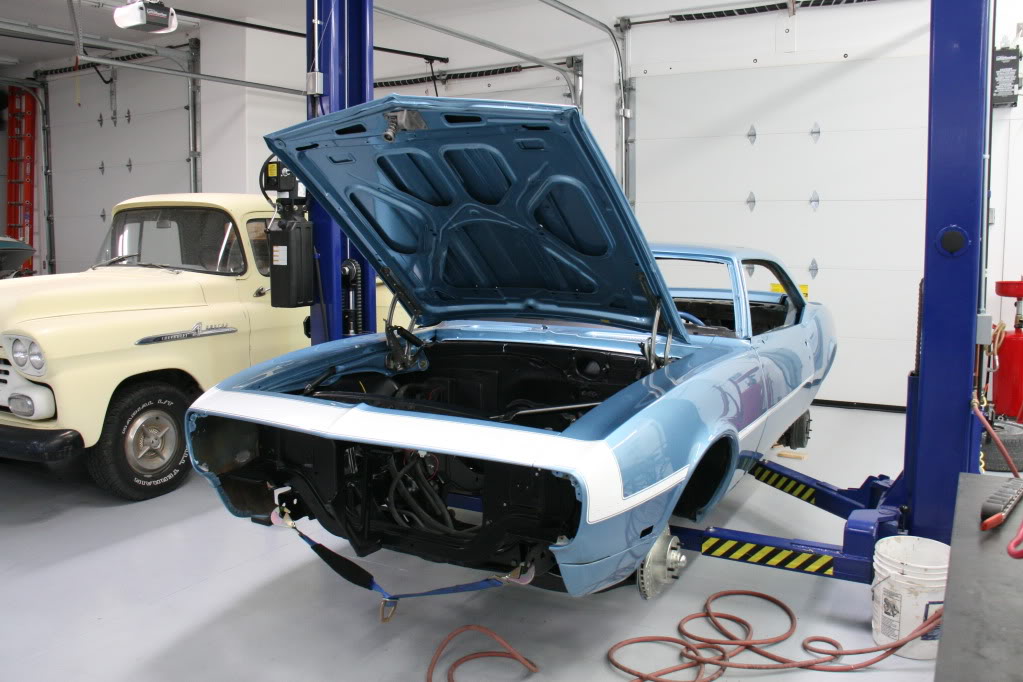
And here it is after coming out of paint last week. I stayed with the factory Grotto Blue Metallic and the factory stripe. The Vinyl top was factory, but I decided enough was enough.
Those rear spring shackles have been replaced with factory shackles. They're disgusting.
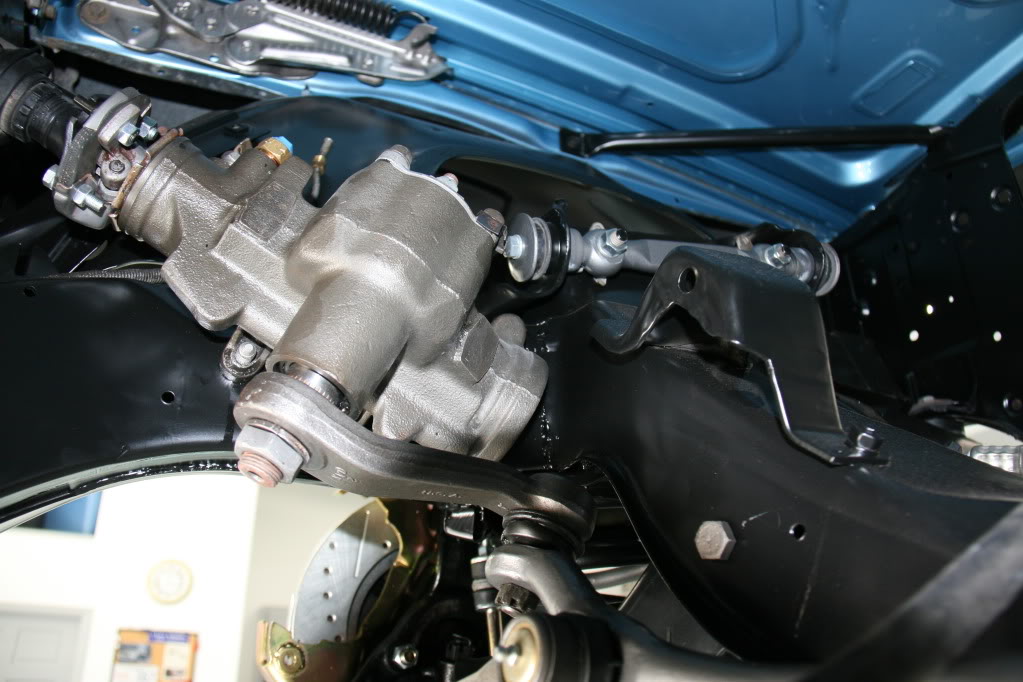
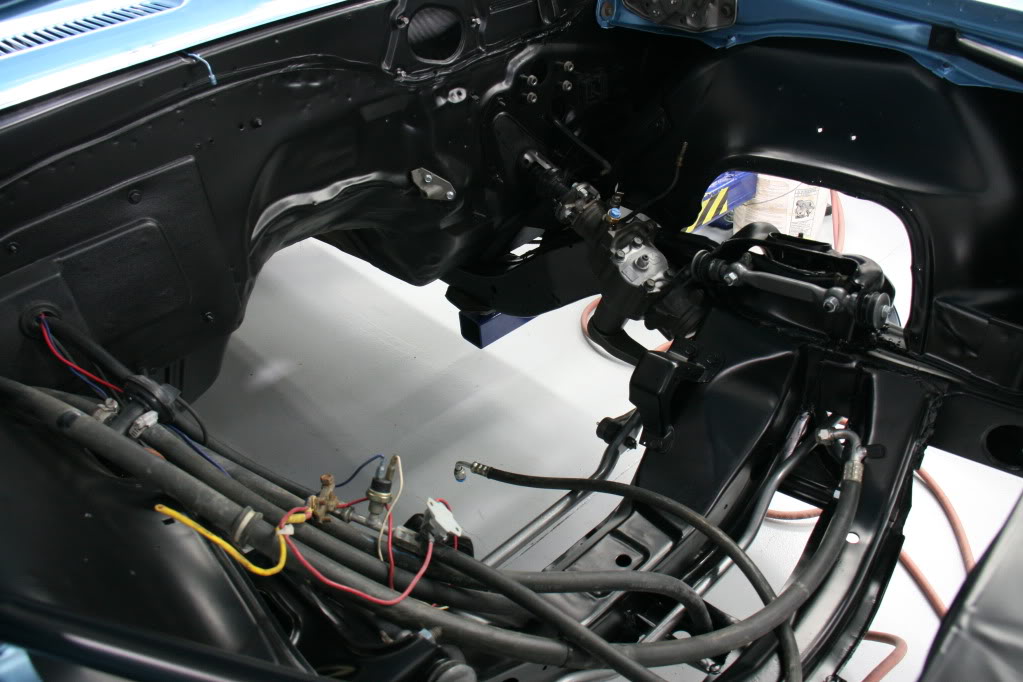
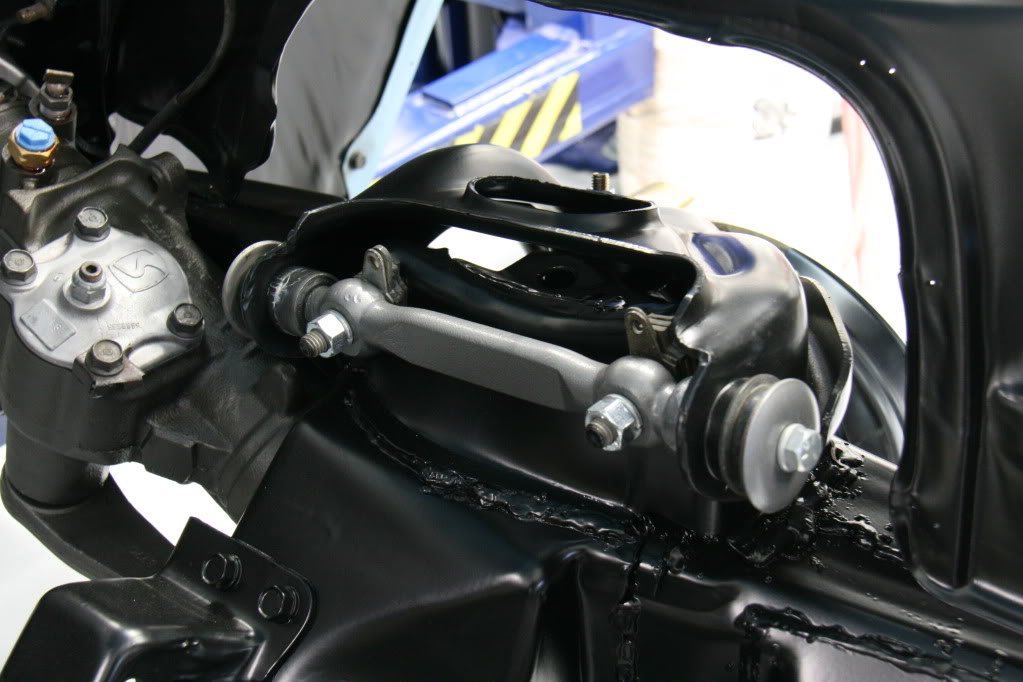
Some of the Chassis work. Pretty much everything black here except for the firewall was powdercoated and all new bushings and steering components installed. BTW, if you see rusty bolts, they're temporary. The front clip is just held in place right now so I can move the car around, but I'm going to take it all off when I put the engine in. I'm going to use a shiny new bolt kit when the parts are installed for real.
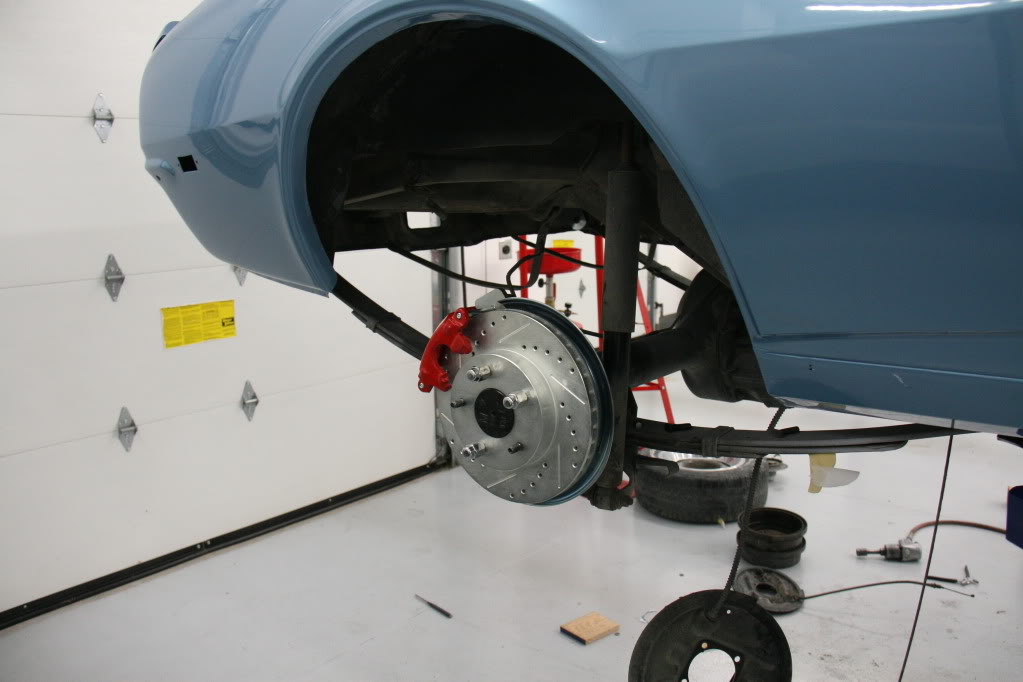
This rear disc kit was a real pain. It's a Right Stuff kit. Nothing wrong with the kit itself, but the rear is a Ford 9" with Chevy 10 bolt axle flange adaptors. I had to machine every part but the caliper to get it to work. Bridgeport mill and 12" atlas lathe for the win. The final result looked right though, was pretty proud of myself on this one.
And finally the driveline.
I look forward to talking with you folks.
I bought a 2010 Camaro drivetrain, computer, harness, driveshaft, pedals (all 3) shifter and MAF for it. The drivetrain has 19K on it and was a pull out of a crashed car. I've ordered the engine mount plates, clutch adaptor plate and transmission crossmember from S&P, but that's about all I've ordered for the engine stuff.
I've been reading this forum and am a little overwhelmed with info right now. Most of the swaps I've been following have been LS1 and LS2 swaps, but I haven't seen anyone attempt this particular combo. All of the LS3 related threads I've seen relate to the Corvette LS3, and not this one, so I'm not sure if there are differences. If I've missed it, please tell me to shut up and link me to it
I have a few questions if you don't mind.This engine has the low mount alternator and AC Compressor. Will this drop in as-is with the accessories pictured below or am I going to need to reconfigure things?
Will the Stock AC Compressor work in place of the Sanden compressor I had on the vintage air system?
Will any LS pan bolt to this? I'm leaning towards the Autokraft pan. Of all of the pans I've seen, it appears to be the nicest. The S&P pan looks a little hacky to me for what they want for it, especially considering they wont take my LS3 pan as a core. The reason I ask is this particular pan has an oil cooler built-in. The Autokraft pan looks like a quality piece, but my major concern with it is oil leakage. It's a stamped pan like the old Gen II small blocks, which always seemed to leak after a while. I like the Cast pan that comes stock on the LS, they really dont seem to leak at all, at least the one on my dad's LS1 in his 01 vette hasn't.
I spent only brief time with this engine before I left AZ a few days ago, so I'm not all that familiar with it, that should change over time, so please excuse my ignorance.
Anyways, I guess that's enough questions for now, how about some car ****?
Here's the car when I finally had enough and decided it was time to restore. The Vinyl top had completely killed the roof, even stored indoors in AZ.
And here it is after coming out of paint last week. I stayed with the factory Grotto Blue Metallic and the factory stripe. The Vinyl top was factory, but I decided enough was enough.
Those rear spring shackles have been replaced with factory shackles. They're disgusting.
Some of the Chassis work. Pretty much everything black here except for the firewall was powdercoated and all new bushings and steering components installed. BTW, if you see rusty bolts, they're temporary. The front clip is just held in place right now so I can move the car around, but I'm going to take it all off when I put the engine in. I'm going to use a shiny new bolt kit when the parts are installed for real.
This rear disc kit was a real pain. It's a Right Stuff kit. Nothing wrong with the kit itself, but the rear is a Ford 9" with Chevy 10 bolt axle flange adaptors. I had to machine every part but the caliper to get it to work. Bridgeport mill and 12" atlas lathe for the win. The final result looked right though, was pretty proud of myself on this one.
And finally the driveline.
I look forward to talking with you folks.


 08-11-2011 | 10:36 AM
#7

Staging Lane
Joined: Jan 2010
Posts: 68
Likes: 0
I have a few questions if you don't mind.
This engine has the low mount alternator and AC Compressor. Will this drop in as-is with the accessories pictured below or am I going to need to reconfigure things?
Typically the F body accessories hit the frame whereas the corvette configuration fits fine. So your choices are to clearance the frame, or get some GM or aftermarket bracketry (i.e. Wegner, March, VA, etc). You can also purchase brackets from Kwik Perfromance that relocates the Alt up high.
Will the Stock AC Compressor work in place of the Sanden compressor I had on the vintage air system?
If you have the VA set up and are planning to run it in your car then you'll need the Sanden compressor.
Will any LS pan bolt to this? I'm leaning towards the Autokraft pan. Of all of the pans I've seen, it appears to be the nicest. The S&P pan looks a little hacky to me for what they want for it, especially considering they wont take my LS3 pan as a core. The reason I ask is this particular pan has an oil cooler built-in. The Autokraft pan looks like a quality piece, but my major concern with it is oil leakage. It's a stamped pan like the old Gen II small blocks, which always seemed to leak after a while. I like the Cast pan that comes stock on the LS, they really dont seem to leak at all, at least the one on my dad's LS1 in his 01 vette hasn't.
Ahhhh, the great oil pan debate. If you're looking for a cast pan, Mast makes a nice piece. If you plan on roadracing I like Autocraft's baffling better. Just my .02

I look forward to talking with you folks.
This engine has the low mount alternator and AC Compressor. Will this drop in as-is with the accessories pictured below or am I going to need to reconfigure things?
Typically the F body accessories hit the frame whereas the corvette configuration fits fine. So your choices are to clearance the frame, or get some GM or aftermarket bracketry (i.e. Wegner, March, VA, etc). You can also purchase brackets from Kwik Perfromance that relocates the Alt up high.
Will the Stock AC Compressor work in place of the Sanden compressor I had on the vintage air system?
If you have the VA set up and are planning to run it in your car then you'll need the Sanden compressor.
Will any LS pan bolt to this? I'm leaning towards the Autokraft pan. Of all of the pans I've seen, it appears to be the nicest. The S&P pan looks a little hacky to me for what they want for it, especially considering they wont take my LS3 pan as a core. The reason I ask is this particular pan has an oil cooler built-in. The Autokraft pan looks like a quality piece, but my major concern with it is oil leakage. It's a stamped pan like the old Gen II small blocks, which always seemed to leak after a while. I like the Cast pan that comes stock on the LS, they really dont seem to leak at all, at least the one on my dad's LS1 in his 01 vette hasn't.
Ahhhh, the great oil pan debate. If you're looking for a cast pan, Mast makes a nice piece. If you plan on roadracing I like Autocraft's baffling better. Just my .02
I look forward to talking with you folks.
Nice score young man. There are lots of good sites for LS motors into first gens; Pro-touring.com would be a good place to start as well as Camaro Performers magazine for inspiration. I'm in the middle of a first gen restore w an LS7 powerplant myself.
Trending Topics

 08-13-2011 | 06:58 PM
#11
Thread Starter
Staging Lane
Joined: Aug 2011
Posts: 57
Likes: 0
Thanks for the comments everyone, esp flash.
One more, is the tranny mount in the same location as the T56 on this? It looks like it's a different style. As long as it's in the same location I think I'm going to be ok.
One more, is the tranny mount in the same location as the T56 on this? It looks like it's a different style. As long as it's in the same location I think I'm going to be ok.
08-22-2011 | 08:02 PM
#14
Thread Starter
Staging Lane
Joined: Aug 2011
Posts: 57
Likes: 0
I will. To be honest though, I think I have a lot of parts fabrication in my future. I'm honestly thinking of fabbing up my own mount for the divorced shifter, but I'm going to have to stuff this thing in the car and take measurements before I decide whether or not that's a feasible task. For some reason the idea of taking that tranny apart and adapting a tail housing and shifter assembly out of a 99-02 F-body seems like more of an undertaking, but I might just end up having to go that route. I'm using this transmission either way, just what form it's in when I install it is the big question at this point. Sucks being 2000 miles away from the car, I wish I could just work on it whenever I want.
11-29-2011 | 03:19 PM
#15
Thread Starter
Staging Lane
Joined: Aug 2011
Posts: 57
Likes: 0
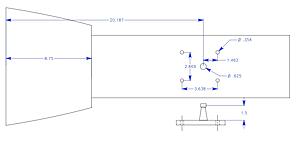
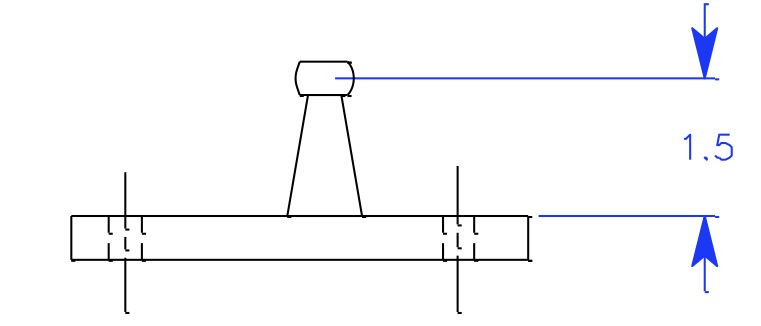
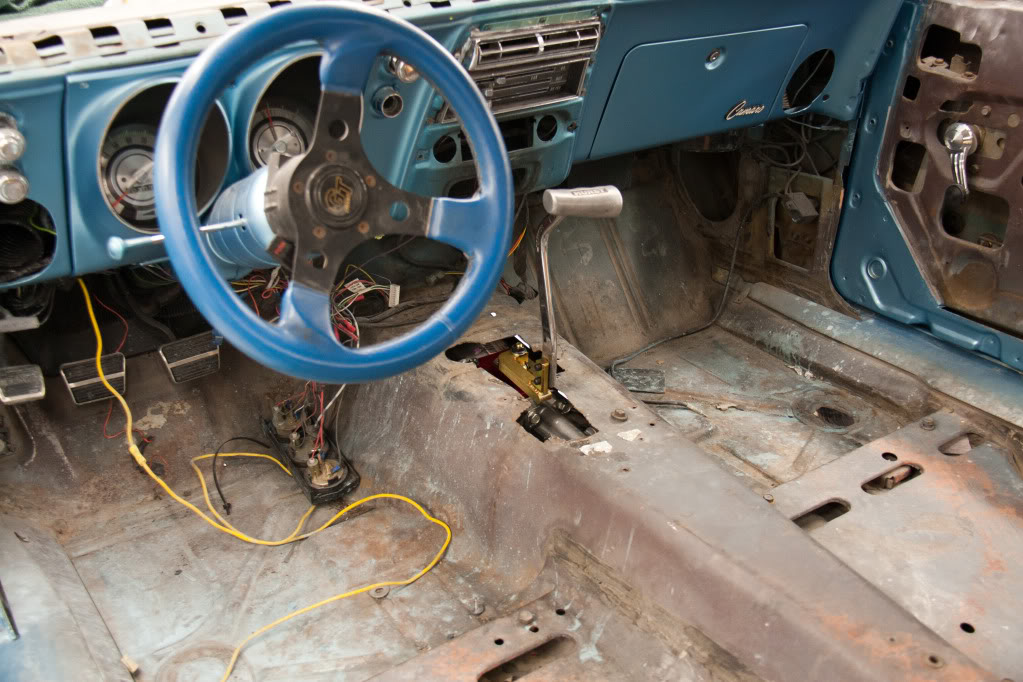
Small update. I'm going to be in AZ with the car for a couple weeks at the end of december. I hope to have the engine and trans mounted in the car and the brake system complete by the time I leave. I worked with Mcleod Racing by sending them dimensions for this setup. According to S&P and Mcleod I might be the first one attempting this particular transmission into a retrofit, at least into a Camaro. The shifter I'm going to use is part number 85-403-124-07. This will relocate the shifter by setting the unit on top of where the remote shifter currently connects and will keep me from having to change out the tailhousing. We'll see how it works.
I'm still not clear on how this trans mount will work with the S&P T-56 crossmember. I know the mount on this setup is different, but I'm not sure if it's located in a different position for-aft. Once I get some "me time" with the new drivetrain I'll have a better idea of how to adapt this if noone chimes in first.
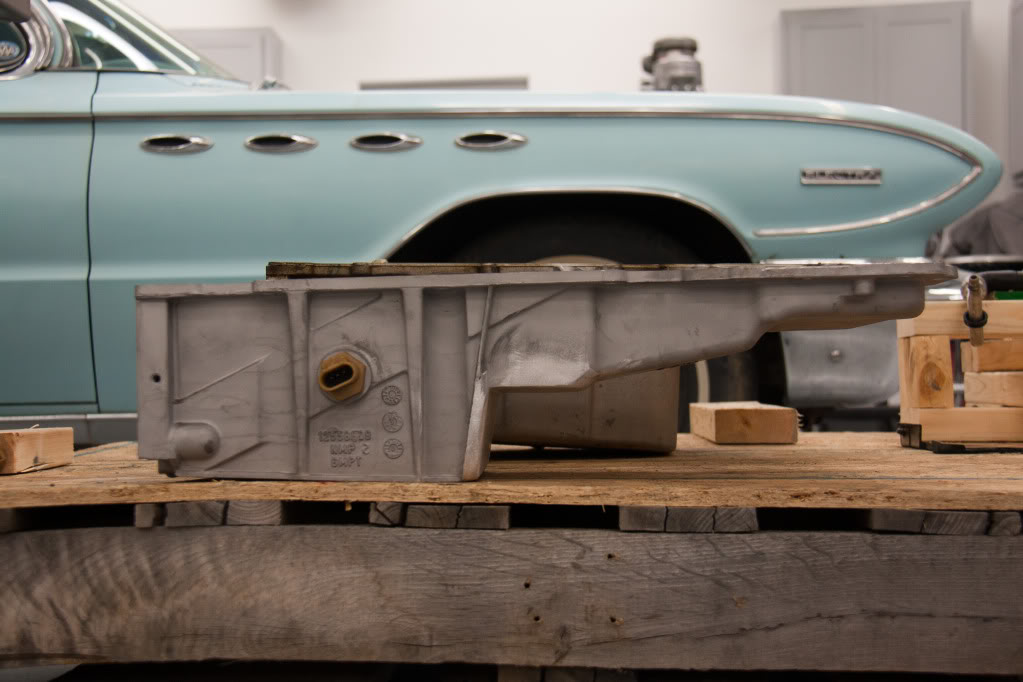
Here are the dimensions for the shifter on the TR6060 in case anyone is interested. The shifter There was another image that showed this bellhousing to be 9.5" long, however based on careful measurements I do not believe that to be correct.


I'm still not clear on how this trans mount will work with the S&P T-56 crossmember. I know the mount on this setup is different, but I'm not sure if it's located in a different position for-aft. Once I get some "me time" with the new drivetrain I'll have a better idea of how to adapt this if noone chimes in first.
Here are the dimensions for the shifter on the TR6060 in case anyone is interested. The shifter There was another image that showed this bellhousing to be 9.5" long, however based on careful measurements I do not believe that to be correct.


Last edited by m0ondoggy; 01-03-2012 at 01:04 PM.
01-04-2012 | 12:18 AM
#16
Thread Starter
Staging Lane
Joined: Aug 2011
Posts: 57
Likes: 0
I've managed to do some work on the car over the past week.
Stripped all of the accessories off.

Installed the S&P modified pan. I discovered a void in one of the welds to the modified pickup tube they sent, so I went ahead and assembled it without the tube for now. I'll have to pull it all back out when it finally shows up.
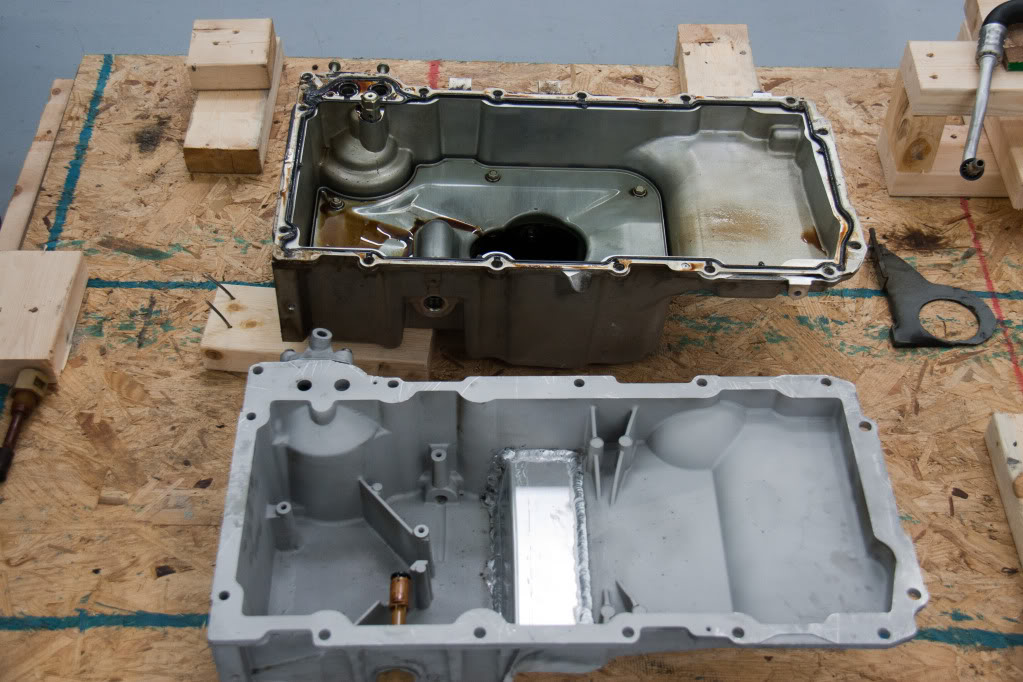
Obligatory comparison shot
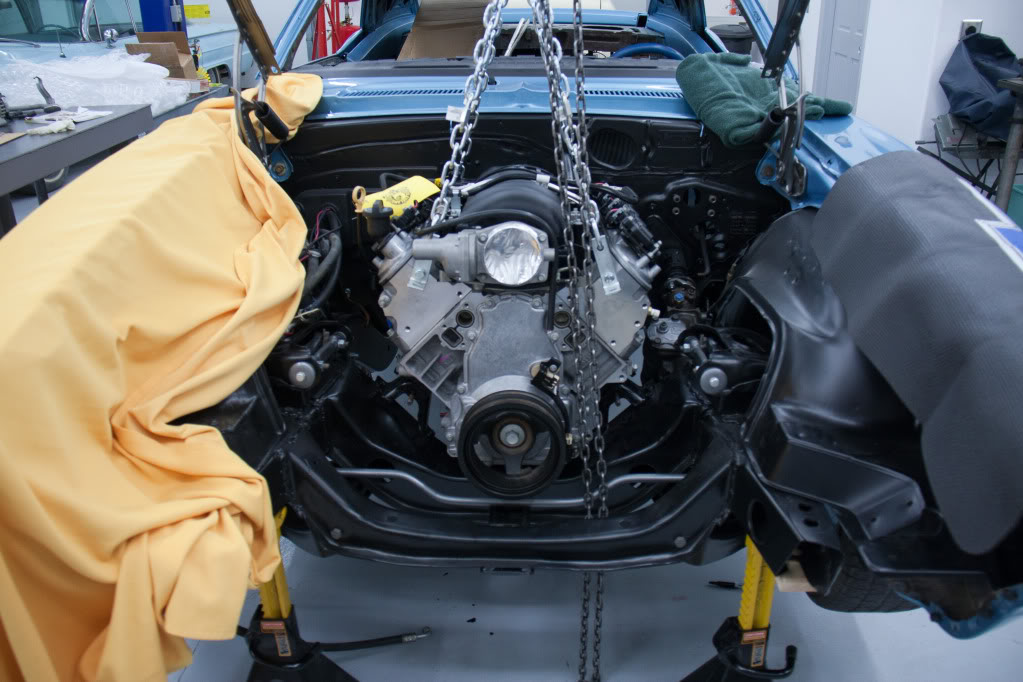
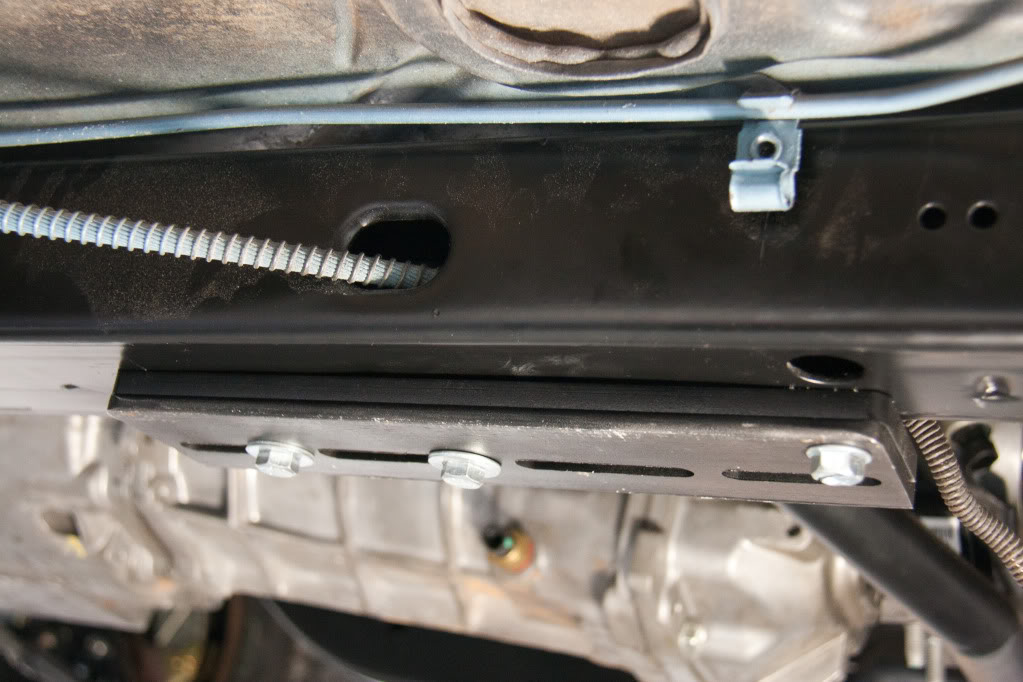
All set up and ready to drop in. I ended up having to use stock 307 mounts since these prothanes didn't fit.
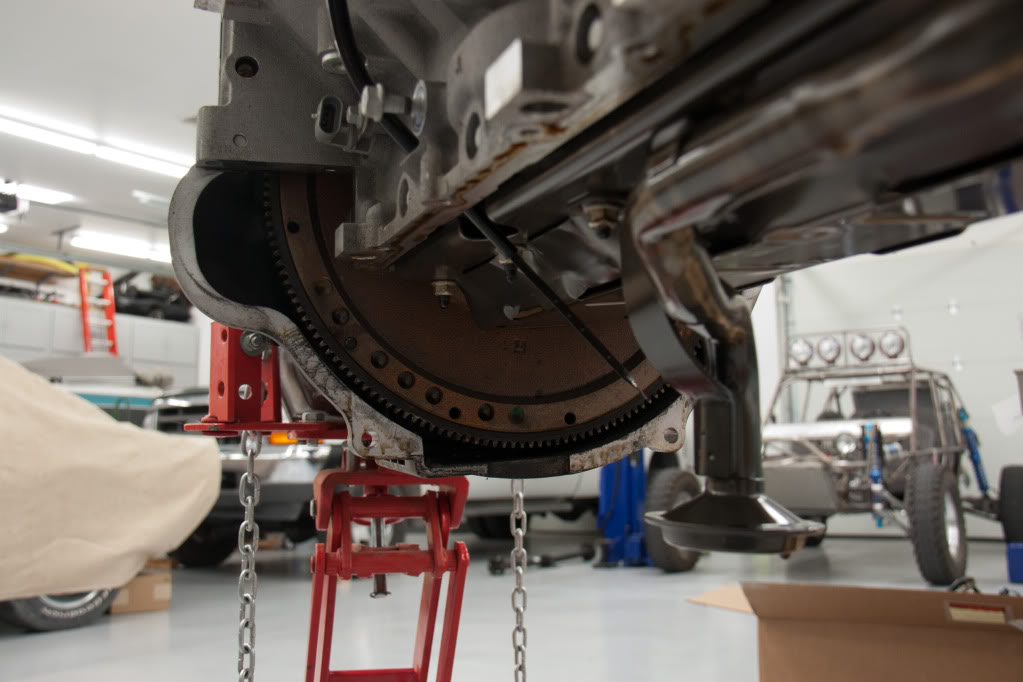
Dropping it in:

The Shifter fits perfectly and is damn smooth.
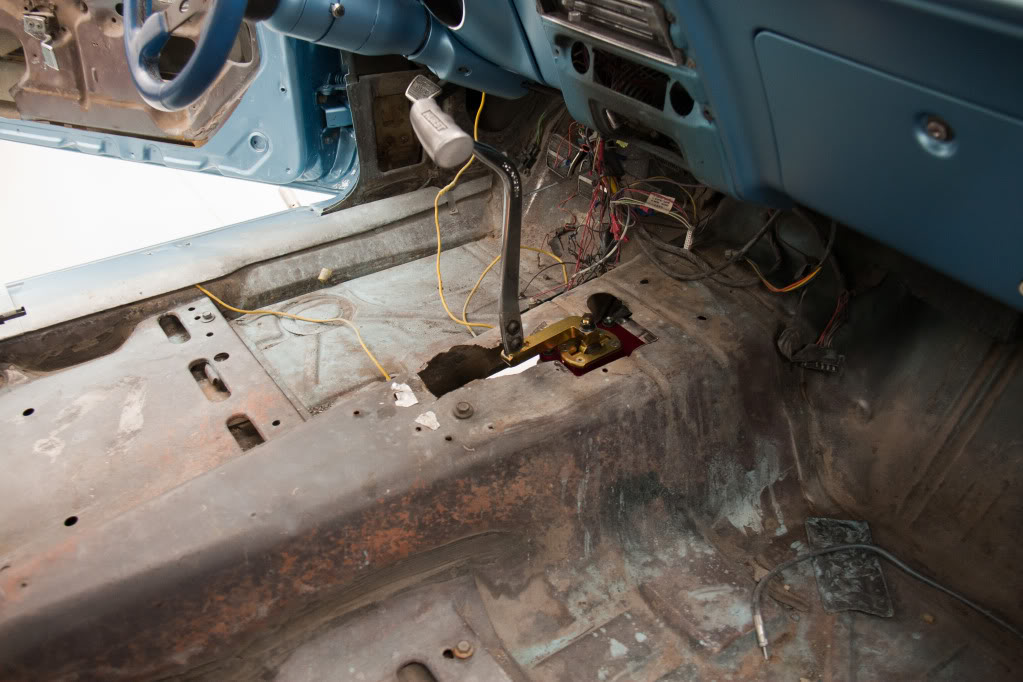

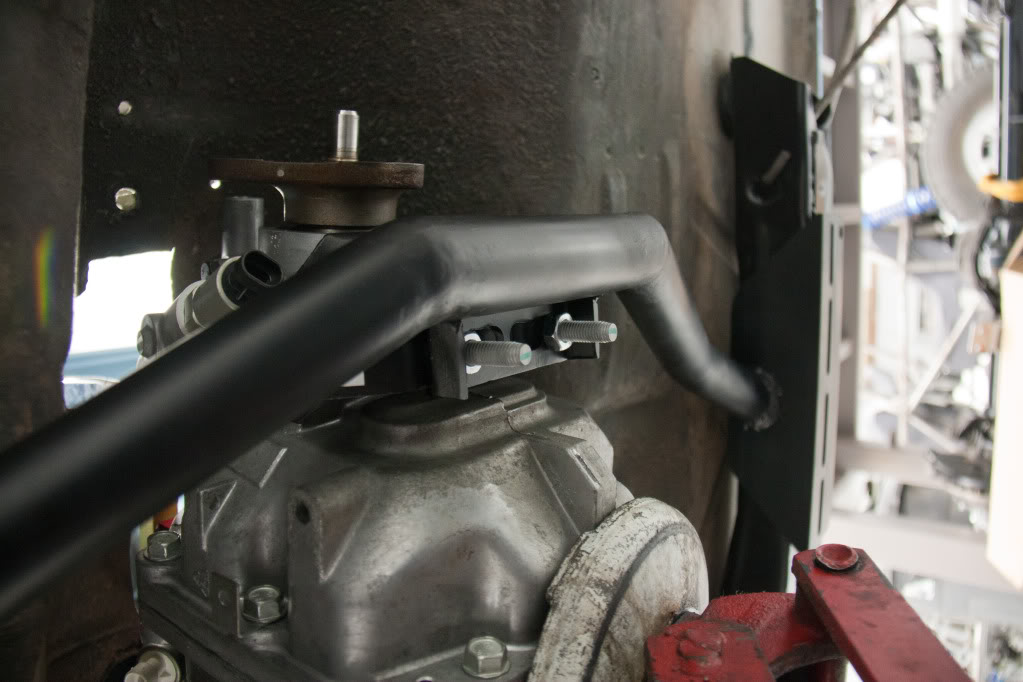
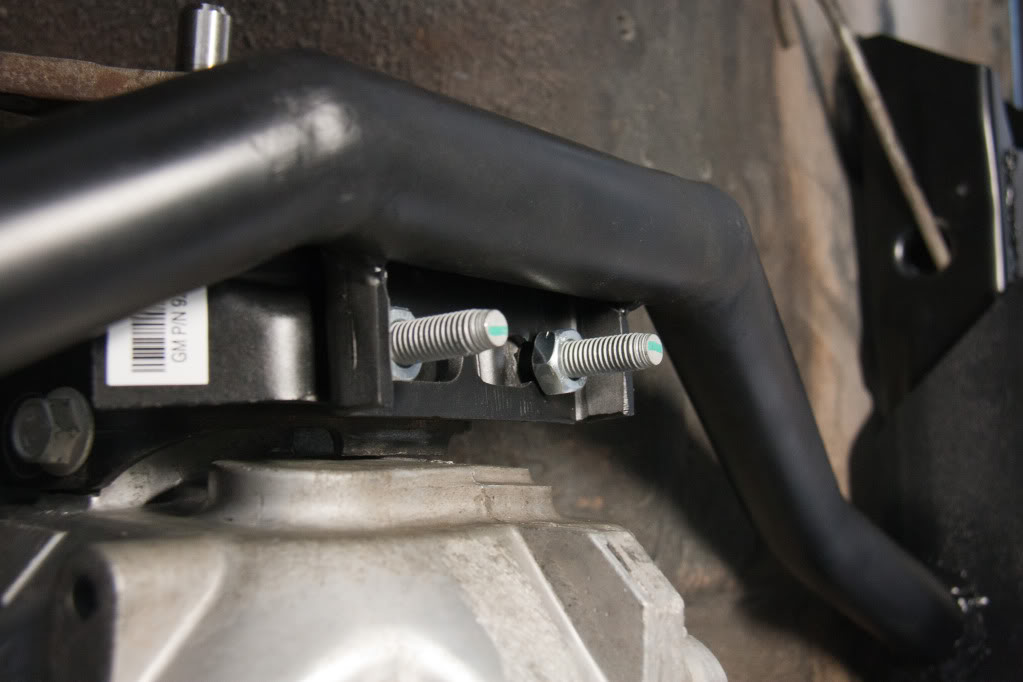
The transmission mount wasn't too bad. I used the stock 2010 Camaro mount and modified the mounting holes by widening the holes about 1/4" in each direction. The driveline angle sits at about 4.5 degrees now. My dad and I made some spacer plates to account for the difference, but I think I'm going to want to raise up the unit a little more. Some massaging of the transmission tunnel where the bellhousing meets the tranny will be necessary, but not much.
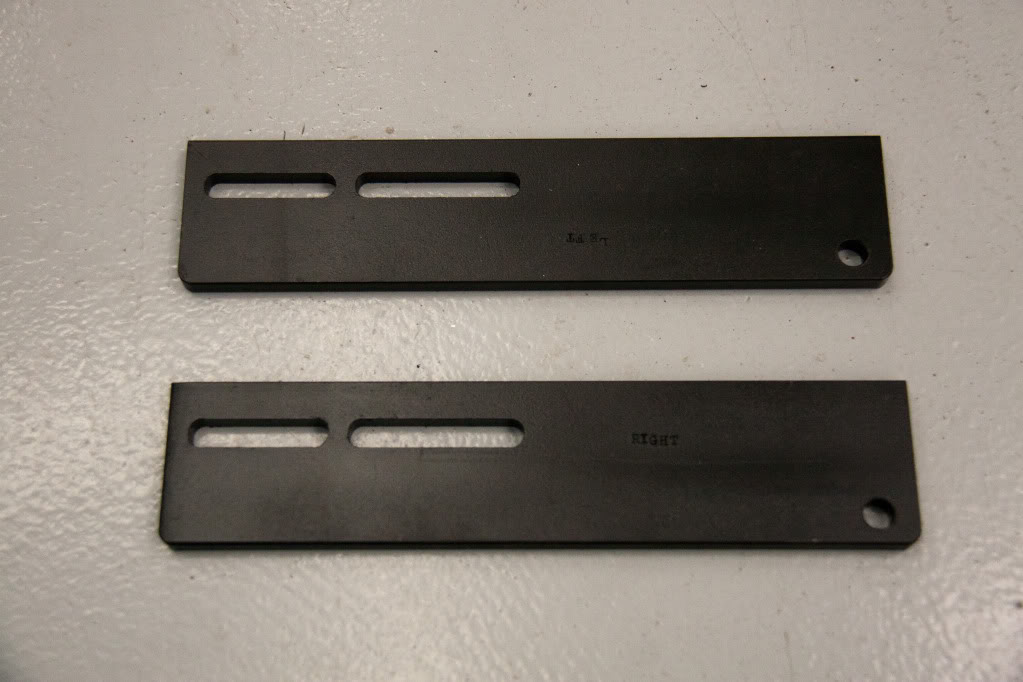
These plates are identical, but we marked them anyways.

Stripped all of the accessories off.
Installed the S&P modified pan. I discovered a void in one of the welds to the modified pickup tube they sent, so I went ahead and assembled it without the tube for now. I'll have to pull it all back out when it finally shows up.
Obligatory comparison shot
All set up and ready to drop in. I ended up having to use stock 307 mounts since these prothanes didn't fit.
Dropping it in:
The Shifter fits perfectly and is damn smooth.
The transmission mount wasn't too bad. I used the stock 2010 Camaro mount and modified the mounting holes by widening the holes about 1/4" in each direction. The driveline angle sits at about 4.5 degrees now. My dad and I made some spacer plates to account for the difference, but I think I'm going to want to raise up the unit a little more. Some massaging of the transmission tunnel where the bellhousing meets the tranny will be necessary, but not much.
These plates are identical, but we marked them anyways.
01-05-2012 | 08:18 PM
#18
Thread Starter
Staging Lane
Joined: Aug 2011
Posts: 57
Likes: 0
https://ls1tech.com/forums/conversio...l#post15790736
01-05-2012 | 08:23 PM
#19
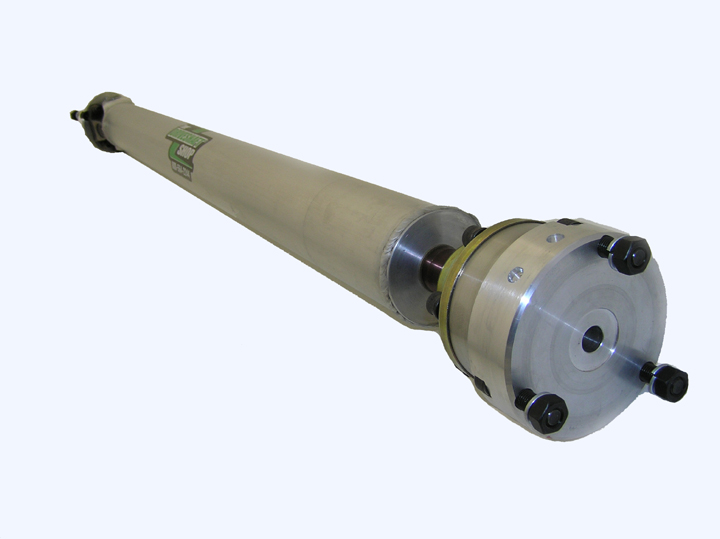
I'm going to have a custom CV joint shaft made. CV on the front, u-joint for the 9" on the rear.

https://ls1tech.com/forums/conversio...l#post15790736
https://ls1tech.com/forums/conversio...l#post15790736