
1937 Ford Sedan


 03-08-2015, 05:06 PM
#43
TECH Regular
Thread Starter

Thanks for looking. I've always liked cars, but street rods haven't always been my first choice until now - at age 47. Years ago I went to the Street Rod Nationals in 1994 just for something to do, and now that I'm building one I cant wait to drive it there someday.
Last edited by Kharp; 03-08-2015 at 07:24 PM.
 03-09-2015, 10:30 AM
#45
TECH Resident

Great job on the fixtures you are building. It is going to be much easier to work on and make sure it doesn't warp when welding.
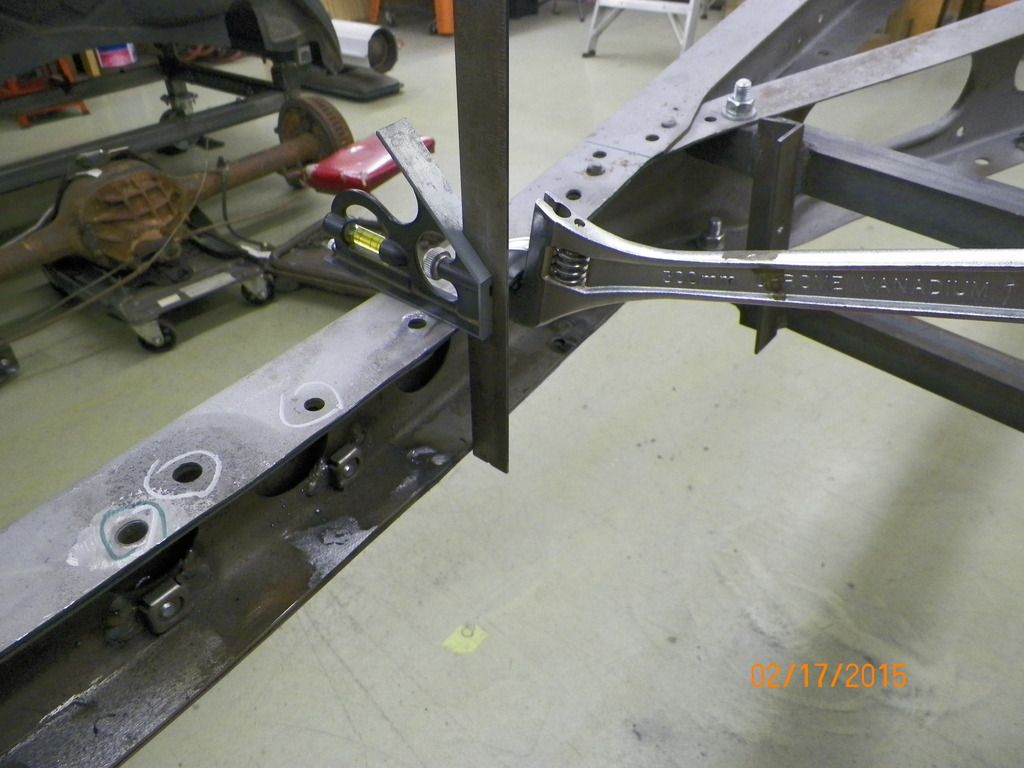
Along those lines, I keep thinking about how much access you have to the frame right now and think it sure would be much easier to build a rear 4 link now than at a later date (like I did).
I documented my triangulated four link build below: . I used a freeware excel spreadsheet to calculate instant centers, roll centers, mounting points, link lengths, etc. etc. which I'd highly recommend. I can send you that spreadsheet if you are interested.
I had four johnny joints (lube-able heim joints used by 4 wheelers on their heavy duty four links) on order from Borgesen, but they were back-ordered at the time of my build. So I ran with the Pete & Jake's bushings which came with the welderseries triangulated 4 link kit. The ride quality and compliance was so nice, I canceled the order. Initially, I was concerned about bushing "stiction".
http://www.ford-trucks.com/forums/13...all-51-f1.html
03-12-2015, 11:13 AM
#47
TECH Regular
Thread Starter
Great job on the fixtures you are building. It is going to be much easier to work on and make sure it doesn't warp when welding.
Along those lines, I keep thinking about how much access you have to the frame right now and think it sure would be much easier to build a rear 4 link now than at a later date (like I did).
I documented my triangulated four link build below: . I used a freeware excel spreadsheet to calculate instant centers, roll centers, mounting points, link lengths, etc. etc. which I'd highly recommend. I can send you that spreadsheet if you are interested.
I had four johnny joints (lube-able heim joints used by 4 wheelers on their heavy duty four links) on order from Borgesen, but they were back-ordered at the time of my build. So I ran with the Pete & Jake's bushings which came with the welderseries triangulated 4 link kit. The ride quality and compliance was so nice, I canceled the order. Initially, I was concerned about bushing "stiction".
http://www.ford-trucks.com/forums/13...all-51-f1.html
Last edited by Kharp; 03-12-2015 at 02:49 PM.
 03-12-2015, 08:40 PM
#49
TECH Regular
Thread Starter
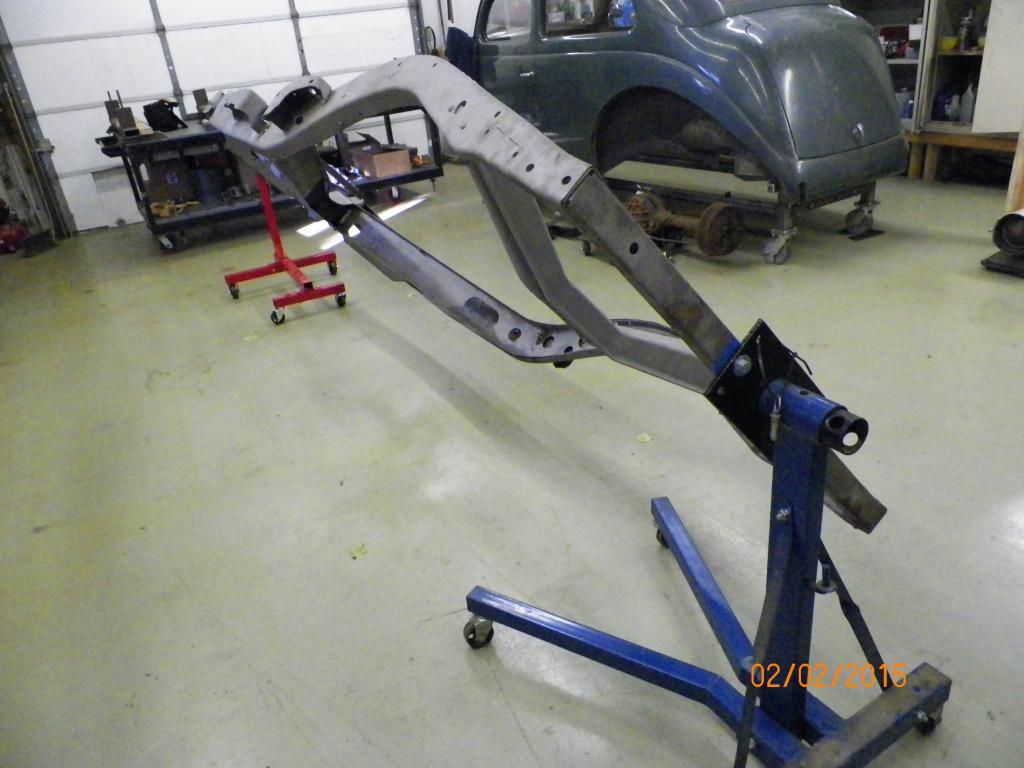
Decided to build a frame rotisserie. I already had one engine stand and bought one more for the project. I had to modify both stands so the rotating points would match.
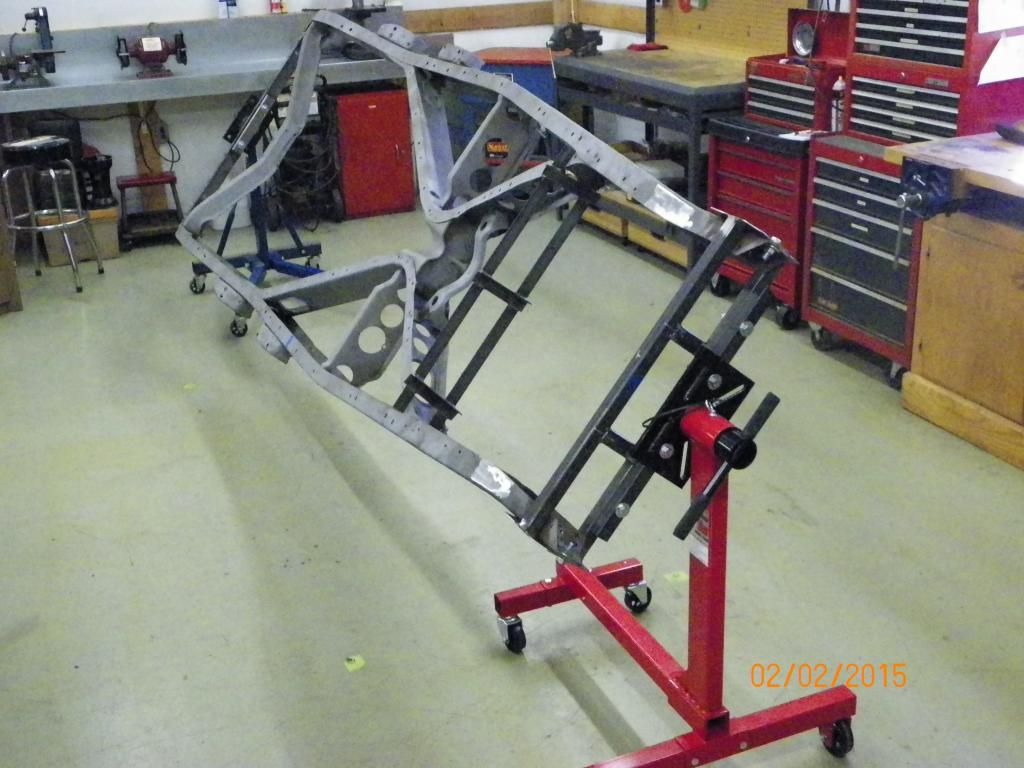
The frame can be rotated and pinned at about 8 locations for working on it from all angles. My back feels better already!

The frame can be rotated and pinned at about 8 locations for working on it from all angles. My back feels better already!
 03-13-2015, 12:48 PM
#50
TECH Regular
Thread Starter
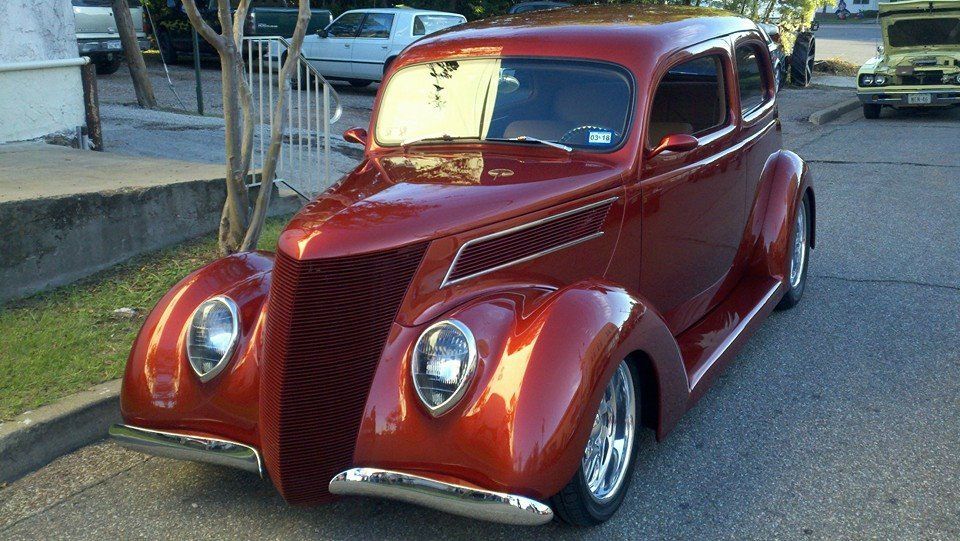
Meet Clarence. This car belongs to some good friends of mine. It is one of my favorites and provided some inspiration for my build. Here is the short story of how Clarence got his name. During the build Bill often told Donna that everything on the car fit very tight, and Bill was always having to make clearance for this, clearance for that, ........etc.etc. SO it was only fitting to name the car CLARENCE. I have recently received word that my build will be referred to as CLARENCE'S COUSIN. 
 03-14-2015, 09:01 AM
#51

Here's a pic of the 37 Sedan I built back in 85........Chopped the top 2", hidden hinges, great car...........
Ken
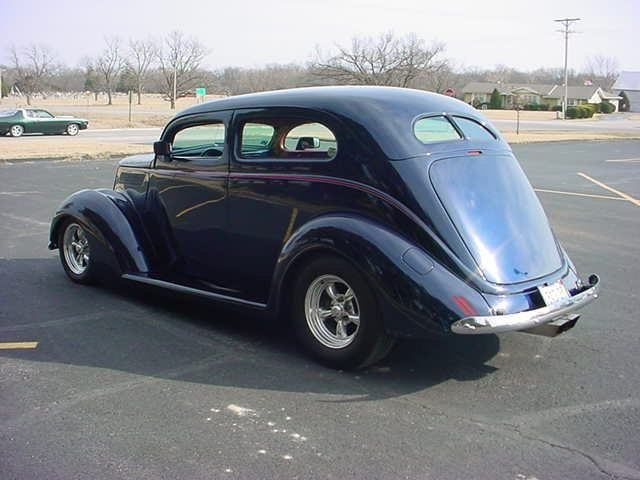
Ken
The following users liked this post:
Cheese Weasel (09-16-2022)
03-14-2015, 08:31 PM
#52
TECH Regular
Thread Starter
Ken thanks for sharing that's awesome! You should know these cars pretty well. Your input and feedback during my build is appreciated and encouraged.
Here is what I was driving in 1985 - I didn't build it though! '69 Camaro with original 300 hp 350 4 speed with RS and SS package......Option sheet in car listed houndstooth interior, enduro front bumper, etc.... Fun car!
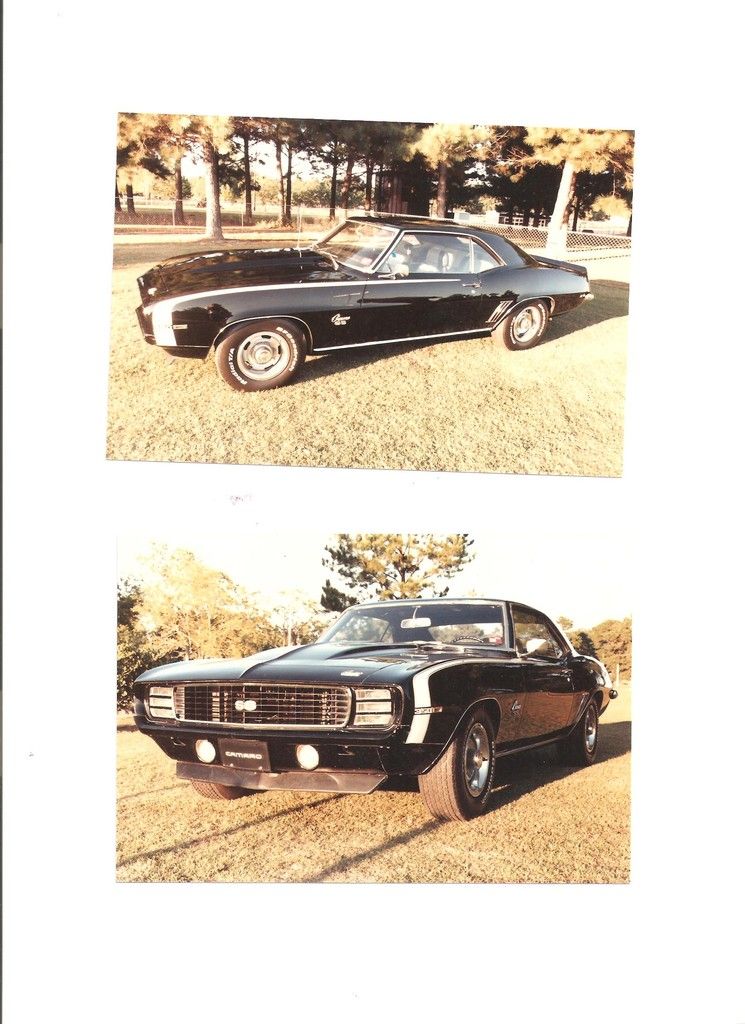
Here is what I was driving in 1985 - I didn't build it though! '69 Camaro with original 300 hp 350 4 speed with RS and SS package......Option sheet in car listed houndstooth interior, enduro front bumper, etc.... Fun car!

Last edited by Kharp; 03-15-2015 at 08:00 PM.
03-14-2015, 09:11 PM
#53
TECH Regular
Thread Starter
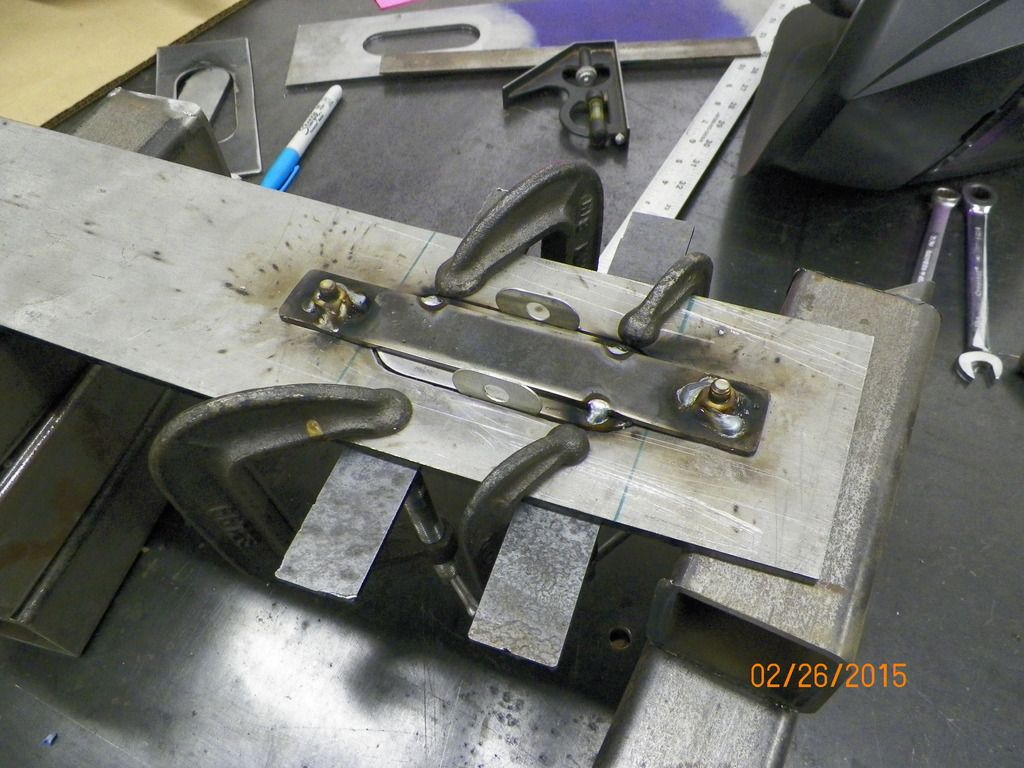
I'm beginning the install of a Mustang 2 front suspension kit from TCI. Before the boxing plates are put on there are several items I would like to tackle first. The inner fenders are bolted through the frame, and there is no access once the boxing plates are welded on. I took the approach of welding caged nuts inside the frame. On this particular car, as Kwhizz pointed out on his 37 Coupe, the foundation of the front end sheet metal starts with the inner fenders, and I wanted to make sure I had wiggle room in each direction for good body lines when assembled later. I took time and made a small jig that actually worked better than it looks. The plastic bushing holds the bolt in the center of the hole, and the other piece holds the square nut in the center of the cage. When assembled it holds the caged nut in place while you weld the tabs, then it just pulls out the side minus the one loose piece that is pushed out with a small screwdriver. Note: the 1/8" hole in the frame is the original axle centerline.
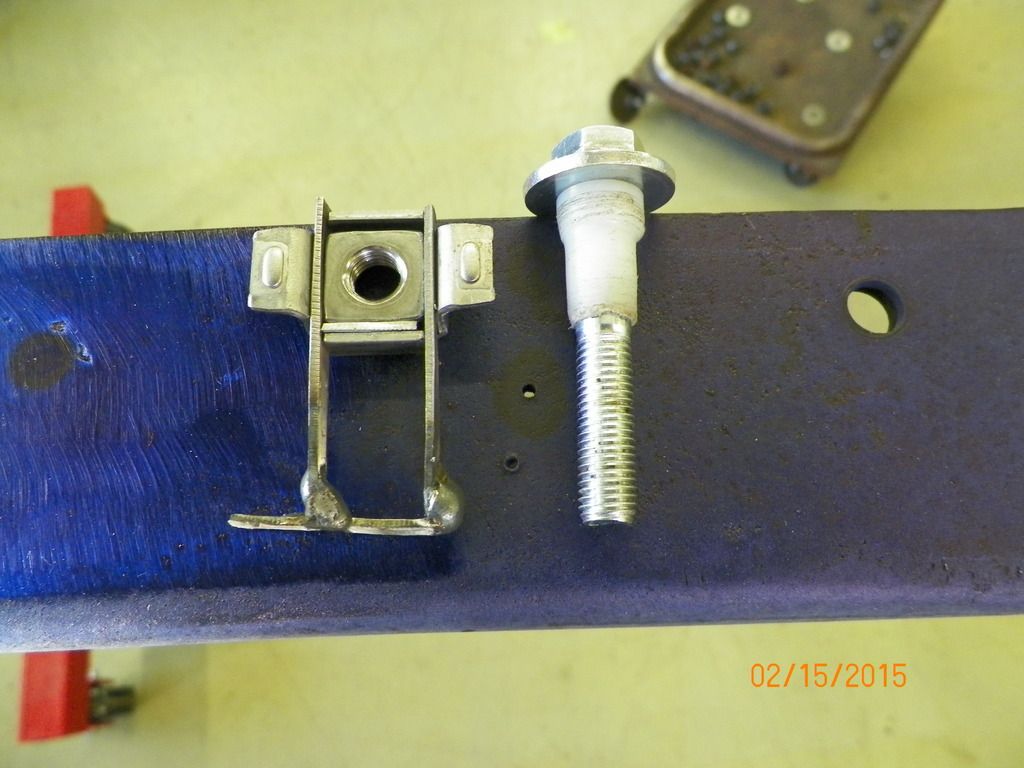
The result is an inner fender that has slight room for adjustment later.
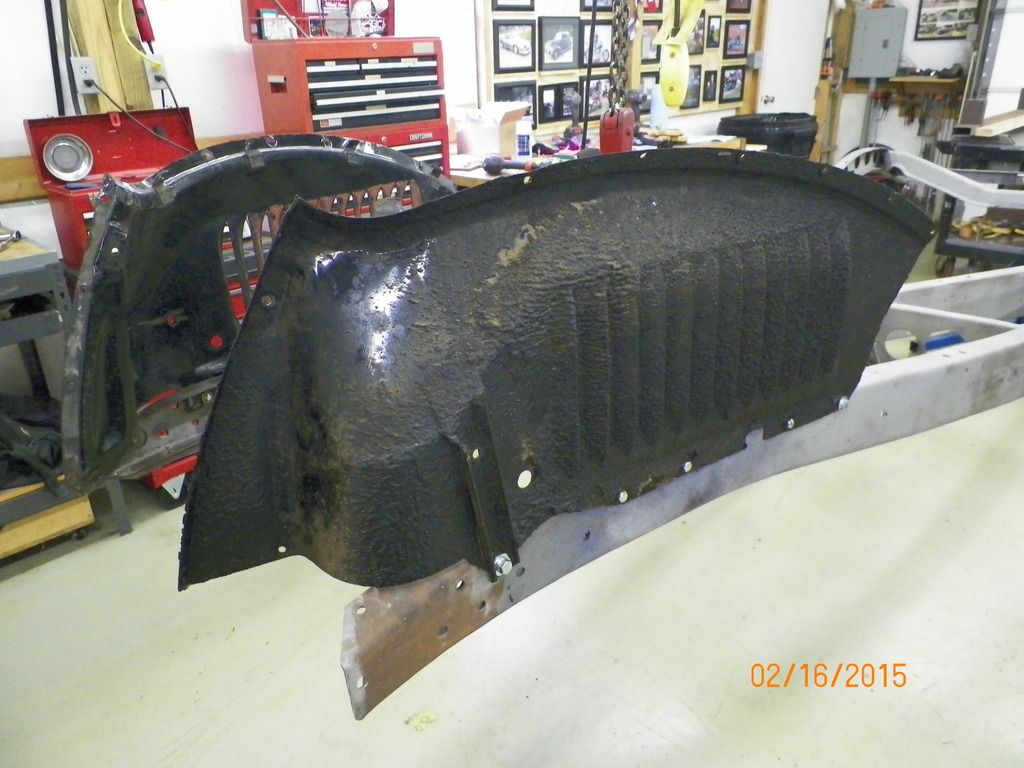

The result is an inner fender that has slight room for adjustment later.

Last edited by Kharp; 03-15-2015 at 06:11 PM.
 03-15-2015, 09:17 AM
#55

Impressive KSharp and Kwizz
03-15-2015, 01:11 PM
#56
TECH Regular
Thread Starter
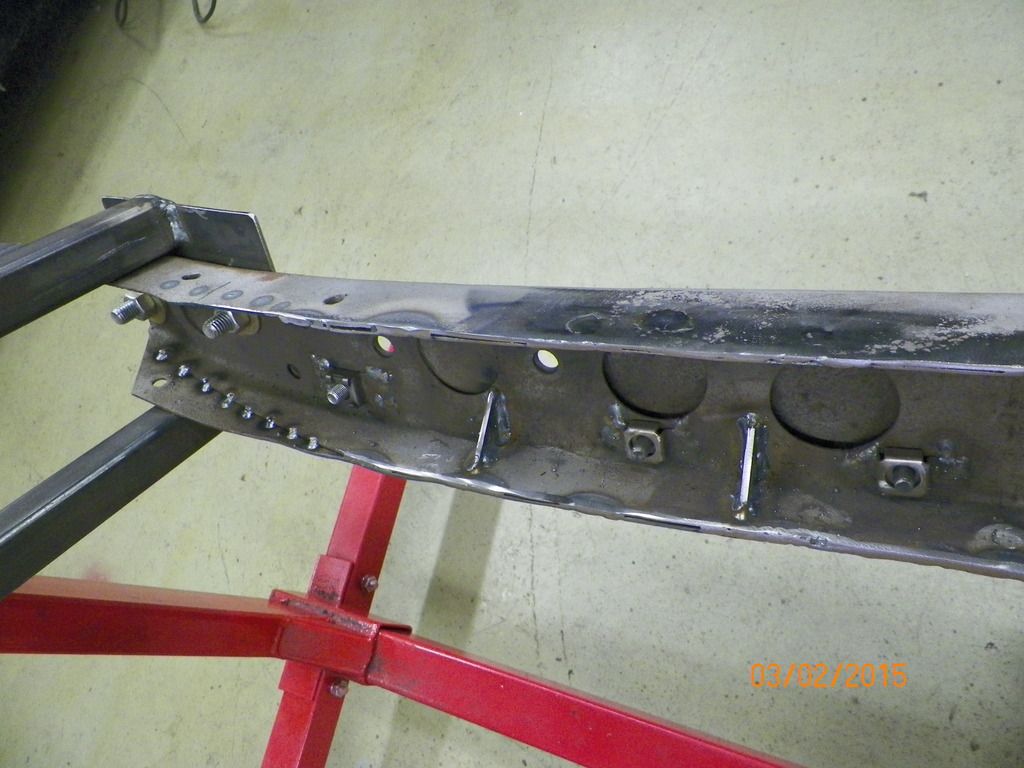
Not too much straight or true on these stock frame rails. I had to grind material off both top rails to make them match the bottom rails.
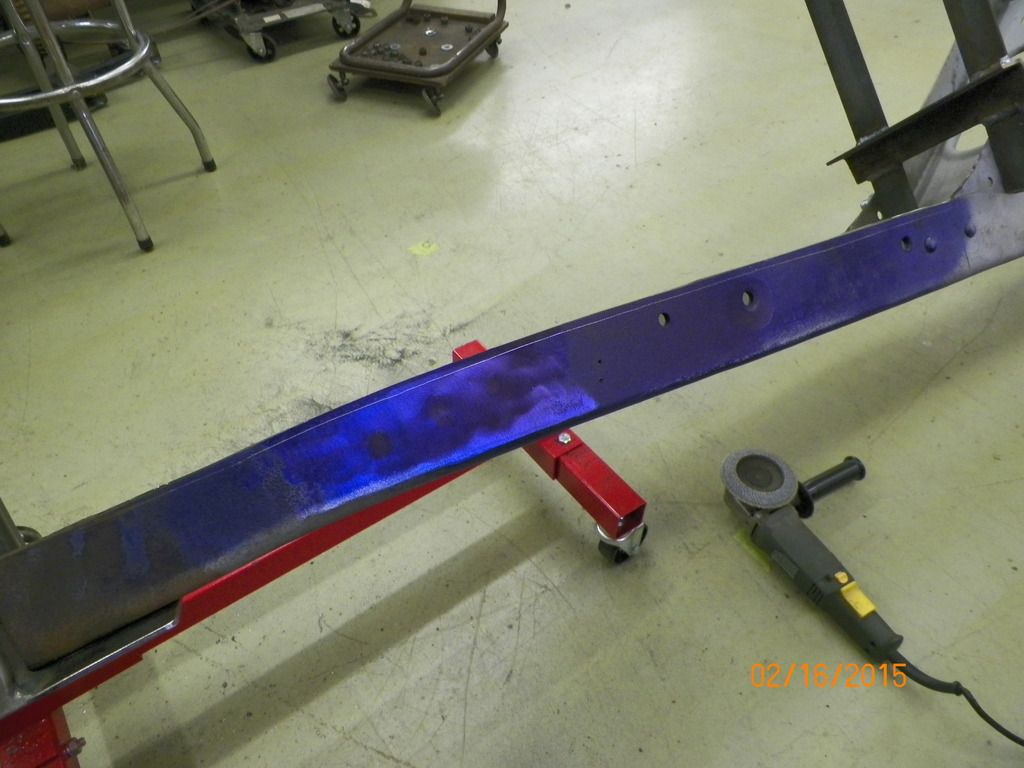
Had to tweak the rails to form 90 degree angles where the boxing plates go.

Had to tweak the rails to form 90 degree angles where the boxing plates go.

Last edited by Kharp; 03-15-2015 at 07:24 PM.
03-15-2015, 06:07 PM
#57
TECH Regular
Thread Starter
More steps leading up to the boxing plate install. Note the frame is upside down. I almost have all the holes welded up that are not needed. I stitched the inner and outer frames together for a little extra strength. Also added some gussets in the top and slicked up the bottom rail where wiring and plumbing will run.
 03-15-2015, 07:23 PM
#58
TECH Regular
Thread Starter
It's really tough building one of these cars for the first time because it's hard to predict where everything will be mounted that needs wiring and plumbing. I know everything in the nose will be tight so I decided to cut some access doors in the boxing plates just in case I need to get in or out with something. Here is what the back side looks like.
And here is the front. Still have options for leaving the door on or off, welding a tube weld in it, etc......
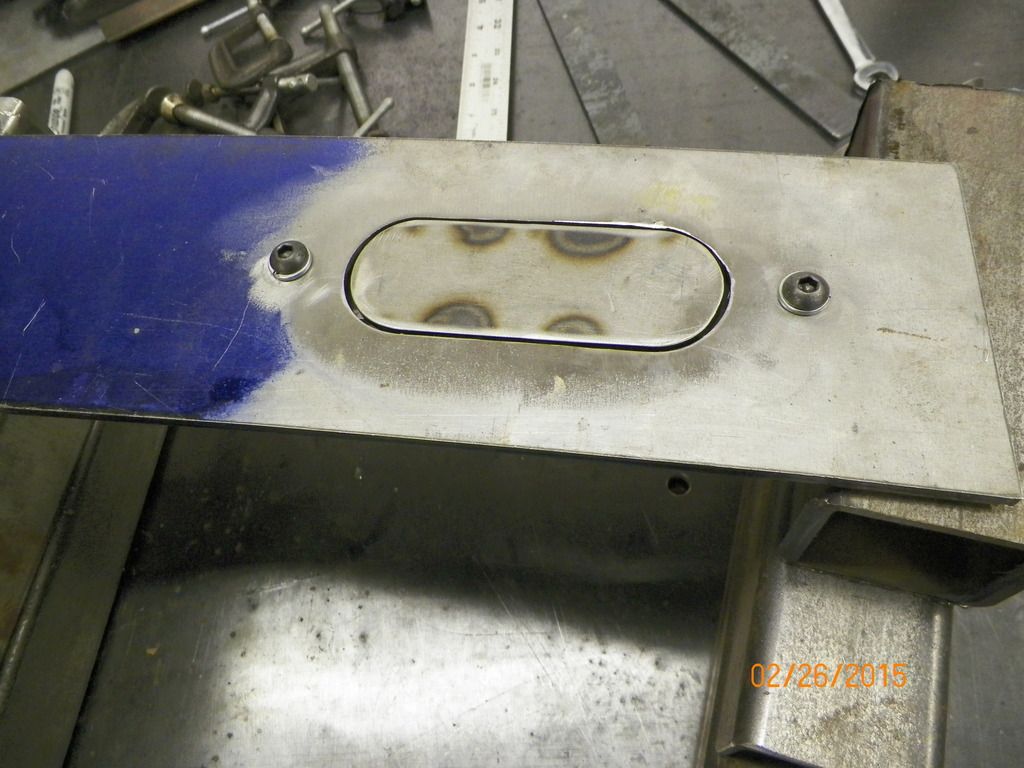

And here is the front. Still have options for leaving the door on or off, welding a tube weld in it, etc......
 03-15-2015, 07:56 PM
#60
TECH Regular
Thread Starter
I welded an extra piece of plate behind where the motor mounts will be located. I'm beginning to think I'll never get these boxing plates on!

