When you click on links to various merchants on this site and make a purchase, this can result in this site earning a commission. Affiliate programs and affiliations include, but are not limited to, the eBay Partner Network.
I'm going to try to pay it forward with some pictures of my build. I've barely started, but I've got most of the wiring harness done and started to check out the engine.
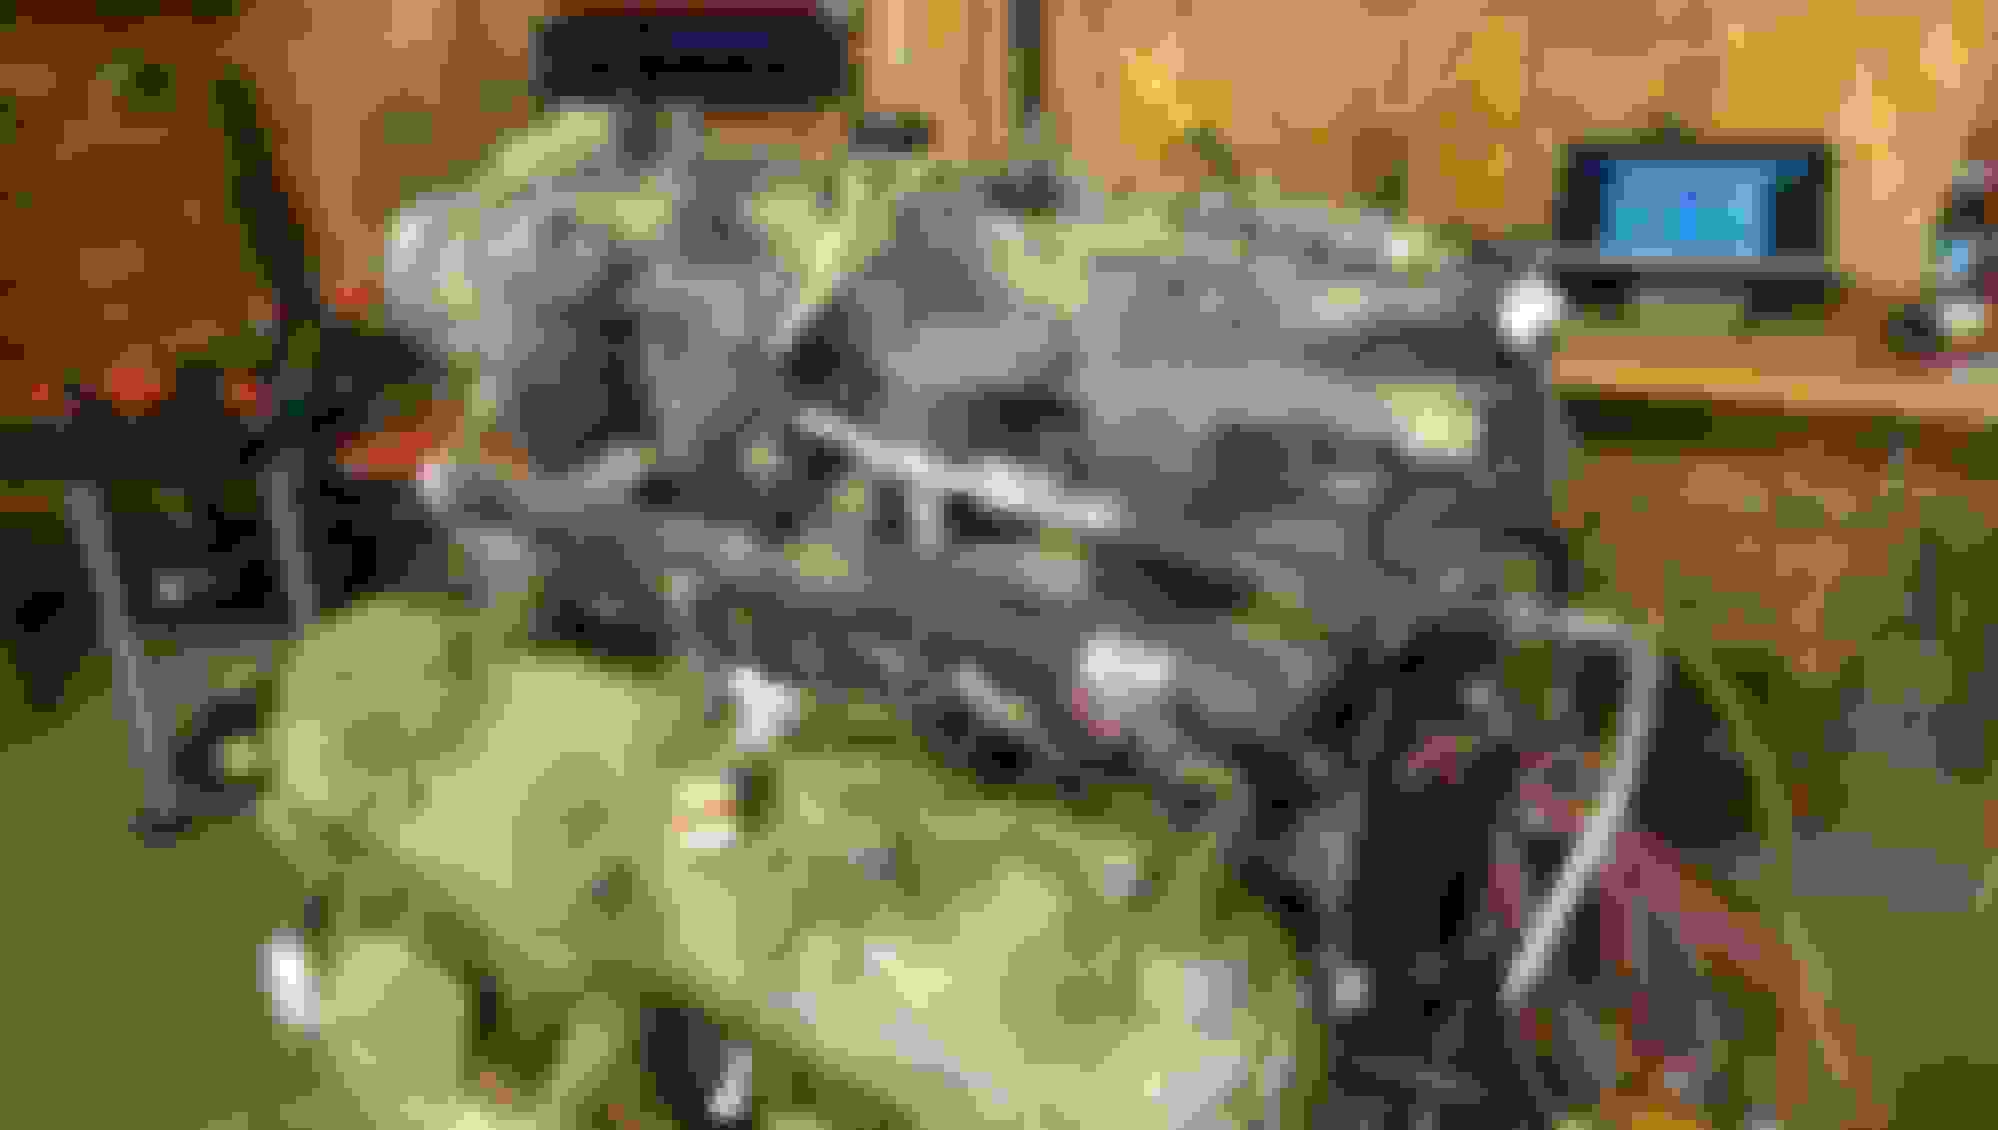
Got it stripped down to this point. I took the oil pan off after taking the picture. There was a bit of steel particles on the drain plug. Not sure what that's about, maybe cam? Maybe lifter? There was also oil in the intake runners. More than seems likely for the EGR. Has anyone else run into this? Motor is supposed to have 180000km
Wiring harness is sort of done. I imagine I did something stupid and will have to tear it apart again
It was warm enough today in Alberta to actually run the pressure washer outside and keep the shop door open. I love global warming
Ordered these off of Amazon. Not super impressed with the turbocharging book, I've learned just as much off of these forums as a quick scan through that book seems to have
Sort of getting the harness organized
I'm an electrician, so I have a wire tag maker, which makes a really clean job of this
skimmed the wire with my knife. There were a couple other wires with copper showing that I'm happy I found
getting the harness mocked up
getting close to done
L33 all aluminium. I hope it turns out good
Scored a T56 with bad syncros in first and second (according to the guy selling it to me) for $300 CAD which is like ten bucks American with our Canadian peso
Looks a little cleaner. Hard to get it really clean using cold water. I didn't feel like loading it in the truck to go to town though
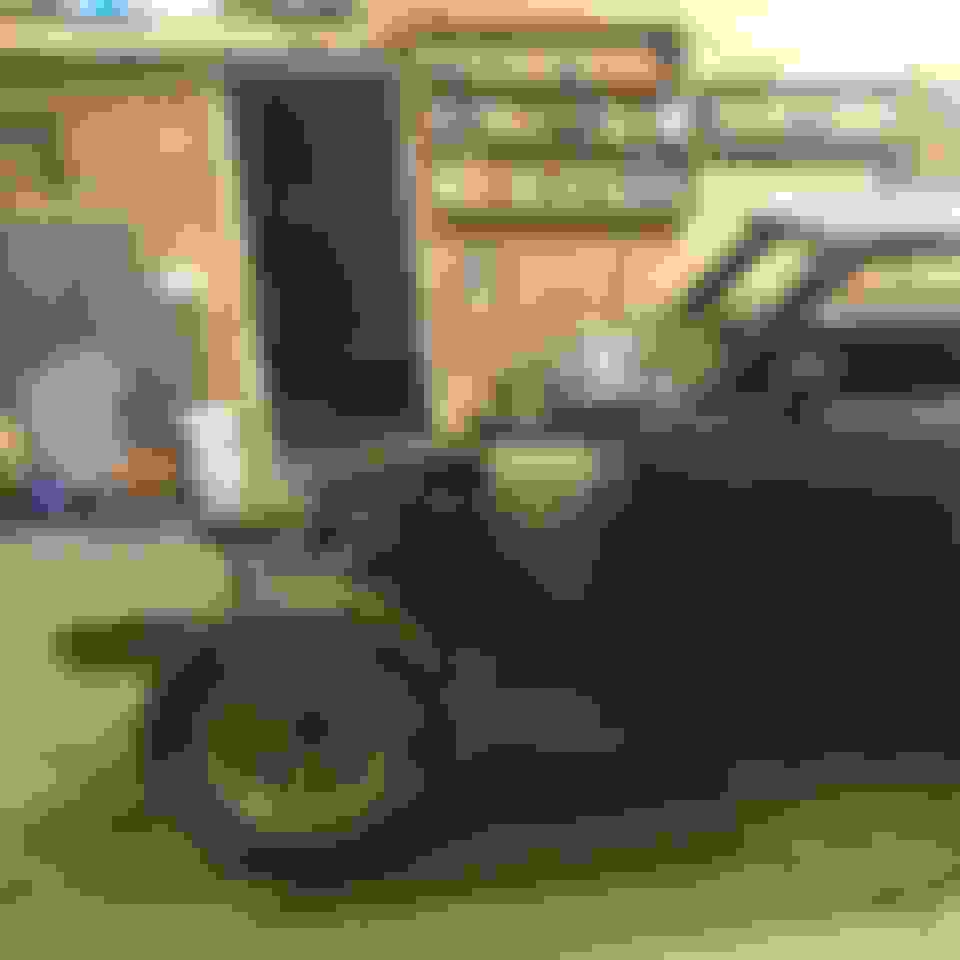
This is the main car. This is from when I first dragged it home in the summer. It's been stripped down lots and I have found so much rust that I'm not going to bother fixing the rust in a nice way because the car just isn't worth it. My buddy bought it when we were eighteen and we tore the tranny out and it sat in his bale yard for ten years so I snagged it off of him finally
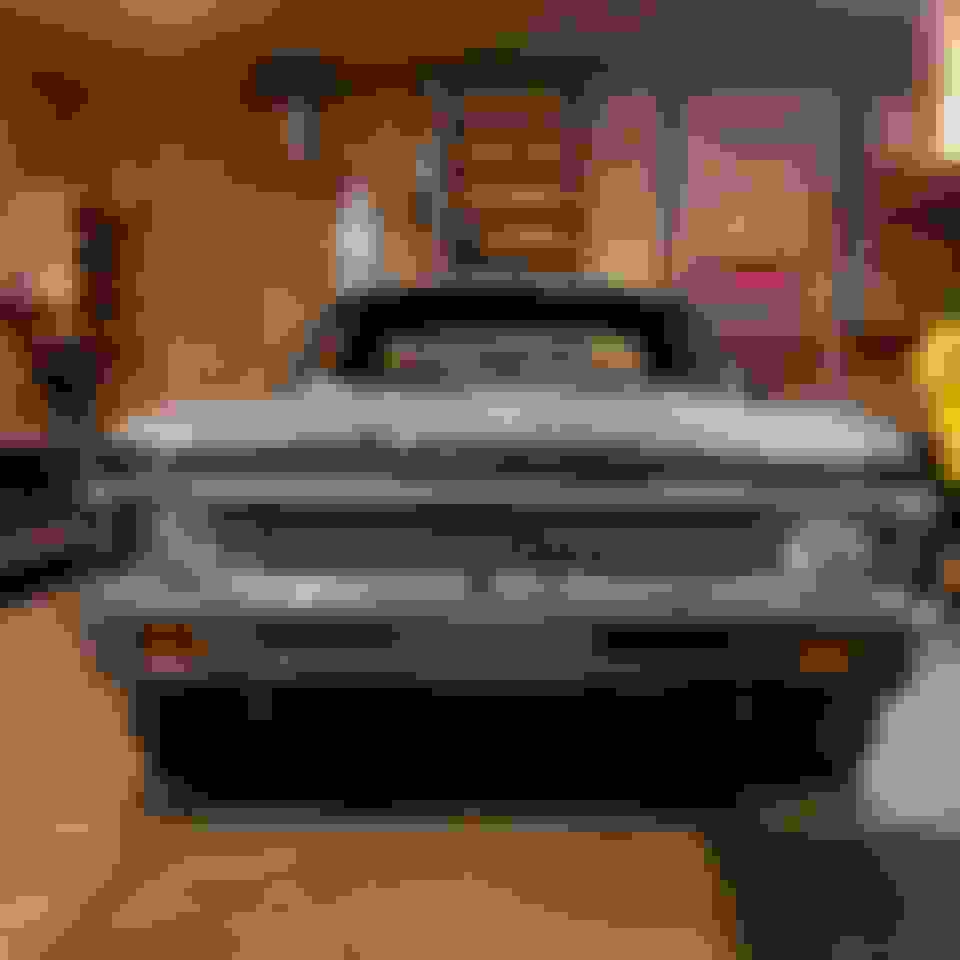
The front end on these cars come off soooo easily. GM does some stuff right
After I swapped the grill off of my Acadian. Gap isn't quite right but it still look better than those horrible 73 grills and bumpers
This is my 71 Acadian that I bought when I was 15. I drove it for a few years, then the timing chain went and it just got parked for ten years. It came with a horrible 307 and is incredibly rusty and not worth fixing. I love this car though and have lots of good memories in it. The interior is actually pretty sweet and black so I used it on the 73
Harness progress is looking good! I remember reading a turbo book way back when in university and it was very basic, altho still had some relevant info in it such as rough turbo pipe sizing, waste gate and blowoff valve angles and orientation, basic flow and fuelling needs, etc. Covers the basic of behaviours across the board from I4's to V12's.. I'm sure if you read the book cover to cover you'll pick up some useful knowledge, however your main source of specific LS turbo knowledge will definitely end up being this forum.
I haven't seen any Acadians here in Texas, but I knew of a 1969 Beaumont, it had a lot of similarities with my 1969 chevelle. But if I remember correctly this 1969 Beaumont seemed to have tail lights and dash of what would have come in a 1968 chevelle here in the U.S.A. As if the 1969 Beaumonts styling was 1 year behind.
Not much of an update. Spent most of the day researching engine parts. Also bought a throw out bearing/slave cylinder from Napa for $100. pulled the whole dash out tonight, tried to get the cables on the heater controls freed up a bit so I didn't bust the ***** off. Took quite a bit of back and forth and Moovit lube
Frojoe wanted to see my little brother's 280zx project he's working on with my Dad. It's getting close to paint. The car was in horrible shape and has sooooo much rust
my small old gauge collection. Can anyone identify the old black ones and the double gauge on the far right?
Car wasn't worth proper body work, so it got body work that will buy it a few summers before it probably falls apart again haha
this is the day he brought it home. I'd really like to LS swap a 240z some day down the road
Not a very interesting update. Ordered tach and GPS speedo from China. They showed up in FOUR days! I asked them to ship it economy to save money because I didn't need them right away though and they didn't listen. Modded the steering column for floor shift, looks pretty ugly at this point in time. I cut a huge chunk of the gauge cluster out yesterday to mount everything too. Pretty much going to copy frojoe. I also took my rear diff cover off to check out if it's a 8.2" or 8.5" It should be an 8.5" because of the year of the car, but of course it isn't so I might've found one with a posi out of a 78 ventura for $150. Also ordered all new valve train minus rockers. And Lunati 60513 cam. I wanted the 60516, but apparently that would have more capacity than my heads anyway, so the tech talked me out of it.
So this is the original steering column out of my 71. It was an auto column shift. Quite the headache to take it apart and no one makes a sleeve to convert it, so it got cut off. I'll try to make a patch or something later
Ordered these gauges from China off of ebay. The speedo is GPS and was cheaper than just buying even the converter box for electronic to mechanical speedo
My high school car came with Cadillac keys and I'd like to keep them
Installed a new signal switch while the column was apart so the cancel would work again.
Love the swap. I learned a TON from redoing my harness a couple times, and now I'm paying for it by having to do one for a buddy's swap. Having the right tools is a huge help, too (thank you on-site electrical shop).
This is all I've got done, cam and valve train stuff is on its way from BC right now, ($2000) That's the bulk of the big time purchases for the time being. I also might have sourced a 10 bolt 8.5" off of a facebook buy and sell from a 74 omega 455. So hopefully it has a posi in it that's not too beat up, I might steal the console from it as well if it's floor shift.
I started taking a closer look at the rear frame rails after cleaning the trunk out and they are SHOT! I'll take some pics later, but the left side is in horrible shape. I'm going to rip the diff out anyway, so I'll pull the exhaust out as well and see if I can get all of the crap off down to good metal and start plating over it so the car doesn't pretzel under power and also doesn't kill me. That's all for now
so, I'm no frojoe here, but this is my attempt at a gauge cluster so far. My wife thought I was getting into scrap booking when I bought a bunch of card stock.
This is about the only satisfying thing I've done for a bit, waiting on my engine plates from the laser cutter, but I thought I'd give it a go and check for clearances and such. It doesn't seem like a truck manifolds will work without modification. It's too bad GM changed the exhaust port spacing because I have a set of SBC headers for this car (although they're pretty beat up.)
This could be a life goal, if I had more money. Definitely an idea I'd like to think about during this build. Just a brute force looking car. Mine will be much more rat though
Pulled the rear end out today and jacked the car up as high as I can. There is an insane amount of rust on the rear subframe, I think I have a plan now on how to fix it though. This car isn't worth the trouble, but oh well, I've got time. It's a good thing no one drove it in its present condition, because the rear end might've ejected under power. Someone applied a bunch of that rubber undercoating quite a long time ago and now it has to come off so it doesn't light on fire while I'm welding. I found some other forum saying that carpet and lino adhesive remover will do the trick. We will find out tomorrow
this is where the front spring perch bolts on. Almost all of the bolt holes are moot
Holy ****, that's nasty. Oh well.. perfect time to box it all in with new tubing and sheet to make it stronger than it ever was from GM.. to handle the future boost!
This is where you figure out your rear suspension setup and do the mini-tub. Do it right the first time (I speak from experience).
Good advice for sure and I like that idea but... dolla dollla dolla bills yo. I think I'll stick with slapper bars for now, but this is going to be a lot beefier when I'm done. The body does nothing anymore since it's so rotten, so this framing has got to be tough
This circa 1850 bio degluer works really good. At least it did in my application? Maybe because it's so old. Bought it at Home Hardware in the paint aisle. It's for removing floor adhesive and mastic.
put the remover on it for twenty minutes, hit it with scraping by hand with a chisel. Worked pretty darn good. I learned about this stuff from google finding a post on the HAMB forum
$400 worth of steel. 2x3x1/8" full sheet of 14 gauge, full sheet of 10 gauge. Heavy
I hit this yesterday with a flappy wheel and this is after I applied some remover. But there really wasn't much under coating here anyway
Not much to update on. The weather got really nice, (except for the terrible forest fires in Alberta) so I've been working outside lots on getting the yard better and such. This is how the car has been sitting for quite awhile
So I went to a car show on the weekend and my little brother got his car done and I had the itch to work on mine again. I've got most of the new rear subframe built. It has taken a few days. It is strong like bull
I have all of the guts pulled out of the t-56 right now and just received my parts for it including a new sycro for second gear (which is a gear itself) The repair manual for the t-56 can be found online for totally free on the manufacturer's website.
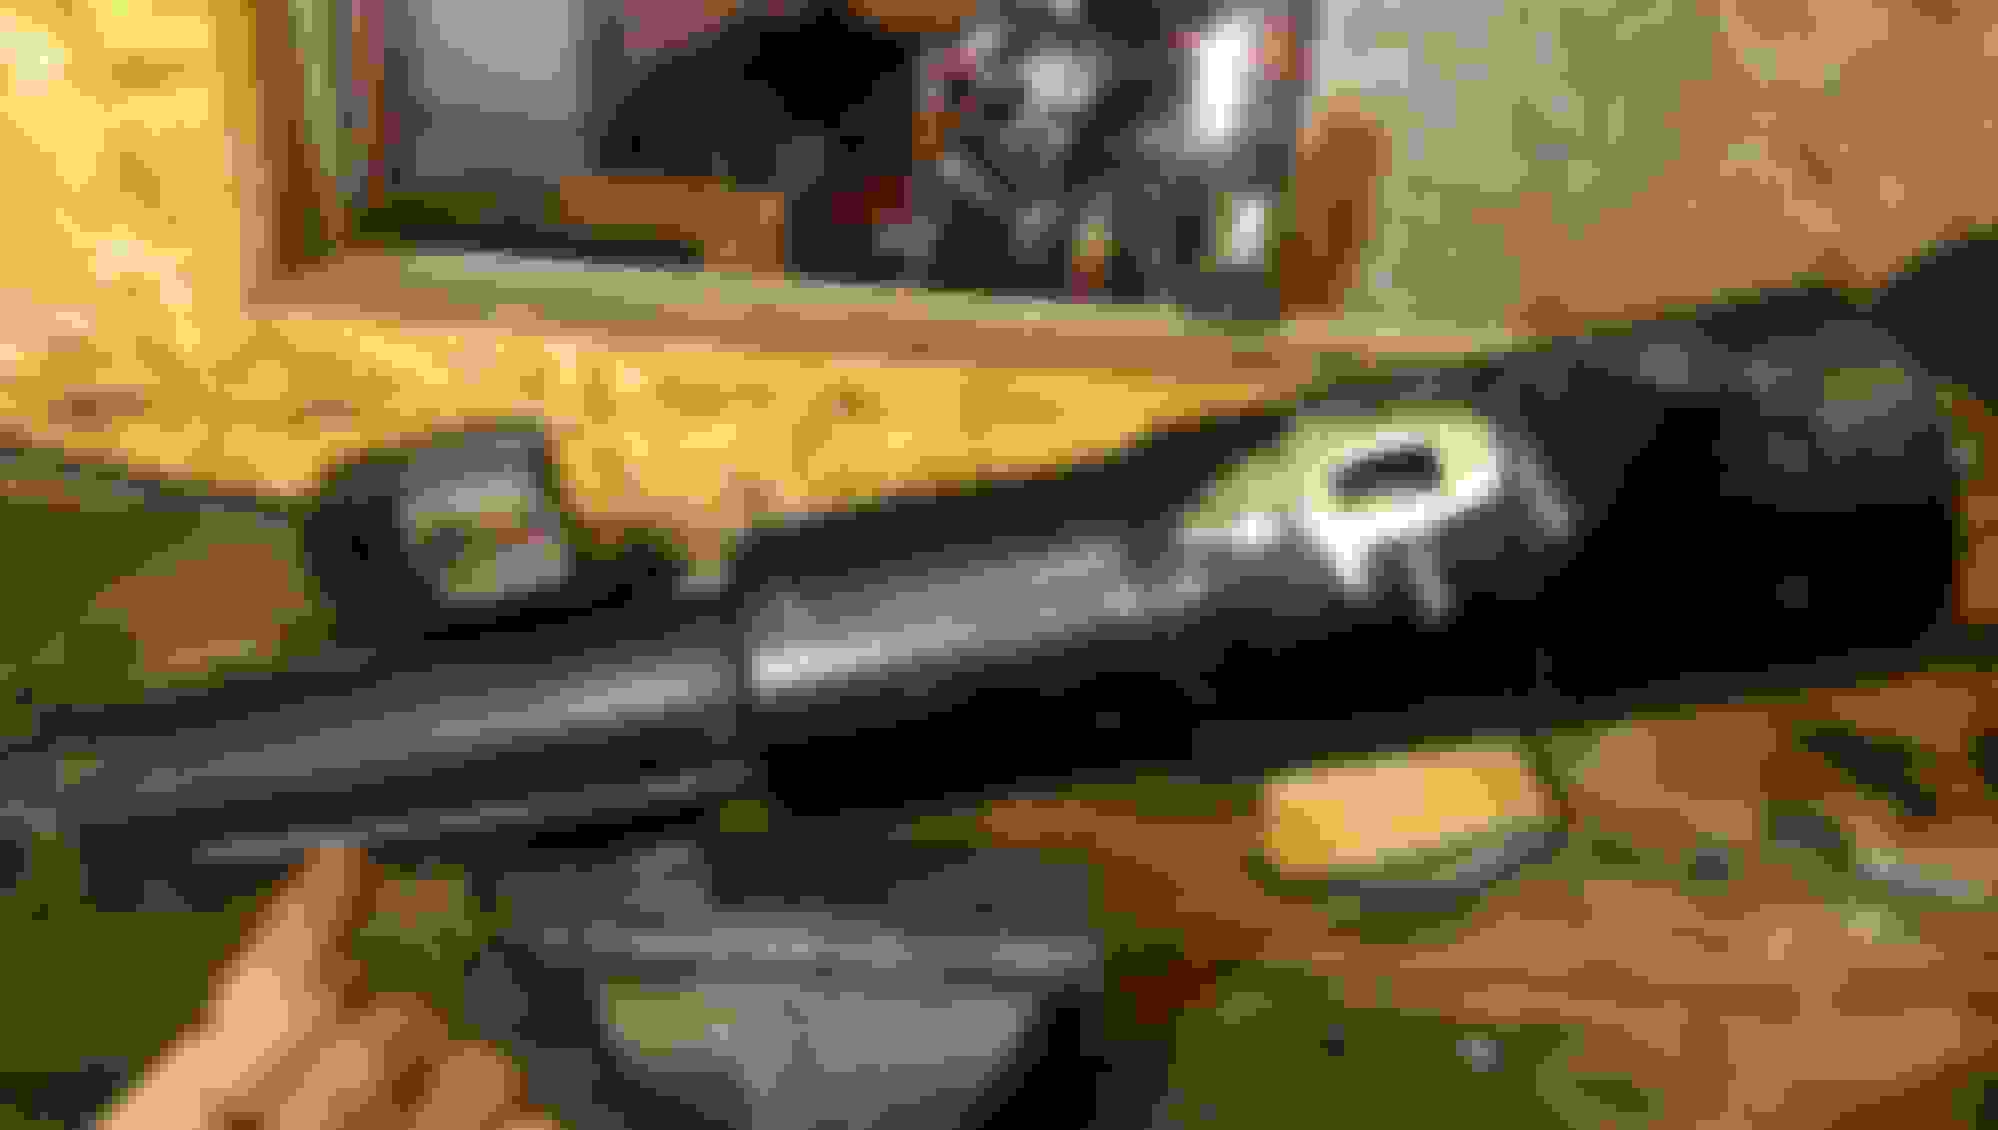
Got a little daunting hurdle out of the way by mounting the clutch master cylinder from wilwood. I bought the 7/8" cylinder, will find out if that was a good idea. I used a little cut off part of square tubing and formed if for the firewall then welded it on. If you're following my thread you'll notice that I'm not too massive on esthetics (must be because we're farmers), and the car sort of is rough looking and I want to keep that motif going for the build
the L shaped bracket with the bolt going through it near the top of the photo is the plunger rod off of the clutch master cylinder, The bracket then pivots on a factor hole near the top of the clutch pedal. This way gives me about 1" of adjustment, which is way more than enough
Different view of the same thing. I will probably use a nylox nut later
It's very hard to find a used 8.5" rear for one of these cars. Finally scored one for $250 out of Edmonton. Need to install posi and 3.73 gears. You can see the subframe I built above the rear. It was almost impossible to get good welding onto the old frame because it was so corroded or not even there. The strength in this comes from the welds joining all of the new pieces which are ten gauge steel
After I installed and bolted down the rear I just had to roll it outside to see the sun a bit and it gave me a chance to clean the shop because it was up on stands for around six months
So I finally basically built a rear subframe using a cheap metal brake, a plasma cutter (leant to me) and a lincoln Mig 180. It was extremely time consuming but now my car has its wheels back on and is probably four times stronger than before. These are the subframe connectors for me Nova. The traction bars are just hanging out for now until I get everything in the car weight wise.
front of the subframe connectors. ten gauge 2x3 tubing. Strong like bull
You can see how rusty the floors are a bit in this picture. This is the beeft crossmember for the back to tie the fronts of the rear spring hangers together. We bent that flat bar by heating it up cherry red and bending it around a chunk of oilfield pipe we had sitting around. Fits snugly in the hole. I will build a seperate piece later for a driveshaft loop that can bolt on the bottom

 02-11-2016, 07:36 PM