
Simple IS300 LS1 Swap
 05-11-2016, 02:17 AM
#1
Teching In
Thread Starter
iTrader: (1)

Join Date: Feb 2016
Posts: 25
Likes: 0
Received 0 Likes
on
0 Posts
I'm using this thread to document my progress on this project.
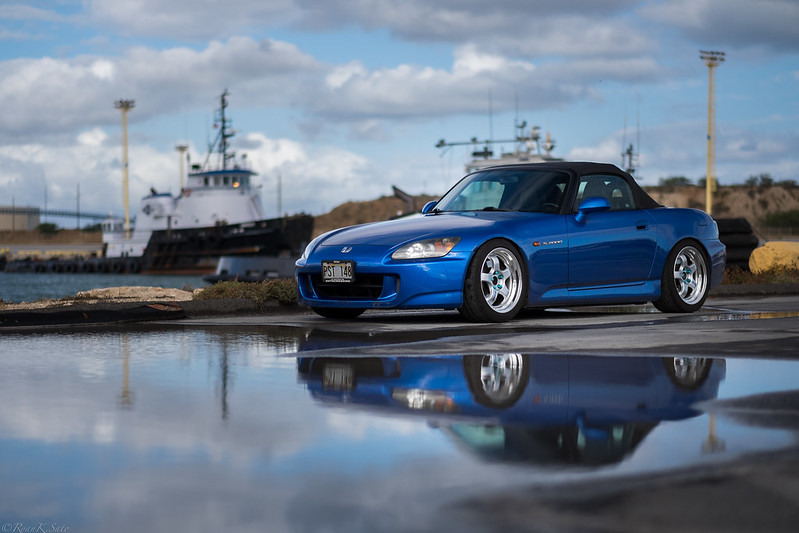
Background: I'm more interested in performance driving than looking cool so I tend to mod my cars more towards function over fashion. Living on the island of Oahu in Hawaii, we don't have a track (shut down around 10 years ago) so autocross with the SCCA is my only performance driving outlet. My other car, a Honda S2000, was purchased due to my heavy interest in autocross. Due to the class I'm interested in and due to how good the car is out of the box, the major tuning I did is limited to suspension, bolt ons, and ecu flash.
 20140427_XE220654 by satoman44, on Flickr
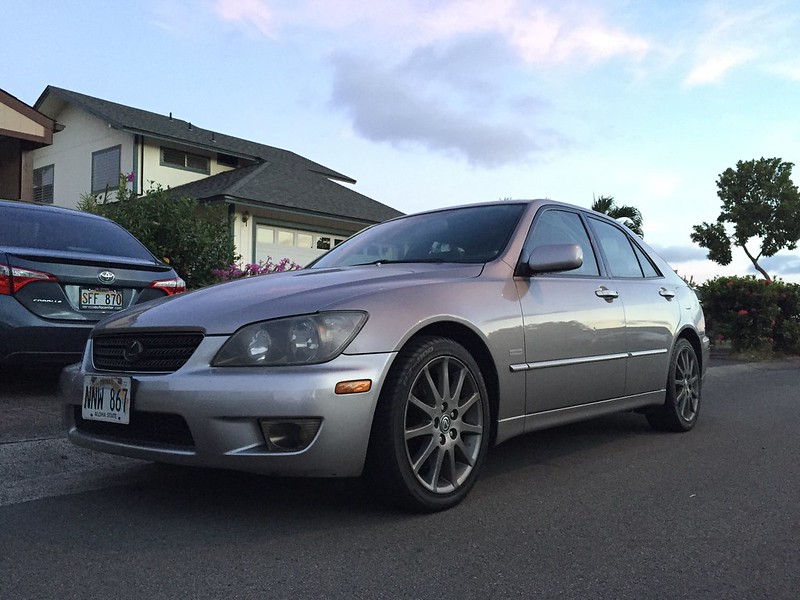
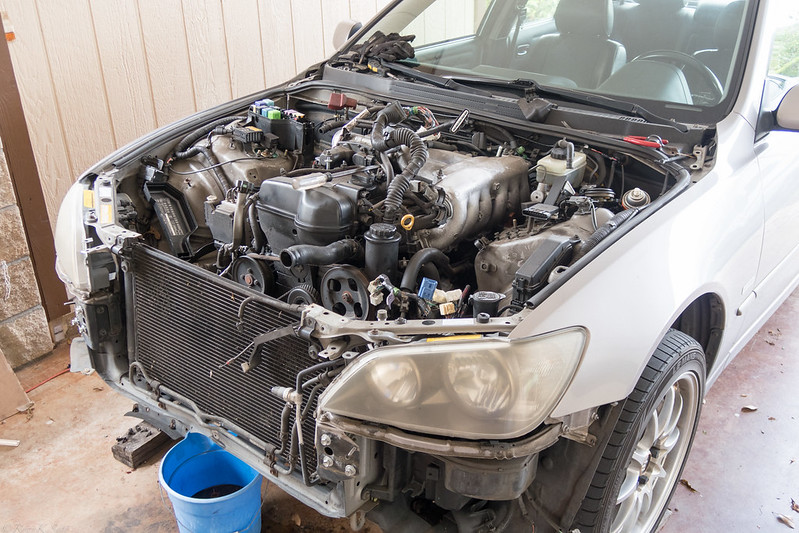
I was driving that car for almost 5 years when I started looking for a second car. My requirements were 4 doors, rear wheel drive, lightweight, and preferably with a v8. Unfortunately, there are no cars that seem to fit my requirements so I started at looking at LS swaps. I was looking at IS300's and G35 sedans as possible candidates. I settled on the IS300 due to the fact that it was smaller, lighter, and better built. They also feel much lighter when driving them. So after looking for 9 months, I finally found a 2004 auto sport design w/ LSD which I purchased in August 2015. It was in really bad shape so I got it for a nice price.
 Untitled by satoman44, on Flickr
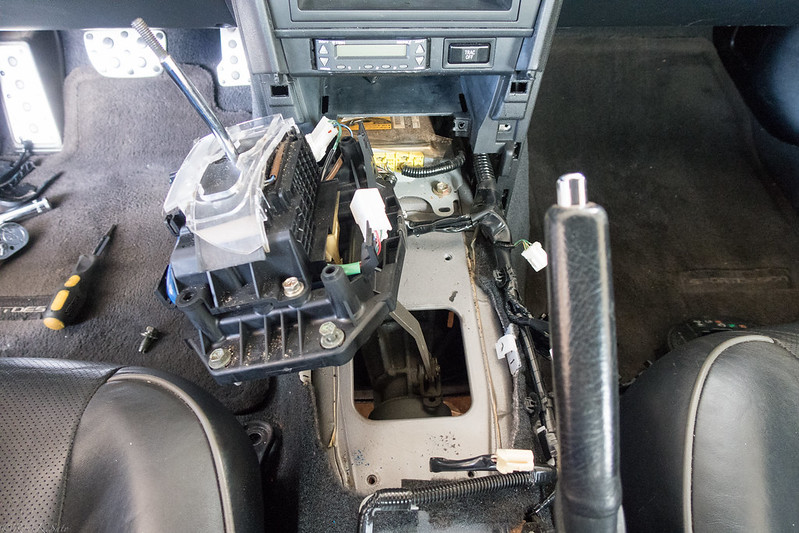
With any of my cars, my "stage 0" is always wheels/coilovers/audio/gauge cluster color change. So within a couple months, it looked like this.
 20160415__DSC4366 by satoman44, on Flickr
The following posts will be documenting my LS swap adventure.
You will notice I don't have the skills that most who do conversions have. I don't own or have the skills to fabricate parts. I rely on the swap parts available to me. That said, I'm still learning as I go and haven't even pulled a motor before this project!
Current Swap Parts List:
Swap kit from Dedicated Motorsports includes the following:
-Engine Mounts
-Trans Mount
-Clutch Master
-Clutch Line
-Modified GTO front sump pan with pickup
-1-3/4" Headers (driver side has steering column running between the runners)
-Radiator Hoses
-Wire Harness
-Throttle Cable
Bone stock 98 LS1 pulled from automatic Camaro
T56 Magnum
4th Gen Fbody Bellhousing
RPS Carbon Twin modified by Tony Mamo
Monster LT1-S (need to sell after deciding to get the RPS)
Fluidampr underdrive pulley
Background: I'm more interested in performance driving than looking cool so I tend to mod my cars more towards function over fashion. Living on the island of Oahu in Hawaii, we don't have a track (shut down around 10 years ago) so autocross with the SCCA is my only performance driving outlet. My other car, a Honda S2000, was purchased due to my heavy interest in autocross. Due to the class I'm interested in and due to how good the car is out of the box, the major tuning I did is limited to suspension, bolt ons, and ecu flash.
20140427_XE220654 by satoman44, on FlickrI was driving that car for almost 5 years when I started looking for a second car. My requirements were 4 doors, rear wheel drive, lightweight, and preferably with a v8. Unfortunately, there are no cars that seem to fit my requirements so I started at looking at LS swaps. I was looking at IS300's and G35 sedans as possible candidates. I settled on the IS300 due to the fact that it was smaller, lighter, and better built. They also feel much lighter when driving them. So after looking for 9 months, I finally found a 2004 auto sport design w/ LSD which I purchased in August 2015. It was in really bad shape so I got it for a nice price.
Untitled by satoman44, on FlickrWith any of my cars, my "stage 0" is always wheels/coilovers/audio/gauge cluster color change. So within a couple months, it looked like this.
20160415__DSC4366 by satoman44, on FlickrThe following posts will be documenting my LS swap adventure.
You will notice I don't have the skills that most who do conversions have. I don't own or have the skills to fabricate parts. I rely on the swap parts available to me. That said, I'm still learning as I go and haven't even pulled a motor before this project!
Current Swap Parts List:
Swap kit from Dedicated Motorsports includes the following:
-Engine Mounts
-Trans Mount
-Clutch Master
-Clutch Line
-Modified GTO front sump pan with pickup
-1-3/4" Headers (driver side has steering column running between the runners)
-Radiator Hoses
-Wire Harness
-Throttle Cable
Bone stock 98 LS1 pulled from automatic Camaro
T56 Magnum
4th Gen Fbody Bellhousing
RPS Carbon Twin modified by Tony Mamo
Monster LT1-S (need to sell after deciding to get the RPS)
Fluidampr underdrive pulley
 05-11-2016, 02:18 AM
#2
Teching In
Thread Starter
iTrader: (1)
Join Date: Feb 2016
Posts: 25
Likes: 0
Received 0 Likes
on
0 Posts
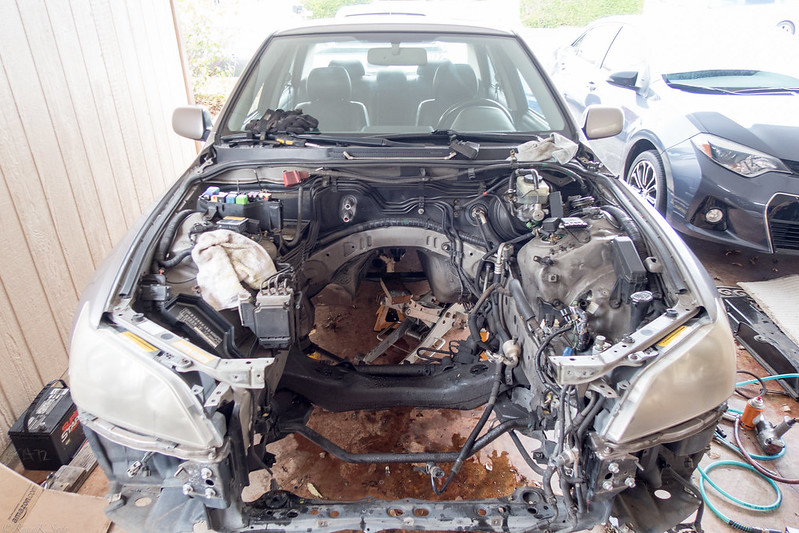
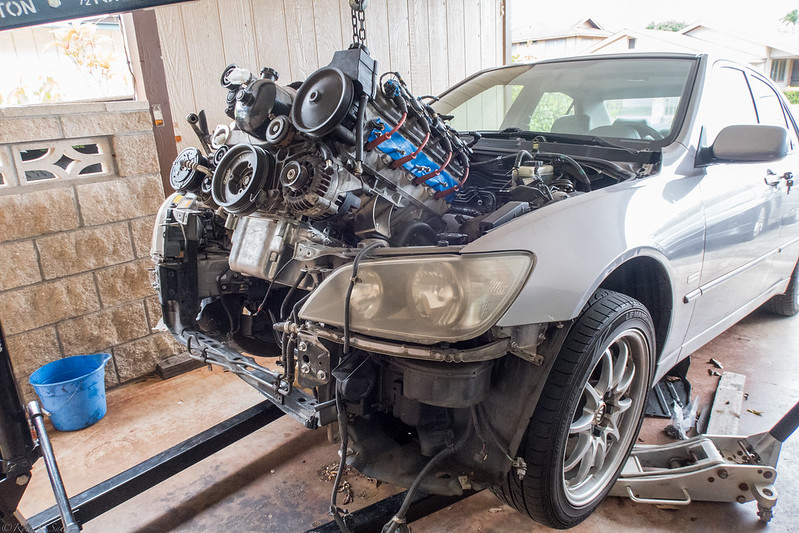
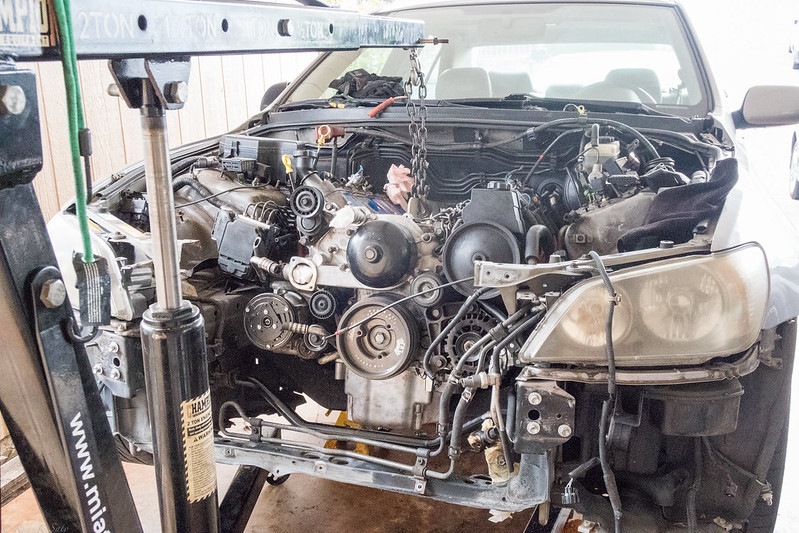
Pulling the stock drivetrain with help from my friend.
 20160423_IMG_2214 by satoman44, on Flickr
 20160423_IMG_2219 by satoman44, on Flickr
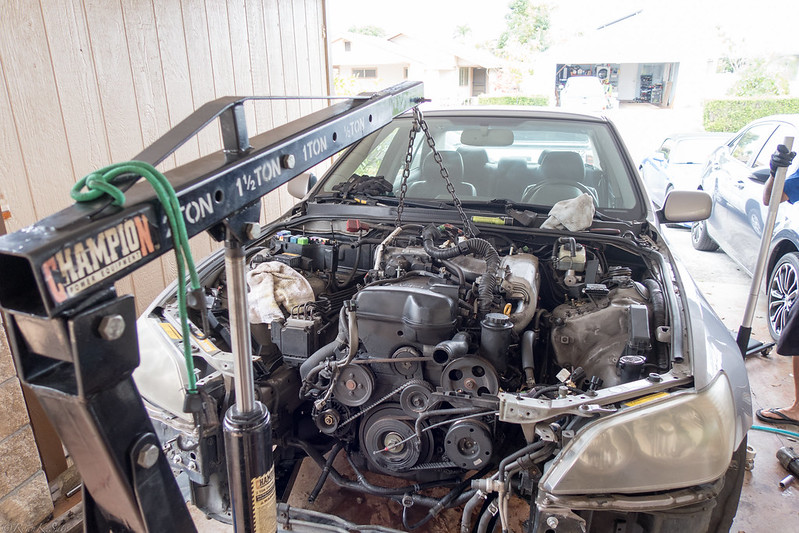 20160423_IMG_2231 by satoman44, on Flickr
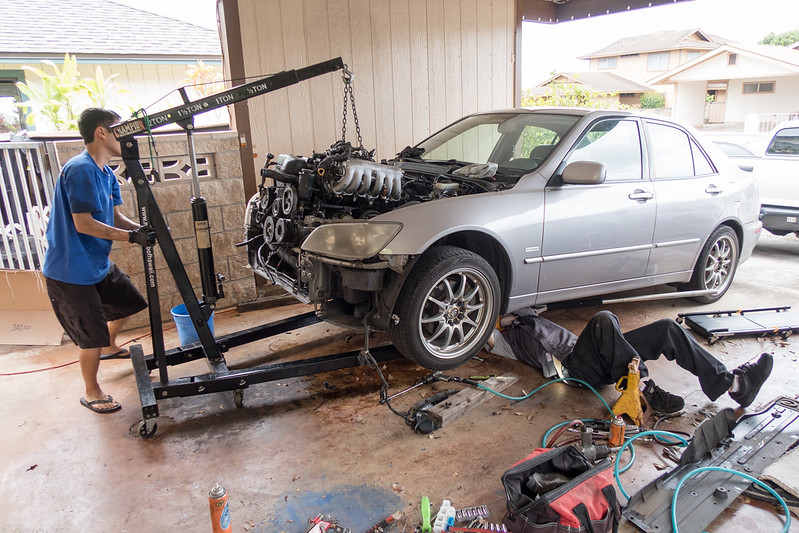 20160423_IMG_2251 by satoman44, on Flickr
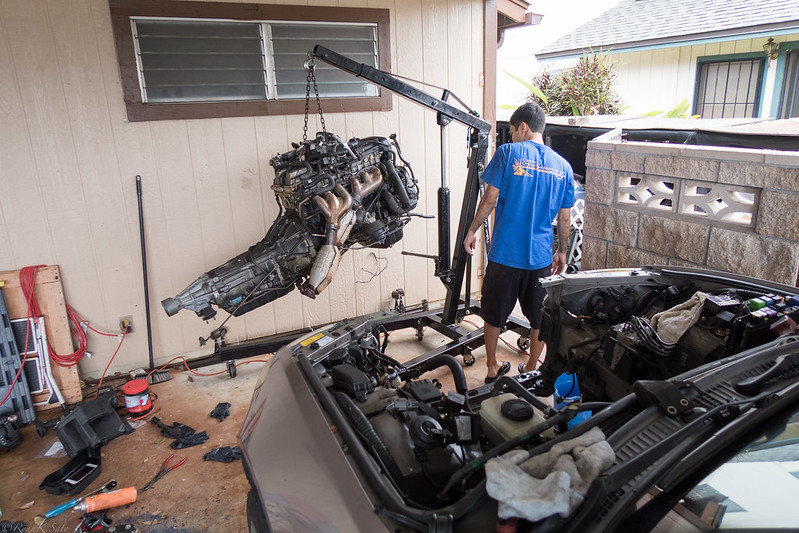 20160423_IMG_2272 by satoman44, on Flickr
 20160423_IMG_2276 by satoman44, on Flickr
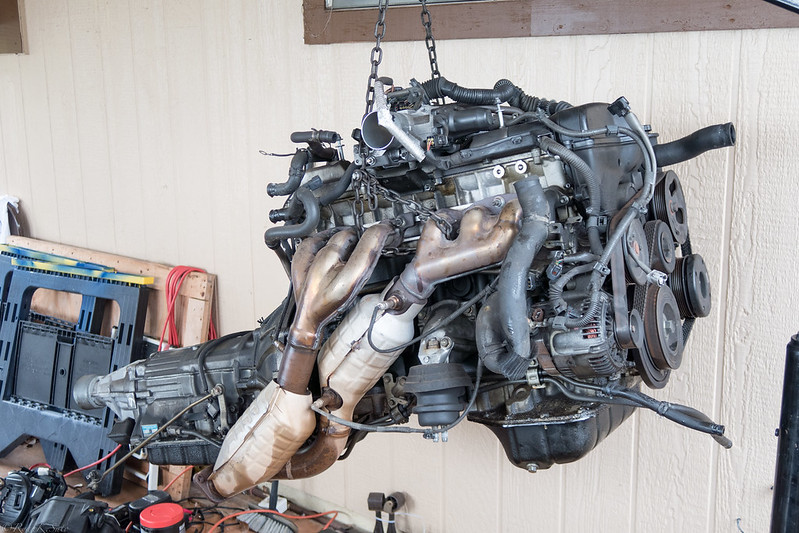 20160423_IMG_2277 by satoman44, on Flickr
20160423_IMG_2214 by satoman44, on Flickr20160423_IMG_2219 by satoman44, on Flickr20160423_IMG_2231 by satoman44, on Flickr20160423_IMG_2251 by satoman44, on Flickr20160423_IMG_2272 by satoman44, on Flickr20160423_IMG_2276 by satoman44, on Flickr20160423_IMG_2277 by satoman44, on Flickr
05-11-2016, 02:25 AM
#3
Teching In
Thread Starter
iTrader: (1)
Join Date: Feb 2016
Posts: 25
Likes: 0
Received 0 Likes
on
0 Posts
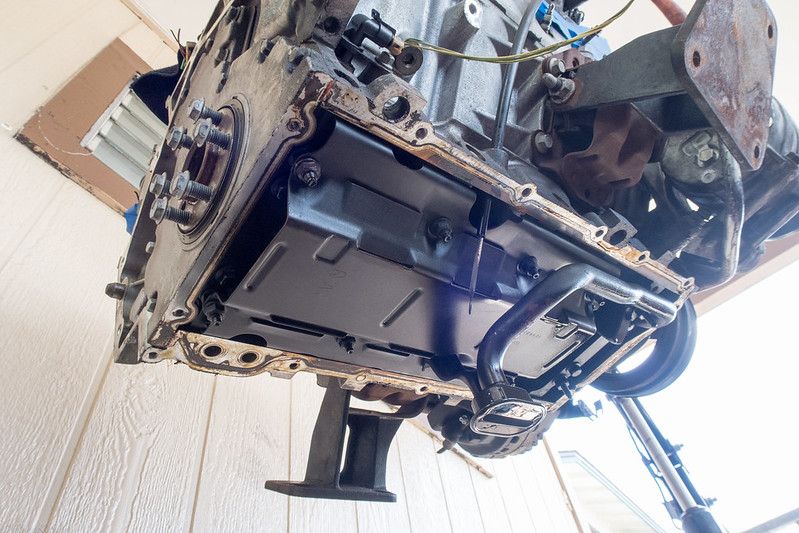
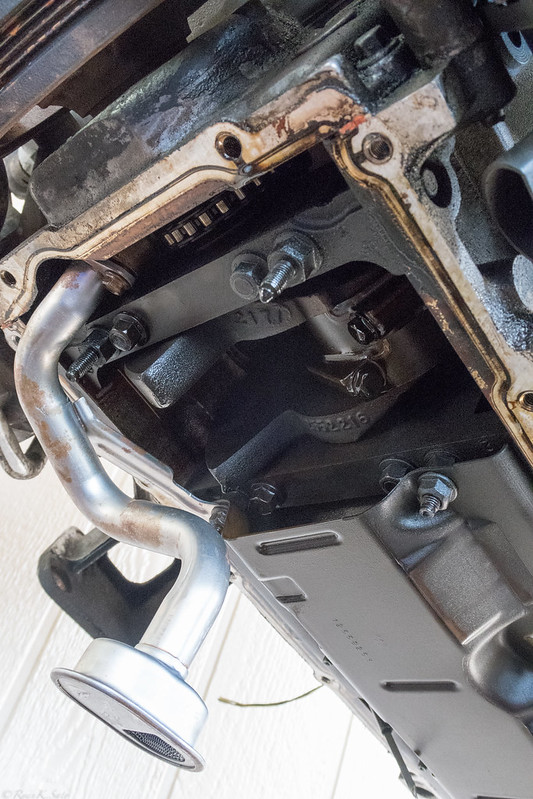
Starting the maintenance on the LS1. I replaced rear cover gasket, rear crank seal, front timing cover gasket, timing chain, oil pump, and water pump gaskets (water pump looks pretty new). The modified GTO pan came with new gasket and the front sump pickup.
Stock 98 LS1
 20160429_IMG_2296 by satoman44, on Flickr
Lift cover
 20160430_IMG_2335 by satoman44, on Flickr
Old oil pickup
 20160430_IMG_2337 by satoman44, on Flickr
New pickup
 20160430_IMG_2346 by satoman44, on Flickr
Notched GTO pan
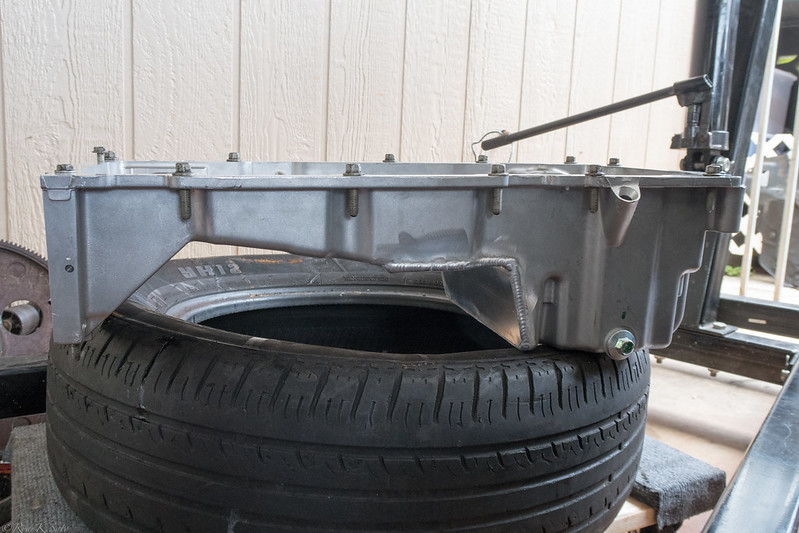 20160430_IMG_2353 by satoman44, on Flickr
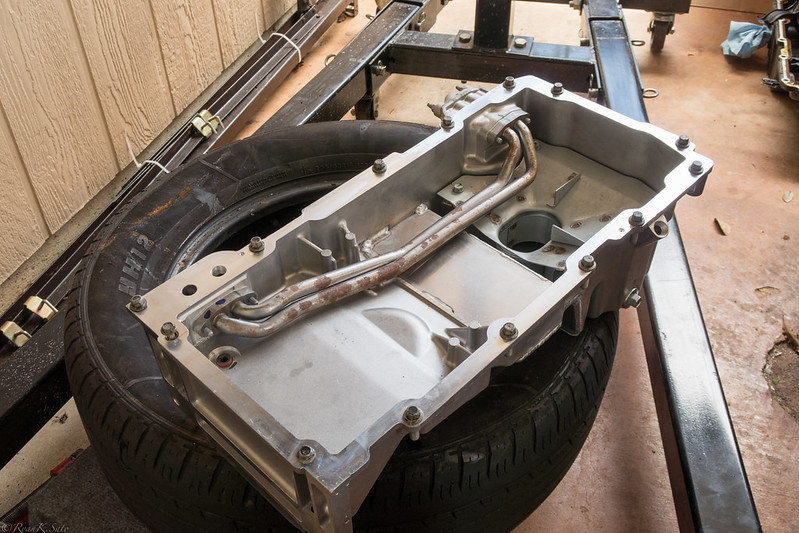 20160430_IMG_2354 by satoman44, on Flickr
 20160430_IMG_2362 by satoman44, on Flickr
Rear cover off
 20160430_IMG_2363 by satoman44, on Flickr
Rear cover on with new gasket and rear crank seal
 20160501_IMG_2369 by satoman44, on Flickr
Stock 98 LS1
20160429_IMG_2296 by satoman44, on FlickrLift cover
20160430_IMG_2335 by satoman44, on FlickrOld oil pickup
20160430_IMG_2337 by satoman44, on FlickrNew pickup
20160430_IMG_2346 by satoman44, on FlickrNotched GTO pan
20160430_IMG_2353 by satoman44, on Flickr20160430_IMG_2354 by satoman44, on Flickr20160430_IMG_2362 by satoman44, on FlickrRear cover off
20160430_IMG_2363 by satoman44, on FlickrRear cover on with new gasket and rear crank seal
20160501_IMG_2369 by satoman44, on Flickr
05-11-2016, 02:30 AM
#4
Teching In
Thread Starter
iTrader: (1)
Join Date: Feb 2016
Posts: 25
Likes: 0
Received 0 Likes
on
0 Posts
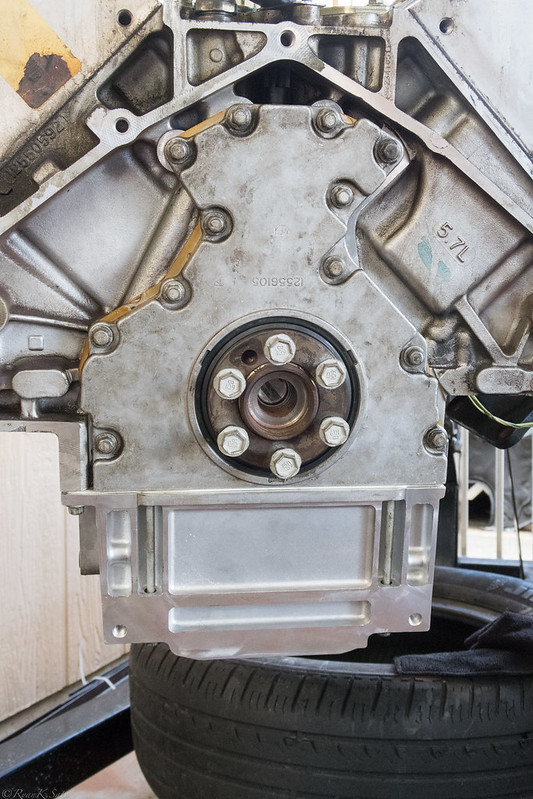
Pulling stock balancer pulley
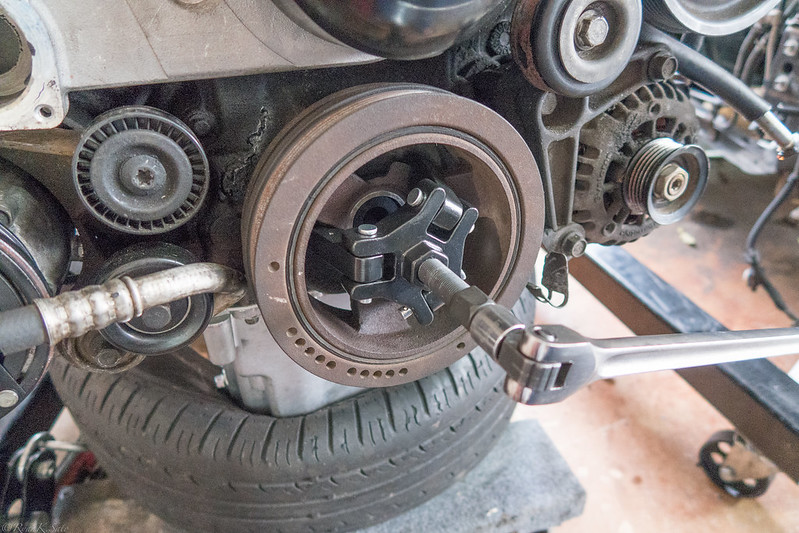 20160503_IMG_2373 by satoman44, on Flickr
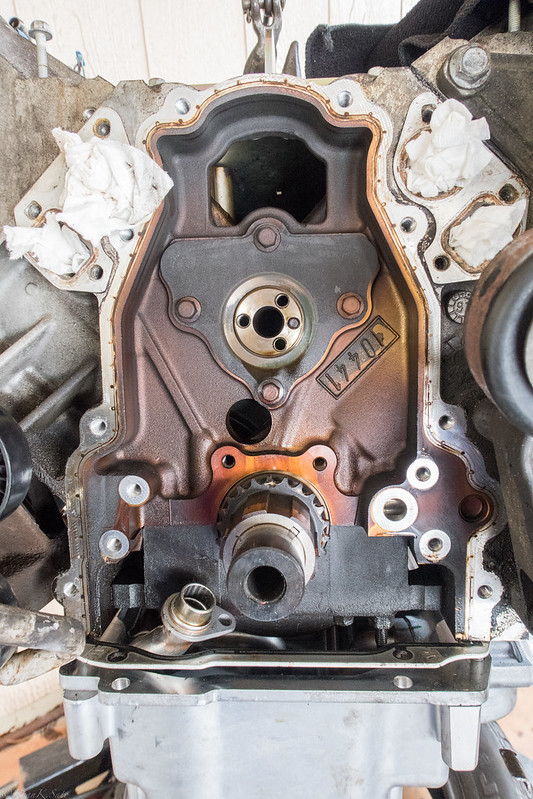
Timing cover removed
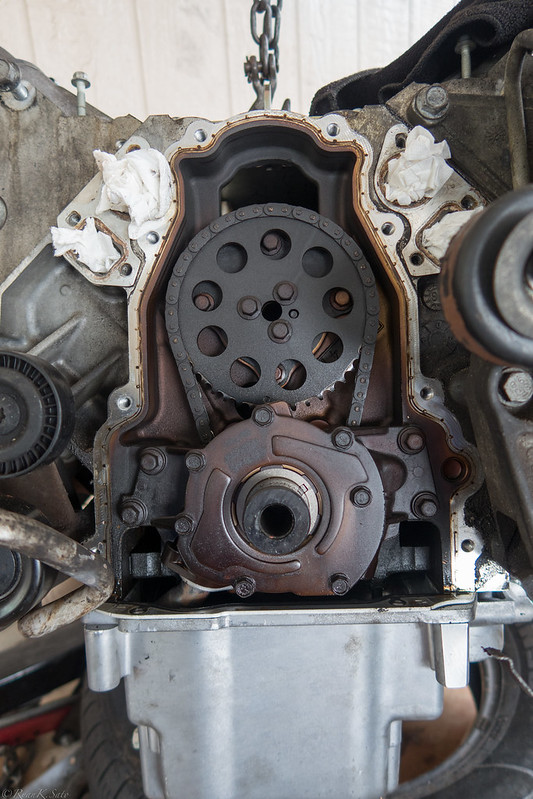 20160507_IMG_2386 by satoman44, on Flickr
 20160507_IMG_2393 by satoman44, on Flickr
Comparison between stock balancer and underdrive Fluidampr
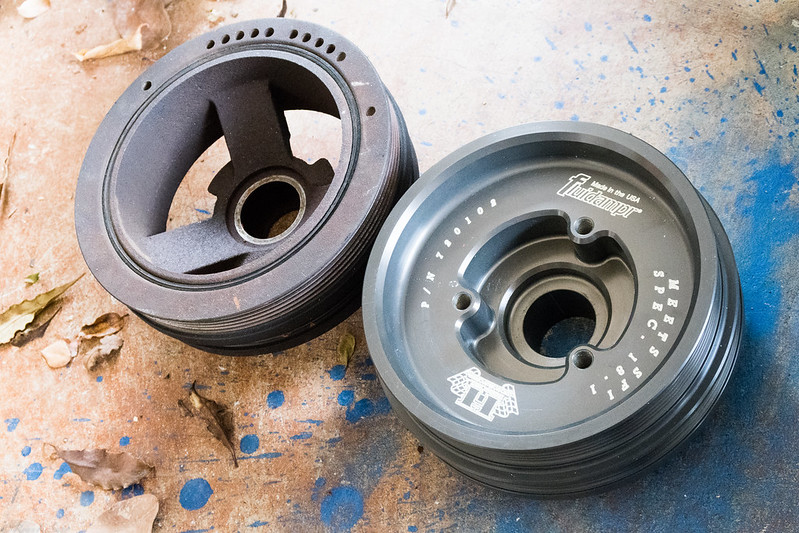 20160507_IMG_2396 by satoman44, on Flickr
Timing gear and oil pump removed
 20160507_IMG_2404 by satoman44, on Flickr
Comparison between stock and updated timing chain
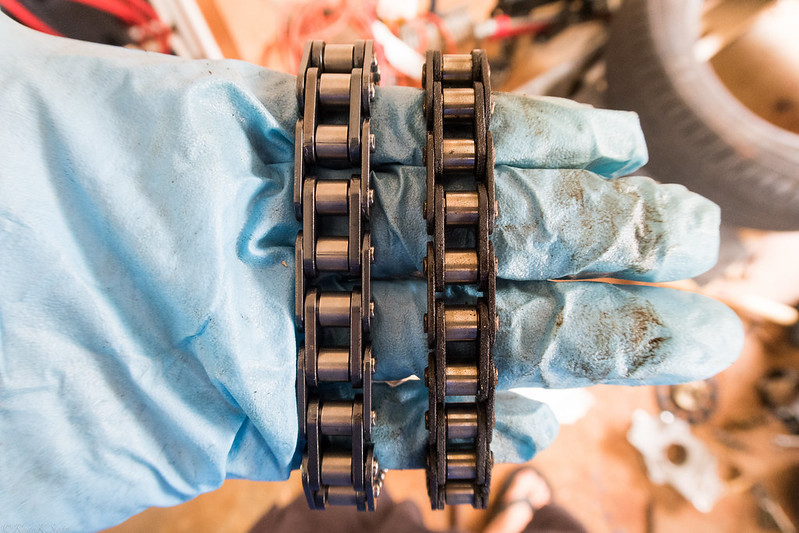 20160507_IMG_2406 by satoman44, on Flickr
New timing chain and oil pump installed
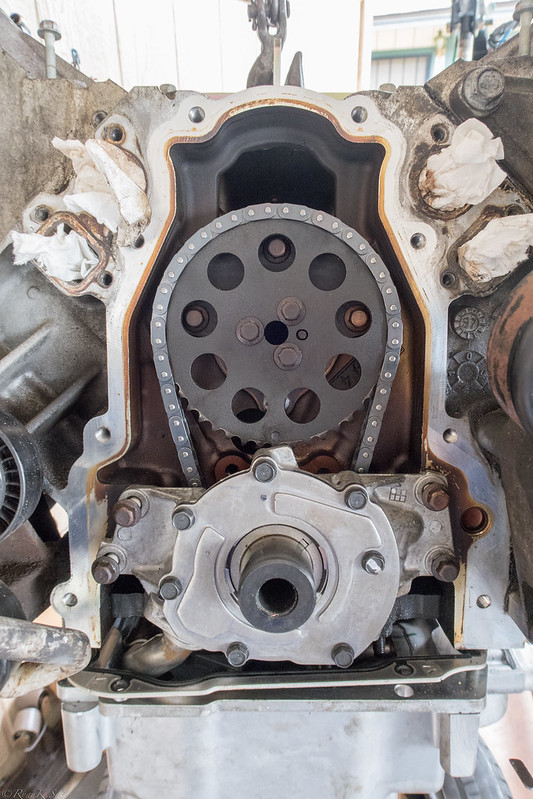 20160507_IMG_2408 by satoman44, on Flickr
Timing cover reinstalled with new gasket and crank seal
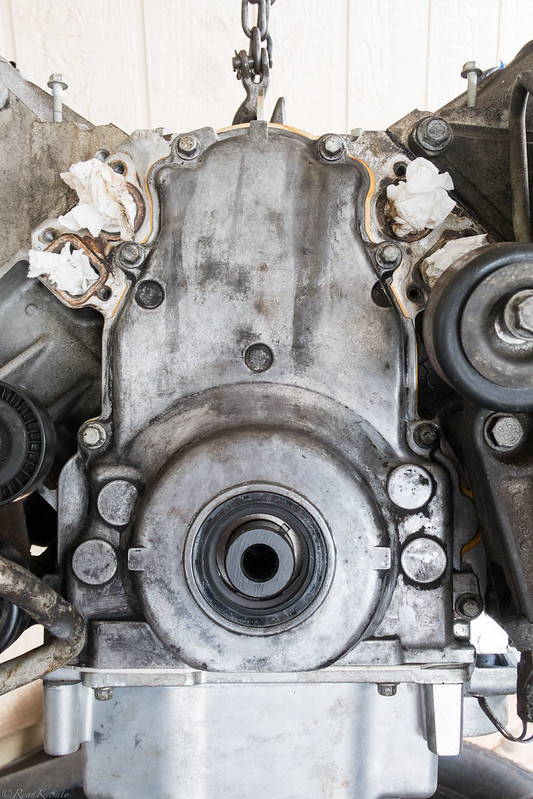 20160507_IMG_2415 by satoman44, on Flickr
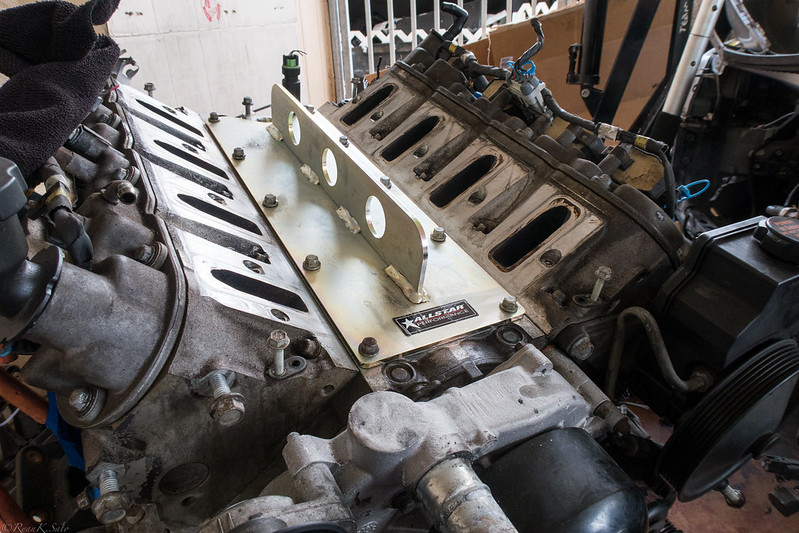
New perimeter valve cover gaskets installed
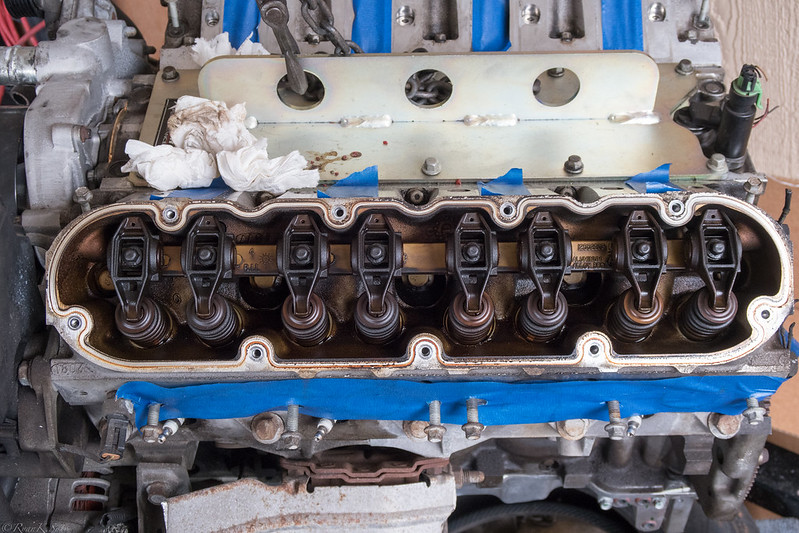 20160507_IMG_2418 by satoman44, on Flickr
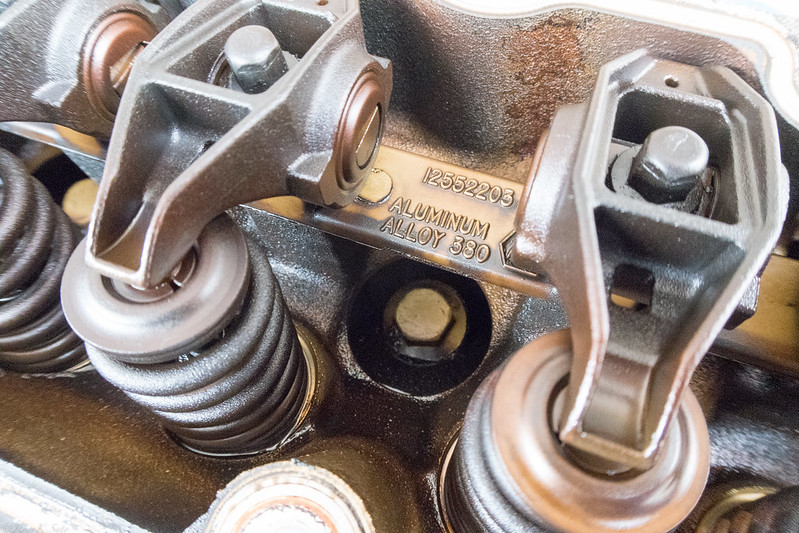 20160507_IMG_2421 by satoman44, on Flickr
20160503_IMG_2373 by satoman44, on FlickrTiming cover removed
20160507_IMG_2386 by satoman44, on Flickr20160507_IMG_2393 by satoman44, on FlickrComparison between stock balancer and underdrive Fluidampr
20160507_IMG_2396 by satoman44, on FlickrTiming gear and oil pump removed
20160507_IMG_2404 by satoman44, on FlickrComparison between stock and updated timing chain
20160507_IMG_2406 by satoman44, on FlickrNew timing chain and oil pump installed
20160507_IMG_2408 by satoman44, on FlickrTiming cover reinstalled with new gasket and crank seal
20160507_IMG_2415 by satoman44, on FlickrNew perimeter valve cover gaskets installed
20160507_IMG_2418 by satoman44, on Flickr20160507_IMG_2421 by satoman44, on Flickr
05-11-2016, 02:37 AM
#5
Teching In
Thread Starter
iTrader: (1)
Join Date: Feb 2016
Posts: 25
Likes: 0
Received 0 Likes
on
0 Posts
4th Gen Fbody Bellhousing
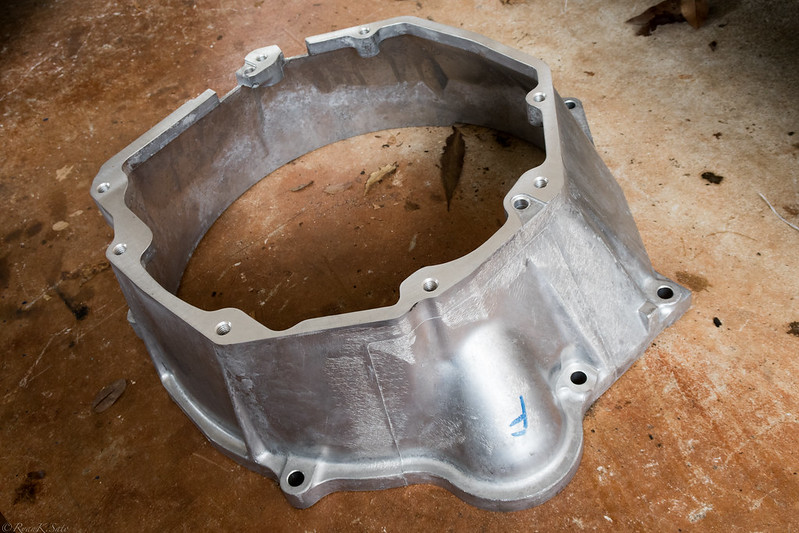 20160508_IMG_2426 by satoman44, on Flickr
Wide ratio T56 Magnum. This is going to be a daily driver.
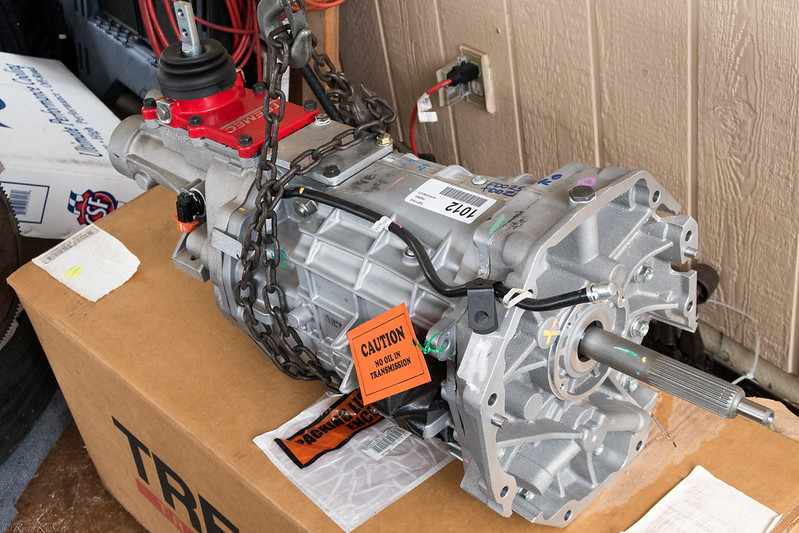 20160508_IMG_2428 by satoman44, on Flickr
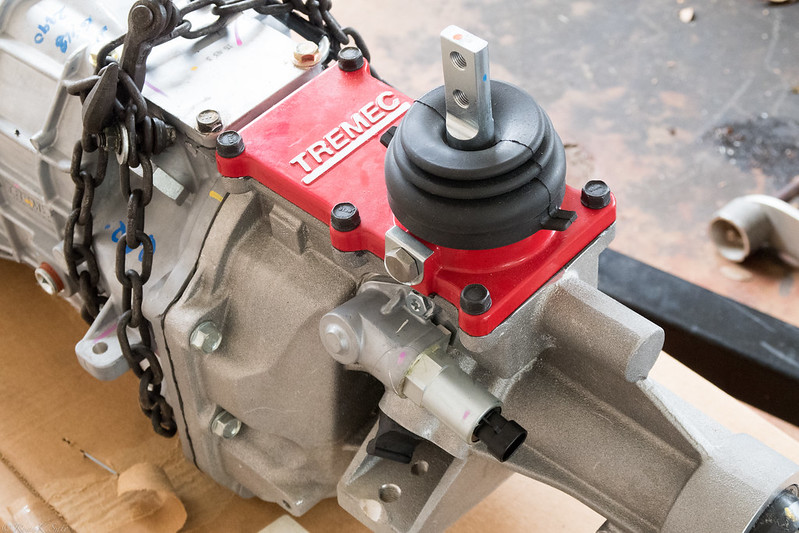 20160508_IMG_2439 by satoman44, on Flickr
Engine and trans mated without clutch installed for test fitting. I have a Monster LT1-S but didn't realize it was so heavy until I received it. I now have a RPS Carbon Twin lightened by Tony Mamo on the way. Anyone who wants the Monster, please PM me, I don't have enough posts to post in the marketplace.
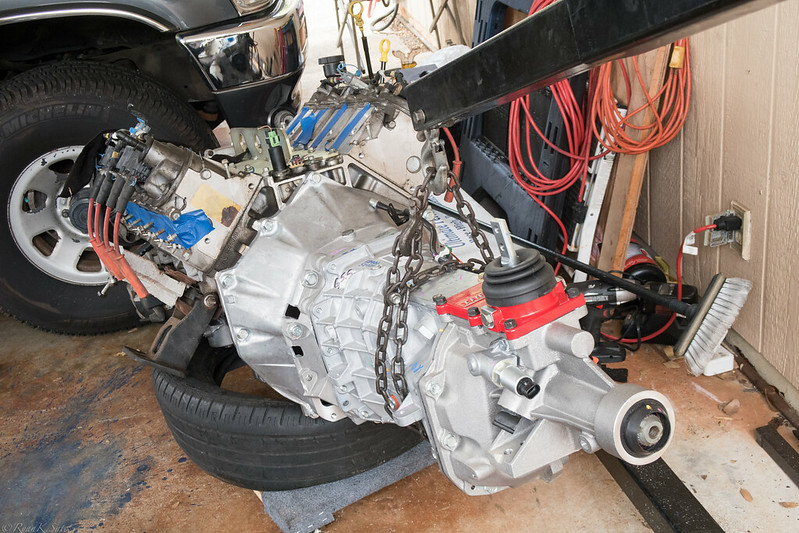 20160508_IMG_2453 by satoman44, on Flickr
Get in there! Not bad considering I'm doing this myself without an extra set of hands.
 20160508_IMG_2458 by satoman44, on Flickr
Test fit successful
 20160508_IMG_2462 by satoman44, on Flickr
Console area needs more trimming. I already notched out about 4". I'll probably need a 4" rear offset shifter.
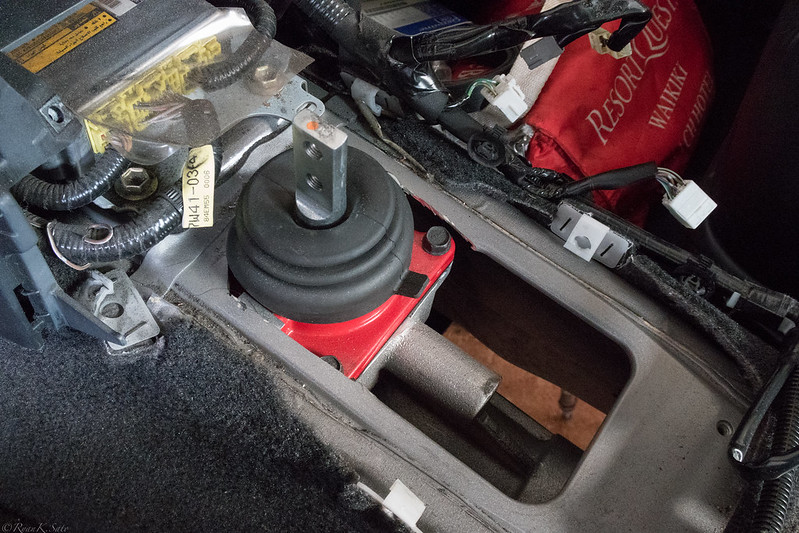 20160510_IMG_2464 by satoman44, on Flickr
20160508_IMG_2426 by satoman44, on FlickrWide ratio T56 Magnum. This is going to be a daily driver.
20160508_IMG_2428 by satoman44, on Flickr20160508_IMG_2439 by satoman44, on FlickrEngine and trans mated without clutch installed for test fitting. I have a Monster LT1-S but didn't realize it was so heavy until I received it. I now have a RPS Carbon Twin lightened by Tony Mamo on the way. Anyone who wants the Monster, please PM me, I don't have enough posts to post in the marketplace.
20160508_IMG_2453 by satoman44, on FlickrGet in there! Not bad considering I'm doing this myself without an extra set of hands.
20160508_IMG_2458 by satoman44, on FlickrTest fit successful
20160508_IMG_2462 by satoman44, on FlickrConsole area needs more trimming. I already notched out about 4". I'll probably need a 4" rear offset shifter.
20160510_IMG_2464 by satoman44, on Flickr 
Trending Topics
05-11-2016, 01:47 PM
#8
Teching In
Thread Starter
iTrader: (1)
Join Date: Feb 2016
Posts: 25
Likes: 0
Received 0 Likes
on
0 Posts
https://www.dedicatedmotorsports.com/product-p/lsmk.htm
In Hawaii, it's common place to wear them all the time. You can tell I'm a noob lol. I'm just not used to wearing them since I'm usually just doing small mods to the car. You can see my friend in the pics who is actually wearing his work shoes since he's an auto tech.

 05-12-2016, 06:36 AM
#12
TECH Apprentice
Join Date: May 2012
Location: Danbury, Ct
Posts: 372
Likes: 0
Received 0 Likes
on
0 Posts
[/QUOTE] In Hawaii, it's common place to wear them all the time. You can tell I'm a noob lol. I'm just not used to wearing them since I'm usually just doing small mods to the car. You can see my friend in the pics who is actually wearing his work shoes since he's an auto tech.[/QUOTE]
lol I get it ive walked into my garage before with them on.. it only took 1 time for something to happen before I wore shoes every time lol
lol I get it ive walked into my garage before with them on.. it only took 1 time for something to happen before I wore shoes every time lol
05-30-2016, 04:18 PM
#15
Teching In
Thread Starter
iTrader: (1)
Join Date: Feb 2016
Posts: 25
Likes: 0
Received 0 Likes
on
0 Posts
Not much of an update, but I've been working on it every Saturday taking care of odds n ends and waiting on parts.
Decided to do more trimming around the shifter
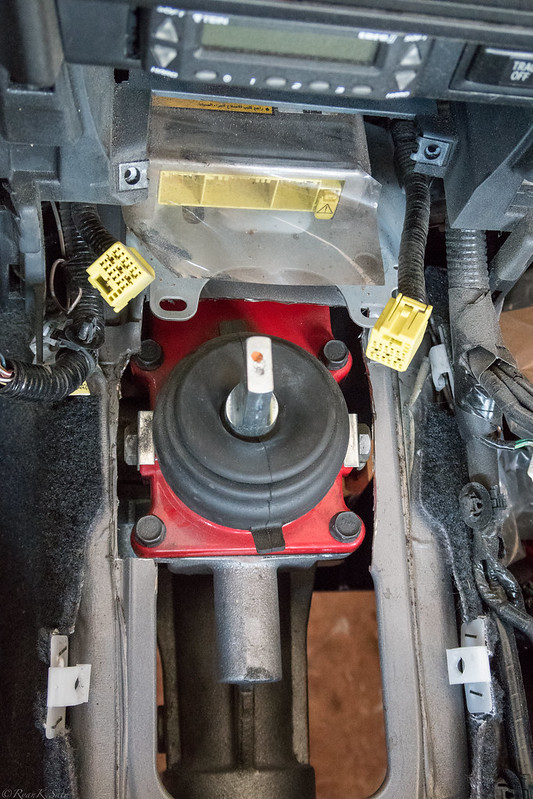 20160521_IMG_2573 by satoman44, on Flickr
Measuring up for driveshaft which needs to be shortened along with a new slip yoke and u-joint.
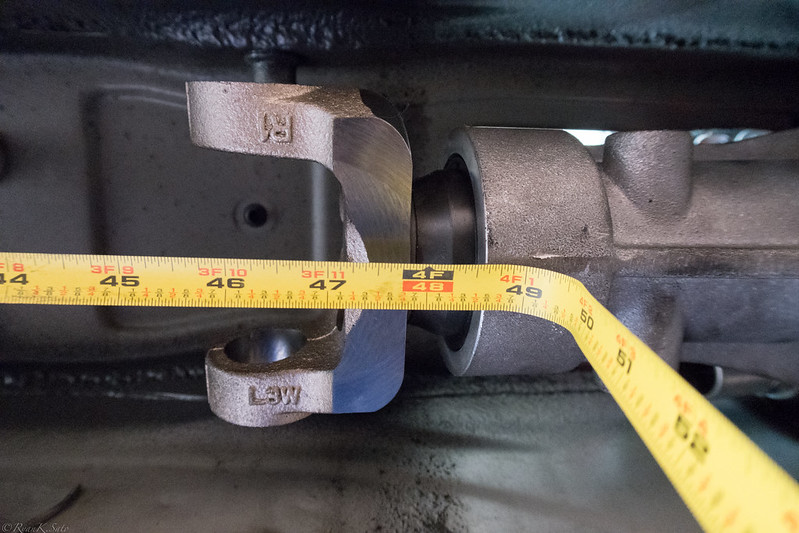 20160521_IMG_2576 by satoman44, on Flickr
Steering column removed
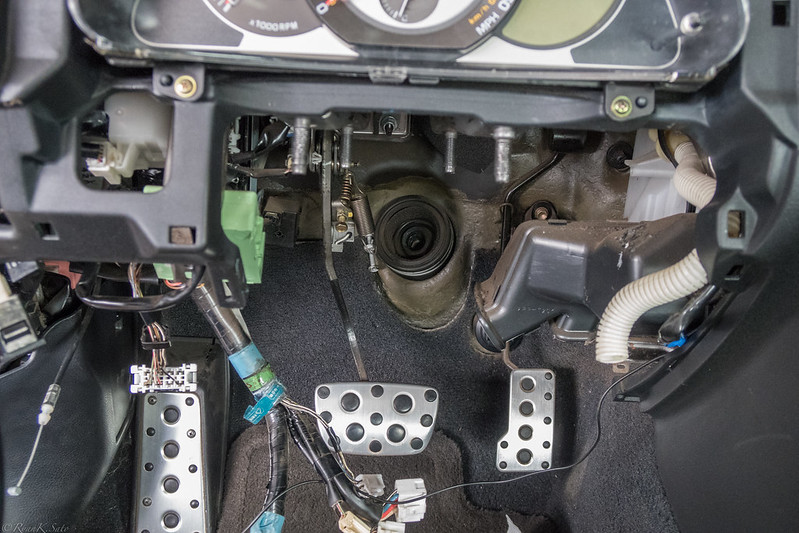 20160521_IMG_2581 by satoman44, on Flickr
Dedicated Motorsport IS300 swap headers test fit
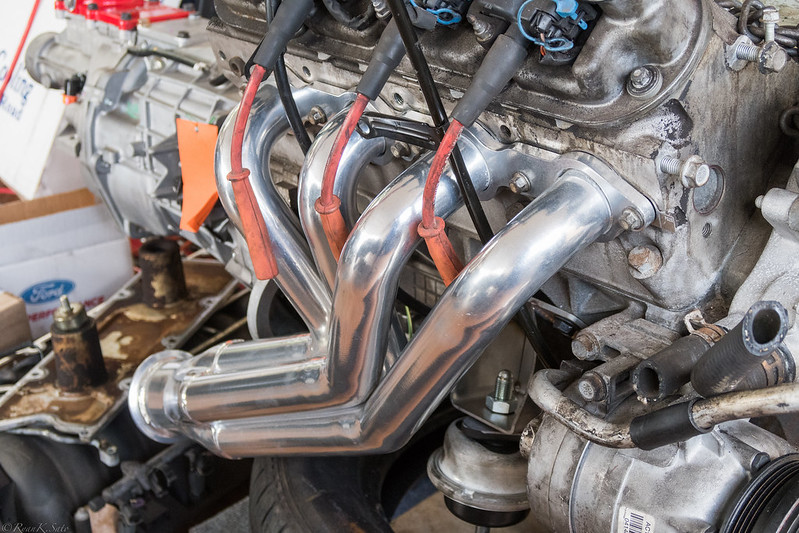 20160521_IMG_2582 by satoman44, on Flickr
The space between driver side runners which the steering shaft goes through
 20160521_IMG_2583 by satoman44, on Flickr
Decided on this Tony Mamo modified RPS Billet Carbon Twin after realizing the Monster LT1-S was over 50 lbs. This RPS is 30.4 lbs, should make the engine feel almost as peppy as my S2000's F22 (hopefully).
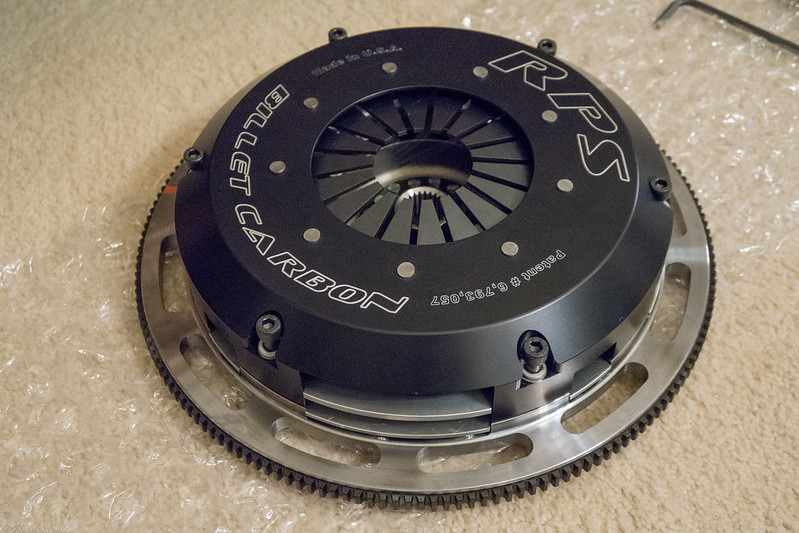 20160527_IMG_2611 by satoman44, on Flickr
Clutch cover removed
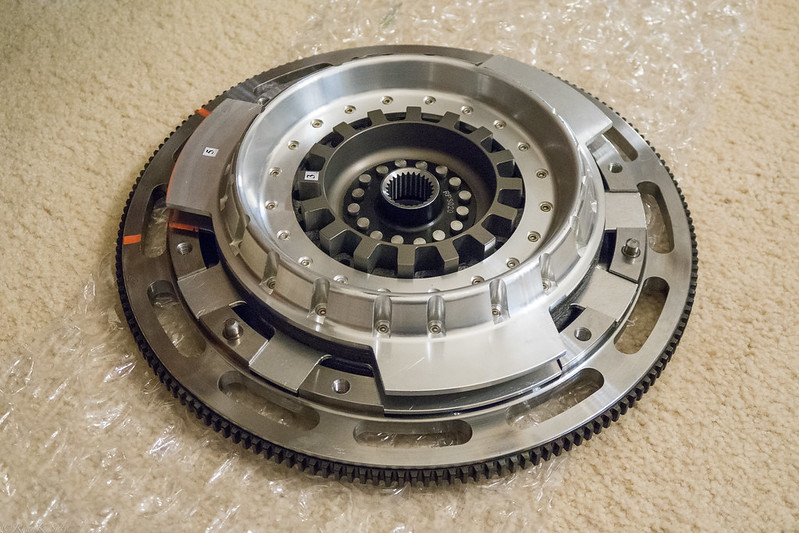 20160527_IMG_2613 by satoman44, on Flickr
Detail
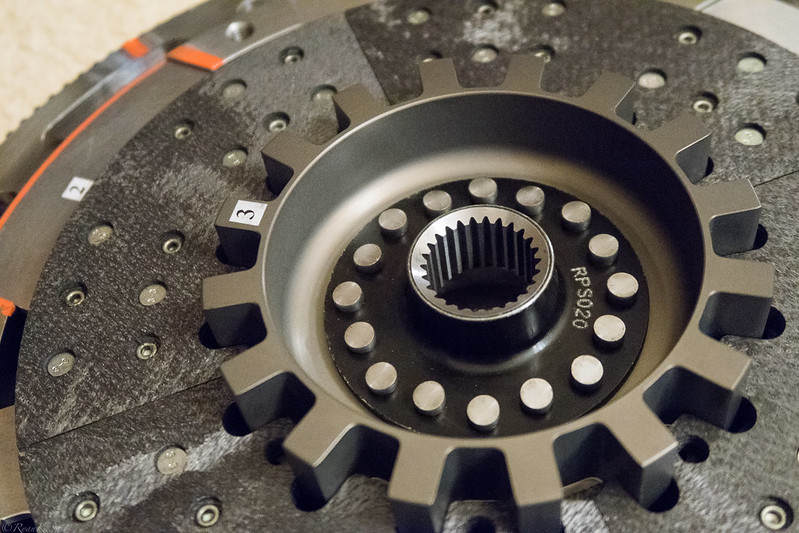 20160527_IMG_2620 by satoman44, on Flickr
More detail
 20160527_IMG_2622 by satoman44, on Flickr
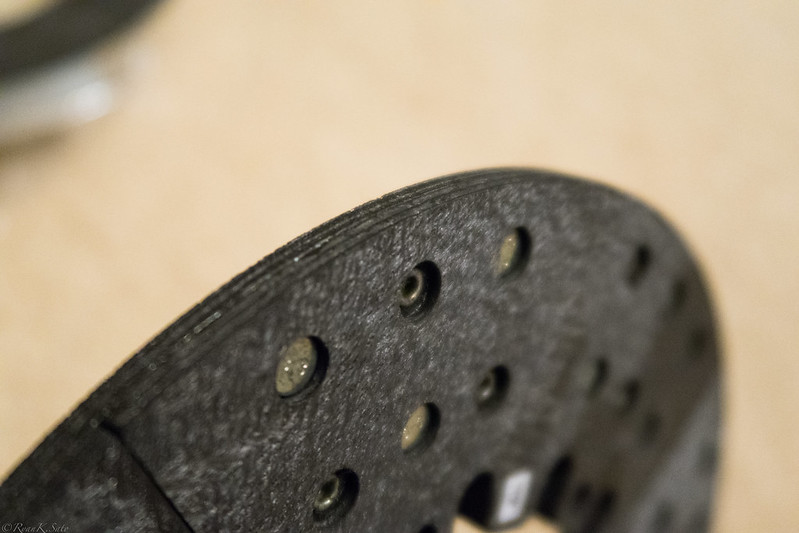
Flywheel with carbon friction inserts
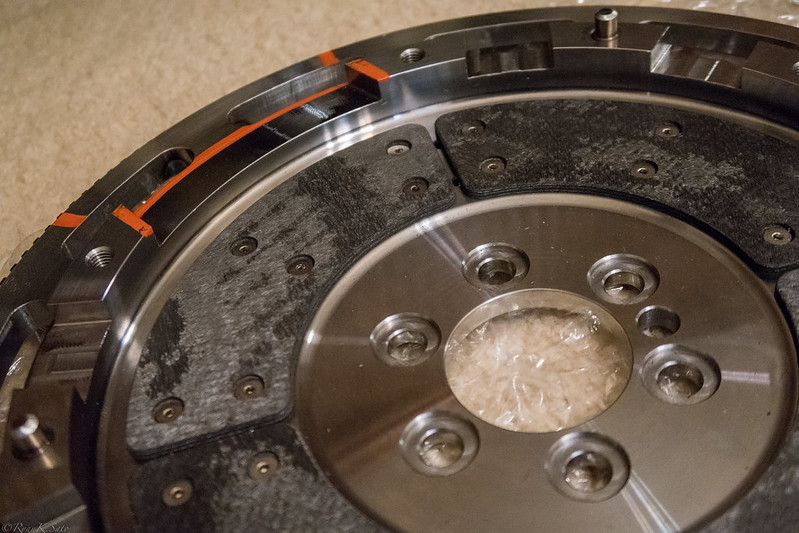 20160527_IMG_2635 by satoman44, on Flickr
Pilot bearing installed. Luckily for me, the LS1 was an auto so there was no existing pilot bearing to remove.
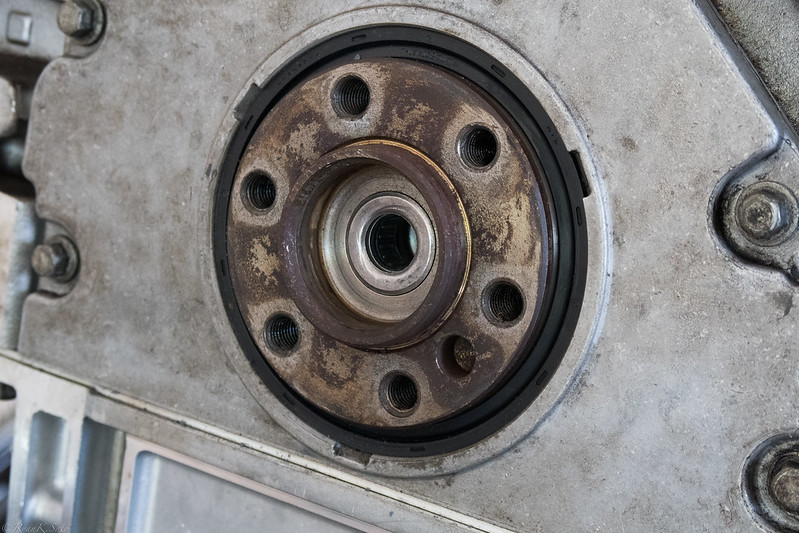 20160528_IMG_2640 by satoman44, on Flickr
Deburring transmission input shaft and clutch rotor per RPS installation instructions
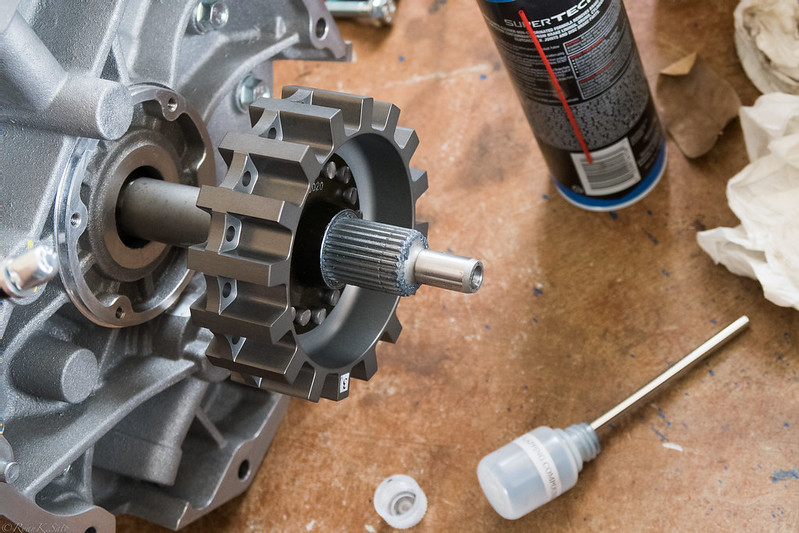 20160528_IMG_2642 by satoman44, on Flickr
Flywheel installed, what a shame this will be never be seen once trans goes back on lol
 20160528_IMG_2643 by satoman44, on Flickr
Upon measuring clearances between pressure plate and throwout bearing, I found my slave was damaged. Thus, this is where my progress has stopped for now.
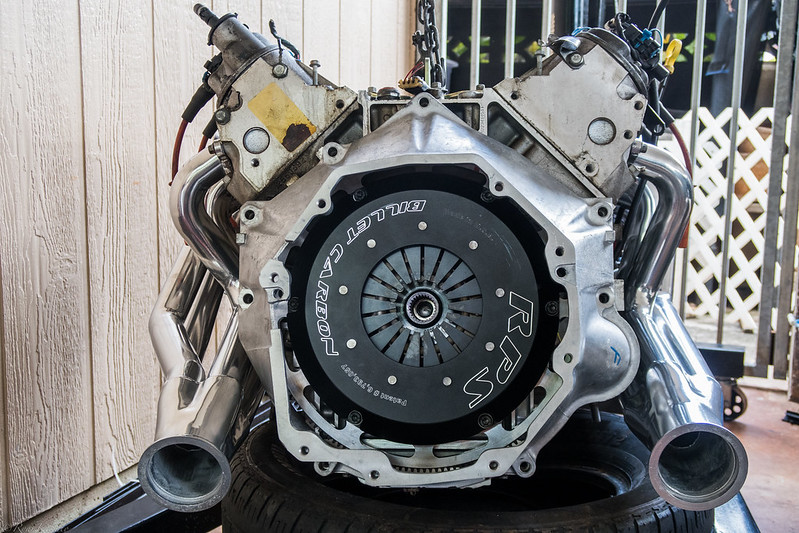 20160528_IMG_2646 by satoman44, on Flickr
Decided to do more trimming around the shifter
20160521_IMG_2573 by satoman44, on FlickrMeasuring up for driveshaft which needs to be shortened along with a new slip yoke and u-joint.
20160521_IMG_2576 by satoman44, on FlickrSteering column removed
20160521_IMG_2581 by satoman44, on FlickrDedicated Motorsport IS300 swap headers test fit
20160521_IMG_2582 by satoman44, on FlickrThe space between driver side runners which the steering shaft goes through
20160521_IMG_2583 by satoman44, on FlickrDecided on this Tony Mamo modified RPS Billet Carbon Twin after realizing the Monster LT1-S was over 50 lbs. This RPS is 30.4 lbs, should make the engine feel almost as peppy as my S2000's F22 (hopefully).
20160527_IMG_2611 by satoman44, on FlickrClutch cover removed
20160527_IMG_2613 by satoman44, on FlickrDetail
20160527_IMG_2620 by satoman44, on FlickrMore detail
20160527_IMG_2622 by satoman44, on FlickrFlywheel with carbon friction inserts
20160527_IMG_2635 by satoman44, on FlickrPilot bearing installed. Luckily for me, the LS1 was an auto so there was no existing pilot bearing to remove.
20160528_IMG_2640 by satoman44, on FlickrDeburring transmission input shaft and clutch rotor per RPS installation instructions
20160528_IMG_2642 by satoman44, on FlickrFlywheel installed, what a shame this will be never be seen once trans goes back on lol
20160528_IMG_2643 by satoman44, on FlickrUpon measuring clearances between pressure plate and throwout bearing, I found my slave was damaged. Thus, this is where my progress has stopped for now.
20160528_IMG_2646 by satoman44, on Flickr
05-31-2016, 01:54 PM
#17
Teching In
Thread Starter
iTrader: (1)
Join Date: Feb 2016
Posts: 25
Likes: 0
Received 0 Likes
on
0 Posts
Is 1/2" the standard amount of slack to give the slip yoke? I just bottomed out for the measurement. I was planning to adjust for some slack in the slip yoke but not quite sure what to make it.

