
LQ4/4L80 swap 1969 Mercedes
 10-11-2016, 01:52 AM
#21
Staging Lane
Thread Starter

No work on the car Sat afternoon/Sunday. Flew my wife over to the Westin Maui for her birthday, too much food, drink, sun, massages at the beach, etc.

So spent today continuing to "port" the intake. Spent 9 hours and learned a little on how to work the tools and some good practice before the heads.
The intake had an 85mm throat, so I enlarged to it 90mm to match the throttle body.

Then worked on the runners. The longest bits I bought are 6" so I can't reach all the way in. Not sure how much an improvement this exercise will provide anyway, but good practice and I'll know I had my hands in there.
The runners had a few rough casting defects and some globs to remove. I shaved just enough the get the runners "flat" with the burr, then 60 grit rolls, then 120 grit rolls. I found that with a very light touch with the burr getting 90% of the work, the sanding went much faster. Although it takes absolute concentration to keep control.

 10-13-2016, 11:06 PM
#22
Staging Lane
Thread Starter
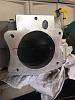
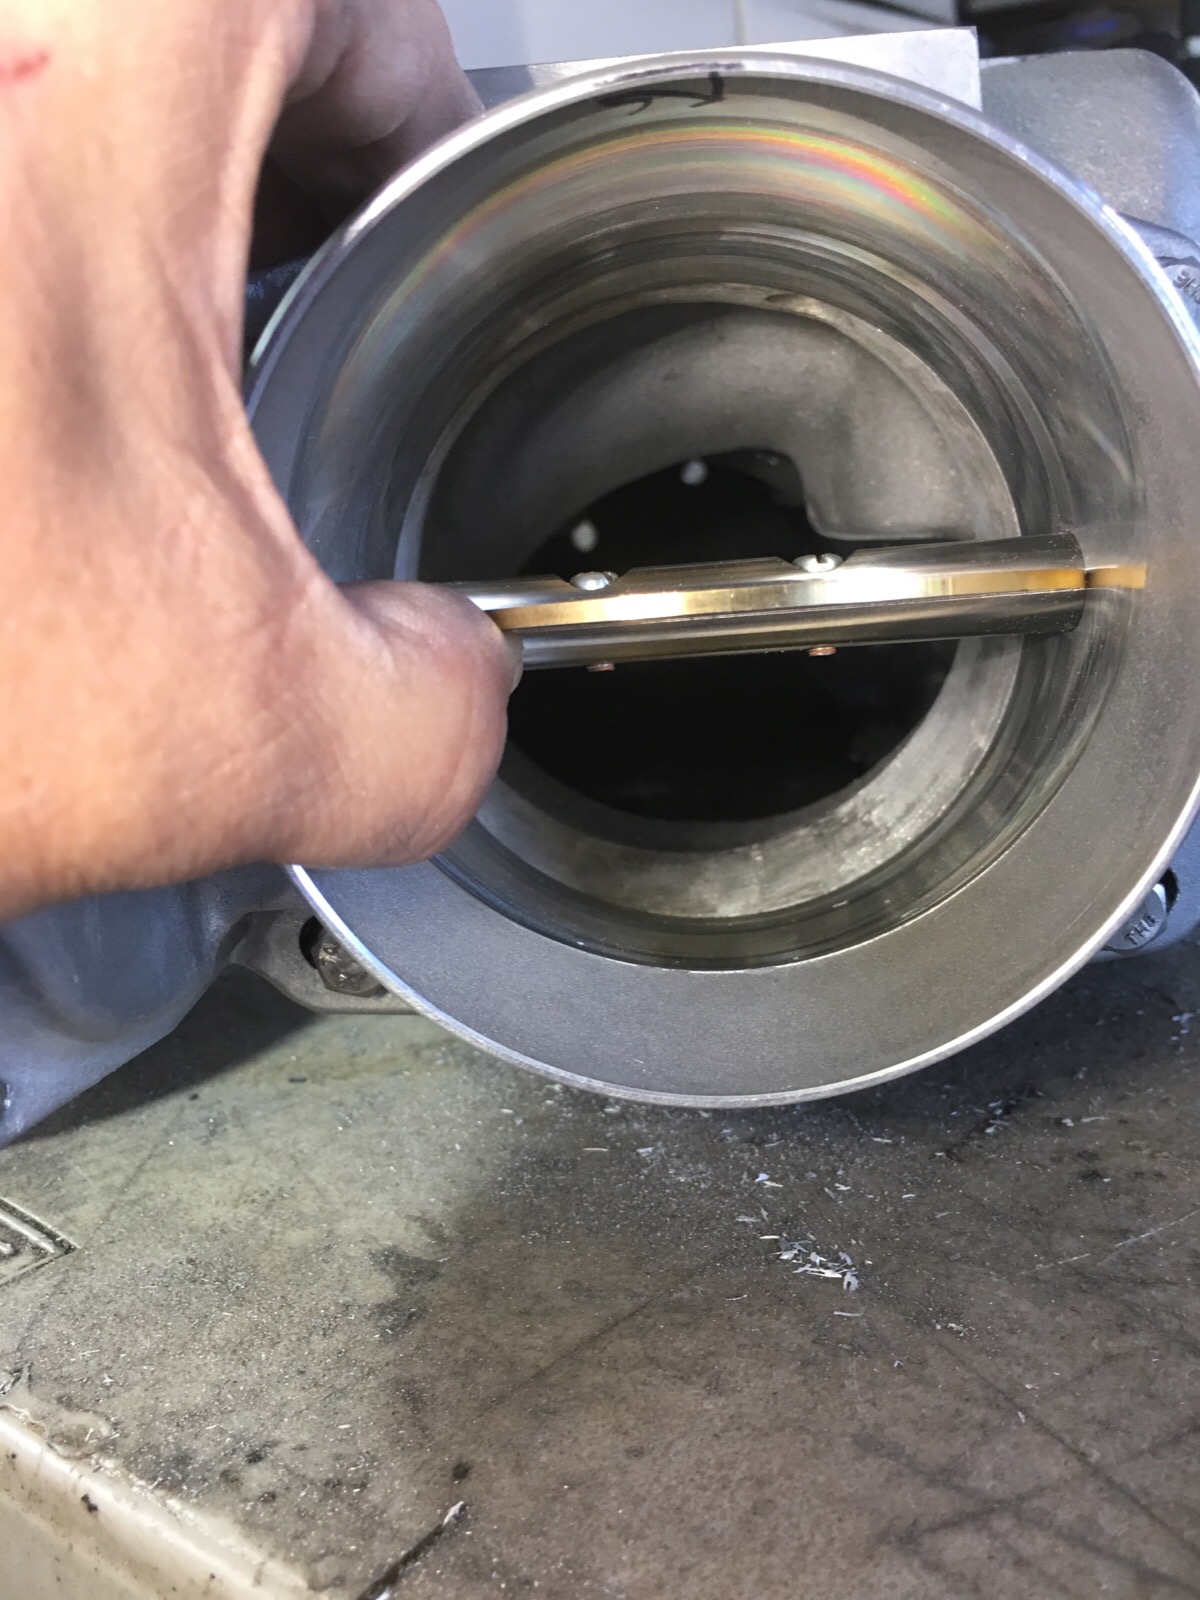
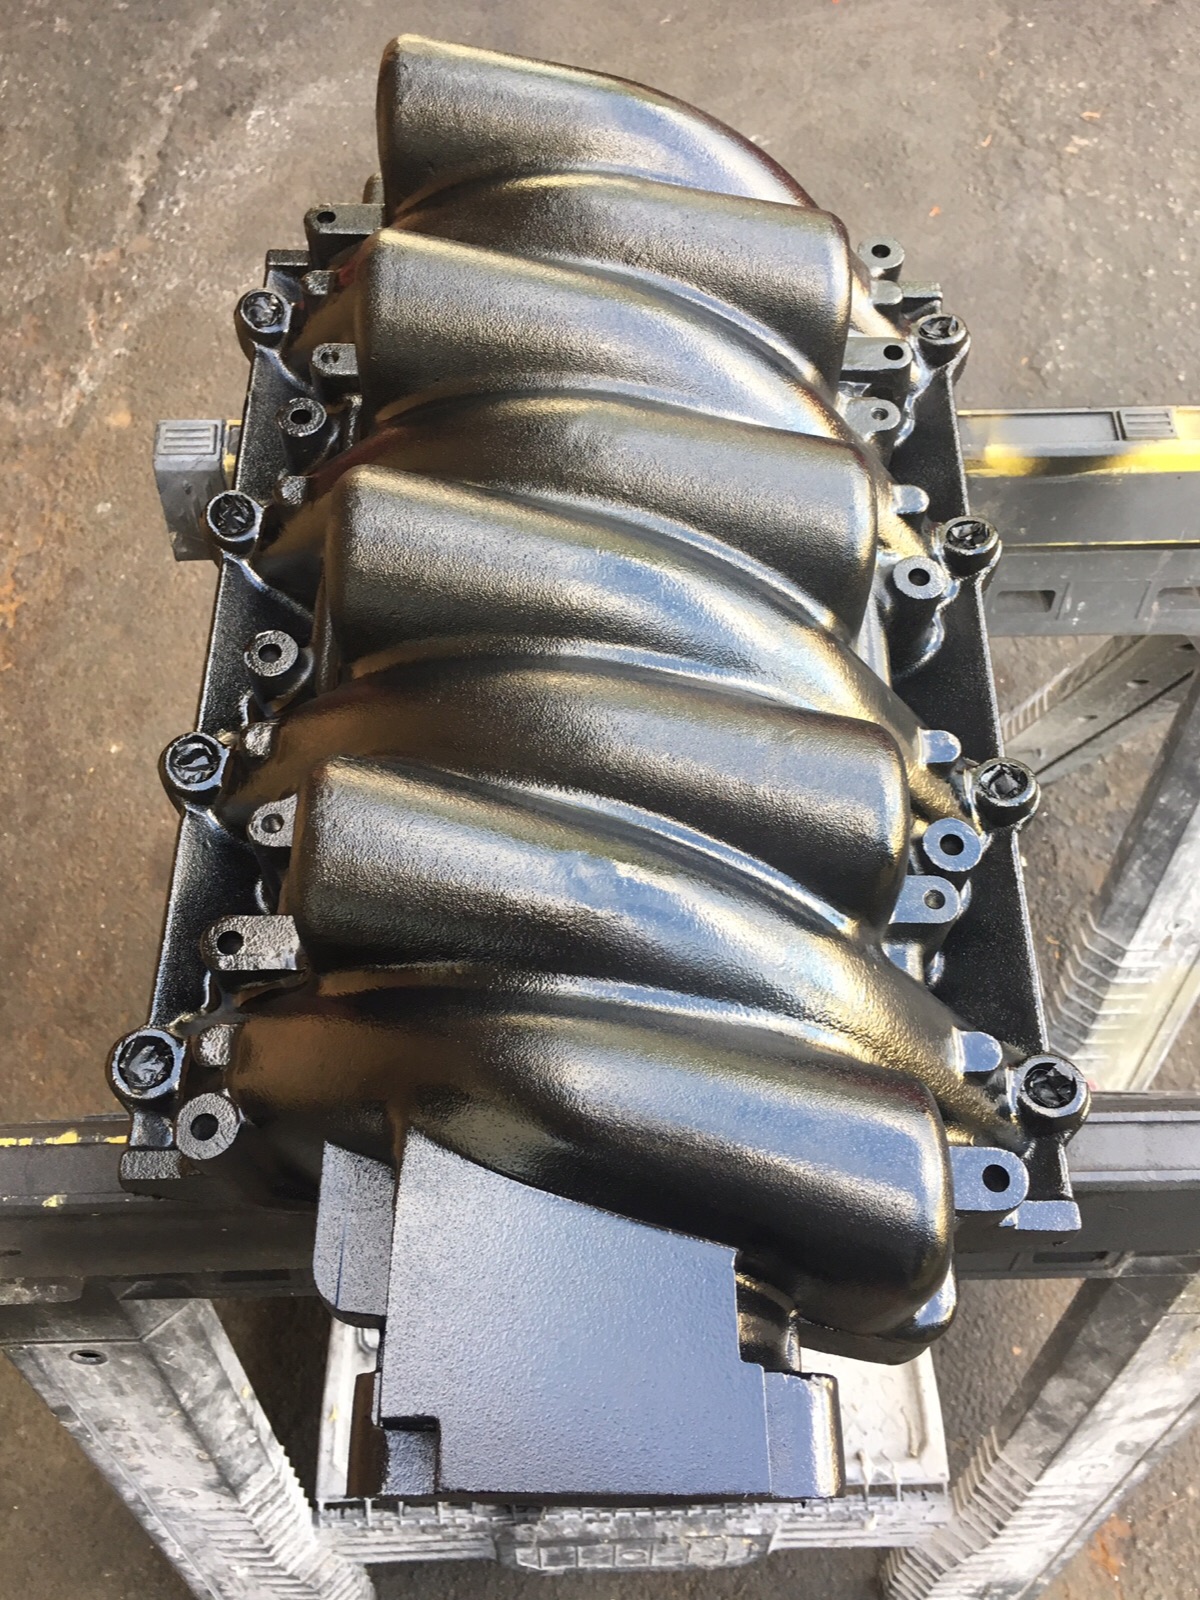
Now that I finished cleaning up the inside of the intake I worked on the outside.
I enlarged the main port to 90mm to match the throttle body, cut off some unneeded aluminum, removed the cover plate on top just behind the throttle body, plugged the opening and bolting location, and sanded off the "Pro Comp" name plate.
Then sprayed some rattle can bed liner to give back the texture to the modified areas and then a couple coats of satin black.

The transmission will be ready to pick up tomorrow from getting rebuilt and the heads are ready at the machine shop. The block and rotating assembly will be ready to pick up on the 24th, they told me today.
10-15-2016, 11:31 PM
#23
Staging Lane
Thread Starter
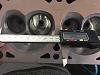
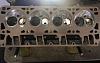
I picked up my 317 heads from the machine shop Friday. They were cleaned, valve job, upgraded springs, and supposed to be milled 0.030.
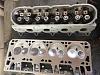
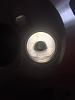
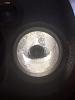
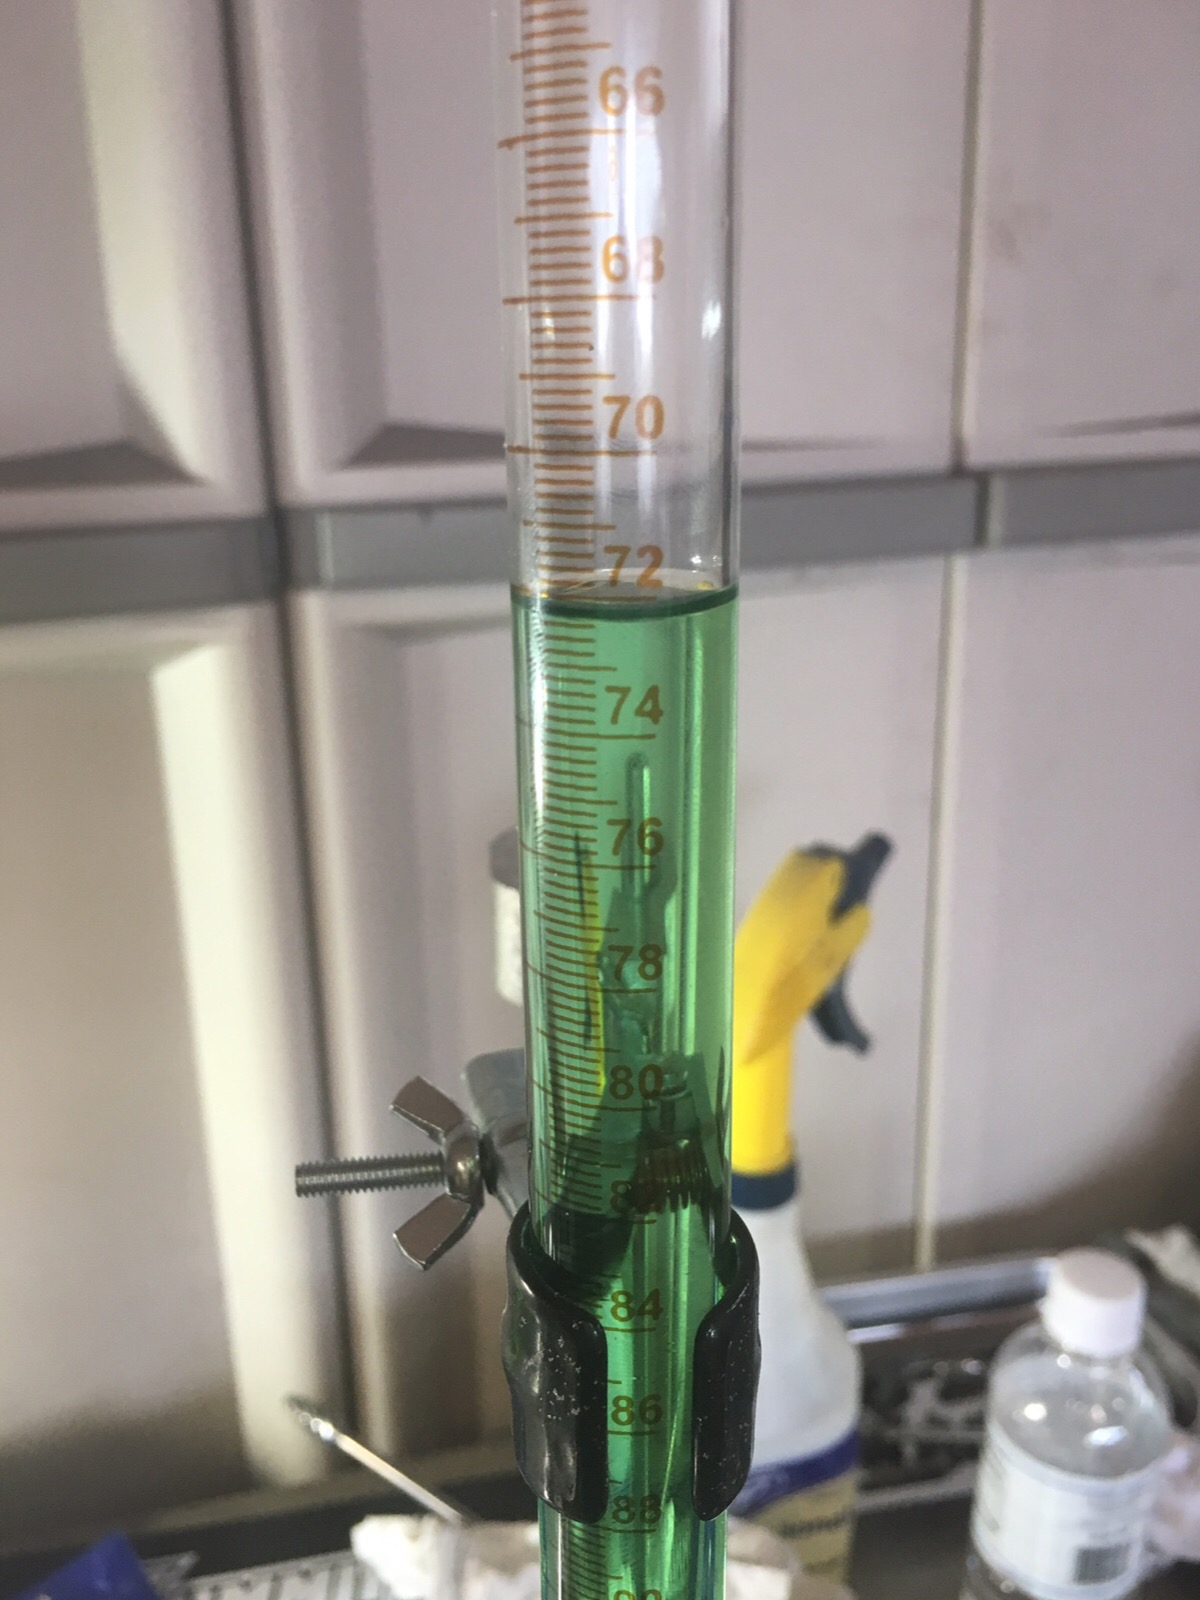
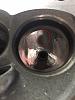
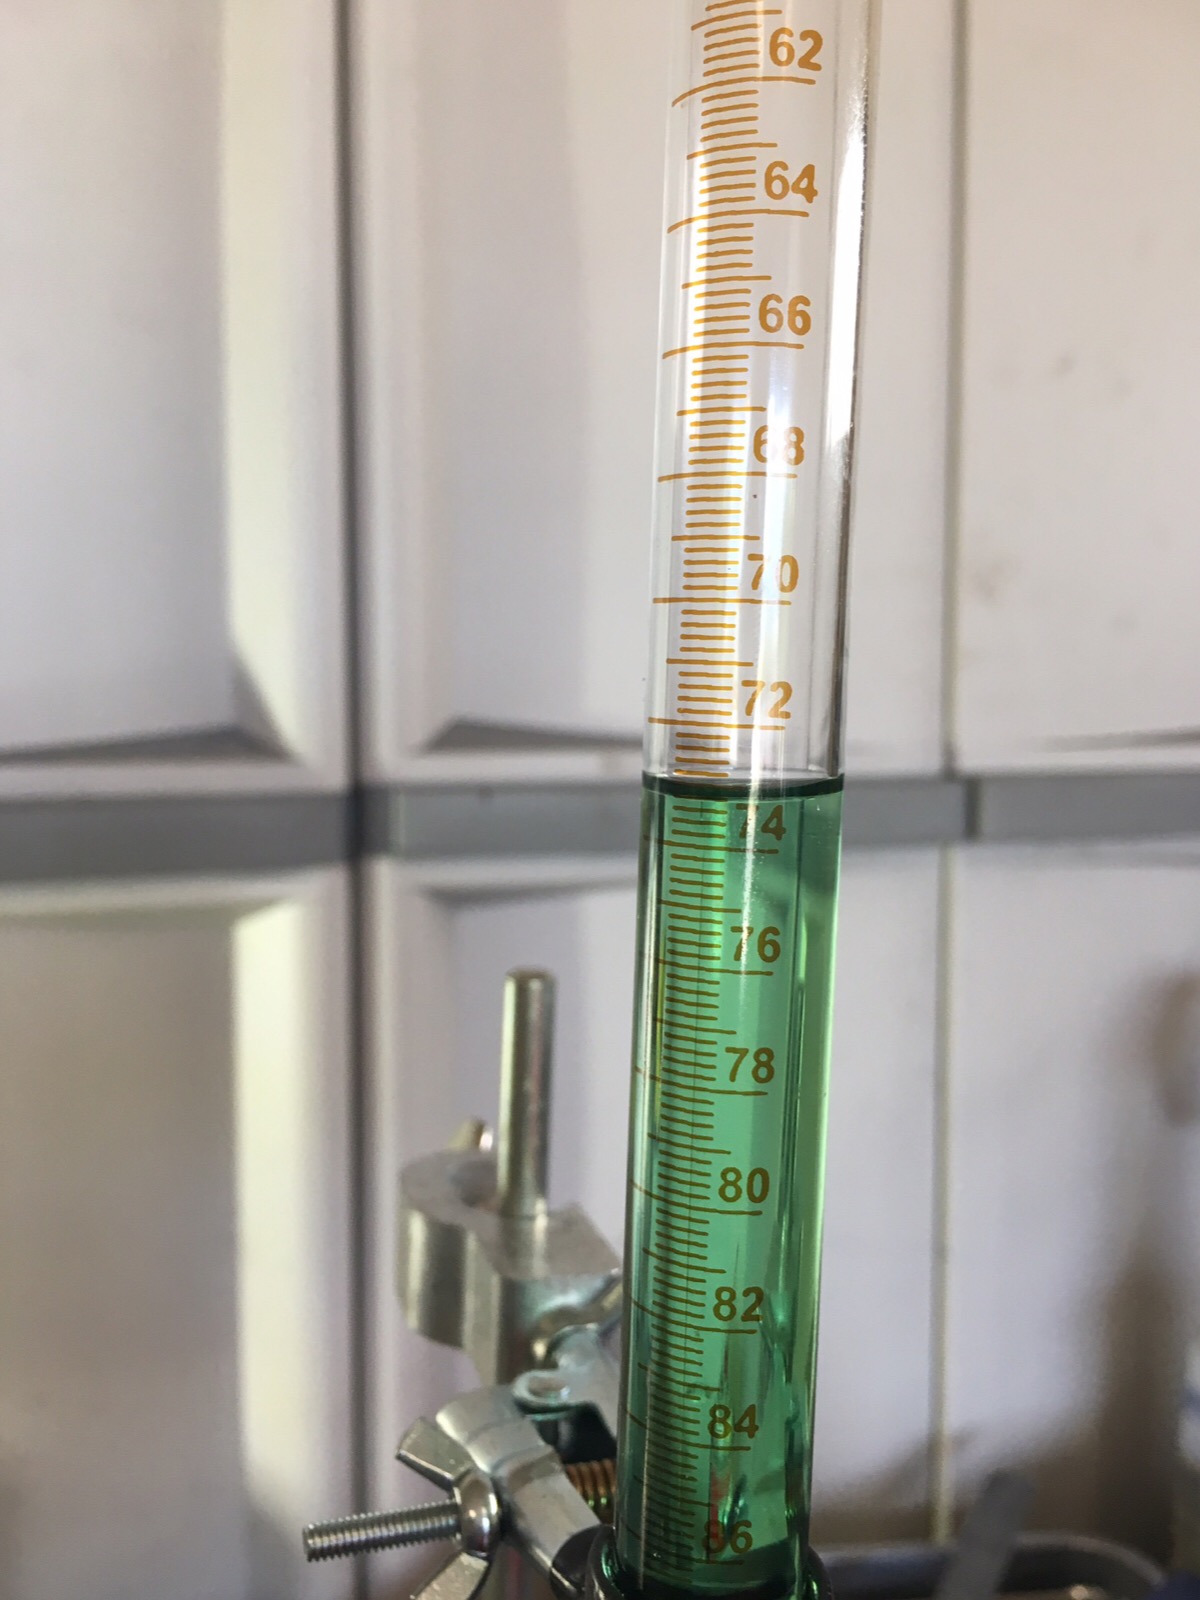
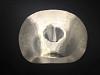
First thing this morning I checked the combustion chamber size.
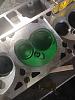
And here is the reading, 72cc's gotta go back for milling. Don't know why they forgot.

I was on the fence if I would actually decide to port them, I don't need the power, but since they have to be taken back to the machine shop anyway I decided to go ahead and try my hand. Rite of passage to be a hot rodder isn't it?
I have spent quite a few hours researching porting these heads. Since I don't have an extra head to chop up to find thicknesses I needed to see what others had done in key areas. Since repeatability is important I decided to tackle one step at a time and repeat for each cylinder. Today I didn't quite finish the valve side of the ports, and with the burr only. A good 8 hours in so far.
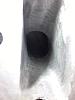
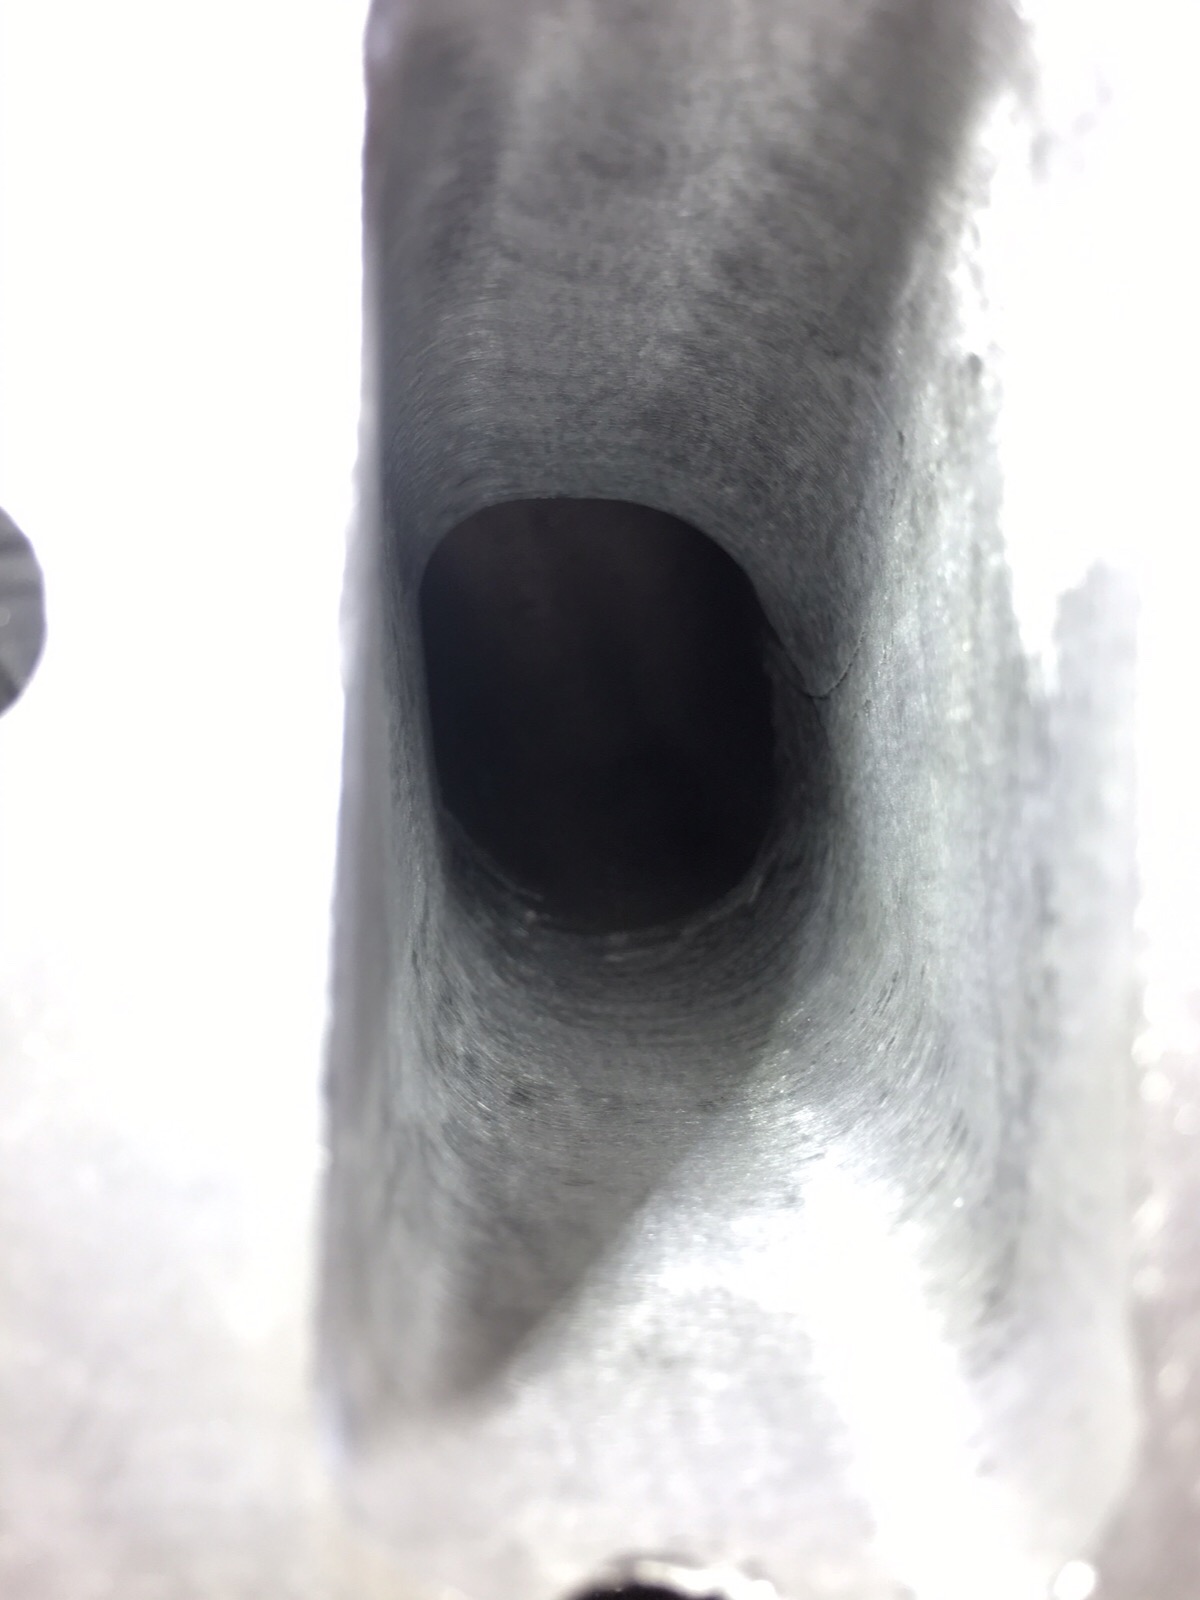
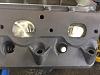
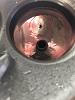
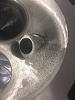
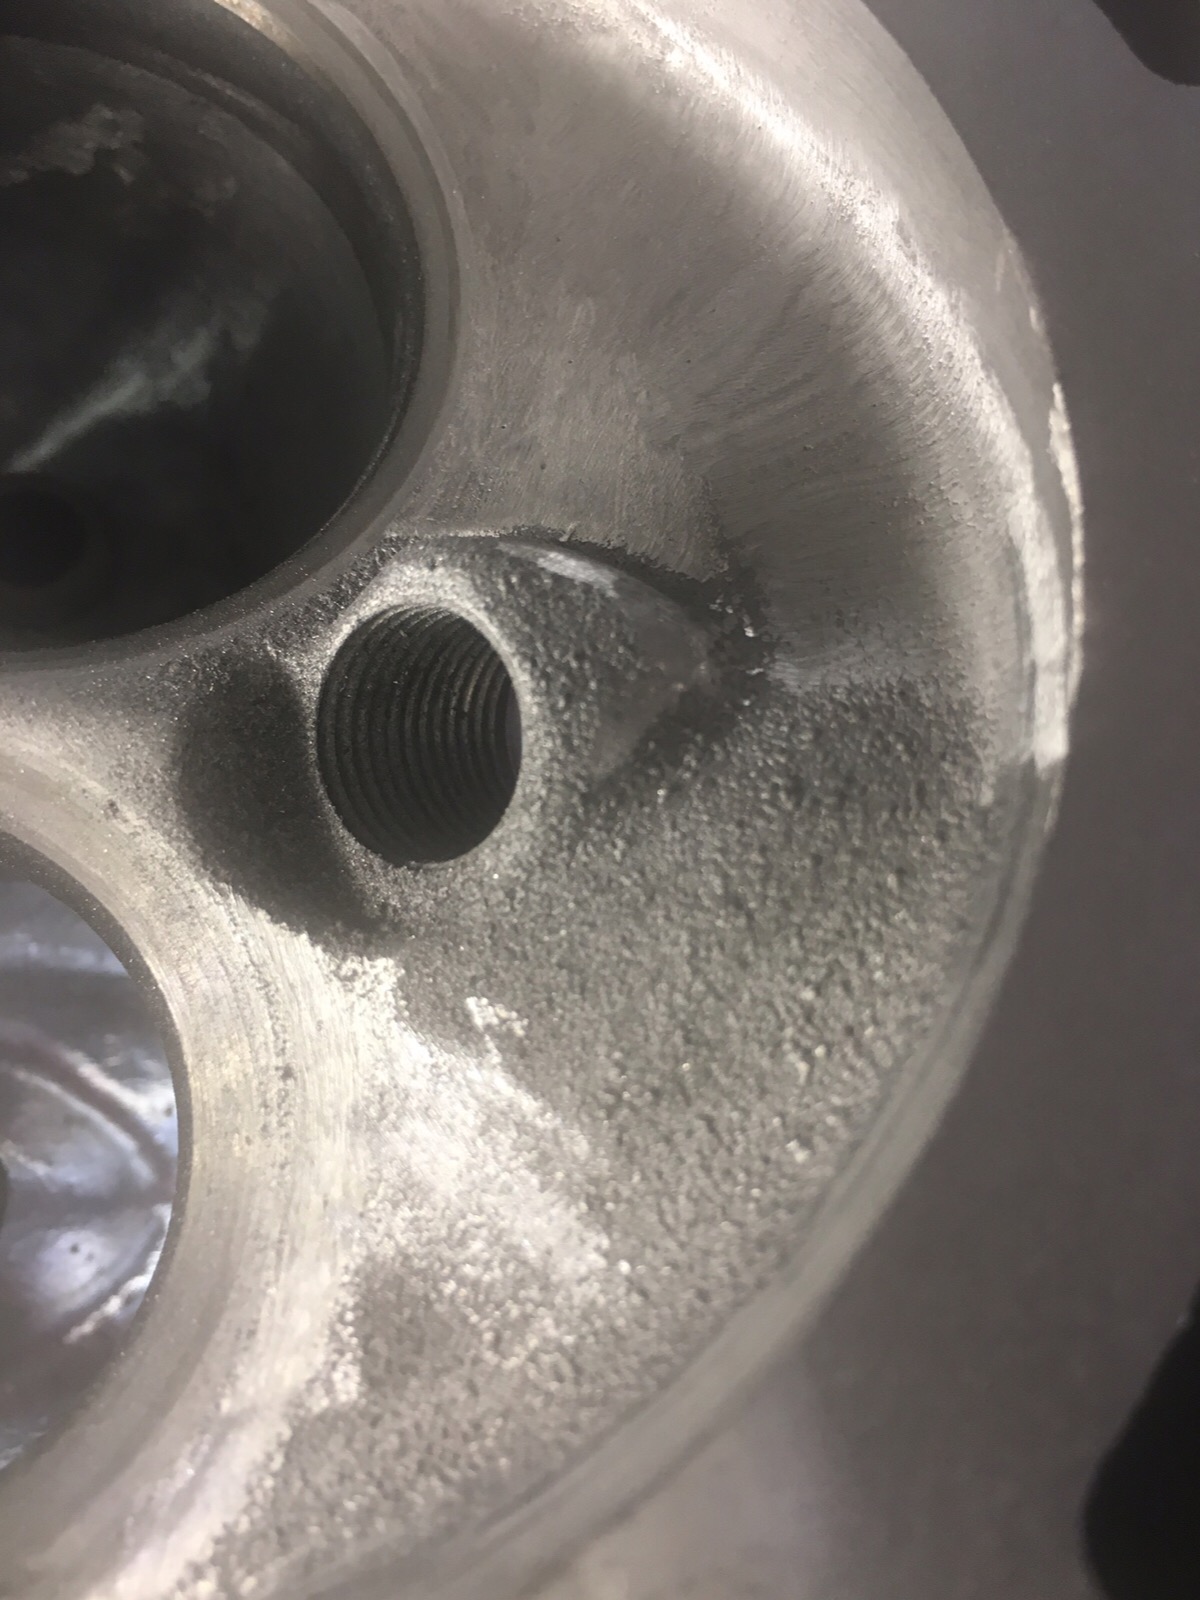
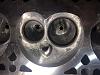
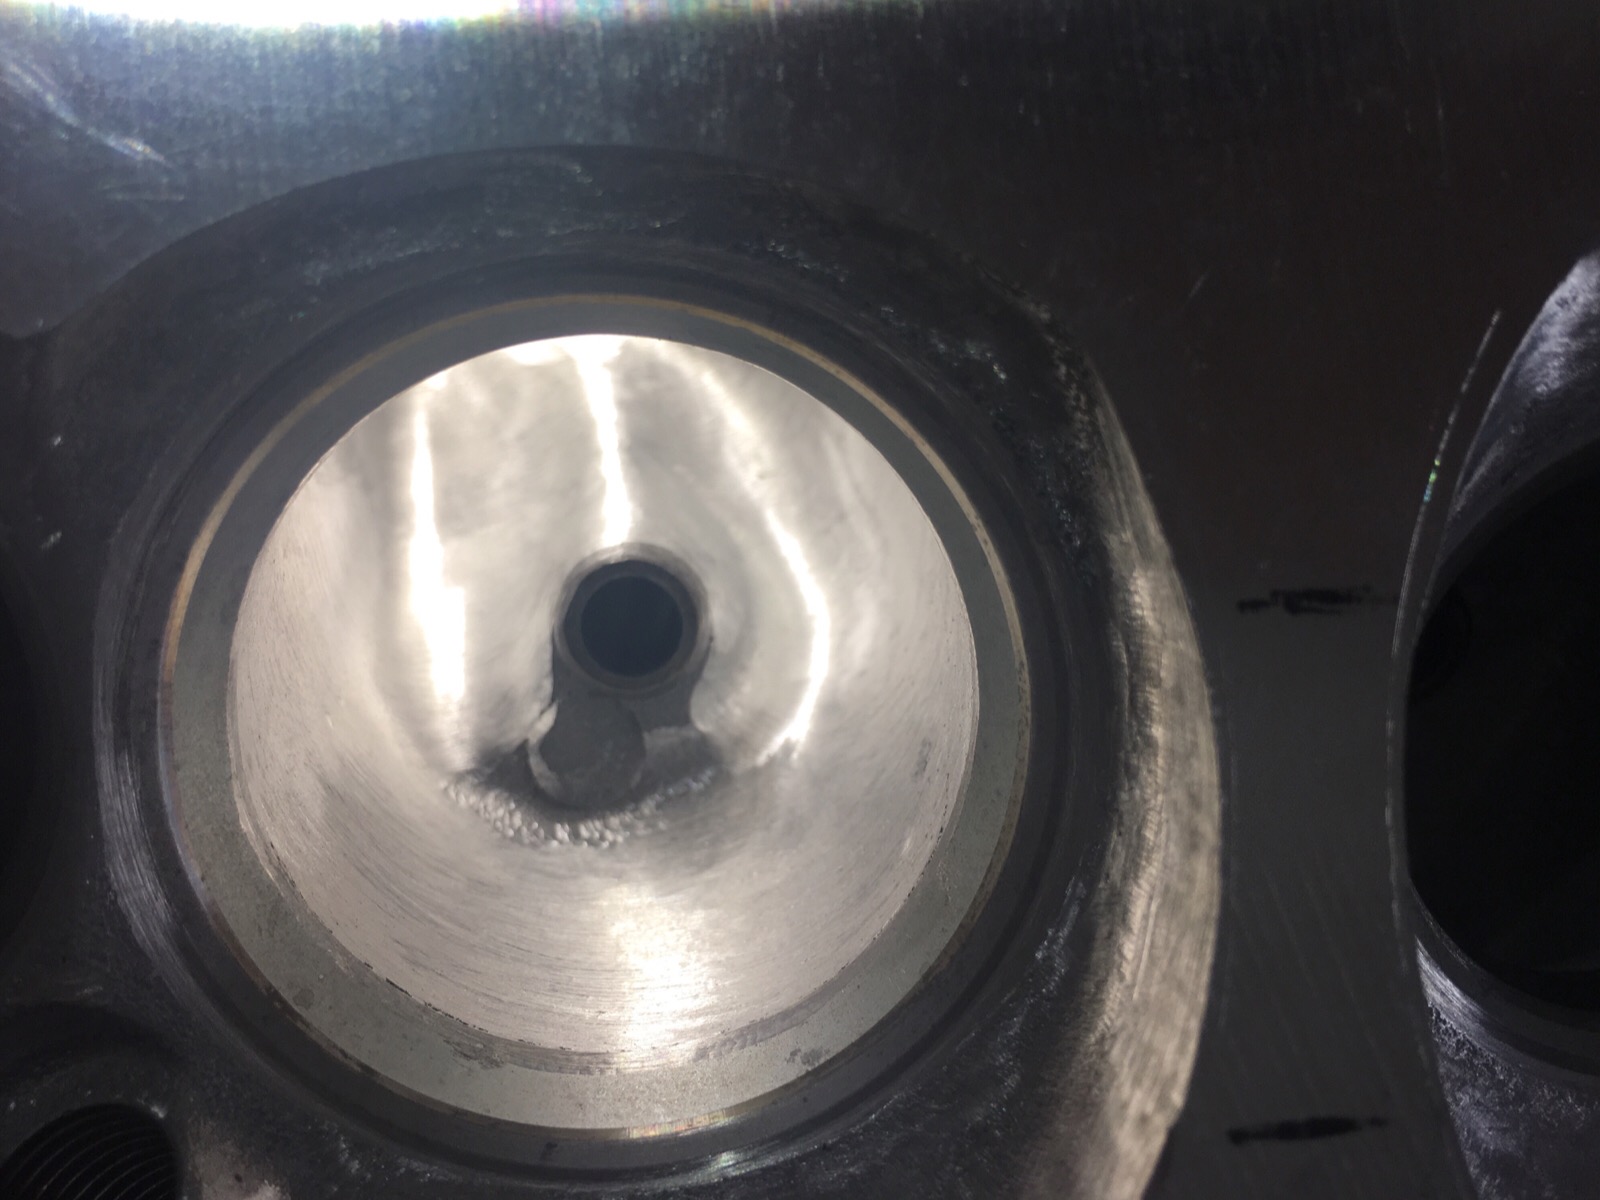
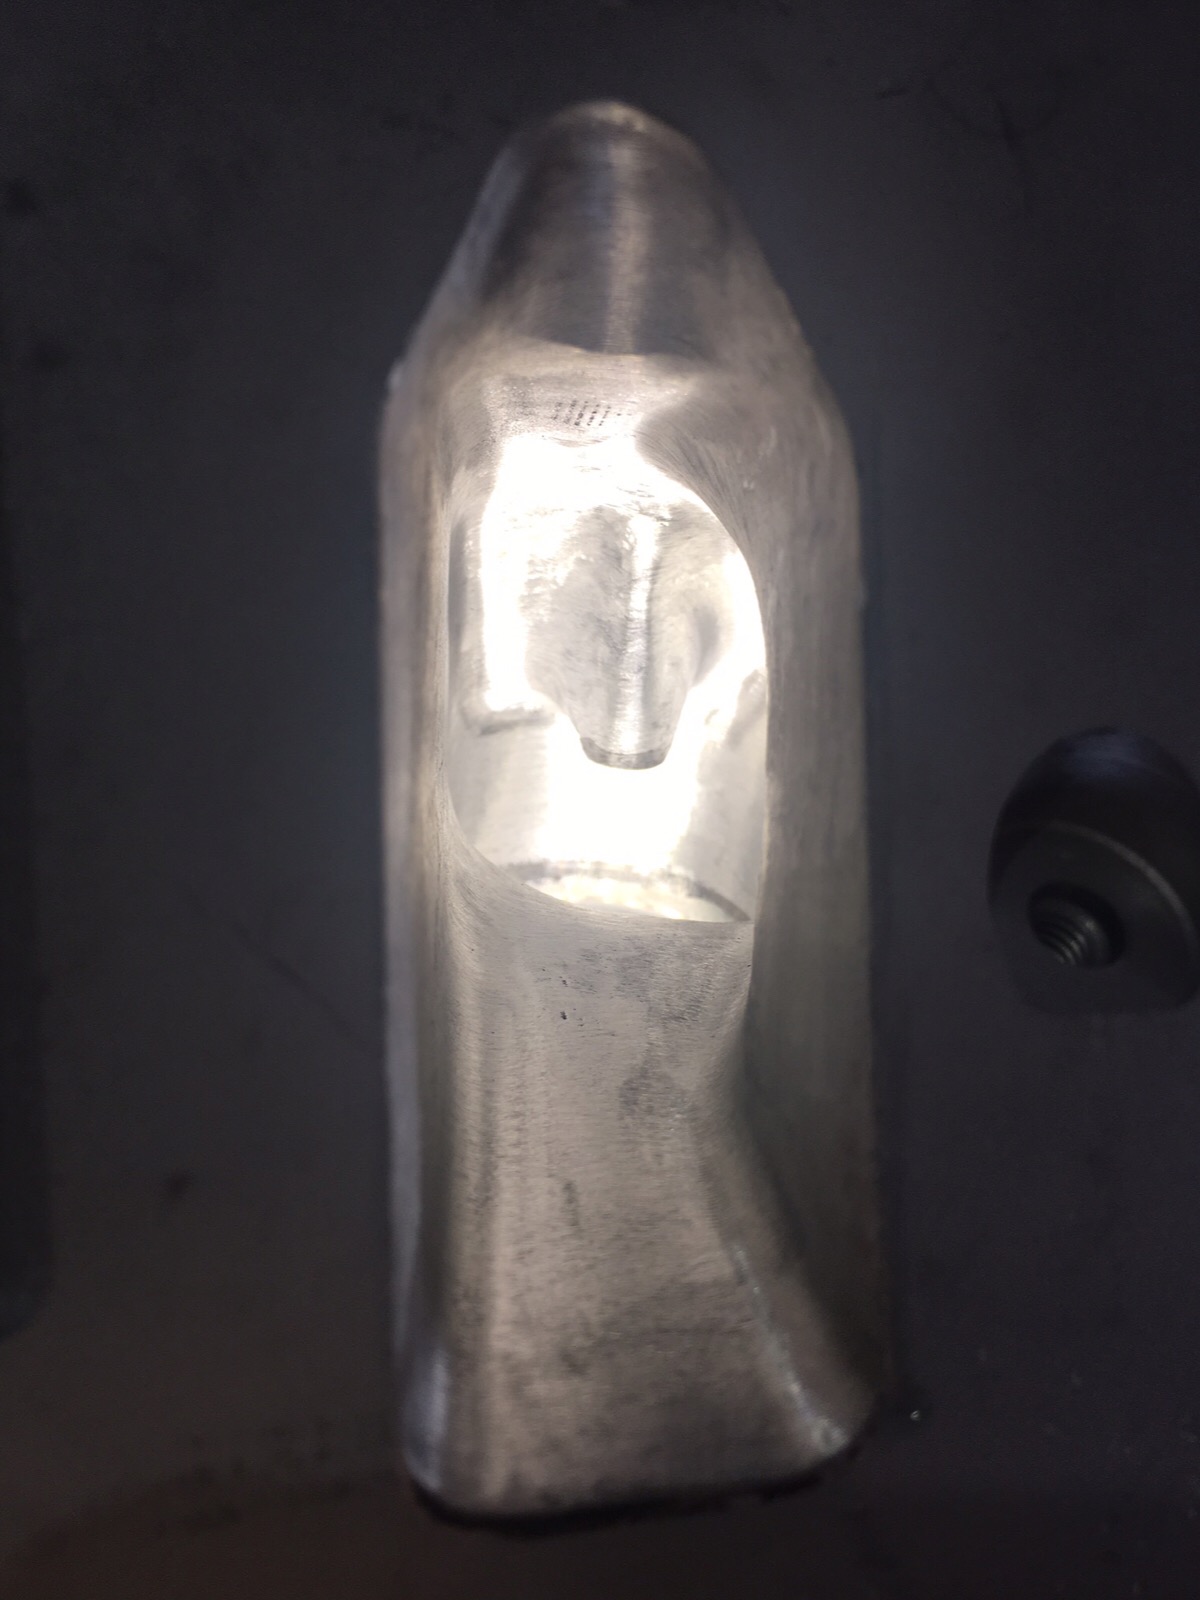
Here is the raw intake bowl.

Here I have the bowl to valve seat flushed and removed that big hump to the left of the valve guide and blended the bowl. I am mainly looking to remove bumps and smooth transitions, not increasing overall port size. So I'm not working deep enough to take out every seam and crack.
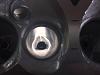
Here is the raw exhaust bowl
I have the bowl to valve seat flushed, removed the big hump and blended the bowl.
Hopefully I can get these done and back to the machine shop by Friday.

First thing this morning I checked the combustion chamber size.

And here is the reading, 72cc's gotta go back for milling. Don't know why they forgot.
I was on the fence if I would actually decide to port them, I don't need the power, but since they have to be taken back to the machine shop anyway I decided to go ahead and try my hand. Rite of passage to be a hot rodder isn't it?
I have spent quite a few hours researching porting these heads. Since I don't have an extra head to chop up to find thicknesses I needed to see what others had done in key areas. Since repeatability is important I decided to tackle one step at a time and repeat for each cylinder. Today I didn't quite finish the valve side of the ports, and with the burr only. A good 8 hours in so far.
Here is the raw intake bowl.

Here I have the bowl to valve seat flushed and removed that big hump to the left of the valve guide and blended the bowl. I am mainly looking to remove bumps and smooth transitions, not increasing overall port size. So I'm not working deep enough to take out every seam and crack.

Here is the raw exhaust bowl

I have the bowl to valve seat flushed, removed the big hump and blended the bowl.

Hopefully I can get these done and back to the machine shop by Friday.

 10-19-2016, 01:16 AM
#26
Staging Lane
Thread Starter
I know now why porting costs so much, takes too much time! On my heads I have blended the bowl to the valve seats, shaved the aluminum tight to the end of the valve guides, port matched exhaust and intake to the headers and manifold, and removed the valve train bolt hump in the intake port. At this point everything is roughed in with the burr and ready to sand. I'll be using 60 grit rolls for both the intake and exhaust and then further sand the exhaust with 120 grit. I have 16 hours in so far as a reference.
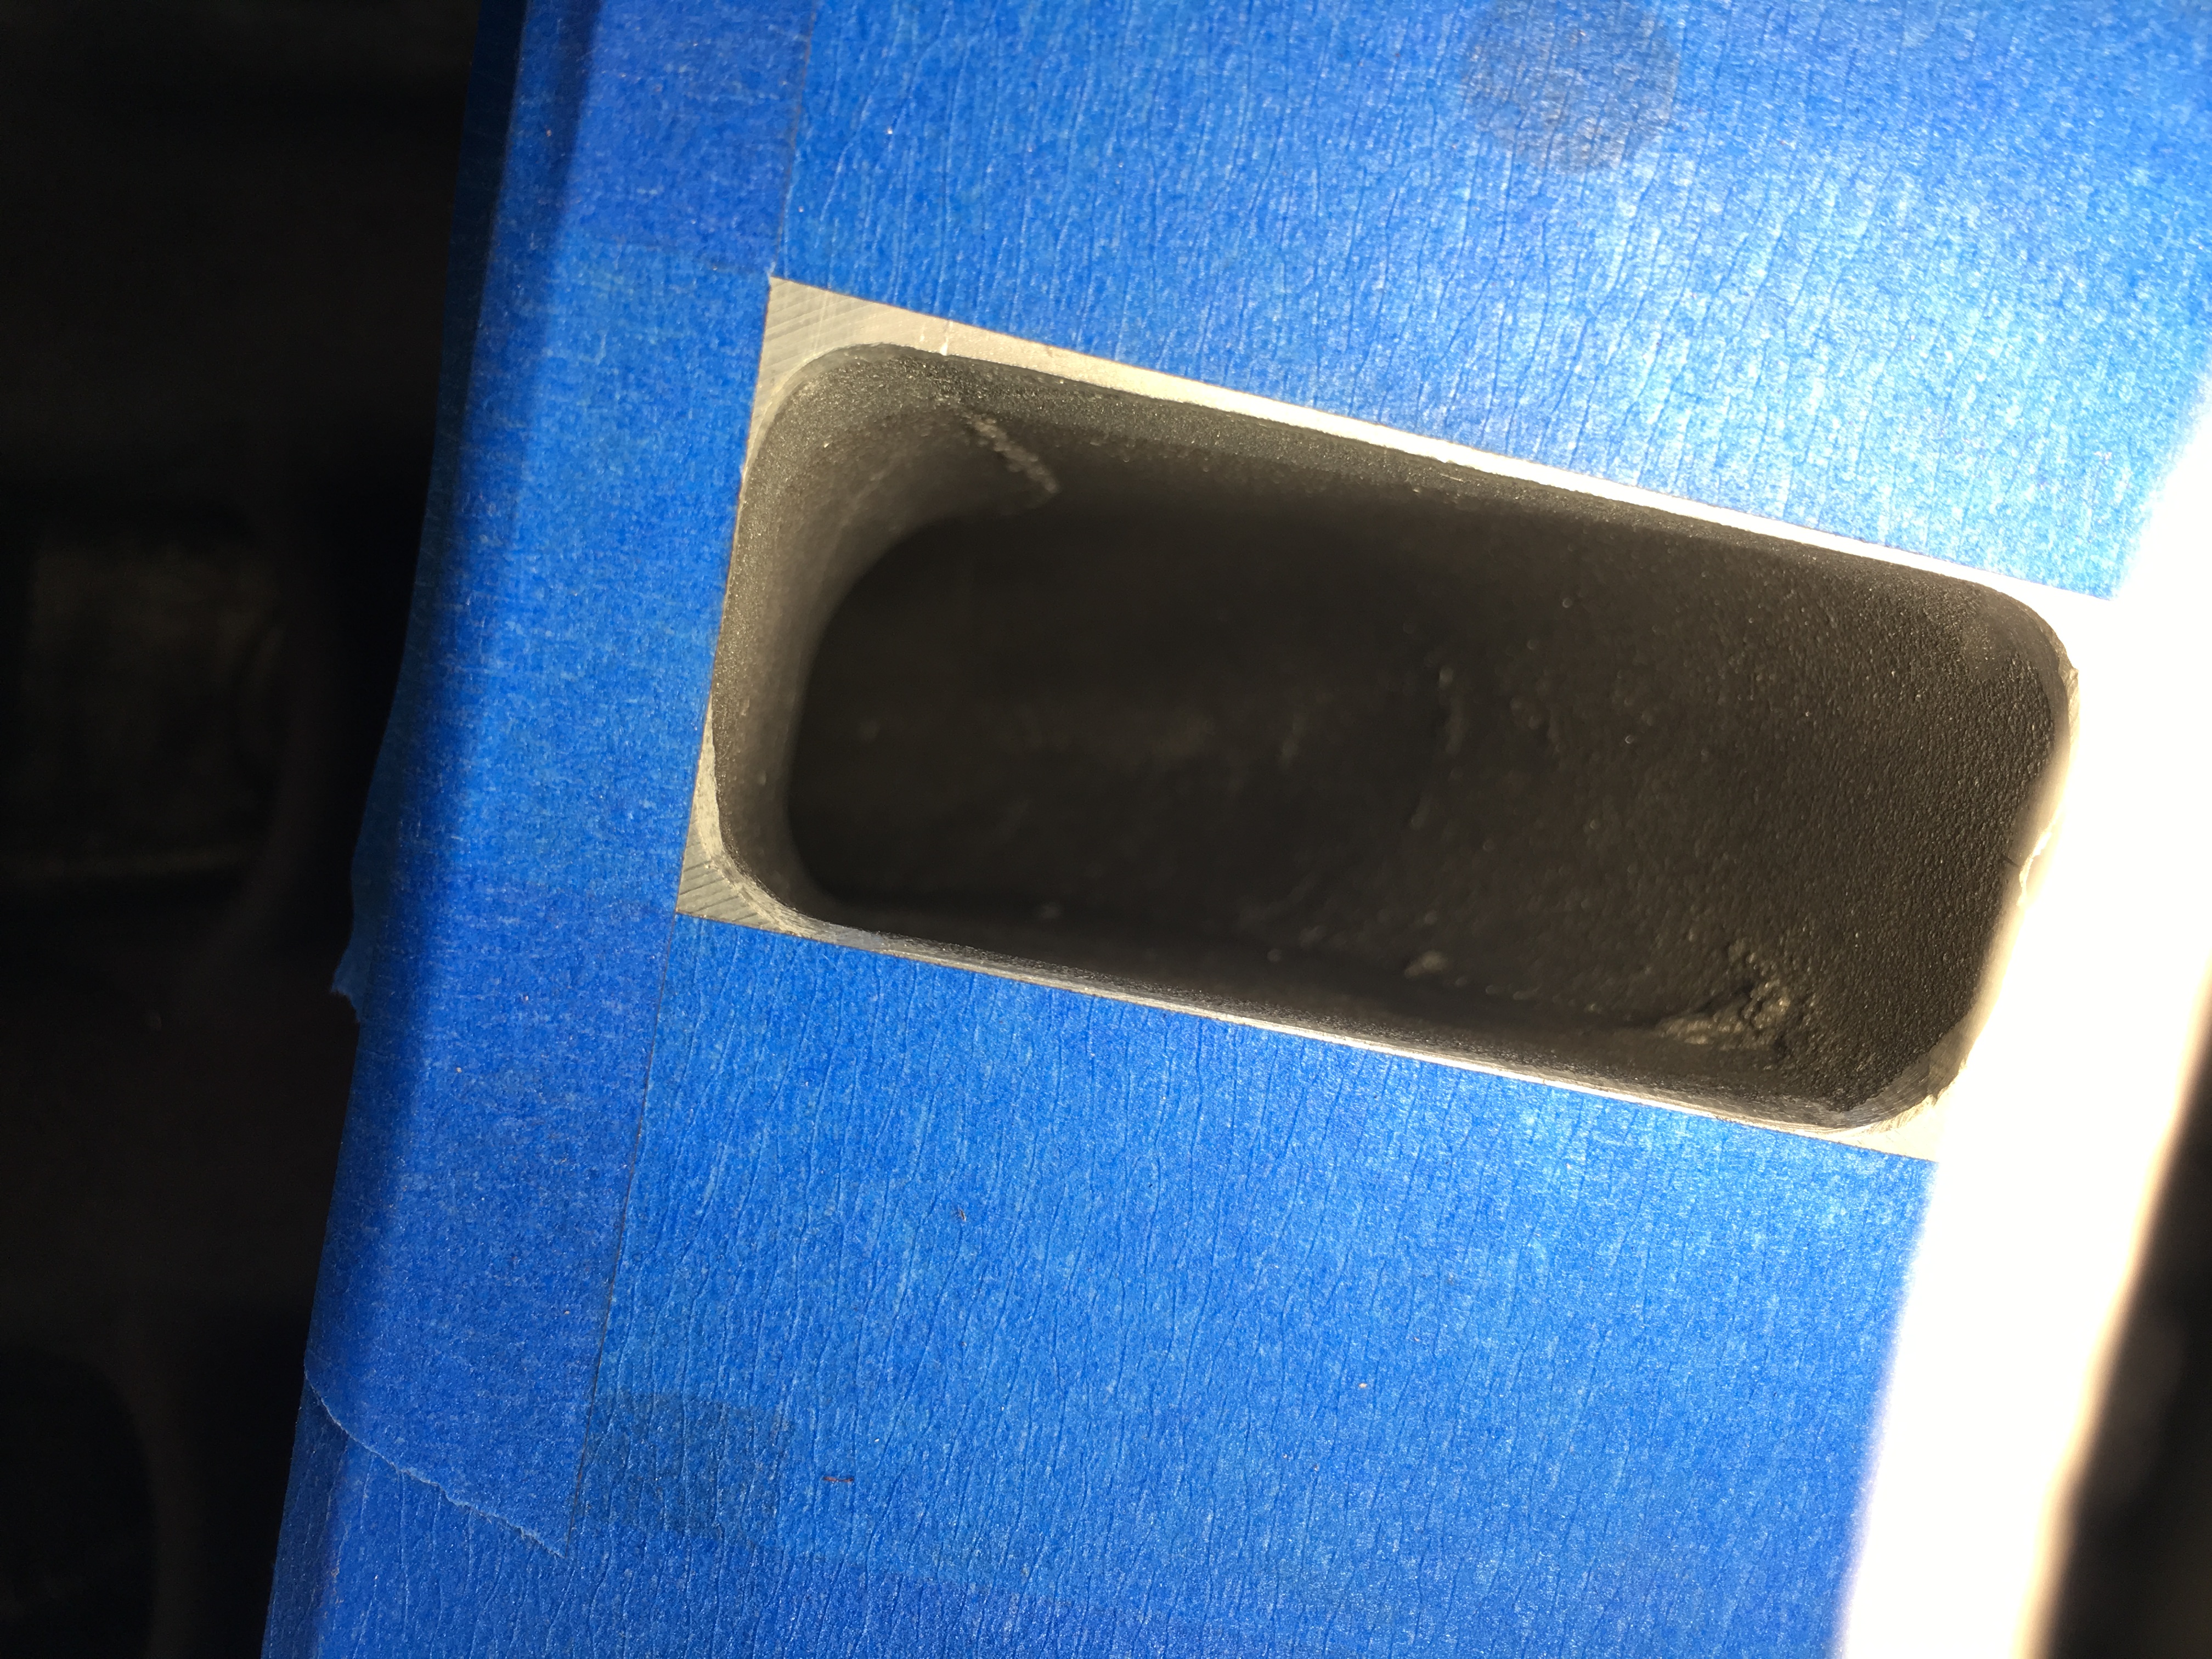
One item that I hadn't read anywhere before is that the intake ports are not square with the head. It does however align with the factory intake manifold. My aftermarket manifold ports are square to the heads. The factory manifold/head port is 1" wide, the aftermarket is 1 1/8" wide. Took me a bit of measuring to determine a point to line up by, hope I'm close. The aluminum walls in this area a fairly thin, so not much room to widen the actual port, so I tapered the wider face back only about 1". The lower head of the pair has had the ports straightened and matched for reference.
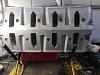
One item that I hadn't read anywhere before is that the intake ports are not square with the head. It does however align with the factory intake manifold. My aftermarket manifold ports are square to the heads. The factory manifold/head port is 1" wide, the aftermarket is 1 1/8" wide. Took me a bit of measuring to determine a point to line up by, hope I'm close. The aluminum walls in this area a fairly thin, so not much room to widen the actual port, so I tapered the wider face back only about 1". The lower head of the pair has had the ports straightened and matched for reference.


 10-22-2016, 02:01 AM
#27
Staging Lane
Thread Starter
I can't believe how much time I'm spending on these heads! I have a whole car to build and I'm spending two weekends and a week of evenings on this. I think I have 20 hours in so far.
Hopefully tomorrow I can complete and be able to drop the heads off back at the machine shop for milling on Monday.
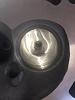
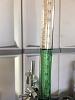
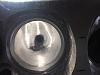
Since I have finished roughing in the ports with the burrs I figured I try detailing out the combustion chamber before I got into sanding with the tootsie rolls. Since I have bored out the block by 30 thou I have at least that much room to unshroud the valves. So I scribbed the deck face with the outline of the head gasket (4.070) for a reference and proceeded to clean up the sides next to the valves up to the new bore size of 4.030.
The actual stock width of the bore in the heads is 3.96, with a good amount of taper down to the valve. I started to question my decision to unshroud the valves after I saw how much material I was taking off with the dremel. But since I had done one chamber I was stuck doing the the other 7.
I read where the chambers are not typically touched or polished due to any material that comes off decreases the compress ratio, which obviously makes sense, but by how much? But doesn't all the effort that's put into building the engine boil down to what happens in the combustion chamber?
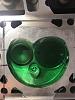
The chambers are extremely rough, beyond 20 grit paper rough. So very carefully I started cleaning them with 120 grit tootsie rolls. That's as far as I'm going to take mine. But major difference.
Then to see what all my whittling did to the size of the chamber I measured them again. After the valve job, but before any mods they measured 72cc, after the unshrouding and polishing they measure 73cc. Not much of a change, but to make up for it I think I'll increase the milling to 40 thou.
All complaining aside, I have enjoyed getting my hands in there. I can't imagine that my time has not made a positive impact. I've got to check to see if I can get at least one cylinder checked for flow numbers for at least a reference.
Hopefully tomorrow I can complete and be able to drop the heads off back at the machine shop for milling on Monday.
Since I have finished roughing in the ports with the burrs I figured I try detailing out the combustion chamber before I got into sanding with the tootsie rolls. Since I have bored out the block by 30 thou I have at least that much room to unshroud the valves. So I scribbed the deck face with the outline of the head gasket (4.070) for a reference and proceeded to clean up the sides next to the valves up to the new bore size of 4.030.
The actual stock width of the bore in the heads is 3.96, with a good amount of taper down to the valve. I started to question my decision to unshroud the valves after I saw how much material I was taking off with the dremel. But since I had done one chamber I was stuck doing the the other 7.

I read where the chambers are not typically touched or polished due to any material that comes off decreases the compress ratio, which obviously makes sense, but by how much? But doesn't all the effort that's put into building the engine boil down to what happens in the combustion chamber?
The chambers are extremely rough, beyond 20 grit paper rough. So very carefully I started cleaning them with 120 grit tootsie rolls. That's as far as I'm going to take mine. But major difference.
Then to see what all my whittling did to the size of the chamber I measured them again. After the valve job, but before any mods they measured 72cc, after the unshrouding and polishing they measure 73cc. Not much of a change, but to make up for it I think I'll increase the milling to 40 thou.

All complaining aside, I have enjoyed getting my hands in there. I can't imagine that my time has not made a positive impact. I've got to check to see if I can get at least one cylinder checked for flow numbers for at least a reference.
10-23-2016, 10:27 PM
#28
Staging Lane
Thread Starter
After 9 hours on Saturday and 4 hours today, for a total of about 33 hours I think I'm done porting. The intake path was final sanded with 60 grit tootsie rolls and the exhaust path was first sanded with 60 grit and then final sanded with 120 grit tootsie rolls.
Then I scrubbed them down good with soap and water, used a pipe cleaner to chase the valve guides and blew everything dry.
Wrappped up and ready to drop back off at the machine shop in the morning.

Then I scrubbed them down good with soap and water, used a pipe cleaner to chase the valve guides and blew everything dry.
Wrappped up and ready to drop back off at the machine shop in the morning.


The following users liked this post:
djr48312 (01-13-2024)
10-25-2016, 12:37 AM
#29
Staging Lane
Thread Starter
I dropped off the heads at the machine shop today, again. But maybe worked out for me as I decided to have them milled .040 to make up for the 1cc I removed from the combustion chambers.
Here is the math for the compression ratio. When I checked the volume of the combustion chambers after I was done they measured 73 cc's. The pistons I ordered spec that with 64cc the ratio is 10.8, 71cc the ratio is 10.0. If it's true that for every .006 removed it changes the volume by 1cc, then removing .040 drops the volume by 6.66. Final guess at this point then is 66.34 cc's. Using the two piston spec ratio's as a guide I should be between 10.5-10.6/1.
Am I close?
The block is done and they were finishing up the balance on the rotating assembly today. All should be ready to pick up Wednesday. I should be spending my weekend assembling.
I picked up the transmission today from being rebuilt and with some mild upgrades.
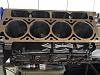
Then I decided that since I gave porting love to the intake manifold and the heads I might as well spend some time on the exhaust manifolds. The manifolds I purchased are the Hooker block hugger cast iron manifolds/headers. They are rated for up to 500HP and I chose the ones with titanium ceramic finish.
I chose them as they dump the exhaust in the best location for my build and are tight to the block since I have a narrow engine bay.
The manifolds overall are nicely made, but the ports all vary a bit. On the heads I ported about 1/16" minimum smaller all around the gasket. On the manifold I went to the gasket side to side and matched what I did on the heads top and bottom. Since these are block huggers, the downturn is pretty drastic. So I port matched and blended back about 3/4" and then cleaned up as fas as the burr would reach and then gave it a once over with a 60 grit tootles roll.
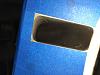
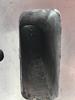
Here is the raw ports with the gasket scribe line.
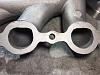
Here is a comparison between ported and unported.
Here is the math for the compression ratio. When I checked the volume of the combustion chambers after I was done they measured 73 cc's. The pistons I ordered spec that with 64cc the ratio is 10.8, 71cc the ratio is 10.0. If it's true that for every .006 removed it changes the volume by 1cc, then removing .040 drops the volume by 6.66. Final guess at this point then is 66.34 cc's. Using the two piston spec ratio's as a guide I should be between 10.5-10.6/1.
Am I close?
The block is done and they were finishing up the balance on the rotating assembly today. All should be ready to pick up Wednesday. I should be spending my weekend assembling.
I picked up the transmission today from being rebuilt and with some mild upgrades.
Then I decided that since I gave porting love to the intake manifold and the heads I might as well spend some time on the exhaust manifolds. The manifolds I purchased are the Hooker block hugger cast iron manifolds/headers. They are rated for up to 500HP and I chose the ones with titanium ceramic finish.
I chose them as they dump the exhaust in the best location for my build and are tight to the block since I have a narrow engine bay.
The manifolds overall are nicely made, but the ports all vary a bit. On the heads I ported about 1/16" minimum smaller all around the gasket. On the manifold I went to the gasket side to side and matched what I did on the heads top and bottom. Since these are block huggers, the downturn is pretty drastic. So I port matched and blended back about 3/4" and then cleaned up as fas as the burr would reach and then gave it a once over with a 60 grit tootles roll.
Here is the raw ports with the gasket scribe line.

Here is a comparison between ported and unported.
 10-27-2016, 10:03 PM
#30
Staging Lane
Thread Starter
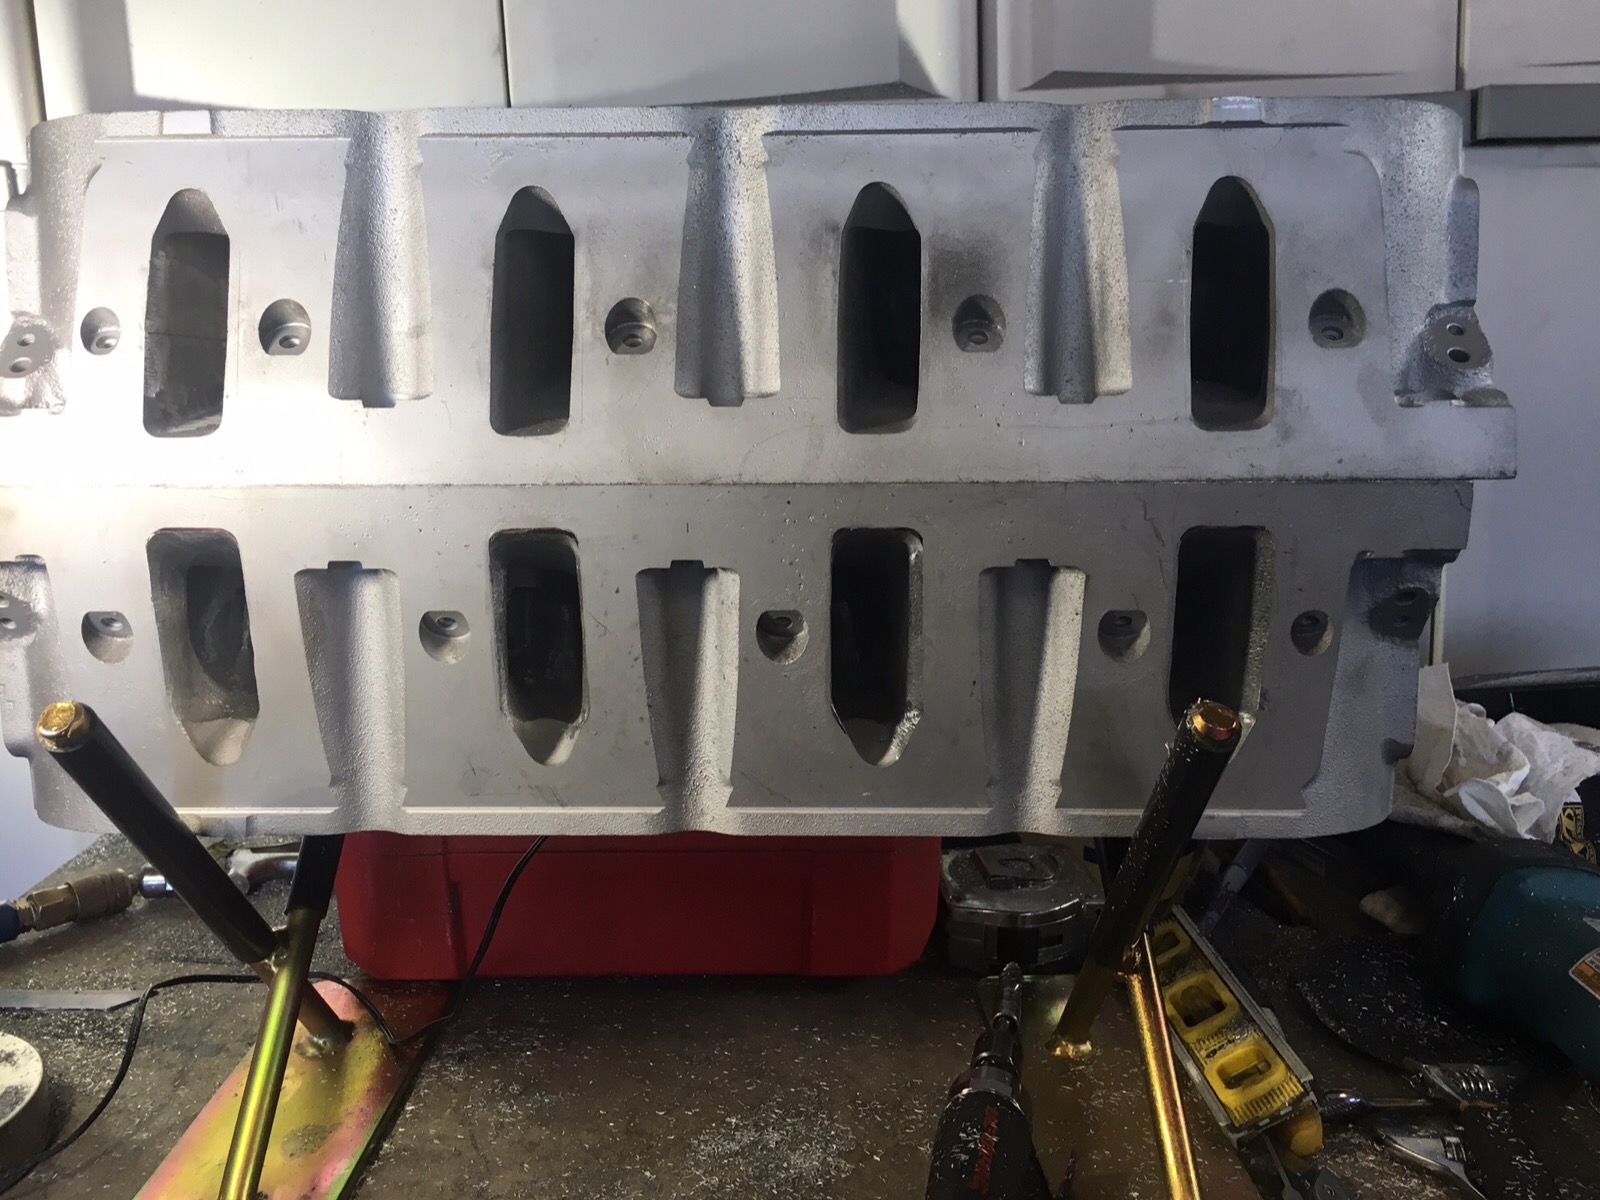
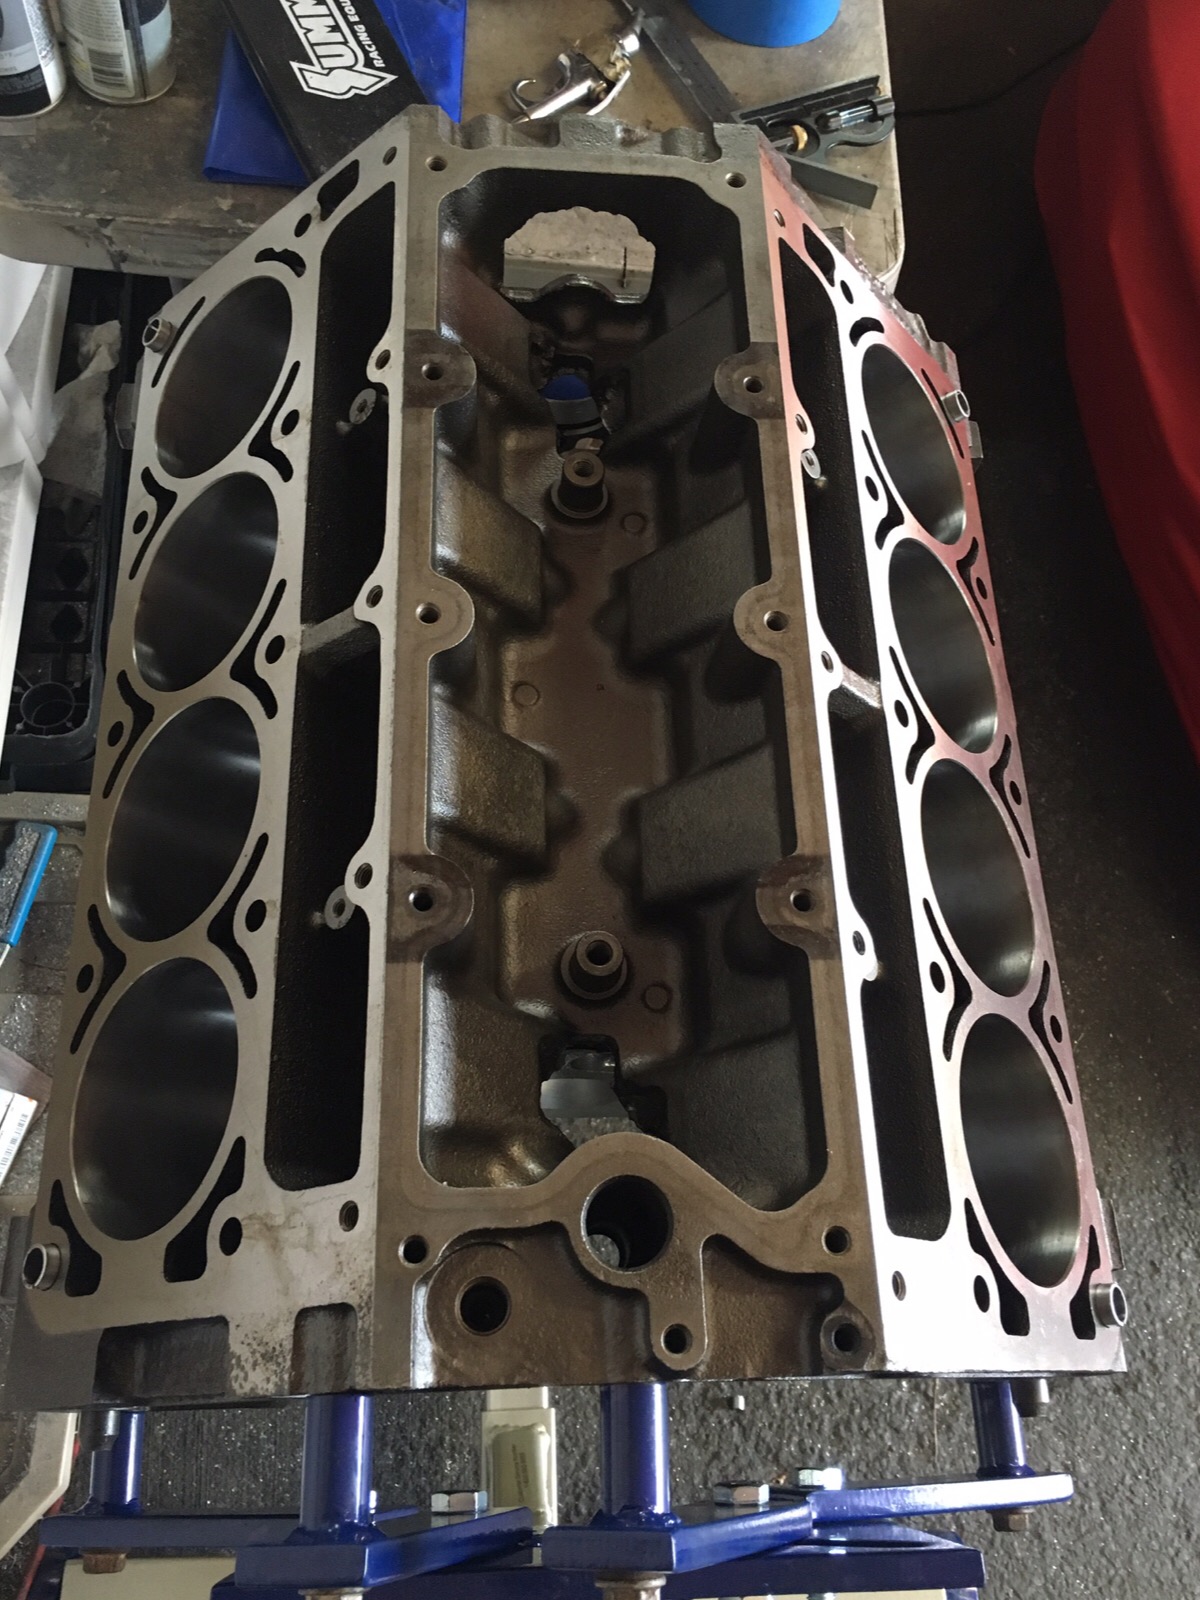
The block is home and on the engine stand. The heads and rotating assembly still isn't ready. Promised for Monday now. I guess I'll spend this weekend organizing parts, cleaning and painting, to get ready for assembly. It's not like I don't have plenty to work on but I excited about building up the short block this weekend.
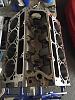
The nasty rusty block cleaned up pretty good!

The nasty rusty block cleaned up pretty good!
10-29-2016, 08:59 PM
#31
Staging Lane
Thread Starter
Since I couldn't start building up the short block this weekend I spent a little time online shopping for some odd and end parts, and cleaning/painting up some of the existing parts.

 10-30-2016, 11:21 AM
#32
Since I couldn't start building up the short block this weekend I spent a little time online shopping for some odd and end parts, and cleaning/painting up some of the existing parts.
Attachment 555817
Attachment 555818
Attachment 555817
Attachment 555818
10-30-2016, 03:01 PM
#33
Staging Lane
Thread Starter
I would be worried about not enclosing the TC here in Hawaii. Besides the fact that we drive the island and park at the beach, there is always sand getting everywhere.
I have this oil cooler from B&M that has worked well for me on my last two Jeep builds that I will also be using on this build to control trans fluid temps.
I have just a stock Chevy 4.8 Vortec in my Wrangler now. Nothing crazy and only 33" tires, but with regular around town driving the fan on the oil cooler rarely comes on.
But good to know there is another option if I can't control temps.
 10-30-2016, 03:05 PM
#34
Staging Lane
Thread Starter
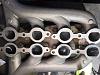
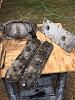
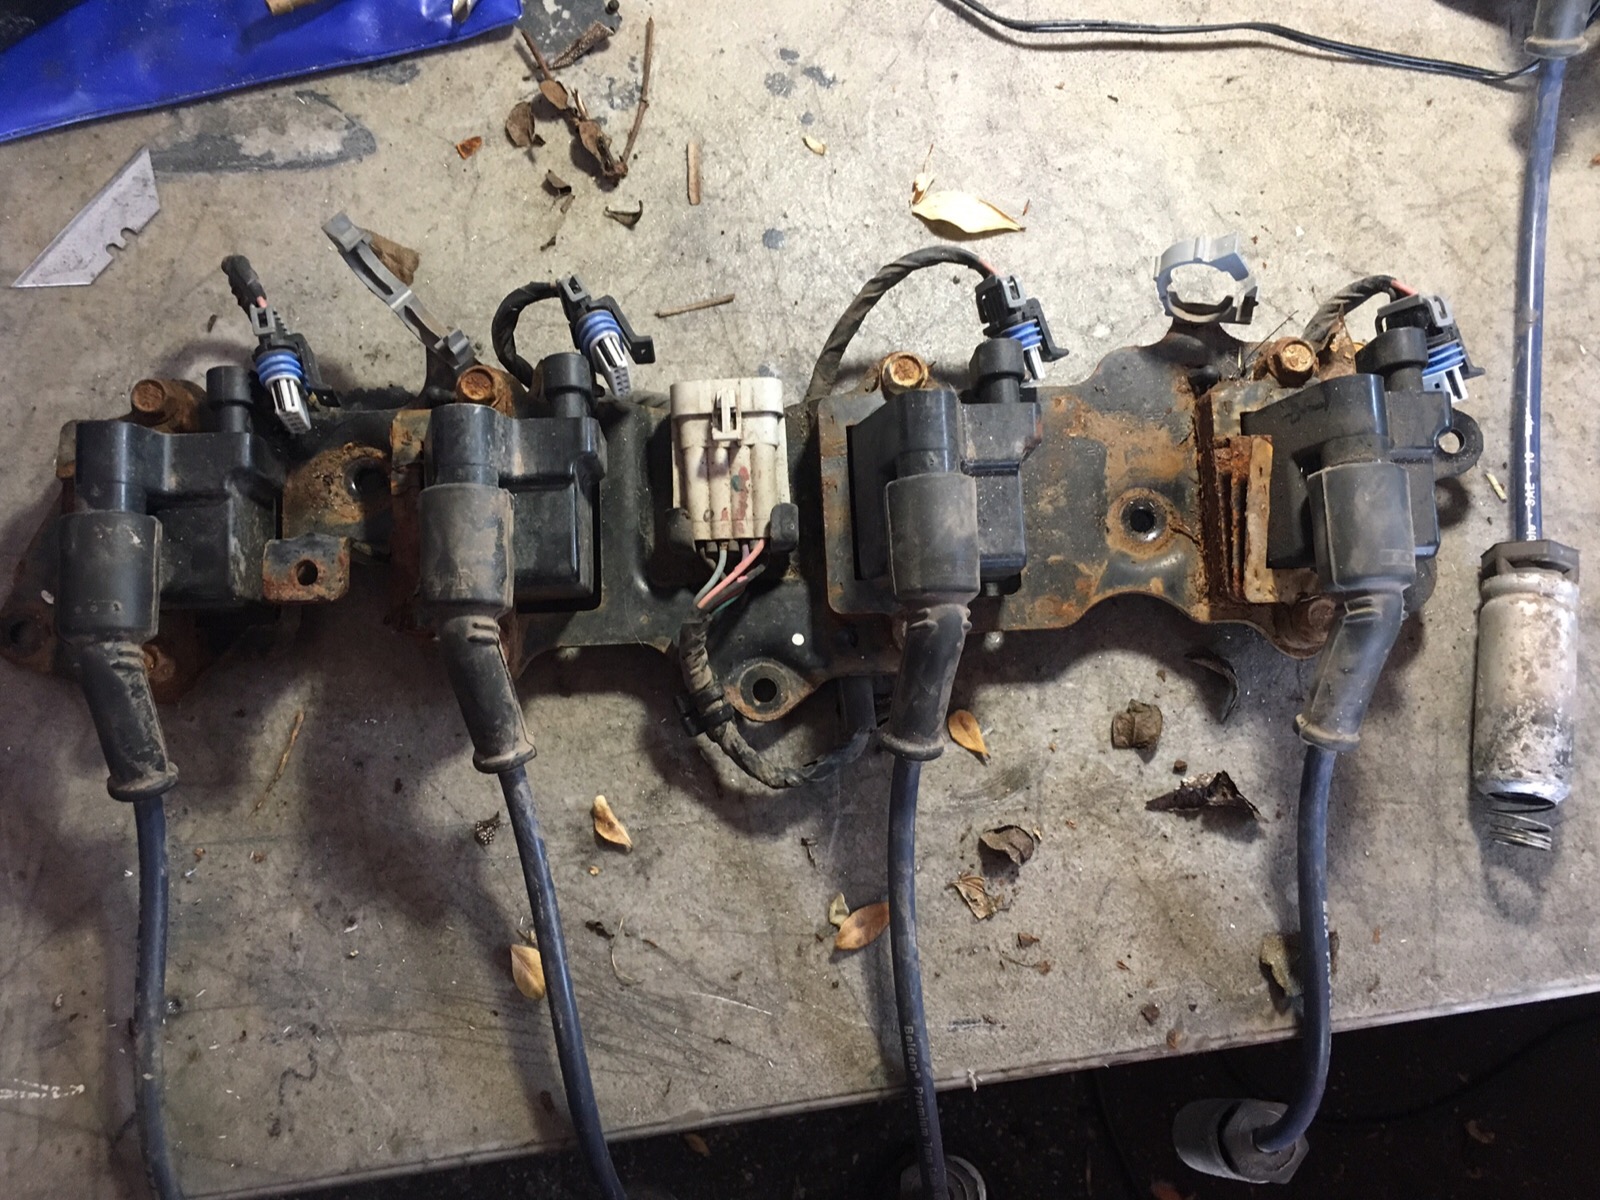
Finished cleaning up the coil pack assembly this morning. This engine came out of NY and has a lot of rust issues unfortunately.
Cleaned up and painted the brackets, cleaned the wire harness and replaced the coil packs.
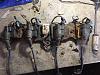
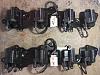
Cleaned up and painted the brackets, cleaned the wire harness and replaced the coil packs.
 11-01-2016, 10:04 PM
#36
Staging Lane
Thread Starter
TJ/LS3, sorry, no build threads on those. Probably wouldn't be much help anyway. My first one was a 1979 Full Size Jeep that I bored and stroked a 401 to 418 with Barry Allen heads, 10.5:1 compression, roller rockers, cam, etc. The one I have now is a YJ with a stock 4.8 Vortec. Conversion parts I purchased from Novak.
11-01-2016, 10:08 PM
#37
Staging Lane
Thread Starter
Machine shop still not done with the balance, so tonight I assembled the intake manifold, injectors, throttle body and fuel rails.
Nice and shiny and ready to go.
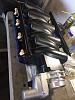
Nice and shiny and ready to go.
 11-03-2016, 10:29 PM
#38
Staging Lane
Thread Starter
Sometimes it's frustrating living in Hawaii, limited competition and slower pace. Machine Shop still not done balancing. They say they are really going to try and finish in the morning so I have the weekend to assemble.
So yesterday I started installing new brake lines on the car with the parts that have arrived so far.
On my previous builds I've farmed out the exhaust system. Since I try to expand my abilities and learn with each build, I thought this would be a perfect project to start with. Since there are a few different ways to connect the piping, like expanding one side and clamping, welding, etc., I wanted to try welding since it's obviously less costly and more flexible.
The Hooker exhaust manifolds I purchased have 1 5/8" primaries and 2 1/4" collector. I will upsize to 2 1/2" at the connection and the rest of the way. I wanted to have a crossover located just after the trans, but I didn't really like the price, design, and/or build of the readily available crossovers. So I figured making a crossover would give me a chance to try out welding stainless.
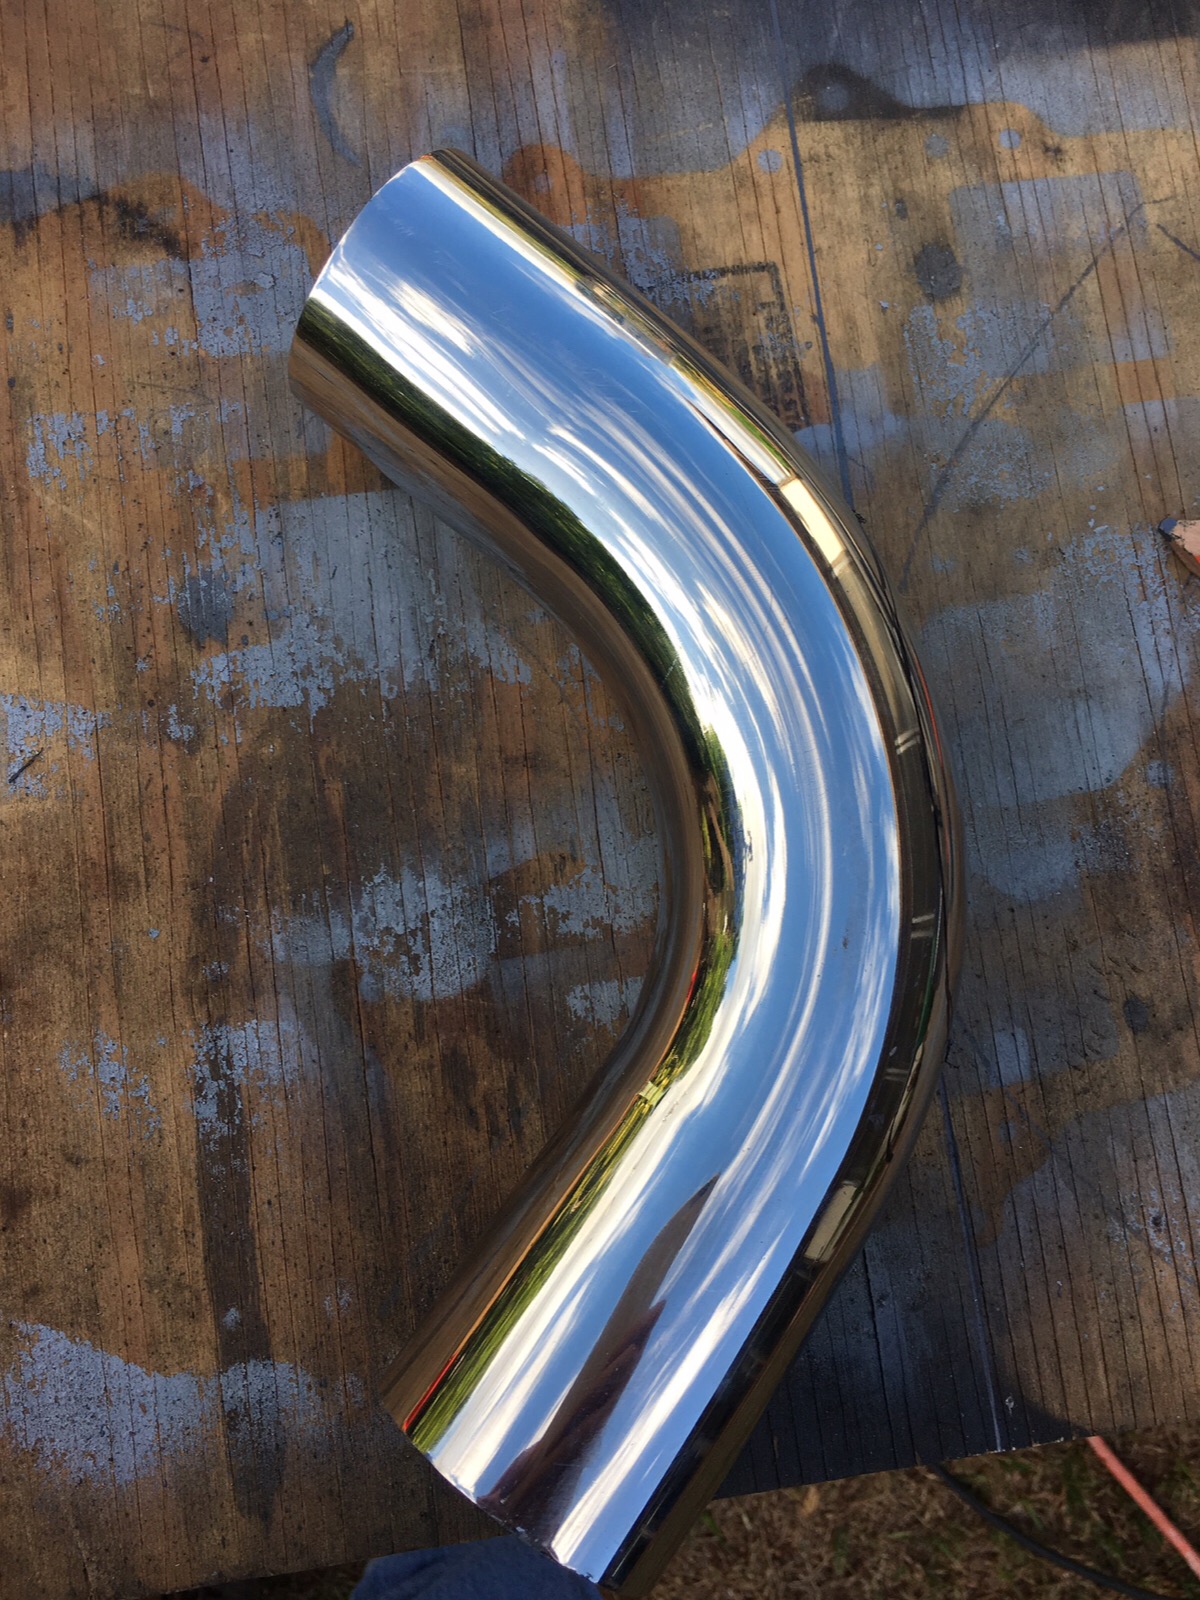
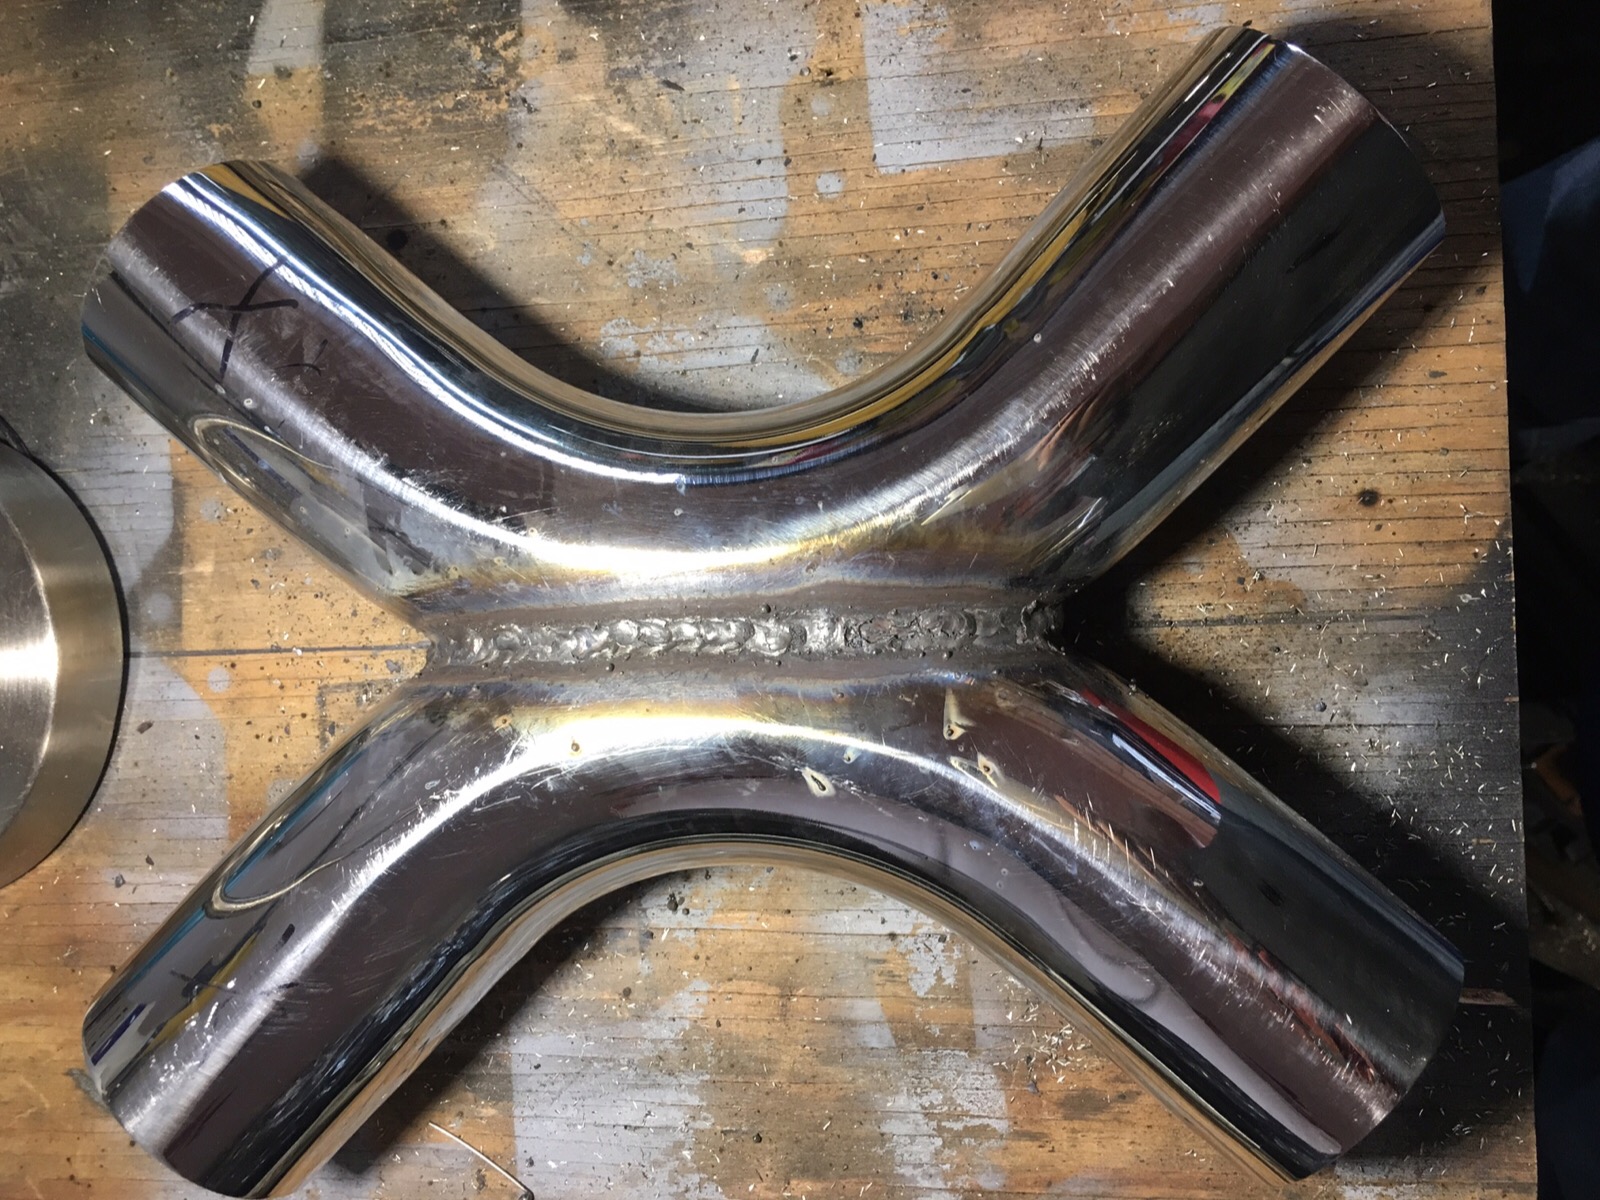
I purchased 2ea 2 1/2" 90* bends from Frozenboost.com, the extra thick ones. I have bought lots of other stuff from them and the price, quality, shipping has all been better than average. So after spending some time getting them symmetrical on a piece of plywood I cut off about 3/4" from the bend with my angle grinder. Then after a little fine tuning with a sanding disk I tried my hand at welding.
I didn't have any stainless around to practice on so what you see is my first try. Not the most perfect by any means, but I'm happy.
So now I can start laying out the piping and get the balance of the system on order.


So yesterday I started installing new brake lines on the car with the parts that have arrived so far.
On my previous builds I've farmed out the exhaust system. Since I try to expand my abilities and learn with each build, I thought this would be a perfect project to start with. Since there are a few different ways to connect the piping, like expanding one side and clamping, welding, etc., I wanted to try welding since it's obviously less costly and more flexible.
The Hooker exhaust manifolds I purchased have 1 5/8" primaries and 2 1/4" collector. I will upsize to 2 1/2" at the connection and the rest of the way. I wanted to have a crossover located just after the trans, but I didn't really like the price, design, and/or build of the readily available crossovers. So I figured making a crossover would give me a chance to try out welding stainless.
I purchased 2ea 2 1/2" 90* bends from Frozenboost.com, the extra thick ones. I have bought lots of other stuff from them and the price, quality, shipping has all been better than average. So after spending some time getting them symmetrical on a piece of plywood I cut off about 3/4" from the bend with my angle grinder. Then after a little fine tuning with a sanding disk I tried my hand at welding.
I didn't have any stainless around to practice on so what you see is my first try. Not the most perfect by any means, but I'm happy.
So now I can start laying out the piping and get the balance of the system on order.
 11-04-2016, 11:45 PM
#39
Staging Lane
Thread Starter
Great weekend ahead! Finally the machine shop finished shaving the heads and balancing the rotating assembly. Yea!
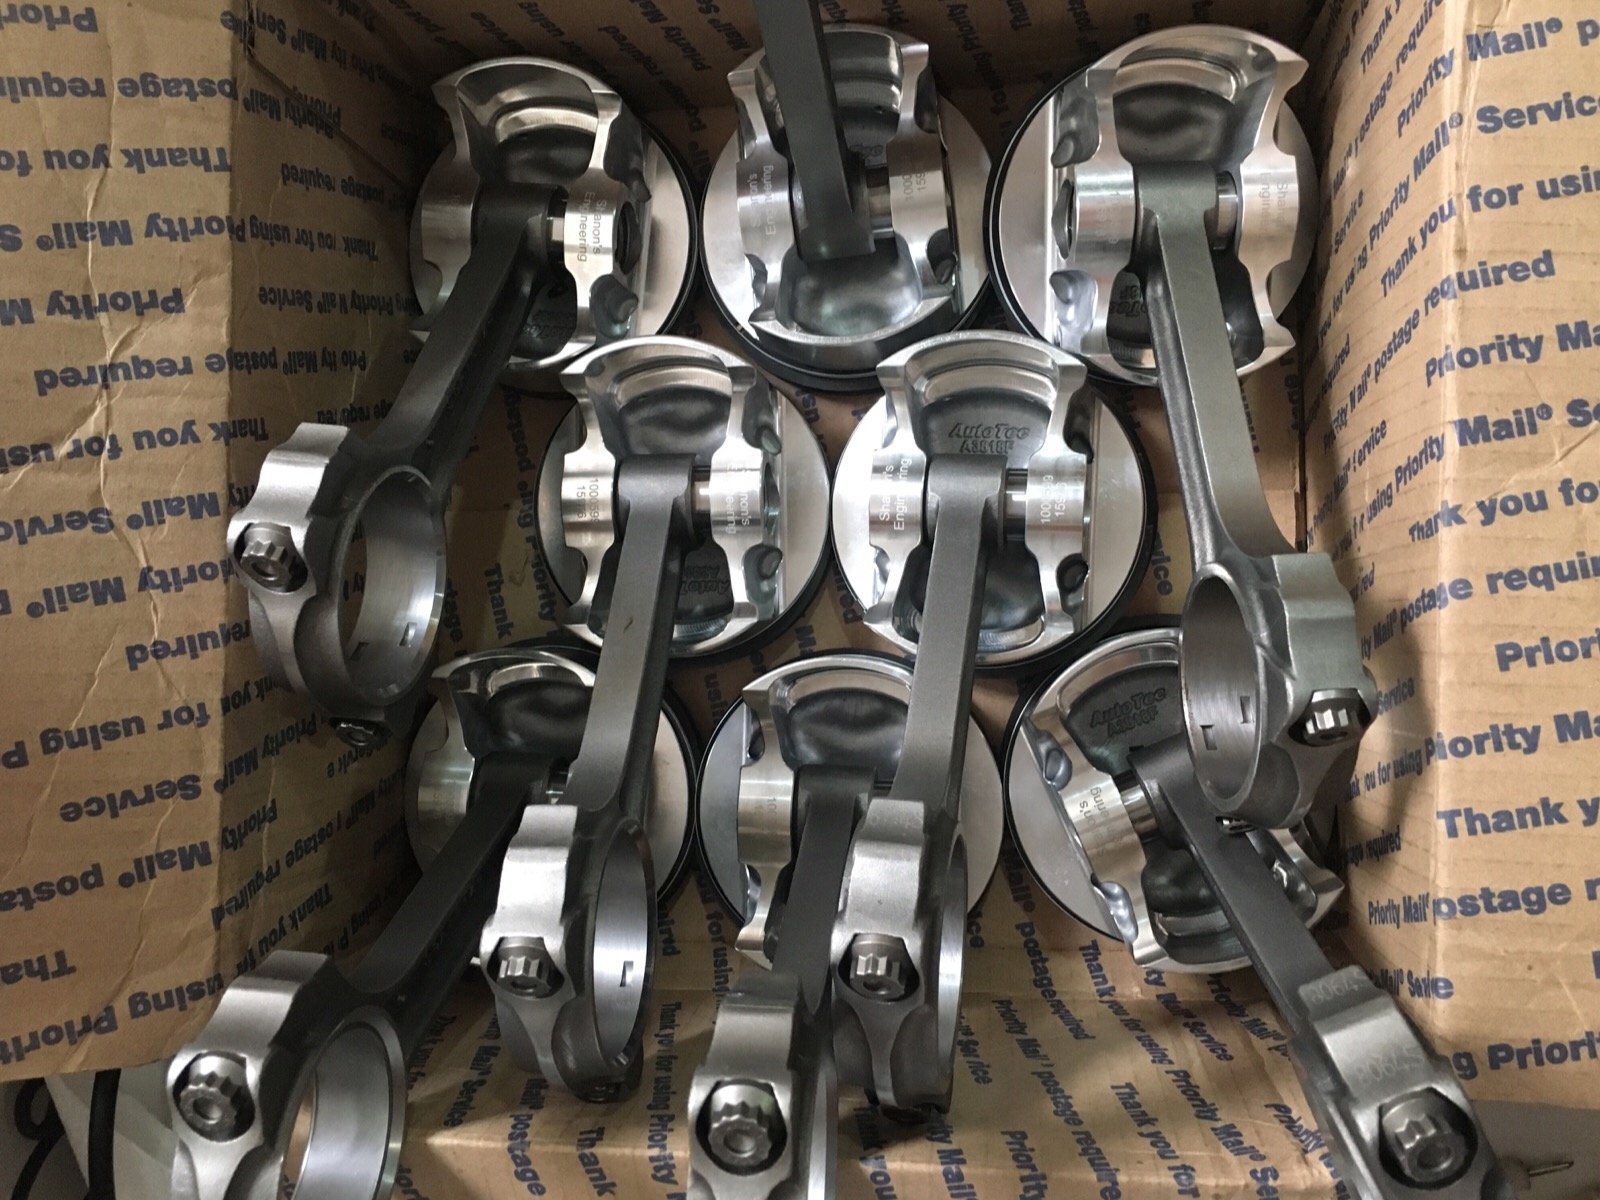
Reports on my choice of pistons and rods were good. Pistons (Racetec) were so close no mods were needed. Only a couple of the Scat rods needed lightening.
Due to the lightness of the pistons the crank needed more than average material removed to balance. Sounds good to me, should spin up faster!
I'll unpack and photo progress tomorrow, but for tonight I was more interested in the chamber size after shaving 40 thou. In my post #29 I laid out the math to estimate where I would be after shaving. My guess was 66.34. Actually number is 67cc's. So I should be around 10.5:1 compression. Not too bad with these heads.

I'll post final costs after I get over the shock. Probably twice the price as on the mainland.
But every process was performed. Each piston matched to each bore and honed with a torque plate, deck squared all 4 corners, etc.
Reports on my choice of pistons and rods were good. Pistons (Racetec) were so close no mods were needed. Only a couple of the Scat rods needed lightening.
Due to the lightness of the pistons the crank needed more than average material removed to balance. Sounds good to me, should spin up faster!
I'll unpack and photo progress tomorrow, but for tonight I was more interested in the chamber size after shaving 40 thou. In my post #29 I laid out the math to estimate where I would be after shaving. My guess was 66.34. Actually number is 67cc's. So I should be around 10.5:1 compression. Not too bad with these heads.


I'll post final costs after I get over the shock. Probably twice the price as on the mainland.
But every process was performed. Each piston matched to each bore and honed with a torque plate, deck squared all 4 corners, etc.
11-06-2016, 01:07 AM
#40
Staging Lane
Thread Starter
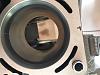
Was so fun to actually get started building up the short block today!
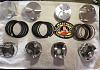
I started by checking/filing the ring sets. The ring sets as delivered were pretty close. Some didn't need any filing at all, some maybe .001 or so. Top rings are set at .018 and middle set at .022.
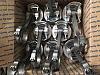
Then I installed all on the pistons.
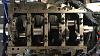
Then installed one spiro lock in each piston. Oriented each rod to piston location, double checking that the chamfer is against the crankshaft instead of next to the other connecting rod. Then after sliding through the pins with lube on all the surfaces, installing the last spiro lock. I was lucky, no locks got away from me, but glad that's done, wore a blister on my finger fighting them in.
After spending some time hosing the block and crank down with WD40, cleaning all surfaces and cleaning out oil passages, I started on the crank. First off check tolerances with plastigauge. On the lower end of .020-.025. Installed the timing chain gear on the snout of the crank and then after some lube dropped the crank in place. After setting the thrust bearings I torqued the mains down to 40 lb-ft and called it a day. Tomorrow I'll finish torquing down the mains and start installing the piston/rod assemblies.
It's been a few years since I built up an engine, and my first LS type. All in all it's been fun so far and no major assembly isssues. I did buy the digital version of "How to build and modify GM LS engines" and keep my iPad close by for reference. A good list of items to keep in mind at every step, one wrong move and many $'s down the drain.
I started by checking/filing the ring sets. The ring sets as delivered were pretty close. Some didn't need any filing at all, some maybe .001 or so. Top rings are set at .018 and middle set at .022.
Then I installed all on the pistons.
Then installed one spiro lock in each piston. Oriented each rod to piston location, double checking that the chamfer is against the crankshaft instead of next to the other connecting rod. Then after sliding through the pins with lube on all the surfaces, installing the last spiro lock. I was lucky, no locks got away from me, but glad that's done, wore a blister on my finger fighting them in.
After spending some time hosing the block and crank down with WD40, cleaning all surfaces and cleaning out oil passages, I started on the crank. First off check tolerances with plastigauge. On the lower end of .020-.025. Installed the timing chain gear on the snout of the crank and then after some lube dropped the crank in place. After setting the thrust bearings I torqued the mains down to 40 lb-ft and called it a day. Tomorrow I'll finish torquing down the mains and start installing the piston/rod assemblies.


It's been a few years since I built up an engine, and my first LS type. All in all it's been fun so far and no major assembly isssues. I did buy the digital version of "How to build and modify GM LS engines" and keep my iPad close by for reference. A good list of items to keep in mind at every step, one wrong move and many $'s down the drain.