

LQ4/4L80 swap 1969 Mercedes
 11-14-2016, 10:59 PM
#61
Staging Lane
Thread Starter

 11-14-2016, 11:23 PM
#62
Staging Lane
Thread Starter
Look Ma, no hands!
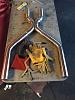
This afternoon I completed the last piece of the trans mount. Pretty simple piece. Made from the same 1/4" x 2" plate as the floor pan brace, V cut, bent and welded. Then 2ea 5/16" bolts on each side to the floor pan/trans tunnel brace/support. I made the mount about 3/16" narrow so that tightening puts tension on the braces.
As I did before and after on the crossmember, as to measuring sag with the engine weight, I did on the trans mount. Zero sag. I'm really surprised since the trans mount is carrying a good amount of weight. The motor mounts are between the first and second row of cylinders, so 3/4 of the weight of the engine and the transmission is on the trans mount.
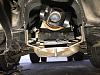
Took the measurement between the transmission yoke and the diff to get the driveshaft made. I used a local company for my jeep project with great success, so I'll drop the related hard parts off at the shop tomorrow.
11-19-2016, 09:37 PM
#63
Staging Lane
Thread Starter
I picked up the new driveshaft and if time will install tomorrow.
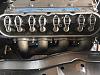
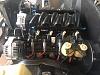
Today I installed the correct length pushrods, 7.325" long and the stock rockers with the trunion upgrade from Harland Sharp. Since, during porting, I exposed the rocker bolt shaft I had to put a dab of sealant on the intake rocker bolts. The reason for the shorter pushrods is because I milled the heads .040.
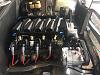
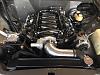
Then I installed the valve covers and coil packs, intake manifold with .030 thick gaskets (.060 is stock I believe) due to the shaved heads.
Then onto the front accessory drive, spark plugs and wires.


Today I installed the correct length pushrods, 7.325" long and the stock rockers with the trunion upgrade from Harland Sharp. Since, during porting, I exposed the rocker bolt shaft I had to put a dab of sealant on the intake rocker bolts. The reason for the shorter pushrods is because I milled the heads .040.
Then I installed the valve covers and coil packs, intake manifold with .030 thick gaskets (.060 is stock I believe) due to the shaved heads.
Then onto the front accessory drive, spark plugs and wires.


 11-20-2016, 10:08 PM
#65
Staging Lane
Thread Starter
Thanks! Great looking truck, BTW.
Today I completed a lot of loose ends. The exhaust parts arrive Monday and I want to jump right in then.
Installed the starter, fuel tank, driveshaft, bolted the flexplate to the converter, installed the torque converter/trans covers, installed the new transmission rubber mount, and bolted in the trunk mount for the battery.
I'll take some pics tomorrow.
Last edited by Coasttocoast; 12-11-2016 at 03:54 AM.
12-11-2016, 04:04 AM
#68
Staging Lane
Thread Starter
Thanks for following, looks like you've been having some fun too! Looking forward to the first start now. Can't see far enough to think about driving yet!
12-11-2016, 04:56 AM
#69
Staging Lane
Thread Starter
Since getting the engine/trans/driveshaft installed I've been playing electrician and plumber!
My plan is to install the exhaust and mount all hard parts that need electrical and plumbing while thinking ahead as to how to route the lines to them.
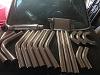
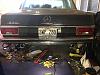
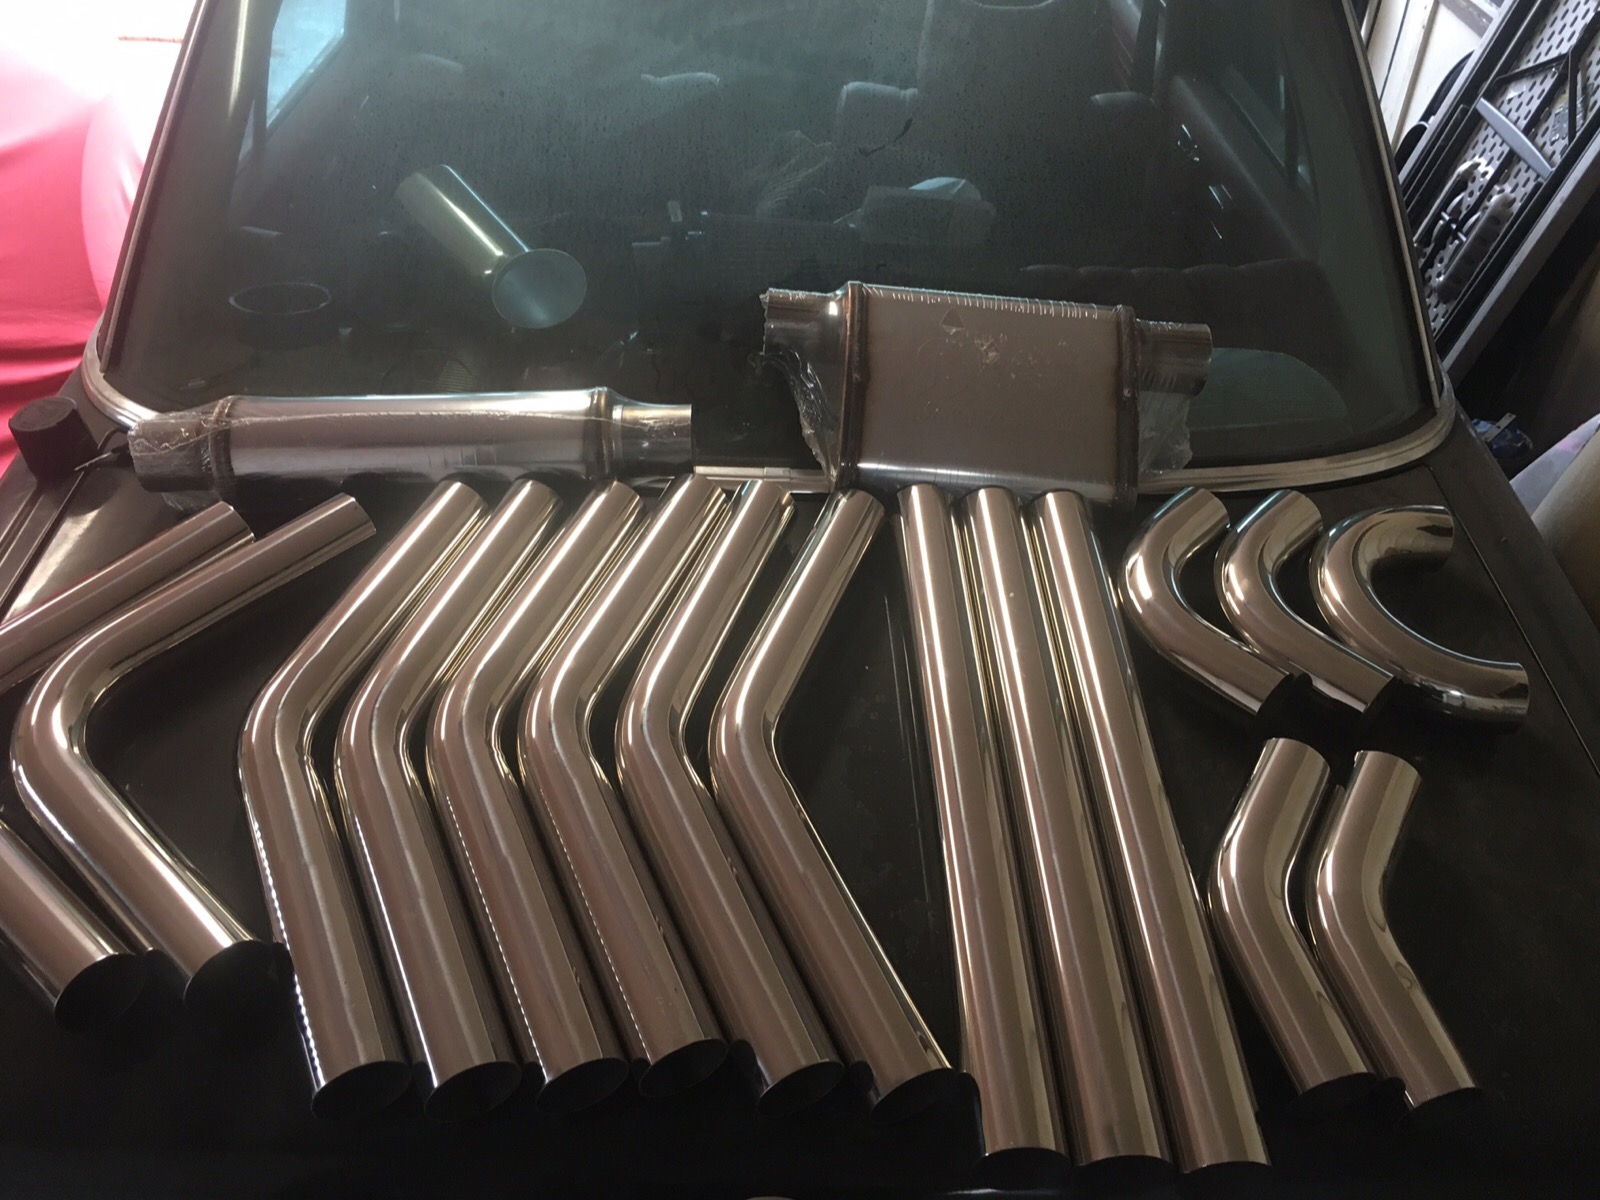
For exhaust I ordered pre bent 2 1/2" thick stainless steel tubes from frozenboost.com, for mufflers a pair of Magnaflow 6" x 9" ovals located under the rear seats and a pair of 4 1/2" round Magnaflow mufflers located on each side of the gas tank under the trunk with a pair of stainless tips exiting under the rear bumper.
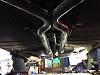
This car had one exhaust exit, i had to move it outbound about 1 1/2" due to the gas tank being slightly off center, then make a new exit to match on the passenger side. I made my own X-over. Right now I have it completely installed,, 60% welded, and the rest tacked. I built it with all the hangers pointed rearward so I can unbolt from the headers and slide the whole exhaust back and out for final welding. The plan is after I make sure all the other plumbing and electrical lines are run with no conflict I can then pull out to final weld.
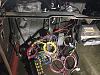
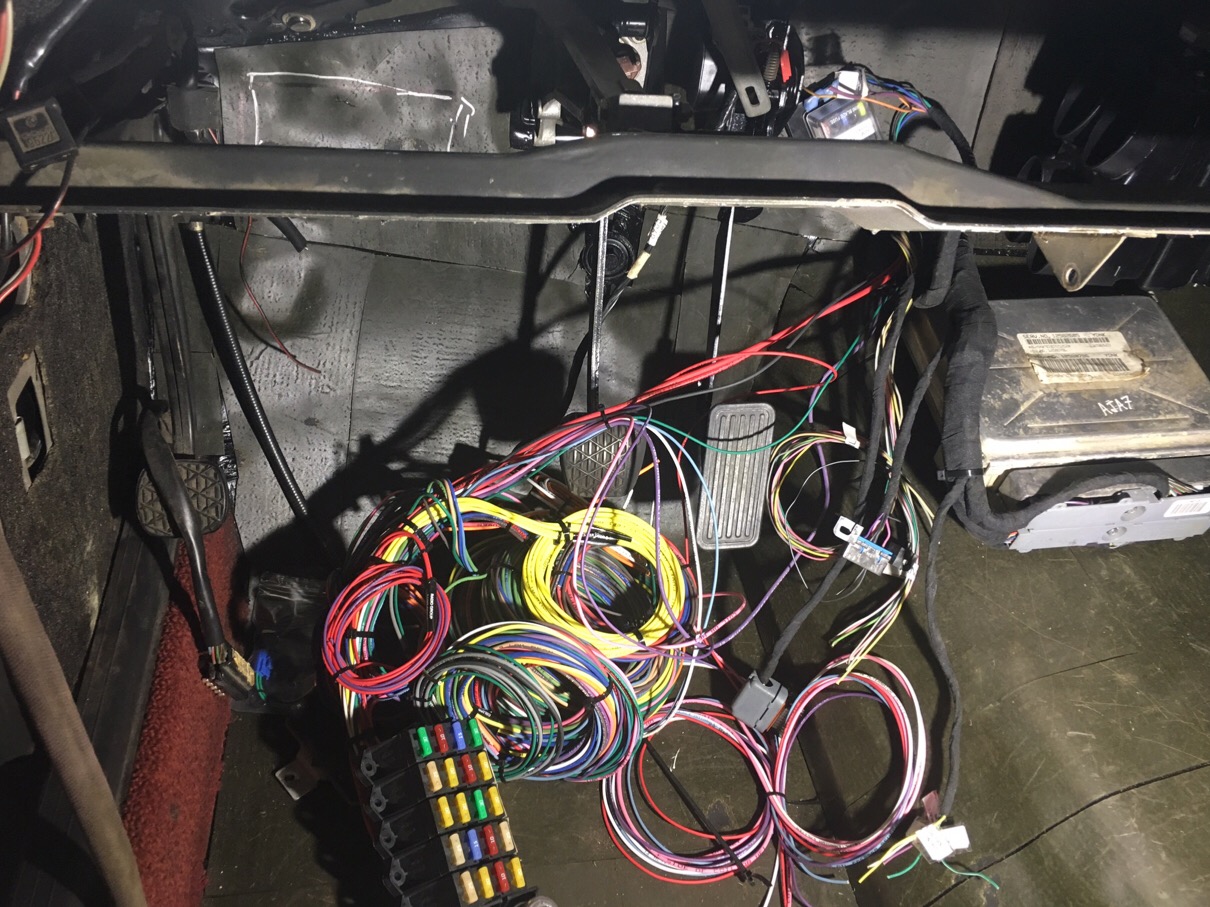
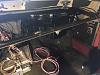
I had 150tunes build the engine harness and preprogram the ECU. The ECU is located on the trans hump and will be covered by the enter console. I fed the engine harness through a 2" hole located slightly to the drivers side over the trans tunnel. The engine is completely connected except for the O2 sensors.
I removed the dash, cleaned up the forward floorboard, primed and painted, and recovered with bitumen sound deadening pads as was original. Still fitting the new Vintage Air system and installing the new fuse box/body harness from Kwikwire.
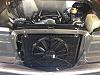
Installed the new radiator, condenser and Spal fans. I purchased a swivel thermostat housing and after picking through the hose inventory at OReilly's found a couple hoses that after cutting some length fit perfect.
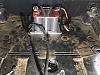
Today I ran the fuel lines, and #2 positive line from the rear mounted battery to the starter, and completed the remote engine oil filter and transmission lines to the B&M fan/cooler assembly.
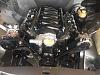
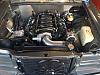
The last major item under the hood is the heater A/C lines. That's tomorrow's project. But other than that the engine bay is basically done. I'm pretty happy that I've managed to keep it pretty clean looking and still have good access for service.
My plan is to install the exhaust and mount all hard parts that need electrical and plumbing while thinking ahead as to how to route the lines to them.
For exhaust I ordered pre bent 2 1/2" thick stainless steel tubes from frozenboost.com, for mufflers a pair of Magnaflow 6" x 9" ovals located under the rear seats and a pair of 4 1/2" round Magnaflow mufflers located on each side of the gas tank under the trunk with a pair of stainless tips exiting under the rear bumper.
This car had one exhaust exit, i had to move it outbound about 1 1/2" due to the gas tank being slightly off center, then make a new exit to match on the passenger side. I made my own X-over. Right now I have it completely installed,, 60% welded, and the rest tacked. I built it with all the hangers pointed rearward so I can unbolt from the headers and slide the whole exhaust back and out for final welding. The plan is after I make sure all the other plumbing and electrical lines are run with no conflict I can then pull out to final weld.
I had 150tunes build the engine harness and preprogram the ECU. The ECU is located on the trans hump and will be covered by the enter console. I fed the engine harness through a 2" hole located slightly to the drivers side over the trans tunnel. The engine is completely connected except for the O2 sensors.
I removed the dash, cleaned up the forward floorboard, primed and painted, and recovered with bitumen sound deadening pads as was original. Still fitting the new Vintage Air system and installing the new fuse box/body harness from Kwikwire.
Installed the new radiator, condenser and Spal fans. I purchased a swivel thermostat housing and after picking through the hose inventory at OReilly's found a couple hoses that after cutting some length fit perfect.
Today I ran the fuel lines, and #2 positive line from the rear mounted battery to the starter, and completed the remote engine oil filter and transmission lines to the B&M fan/cooler assembly.
The last major item under the hood is the heater A/C lines. That's tomorrow's project. But other than that the engine bay is basically done. I'm pretty happy that I've managed to keep it pretty clean looking and still have good access for service.


 12-11-2016, 06:49 AM
#70

Very clean looking engine compartment. Well done. I'm not really a fan of QuickP.s FEAD brakets but they look SO MUCH BETTER black. Before seeing it, I wouldn't think it would make much of a difference, but smart choice IMO
12-11-2016, 10:47 AM
#71
Staging Lane
Thread Starter
Thanks for the compliment and commenting.
I'm assuming your reference to "QuickP.s FEAD brackets" is to the front accessory brackets? I purchased these from Dirty Dingo, unless they also go by another name?
I'm assuming your reference to "QuickP.s FEAD brackets" is to the front accessory brackets? I purchased these from Dirty Dingo, unless they also go by another name?
12-11-2016, 01:53 PM
#72
TECH Resident

Looks great! Nice job.
Did you figure out a more robust rear diff / rear end? Or will you just wait until you snuff this one?
What would be cool is to transplant an IRS via its subframe out of a newer car.
Did you figure out a more robust rear diff / rear end? Or will you just wait until you snuff this one?
What would be cool is to transplant an IRS via its subframe out of a newer car.
12-11-2016, 10:01 PM
#73
Staging Lane
Thread Starter
But with only 225 wide tires I'm not sure how much pressure I can put on the diff anyway.
12-11-2016, 10:43 PM
#74
Staging Lane
Thread Starter
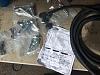
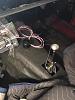
Today I was able to complete the installation of the Vintage Air system including the hoses. I used the EZ Clip Universal set they sell. Worked great, ends go on easy and instead of buying their $70 pliers I took an angle grinder to a set of my pliers to make the recess needed.
After I completed the heater hoses I filled the radiator/cooling system and put some freon in the AC system until it can be properly evacuated and charged.
Also installed the Lokar dip stick for the trans.
Feels good to be able to start adding fluids!

After I completed the heater hoses I filled the radiator/cooling system and put some freon in the AC system until it can be properly evacuated and charged.
Also installed the Lokar dip stick for the trans.
Feels good to be able to start adding fluids!


 12-12-2016, 10:57 PM
#77
Staging Lane
Thread Starter
Today I finished connecting the electrical to the trans, installed the Lokar floor shifter, and poured in the first gallon of trans fluid.
After a rebuild how much fluid is safe to put in without overfilling? 4L80e, BTW.
After a rebuild how much fluid is safe to put in without overfilling? 4L80e, BTW.
 12-13-2016, 10:48 AM
#78
TECH Resident
Looking great!
Curious, why did you add the freon without evacuating? Did you also add the compressor oil?
According to this:
http://www.tciauto.com/tc/fluid-capacity/
7.7 total. I'd probably add 6.5 quarts and check after moving it through the gears and then go to the dipstick.
I'd probably poll a few more sites, too.
Doug
12-13-2016, 12:18 PM
#80
Staging Lane
Thread Starter
Looking great!
Curious, why did you add the freon without evacuating? Did you also add the compressor oil?
According to this:
http://www.tciauto.com/tc/fluid-capacity/
7.7 total. I'd probably add 6.5 quarts and check after moving it through the gears and then go to the dipstick.
I'd probably poll a few more sites, too.
Doug
Curious, why did you add the freon without evacuating? Did you also add the compressor oil?
According to this:
http://www.tciauto.com/tc/fluid-capacity/
7.7 total. I'd probably add 6.5 quarts and check after moving it through the gears and then go to the dipstick.
I'd probably poll a few more sites, too.
Doug
The compressor did not ship with oil. I will have a shop drain, evacuate, fill with oil, and charge the system after I get it back on the road.
Thanks for the answer on the trans oil. I'm using the stock converter for now to get a baseline. I had it checked out when I had the trans rebuilt, so probably most of that oil is out also. I will probably dump another gallon in to be safe for startup. I would guess the cooler lines and trans cooler will eat up a quart by itself.