

LQ4/4L80 swap 1969 Mercedes
 11-06-2016, 10:59 PM
#41
Staging Lane
Thread Starter

Today finished torquing down the mains, actually angle guage as I'm reusing the stock bolts. Checked the thrust and it's right in the middle of the range at .003
Crank turns easily by hand on the snout.
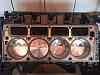
Then on to piston assemblies. Nothing out of the ordinary, recleaned everything, double checked ring placement. I have the center of the scrapper at 12:00 with each of its accompanying ring each side about 1 1/2" away, the second ring at 3:00 and the top ring at 9:00. Lubed it up (using Torco assembly lube) and installed with a taper ring compressor. Used the ARP lube on the ARP rod bolts and torqued down. Previously I had checked the bearing clearance with plastigage and I'm on the tight side of the spec. The book shows .020-.025 with a tolanace of .003. I'm at .017-.019.
Put a couple bolts in the flex plate to spin the crank and after all the pistons are in, turns without much effort and smooth as you would expect.
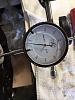
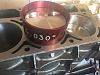
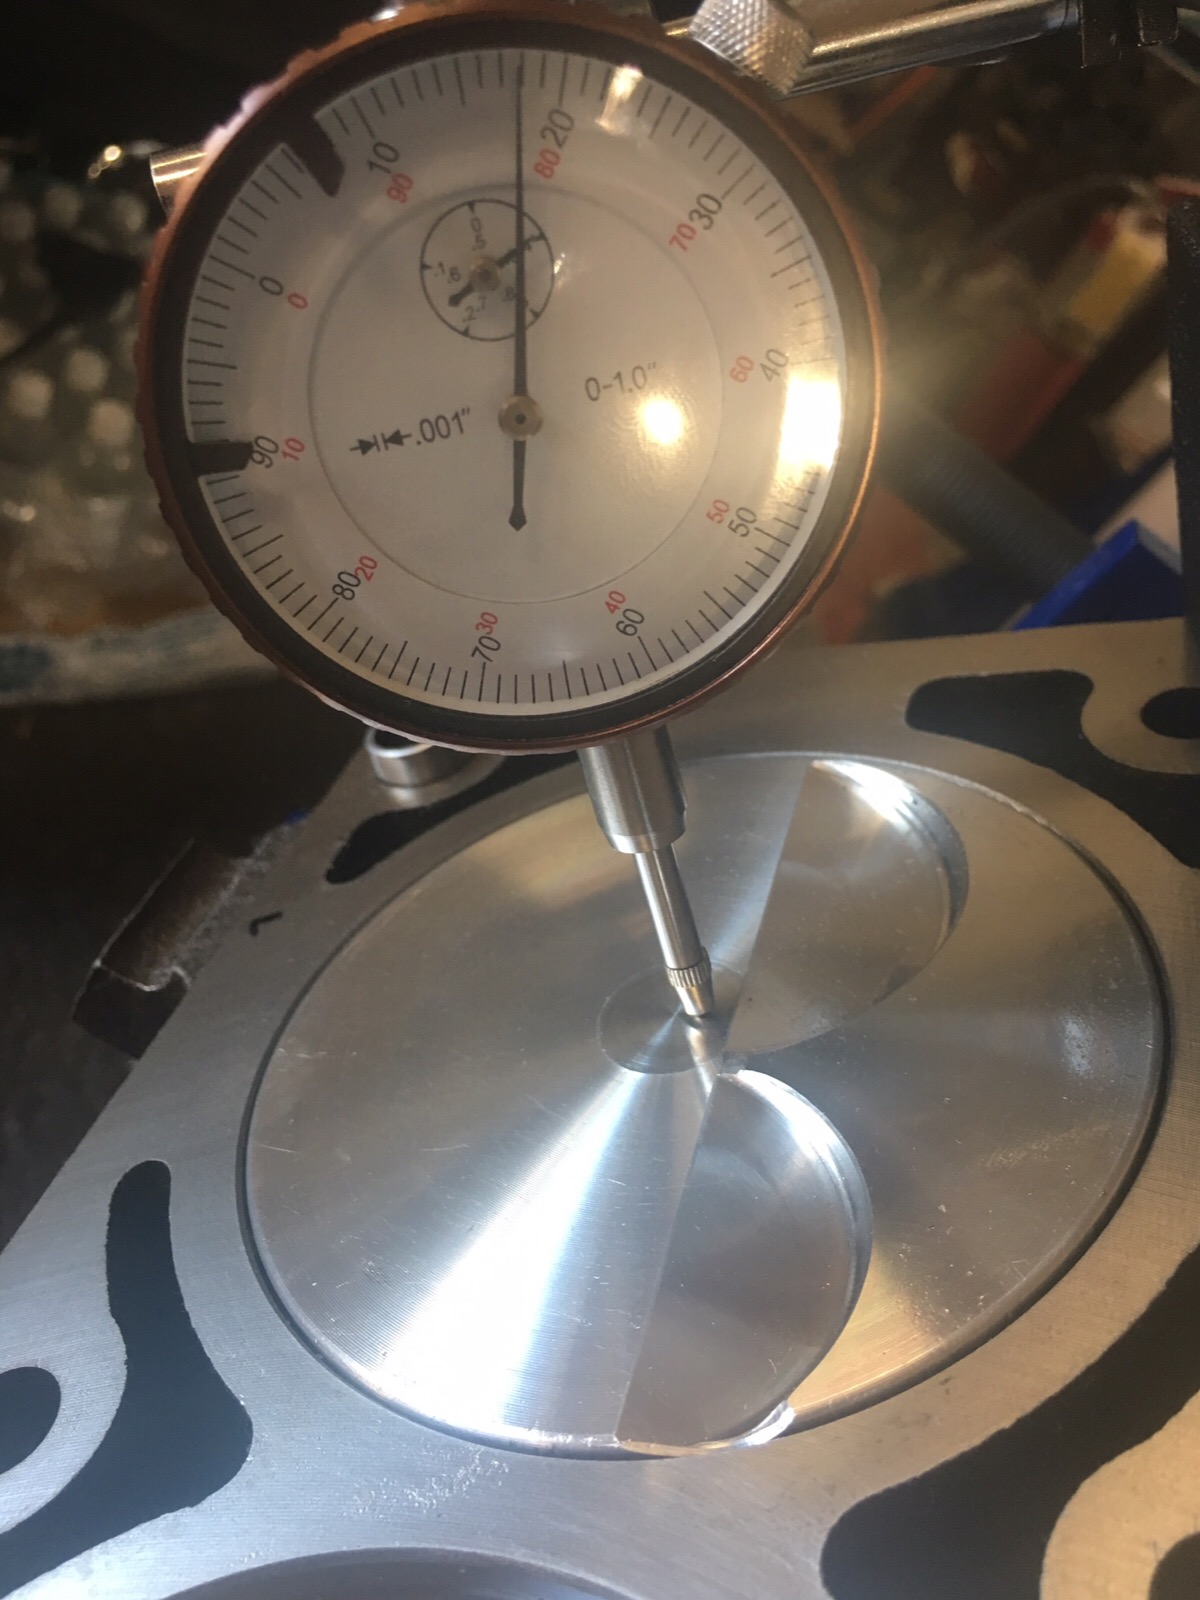
Then I wanted to check the squareness of the block. Using a straight edge and aligning the piston in each corner flat to the deck, then zero out the guage and then spin the crank to top dead center, I measured on the passenger side .018 at the rear and .020 at the front. On the drivers side I measured .024 at the rear and .022 at the front. Is this in spec?

After giving the new Texas Speed cam a good cleaning and lube that was slid into place and then installed the cam thrust plate with lock tite on the threads.
That's it for today.

Crank turns easily by hand on the snout.
Then on to piston assemblies. Nothing out of the ordinary, recleaned everything, double checked ring placement. I have the center of the scrapper at 12:00 with each of its accompanying ring each side about 1 1/2" away, the second ring at 3:00 and the top ring at 9:00. Lubed it up (using Torco assembly lube) and installed with a taper ring compressor. Used the ARP lube on the ARP rod bolts and torqued down. Previously I had checked the bearing clearance with plastigage and I'm on the tight side of the spec. The book shows .020-.025 with a tolanace of .003. I'm at .017-.019.

Put a couple bolts in the flex plate to spin the crank and after all the pistons are in, turns without much effort and smooth as you would expect.
Then I wanted to check the squareness of the block. Using a straight edge and aligning the piston in each corner flat to the deck, then zero out the guage and then spin the crank to top dead center, I measured on the passenger side .018 at the rear and .020 at the front. On the drivers side I measured .024 at the rear and .022 at the front. Is this in spec?
After giving the new Texas Speed cam a good cleaning and lube that was slid into place and then installed the cam thrust plate with lock tite on the threads.
That's it for today.
 11-07-2016, 12:18 AM
#42
TECH Resident


VERY cool build! I've had several old mercedes (1969 280SL, 1979 W123 300D, 1970 300SEL 6.3, 1992 500E (and now newer 2011 E63). Great cars!
I've noodled on building an old LS-powered MB sleeper, too. Will be following along!
Nice work, so far!
I blew out the rear diff in my 1970 300SEL 6.3 with the stock engine. I'm guessing that will be your weak point (as already pointed out). The cars are well engineered, but they aren't over engineered in every area, as you can also tell from the modest weight.
I wonder if the rear end from the 280SEL 6.9 is affordable and not unobtanium and possibly even a bolt in? They went decades at times between major changes. My 1992 500E had a 5 link rear suspension and part #s went all the way to 2015 or 2016 for the individual links. And that suspension came out in the late 80s with the first of the W124 chassis.
Look forward to updates!
Doug
11-12-2016, 11:51 AM
#43
Staging Lane
Thread Starter
VERY cool build! I've had several old mercedes (1969 280SL, 1979 W123 300D, 1970 300SEL 6.3, 1992 500E (and now newer 2011 E63). Great cars!
I've noodled on building an old LS-powered MB sleeper, too. Will be following along!
Nice work, so far!
I blew out the rear diff in my 1970 300SEL 6.3 with the stock engine. I'm guessing that will be your weak point (as already pointed out). The cars are well engineered, but they aren't over engineered in every area, as you can also tell from the modest weight.
I wonder if the rear end from the 280SEL 6.9 is affordable and not unobtanium and possibly even a bolt in? They went decades at times between major changes. My 1992 500E had a 5 link rear suspension and part #s went all the way to 2015 or 2016 for the individual links. And that suspension came out in the late 80s with the first of the W124 chassis.
Look forward to updates!
Doug
I've noodled on building an old LS-powered MB sleeper, too. Will be following along!
Nice work, so far!
I blew out the rear diff in my 1970 300SEL 6.3 with the stock engine. I'm guessing that will be your weak point (as already pointed out). The cars are well engineered, but they aren't over engineered in every area, as you can also tell from the modest weight.
I wonder if the rear end from the 280SEL 6.9 is affordable and not unobtanium and possibly even a bolt in? They went decades at times between major changes. My 1992 500E had a 5 link rear suspension and part #s went all the way to 2015 or 2016 for the individual links. And that suspension came out in the late 80s with the first of the W124 chassis.
Look forward to updates!
Doug
After I get the car running and on the road again I'll start digging into the diff and suspension issues. Besides finding a solution on the diff I also want to change to an Air-Ride type of suspension. Not for lowering but for ride and auto leveling. Since these two issues effect each other directly I'll need a full plan before moving forward on either, and have to drive conservatively in the mean time!
I had read somewhere once that someone had had their stock diff modified with new stronger made gears, but I forgot to book mark it and haven't been able to find it since. But that would be the best solution if true.
BTW, great looking truck!!
Last edited by Coasttocoast; 11-12-2016 at 11:12 PM.
11-12-2016, 12:04 PM
#44
Staging Lane
Thread Starter
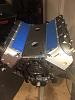
This past week I have made some good progress on the assembly.
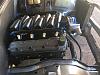
After checking the spring heights I purchased the needed shims and finished the assembly of the heads. All be one valve needed a shim, FYI.
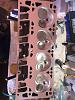
Then after a good clean of the head and deck surface with solvent, installed the head gasket and heads.
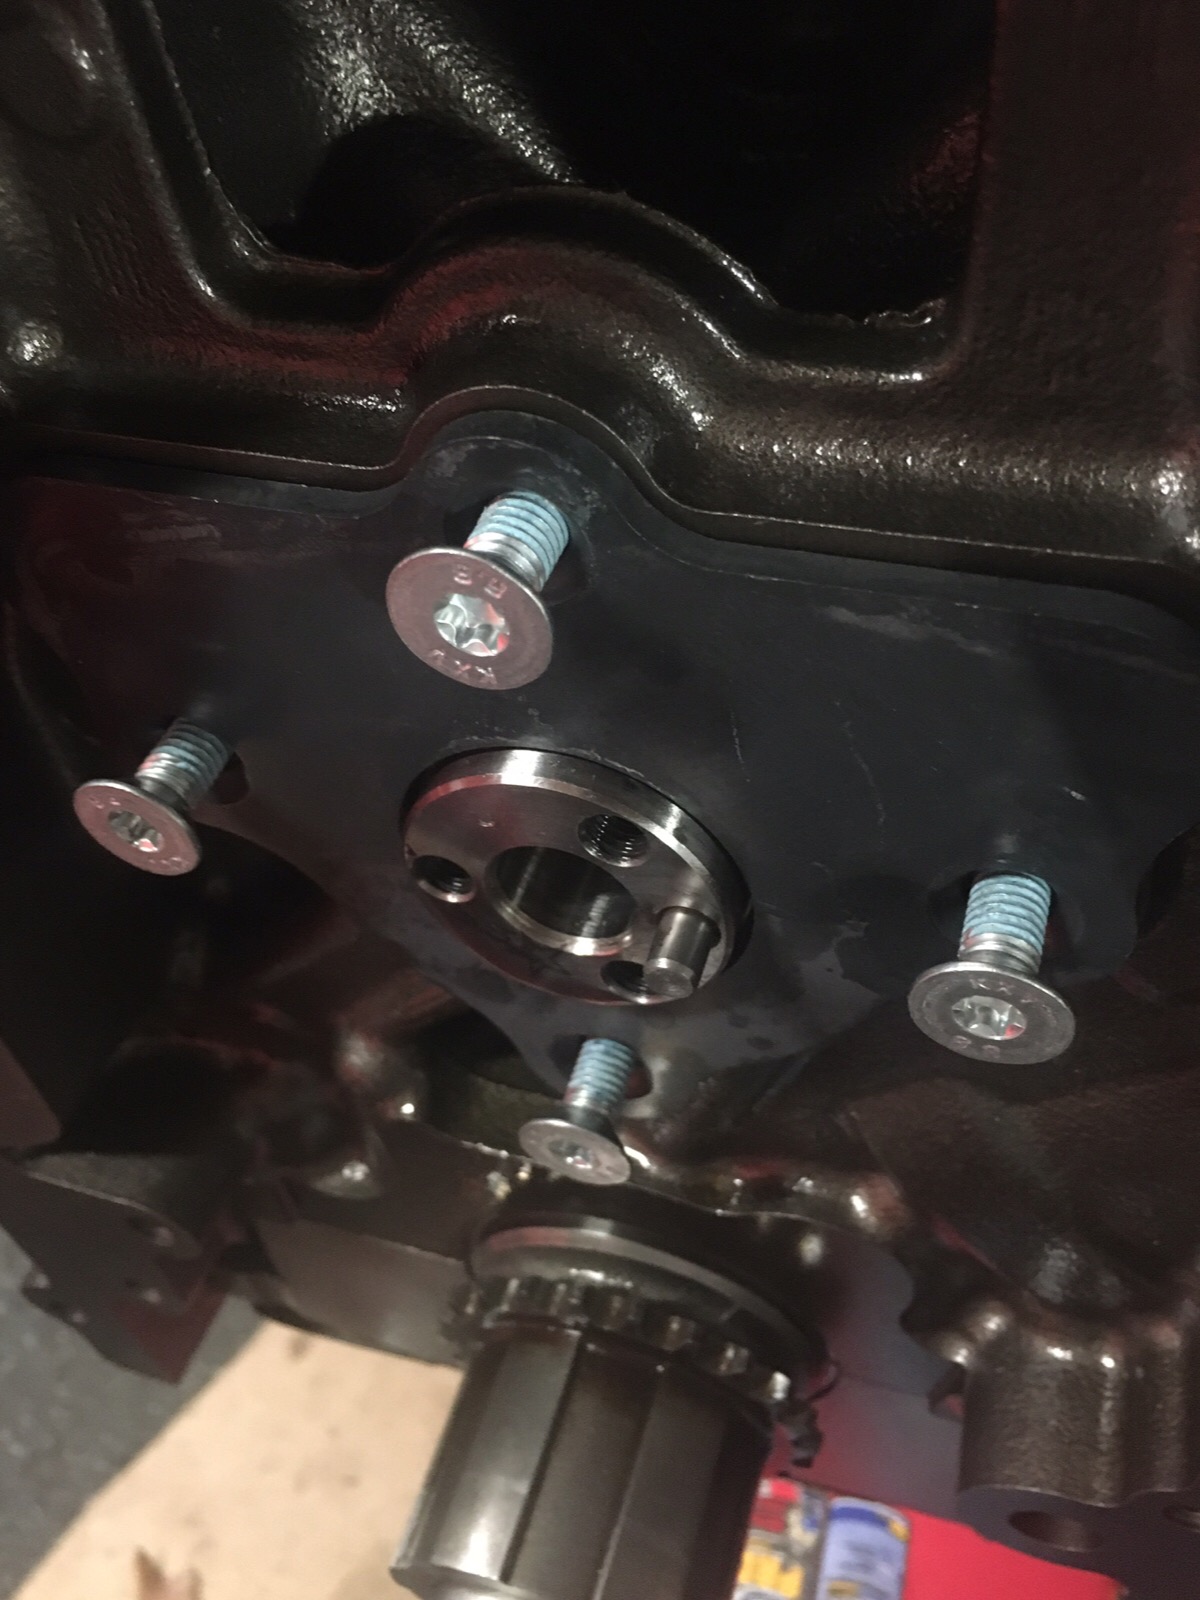
The existing cam retention plate looked to be in good shape, but the gasket was a little flat, so I went ahead and ordered a new plate and new bolts. This is the new style with the countersunk heads.
I used the stock cam gears but ordered the newer stronger version of the single roller chain and new ARP bolts.
Also upgraded to a Meling oil pump and added the little oil pickup brace that utilizes both side bolting.
I have to measure for push rods so I can order this weekend.
After checking the spring heights I purchased the needed shims and finished the assembly of the heads. All be one valve needed a shim, FYI.


Then after a good clean of the head and deck surface with solvent, installed the head gasket and heads.

The existing cam retention plate looked to be in good shape, but the gasket was a little flat, so I went ahead and ordered a new plate and new bolts. This is the new style with the countersunk heads.
I used the stock cam gears but ordered the newer stronger version of the single roller chain and new ARP bolts.
Also upgraded to a Meling oil pump and added the little oil pickup brace that utilizes both side bolting.

I have to measure for push rods so I can order this weekend.
 11-12-2016, 12:30 PM
#45
TECH Senior Member
iTrader: (7)

I have experience with IRS from my RX7 days. Always keep in mind that an IRS is only as strong as the weakest link, and there are a lot of links. You beef up the diff, then you start breaking inner CV joints. You beef those up ,then the axles break, etc...
You have to think of it as a system from the pinion yoke to the wheel studs.
I'd love to see some detailed pictures of the rear suspension and I'd gladly make some suggestions.
Andrew
You have to think of it as a system from the pinion yoke to the wheel studs.
I'd love to see some detailed pictures of the rear suspension and I'd gladly make some suggestions.
Andrew
 11-12-2016, 11:14 PM
#47
Staging Lane
Thread Starter
I have experience with IRS from my RX7 days. Always keep in mind that an IRS is only as strong as the weakest link, and there are a lot of links. You beef up the diff, then you start breaking inner CV joints. You beef those up ,then the axles break, etc...
You have to think of it as a system from the pinion yoke to the wheel studs.
I'd love to see some detailed pictures of the rear suspension and I'd gladly make some suggestions.
Andrew
You have to think of it as a system from the pinion yoke to the wheel studs.
I'd love to see some detailed pictures of the rear suspension and I'd gladly make some suggestions.
Andrew
11-12-2016, 11:16 PM
#48
Staging Lane
Thread Starter
11-12-2016, 11:57 PM
#49
Staging Lane
Thread Starter
Another positive day on engine building.
I've read some posts of people forgetting to install the "barbell" oil restrictor in the rear of the engine and the "plug" in the front of the engine. Made sure I remembered.
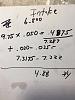
The 317 heads were shaved 0.040. So measuring for the correct length pushrods was required. I purchased the Comp Cam's checker, base length of 6.8", with every turn increasing the length by 0.050. Both the intake and exhaust required extending the adjuster 9.75 turns. So zero lash was 7.287. I purchased Morel lifers and they require 0.030 - 0.035 preload. So new pushrods need to be 7.317 - 7.322.
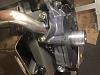
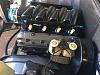
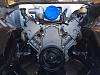
Up next was installing the oil pan, front and rear covers. I replaced both seals in the covers. To help make sure the front cover was centered on the crankshaft I took an old balancer, cut off most of the body, and used a flex hone to enlarge the opening so it would slide easily on the crank. After all the bolts were started I tapped the cover around a little with a rubber mallet to try and center the cover on the modified balancer.

Then I was kind of unshared what to do next. With all the time it has taken to get to this point I couldn't really comprehend that I was really about ready to install this thing!
Now that I have a nice clean engine, and need to paint the outside of it, and need a less damaging way of connecting the hoist, I made some brackets to connect too. I took some 1/8" x 1 1/4" angle and made a couple holes to bolt to the block and connect to the chain part of the hoist. Then after loosing the engine stand bolted up the flex plate, torqued to 74 lbs with blue locktite, installed the stock torque converter into the newly rebuilt 4L80 trans, and bolted up to the engine. Tomorrow I will final clean the assembly, paint, and stick in the hole! Yea!
So I have a front sump pan to fit this rear steer Mercedes. The pan is so thin at the location on the dipstick that I cannot read the correct oil level, anyone know an easy solution?
I've read some posts of people forgetting to install the "barbell" oil restrictor in the rear of the engine and the "plug" in the front of the engine. Made sure I remembered.


The 317 heads were shaved 0.040. So measuring for the correct length pushrods was required. I purchased the Comp Cam's checker, base length of 6.8", with every turn increasing the length by 0.050. Both the intake and exhaust required extending the adjuster 9.75 turns. So zero lash was 7.287. I purchased Morel lifers and they require 0.030 - 0.035 preload. So new pushrods need to be 7.317 - 7.322.

Up next was installing the oil pan, front and rear covers. I replaced both seals in the covers. To help make sure the front cover was centered on the crankshaft I took an old balancer, cut off most of the body, and used a flex hone to enlarge the opening so it would slide easily on the crank. After all the bolts were started I tapped the cover around a little with a rubber mallet to try and center the cover on the modified balancer.


Then I was kind of unshared what to do next. With all the time it has taken to get to this point I couldn't really comprehend that I was really about ready to install this thing!
Now that I have a nice clean engine, and need to paint the outside of it, and need a less damaging way of connecting the hoist, I made some brackets to connect too. I took some 1/8" x 1 1/4" angle and made a couple holes to bolt to the block and connect to the chain part of the hoist. Then after loosing the engine stand bolted up the flex plate, torqued to 74 lbs with blue locktite, installed the stock torque converter into the newly rebuilt 4L80 trans, and bolted up to the engine. Tomorrow I will final clean the assembly, paint, and stick in the hole! Yea!

So I have a front sump pan to fit this rear steer Mercedes. The pan is so thin at the location on the dipstick that I cannot read the correct oil level, anyone know an easy solution?
11-13-2016, 04:10 AM
#50
Staging Lane
Thread Starter
Anyone have an educated guess as to what my whp should be?
4.030 bore 3.622 stroke, 10.5:1 compression, 218/224, .600/.600, 114LSA +4 cam, 90mm throttle body, port matched Speedmaster intake, port matched Hooker cast iron exhaust manifolds (1 5/8" primary, 2 1/2" collector), ported 317 heads (estimate @.600 intake 280, exhaust 220), 4L80 w/stock converter, 92 octane fuel, stock ECU dyno tuned.
4.030 bore 3.622 stroke, 10.5:1 compression, 218/224, .600/.600, 114LSA +4 cam, 90mm throttle body, port matched Speedmaster intake, port matched Hooker cast iron exhaust manifolds (1 5/8" primary, 2 1/2" collector), ported 317 heads (estimate @.600 intake 280, exhaust 220), 4L80 w/stock converter, 92 octane fuel, stock ECU dyno tuned.
11-13-2016, 08:53 AM
#51
TECH Resident
Good luck! Eager to see updates from today's installation efforts!
Not sure I understand the question about reading the dipstick? Are you saying the pan is shallow at the dipstick location?
Not sure I understand the question about reading the dipstick? Are you saying the pan is shallow at the dipstick location?
11-13-2016, 10:59 PM
#54
Staging Lane
Thread Starter
I need to come up with a solution.
Thanks for posting.
11-13-2016, 11:01 PM
#55
Staging Lane
Thread Starter
11-13-2016, 11:03 PM
#56
Staging Lane
Thread Starter
11-13-2016, 11:22 PM
#57
Staging Lane
Thread Starter
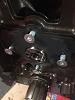
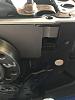
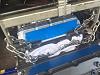
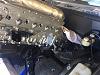
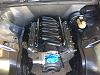
The engine is now home!
Spent about 4 hours cleaning and painting the trans and engine. Installed all new sensors in both the trans and engine.
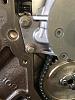
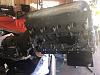
The anchor points I made out of angle yesterday worked out beautifully. Stuffing such a large engine and trans into this body is tight, especially because I didn't want to cut open the radiator support. Worked out great with the sliding engine hoist. With an air ratchet I could radically angle the engine assembly.
The engine is fully bolted to the front mounts and on a jack under the trans. Tomorrow I'll make the balance of the trans mount.
Before I dropped the engine on the mounts I took a measurement from the crossmember to the ground, then again after the engine was bolted in. Was lower by 1/4". The car is stitting level on jack stands at the factory lifting points.
With the firewall moved back a little from stock the engine mounts are centered on the front axle between the 1st and 2nd bore front to back. Weight distribution should be a major improvement over stock.
Now a lot of work to do. I started sticking some items in to make sure of fitment.
I have to say, very pleased by how it's looking so far.

Spent about 4 hours cleaning and painting the trans and engine. Installed all new sensors in both the trans and engine.
The anchor points I made out of angle yesterday worked out beautifully. Stuffing such a large engine and trans into this body is tight, especially because I didn't want to cut open the radiator support. Worked out great with the sliding engine hoist. With an air ratchet I could radically angle the engine assembly.
The engine is fully bolted to the front mounts and on a jack under the trans. Tomorrow I'll make the balance of the trans mount.
Before I dropped the engine on the mounts I took a measurement from the crossmember to the ground, then again after the engine was bolted in. Was lower by 1/4". The car is stitting level on jack stands at the factory lifting points.
With the firewall moved back a little from stock the engine mounts are centered on the front axle between the 1st and 2nd bore front to back. Weight distribution should be a major improvement over stock.
Now a lot of work to do. I started sticking some items in to make sure of fitment.
I have to say, very pleased by how it's looking so far.


 11-14-2016, 08:31 AM
#59
11-14-2016, 10:55 PM
#60
Staging Lane
Thread Starter