
1959 Biscayne 2 door wagon


 01-01-2017, 09:23 PM
#122

I actually have one of those lying around, but it was going to be hard to mount to the firewall since the upper right corner is kind of in the air and there is nothing to bolt it to.
I still have it, and I still get it out on occasion, its everybody's favorite!
Were you the one on the 2001 Power Tour with the real rowdy sounding WS6? Looks like the one in your avatar?
Eric, been a while since I last saw one of your builds - what ever happened to the green wagon truckster? classic and complete with Dinky's leash! I loved it!
https://www.youtube.com/watch?v=5HbBL62IiRE
https://www.youtube.com/watch?v=5HbBL62IiRE
Were you the one on the 2001 Power Tour with the real rowdy sounding WS6? Looks like the one in your avatar?
Last edited by ls1nova71; 01-01-2017 at 09:39 PM.
01-01-2017, 09:37 PM
#123
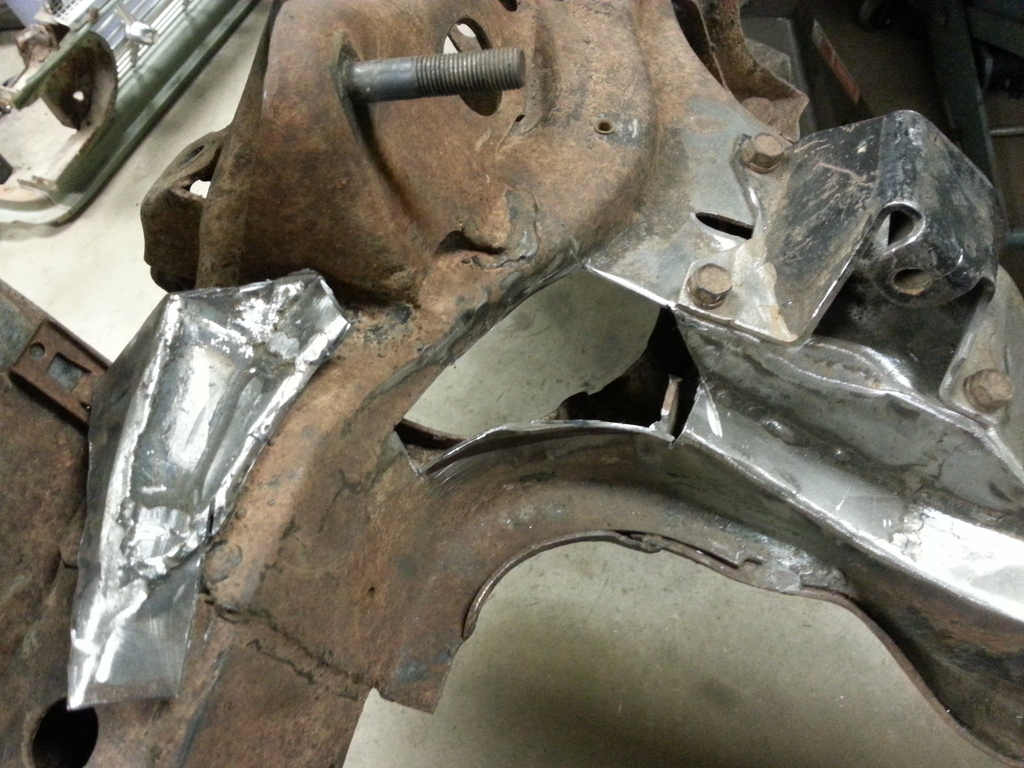
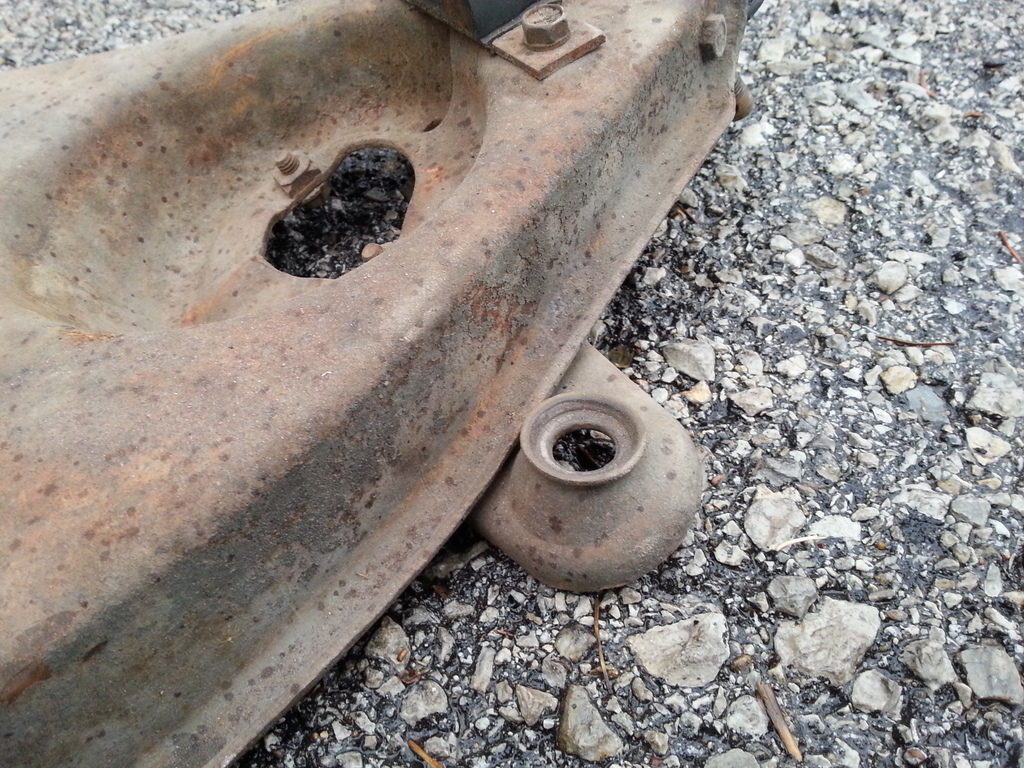
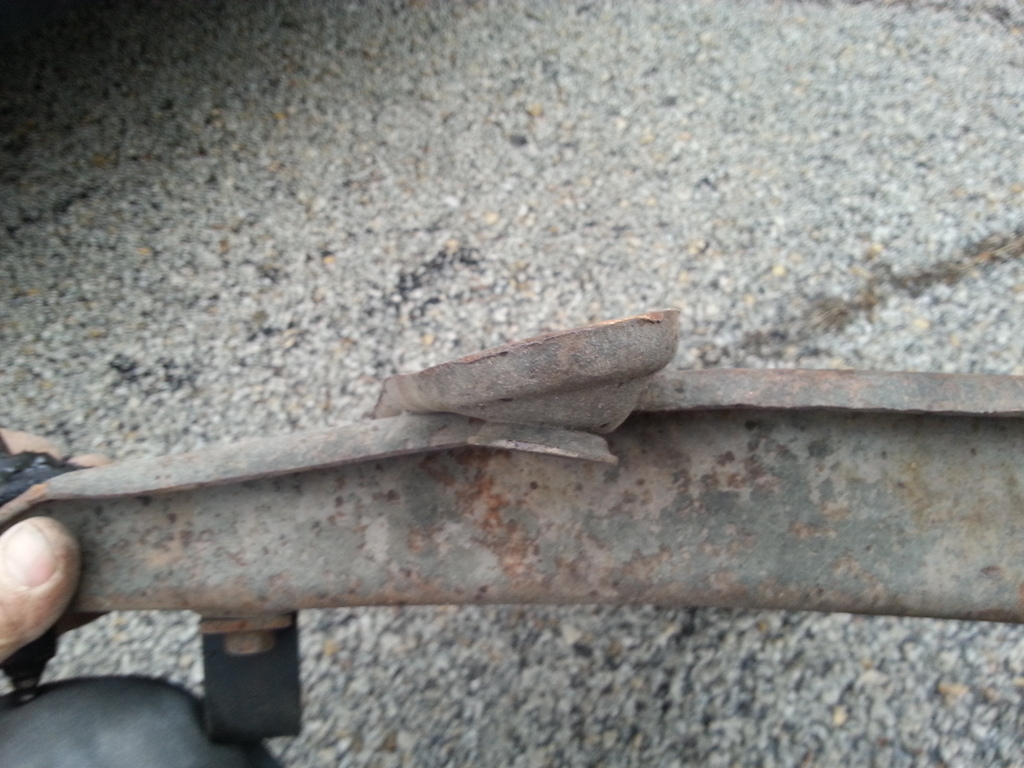
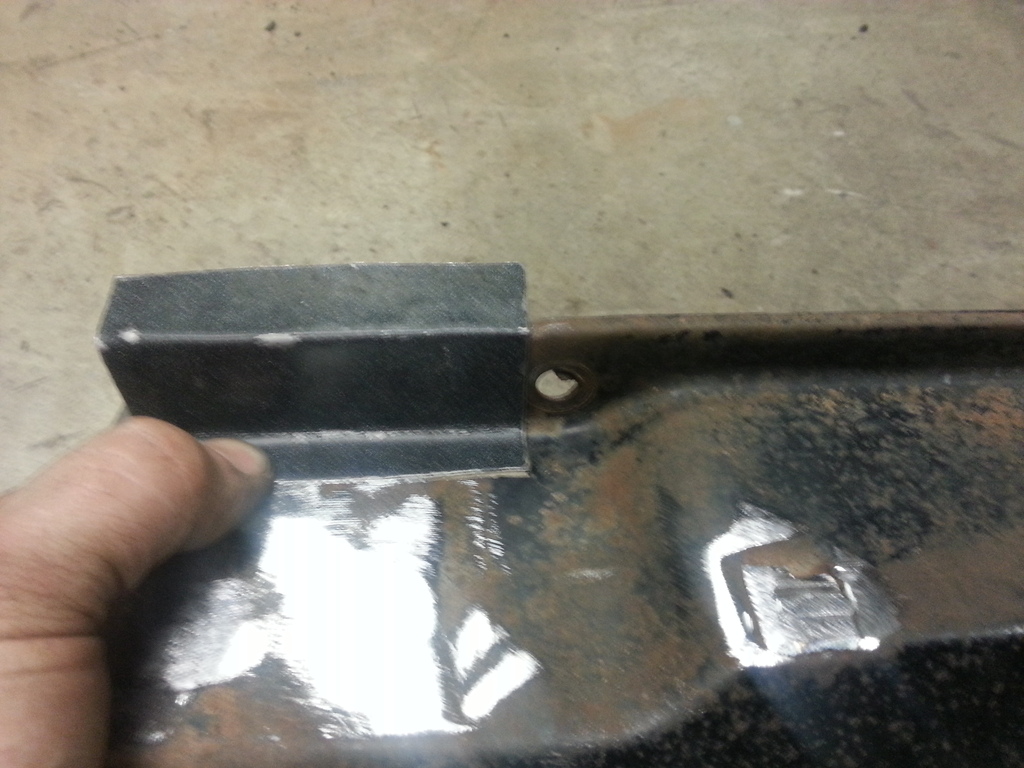
Not a lot of progress, but I did find out I made the notch in the frame for the compressor too small, so I got to cut it back out.....
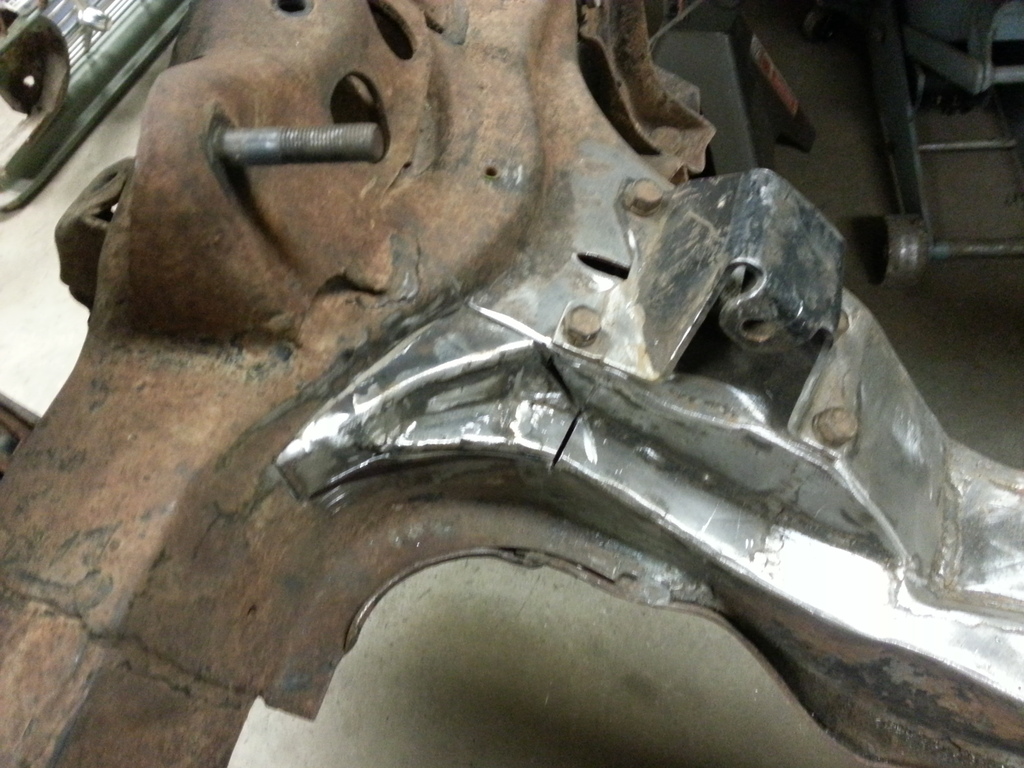
This is how much more needed cut out. Guess I didn't take any pics while I was welding it back in though.
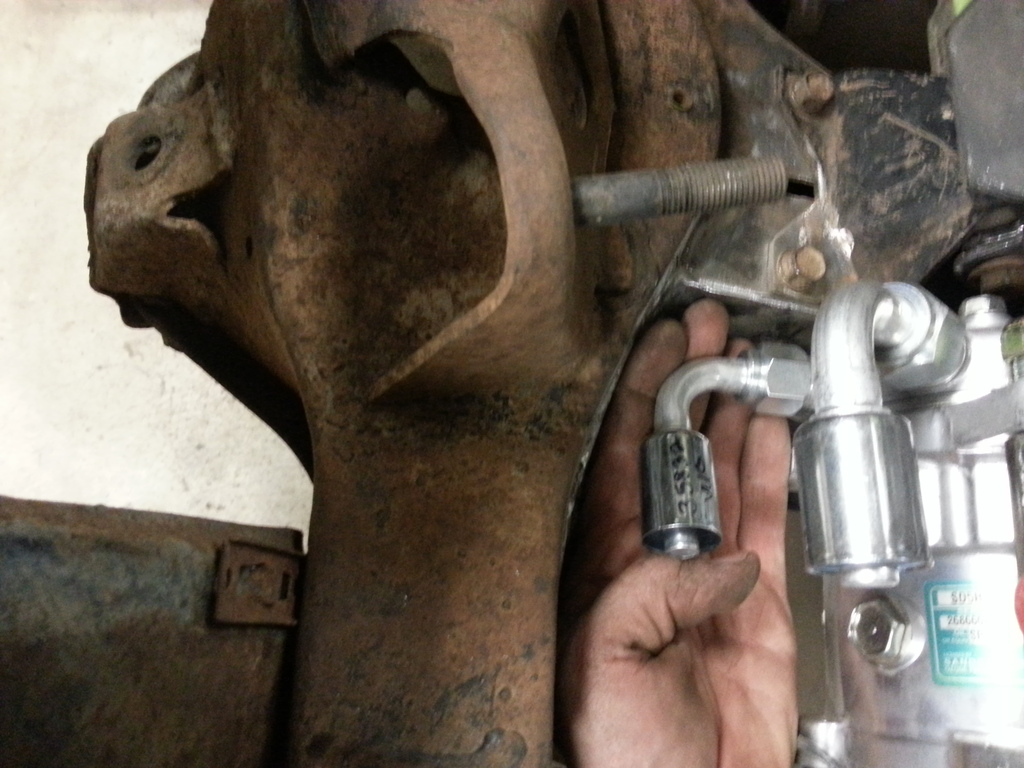
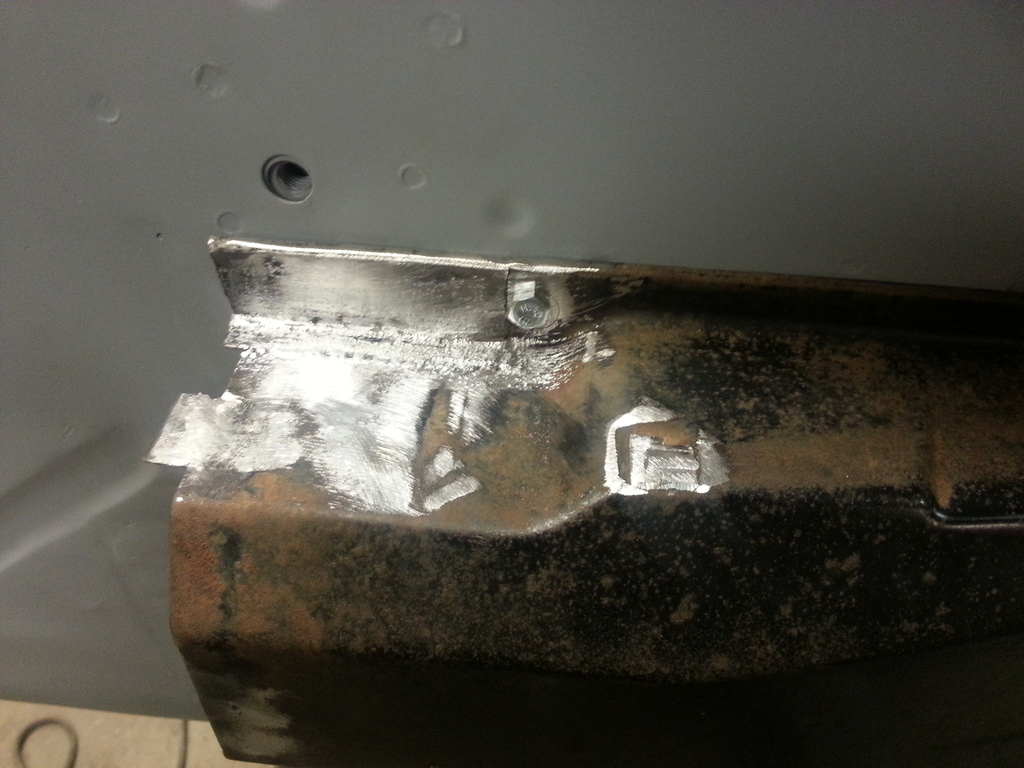
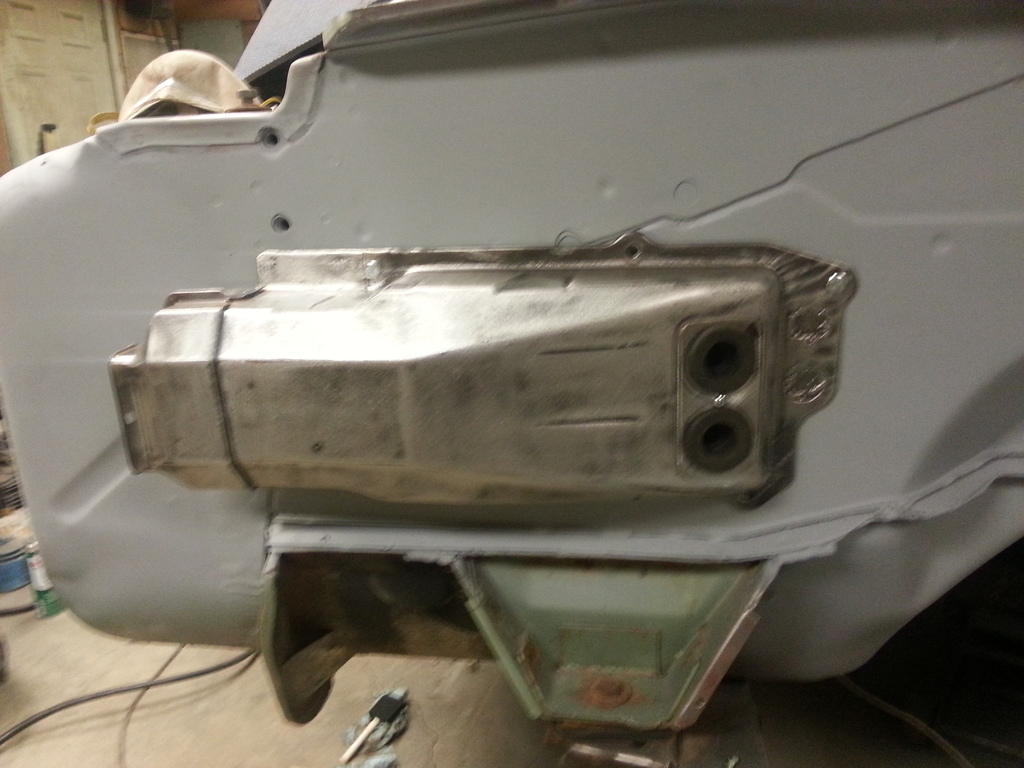
All welded up, and the fittings on the compressor to make sure it's big enough this time around.
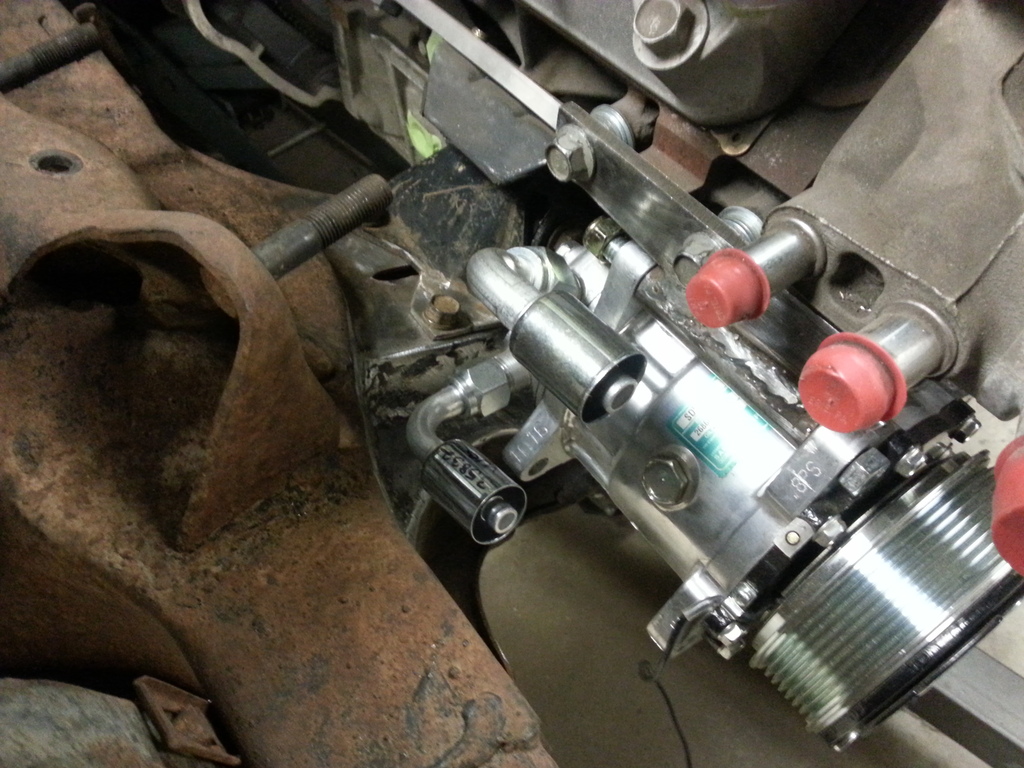
Looks like it will work.
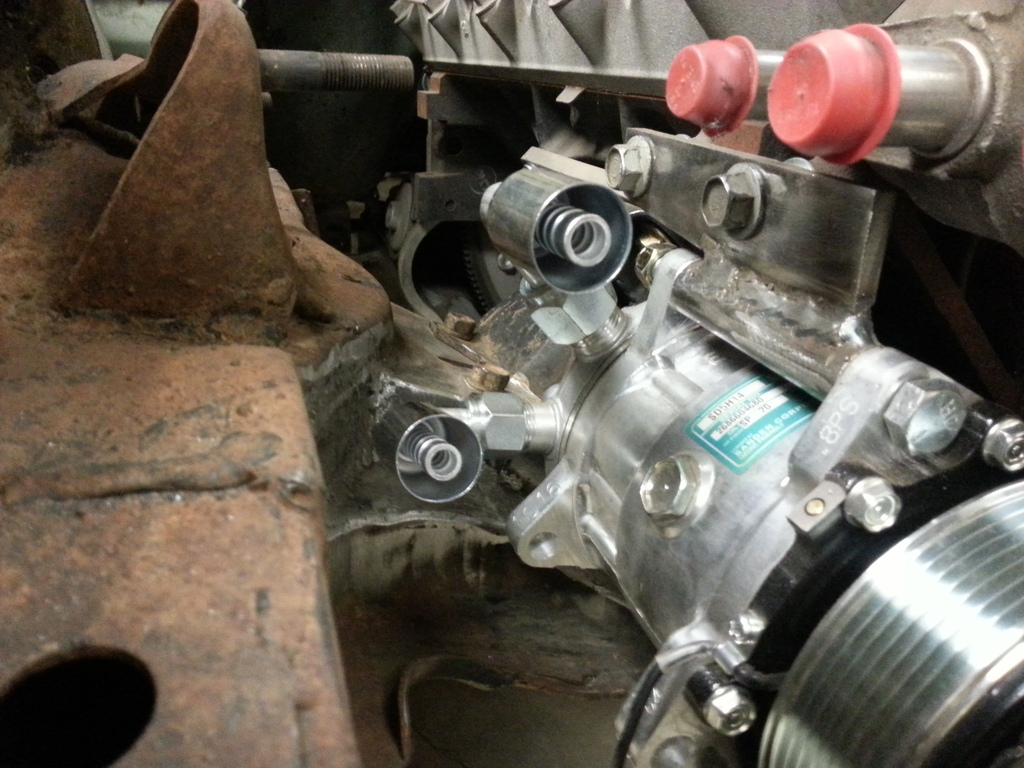
I can get my hand all the way around the high side fitting, so it shouldn't be a problem.
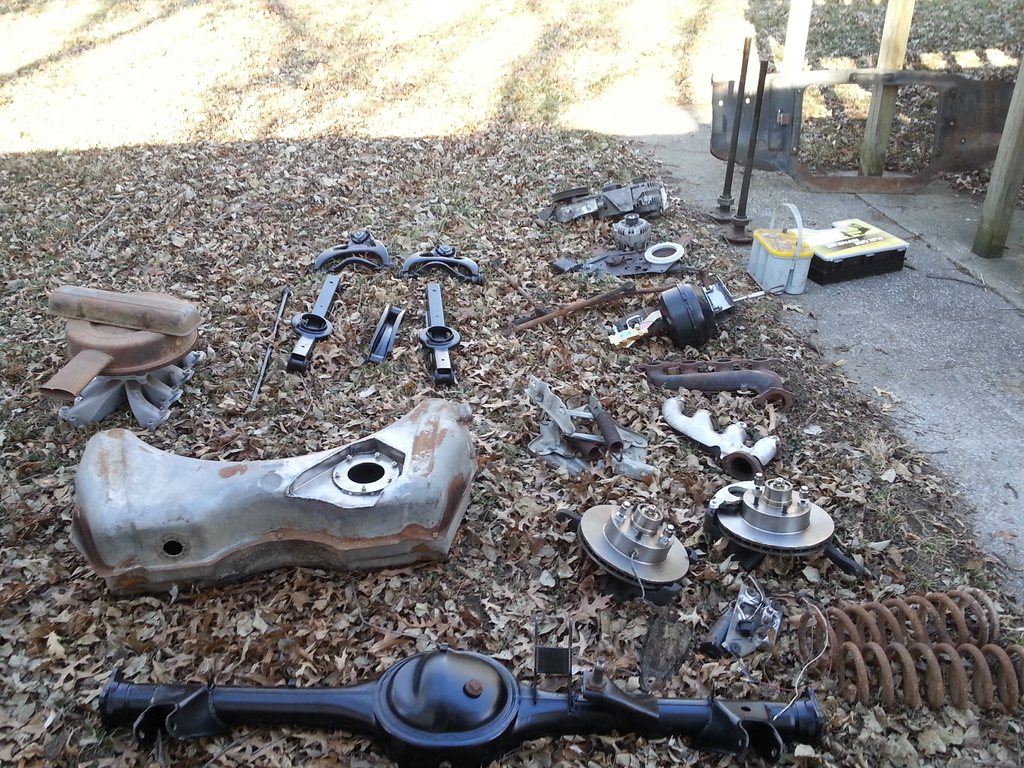
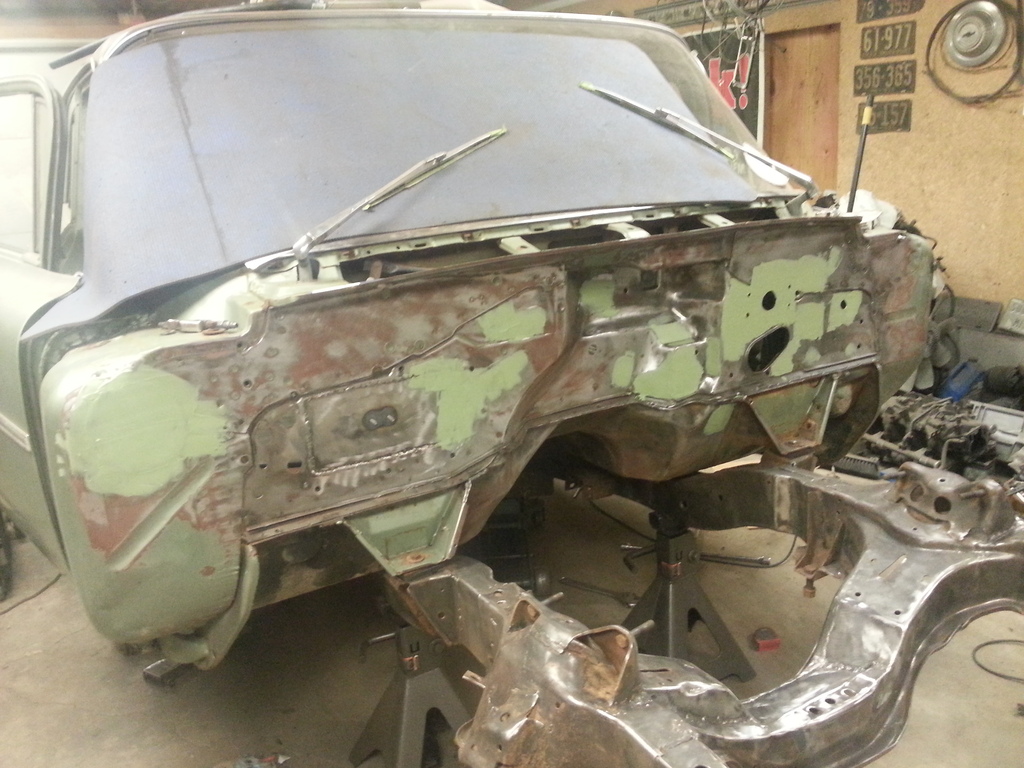
Then had to take some stuff out of the garage to make room. I'll be putting all this stuff in the basement for the time being. My back yard looked like a swap meet, and now the basement just looks like a car blew up down there. I need to get to a point where I can start putting things back together, cars take up a lot more room when disassembled, the whole garage and half the basement.....

This is how much more needed cut out. Guess I didn't take any pics while I was welding it back in though.

All welded up, and the fittings on the compressor to make sure it's big enough this time around.

Looks like it will work.

I can get my hand all the way around the high side fitting, so it shouldn't be a problem.

Then had to take some stuff out of the garage to make room. I'll be putting all this stuff in the basement for the time being. My back yard looked like a swap meet, and now the basement just looks like a car blew up down there. I need to get to a point where I can start putting things back together, cars take up a lot more room when disassembled, the whole garage and half the basement.....
 01-01-2017, 10:19 PM
#124
Then had to take some stuff out of the garage to make room. I'll be putting all this stuff in the basement for the time being. My back yard looked like a swap meet, and now the basement just looks like a car blew up down there. I need to get to a point where I can start putting things back together, cars take up a lot more room when disassembled, the whole garage and half the basement.....
I've discovered to properly disassemble a car it takes four bays.... Body, interior, chassis and engine. Any less and you still have parts attached to something.
...and you aren't doing it properly unless the neighbours or cops drive by and check out your chop shop at least once. Hahaha!!!
 01-02-2017, 12:05 PM
#125
I've discovered to properly disassemble a car it takes four bays.... Body, interior, chassis and engine. Any less and you still have parts attached to something.
...and you aren't doing it properly unless the neighbours or cops drive by and check out your chop shop at least once. Hahaha!!!
...and you aren't doing it properly unless the neighbours or cops drive by and check out your chop shop at least once. Hahaha!!!
01-04-2017, 10:33 PM
#127
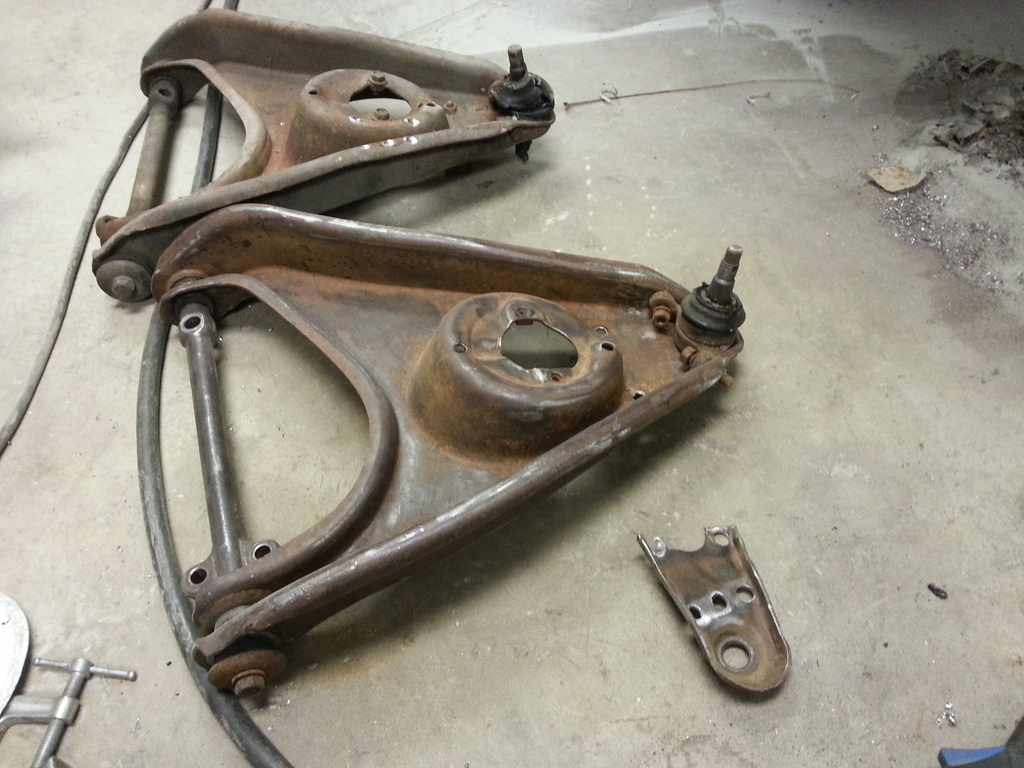
So my bud gofastwclass came over the other day and sold me a sway bar and these lower control arms. I will be cutting the sway bar mounts off of them and welding them to my arms. He told me he had them after I spent a whole evening replacing the bushings in one of my arms, or else I would have just used these and made life easier...
I was originally going to just make the mounts, but for the price it was money well spent not having to reinvent the wheel, these wouldn't have been real hard to make, but this way I will save some time.

Got the first round of mud slingin' done on the firewall....
All sanded, etch primed and urethane primer on.


I was originally going to just make the mounts, but for the price it was money well spent not having to reinvent the wheel, these wouldn't have been real hard to make, but this way I will save some time.


Got the first round of mud slingin' done on the firewall....

All sanded, etch primed and urethane primer on.

Last edited by ls1nova71; 01-04-2017 at 10:39 PM.
01-09-2017, 10:46 PM
#129
So it looks like the sway bar mounts are just held on with 3 spot welds, easy enough to remove....
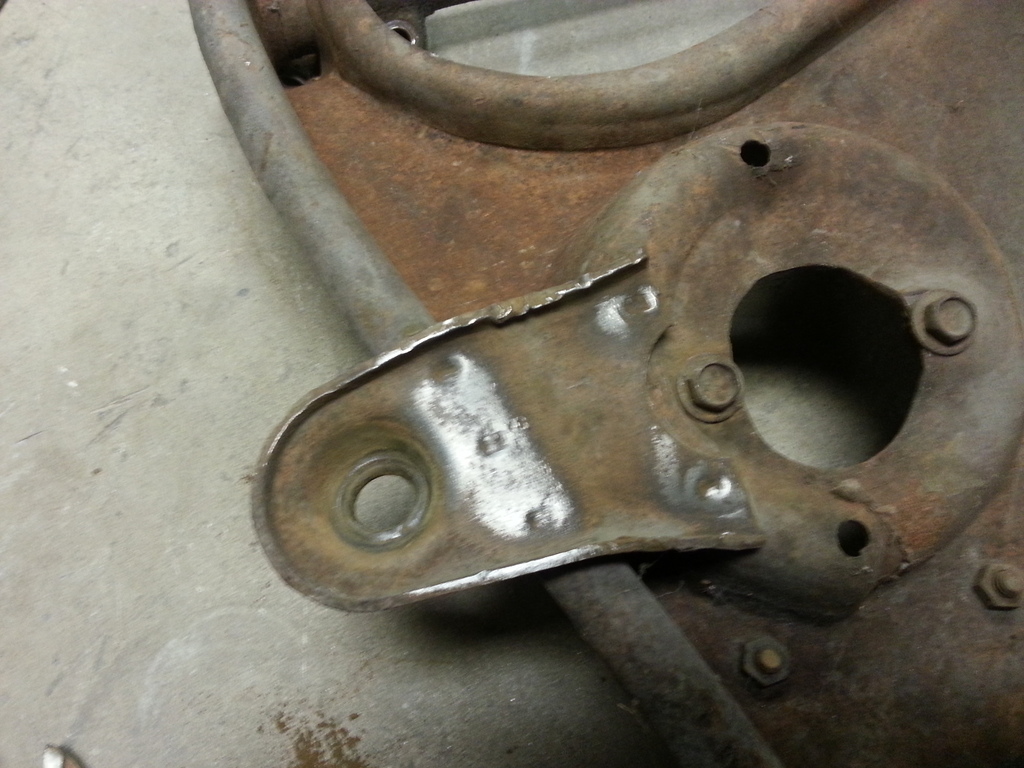
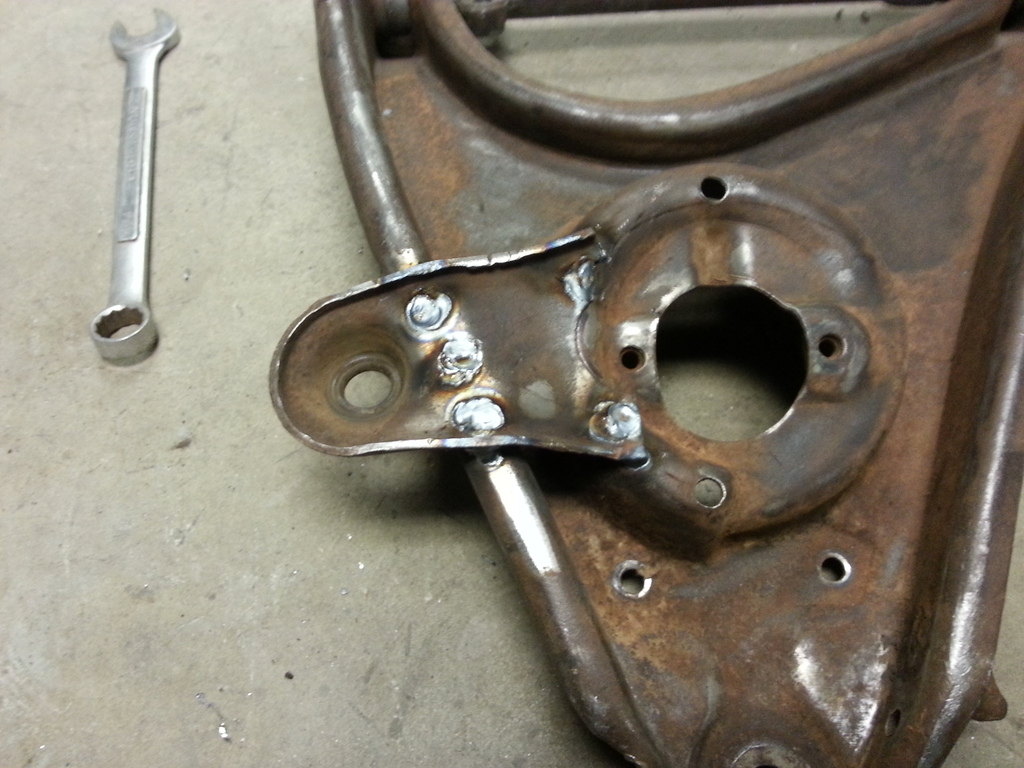
Drilled them out and hit them with the BFH...
Plug welded back on my arms with a tack on the edges just for good measure. After this I cleaned them and the sway bar up a bit and hit them with the POR15, but guess I didn't get any pics of that.
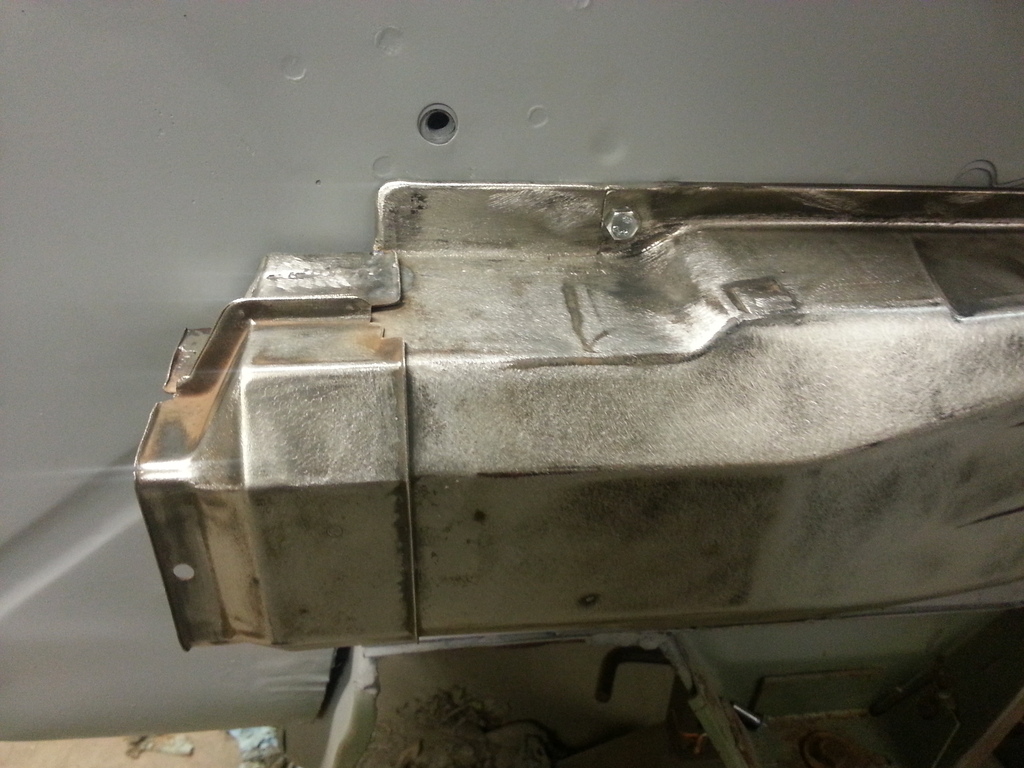
Since I'm getting closer to painting the firewall, I needed to do a couple mods to the heater box I'm using to hide the A/C and heater lines. I wanted the box to be completely against the firewall so that the fittings don't show at all, so I had to make a few small filler pieces.
Welded in
Rounded the corner off a bit for looks, then welded on the other part that used to bolt on, so it's all one piece
After putting the fender on for line mock up, it became apparent that there was no way both A/C lines and both heater hoses were going to fit in that small area, so I changed paths of the heater hoses. They will now be coming out of the side of the heater box itself.
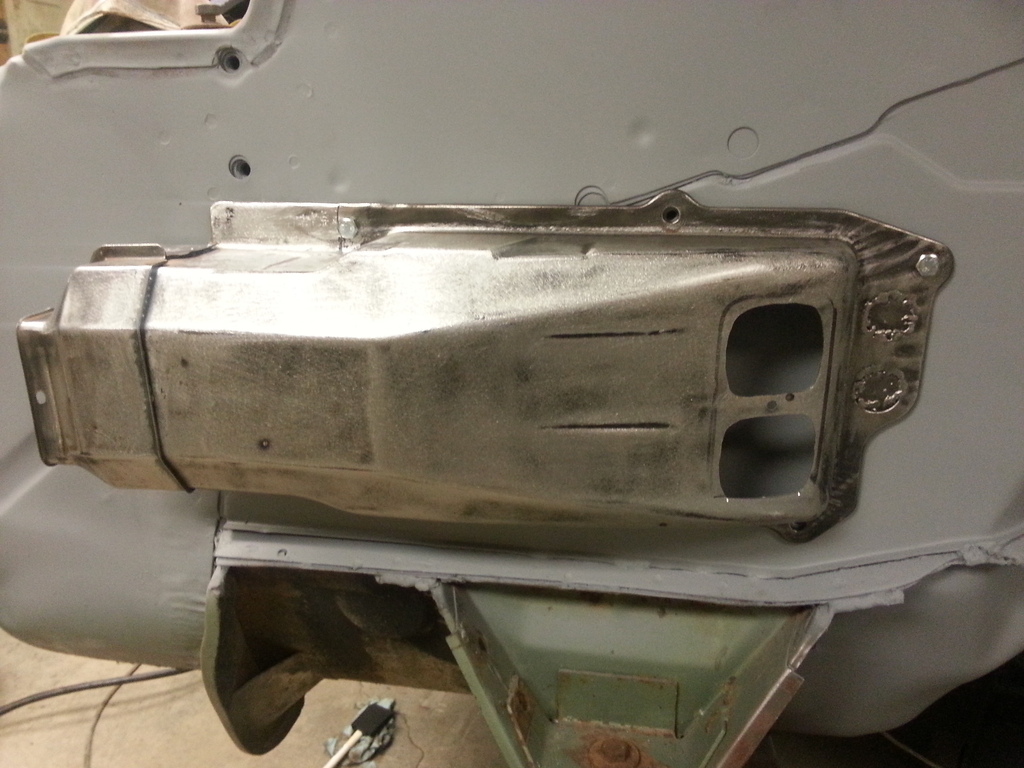
Made this little filler piece to that I can put the box on easier, then slide this on and it secures with one screw. The heater hoses will now come out of the box, go along the inner fender through the factory hose retainer clamp and then to the engine, should look mostly stock.

Drilled them out and hit them with the BFH...

Plug welded back on my arms with a tack on the edges just for good measure. After this I cleaned them and the sway bar up a bit and hit them with the POR15, but guess I didn't get any pics of that.

Since I'm getting closer to painting the firewall, I needed to do a couple mods to the heater box I'm using to hide the A/C and heater lines. I wanted the box to be completely against the firewall so that the fittings don't show at all, so I had to make a few small filler pieces.

Welded in

Rounded the corner off a bit for looks, then welded on the other part that used to bolt on, so it's all one piece

After putting the fender on for line mock up, it became apparent that there was no way both A/C lines and both heater hoses were going to fit in that small area, so I changed paths of the heater hoses. They will now be coming out of the side of the heater box itself.

Made this little filler piece to that I can put the box on easier, then slide this on and it secures with one screw. The heater hoses will now come out of the box, go along the inner fender through the factory hose retainer clamp and then to the engine, should look mostly stock.
 01-09-2017, 11:02 PM
#130
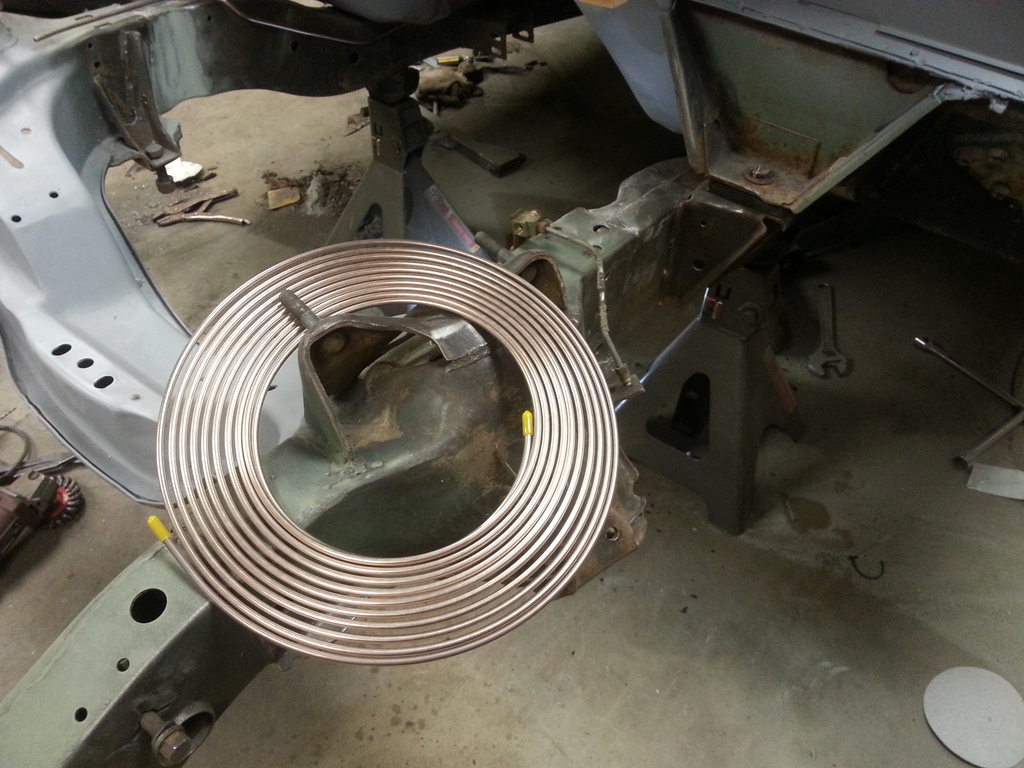
Next it was time for everybody's favorite job.... Bending brake lines.  Started with two 25ft rolls of Nicop brake line, one 3/16" and one 1/4". If you've never used this stuff before, you don't know what your missing! Its super easy to bend and flaring is a breeze.
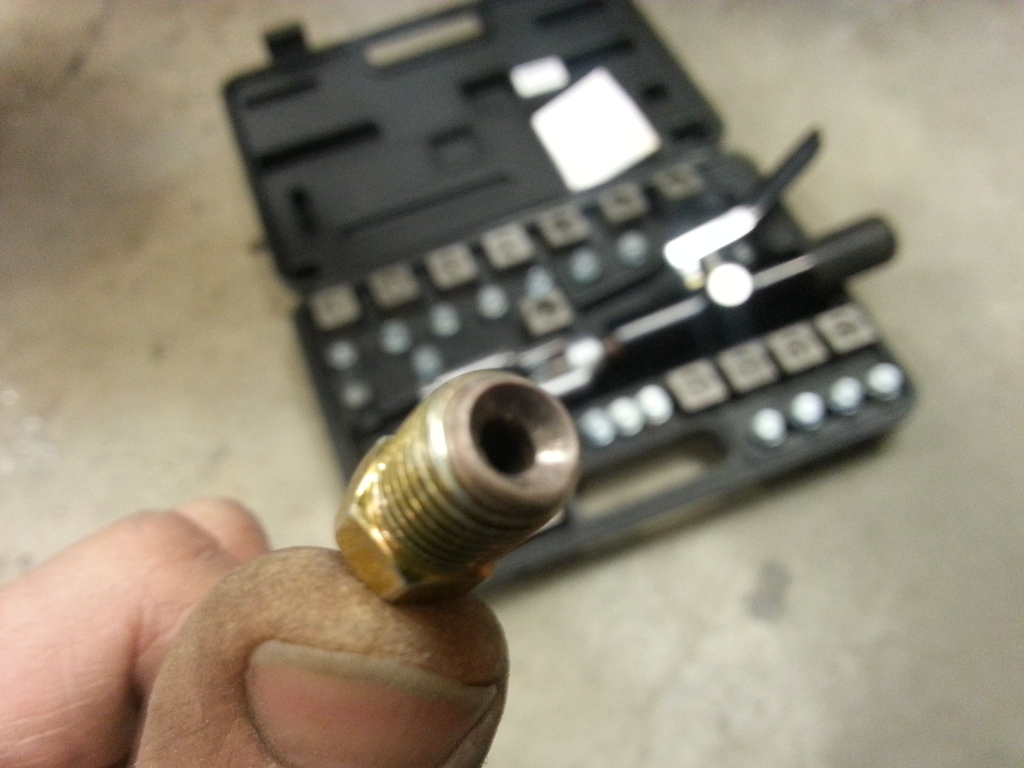
Got out the best flaring too ever made, although with the Nicop line it really isn't necessary, its still the best!
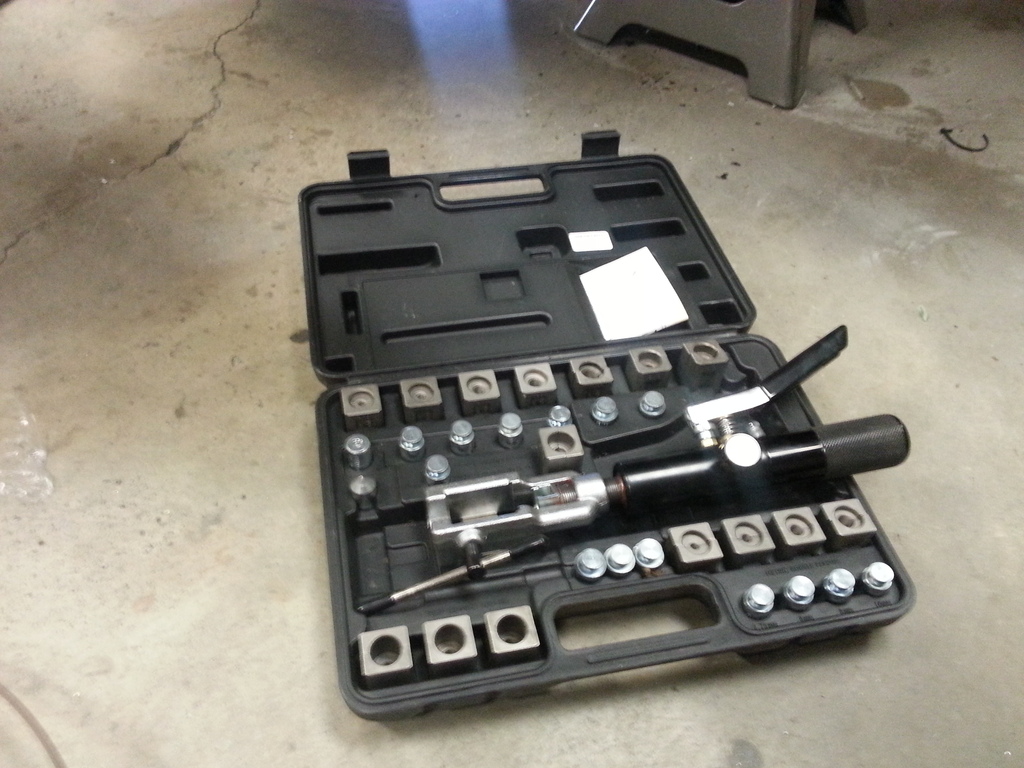
The line flares really nice.
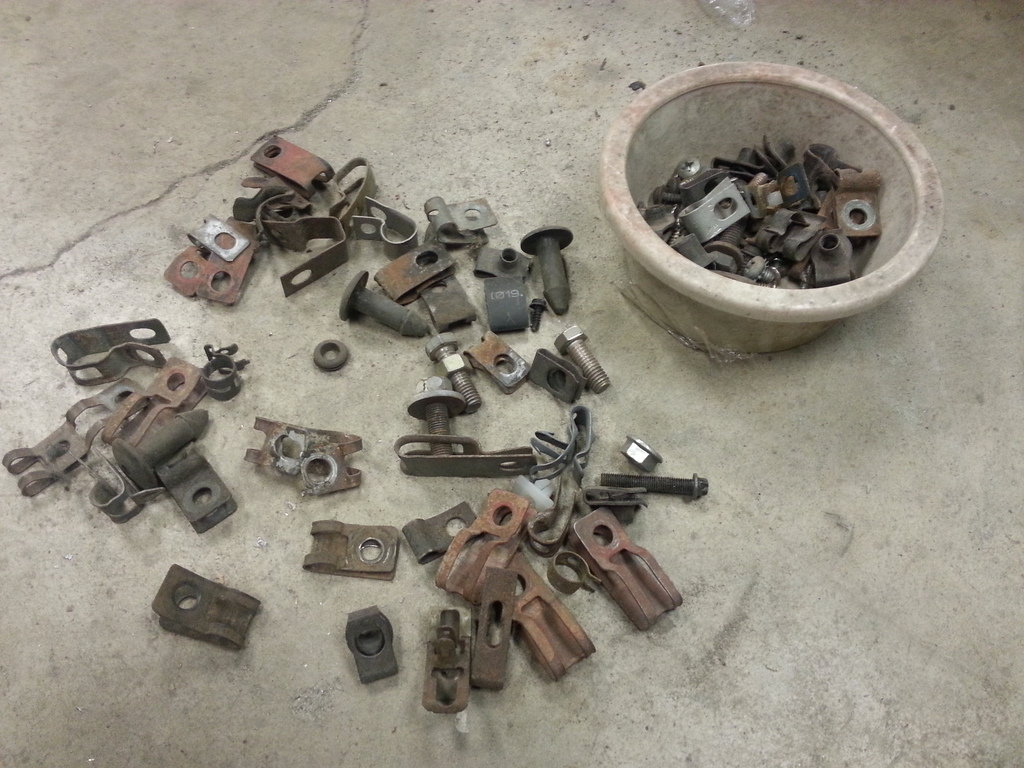
Everybody should have a bowl of factory line clamps! I get these at the Pick-n-Pull and they make the install look factory.
Put the fender on and the column back in to check for clearance.
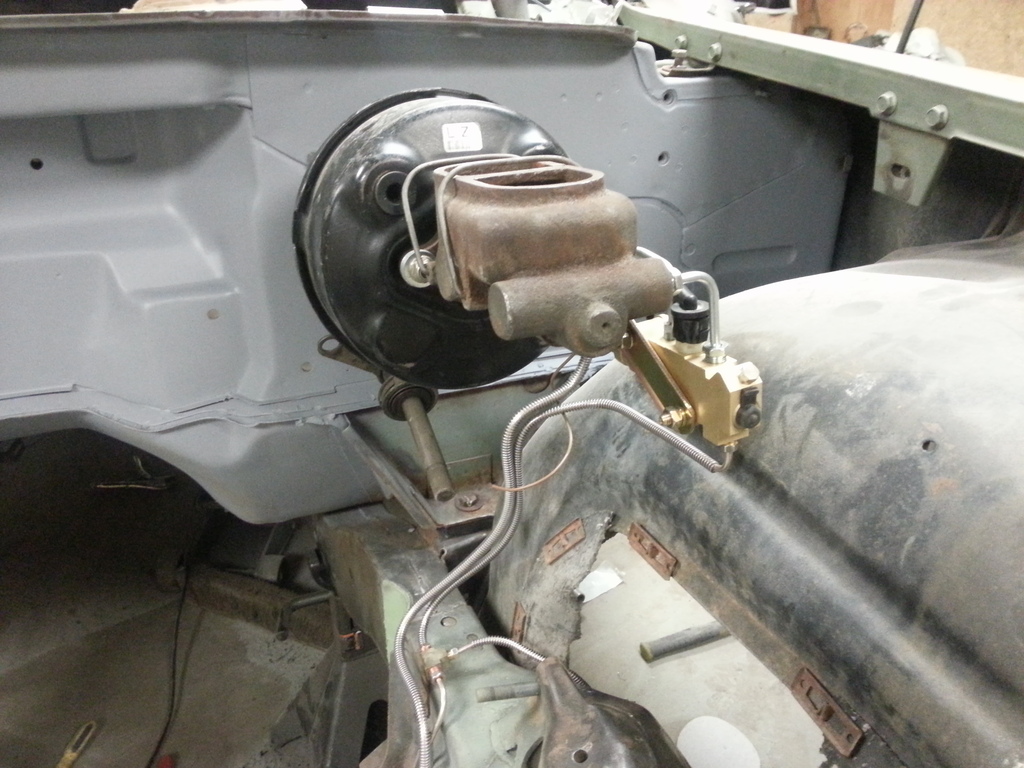
Got the front lines done and bolted on.
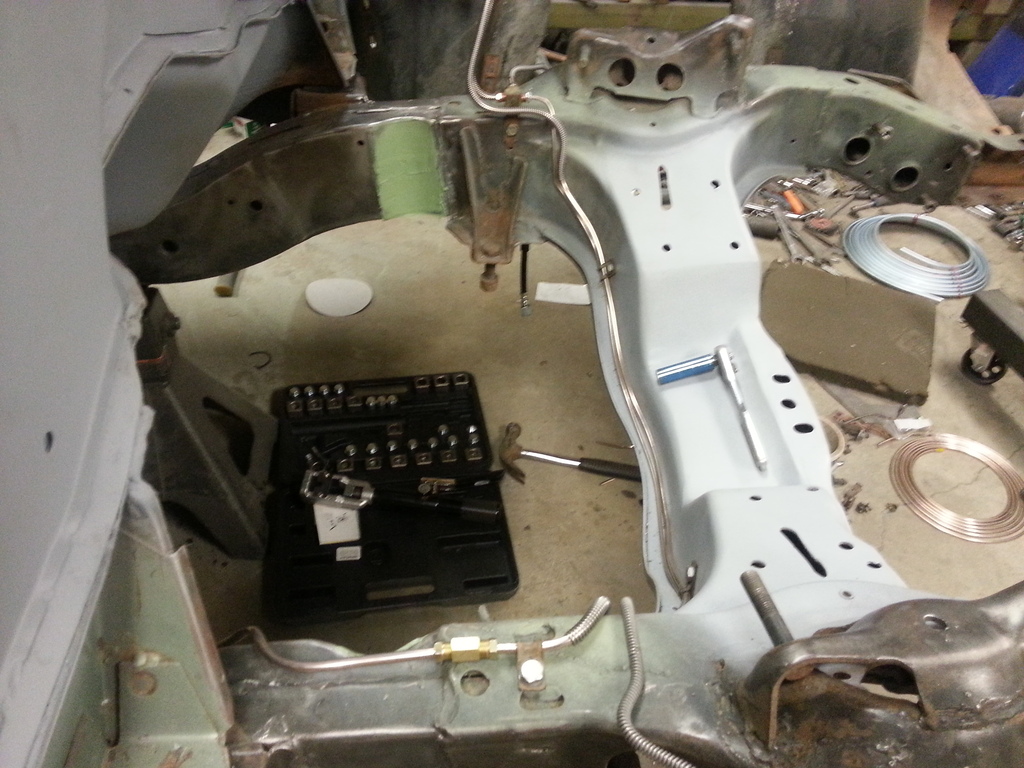
1/4" line going toward the rear of the car. I put brake line armor on the bends where it contacts the frame.
And ran all the way back to the hose going to the rear end. Next will be fuel lines.....
Started with two 25ft rolls of Nicop brake line, one 3/16" and one 1/4". If you've never used this stuff before, you don't know what your missing! Its super easy to bend and flaring is a breeze.
Got out the best flaring too ever made, although with the Nicop line it really isn't necessary, its still the best!

The line flares really nice.

Everybody should have a bowl of factory line clamps! I get these at the Pick-n-Pull and they make the install look factory.

Put the fender on and the column back in to check for clearance.

Got the front lines done and bolted on.

1/4" line going toward the rear of the car. I put brake line armor on the bends where it contacts the frame.

And ran all the way back to the hose going to the rear end. Next will be fuel lines.....

 01-10-2017, 03:13 AM
#133
The heater box mod turned out well. I wonder how long it will take average people to see what you've done. 
I love my flare tool, that thing is awesome. Did you get the transmission line adapter? Looks like it's in there.
I use NiCopp for brake, transmission and fuel lines.
I love my flare tool, that thing is awesome. Did you get the transmission line adapter? Looks like it's in there.
I use NiCopp for brake, transmission and fuel lines.
 01-10-2017, 09:40 PM
#137
I can't help thinking back to when you modded the brake M/C location... IIRC, I saw it with a SBC, but did you test fit all that with the LS engine (and valve cover!) in place? Sure doesn't look like its gonna clear. I ran into this on my Maverick, no way to run a booster.
01-11-2017, 05:15 AM
#138
Fuel line running time! I didn't get the Nicop for this, just the plain old steel line in a 25 foot roll.
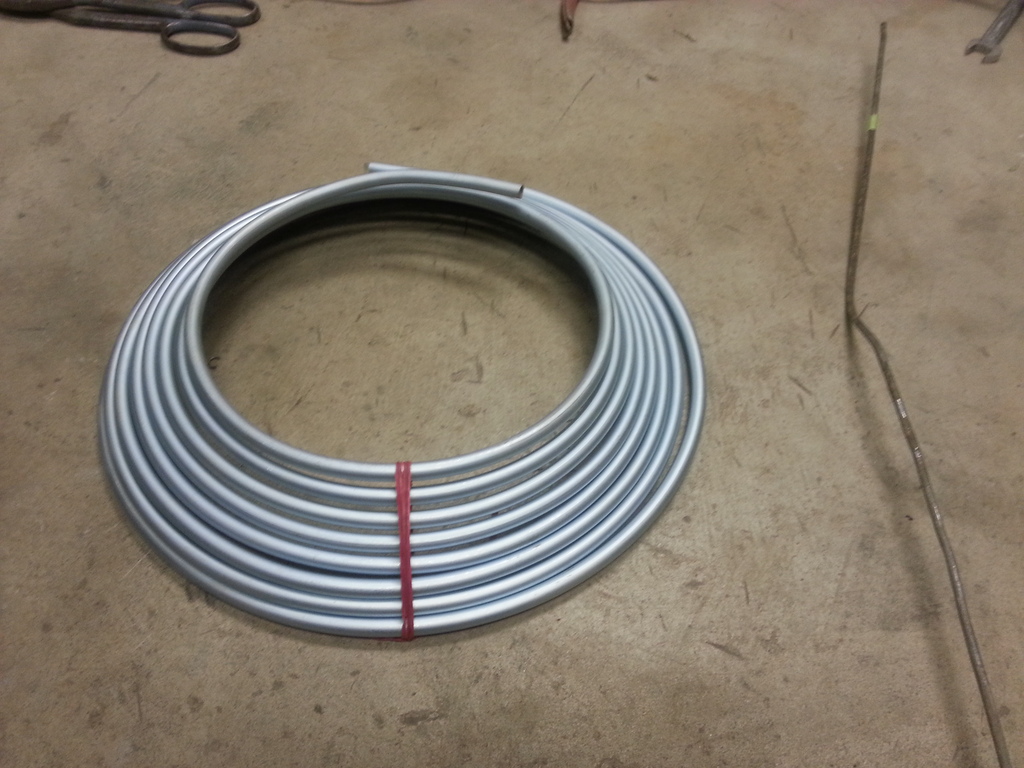
This is where I become OCD. I was determined to do this run in one piece, all 8' 4" of it! If there wasn't a body on the frame, this would be a piece of cake, but with the body on, it becomes an exercise in patients... It's a pet peeve of mine, I cant stand shoddy fuel lines. I've seen way too many cars with all rubber line run front to back and secured with zip ties.... If you've ever watched your car burn, I can tell you from first hand experience it's not fun, so fuel lines are not something you want to skimp on, or take the easy, lazy way out on.
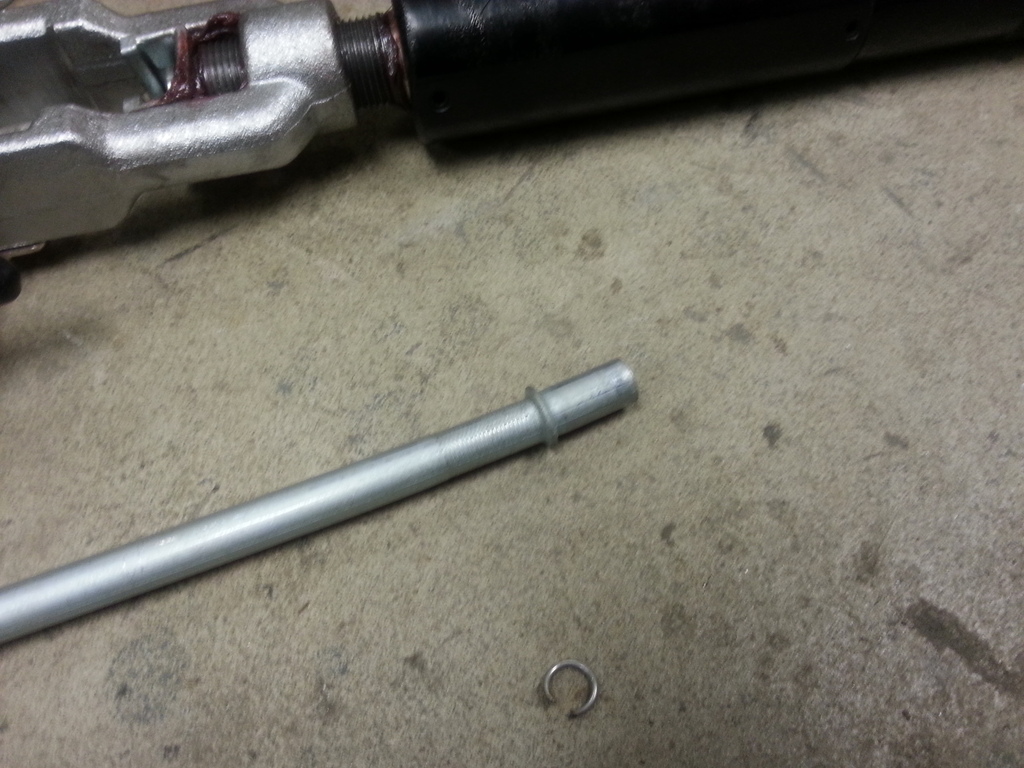
Put a quick connect flare on one end.
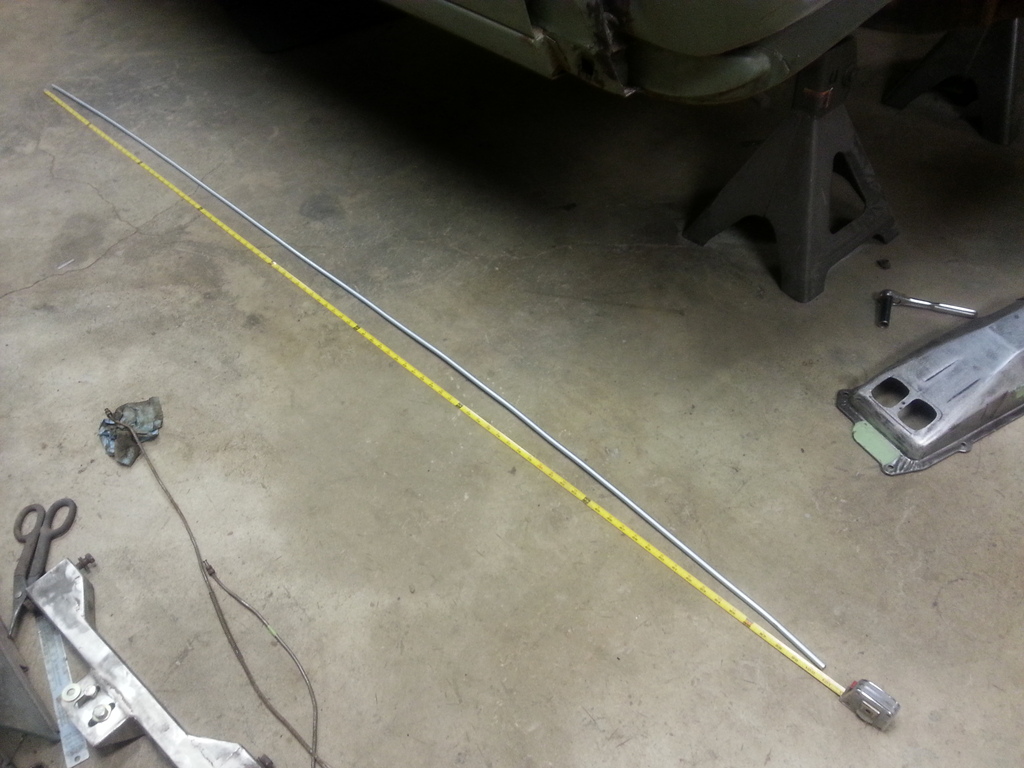
Then took the old brake line I had removed earlier and straightened it out so I could use it to make my templates from. It's easy to bend and keeps its shape better than bailing wire.
So far so good....
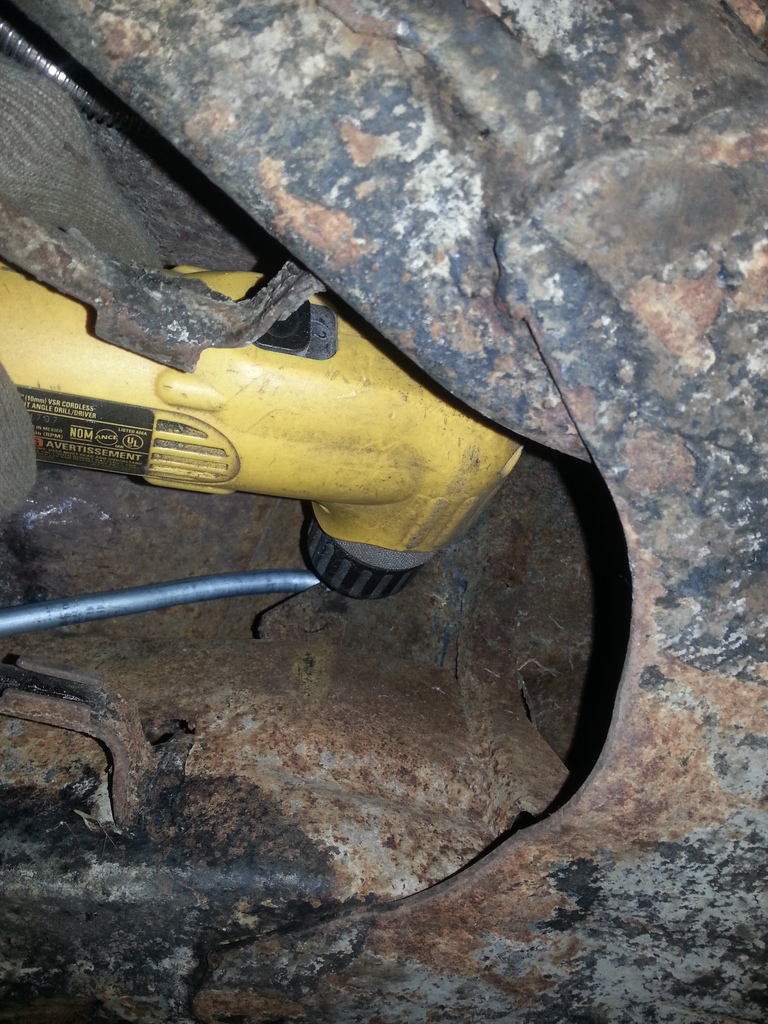
Had to drill a hole in the frame to put a clamp on to hold the line. Here's a tip, buy some cheap drill bits at Harbor freight or Northern Tool, and cut them down so that you can get the drill in tight spots. I've found out that's about all those bits are good for! $10 for 50 drill bits? What a bargain! I've lost count of how many broke the first time using them.....
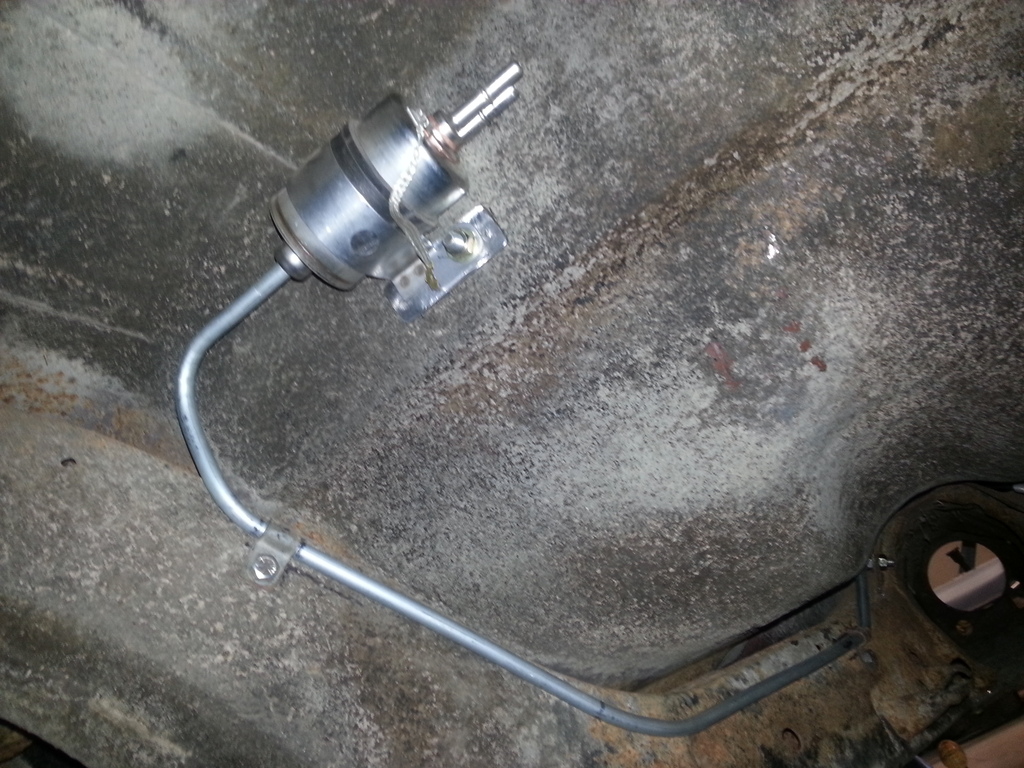
Line bolted in...
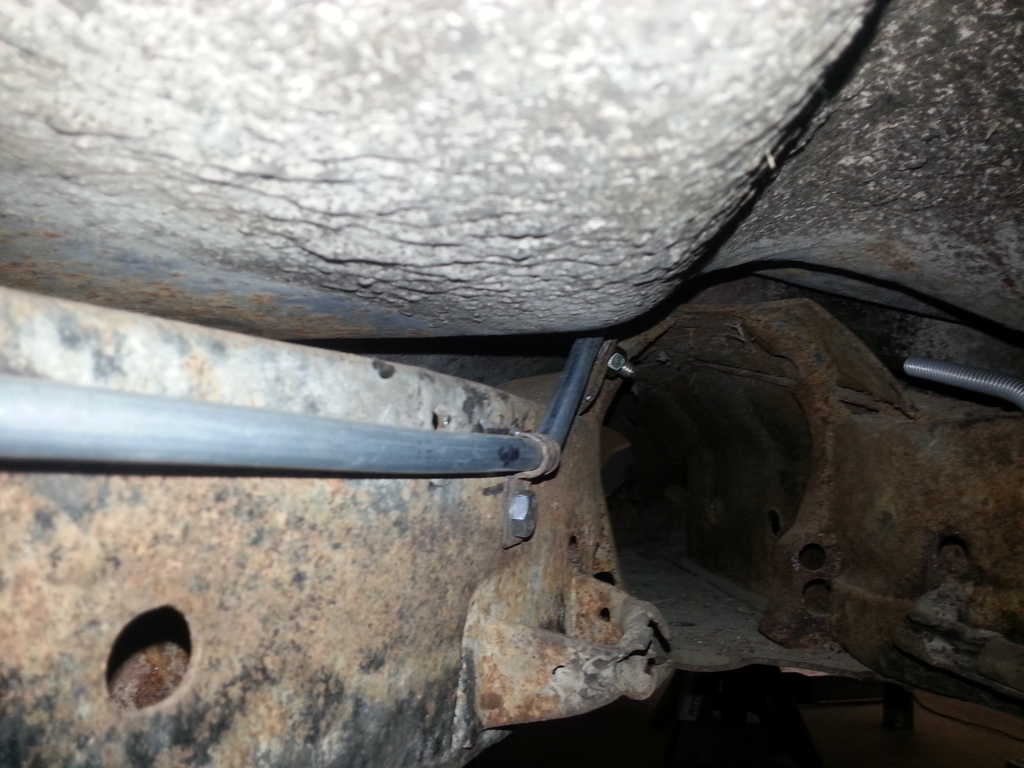
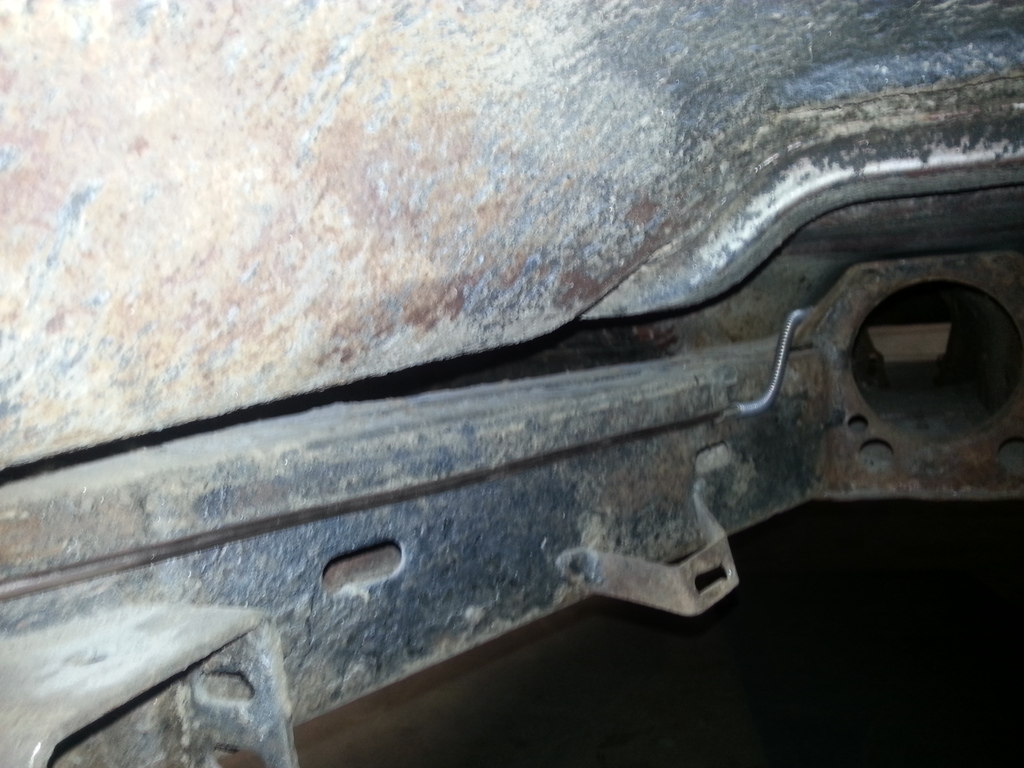
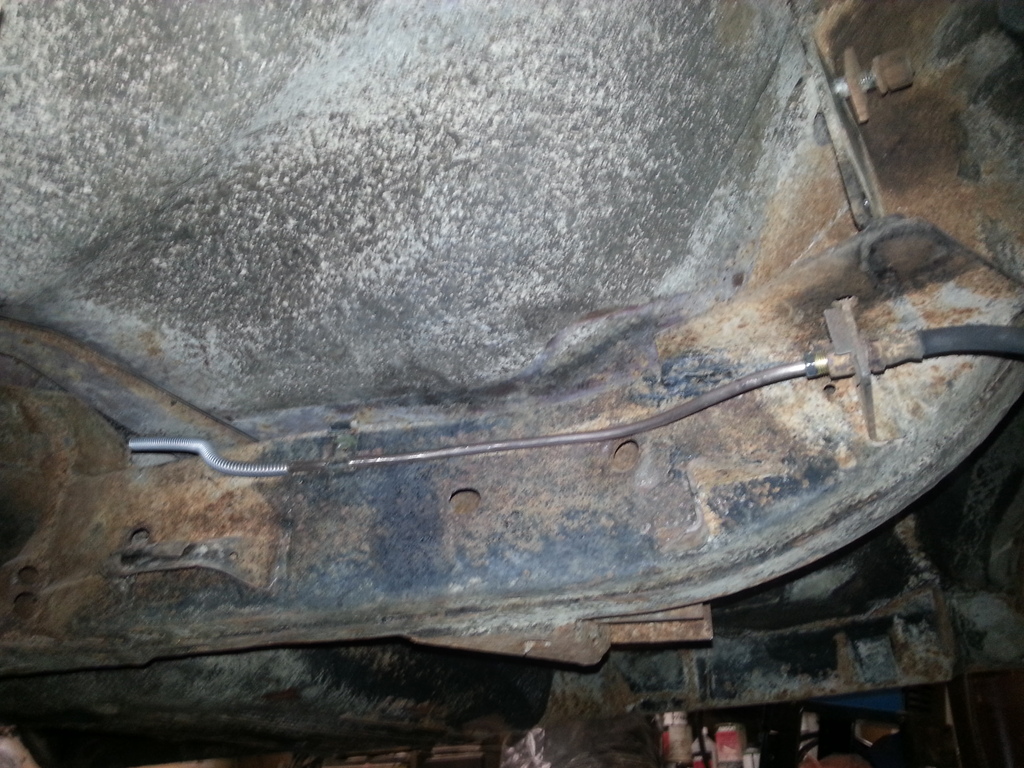
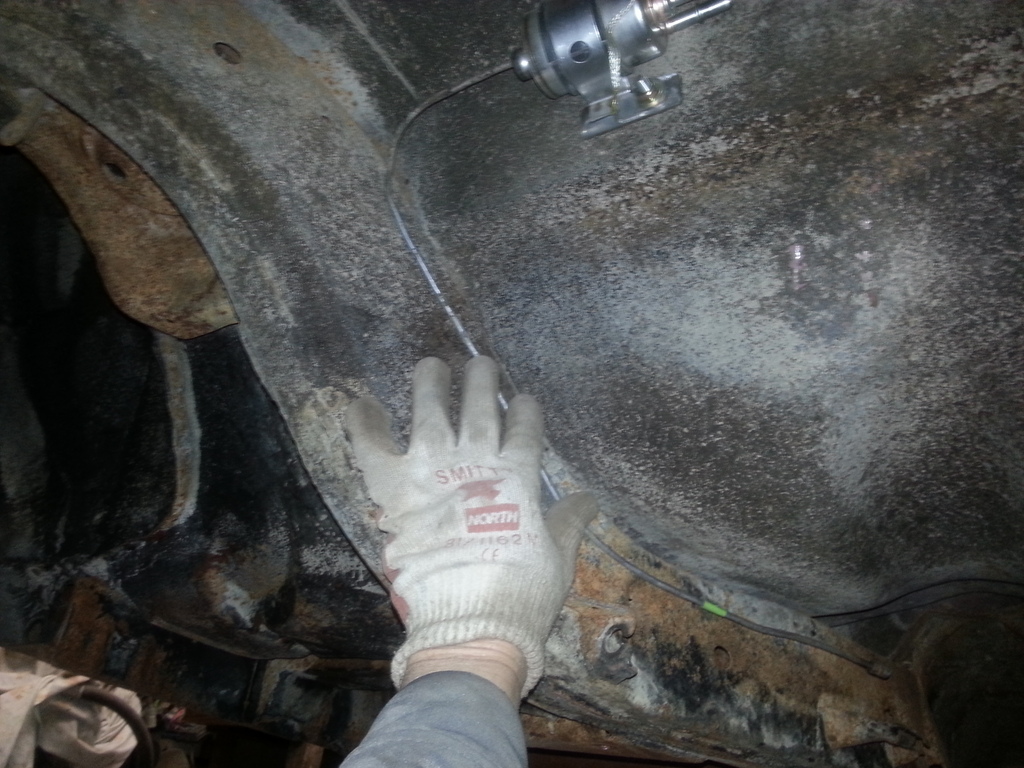
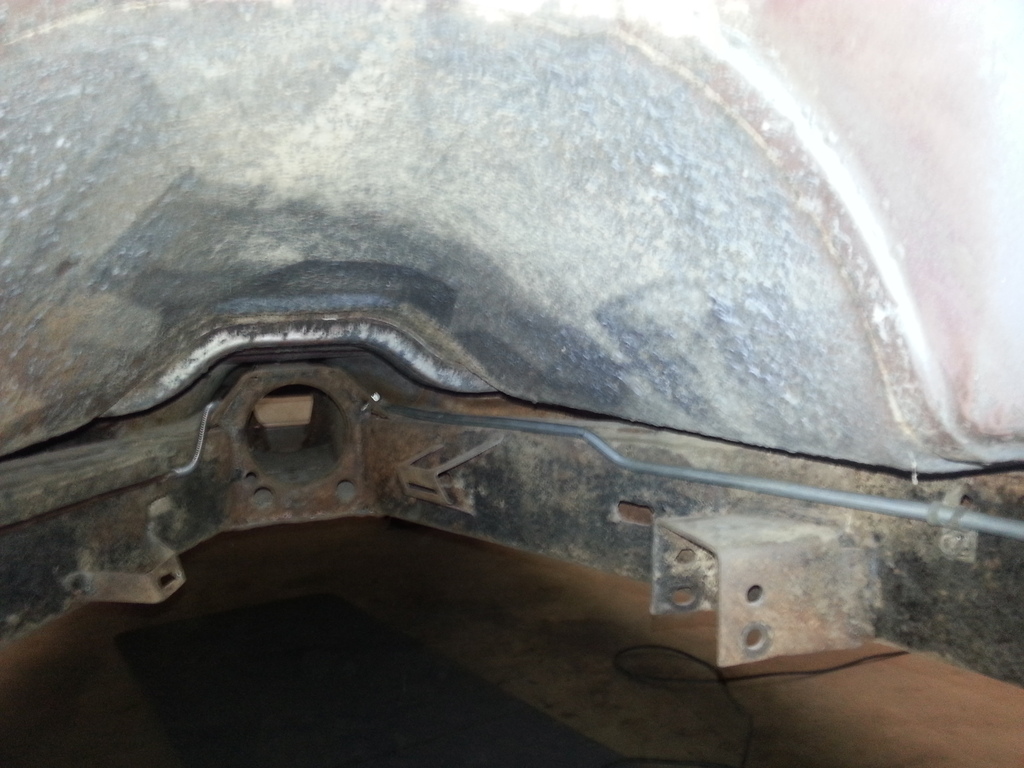
This is the line in the center of the X frame, it's secured on both ends, and isn't touching anything in the middle.
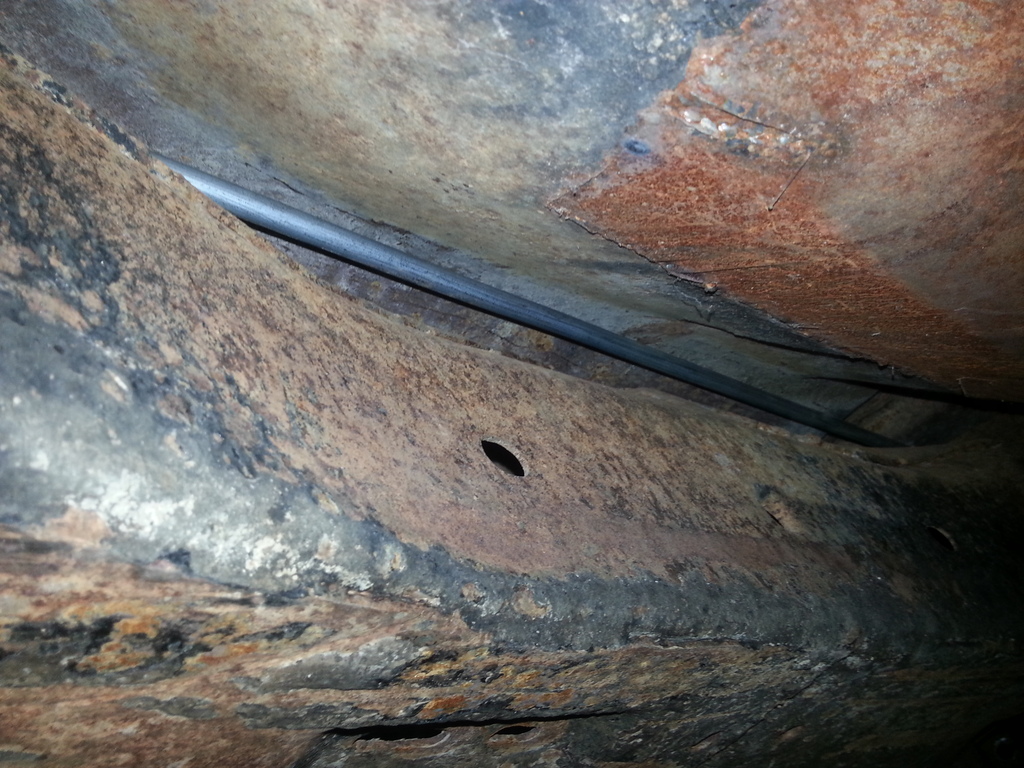
And ran all the way to the front. Just have to figure out where to make the bend to hook the flexible line to the engine, but that will have to wait until in get all the fittings for the fuel rails.

This is where I become OCD. I was determined to do this run in one piece, all 8' 4" of it!
If there wasn't a body on the frame, this would be a piece of cake, but with the body on, it becomes an exercise in patients... It's a pet peeve of mine, I cant stand shoddy fuel lines. I've seen way too many cars with all rubber line run front to back and secured with zip ties.... If you've ever watched your car burn, I can tell you from first hand experience it's not fun, so fuel lines are not something you want to skimp on, or take the easy, lazy way out on.
Put a quick connect flare on one end.

Then took the old brake line I had removed earlier and straightened it out so I could use it to make my templates from. It's easy to bend and keeps its shape better than bailing wire.

So far so good....

Had to drill a hole in the frame to put a clamp on to hold the line. Here's a tip, buy some cheap drill bits at Harbor freight or Northern Tool, and cut them down so that you can get the drill in tight spots. I've found out that's about all those bits are good for!
$10 for 50 drill bits? What a bargain! I've lost count of how many broke the first time using them..... 
Line bolted in...

This is the line in the center of the X frame, it's secured on both ends, and isn't touching anything in the middle.

And ran all the way to the front. Just have to figure out where to make the bend to hook the flexible line to the engine, but that will have to wait until in get all the fittings for the fuel rails.
 01-11-2017, 05:18 AM
#139
I can't help thinking back to when you modded the brake M/C location... IIRC, I saw it with a SBC, but did you test fit all that with the LS engine (and valve cover!) in place? Sure doesn't look like its gonna clear. I ran into this on my Maverick, no way to run a booster.
01-11-2017, 08:34 AM
#140
On The Tree

Love your current build and your earlier truck builds. What brand of flaring tool are you using? I need one that can make the lips on a gas line to use push style fittings.
Ricky
Ricky