
1959 Biscayne 2 door wagon


 02-06-2017, 11:07 PM
#162
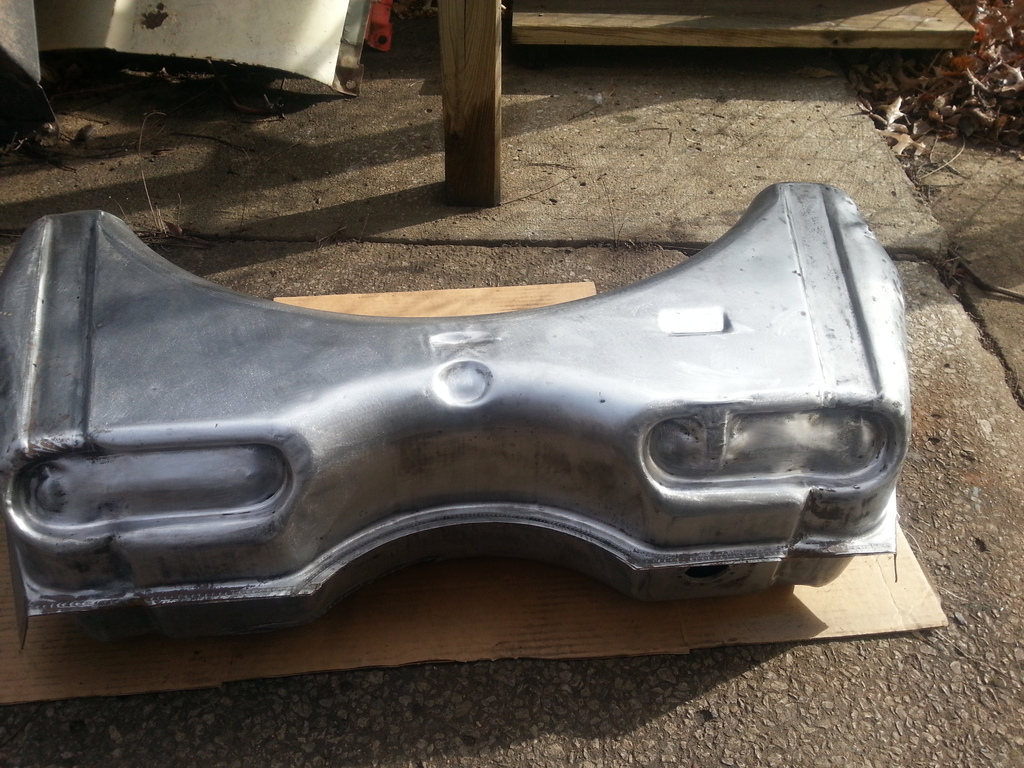
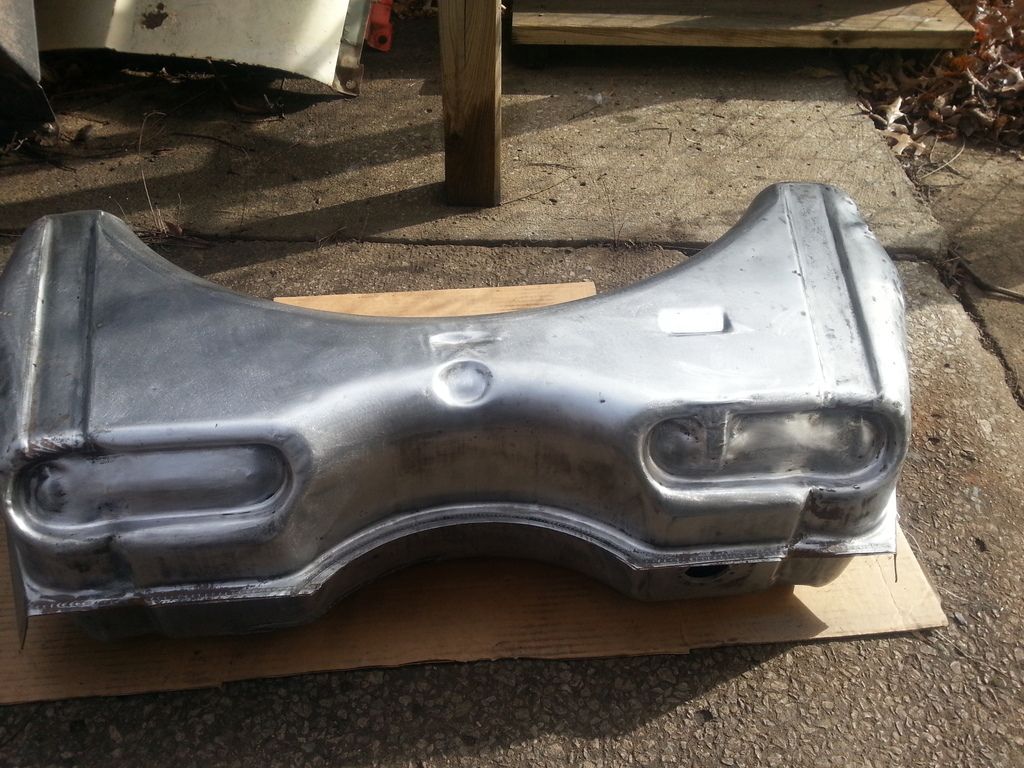
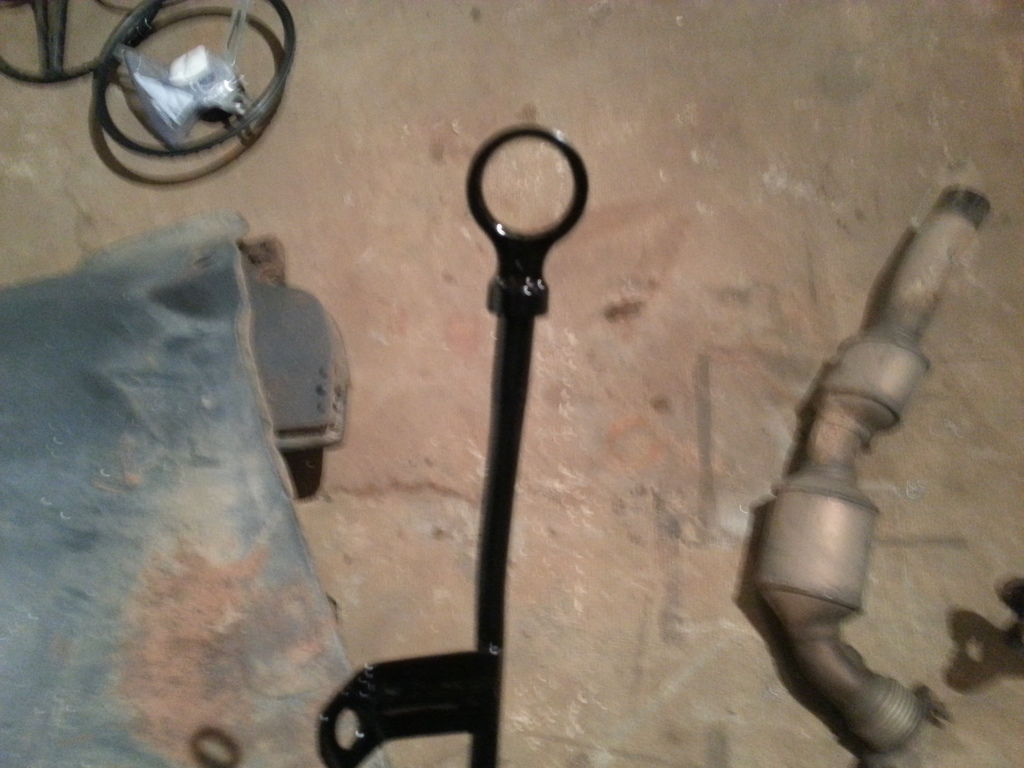
I've been slacking a bit on updating this thread, but still working on it. Got all the undercoating scraped off the gas tank and the outside cleaned up pretty good.
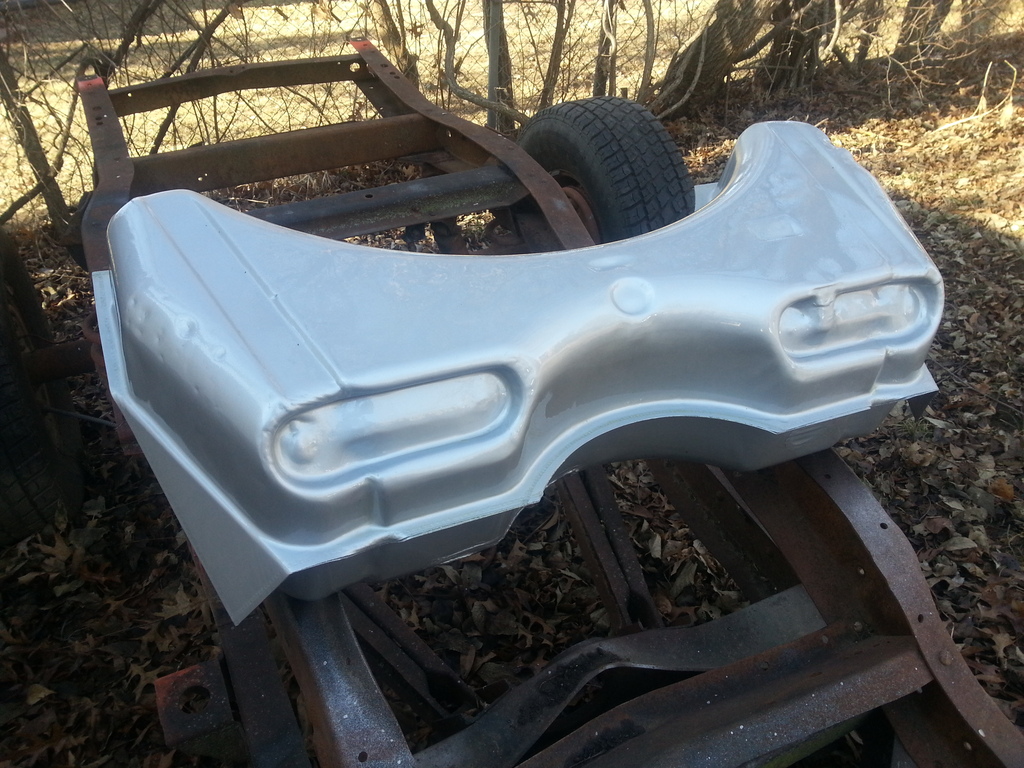
Got it painted. It's got some dings in it, but hey, its just a gas tank, and it's probably got a nicer paint job than it needed.....
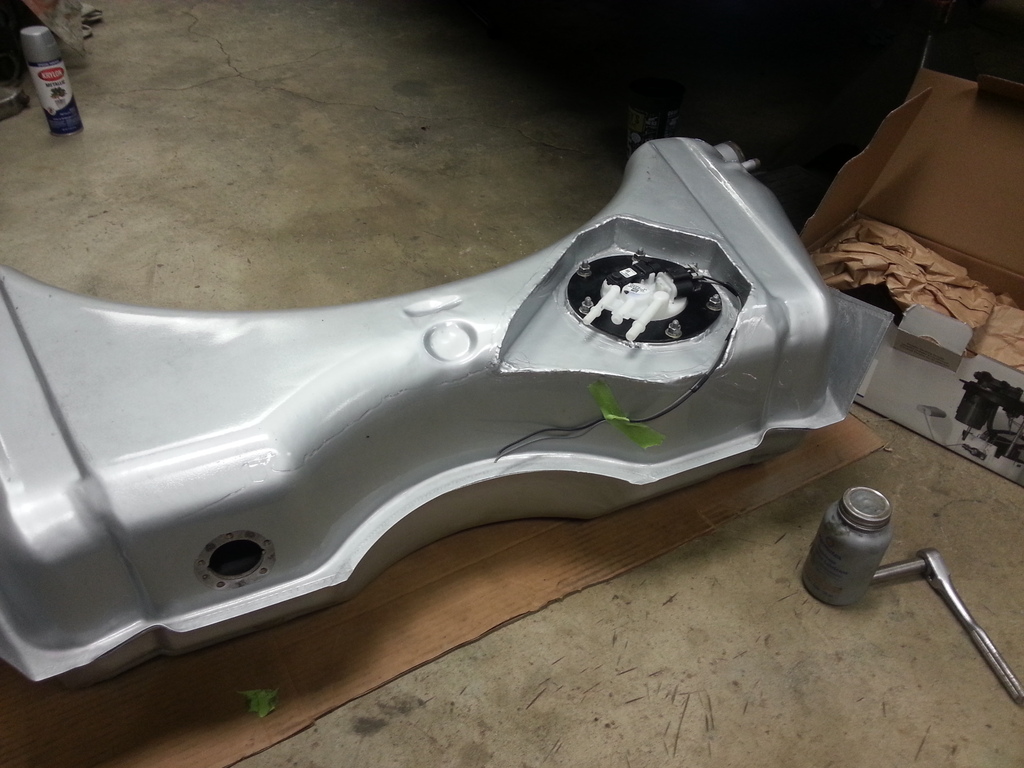
Fuel pump back in for good.
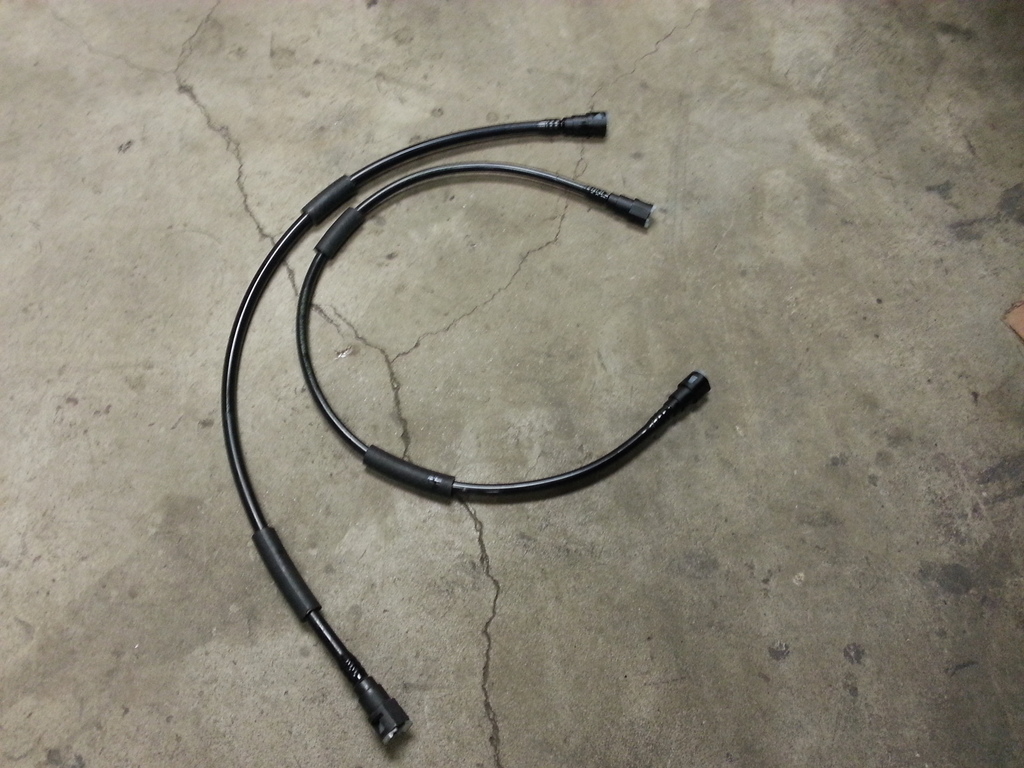
Made up some nylon fuel lines.
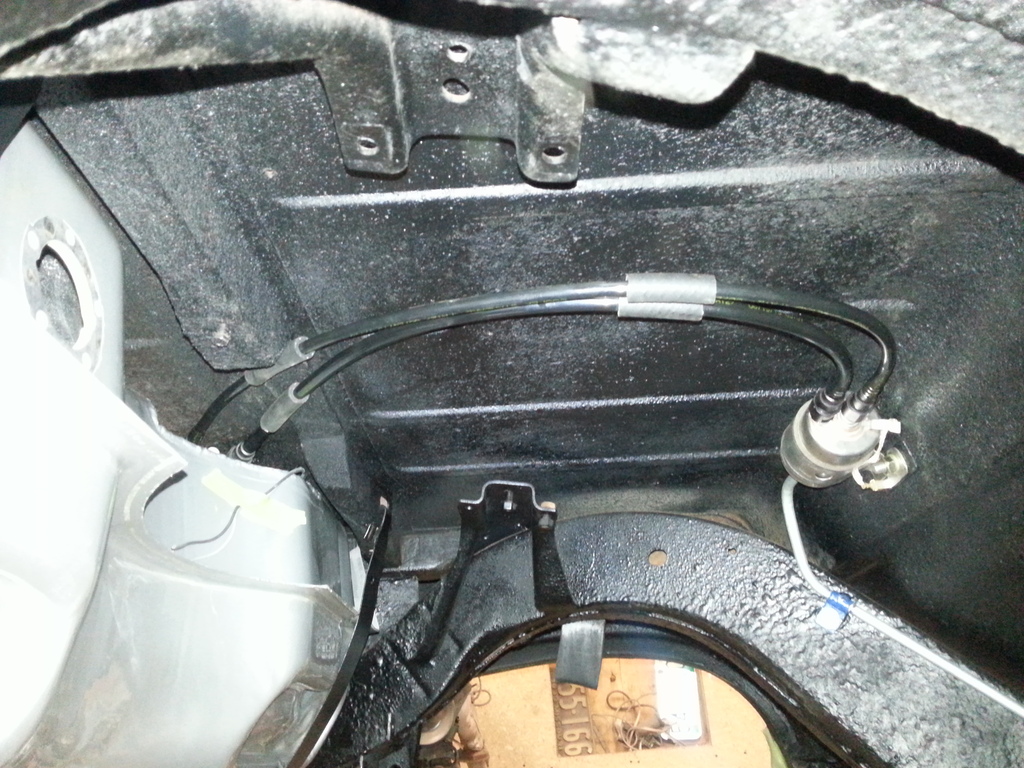
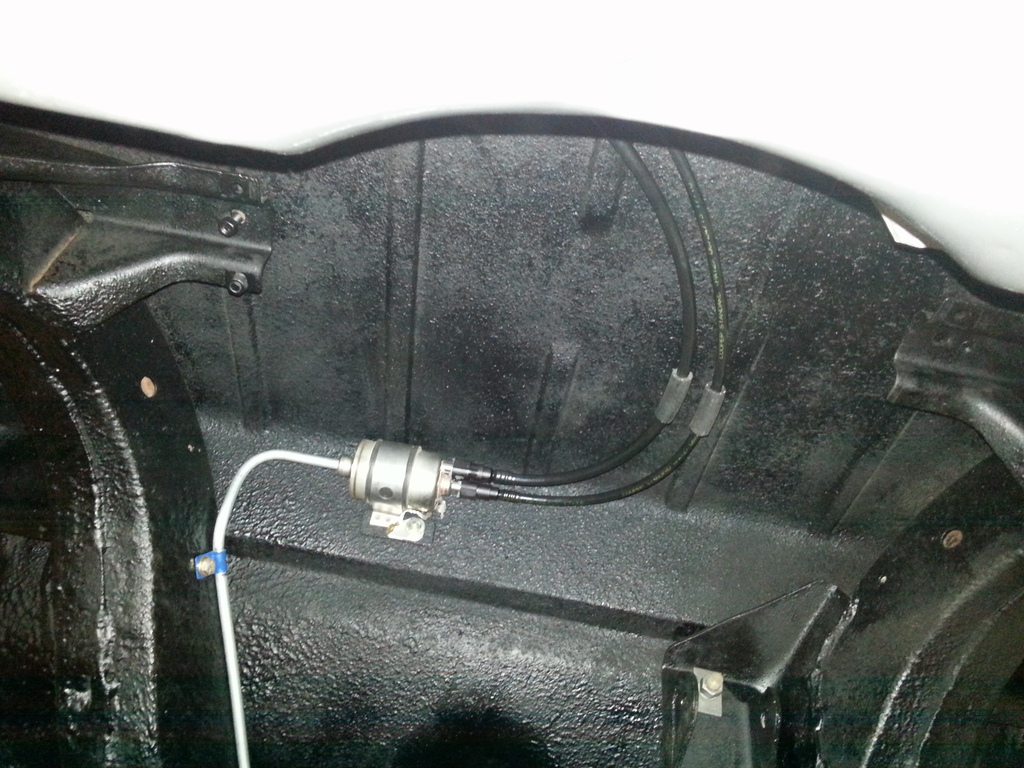
Than back in the car for the final time, and fuel lines hooked up to the filter.
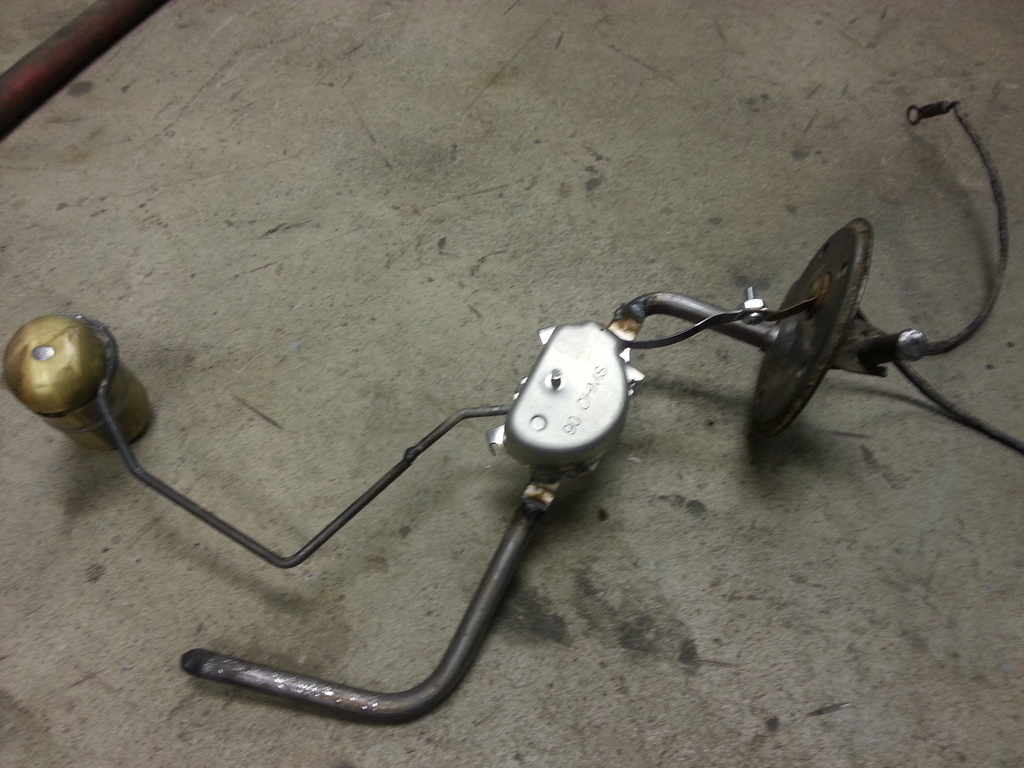
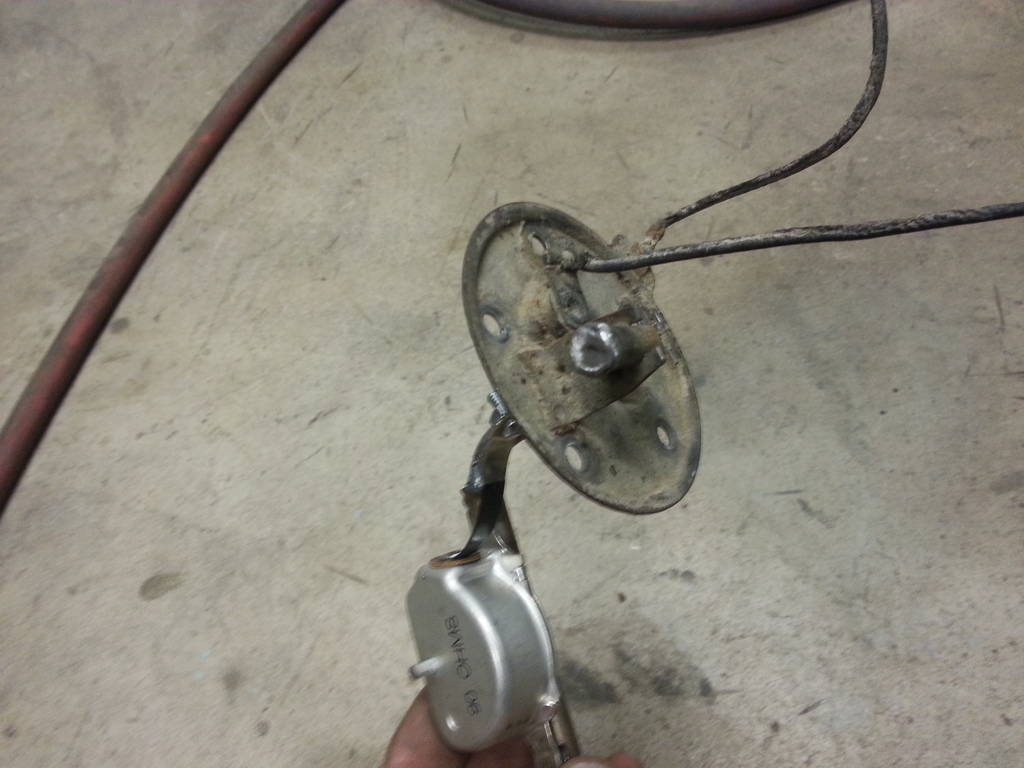
The original fuel sender didn't work, so I took a sender part off a new truck sender that a buddy gave me and put it on the '59 sender. Also welded both ends of the tube closed since all I am using it for now is the gas gauge.
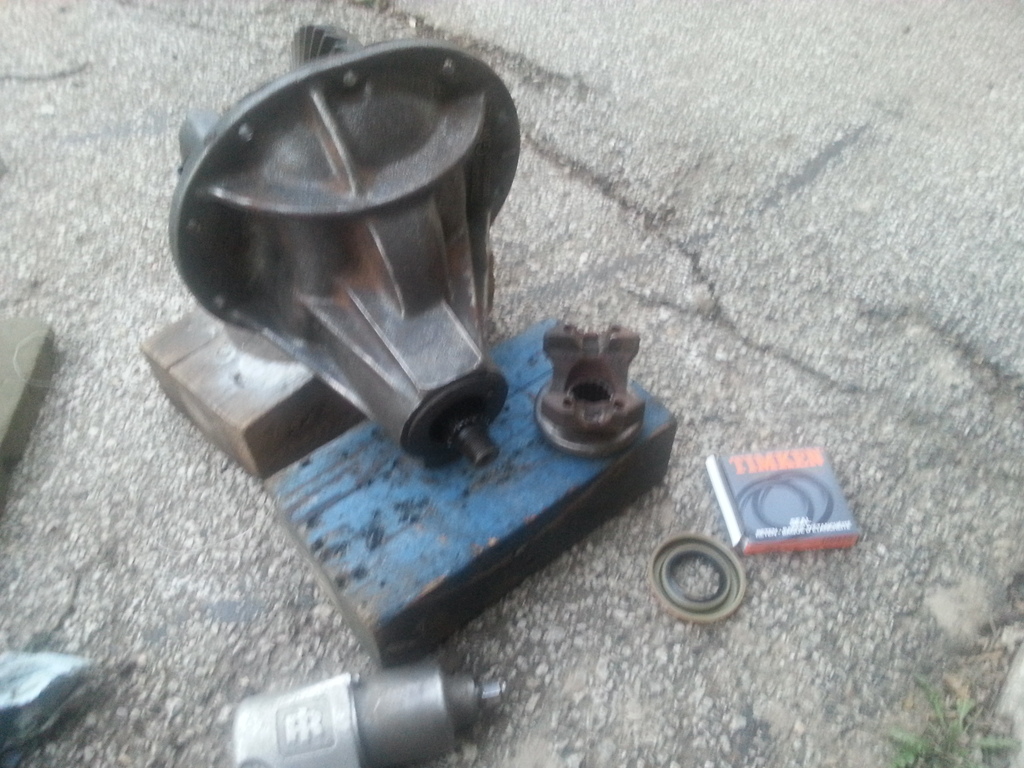
Then moved on to getting the rear end back together and in the car. The pinion seal leaked pretty bad so it needed to be changed. Some people with good eyes will notice that that isn't the right seal......

Got it painted. It's got some dings in it, but hey, its just a gas tank, and it's probably got a nicer paint job than it needed.....

Fuel pump back in for good.

Made up some nylon fuel lines.

Than back in the car for the final time, and fuel lines hooked up to the filter.


The original fuel sender didn't work, so I took a sender part off a new truck sender that a buddy gave me and put it on the '59 sender. Also welded both ends of the tube closed since all I am using it for now is the gas gauge.


Then moved on to getting the rear end back together and in the car. The pinion seal leaked pretty bad so it needed to be changed. Some people with good eyes will notice that that isn't the right seal......
 02-06-2017, 11:12 PM
#163
I have also decided that I'm going to put a back seat in the car, and the prospective parts cars I was told about are not available, they're there, and the guy doesn't want them, but also doesn't want to do anything with them...... So, if anyone knows where there are any parts car wagons around, I need a seat!
02-07-2017, 01:26 PM
#164
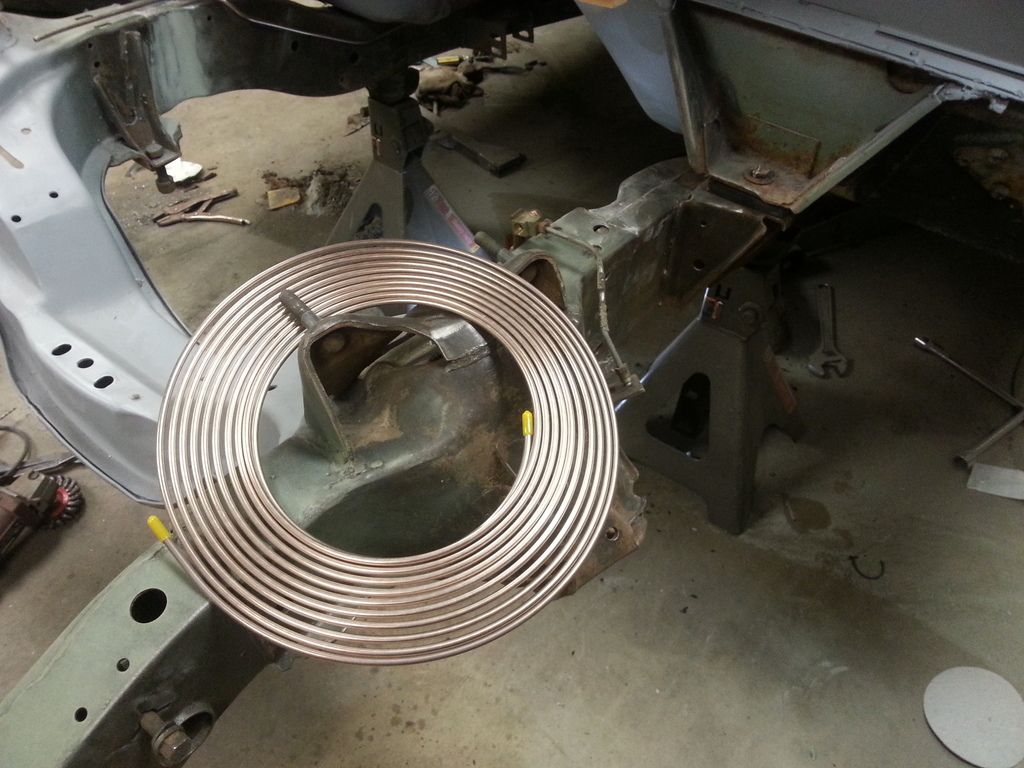
Next it was time for everybody's favorite job.... Bending brake lines.  Started with two 25ft rolls of Nicop brake line, one 3/16" and one 1/4". If you've never used this stuff before, you don't know what your missing! Its super easy to bend and flaring is a breeze.
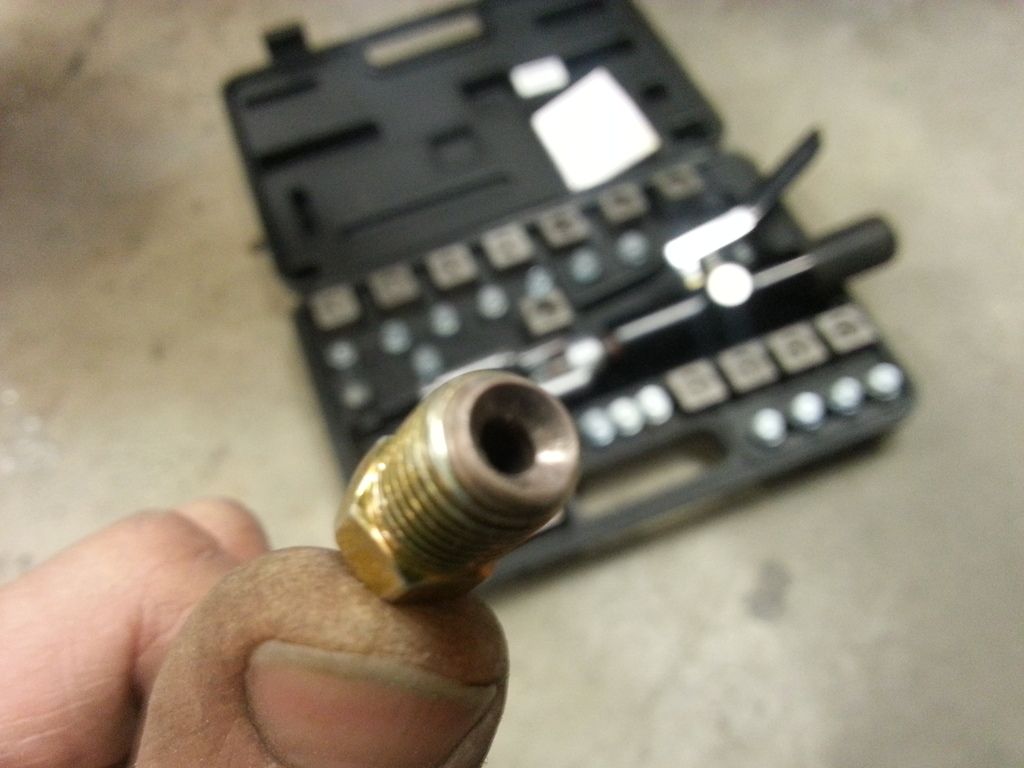
Got out the best flaring too ever made, although with the Nicop line it really isn't necessary, its still the best!
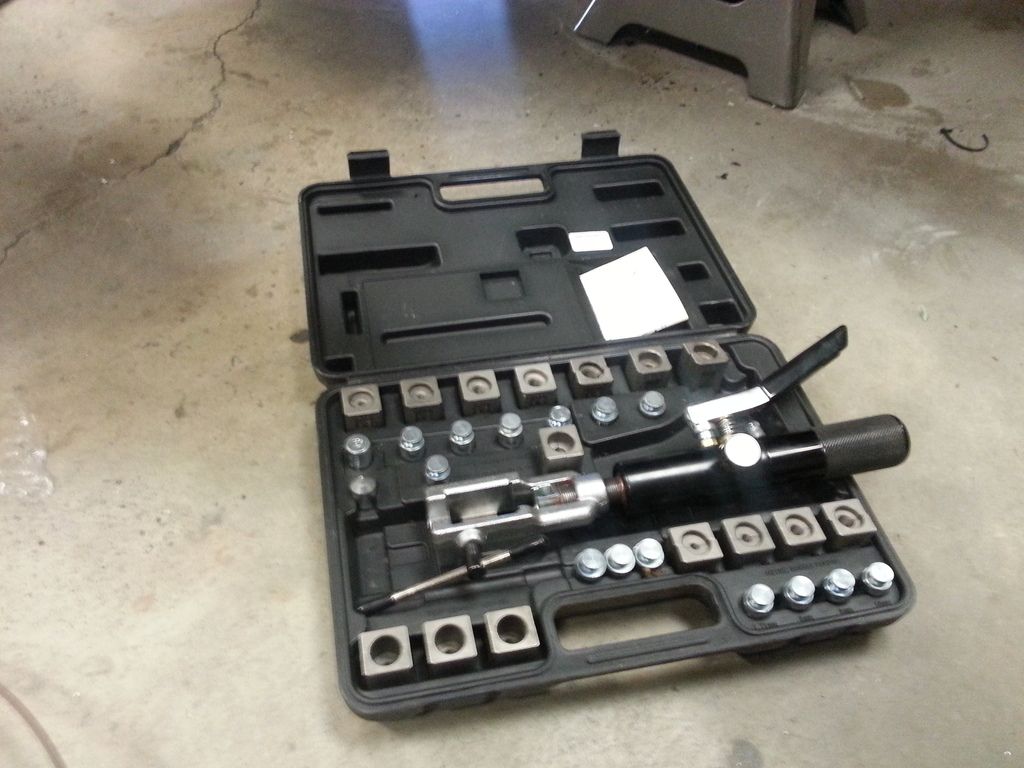
The line flares really nice.
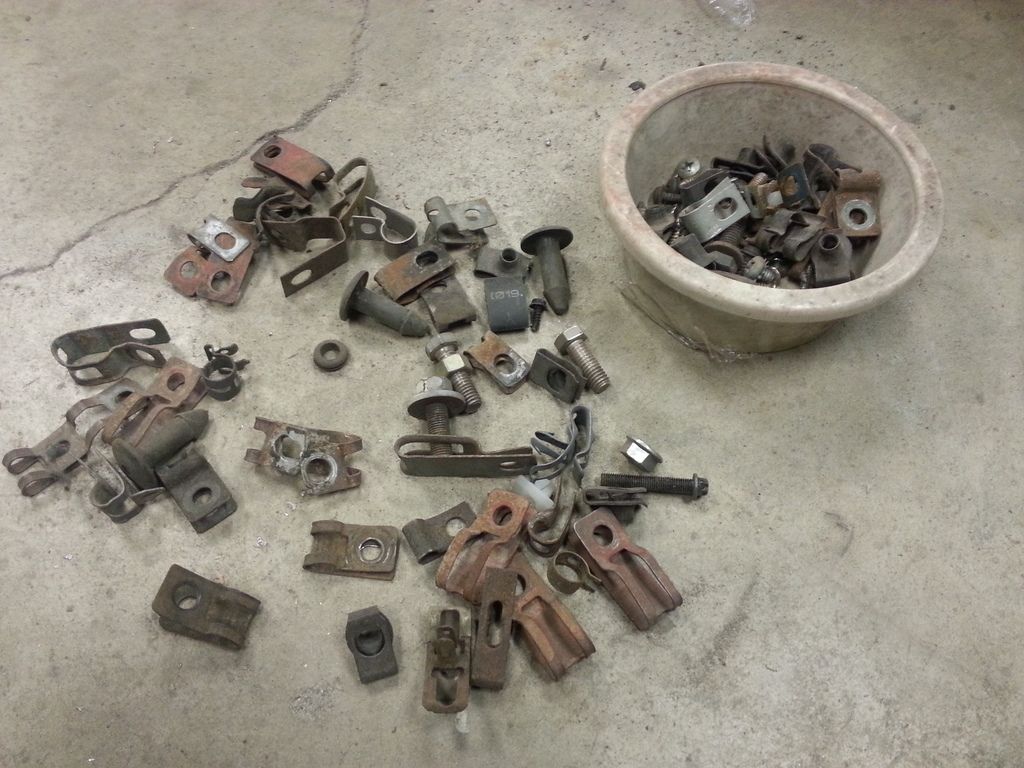
Everybody should have a bowl of factory line clamps! I get these at the Pick-n-Pull and they make the install look factory.
Put the fender on and the column back in to check for clearance.

Got the front lines done and bolted on.
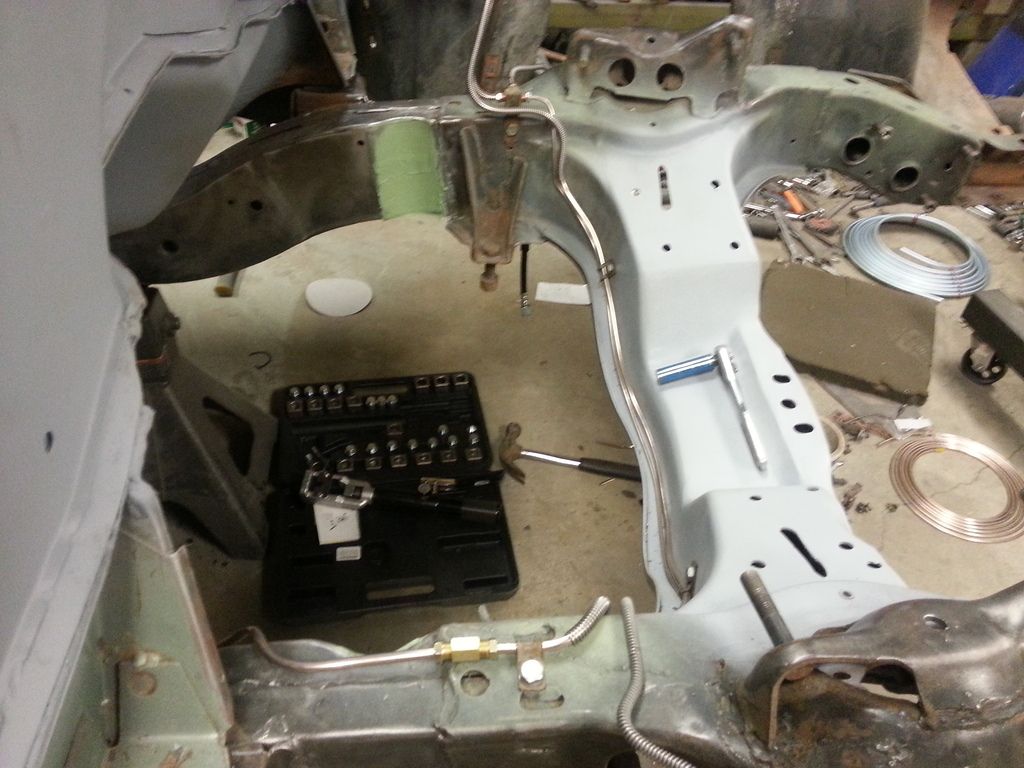
1/4" line going toward the rear of the car. I put brake line armor on the bends where it contacts the frame.

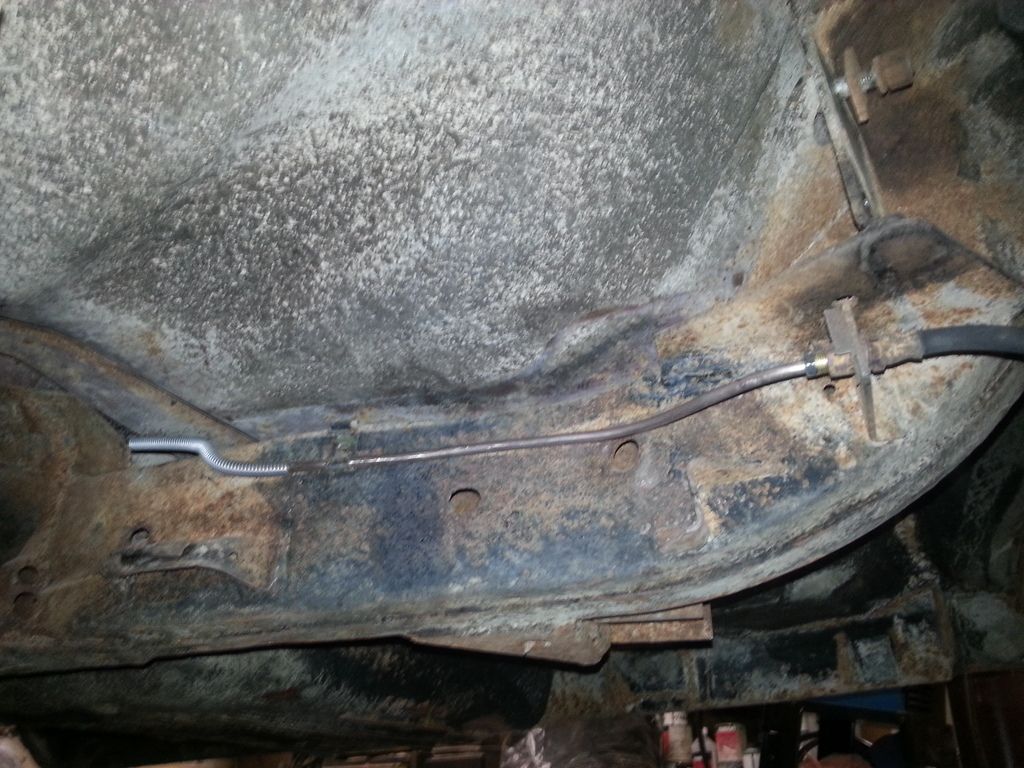
And ran all the way back to the hose going to the rear end. Next will be fuel lines.....
Started with two 25ft rolls of Nicop brake line, one 3/16" and one 1/4". If you've never used this stuff before, you don't know what your missing! Its super easy to bend and flaring is a breeze.
Got out the best flaring too ever made, although with the Nicop line it really isn't necessary, its still the best!

The line flares really nice.

Everybody should have a bowl of factory line clamps! I get these at the Pick-n-Pull and they make the install look factory.

Put the fender on and the column back in to check for clearance.

Got the front lines done and bolted on.

1/4" line going toward the rear of the car. I put brake line armor on the bends where it contacts the frame.

And ran all the way back to the hose going to the rear end. Next will be fuel lines.....

 . Thanks!
02-07-2017, 03:24 PM
. Thanks!
02-07-2017, 03:24 PM
#165

I'd try AMAZON
02-07-2017, 09:36 PM
#167
I've been slacking a bit on updating this thread, but still working on it. Got all the undercoating scraped off the gas tank and the outside cleaned up pretty good.
Got it painted. It's got some dings in it, but hey, its just a gas tank, and it's probably got a nicer paint job than it needed.....
Got it painted. It's got some dings in it, but hey, its just a gas tank, and it's probably got a nicer paint job than it needed.....
02-08-2017, 09:09 AM
#170
I got mine from Tooltopia, it was the cheapest place I found and came with free shipping. http://www.tooltopia.com/search.aspx...l+flaring+tool
 02-08-2017, 08:14 PM
#172
TECH Resident

I hope this isn't getting your great thread off track. (let me know and I'll delete my post).
I have had a great experience with this flaring tool. Eastwood, bought the design or just sells it. I first used it before they started selling it. It is a bit cheaper than the hydraulic tool.
http://www.eastwood.com/professional...ring-tool.html
They also sell AN flare dies.
I have had a great experience with this flaring tool. Eastwood, bought the design or just sells it. I first used it before they started selling it. It is a bit cheaper than the hydraulic tool.
http://www.eastwood.com/professional...ring-tool.html
They also sell AN flare dies.
02-08-2017, 08:48 PM
#173

I hope this isn't getting your great thread off track. (let me know and I'll delete my post).
I have had a great experience with this flaring tool. Eastwood, bought the design or just sells it. I first used it before they started selling it. It is a bit cheaper than the hydraulic tool.
http://www.eastwood.com/professional...ring-tool.html
They also sell AN flare dies.
I have had a great experience with this flaring tool. Eastwood, bought the design or just sells it. I first used it before they started selling it. It is a bit cheaper than the hydraulic tool.
http://www.eastwood.com/professional...ring-tool.html
They also sell AN flare dies.
I needed to make a single on-car bubble flare and after using a handful of junk tools that either stripped or simply made poor flares, I found a bubble flare equivalent of the tool pictured below on eBay, shipped from the UK. It worked very well.
Tipsy
 02-08-2017, 10:59 PM
#174
Back to our regularly scheduled program.... I's time to get the engine ready to go back in for the final time, which means cleaning and painting every piece.... But before that can happen, a few more parts need modifying. For example, this is ridiculously long, so it needs some shortening.
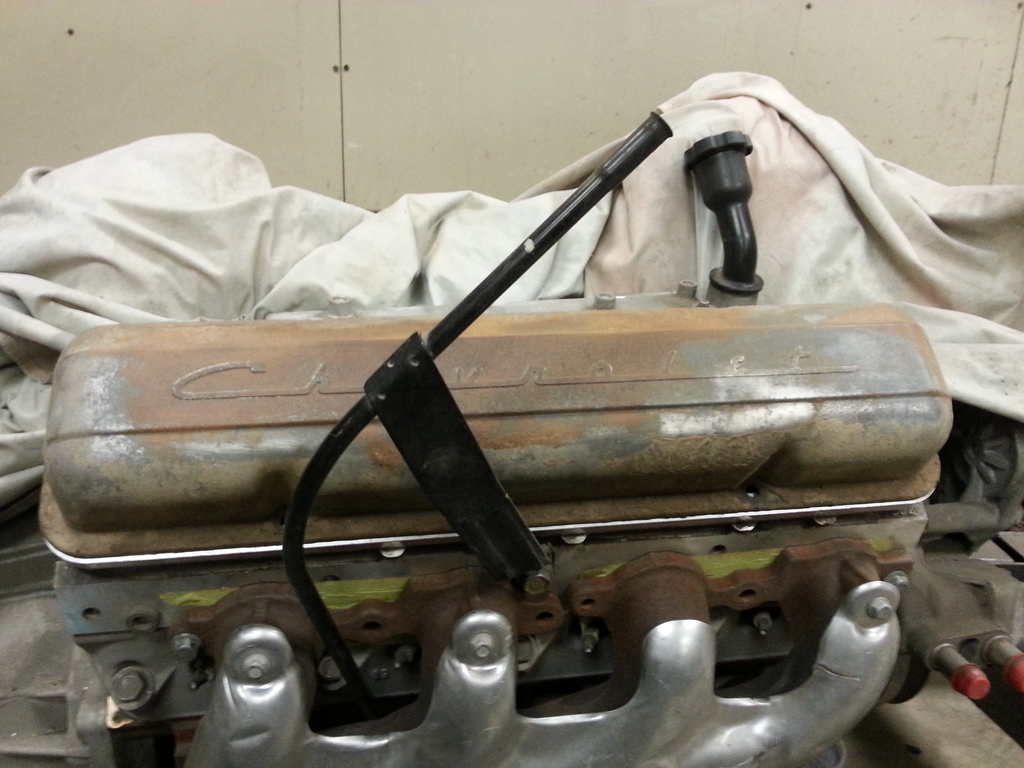
You would think cutting down a dipstick tube would be easy, but then you realize the stick doesn't fit any more due to the end being flared out. So I cut the end off and welded it back on in the correct spot.
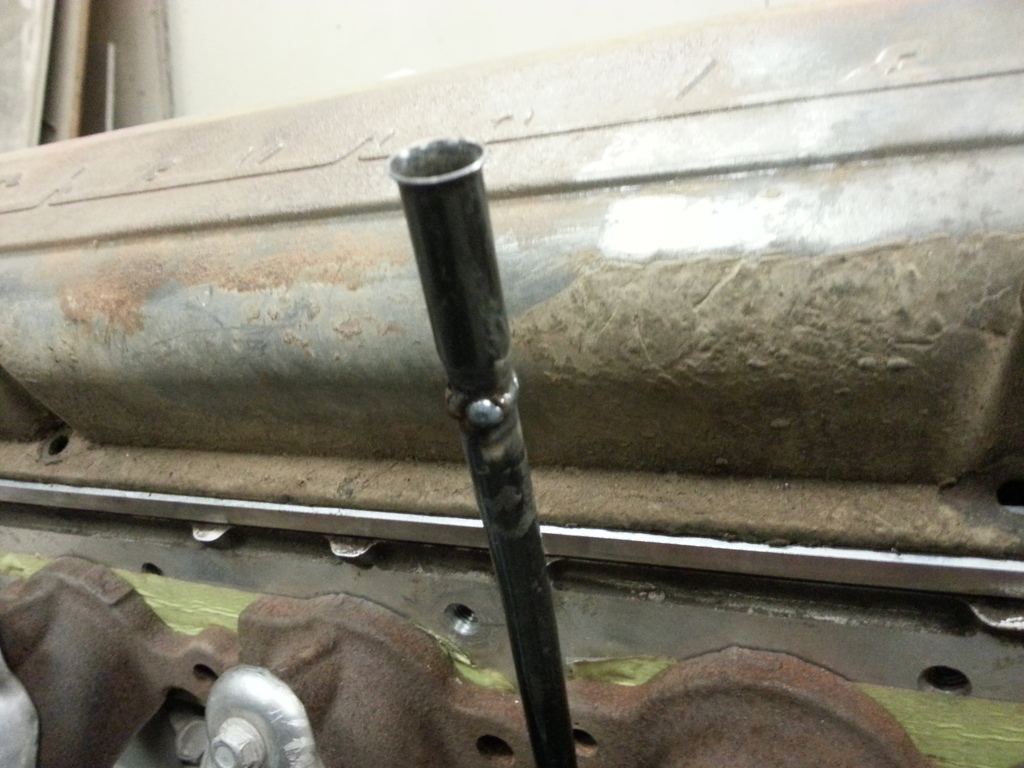
Bent the tube to come out in a better location, cut the mounting tab down and welded it back on then cleaned up the welds. Looks better in my opinion, just have to cut the stick and re-mark it, but I'll do that at a later date.
Just a bit shorter....
Then it was painting time. Didn't get any pics after the painting because everything you see here was painted black, and it was a bit 'foggy' in the garage after that.
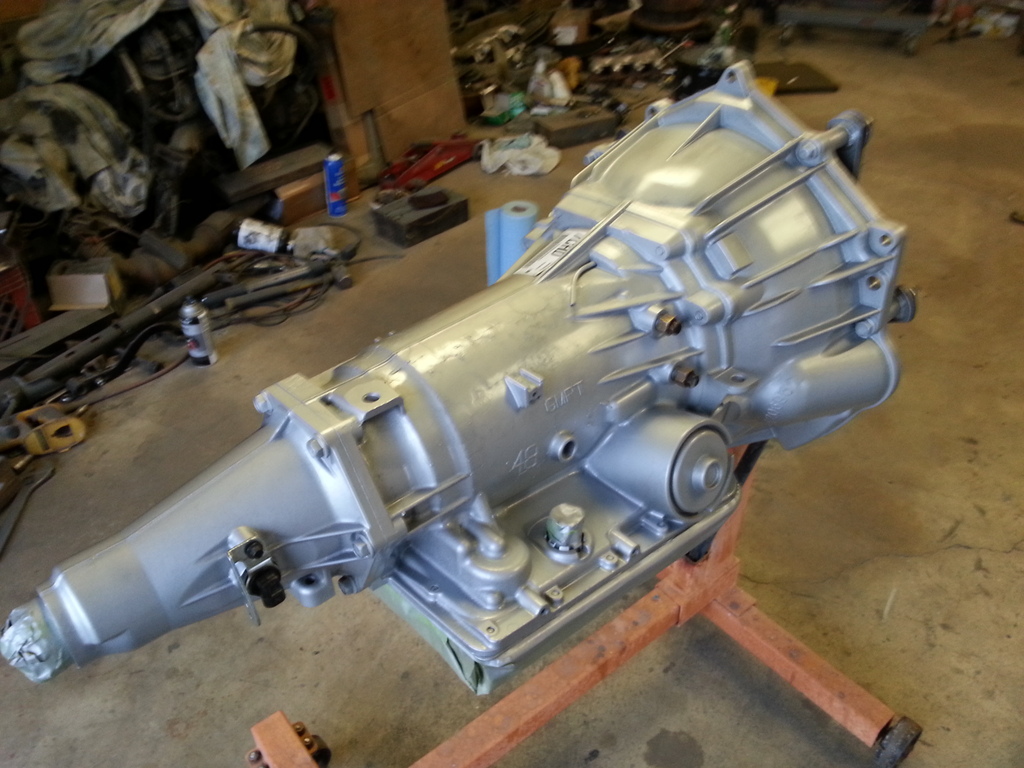
Once the fog had cleared, I cleaned up the transmission a bit.
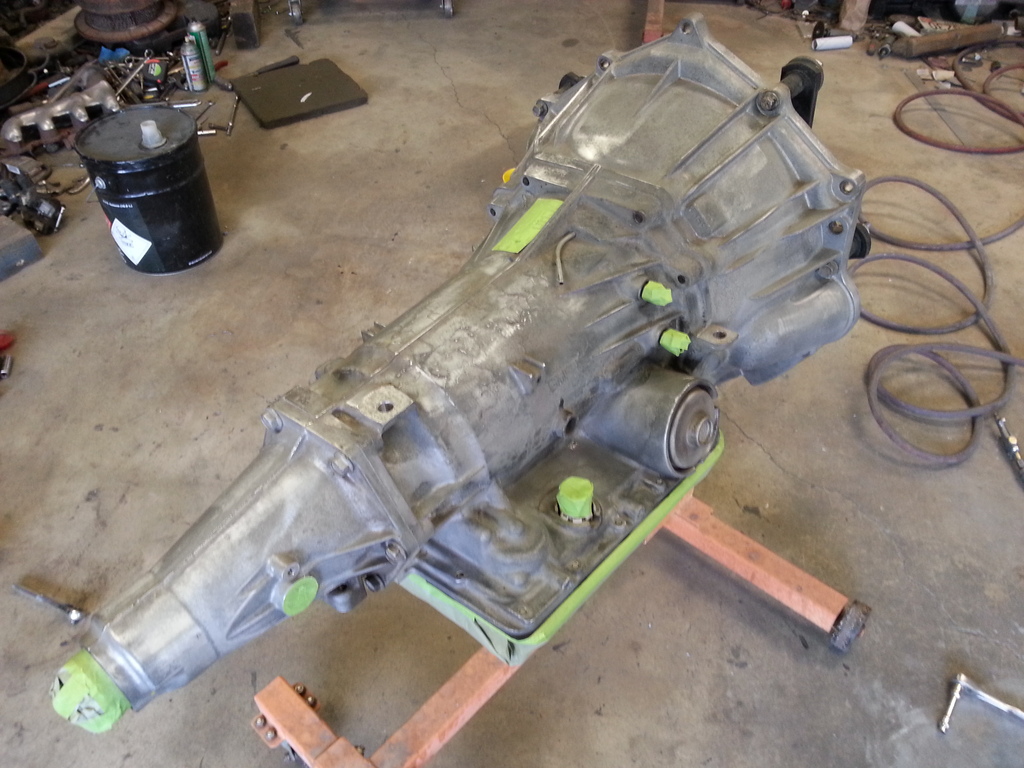
Little bit of paint and it looks way better than it needs to since no one ever sees the transmission when it's in the car!
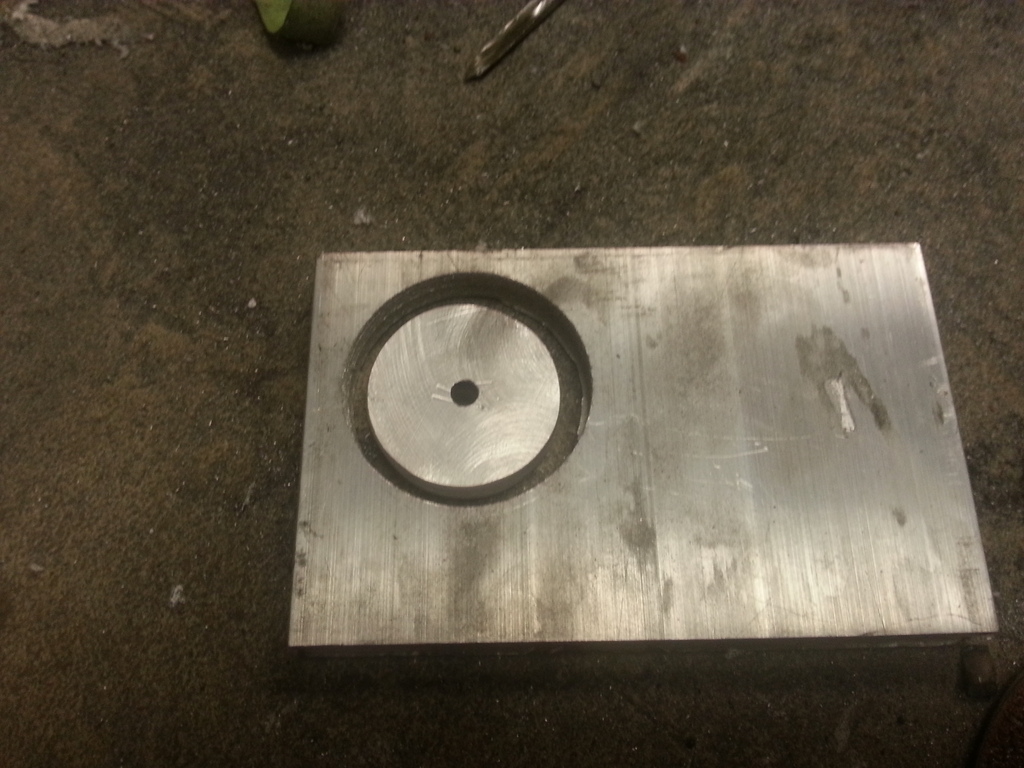
Then the fun begins. I bet no one knows what this is going to be used for.....

You would think cutting down a dipstick tube would be easy, but then you realize the stick doesn't fit any more due to the end being flared out. So I cut the end off and welded it back on in the correct spot.

Bent the tube to come out in a better location, cut the mounting tab down and welded it back on then cleaned up the welds. Looks better in my opinion, just have to cut the stick and re-mark it, but I'll do that at a later date.

Just a bit shorter....

Then it was painting time. Didn't get any pics after the painting because everything you see here was painted black, and it was a bit 'foggy' in the garage after that.

Once the fog had cleared, I cleaned up the transmission a bit.

Little bit of paint and it looks way better than it needs to since no one ever sees the transmission when it's in the car!

Then the fun begins. I bet no one knows what this is going to be used for.....
 02-09-2017, 02:47 AM
#175
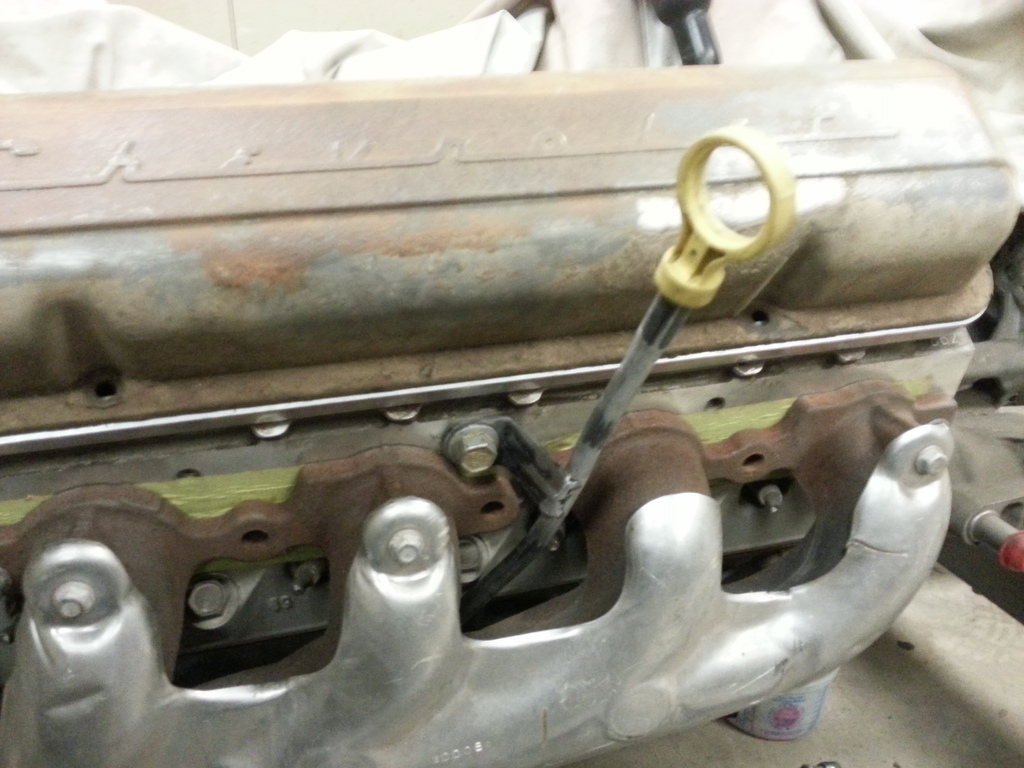
How about a hint. Whats the O.D. ? Steering wheel adapter.
 02-09-2017, 11:17 AM
#178
02-09-2017, 11:18 AM
#179
The dipstick looks great. I love the old VC. Perfect fit.
02-09-2017, 09:41 PM
#180
That wasn't really a fair question since no one would ever guess! But the diameter is about 2"......
This answer may be giving me too much credit.  The valve cover adapters are ICT Billet. They're a little pricey, but I guess it's the price you have to pay for the look I'm going for. http://www.ebay.com/itm/LS-Valve-Cov...9WzhpW&vxp=mtr
The dipstick handle is painted black, I didn't like the yellow either. I just want it to look more old school.
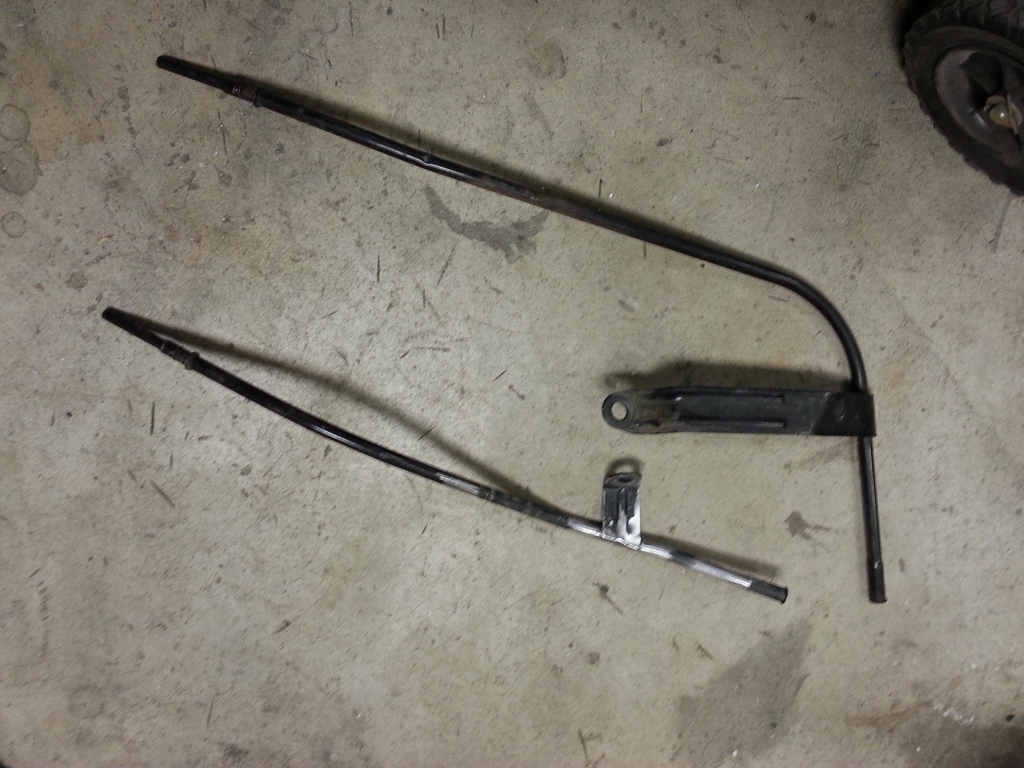
WOW! that's a terrible picture! Sorry
The valve cover adapters are ICT Billet. They're a little pricey, but I guess it's the price you have to pay for the look I'm going for. http://www.ebay.com/itm/LS-Valve-Cov...9WzhpW&vxp=mtr
WOW! that's a terrible picture! Sorry