When you click on links to various merchants on this site and make a purchase, this can result in this site earning a commission. Affiliate programs and affiliations include, but are not limited to, the eBay Partner Network.
Thanks ! I'm pretty confidant that the rubber will have enough flex to keep it soft but I'll be reporting back to let people know how they work. If I had used new arms the other end the them use's a busing that's a lot closer in design to what the OEM motor mount rubber section would have looked like and would provide a lot more give if the solid rubber end proves to be harsh. They are not quite as wide as the original mounts but for getting the trans mocked up that actually worked out well. I was able to slide the engine forward/backwards about an inch as well as angle it side to side a bit to make sure it all lined up straight in the chassis. I may take the easy way out and just stack washers on either side of the bushing so they fit the frame pocket or I may get some tubing to cut down and make actual spaces.....haven't really decided what direction I want to go with that just yet.
Anyways here are some up close pics or the mounts once I had them on the bench to weld up and get painted.
Trying to remember exactly where I left off at......So where gonna start with the oil pan. Once again luck was on my side and I just happen to find the absoulte PERFECT oil pan for this swap and it happens to be about the least desirable pan out there and is plentiful since it's what comes on the GMPP LS3 crate engine.
The pan fits the following applications.....
2010-2015 Camaro SS
2012-2015 Camaro ZL1
2014-2017 Chevy SS
2011-2017 Chevrolet Caprice PPV
2009 Pontiac G8
I do not have the matching dipstick since I'm not sure how it would have fit, I'll start with the truck dipstick/tube and go from their. Something I want to point out is this is a VERY large pan in terms of oil quantity holding 8 quarts of oil.
Since you can see part of the AC bracket in a couple of the oil pan pics I'll go over that next.
There is a fitting on the Rack and Pinion that will interfere with the stock truck bracket even after notching the subframe with the engine sitting this low in the chassis.
The Fix this this was actually pretty simple and looks as good if not better then the stock bracket from the bottom as well.
Spoiler!
When you look at an uncut bracket from the back it's pretty easy to see what I did here. Just follow the contour that the bracket already has below the outer edge that you can see was cut off.
Once the piece is cut off it really opens up the bracket on the bottom and adds a nice curve that will clear the fitting.....not by much but enough that it's not going to be an issue.
The line is unbent/untouched at this point, it only has about a papers thickness of clearance a nice tug on the line will gain you about 1/4 inch of room above the line so it's not going to be rubbing on anything.
As you can now see it's clearing just fine after the quick tug down on it.
I do not have any pics from the bottom just yet because the compressor being used was just for mock up purposes. The bottom 2 bolts are going to suck pretty bad to put in with out jacking the engine up a bit..... but I'm betting it's still going to be easier to change in the Jeep then it would be in a Silverado's after it's all said and done LOL
As much as I would have liked to continue this massive speed show of pictures we've reached the current build progress. I started on this Aug 1st and have really only been able to do much work on this 1-2 days a week since I started on this.....and even then those 1-2 days a week seemed like they were always on days that were near 100 degree's with like 90% humidity. My friends shop is not air conditioned however his office is and we likely spent as much time cooling off in the AC as we did actually working on the Jeep. The plan when I started on this was to have it 100% done in time to drive it down to LS Fest in Kentucky this week but plans got moved around and my family vacation ended up getting moved to the end of August and put a kabosh to my last minute plans for this to be done in time.
Labor day was a hard decision, realistically the rest of the swap and even the engine wiring could have been finished in time to get it down to LS fest if I'd have taken the next 2 days off of work......I mean it's actually pretty close in terms of the mechanical work that still needed to be done and the engine/trans wiring. But the entire point of this build wasn't actually about what was under the hood, it's about how it worked and is the ONLY reason I would have been taking it to LS Fest in the first place. The engine is a 3rd gen 24x and will run on a P01 or P59....still up in the air on this at the moment and that hasn't helped things either. The reason I bought the Jeep in the first place was for one thing.....data conversion. While it may look "Pretty" that is just for credibility/reputation reasons at this point........but wow it does look nice under the hood now.
The Jeep use's what Chrysler calls a PCI BUS, this is their name for the J-1850 VPW protocol. The P01 and P59 both use what GM calls Class 2 Data and is how they refer to the J-1850 VPW protocol. While both vehicles use the same format for data communication the text book description of the requirements on the VPW specification are the only thing they share in common. The actual data present on the BUS is about as close to being the same as if you were to say a Ford is like a Honda. There is no similarities between the the PCI BUS format and the Class 2 format other then the timing and size of the data packets. I've done a great deal with the Class 2 data and have an above average understanding of how it works and the way modules communicate with each other so the engine side of the data conversion isn't a big deal. The real trouble is on the Jeep side of things, like all things Chrysler does they decided to implement some god awful methods to pass data that's almost impossible to make heads or tails of going off data logs of the PCI BUS alone. Since the Jeep was in a non-running condition when I bought it I also have VERY limited amounts of data logs to work with that I was able to pull from the data bus. Things become more difficult since the 2002 Liberty use's a half breed version of what Chrysler calls a "Smart Junction Box". In most cases the smart junction box(also called a TIPM module) is the body control module and fuse box all rolled up into one. I was prepared to deal with this and it wasn't until I started to pull the Jeep harness open that I realized that the 2002 version was all by it self in this aspect. I also never payed attention to the fact that this particular Jeep doesn't even have ABS brakes. Now not only do I have an odd ball computer system that I'm dealing with I also don't have wiring diagrams for things like the speed sensor mounted in the rear diff. The non-ABS version must have been rare enough that Alldata didn't even bother making wiring diagrams for the non-ABS version.
So at long last I found the point that things would run into problems and it really wasn't with things I was expecting and I hate to admit it but I wasn't prepared for something like this especially when this is a last minute project with a very tight deadline. All of these things will be over come but I've had to rethink a good portion of how I was going to go about doing this as well as redesigning the hardware I had been working on for the last couple of months to accommodate the changes I found. I would have much rathered done this swap on something else that was a bit newer and that used a CAN data bus but I needed something cheap and in all honesty this entire swap hasn't cost all that much in materials it's just turning out to be a bit more specific on the wiring than I had hoped for.
My Class 2 to PCI BUS module is untested at this point in terms of data decryption of the Jeep side but I do have the basic gauges sorted out, Speed, Temp, Tach etc and those do work but those are only a couple of the things I want working with this swap. I've been working on some pretty tick methods of re-purposing gauges on the fly for a while now and this Jeep is what I plan to unveil the finished product of that work with.
When most people look at this dash they only see 4 gauges and a couple of warning lights.
When I look at this dash I see trans temp, oil pressure gauge, oil temperature gauge, fuel trims and all sorts of other things.
This is getting WAAAY too easy... LOL The oil pan, the AC compressor... Soon EVERYBODY'S gonna do this swap!
Well that's kind of what I was hoping for, I didn't want a long, hard and costly swap. I wanted to do something that was cheap and easy, document it along the way and make notes of things I think could be done better on the next one.
But everything will come to a screeching hault the minute you go to start hooking up gauges and find out that EVERY THING is run on the Chrysler data bus. That leaves 2 options, give up all factory accessories and run with standalone gauges or keep all the stock Jeep computers(Ecm/Tcm) either piggy back the sensors onto the LS engine.
These two options are not just specific to the Jeep Liberty they also apply to the Wrangler, Cherokee, Grand Cherokee, Dodge Ram, Dakota and so on. Getting every thing in the vehicle to work with the LS engine is about like putting a square peg in a round hole.....until I'm done with this swap anyways
There is about to be a 3rd option that until now has only existed for a couple of very specific swaps and has a rather hefty price tag in every variant I've come across. Option 3 is remove the Jeeps Pcm/Tcm, tie into the existing data lines with a conversion module and bring the Jeeps data bus back online with the LS Pcm. While I can't create a scenario for every possible option imaginable I can create something that's virtually plug and play and create diagrams/pin out tables to purpose the existing wiring to things like the fuel pump, cruise control....... the Chrysler cruise control buttons in the steering wheel were a SOB to figure out how to interface with the GM cruise box but that's been solved already . So that what your left with is the Factory fuse box and a hand full of wires that you will reconnect to the LS pcm and the data conversion module will take care of every thing else.
No more 3 wire temp sending units, or re-threading sensor holes or even oil pressure sensor adapters. All of that information is avaible directly from the LS computer and pretty much any vehicle built in the last 15 years will also want to see that data on it's data bus. It;s just high time someone stepped up to the plate and made this type of conversion happen for every one.....not just those with deep pockets.
Yeah, the physical was easy, but it looks like the electrical might be a real bugger, but then that's where your expertise checks in! NOW it's gonna get GOOD!
After going over every single wire under under the hood I was able to trim it down to the bare minuim I think I might need. I kept things like Evap for now because I haven't made up my mind on if I'm going to run it or just deal with the gas vapor smell in the summer.....
Some of the more notable things I've kept are the power steering high pressure switch, may run it.....will see how well the computer reacts once it's running.
All of the AC system wiring is still there
Evap vent valve and NVLD pump, NVLD is Chrysler's way of over thinking an evap system. I should shoot myself for even thinking about keeping it but for now at least it's wires to the back I can use if I need them.
The SCI and PCI data lines
ASD Relay control
Cooling fan wiring, may not use electric but I'm not sure yet so for now it can stay.
Pcm/Tcm constant and switched powers for obvious reasons lol
Since I'm building this as a demonstration vehicle for my "tech" and every thing else looks so nice I figured I'd show it some love.....In all seriousness I stopped reworking harnesses almost 2 years ago, and not just my own.....I stopped working with all together. Stock harnesses are being to show their age in more ways then one and after a string of bad harnesses I said that was it and I moved on. What you'll want to note here is this is not some 15 color universal copy of what most people are doing these days.....I take my electrical very serious and all my wiring reflects that.
Prior to designing my own wiring harness something I saw done and even ran into a few issues on one's people did them selves or had "mail order" converted was that is a lot of cases the wire gauge used from the factory was questionable at best on a stock length harness. Now add 3-6 feet and your overloading the "rated" current for many of the wires or the voltage drop on signal wires starts becoming noticeable. Many people think that because the factory did something a certain way it's fine. Well what they forget is that once the engineer designs it a team of penny pinches will comb over the design and cut out or alter anything not absolutely necessary if they feel they can save money. For example the wire gauge is one of the first things that often takes a hit, larger wire costs more money, every thing has a ranges of values that are considered acceptable. Engineers will almost always stay on the conservative side to be safe while those looking to cut costs will look for the absolute minimum necessary to stay in the unacceptable range.
The other major fault found in every vehicle on the road can also be attributed to cutting costs plain and simple..... multiple grounding points. On the off chance your not familiar with the issues that arise from multiple grounds then take a quick look at this page to see what a ground loop is and what they do to an electrical circuit. https://en.wikipedia.org/wiki/Ground_loop_(electricity)
In an ideal environment every ground would come back to one point. There are a multitude of reasons why this isn't practical in reality when a car is designed but that doesn't mean that the issue can't be addressed when designing a new engine/transmission harness.
So the 2 major issues I address are wire gauge and grounding. To address the wire gauge it was pretty straight forward, increase the gauge on all the wiring used. While that seems simple enough you also need to remember that most of the wire terminals used are designed for a specific gauge of wire so those will also need to be increased accordingly. That is where the real headache starts....but it's the type of thing you only need to do once and will last you a life time once you have all the correct terminal and seal numbers as long as they don't discontinue the part or supersede the part number. Grounding is also simple, I use the bolt hole on the back of the block by the intake for every ground. So even when I'm mounting a pcm in the trunk I'm still going to ground it in the same place, voltage drop isn't an issue even on long runs because that has also been addressed.
You can see that GM learned from their mistakes of under sizing wiring if you look at diagrams. Take an 2002 Silverado and an 03 Silverado, wire sizes were increased in a number of areas. Now before saying that's just from the change of the 512K to the 1mb pcm's then take a look at 03 to say 06 and you'll see that wire sizes also changed again. The same thing can be seen when looking at Express van diagrams, the van harness is several feet longer then the truck harness and the wire size does reflect the longer harness. There are some things that you just can't go much larger on like the Multitec truck injector plugs, 20 gauge wire is the biggest they will take, terminals for larger wire just don't exist and this can also be seen in factory diagrams. This is where common sense and experience will give you the best idea of what's going to work and then is that going to be acceptable.
Ok...enough with the rant......lets look at something pretty now.
It's been a while since I was able to get much done on this, I've been slowly separating out all the unused jeep wiring under the hood for the last month or two. I also had a bad luck streak with 2 defective crank sensors and a bad cam sensor that had me chasing myself in circles for a while as well. But things are looking better and I was able to test the conversion module I've been working on in the jeep for the first time last night.
Gas gauge and speedo were set to 50% so I could see how long the module took to come online after being powered up.
Most warning lights are working correctly, the Airbag light is on so the SRS module isn't happy so I need to dig into that a bit more but otherwise it looks like this is gonna work just fine.
Engine is running a Sloppy Stage 2 cam and the pcm is untuned. Its also missing both O2 sensors and the MAF sensors still so the pcm isn't a happy camper but its enough to get it running for now.
It's been quite a while since I updated this thread and it was mostly done intentionally. I had a lot of unfinished things I needed to take care of and have spent a great deal of time working on the conversion module that was the entire point behind this project. Rather then sharing bits and pieces dragging this on over the last 8 months I decided to get everything wrapped up first.
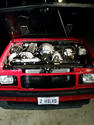
So....if you went to LS Fest East 2019 there's a good chance you saw my Jeep there
I've had more then a couple of setbacks along the way including a broken rod in the first engine.....and I ended up putting a stock 300K engine back in it's place so performance wise it's taken a MASSIVE step backwards but overall I'm very happy with how the entire swap turned out.
Getting the oil and trans dipstick tubes fitted Transmission shift cable bracket. Cut up a Novak shiftier bracket for a Jeep Wrangler bracket uses 2 bell housing bolts and 1 bolt on the ear of the transmission. Since the Jeeps shifter was originally a 3 speed with push button over drive I can't get low gear manually but I knew that would happen going into this.
After searching for nearly a month and not being able to find anyone local that was able to make my Ac lines I decided to buy the tools and make them myself. It's a bit nerve wracking when your dealing with stuff that's 15 bucks a crimp and the tool tells you to expect there to be a learning curve on proper use.... All the lines came out pretty good and have been holding now for the last couple of months with out any issues The nice part about making the Ac lines myself was being able to make 100% sure they were all clocked exactly how I wanted them...and they ended up fitting exactly how I wanted them too. Now to address the rest of the underhood wiring....
While I was in the middle of building the engine and vehicle harness the hard driver on my laptop decided to take a crap so I was left with a whole lot of wires that I had no idea what they went to. It was interesting to say the least.... Once I had eveyrthing sorted out it was time to get things cleaned up and put the carpet back down.... Was able to still fit the factory channels cover even with all the added wires for the engine. And the carpet went back down and things really started to look like this might turn out half way decent after all
And then something like this happens.... I had maybe 50 miles on the engine and it had not even come close to being abused. This was just more bad luck and the Jeep attempting to resist the transplant.... So as they say....out with the old Yes......I was able to pull the engine with out taking off the hood and I didn't even need to pull the truck balancer. Or pull the radiator/condenser for that matter.There is a LOT more room under the hood then people give these things credit for. Despite the Jeeps attempts at rejecting the transplant another engine was sourced ad reinstalled the next day. A couple hours with a pressure washer and some engine paint cleaned up this high mileage engine pretty good. It was just under 300K miles and came from an express van. In case anyone is wondering.....nope...still didn;t have 4th gen rods. After having at least driven the jeep a little bit with the last engine I deiced to add some heat wrap on the pass side manifold. It was RIGHT under the coolant tank and that side undder the hood was pretty warm. I'm sure the AC also being right there wasn't helping either. Other then the 1 ear at the back of the manifold these really do fit pretty good.
The entire time I've been working on the Jeep i was also working on perfecting the data bus conversion module. I've made this in like 5 or 6 different versions using various processors trying to get things working as close to OEM as possible and I'm not going to lie......there were a few times I didn't think it was going to be possible to get the data conversion working fast enough.
So I decided to move to the ARM CORTEX processor and just start throwing raw speed at this issue until it went away. It turned out that with enough processor power it doesn't matter how good or how poorly optimized your program is...because it will just flat out work.
So.....Say Hello to my little friend sporting over 800mhz of collective processing power.
After almost 2 years of blood,sweat and many...many tears my vision had become reality....
The swap in it self was never what was going to be impressive about this build. People have fit engines into much smaller vehicles, its not fast compared to what most street vehicles are capable of these days with a turbo and it's not a vehicle that a lot of people would even be interested in driving.
It is however the first of its kind and it's going to change the way people look at engine swaps.
I really should have recorded what took place when I drove into the track at Ls Fest Friday morning, every single gate attendant mistook the Jeep for a spectators vehicle and kept trying to redirect me into the public area. If it had happened once it may not have stood out....but that fact that it happened 3 times in less then 10 minutes at a show that has primarily Ls swapped vehicles tells me it turned out to be one hell of a sleeper.
Gas Monkey Built a 6-Wheel Ferrari Testarossa With a Corvette LT4 Engine
Slideshow: The controversial Ferrari F6 swaps its original flat-12 for a Corvette Z06-derived LT4 V8 and sends power to four rear wheels through a custom-built drivetrain.
7 Most Reliable High-Performance Engines GM Has Ever Built
Slideshow:These GM engines didn't just make huge power, they survived abuse, boost, track days, and six-digit mileage with a reputation for refusing to quit.
6 Common C5 Corvette Failures and What's Involved In Repairing Them
Slideshow: From wobbling harmonic balancers to failed EBCMs, these are the issues that define long-term C5 ownership and what repairs typically involve.
Retro Modern Bandit Pontiac Trans AM Comes With Burt Reynolds' Autograph
Slideshow: A modern Camaro transformed into a retro icon, this limited-run "Bandit" build blends nostalgia with brute force in a way few revivals manage.
Top 10 Greatest Cadillac V Series Performance Models Ever, Ranked
Slideshow: Cadillac didn't just crash the high-performance luxury vehicle party, it showed up loud, supercharged, and occasionally a little unhinged...
Coachbuilt N2A Anteros Is an LS2-Powered C6 Corvette In Italian Clothes
Slideshow: A one-off sports car that looks like a vintage Italian exotic-but hides a C6 Corvette underneath-just sold for the price of a new mid-engine Corvette.




 .
. 
 . So that what your left with is the Factory fuse box and a hand full of wires that you will reconnect to the LS pcm and the data conversion module will take care of every thing else.