

LQ4 in a 1971 Nova

 04-02-2013, 10:00 AM
#302
thanks guys. Rich, I'll get a hold of Philip. He coming to the cruise this weekend?
Joe, the fronts are serious bright - the white LEDs overpower the ambers. in fact, the second pic actually has the ambers illuminated. I've got a set of higher-intensity amber lights on the way. the lenses also don't lend themselves well to LEDs, so I'm going to attempt to cast my own without the pillows on the forward side.
Tony, HIDplanet.com is a great resource for retrofitting LEDs. here's a link to my thread - there's a guy on there that did a 69 Camaro.
04-02-2013, 03:16 PM
#303
Found a set of wheels I like at wheelstudios. Plan is to buy the 18x8.5" and 18x9.5" and have the rears widened to 11". That would put BS at 6.13" front and 8.38" rear, which I could fix with my spacers.

 04-09-2013, 11:30 AM
#305
Well, those wheels are no longer manufactured. I might still go with the RPMs, but I'll wait until after the mini-tub is done to pull the trigger. I just don't really like the black look, or the lighter silver - I'm pretty set on gunmetal.
We made a 160 mile trek to Wickenburg on Sunday with the ET Streets and pizza cutters as part of a cruise - the longest I've taken it at one time since the LS swap. Sad part - I ran out of gas a couple miles from home, despite the gauge reading just under 1/4 tank. I filled it with 10.5 gallons, though the stock tank is 15 I believe. Sooooo... that's odd. Also, my fuel pump relay overheated a couple times, leaving us temporarily stranded on the side of the highway until I replaced it. The wiring is 10 gauge back to the pump, so I'm pretty sure that's not the problem. Maybe it's the close proximity to the headers. Swapping relays seemed to do it.
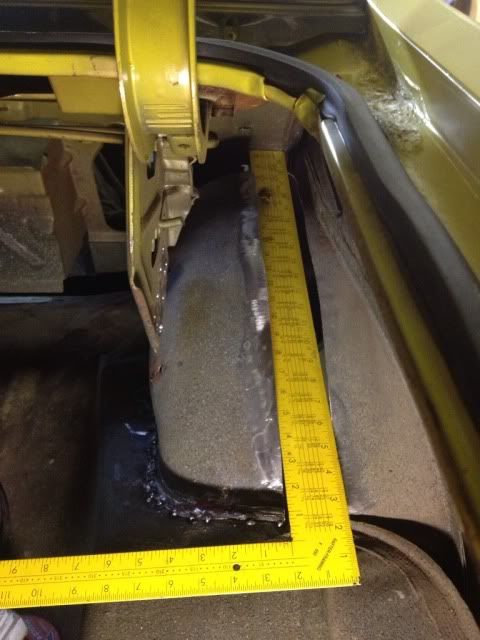
I also began the mini-tub last night. I got a little overzealous with the angle grinder when sanding off the coating, and removed a little extra material (see if you can figure out where). I'm following this write-up from TCI, though I'm deviating slightly since I'm not replacing my inner wheel housings (it would be over $200, and at that point you may as well buy the DSE tubs). Since I'm adding 2" strips, rather than DSE tubs like Joe, I'll provide some pics.
Spot welds drilled out. I used a 5/16" bit, though a 3/8" would've been better, as I had to break bits of weld with my chisel after drilling.
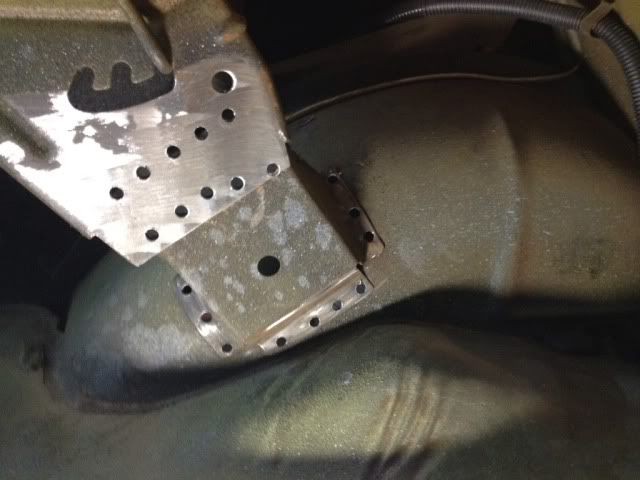
Driver's side - you can see that I cut the tub with my chisel trying to break the weld I didn't drill out. It'll be flattened and filled.
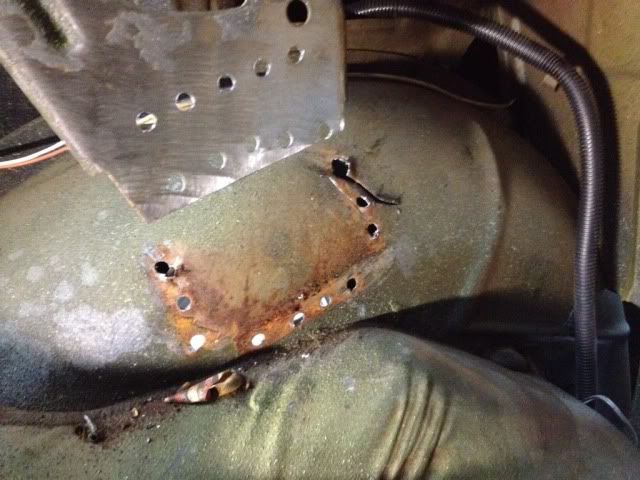
Passenger side. Much nicer.
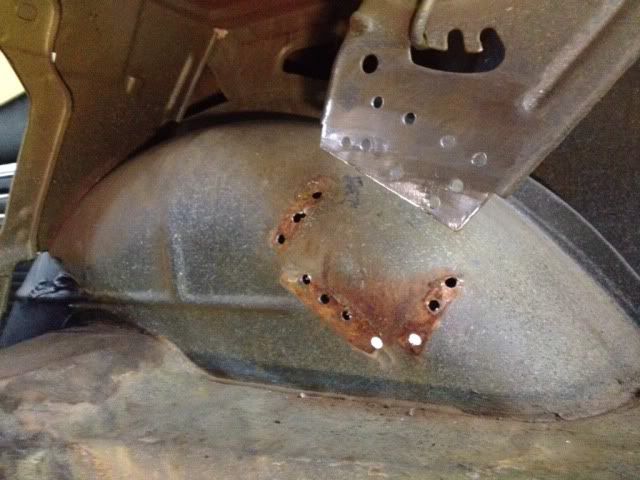
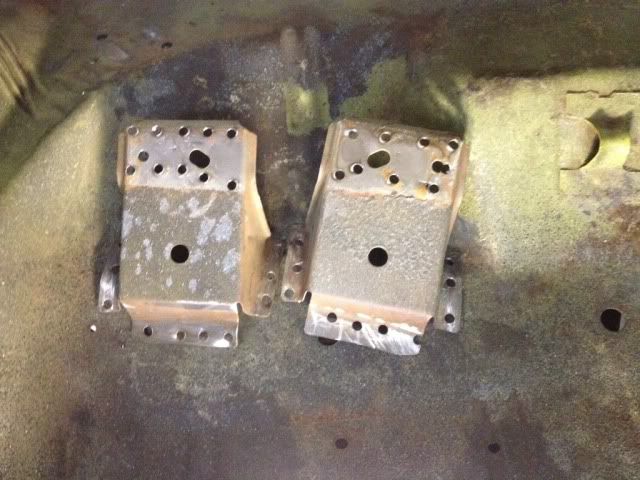
Brackets removed.
And a little extra material removed (whoops). That was with a sanding disc - imagine what'll happen when I get a cutting device in my hands.

We made a 160 mile trek to Wickenburg on Sunday with the ET Streets and pizza cutters as part of a cruise - the longest I've taken it at one time since the LS swap. Sad part - I ran out of gas a couple miles from home, despite the gauge reading just under 1/4 tank. I filled it with 10.5 gallons, though the stock tank is 15 I believe. Sooooo... that's odd. Also, my fuel pump relay overheated a couple times, leaving us temporarily stranded on the side of the highway until I replaced it. The wiring is 10 gauge back to the pump, so I'm pretty sure that's not the problem. Maybe it's the close proximity to the headers. Swapping relays seemed to do it.
I also began the mini-tub last night. I got a little overzealous with the angle grinder when sanding off the coating, and removed a little extra material (see if you can figure out where). I'm following this write-up from TCI, though I'm deviating slightly since I'm not replacing my inner wheel housings (it would be over $200, and at that point you may as well buy the DSE tubs). Since I'm adding 2" strips, rather than DSE tubs like Joe, I'll provide some pics.
Spot welds drilled out. I used a 5/16" bit, though a 3/8" would've been better, as I had to break bits of weld with my chisel after drilling.
Driver's side - you can see that I cut the tub with my chisel trying to break the weld I didn't drill out. It'll be flattened and filled.
Passenger side. Much nicer.
Brackets removed.
And a little extra material removed (whoops). That was with a sanding disc - imagine what'll happen when I get a cutting device in my hands.
04-10-2013, 12:44 AM
#307
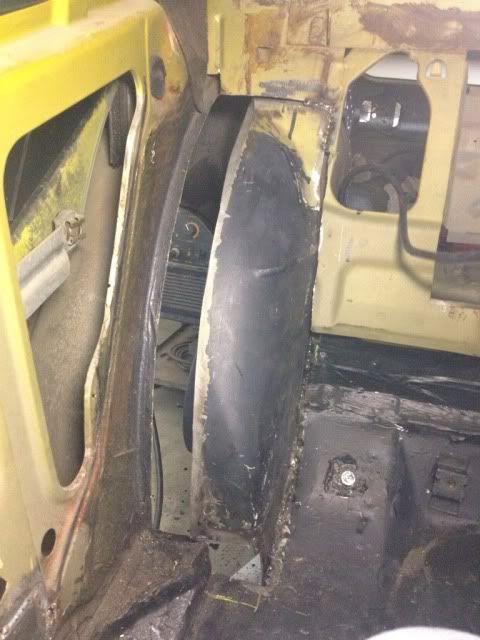
Drivers side is done. Sawzall FTMFW. I planned to leave a lip surrounding the tub, but wasn't able to for reasons shown below. And I still have all 20 digits!
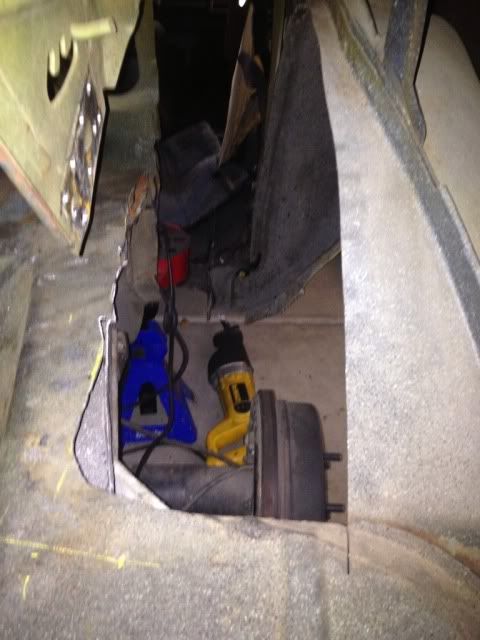
From the cabin. I need to get rid of those drums...
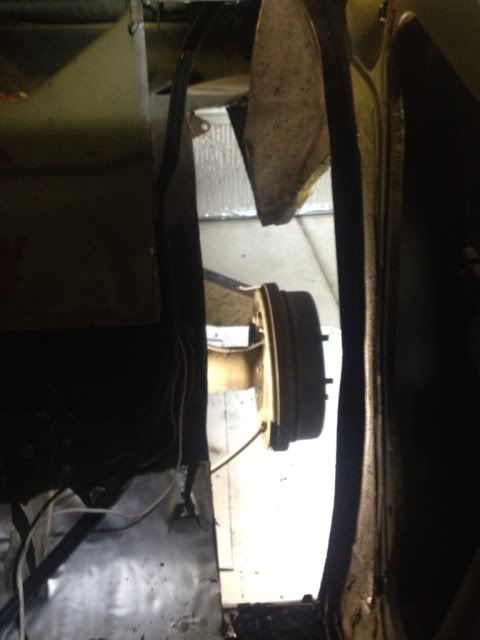
From the trunk

Wheel side looking forward
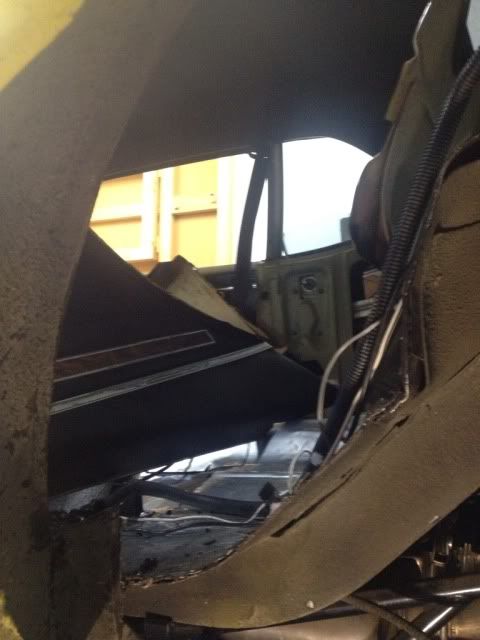
Here's the forward part of the tub before I cut it. I'm pretty sure I made the cut lines when I was in high school. I cut along that, and plan to reattach to the rear support when I reinstall the tub.
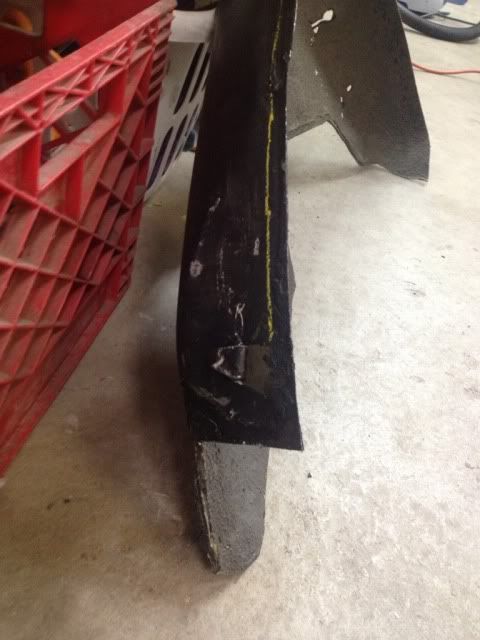
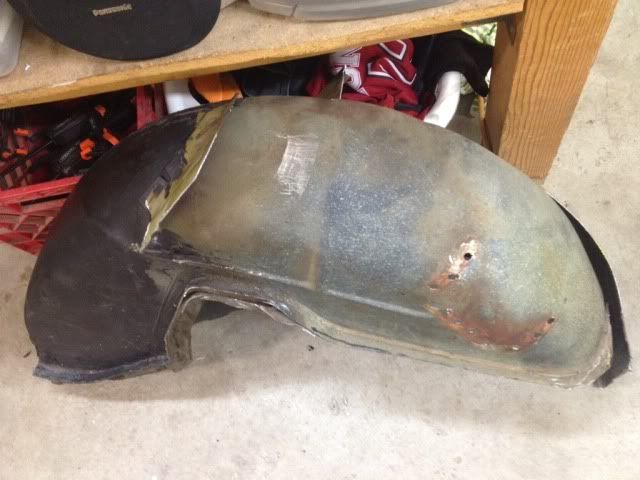
Tub removed. Black is forward (from when I laid down rust oleum).

Forward portion of the tub. The metal below this point (in the car) is mighty thick. I scrapped a saws all blade before I figured it out.
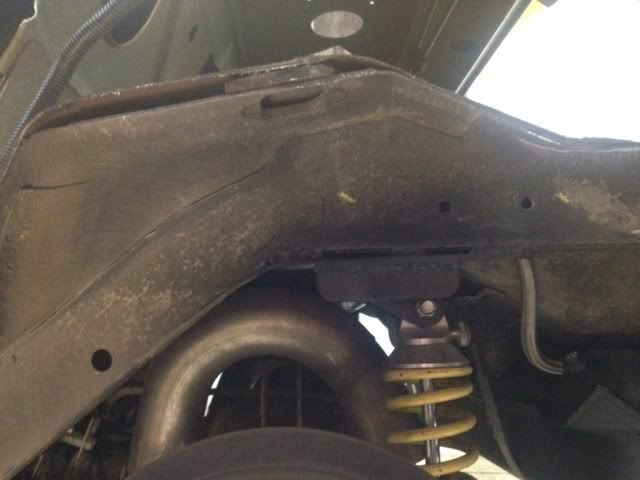
Here's why I had to cut so close to the tub, instead of cutting a lip around it. Notice the upper shock mount sandwiched between two pieces of sheet metal, which I partially cut through, as well as the Proximity to the frame on the right of the picture. Both will be removed (the frame notched).
From the cabin. I need to get rid of those drums...
From the trunk
Wheel side looking forward
Here's the forward part of the tub before I cut it. I'm pretty sure I made the cut lines when I was in high school. I cut along that, and plan to reattach to the rear support when I reinstall the tub.
Tub removed. Black is forward (from when I laid down rust oleum).
Forward portion of the tub. The metal below this point (in the car) is mighty thick. I scrapped a saws all blade before I figured it out.
Here's why I had to cut so close to the tub, instead of cutting a lip around it. Notice the upper shock mount sandwiched between two pieces of sheet metal, which I partially cut through, as well as the Proximity to the frame on the right of the picture. Both will be removed (the frame notched).
 04-11-2013, 11:26 AM
#310
Mas...

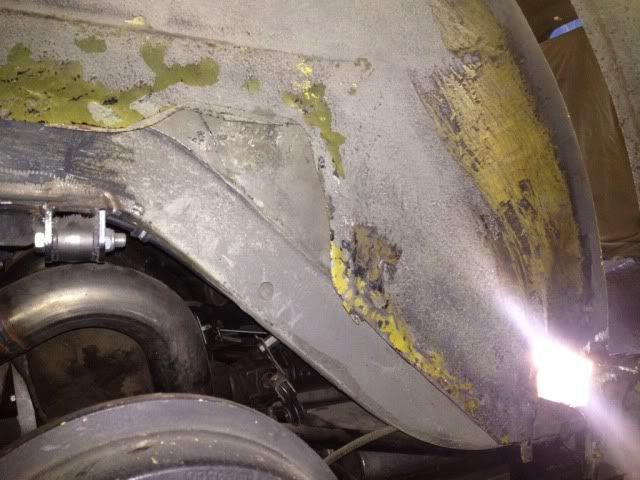
Post-2" secton removal, pre clean-up (sawzall got snagged by the underlying sheet metal). The wheel well cuts are clean though. And I'll be much more careful on the driver's side.
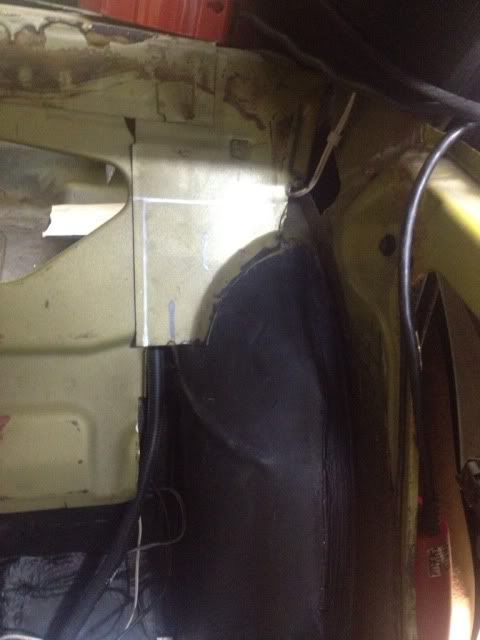
You can see I was able to salvage more of a lip on the passenger-side wheel well.
Now, I ran into a small snafu... my panhard bar mount is attached to the passenger-side frame rail where it begins to kick out (aka part that needs to be removed). Same with both spring mounts, though they're less pronounced and therefore easier to modify. So I'll likely remove the bar and have the fabricator cut and remount it. I'll be cleaning up the area over the next few days. And I'll admit I'm a little terrified right now.
Post-2" secton removal, pre clean-up (sawzall got snagged by the underlying sheet metal). The wheel well cuts are clean though. And I'll be much more careful on the driver's side.
You can see I was able to salvage more of a lip on the passenger-side wheel well.
Now, I ran into a small snafu... my panhard bar mount is attached to the passenger-side frame rail where it begins to kick out (aka part that needs to be removed). Same with both spring mounts, though they're less pronounced and therefore easier to modify. So I'll likely remove the bar and have the fabricator cut and remount it. I'll be cleaning up the area over the next few days. And I'll admit I'm a little terrified right now.
04-26-2013, 10:48 AM
#311
I know that feeling of being terrified. It's unsettling to see the ground through an opening in your trunk, but you'll get the job done - just take your time. It's going to be awesome when you're finished!
How do you like that Taylor battery box? I may be moving my battery to the trunk also. There are so many ways to wire it - what method did you chose? Remote solenoid? Single wire to start & alt or dedicated charging wire? Cutout switch?
How do you like that Taylor battery box? I may be moving my battery to the trunk also. There are so many ways to wire it - what method did you chose? Remote solenoid? Single wire to start & alt or dedicated charging wire? Cutout switch?
04-26-2013, 11:42 AM
#312
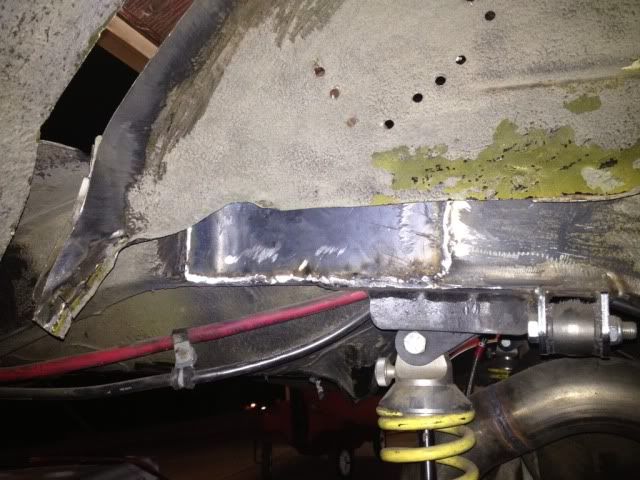
So I got the frame patches welded in, and tacked the passenger-side wheel well. I spent a lot of time cleaning the crap off the areas to be welded and inside the wheel wells themselves (lots of rubber). Also, I was a little over-zealous with the cutters, so I'll have to fill some gaps. Luckily my BFH took care of a lot of the gap issue. I still have some cutting to do on the driver's side, but I should have both done (maybe not the 2" strips though) this weekend.
Clint, I like the battery box. It looks great for the price, though it is a little flimsy. I recommend it though. I used a turn-switch (as opposed to a push-pull) that I bolted to my rear bumper. The only real pain is running the alternator wire alllllll the way to the back to comply with NHRA regs.
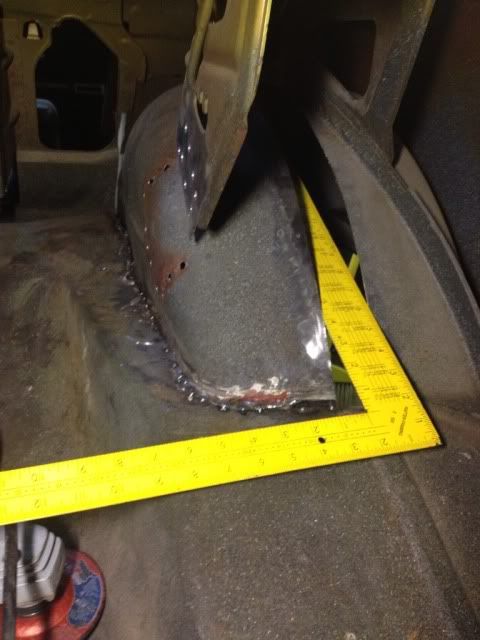
This is literally my first legitimate welding project, so don't hammer me to hard for my weld quality. I plan to do spot welds down the wheel wells to minimize burn-thru. Also, my square is 2" wide, thus why it's in the pictures.

Clint, I like the battery box. It looks great for the price, though it is a little flimsy. I recommend it though. I used a turn-switch (as opposed to a push-pull) that I bolted to my rear bumper. The only real pain is running the alternator wire alllllll the way to the back to comply with NHRA regs.
This is literally my first legitimate welding project, so don't hammer me to hard for my weld quality. I plan to do spot welds down the wheel wells to minimize burn-thru. Also, my square is 2" wide, thus why it's in the pictures.


 04-26-2013, 07:52 PM
#313
Looking good! Are you going to use flat metal to fill the 2" gap or get fancy and roll a step on each side of the strip to have a flush finish on the top side? What size of wire are you using? If you use .023" you shouldn't have much issue with burn through if you keep the welds cool and space the welds correctly. Are you using flux core or MIG? Can't wait to see the finished product, so far so good!
04-26-2013, 08:06 PM
#314
TECH Resident
iTrader: (24)
Join Date: Jun 2005
Location: Houston, TX
Posts: 860
Likes: 0
Received 0 Likes
on
0 Posts

Is it just due to cost that you are stretching the stock tubs? You can pick up the Dynacorn deep inner tubs for about $200. Either way going to be well worth the time to minitub, changes the whole attitude of the car for the better 
04-26-2013, 08:50 PM
#315
Tony,
-Flat metal. I saw a company that makes the stepped inserts for 1st and 2nd gen Novas for around $100, but nothing for the 68-79.
-.o23" wire. I had to play around with the voltage and wire feed, but I'm fairly certain I'm getting good enough to preclude burn-thru, for the most part. Filling holes in my floor pan has helped me figure out the settings and touch.
-MIG. Miller 135 I'm borrowing from a buddy. I've got a smaller welder Im picking up from my dad next time I'm up in Washington.
Sierra, it's mainly cost. I saw a write-up on a 1st-gen camaro on TCI's website that used new inner tubs. But there are enough DIYs out there that I decided to try modifying mine. The worst part is definitely removing the undercoating and crap from the tubs, which obviously wouldnt be much of a problem with new inners.
Side note, Arr you keeping VVT with the LY6/T56 you're doing? I'm interested to see if anyone could make that work.
04-26-2013, 08:57 PM
#316
Also, I've been looking at wheels. A lot have deep offsets, but I've got a set of adapters I can use, which feature a ford bolt pattern. So I'll likely get something with a 5x4.5 like Joe did. Here's two I'm seriously interested in.
TSW Nurburgring (gun metal).
Positive: 10.5" rear wouldn't need to be widened for a 305; Spin forged, so they're just over 20 (18x9") and 21 (18x10.5) lbs, per TSW.
Negative: no lip (here's an idea of what they look like on a vintage car, though it's a mustang.

TSW Tremblant (matte black)
Positive: 2" rear lip; the black does look pretty nice (better than gloss, at least)
Negative: rear is 9.5", so id have to spend another $450+ to have them widened; cast, so they're about 5 lbs heavier per wheel vs. the 'Rings

TSW Nurburgring (gun metal).
Positive: 10.5" rear wouldn't need to be widened for a 305; Spin forged, so they're just over 20 (18x9") and 21 (18x10.5) lbs, per TSW.
Negative: no lip (here's an idea of what they look like on a vintage car, though it's a mustang.
TSW Tremblant (matte black)
Positive: 2" rear lip; the black does look pretty nice (better than gloss, at least)
Negative: rear is 9.5", so id have to spend another $450+ to have them widened; cast, so they're about 5 lbs heavier per wheel vs. the 'Rings
04-26-2013, 10:07 PM
#317

 04-27-2013, 06:26 PM
#320
I like the TSW wheels but I am with you on the lip. I put a set of these on my son's Mustang and they look great. Not sure how they will look on a Nova but here they are on a Mustang. One word of caution: the charcoal matte wheels are a pain in the ars to clean between the spokes.
[IMG] [/IMG]
[IMG] [/IMG]
[IMG]
 [/IMG]
[IMG]
 [/IMG]