
LQ4 in a 1971 Nova


 10-28-2009, 10:24 AM
#102
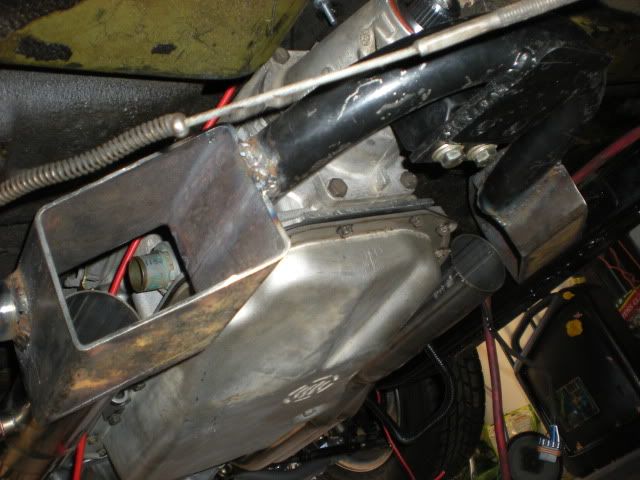
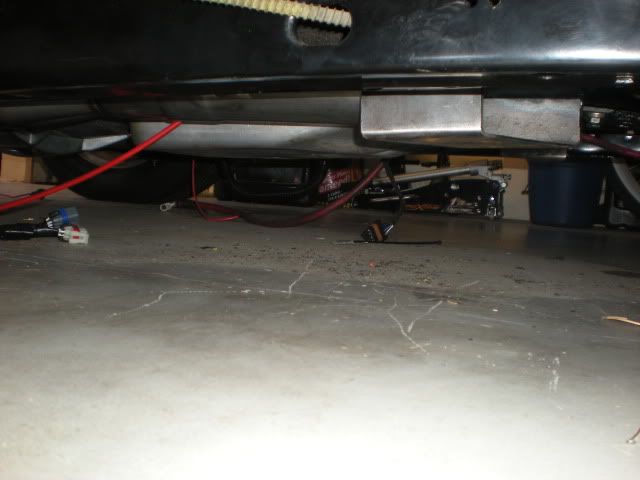
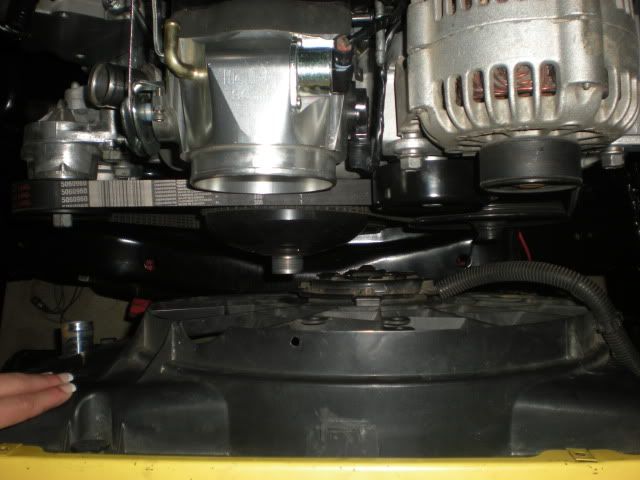
'nother small update... Fenders are back on, wiring is 95% done, and I had to cut apart the trans x-member to make some exhaust cutouts. The header extensions (which i had to drill and weld o2 sensor bungs into due to the lack of space between the collectors and trans pan) were literally an inch from it, and ground clearance is at a premium, so going under was no option.
F*$%, i paid $200 for the damn thing because i didn't want to deal with fabbing one, and I've ended up welding an extension to the mount plate and hacking it for the exhaust cutouts. Not too happy about it. On the bright side, it turned out pretty sweet looking and functional.
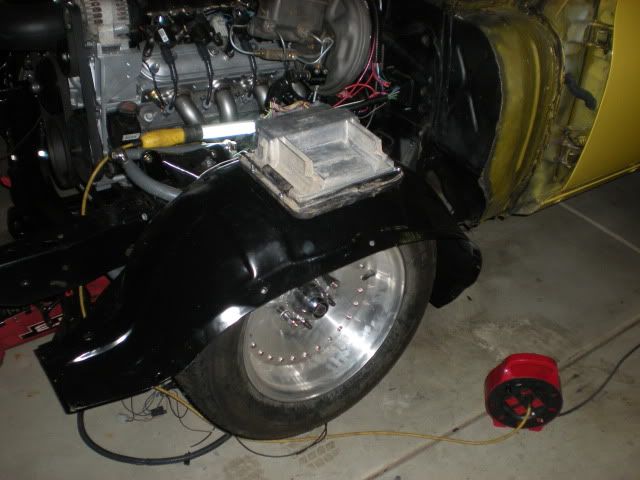
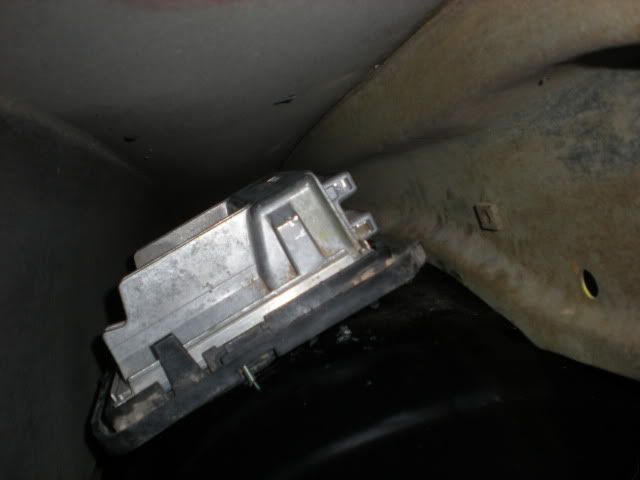
Also, I mounted the PCM to the driver's side inner fender. It's a tight fit, but I got it in there.
F*$%, i paid $200 for the damn thing because i didn't want to deal with fabbing one, and I've ended up welding an extension to the mount plate and hacking it for the exhaust cutouts. Not too happy about it. On the bright side, it turned out pretty sweet looking and functional.
Also, I mounted the PCM to the driver's side inner fender. It's a tight fit, but I got it in there.
10-28-2009, 11:21 AM
#103
It does look pretty sweet. I guess there is no need for me to buy a new crossmember until I see how it all fits together, since I might have to alter it anyway. You may have just saved me $200.00. =)
Last edited by crosstraining; 10-28-2009 at 11:48 AM.
10-29-2009, 07:08 PM
#105

I def like the pcm mounting. nice work. Is there enough rigidity left in that crossmember though? I only ask b/c I just had to redesign the one in my Regal twice b/c of strength issues. Oh and I used 1/4" plate when I did it. You may want to add some gussets to it. Triangles make **** strong!
10-29-2009, 08:15 PM
#106
On The Tree
iTrader: (4)

Join Date: Mar 2009
Location: British Columbia, Canada
Posts: 132
Likes: 0
Received 0 Likes
on
0 Posts
Looking good. That's going to be a sweet car when it's done. My wife has always been a fan of yellow Novas. I don't mind the yellow either. When I was looking for a color to paint mine, I mentioned yellow. She liked the idea but said it wouldn't suit me so I ended up going with HOK's apple red. Keep up the good work.
11-03-2009, 10:21 PM
#107
on top of it topher! I'm going to pick up some scrap metal tomorrow, then going to weld in some gussets after work.
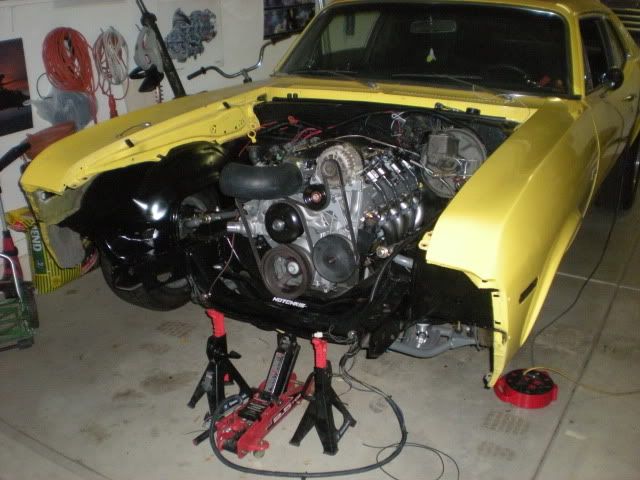
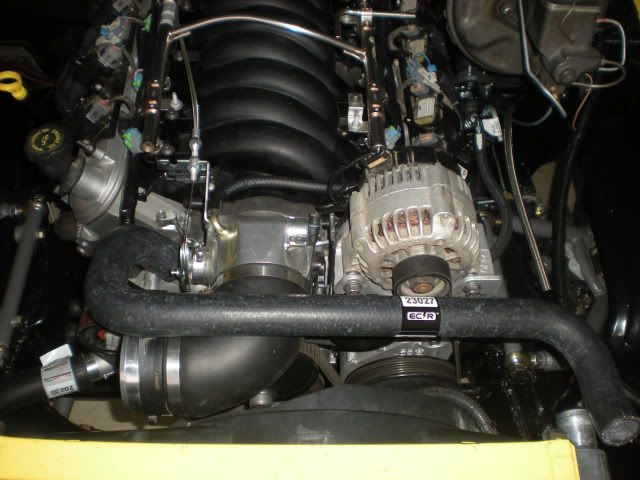
I should be doing homework, but I'm so close I've been working on the project instead. I put the radiator support back on tonight and bolted down the fenders (they were just loosly attached before). Wiring is done, other than the fan relay to fan and front lighting.
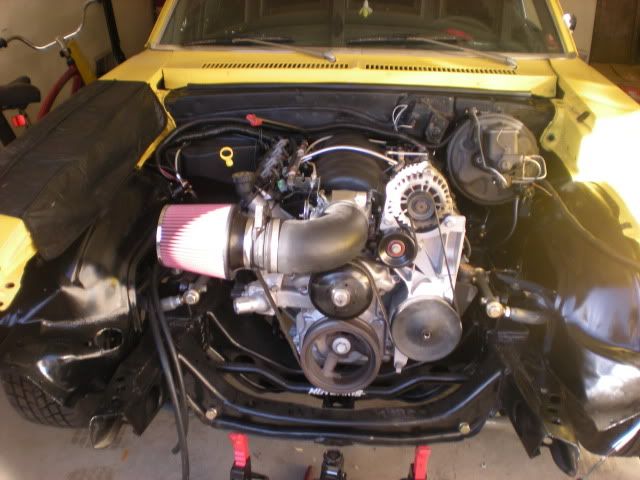
I ran into a problem though... my intake tube interferes with the Taurus fan. Unfortunately, I lost an inch in the TB spacer required to run the LS3 intake with truck accessories. So I've got two options:
1) Trim down or find another tube AND trim part of the fan, or
2) Find a slimmer aftermarket fan
I'm hoping for the cheap route (step 1), since the Taurus fan had no trouble keeping my 350 cool before, as it pumps serious air. Also, I believe a longer intake tube is in order anyway, as I'd like to move the filter further toward the passenger side of the car. I'll call AZ TPI (where I bought it) tomorrow to see if they can hook me up with anything else.
Other than that, I'm fairly certain my next big step is figuring out the radiator hoses (I want to splice the crossover tube into the upper hose, so I'm not going the frojoe route), checking my wiring/fuel systems, and hanging the front hardware (and installing the interior, and hooking up the Quicksilver shifter to the trans, and, and, and... **** there's a bunch more small stuff to do).
I should be doing homework, but I'm so close I've been working on the project instead. I put the radiator support back on tonight and bolted down the fenders (they were just loosly attached before). Wiring is done, other than the fan relay to fan and front lighting.
I ran into a problem though... my intake tube interferes with the Taurus fan. Unfortunately, I lost an inch in the TB spacer required to run the LS3 intake with truck accessories. So I've got two options:
1) Trim down or find another tube AND trim part of the fan, or
2) Find a slimmer aftermarket fan
I'm hoping for the cheap route (step 1), since the Taurus fan had no trouble keeping my 350 cool before, as it pumps serious air. Also, I believe a longer intake tube is in order anyway, as I'd like to move the filter further toward the passenger side of the car. I'll call AZ TPI (where I bought it) tomorrow to see if they can hook me up with anything else.
Other than that, I'm fairly certain my next big step is figuring out the radiator hoses (I want to splice the crossover tube into the upper hose, so I'm not going the frojoe route), checking my wiring/fuel systems, and hanging the front hardware (and installing the interior, and hooking up the Quicksilver shifter to the trans, and, and, and... **** there's a bunch more small stuff to do).
11-04-2009, 08:58 AM
#109
the flexible radiator hoses. i actually don't think you mentioned the x-over tube, so i'm not sure what you did with it, but i'm just going to T it into my upper hose. i'm fairly certain the hoses you're running won't allow this?
EDIT: you know what i like about the need for a spacer though? it gives me an excuse to run nitrous when i get some more $$$ and a beefier rear.
EDIT: you know what i like about the need for a spacer though? it gives me an excuse to run nitrous when i get some more $$$ and a beefier rear.
Last edited by hookemdevils22; 11-04-2009 at 09:18 AM.
11-12-2009, 06:38 PM
#111
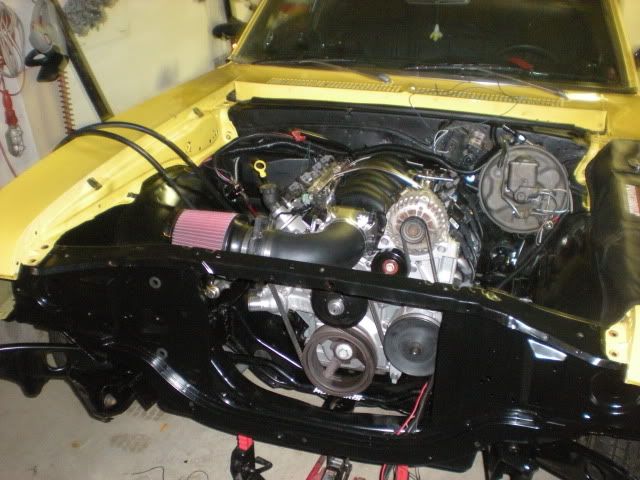
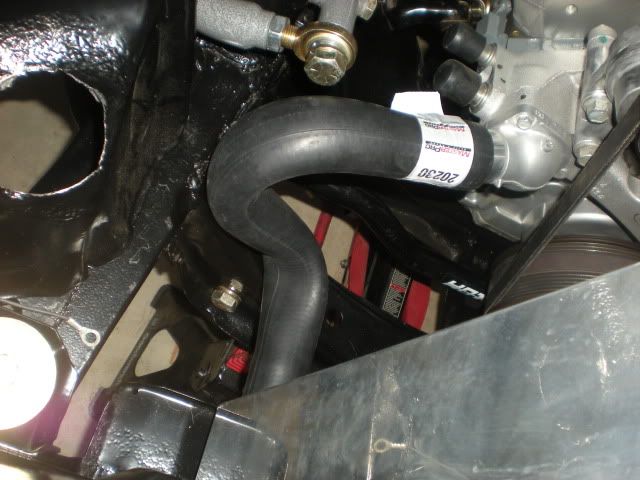
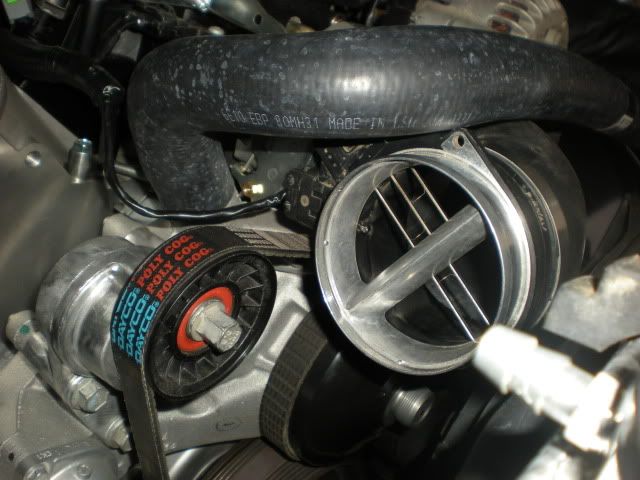
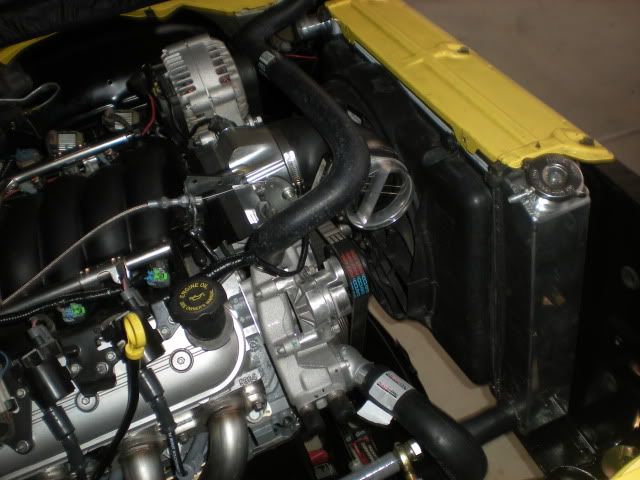
Found some radiator hoses that work with my setup today. In fact, they'd work better with a truck intake because the upper contacts my MAF. They are Gates PN 23027 (upper - for a Chev SSR) and 20230 (lower - not sure what it's for). Both need a little trimming (lower more than upper), but i'm sure they'll fit. I also picked up a hose connector w/ nipple for my x-over tube.
I'm running an AFCO stock-replacement radiator (inlet on upper driver's side, outlet on lower pass side) with a Taurus fan. The taurus fan required a little trimming because I had no room to my 90� TB inlet.
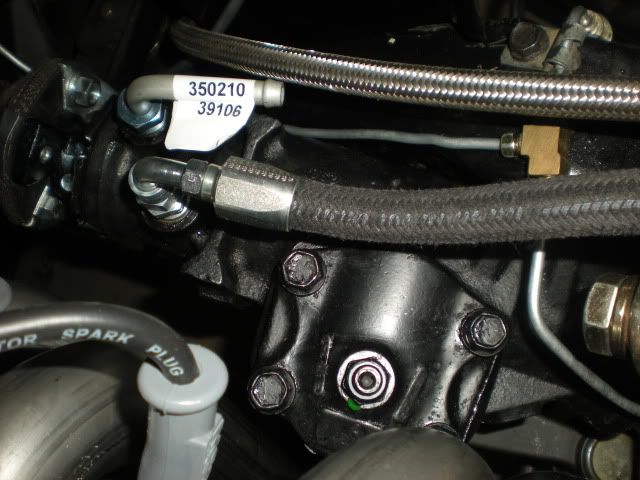
I also got a custom hi-pressure PS hose from Parker Store. F&$#, it was expensive ($60)! It's 17" of hose with two 90� -6AN fittings. I also picked up two Earl's -6AN adapters - one 16mm x 1.5, the other 18 mm x 1.5. For the lo-pressure side, I found a 'power steering repair kit' from edelmann's, PN 39106. It's a 90� hard line with a 16mm x 1.5 adapter on one end and a 3/8" nipple on the other.
EDIT: 71 chevy mentioned in another thread that he found a $16 hose on ebay for a 5.3L that worked. I did some digging @ rock auto, and found gates PN 22436. It is for a bunch of different gm trucks, but I used a 2000 silverado 1500 w/ the 5.3L. It looks like it may work as well, and save you $20 or so.
Here's where I'm at so far. I'm going to get some gas tomorrow and test the fuel system.
Hoses:
Power Steering:
I'm running an AFCO stock-replacement radiator (inlet on upper driver's side, outlet on lower pass side) with a Taurus fan. The taurus fan required a little trimming because I had no room to my 90� TB inlet.
I also got a custom hi-pressure PS hose from Parker Store. F&$#, it was expensive ($60)! It's 17" of hose with two 90� -6AN fittings. I also picked up two Earl's -6AN adapters - one 16mm x 1.5, the other 18 mm x 1.5. For the lo-pressure side, I found a 'power steering repair kit' from edelmann's, PN 39106. It's a 90� hard line with a 16mm x 1.5 adapter on one end and a 3/8" nipple on the other.
EDIT: 71 chevy mentioned in another thread that he found a $16 hose on ebay for a 5.3L that worked. I did some digging @ rock auto, and found gates PN 22436. It is for a bunch of different gm trucks, but I used a 2000 silverado 1500 w/ the 5.3L. It looks like it may work as well, and save you $20 or so.
Here's where I'm at so far. I'm going to get some gas tomorrow and test the fuel system.
Hoses:
Power Steering:
Last edited by hookemdevils22; 11-15-2009 at 09:08 AM.

The following users liked this post:
hookemdevils22 (12-03-2019)
11-15-2009, 09:27 AM
#117
got the fuel system tested. fuel pump works great, pumped a few gallons thru it into an old bucket. had one minor leak from the hard line to the flex line at the front. tightened it down, and we're good to go. only other thing was this:
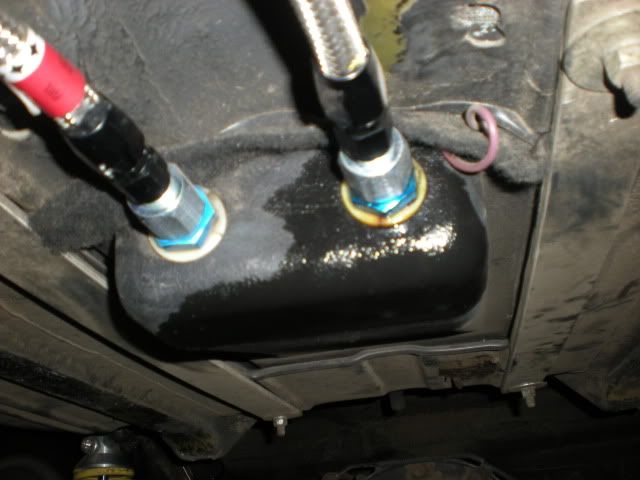
fuel is leaking out of the return line at the sump. it's in the cell itself, not the line. so i used that as an excuse to order a new powdercoated black aluminum cell from summit. the old cell was one of those cheap plastic jobs - it literally caved in moments after we installed it and fired the engine. the return line to the same area as the feed line was a bad idea anyway - the new cell's got a return at the top, well away from the sump. once i install that, i should be good to fire the beast up.
fuel is leaking out of the return line at the sump. it's in the cell itself, not the line. so i used that as an excuse to order a new powdercoated black aluminum cell from summit. the old cell was one of those cheap plastic jobs - it literally caved in moments after we installed it and fired the engine. the return line to the same area as the feed line was a bad idea anyway - the new cell's got a return at the top, well away from the sump. once i install that, i should be good to fire the beast up.
Last edited by hookemdevils22; 11-19-2009 at 12:24 PM. Reason: it's a fuel cell, not a fuel pump!
11-24-2009, 12:17 PM
#118
Teching In

Join Date: Oct 2009
Posts: 2
Likes: 0
Received 0 Likes
on
0 Posts
I had read in another thread where you had run into a problem with your power steering pump. You have a pump that was designed for hydroboost right? How did you go about eliminating one of the conections to the pump and which one did you eliminate? By the way car looks good, and one of the cleanest LQ4 swaps ive seen.
11-24-2009, 02:24 PM
#119
Here's the thread you're referring to. Basically, the PS pump has two lo-pressure lines (in addition to the 16mm HP fitting - click here for a pic). I'm going to cap the upper (on the side of the reservoir) and run the lower. My only issue was that I cut and moved the lower to get the pump to fit in the car, as it was hitting the cross-member. So it doesn't have the barb anymore (while the upper does).
11-24-2009, 04:08 PM
#120
Teching In
Join Date: Oct 2009
Posts: 2
Likes: 0
Received 0 Likes
on
0 Posts
So your saying that you can use the fitting on the lower backside to go to the steering box and the return line will go to the lowest barb on the outside near the frame rail. What would be the best way to cap that top barb? How much pressure is behind that barb? Good info!!  I am in the LQ4 fight for the long haul too.
I am in the LQ4 fight for the long haul too.