

kst8engineer - '71 Chevelle LS1/T56 build thread
 08-06-2011, 05:04 PM
#221
On The Tree
Thread Starter
iTrader: (6)

Join Date: Mar 2006
Location: Kansas
Posts: 192
Likes: 0
Received 0 Likes
on
0 Posts

Thanks for the reply, I'm still deciding between 17s or 18s. As I was re-reading through you thread, how did your F-body fuel pump set up work out? Is it performing under hard turns, or are you having starvation issues? I like the idea that it is OEM, like your F-body radiator set up. Using pre-engineered parts in our cars can save a lot of headaches. And it makes part replacement for repairs easier.

 08-06-2011, 06:31 PM
#223

GM Needs to take some notes. That cluster is Beautiful. I hope my custom Autometer cluster looks half as good as that one.
08-07-2011, 07:50 AM
#224
Teching In

Bronco3738, I agree with your thoughts -- if it's possible to integrate OEM-engineered components or systems, it's likely to be more reliable in the long run. The fuel pump setup has worked perfectly. I haven't had any starvation issues cornering, accelerating, or braking.
Mike
08-07-2011, 09:04 AM
#225

 08-07-2011, 11:53 PM
#227
On The Tree
Thread Starter
iTrader: (6)
Join Date: Mar 2006
Location: Kansas
Posts: 192
Likes: 0
Received 0 Likes
on
0 Posts
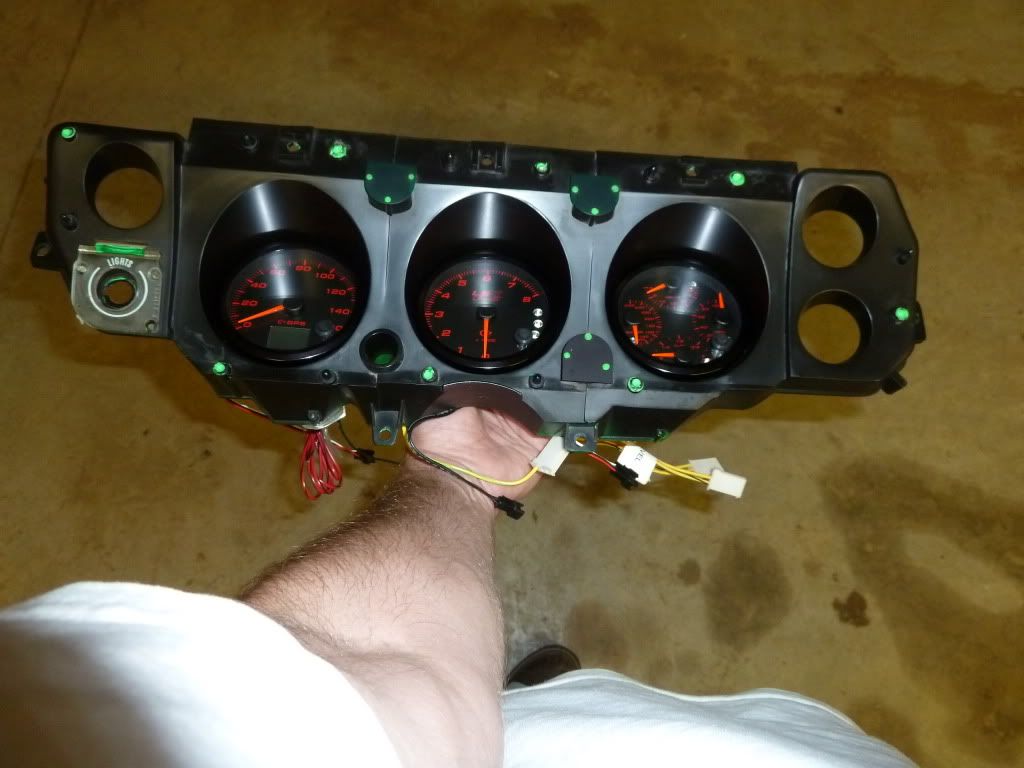
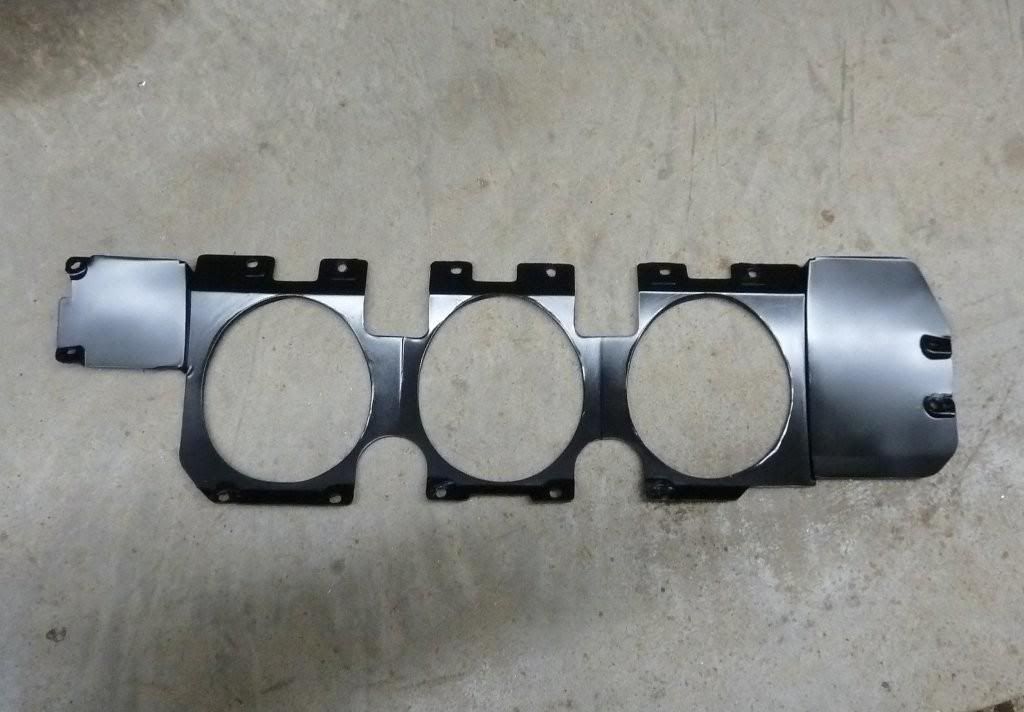
I ended up modifying the factory Chevelle instrument panel lens by cutting holes in it for each of the new gauges, scuffing it with a Scotch-Brite pad and then painting it with Krylon Fusion satin black. The black lens will form the blockoff panel for the three smaller gauge openings, and it will also fill the gap correctly between the instrument panel and the dash.
The only place the black lens will be visible is in the holes where the small gauges previously were.
The only place the black lens will be visible is in the holes where the small gauges previously were.
09-18-2011, 07:30 AM
#229
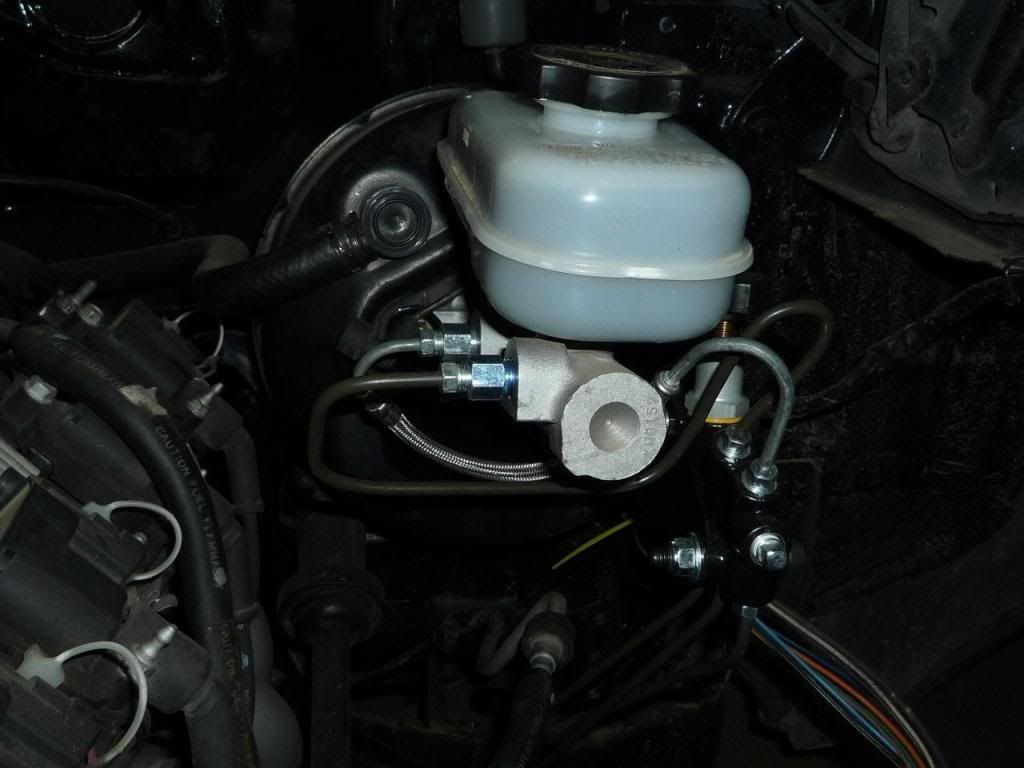
Time for an update... As mentioned before, I installed the '98-'02 F-body master cylinder and booster, and I fabbed up a little bracket to mount a Wilwood adjustable proportioning valve. The valve also serves as a distribution block and splits the lines out into left front, right front, and rear.
thanks
09-18-2011, 11:14 PM
#230
On The Tree
Thread Starter
iTrader: (6)
Join Date: Mar 2006
Location: Kansas
Posts: 192
Likes: 0
Received 0 Likes
on
0 Posts
Chuckd71 - that flex line was actually from the '99 T/A donor car. I used a little tubing bender to bend the rigid portions as needed, and if I remember right, I believe I put my own end fittings on it and flared the line. I believe there were two flex lines on the T/A donor car, both located in the vicinity of the antilock brake box. You have to be careful trying to bend them. If you place the bend too close to the rigid/flex joint, it'll break right at the joint. If I recall correctly, that's why I only have one flex line instead of two (I learned the lesson on the first one when it broke).
09-20-2011, 04:32 AM
#231
Indeed. I'm going to try bending the lines I already have and see what happens.
Good to see those gauges fit in the holes like that since I ordered the same ones a couple weeks ago. I was thinking someone had thrown them in there and I guess it was you. I grabbed a few of their smaller gauges as well thinking I might open up the holes you opted to cover, but thinking about it I think your approach will work better and I'll just continue to use my a-pillar.
Perhaps I missed it, but are you using the stock f-body master and shifter?
10-04-2011, 08:48 PM
#232
On The Tree
Thread Starter
iTrader: (6)
Join Date: Mar 2006
Location: Kansas
Posts: 192
Likes: 0
Received 0 Likes
on
0 Posts
Yes, I am. I never even cracked the hydraulic clutch system open during the swap. I pulled the clutch master cylinder from the donor at the same time the engine and transmission came out, and I installed it all together into the Chevelle as well.
10-04-2011, 09:01 PM
#234
On The Tree
Thread Starter
iTrader: (6)
Join Date: Mar 2006
Location: Kansas
Posts: 192
Likes: 0
Received 0 Likes
on
0 Posts
I finally finished up the gauge installation, along with some general cleanup of the wiring behind the dash. Here are a few long-overdue update pictures:
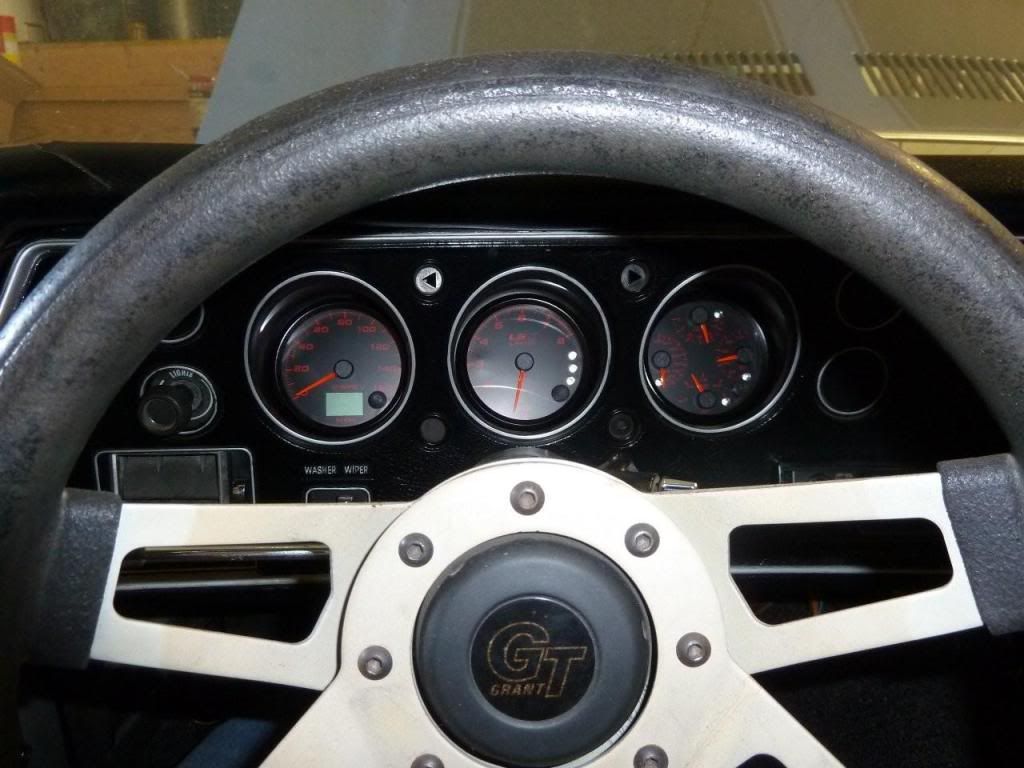
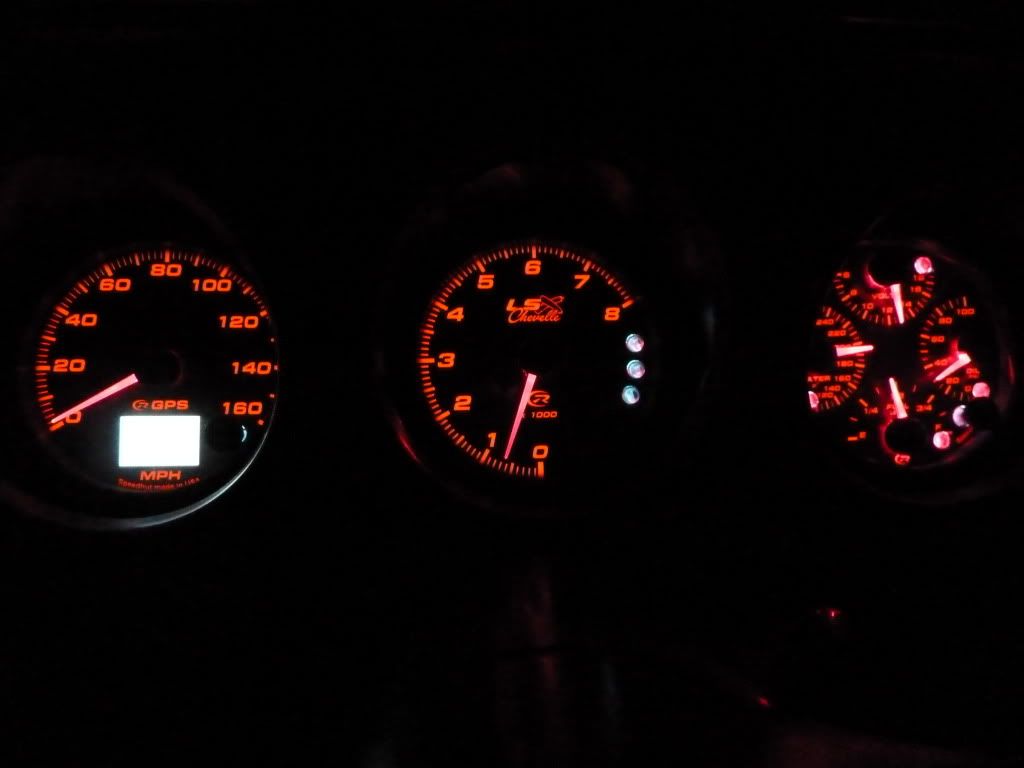
And my favorite:
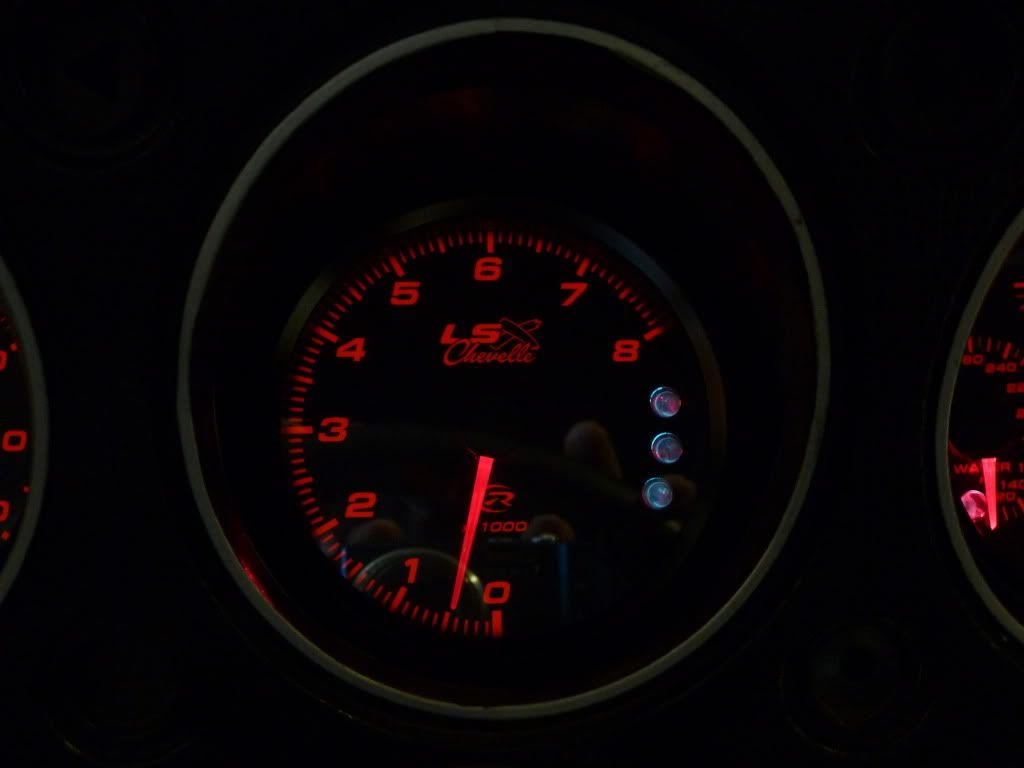
I set the tach to 2 pulses per rev, and it seems to be reading correctly, and the GPS speedo works great with no setup required. I still need to calibrate the fuel gauge, but that should be pretty straightforward.
And my favorite:
I set the tach to 2 pulses per rev, and it seems to be reading correctly, and the GPS speedo works great with no setup required. I still need to calibrate the fuel gauge, but that should be pretty straightforward.
Last edited by kst8engineer; 10-04-2011 at 09:50 PM.

 02-14-2012, 02:59 AM
#239
Glad someone bumped this, I couldn't find it.
What did you use to cut the holes in the clear plastic? That's where I am at this point in my speedhut install. I was thinking a dremel, but wasn't sure if it would cut through or simply melt and make a mess.
What did you use to cut the holes in the clear plastic? That's where I am at this point in my speedhut install. I was thinking a dremel, but wasn't sure if it would cut through or simply melt and make a mess.