

kst8engineer - '71 Chevelle LS1/T56 build thread


 01-17-2009, 08:49 PM
#22
On The Tree
Thread Starter
iTrader: (6)

Join Date: Mar 2006
Location: Kansas
Posts: 192
Likes: 0
Received 0 Likes
on
0 Posts

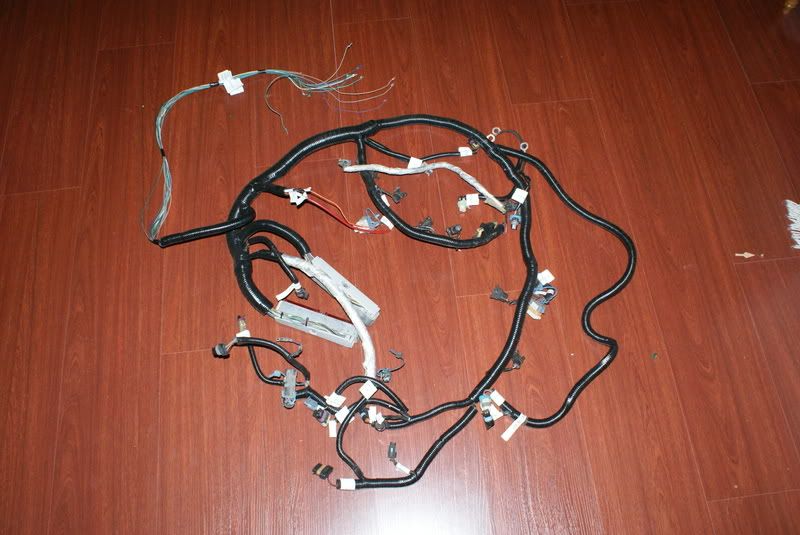
Received the modified harness and reprogrammed PCM from Wait4Me yesterday.
I've been working on stripping down the Chevelle's engine compartment. So far, I've got the A/C, PS pump, alternator, heater hoses, battery, and radiator pulled out.
I've been working on stripping down the Chevelle's engine compartment. So far, I've got the A/C, PS pump, alternator, heater hoses, battery, and radiator pulled out.
01-24-2009, 06:30 PM
#23
On The Tree
Thread Starter
iTrader: (6)
Join Date: Mar 2006
Location: Kansas
Posts: 192
Likes: 0
Received 0 Likes
on
0 Posts
A few update pics:
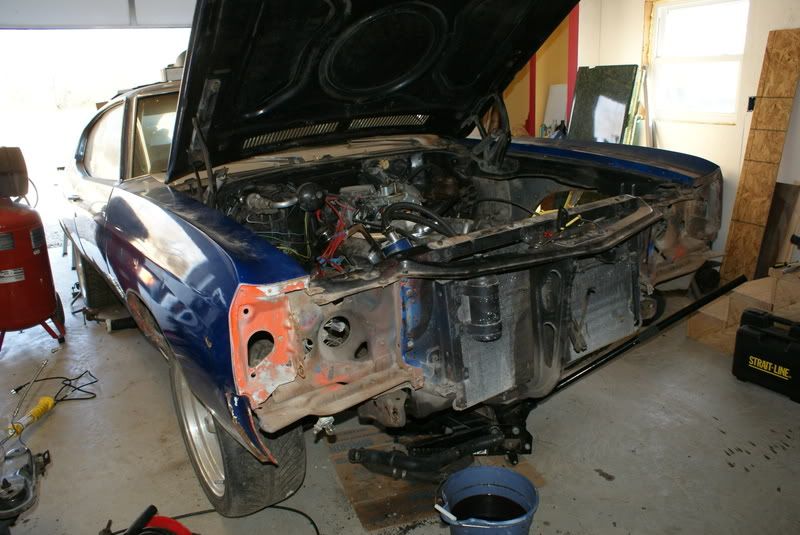
Almost ready to lift the old engine / transmission out of the Chevelle. I also got the donor car out of the garage, so that freed up a lot of room to work.
Almost ready to lift the old engine / transmission out of the Chevelle. I also got the donor car out of the garage, so that freed up a lot of room to work.
01-24-2009, 11:28 PM
#24
On The Tree
Thread Starter
iTrader: (6)
Join Date: Mar 2006
Location: Kansas
Posts: 192
Likes: 0
Received 0 Likes
on
0 Posts
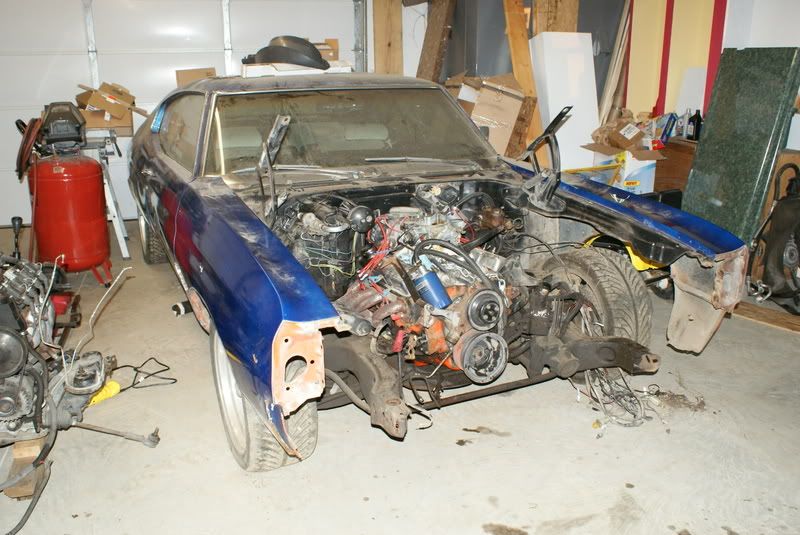
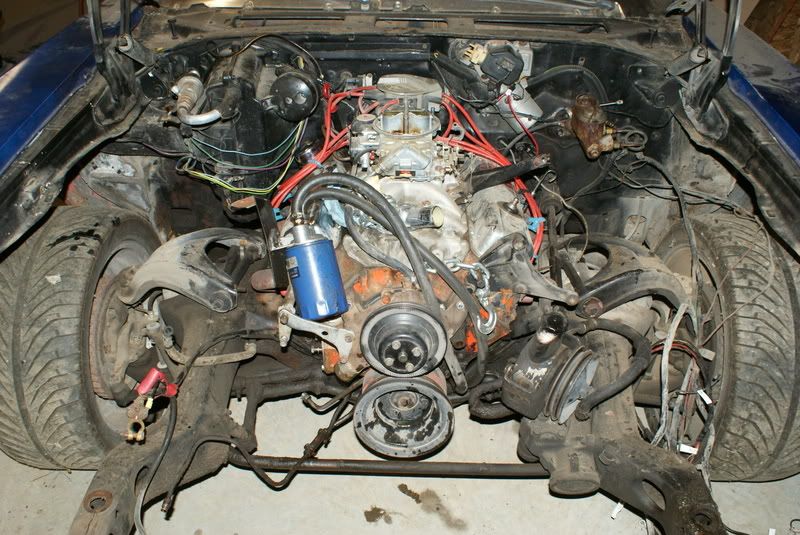
More updates, it was a good day!
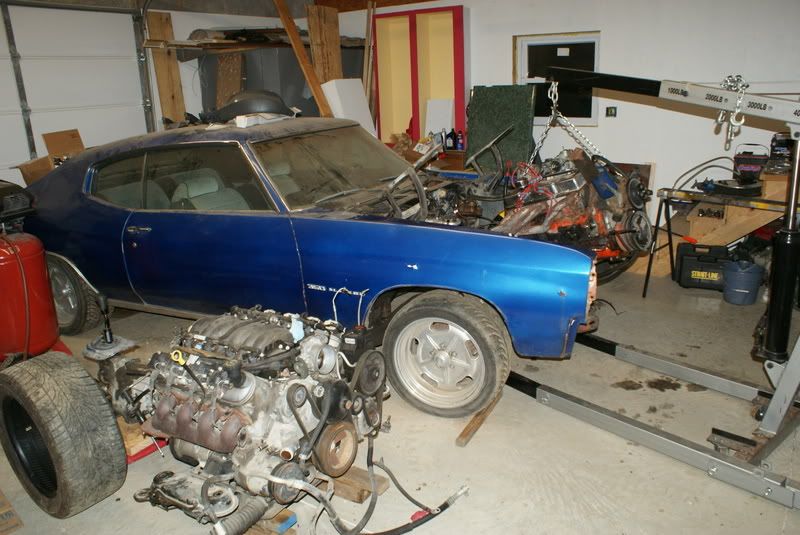
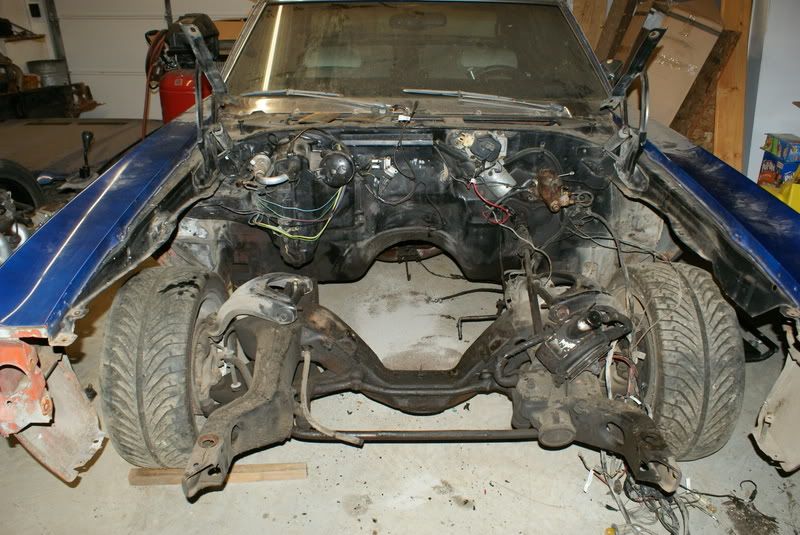
It's definitely ready for a good cleaning after too many years of dealing with a leaking rear main seal in the old engine.
It's definitely ready for a good cleaning after too many years of dealing with a leaking rear main seal in the old engine.
 01-25-2009, 03:50 PM
#26
On The Tree
Thread Starter
iTrader: (6)
Join Date: Mar 2006
Location: Kansas
Posts: 192
Likes: 0
Received 0 Likes
on
0 Posts
Got the motor mount adapter plates done after church today.
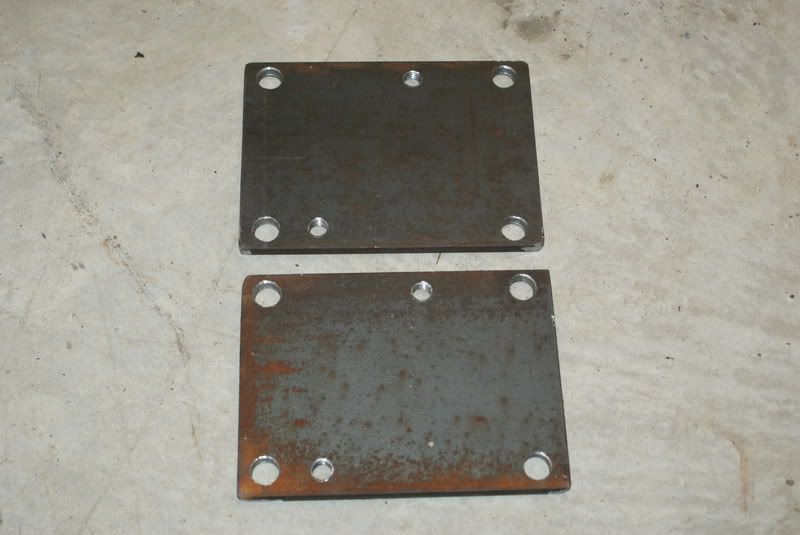
After I get some paint on them, they'll be ready to go. I've got a set of Energy Suspension motor / tranny mounts on order, along with a Pypes stainless 2.5" x-pipe, a pair of stainless 3"-to-2.5" reducers, some 2.5" stainless mandrel bends, and a pair of Edelbrock headers.
After I get some paint on them, they'll be ready to go. I've got a set of Energy Suspension motor / tranny mounts on order, along with a Pypes stainless 2.5" x-pipe, a pair of stainless 3"-to-2.5" reducers, some 2.5" stainless mandrel bends, and a pair of Edelbrock headers.
01-29-2009, 07:36 PM
#28
On The Tree
Thread Starter
iTrader: (6)
Join Date: Mar 2006
Location: Kansas
Posts: 192
Likes: 0
Received 0 Likes
on
0 Posts
The UPS man brought a few goodies to the house...
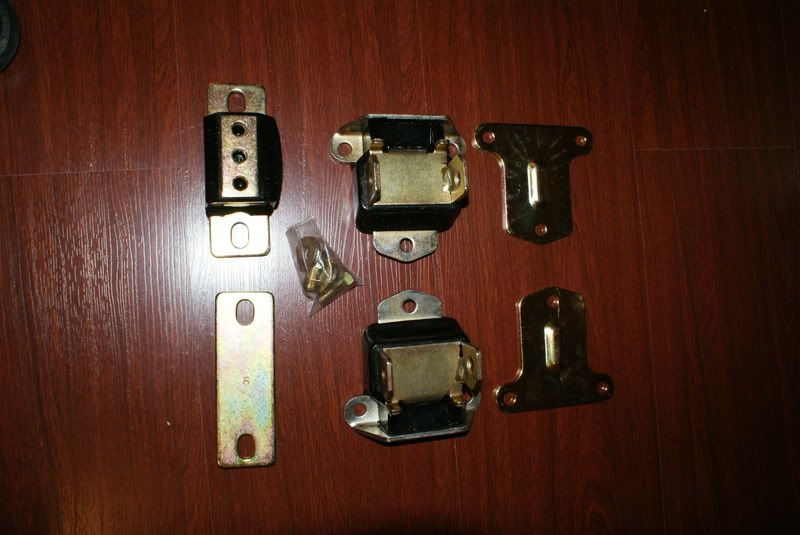
Energy Suspension polygraphite mounts
Pypes 2.5" stainless X-pipe and SLP stainless mufflers
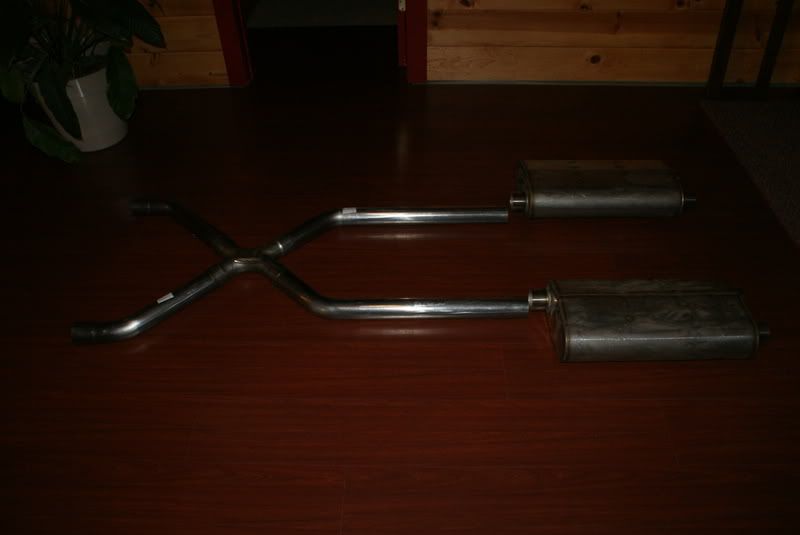
This will be the basic exhaust setup. The Edelbrock headers should arrive tomorrow. I'm planning on doing a side exit exhaust from one outlet on each muffler, with the other exit simply turned down and capped with a rubber expansion plug. When I want a little more noise, I'll just remove the expansion plug. One outlet on each muffler has a straight flow path compared to the other, so my thought is that I'll have the ability to "tune" the sound to my liking based on which outlet I use (and whether I plug one or leave them both open).
I chose the SLP mufflers based on their sound. Out of all the f-body LS1 exhaust systems, the SLP dual-dual system has the sound I like the best. Basically, it's a throaty, smooth sound with no raspiness or popping. Another SLP system I'm hoping to acheive a similar sound to is this one:
http://www.youtube.com/watch?v=Awcg7...e=channel_page
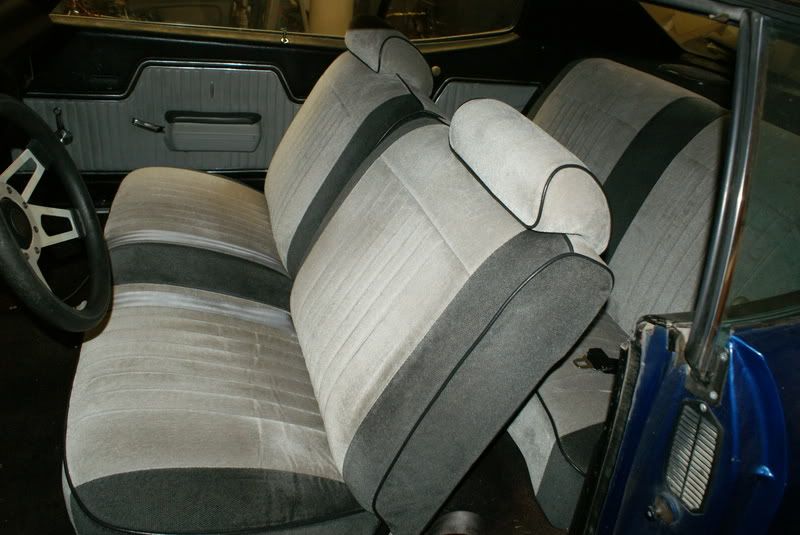
I'm getting ready to pull the seats out to allow for transmission tunnel mods. I'm thinking about selling the seats, but I don't know what they're worth. I suppose I'll post a feeler ad over on Team Chevelle.
Energy Suspension polygraphite mounts
Pypes 2.5" stainless X-pipe and SLP stainless mufflers
This will be the basic exhaust setup. The Edelbrock headers should arrive tomorrow. I'm planning on doing a side exit exhaust from one outlet on each muffler, with the other exit simply turned down and capped with a rubber expansion plug. When I want a little more noise, I'll just remove the expansion plug. One outlet on each muffler has a straight flow path compared to the other, so my thought is that I'll have the ability to "tune" the sound to my liking based on which outlet I use (and whether I plug one or leave them both open).
I chose the SLP mufflers based on their sound. Out of all the f-body LS1 exhaust systems, the SLP dual-dual system has the sound I like the best. Basically, it's a throaty, smooth sound with no raspiness or popping. Another SLP system I'm hoping to acheive a similar sound to is this one:
http://www.youtube.com/watch?v=Awcg7...e=channel_page
I'm getting ready to pull the seats out to allow for transmission tunnel mods. I'm thinking about selling the seats, but I don't know what they're worth. I suppose I'll post a feeler ad over on Team Chevelle.
Last edited by kst8engineer; 02-22-2009 at 11:28 PM. Reason: fixing broken img links
02-03-2009, 08:53 PM
#29
On The Tree
Thread Starter
iTrader: (6)
Join Date: Mar 2006
Location: Kansas
Posts: 192
Likes: 0
Received 0 Likes
on
0 Posts
I pulled the front seat and carpet last week in preparation for the trans tunnel mods, and I also pulled the fuel tank in preparation for a B-body tank swap.
I wish there was another late-model tank that I could swap that wouldn't hang down below the 1/4-panel the way the B-body tank will, but since I haven't identified any better (cost effective) options, the B-body tank will have to suffice. The cost difference for the aftermarket (or updated OEM Chevelle) tanks are just too far out-of-line to be realistic. I've got a local salvage yard lined up to provide me with a B-body tank complete with pump, sending unit, etc. for $150.
I wish there was another late-model tank that I could swap that wouldn't hang down below the 1/4-panel the way the B-body tank will, but since I haven't identified any better (cost effective) options, the B-body tank will have to suffice. The cost difference for the aftermarket (or updated OEM Chevelle) tanks are just too far out-of-line to be realistic. I've got a local salvage yard lined up to provide me with a B-body tank complete with pump, sending unit, etc. for $150.
 02-04-2009, 02:12 PM
#31
Nice progress. I think the biggest problem with the Impala tank is the trunk situation. I have still yet to make a cover panel. I'm planing on fabing something up and holding it in with dzus fasteners. I know if I weld a cover in the pump will go out as soon as it's finished. My tank is visible from the rear, but no one has ever noticed, mentioned or asked about the tank swap.
02-04-2009, 10:14 PM
#32
+1 on the truck access panel.. I am glad I did it. cause after about 1/2 year. I started having problem of the fuel pump cutting out. I was able to remove the panel, found that the connection were loose, I crimped them tight and was back on the road in about 30 min's.
You can see my work on my link to my Car domain site. page #9.
You can see my work on my link to my Car domain site. page #9.
02-05-2009, 02:27 PM
#33
On The Tree
Thread Starter
iTrader: (6)
Join Date: Mar 2006
Location: Kansas
Posts: 192
Likes: 0
Received 0 Likes
on
0 Posts
Thanks for the input on the tank, guys. The $452 tank from SPI/Rock Auto is out of my budget, although it looks like a nice solution. Maybe I'll feel rich when I get my tax return and change my mind. 
I definitely agree with Bczee's comments regarding the trunk access panel. That's the way I'll plan on going as well. I like the ease of access for fuel pump repairs.
I wonder if a guy could come up with a pre-made plastic panel to cover the cut-out area of the trunk floor -- basically a box with the bottom open and that would have a flange on it to allow it to be bolted down. I'm not sure what I might be able to use for this. The idea of a battery relocation box comes to mind, but that's too tall.
02-06-2009, 12:41 PM
#35
I just used some sheet metal and fab'd upa box with flanges that is about 1" tall, I also used some 1"x1/8" steel strap metal to fab up and frame with u-nuts and attached it to the under side of the trunk, drilled matching hose and just used some machine screens (round hex head) to secure it down. I also used some rubber and glued it down for a gasket as a seal.
02-09-2009, 12:12 AM
#36
On The Tree
Thread Starter
iTrader: (6)
Join Date: Mar 2006
Location: Kansas
Posts: 192
Likes: 0
Received 0 Likes
on
0 Posts
I'm looking at a change of plans on my fuel system. To avoid the low-hanging look of the B-body fuel tank and still work on a skinny budget, here's my new plan: I removed the fuel pump / sender / bucket assembly from the '99 Trans Am donor car and took some measurements. From the mounting surface of the T/A pump assembly to the bottom of it, it's about 11". The Chevelle tank appears to be ~7.25" deep in the area where the pump would mount (based on quick external measurements).
The T/A pump bucket assembly is spring-loaded to seat it tightly against the bottom of the fuel tank. When you compress the springs, the length is reduced to about 9". I believe with very minor modifications, I can make squeeze it down to 8.5" if I have to.
My plan is to use a new Spectra stock replacement fuel tank (on order for $130 with shipping from Rock Auto), modify the top of the tank to bulge upward similar to the B-body tank, and mod the trunk floor similar to Bczee's. Since the T/A pump assembly has an internal regulator, no external return line should be required, so this will help simplify the plumbing and cut the cost down as well. I'll save the $40 I'd otherwise spend on the Vette filter / regulator, as well as reducing the number of fittings needed.
Will it work? It seems like the cheapest and simplest option. It should look stock from the outside, but I'll still have easy access for maintenance through the trunk.
02-09-2009, 12:52 AM
#38
On The Tree
Thread Starter
iTrader: (6)
Join Date: Mar 2006
Location: Kansas
Posts: 192
Likes: 0
Received 0 Likes
on
0 Posts
I got the basic idea from the ls1tech FAQ's (I thin it was on a 2nd-gen F-body). I beleive Thunderstruck502 also considered a similar plan before going a different way with his fuel system.
02-09-2009, 05:37 AM
#39

I believe your 99 fuel pump has an internal regulator but it has an external return line from a tee off the supply line. Just mentioning this so you leave room in your tank and trunk floor mods. (This was the way my 99SS parts car was set up)
02-22-2009, 10:42 PM
#40
On The Tree
Thread Starter
iTrader: (6)
Join Date: Mar 2006
Location: Kansas
Posts: 192
Likes: 0
Received 0 Likes
on
0 Posts
Progress has been slow lately, but I did manage to get the new fuel tank prepped for the Trans Am fuel pump assembly. I'm planning to coat the modified area with some Eastwood's Tank Tone zinc coating.
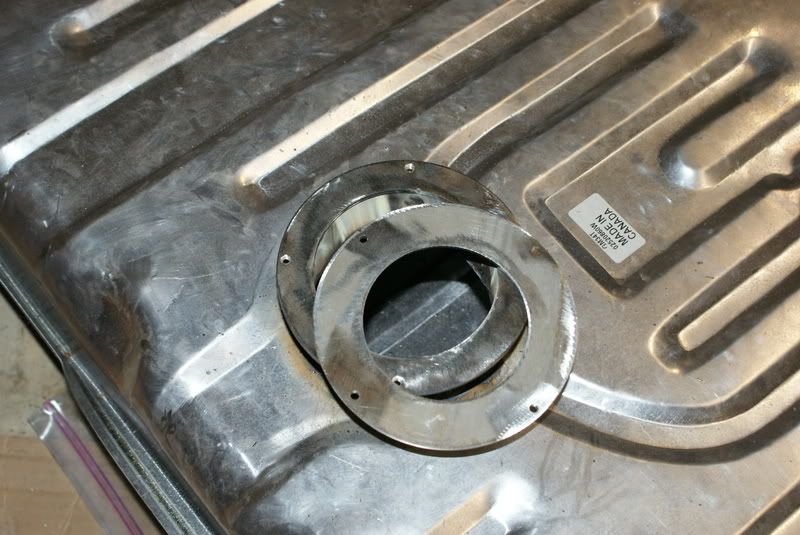
Basically, I used a 2" long piece of 4" aluminized exhaust tubing to raise the top of the tank and allow room for the fuel pump assembly. I had the local muffler shop flare the exhaust tubing a little bit so that the fit around the pump wouldn't be quite as tight. A friend has access to a CNC plasma, so he cut the top plate for me out of 1/8" steel plate. I drilled/tapped four 10-24 holes in the top plate, and I drilled clearance holes for these four screws in the new lock ring. The new lock ring (laying on top in the pic) was also cut on the CNC plasma from 0.125" steel plate.
Basically, I used a 2" long piece of 4" aluminized exhaust tubing to raise the top of the tank and allow room for the fuel pump assembly. I had the local muffler shop flare the exhaust tubing a little bit so that the fit around the pump wouldn't be quite as tight. A friend has access to a CNC plasma, so he cut the top plate for me out of 1/8" steel plate. I drilled/tapped four 10-24 holes in the top plate, and I drilled clearance holes for these four screws in the new lock ring. The new lock ring (laying on top in the pic) was also cut on the CNC plasma from 0.125" steel plate.