


1937 Ford LS2 Install

Thread Starter
TECH Fanatic


Joined: Jul 2008
Posts: 1,570
Likes: 173
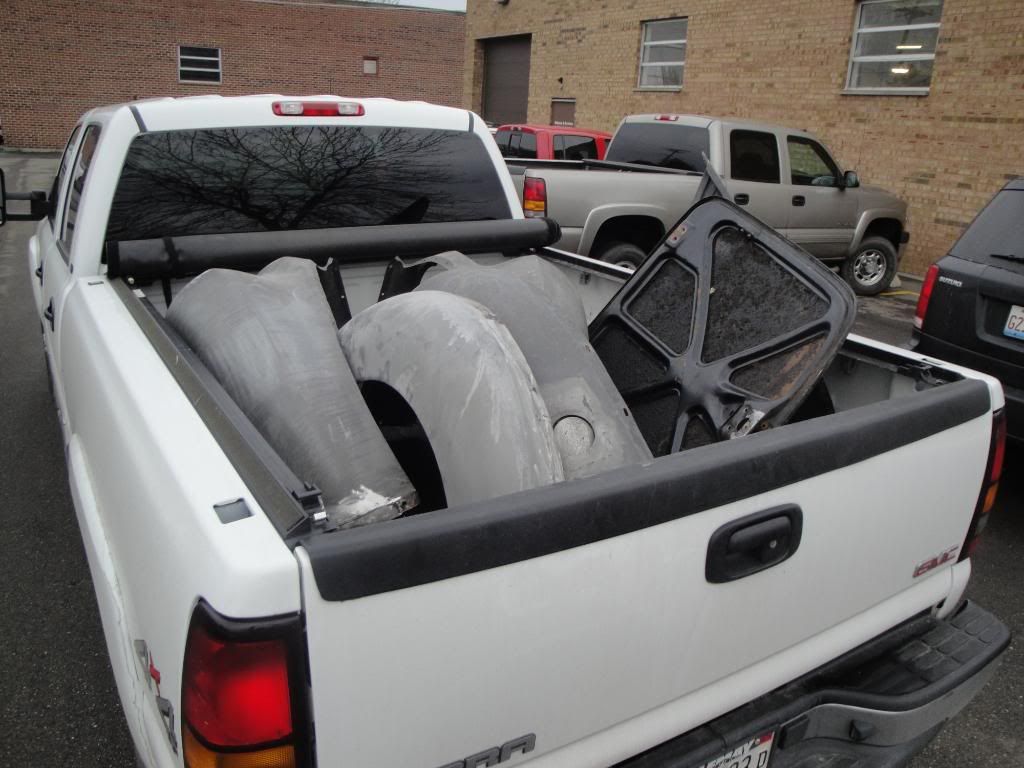
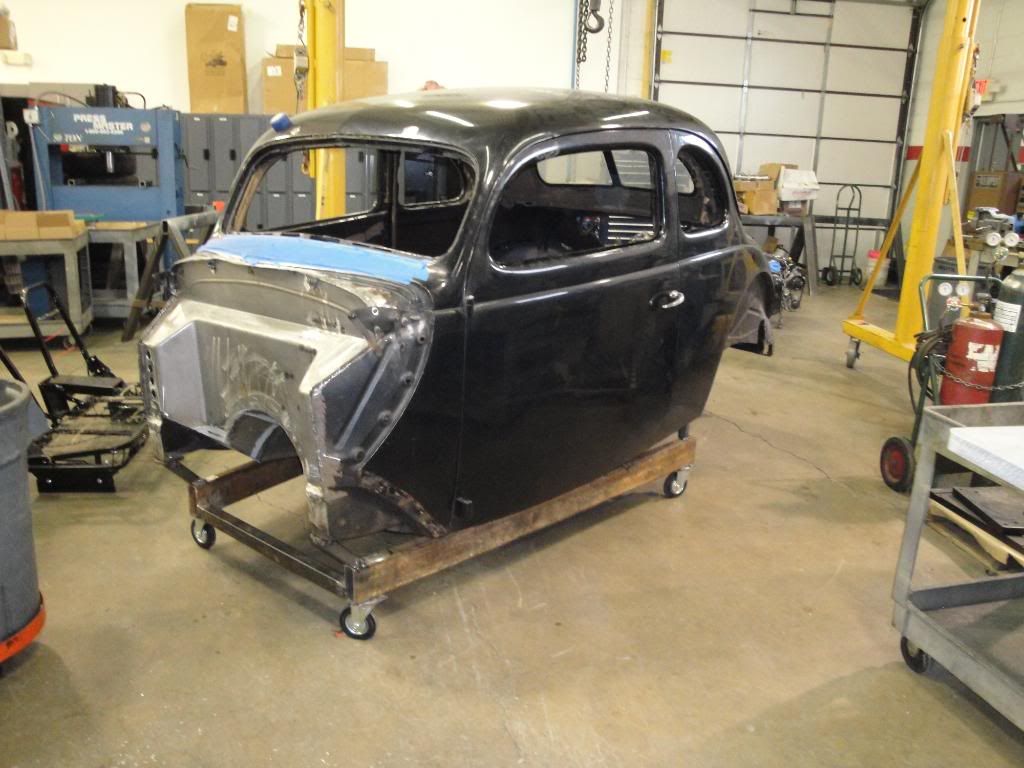
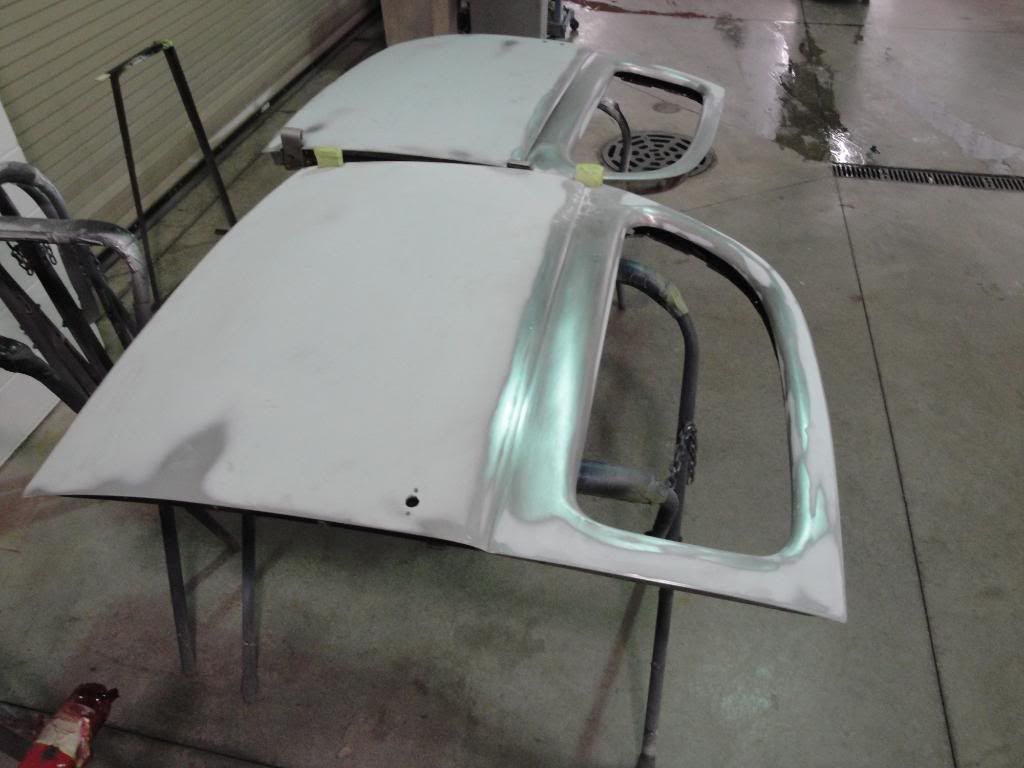
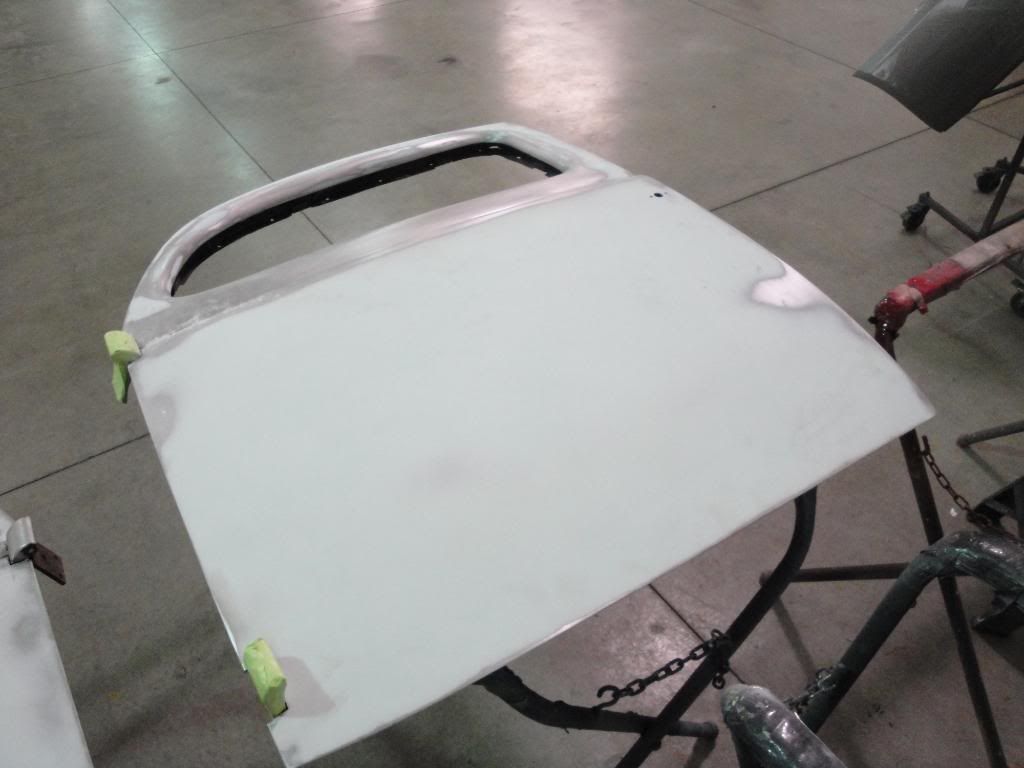
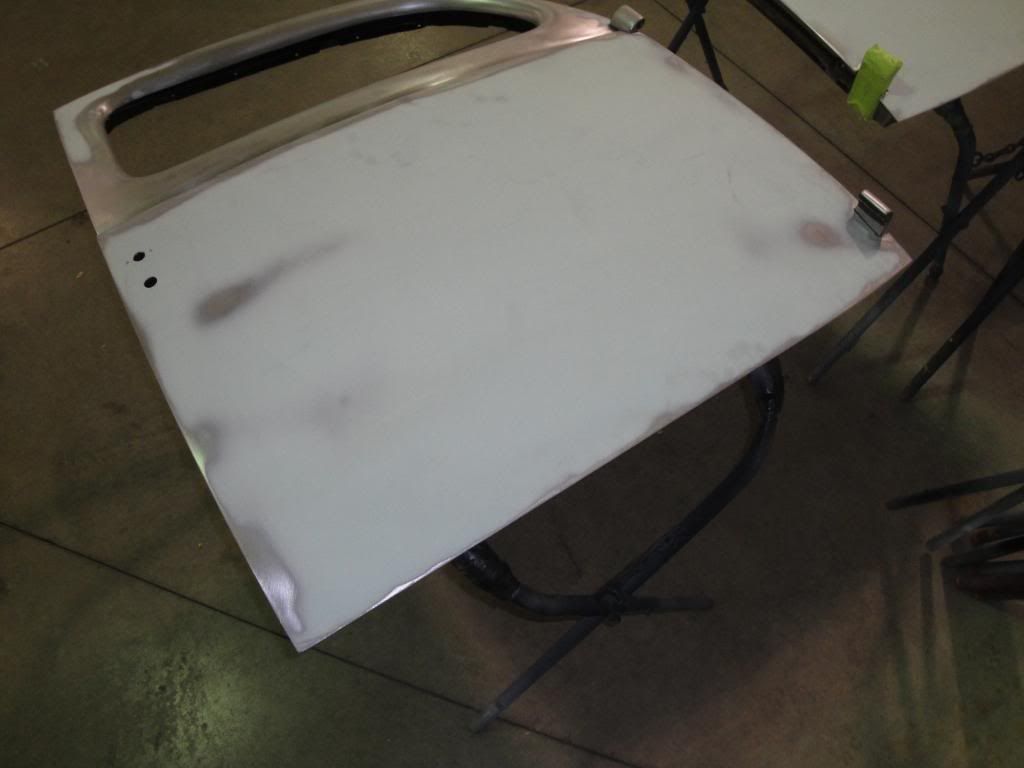
Been a while........................Got most of the sheetmetal to the bodyshop
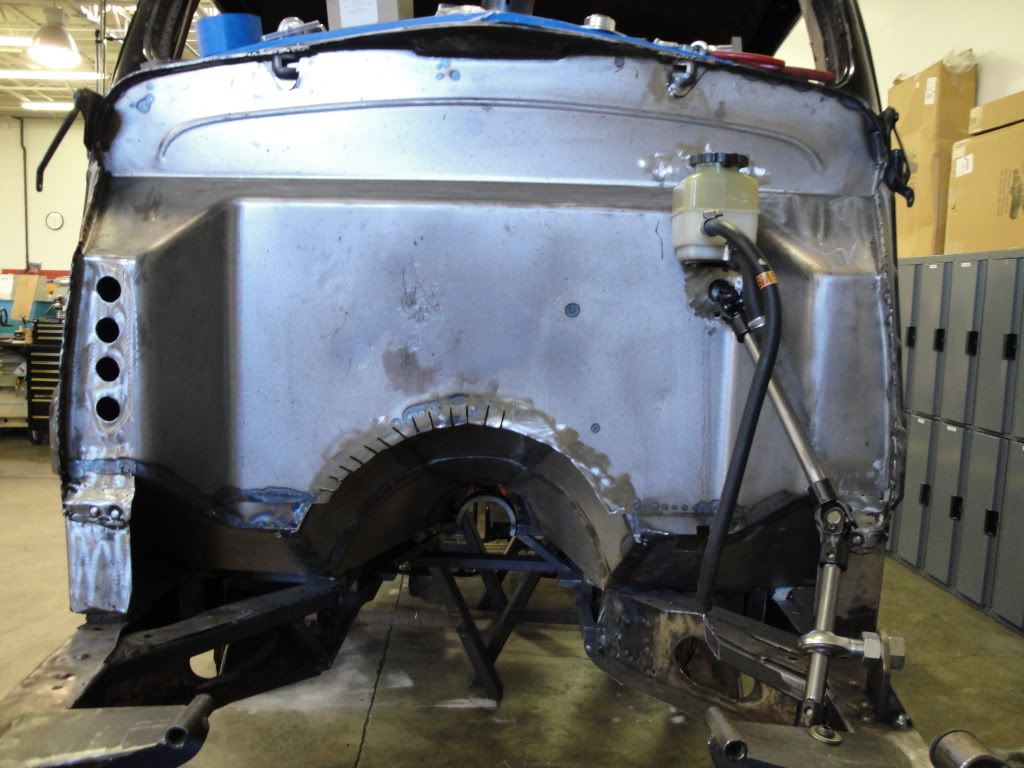
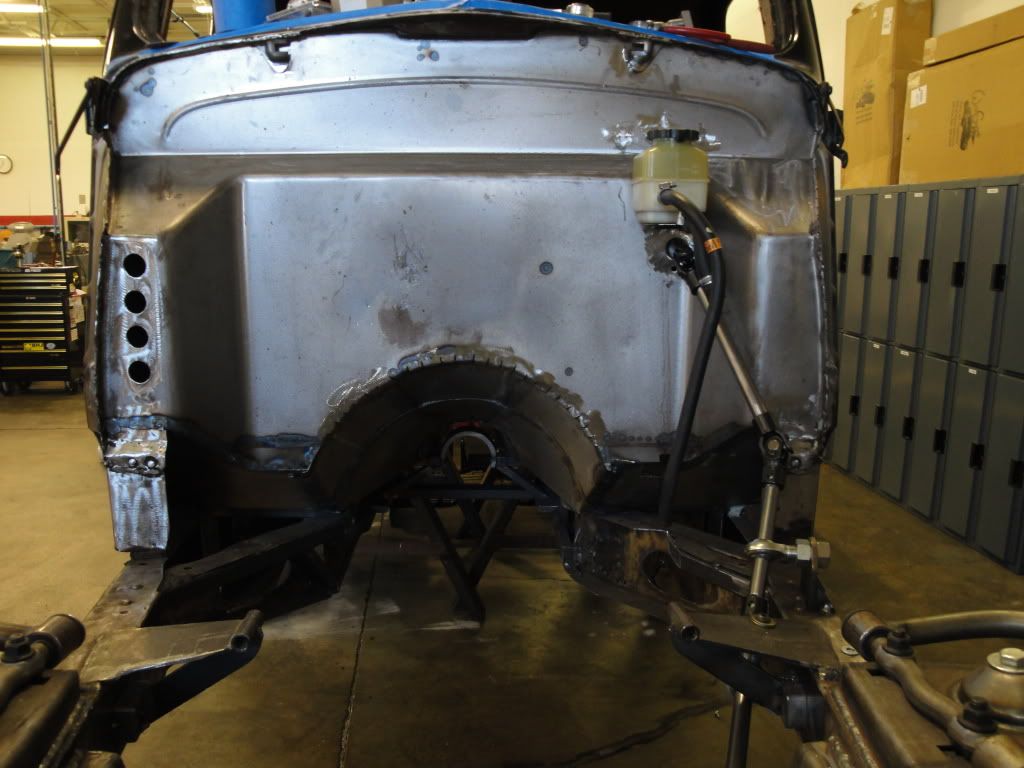
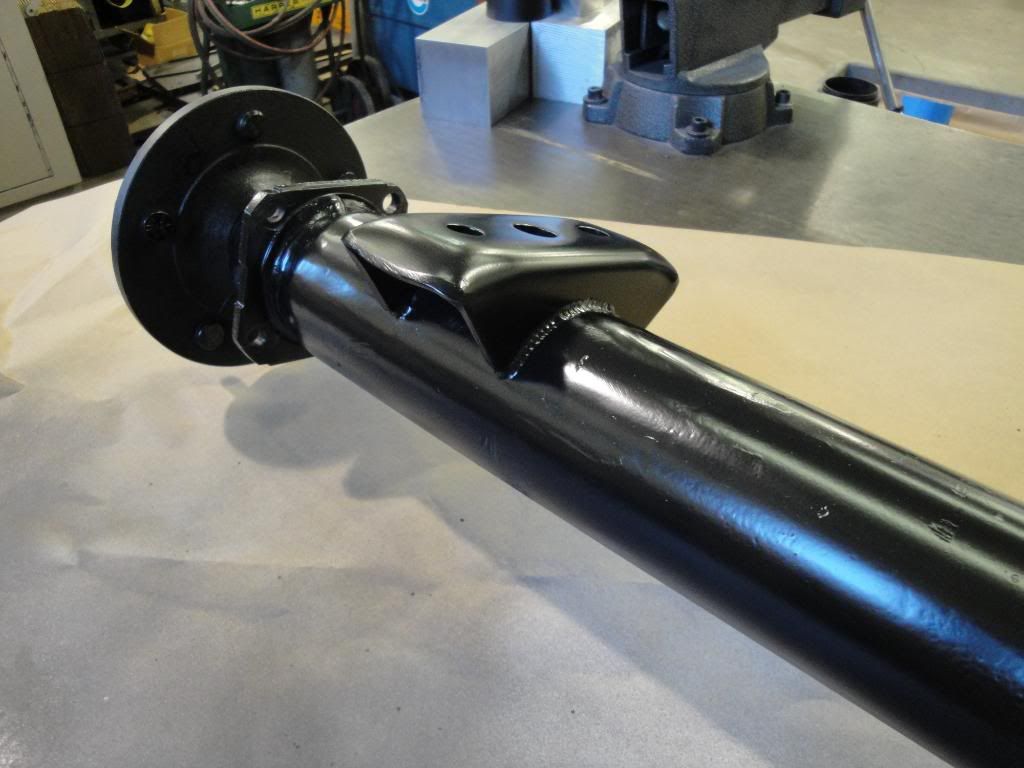
Got the Heidt's Power Steering valve installed
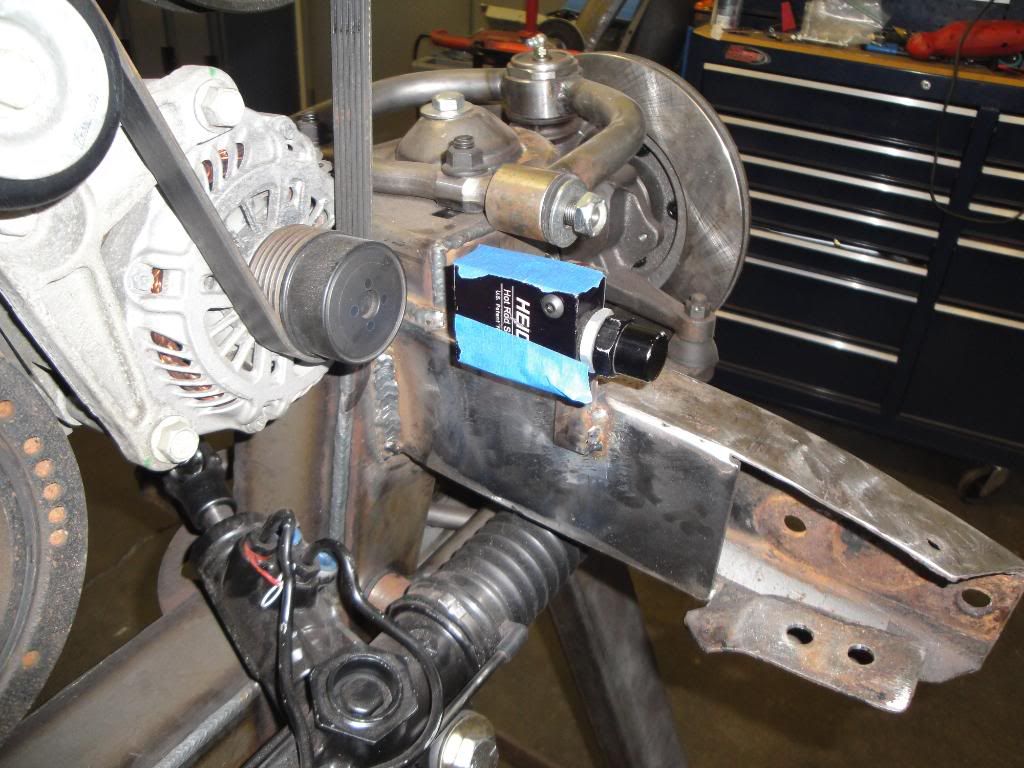
Also.....the steering linkage is in and hooked up......worked out pretty good using the Ididit "Shorty" column as the normal long column foot clearance issues are non-existant.
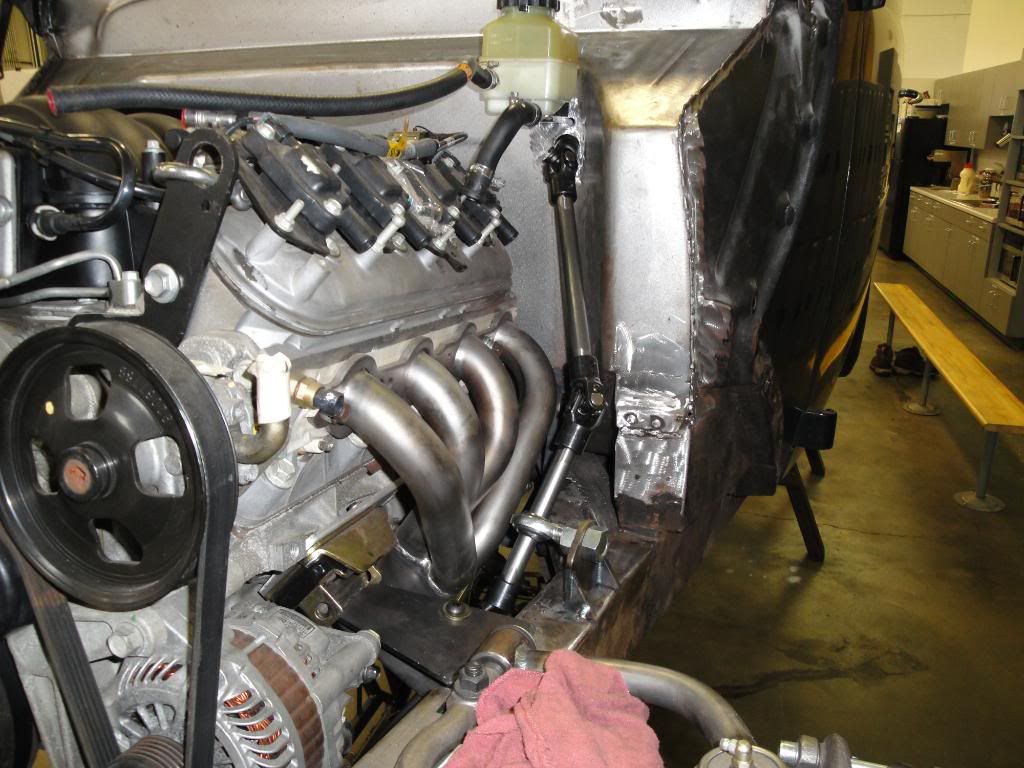
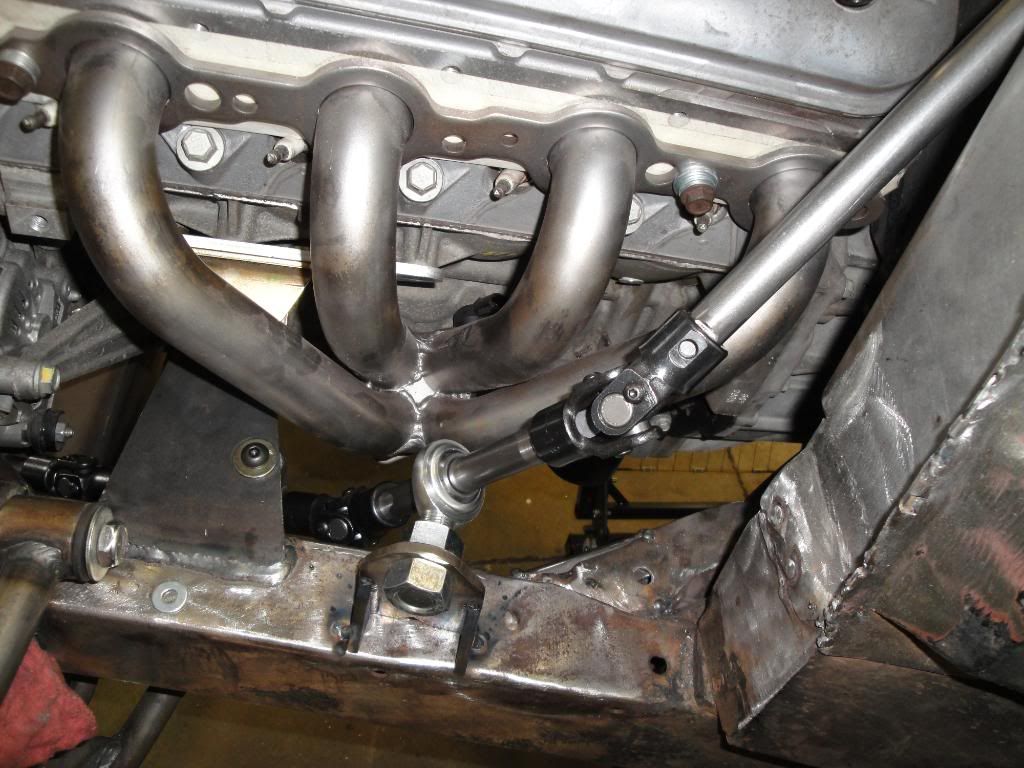
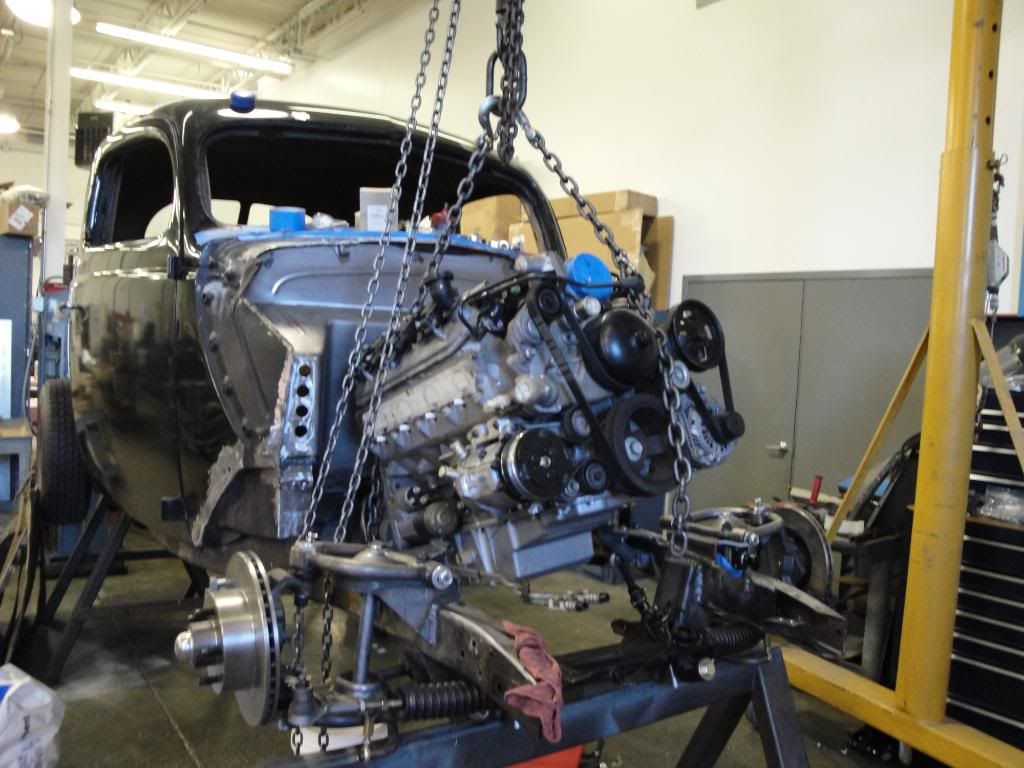
Engine coming out for the last time...........
Ken
Got the Heidt's Power Steering valve installed
Also.....the steering linkage is in and hooked up......worked out pretty good using the Ididit "Shorty" column as the normal long column foot clearance issues are non-existant.
Engine coming out for the last time...........
Ken
Thread Starter
TECH Fanatic
Joined: Jul 2008
Posts: 1,570
Likes: 173
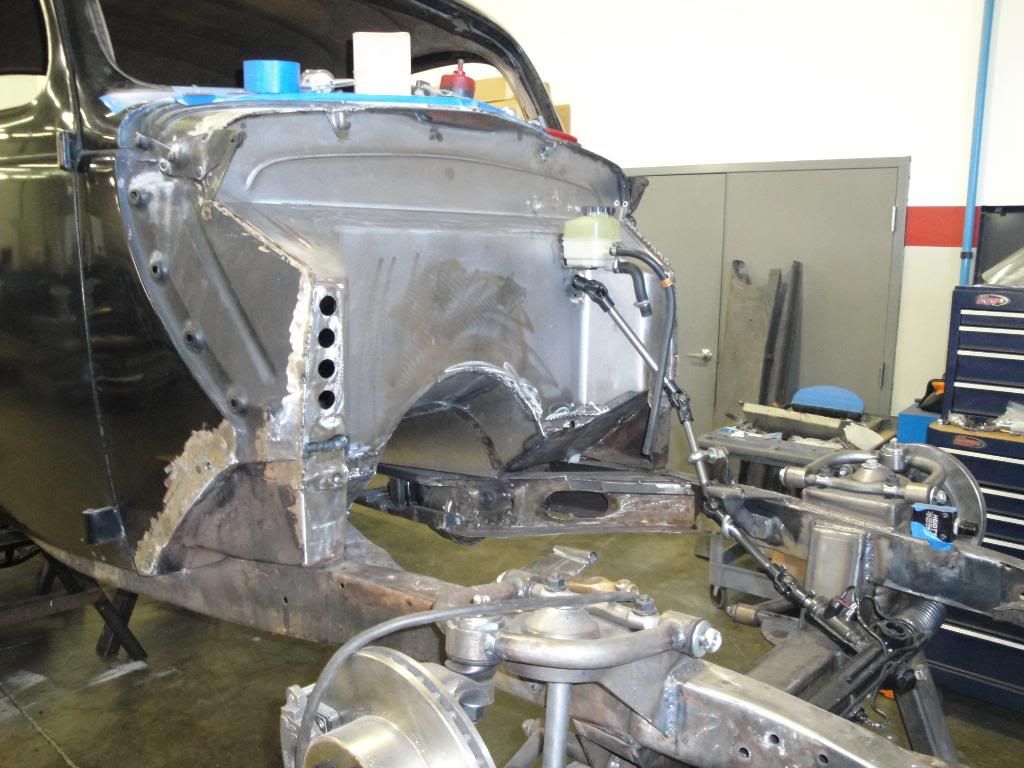
Finished up matching the Firewall opening to match the Trans tunnel
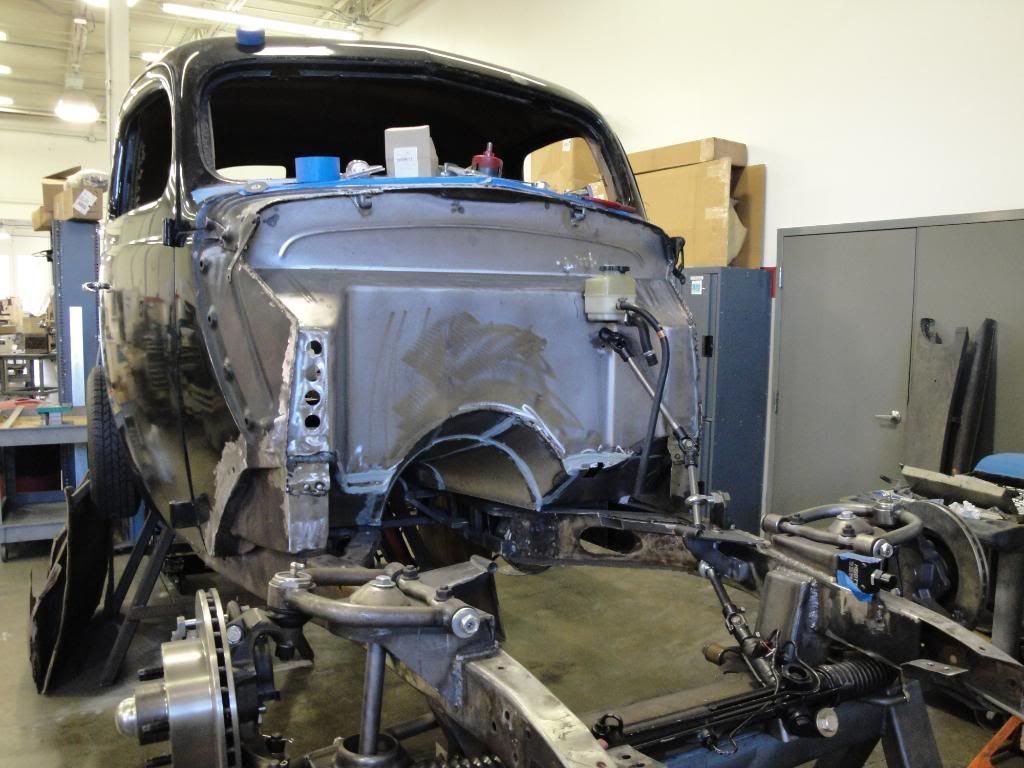
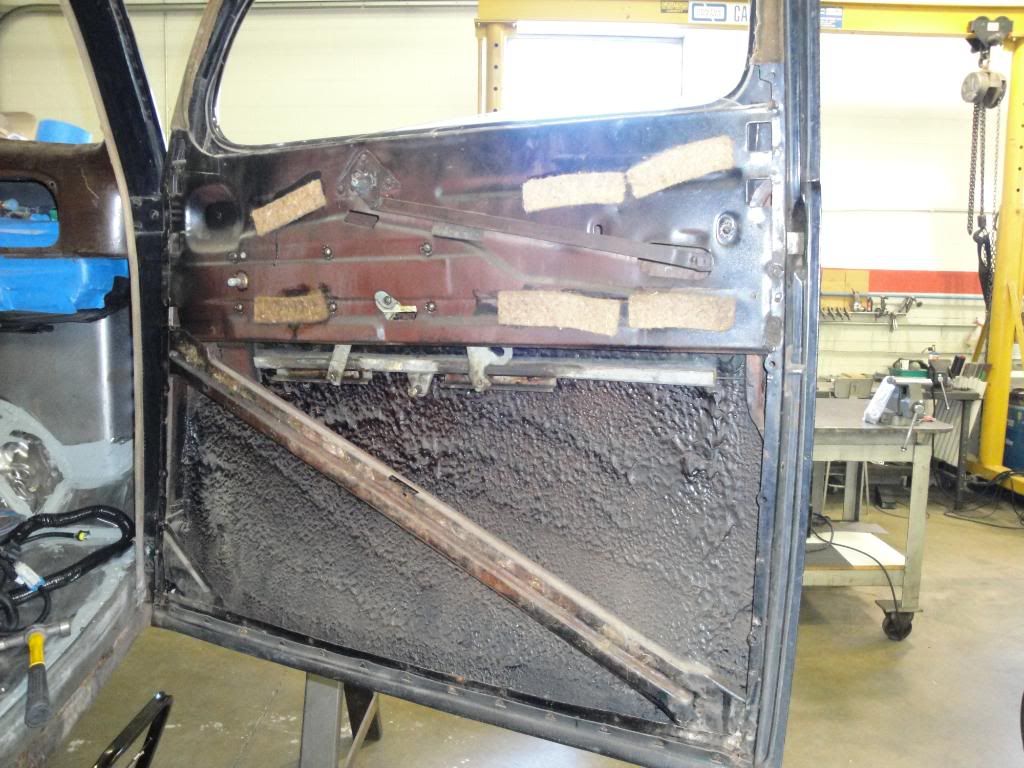
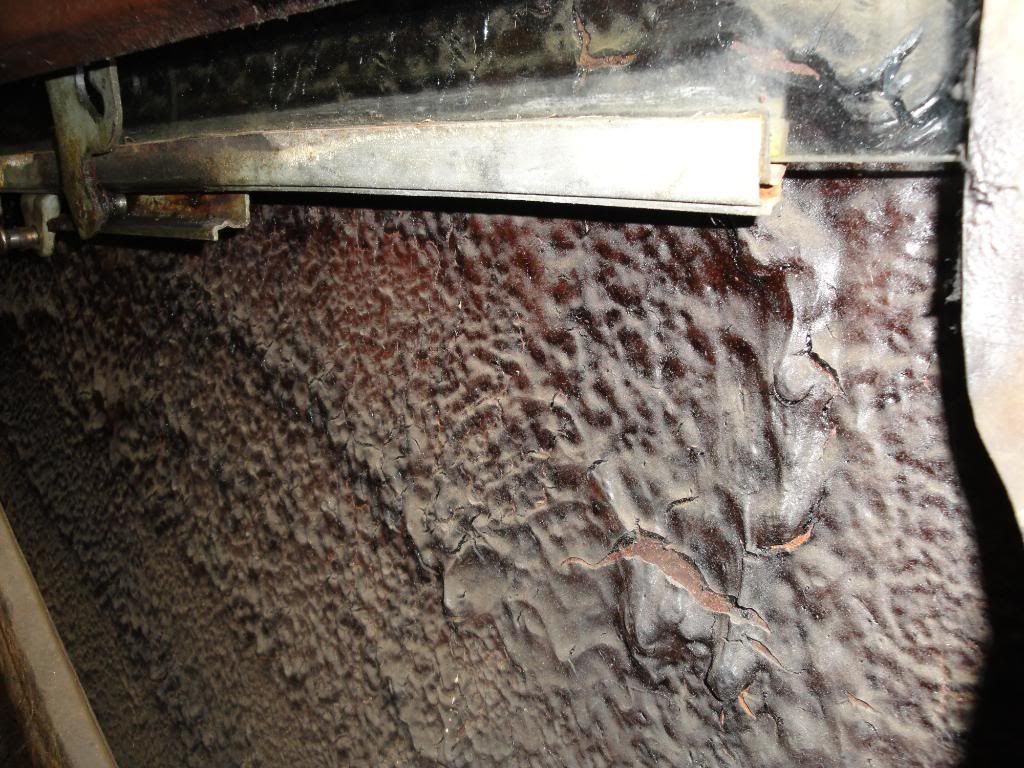
Also removed the window glass and mechanisms........Now......"That's" real undercoating
The Body will be coming off next week to go to the Body Shop.....while the body is gone I'll get the Chassis finished along with the Fuel and Exhaust system.......
Ken
Also removed the window glass and mechanisms........Now......"That's" real undercoating
The Body will be coming off next week to go to the Body Shop.....while the body is gone I'll get the Chassis finished along with the Fuel and Exhaust system.......
Ken
Thread Starter
TECH Fanatic
Joined: Jul 2008
Posts: 1,570
Likes: 173
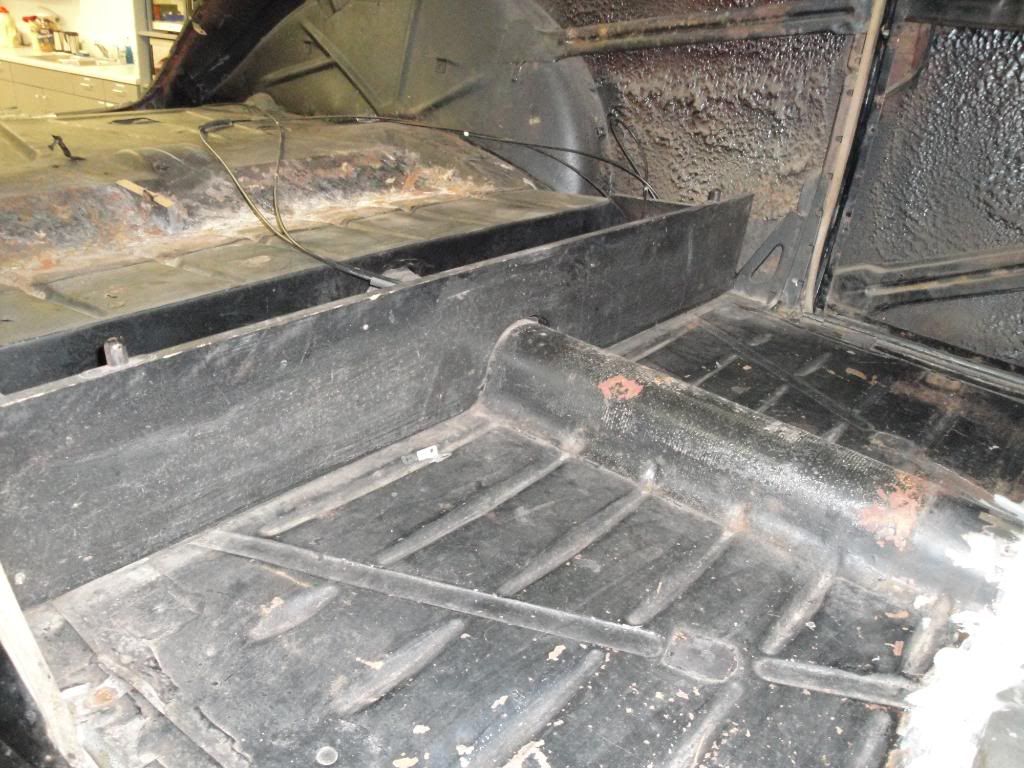
In getting ready to pull the body off, I cleaned out all the "Stuff" that collected inside the car in the past month's........It's been a while since I've seen the original floors.......I'm impressed all over again as to how nice they are....
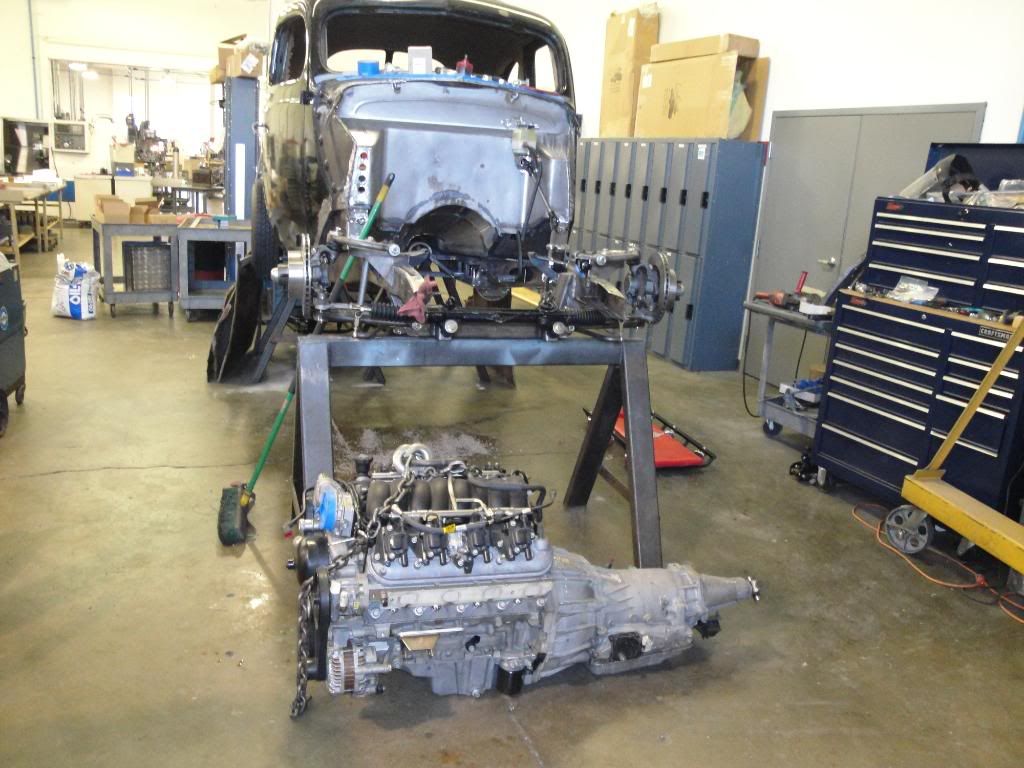
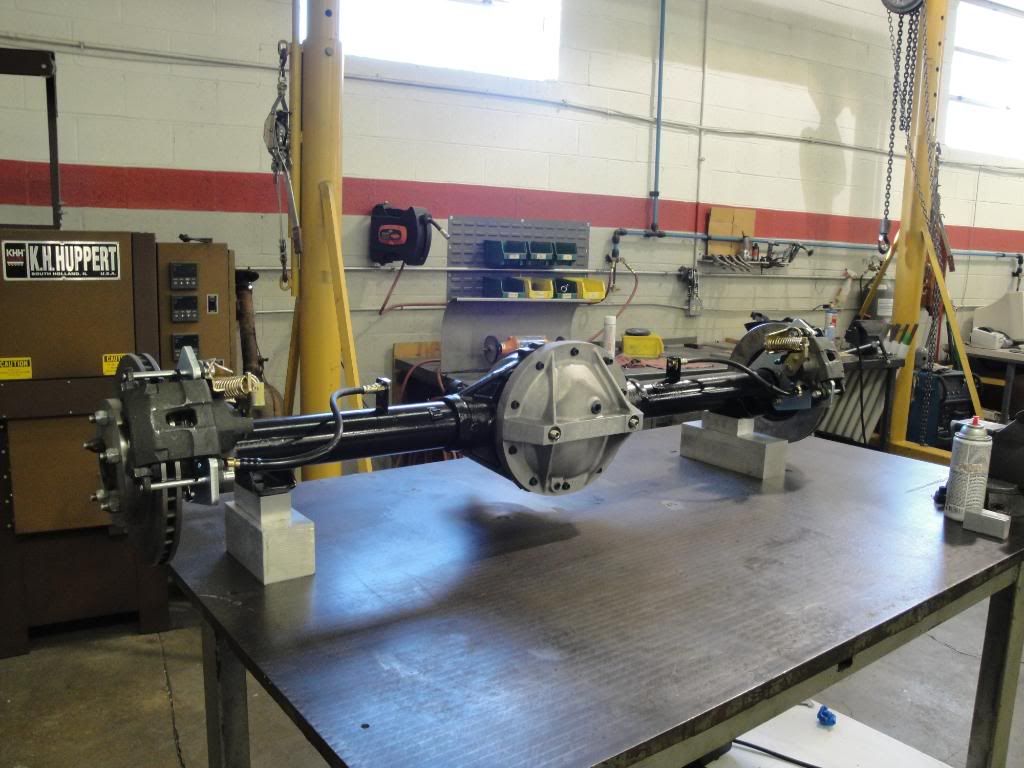
Got the body off the frame.........
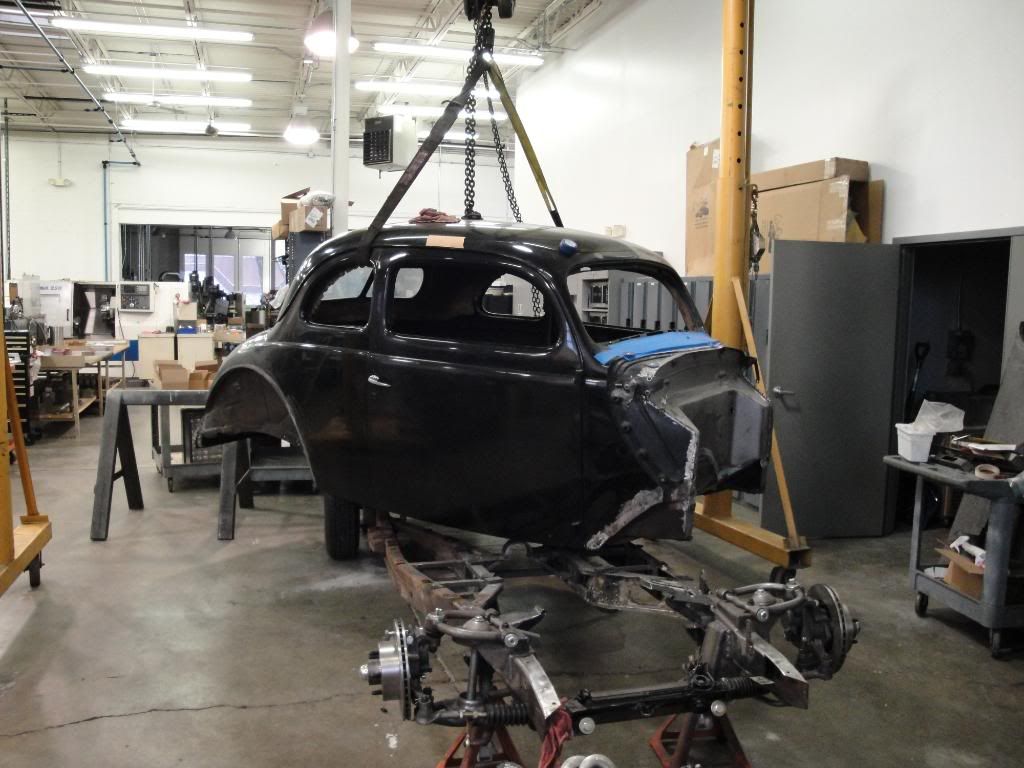
First time off the frame since Henry put it together 72 years ago.....the trans mount is not in the pic that ties the frame together....
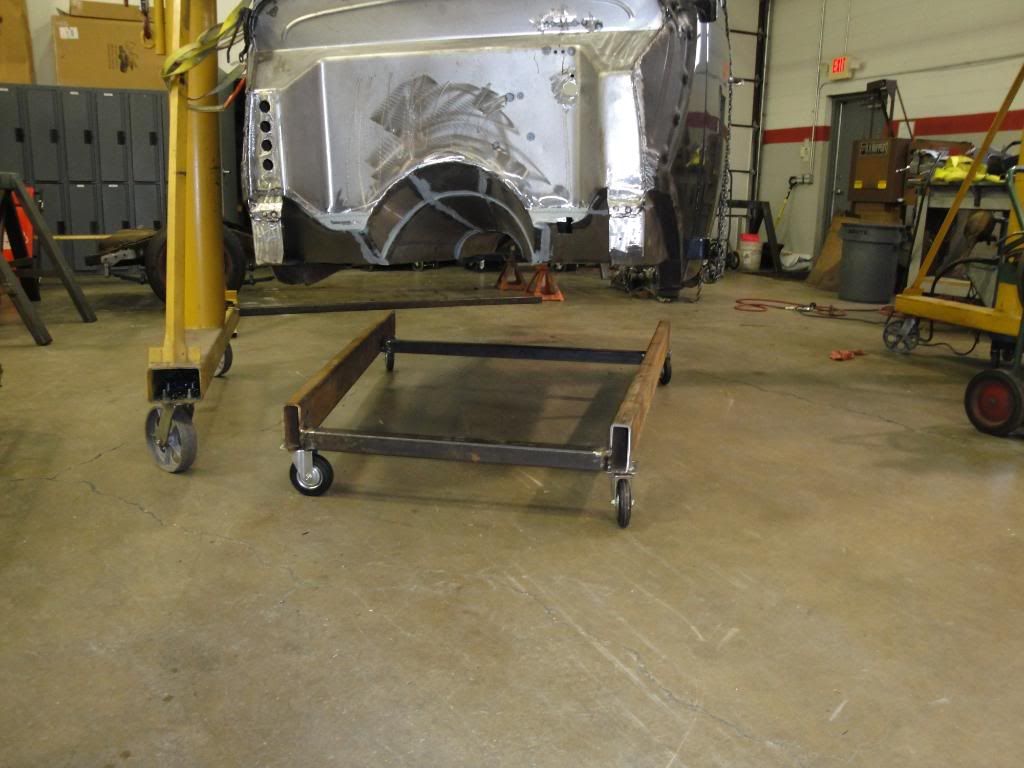
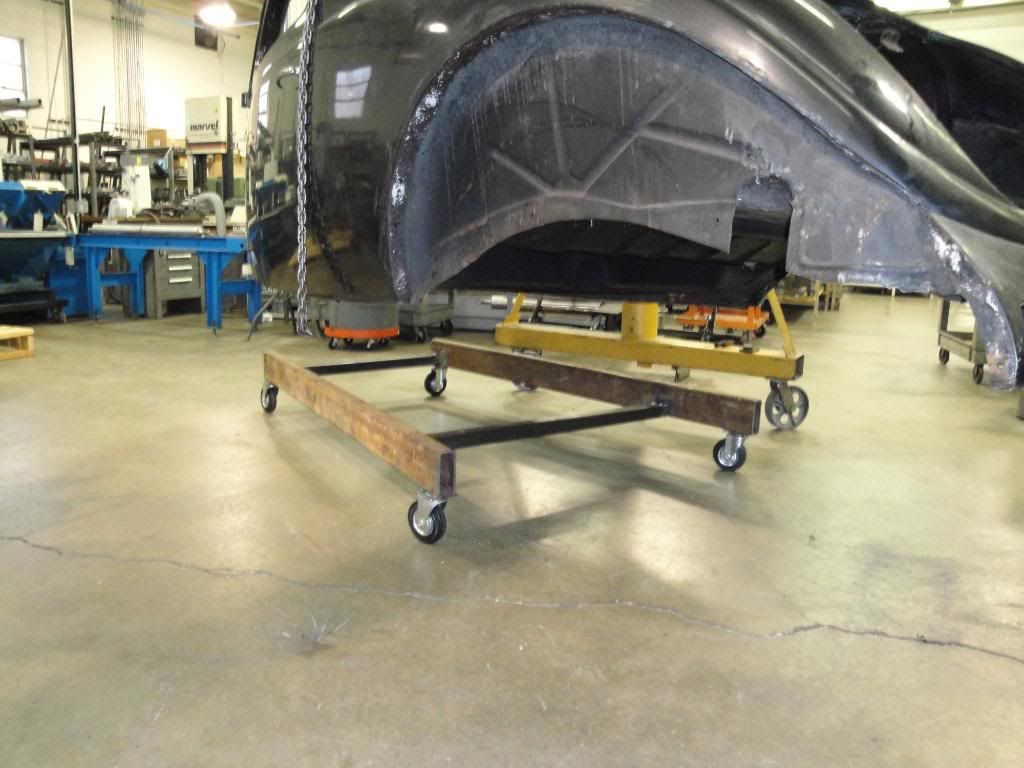
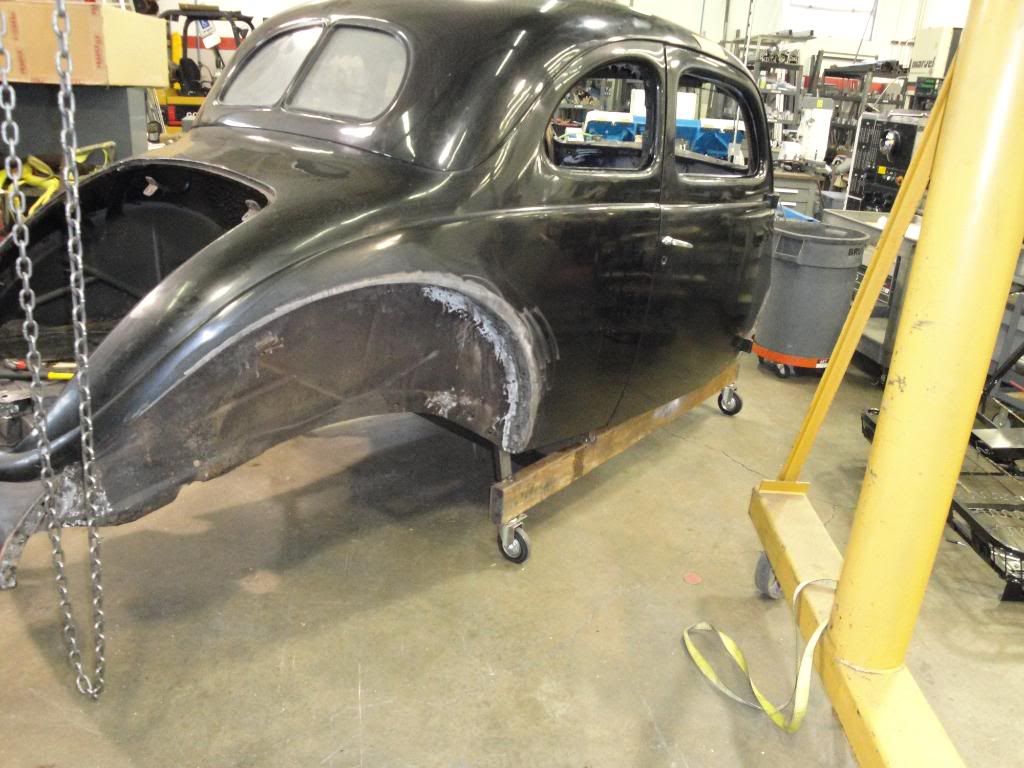
Built a roll around dolly to mount the body to for the Body shop
Bolted steel pads to the body mount positions, cut some tubing and welded everything in position...worked out pretty good as the doors open and close as mounted on the frame
Now......The next problem is that the Trailer is frozen in position in it's parking place and it might not want to move.........You West Coast guy's got it easy....Hopefully on Monday I'll have pic's of it going to the body shop (if the trailer can be freed.....LOL)
Ken
Got the body off the frame.........
First time off the frame since Henry put it together 72 years ago.....the trans mount is not in the pic that ties the frame together....
Built a roll around dolly to mount the body to for the Body shop
Bolted steel pads to the body mount positions, cut some tubing and welded everything in position...worked out pretty good as the doors open and close as mounted on the frame
Now......The next problem is that the Trailer is frozen in position in it's parking place and it might not want to move.........You West Coast guy's got it easy....Hopefully on Monday I'll have pic's of it going to the body shop (if the trailer can be freed.....LOL)
Ken
Thread Starter
TECH Fanatic
Joined: Jul 2008
Posts: 1,570
Likes: 173
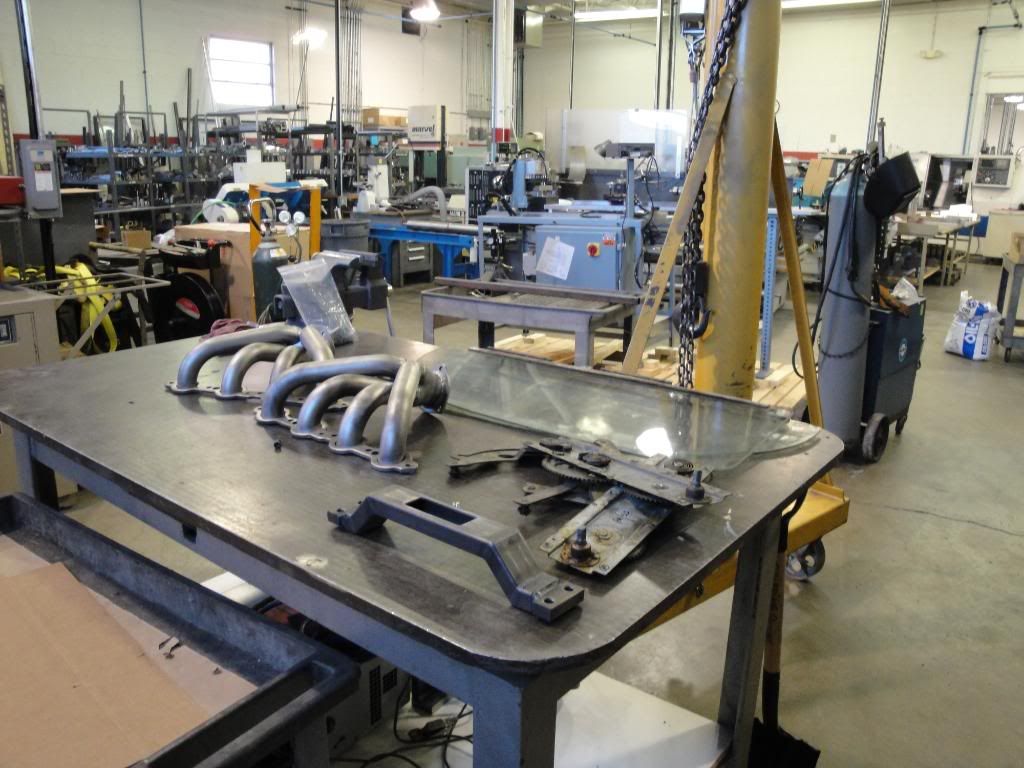
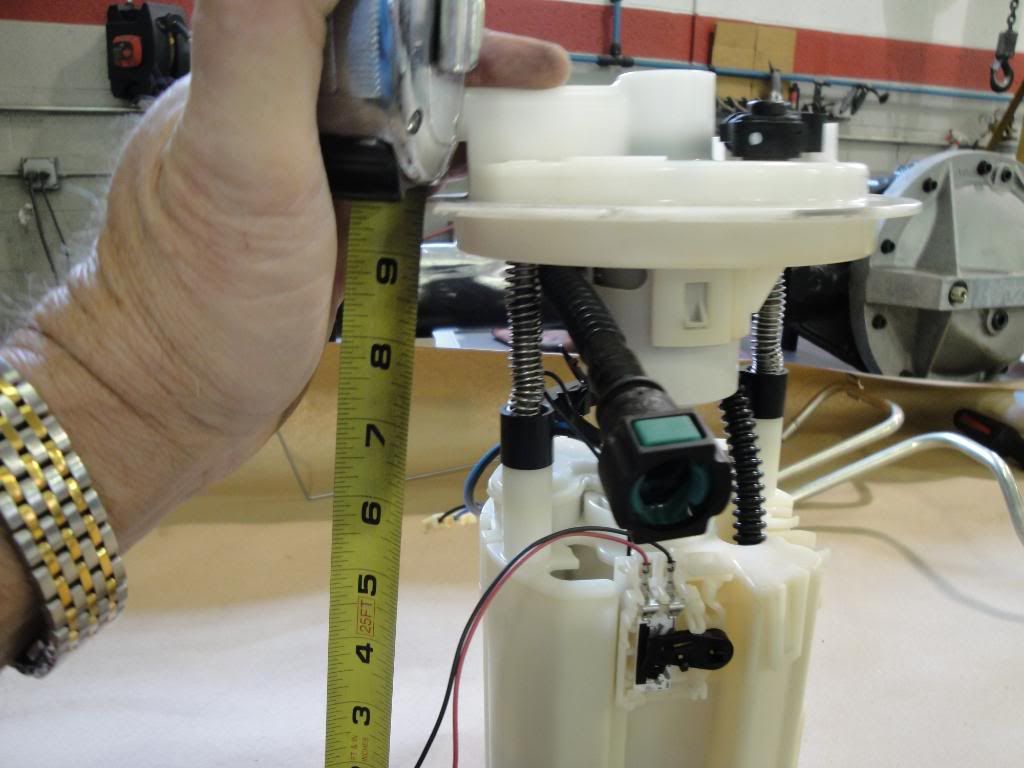
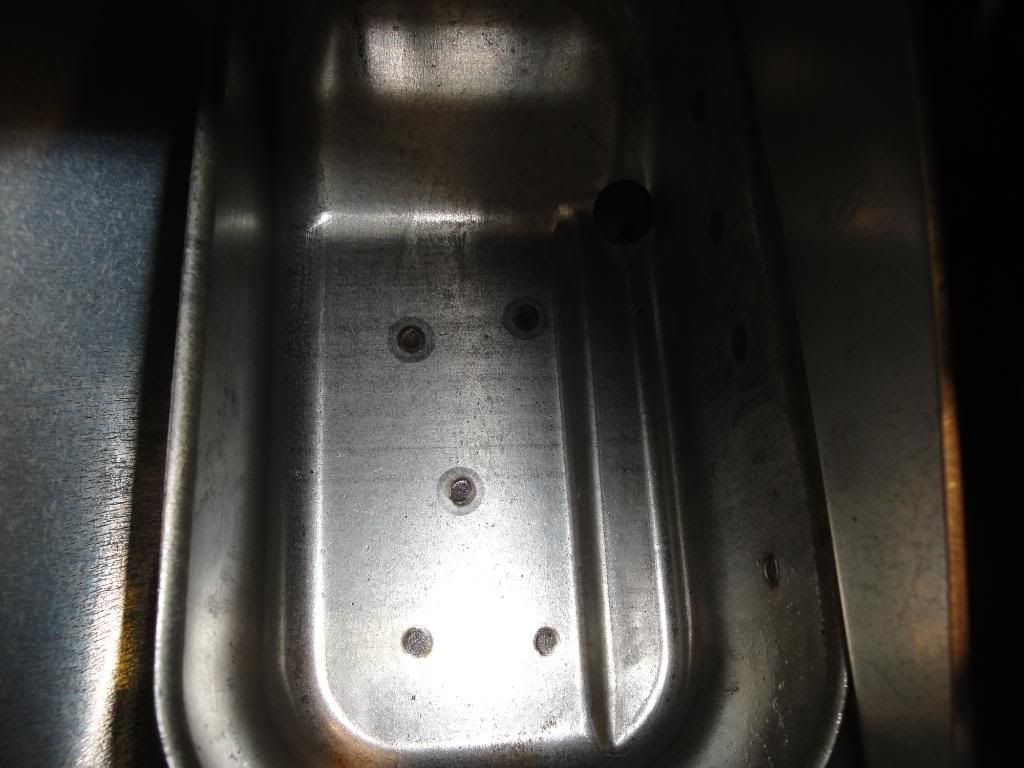
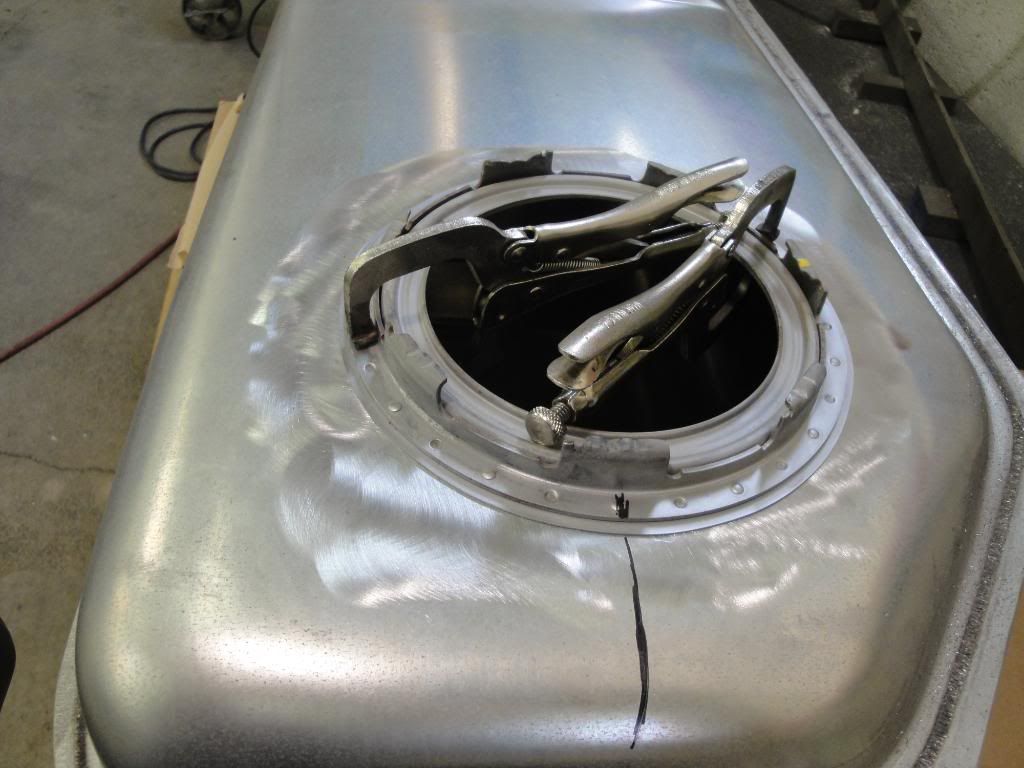
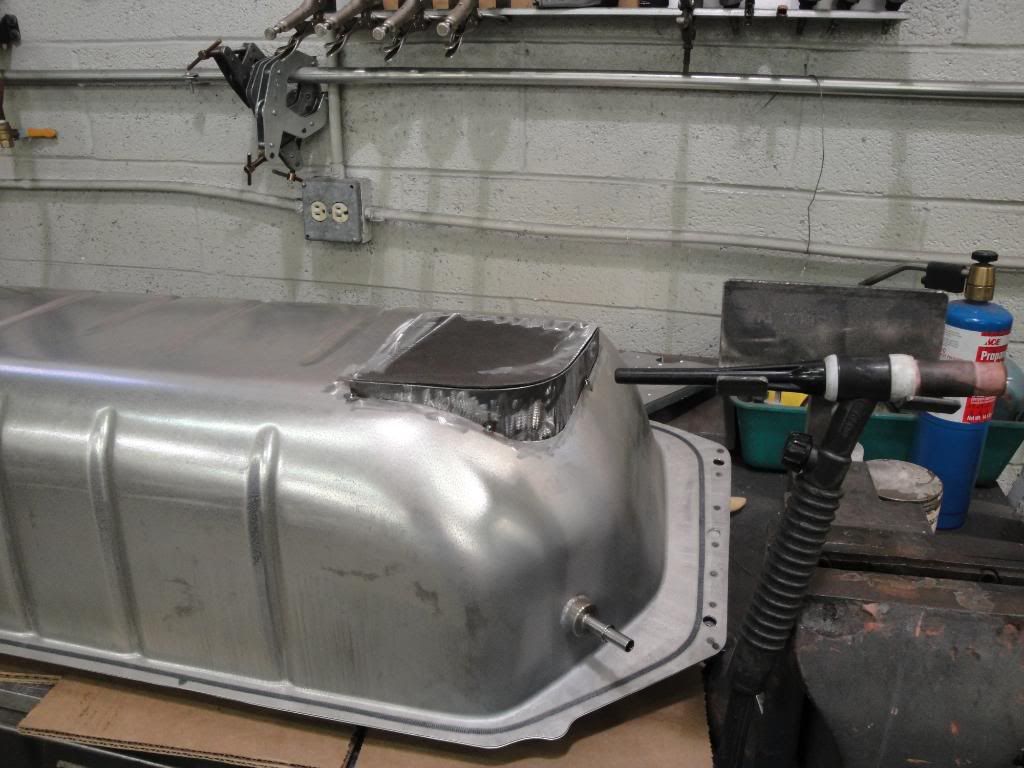
O.K...........Now I need some Help........I'm getting into an area that I don't have any experience in and need some input......I'm building the GTO Pump/Sender assy into a new 37 Ford gas tank that I just got.......The stock pump assy is spring loaded to keep the pump on the bottom of the tank....the main problem is the GTO tank is much deeper than the 37 (Approx 13-14" for the GTO and 9" for the Ford)....so.....I cut and shortened the springs and guide rods on the Pump to allow the installed height of the pump to work in the Ford tank......

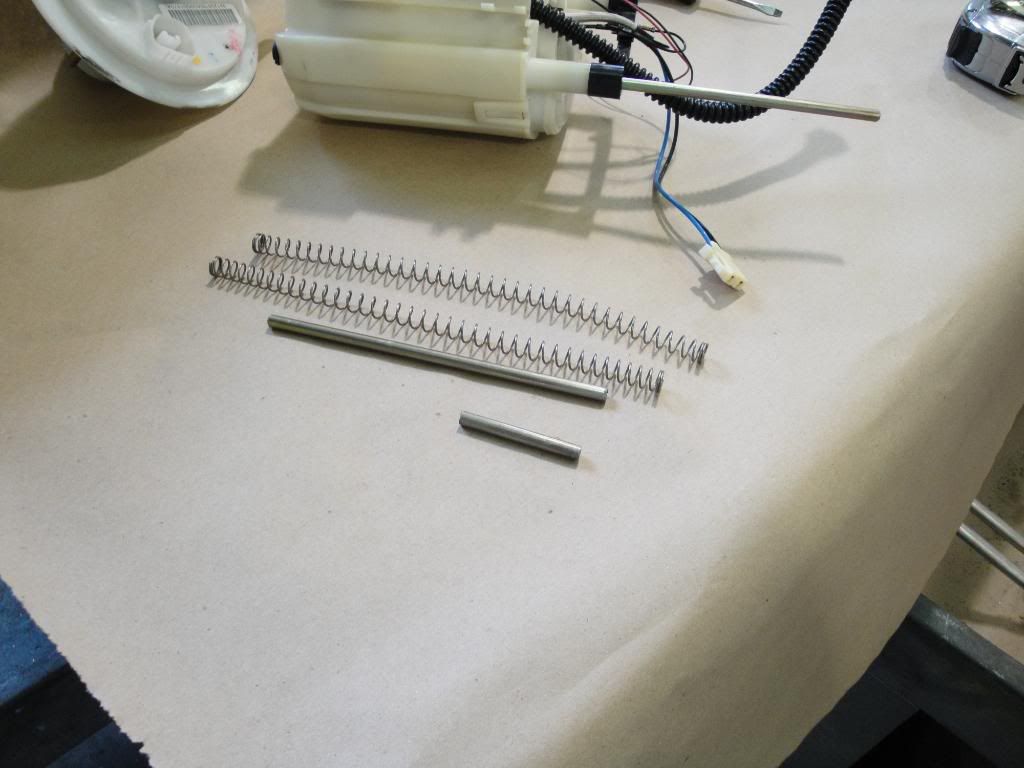
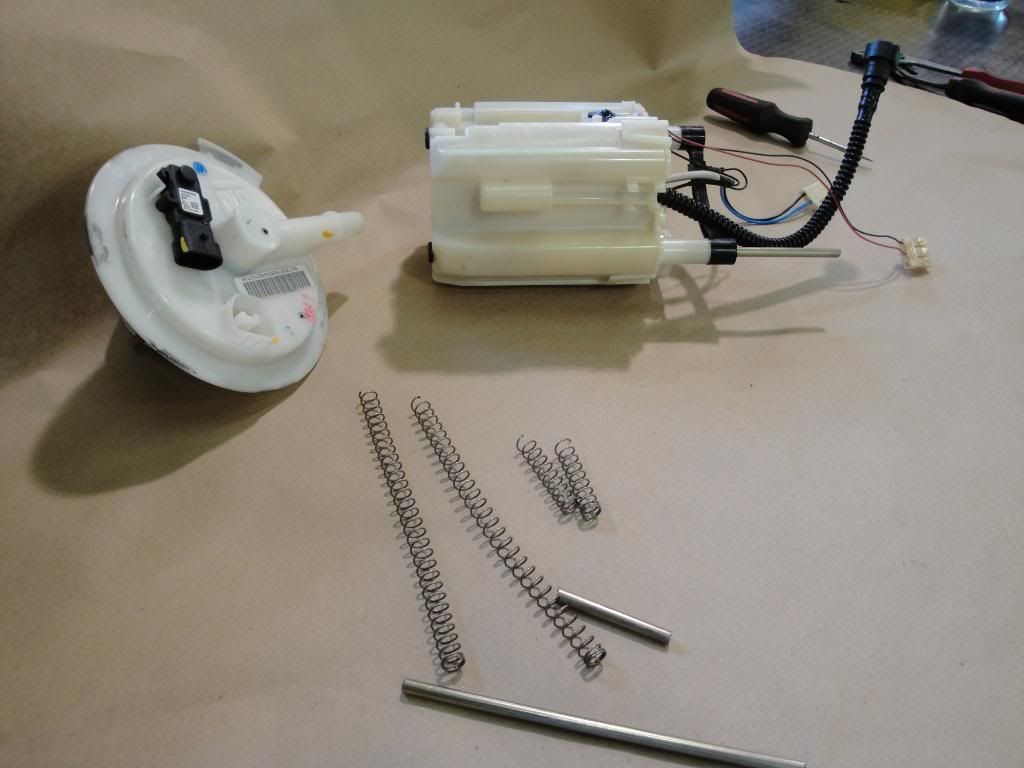
I made some steel sleeves that were small enough to have clearance with the springs and slid the rods inside and welded everything back together......ended up shortening the assy by 2"....
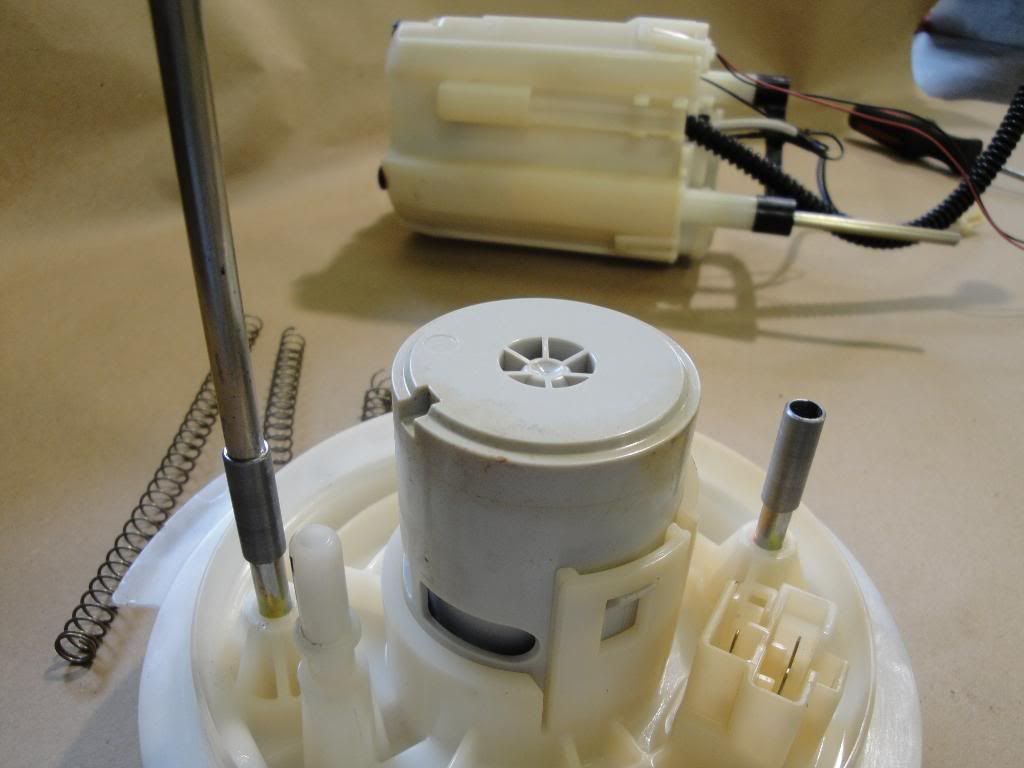
Now, my question I'm going to build the stock GTO collar and ring into the tank as shown.......do I need to make a cup or resevior assy for the pump assy to sit in inside the tank?? I noticed the new tank has one in the fuel pick-up area and just wondered if I need to replicate that with the GTO pump??
Thanks in advance
Ken
I made some steel sleeves that were small enough to have clearance with the springs and slid the rods inside and welded everything back together......ended up shortening the assy by 2"....
Now, my question I'm going to build the stock GTO collar and ring into the tank as shown.......do I need to make a cup or resevior assy for the pump assy to sit in inside the tank?? I noticed the new tank has one in the fuel pick-up area and just wondered if I need to replicate that with the GTO pump??
Thanks in advance
Ken
I don't think you need to, I think the reservoir is built into the plastic fuel pump module. Did the GTO tank have any reservoir/baffle? If it didn't you should be good to go as long as you got the whole module to fit in the tank. If it's still too tall, you may have to add a small sump to the bottom of the tank. I've done this before and it serves two purposes, it allowed the fuel sender to fit in the tank, and it acts like a baffle to keep the fuel where you need it, at the fuel pump. (but it was a sender, not the module type that you have, as I still think the baffle is made into the module). Hope I didn't confuse you!  And keep up the good work, it's looking great, can't wait to see it on the PowerTour.
And keep up the good work, it's looking great, can't wait to see it on the PowerTour. TECH Resident
Joined: Oct 2004
Posts: 800
Likes: 1
From: Simi VAlley,CA
That thing is awesome Ken. I'd put a reservoir or at least a dam of some sort around the fuel module. I have one in mine and I've NEVER starved it when cornering...and believe me, there are some COOL canyons out here to blast through.
I hope you guys thaw out pretty soon. (It's been in the mid 70's here all month)
I hope you guys thaw out pretty soon. (It's been in the mid 70's here all month)
LS1 Tech Stories
The Best V8 Stories One Small Block at Time

6 Common C5 Corvette Failures and What's Involved In Repairing Them
Pouria Savadkouei
Retro Modern Bandit Pontiac Trans AM Comes With Burt Reynolds' Autograph
Verdad Gallardo
Top 10 Greatest Cadillac V Series Performance Models Ever, Ranked
Pouria Savadkouei
Top 10 Most Powerful Chevy Trucks Ever Made!

Hennessey's New Supercharged Silverado ZR2 Has 700 HP
Verdad Gallardo
Coachbuilt N2A Anteros Is an LS2-Powered C6 Corvette In Italian Clothes
Verdad Gallardo
Awesome K5 Blazer Restomod Comes With C7 Corvette Power
Verdad Gallardo
10 Camaros You Should Never Buy

10 LS Engine Myths That Refuse to Die
Verdad Gallardo Thread Starter
TECH Fanatic
Joined: Jul 2008
Posts: 1,570
Likes: 173
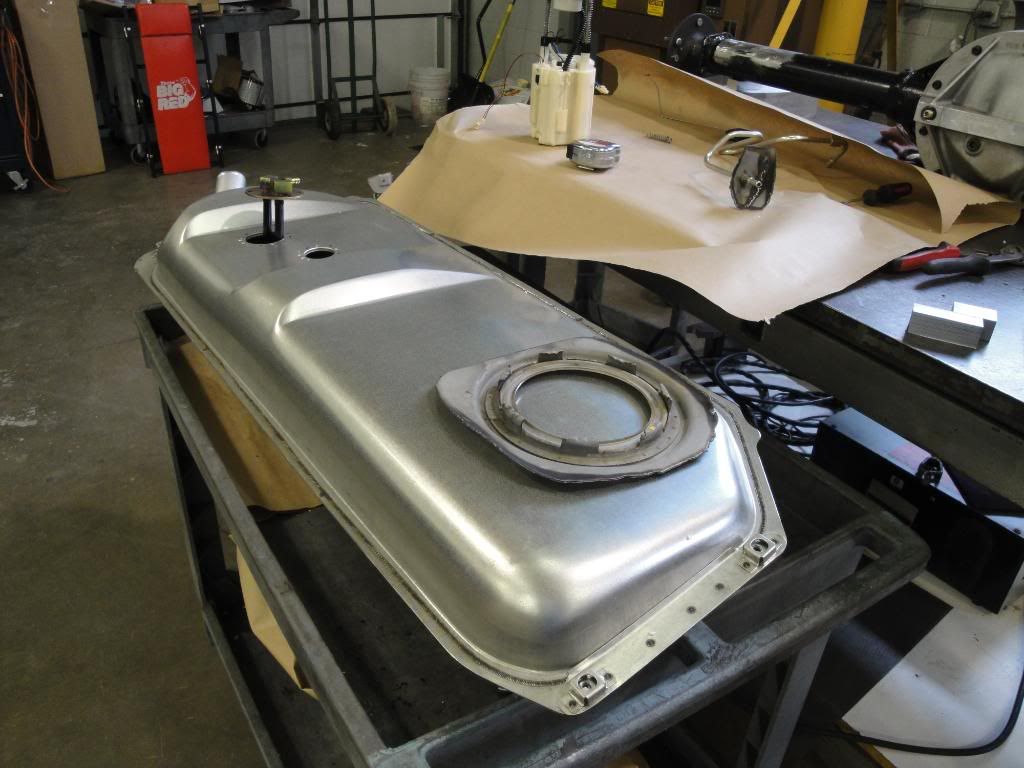
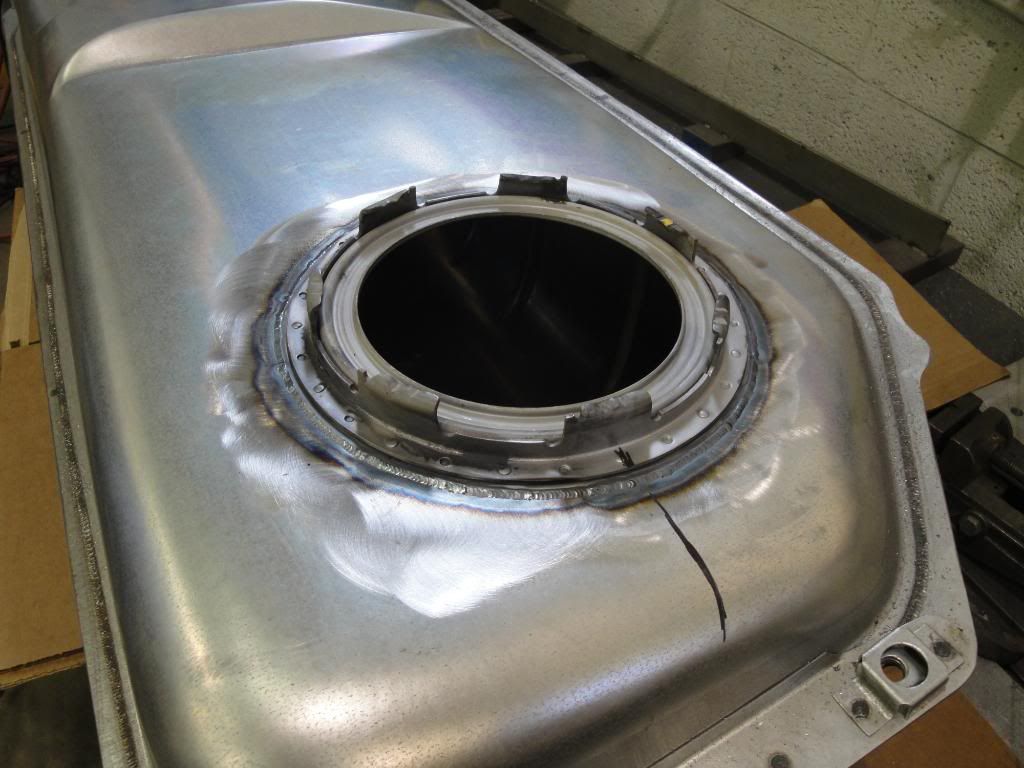
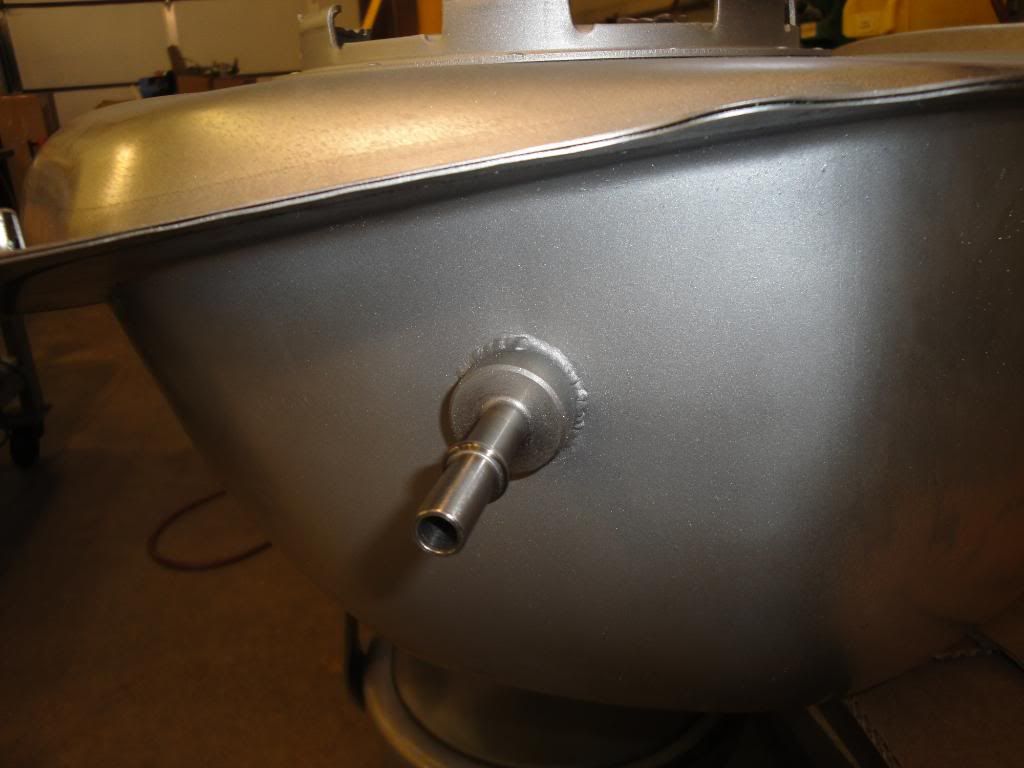
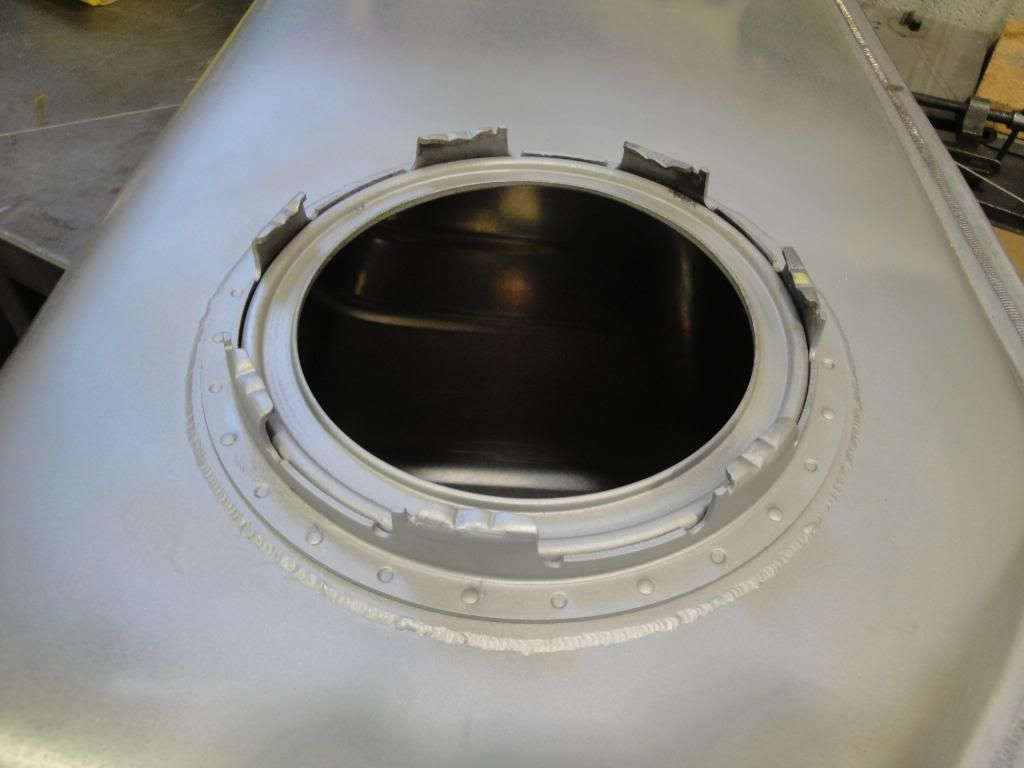
Modified the new tank for the Pump assy today......Cut a hole and fit and welded the GTO tank pump flange into the 37 tank.......
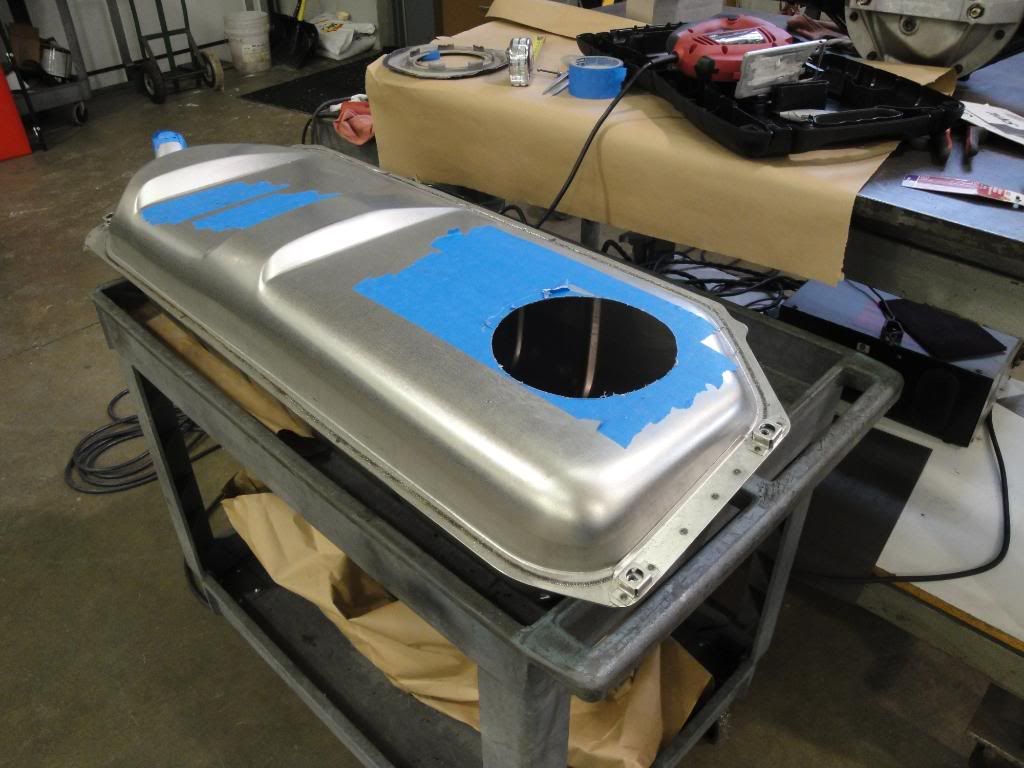
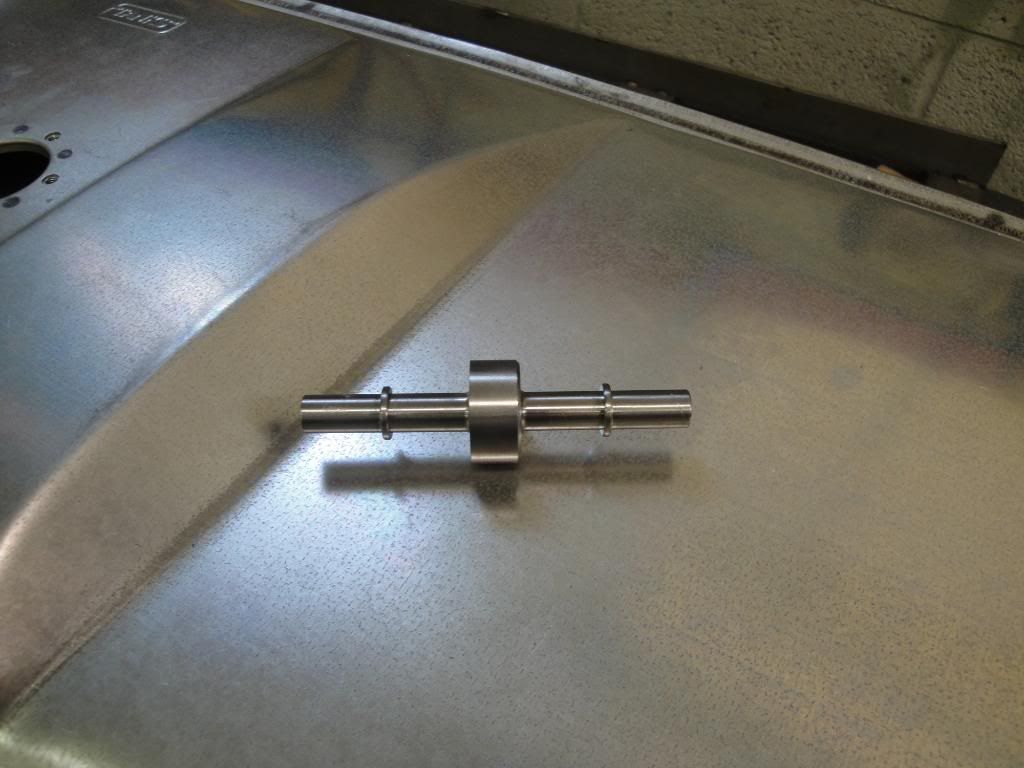
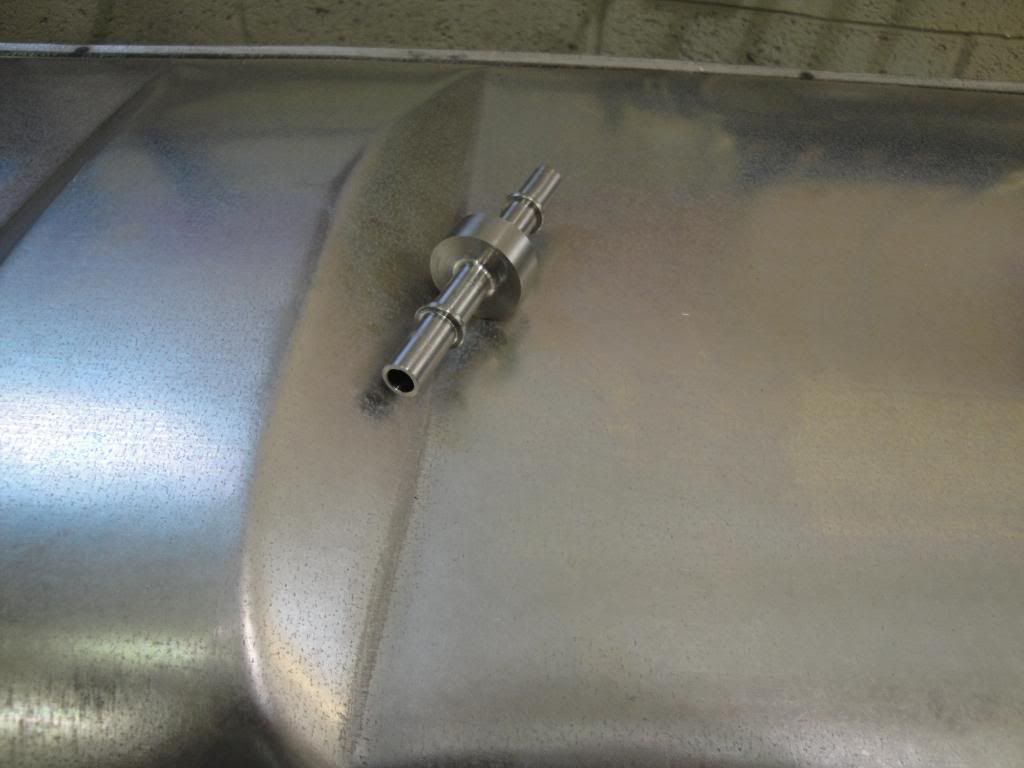
Also made a fitting for the internal Pump fitting that I will weld into the Tank tomorrow....this fitting will connect the Internal and External fuel line connections...
Ken
Also made a fitting for the internal Pump fitting that I will weld into the Tank tomorrow....this fitting will connect the Internal and External fuel line connections...
Ken

Wow!! Now that is some quality work.
I have a question about your fuel pump setup, if you don't mind. I am using the GTO pump also. How did you make the fitting that goes from the inside tank pickup to the outside? Also what does the larger about 1/2" fitting on the top of the pickup go? (plastic connector on top outside of pump assembly) Is this the return line or is the GTO system returnless? Sorry to hijack your thread. Thanks
I have a question about your fuel pump setup, if you don't mind. I am using the GTO pump also. How did you make the fitting that goes from the inside tank pickup to the outside? Also what does the larger about 1/2" fitting on the top of the pickup go? (plastic connector on top outside of pump assembly) Is this the return line or is the GTO system returnless? Sorry to hijack your thread. Thanks
Thread Starter
TECH Fanatic
Joined: Jul 2008
Posts: 1,570
Likes: 173
Wow!! Now that is some quality work.
I have a question about your fuel pump setup, if you don't mind. I am using the GTO pump also. How did you make the fitting that goes from the inside tank pickup to the outside? Also what does the larger about 1/2" fitting on the top of the pickup go? (plastic connector on top outside of pump assembly) Is this the return line or is the GTO system returnless? Sorry to hijack your thread. Thanks
I have a question about your fuel pump setup, if you don't mind. I am using the GTO pump also. How did you make the fitting that goes from the inside tank pickup to the outside? Also what does the larger about 1/2" fitting on the top of the pickup go? (plastic connector on top outside of pump assembly) Is this the return line or is the GTO system returnless? Sorry to hijack your thread. Thanks
I measured the GM tubing and just made my own on a Lathe.....The 1/2" fitting is a vent........The GTO set-up does not have a return line, as I understand it the computer and pump work together to monitor fuel rail pressure........
Ken
Very nice job on that fitting, looks like it will work out great. It's those kind of fab skills that seperate the pros from the amateurs. Sadly, I fall into the amateur catagory.  But I think I would round the ends of it just a touch to make it easier to install the quick connect fitting and to make sure the edge doesn't nick the o ring inside of it.
But I think I would round the ends of it just a touch to make it easier to install the quick connect fitting and to make sure the edge doesn't nick the o ring inside of it. You are putting together some really nice fabrication work. I like the project, that should be really cool when completed! 
...so do you own the machine shop or just work there? If I had access to a machine shop and a fabrication shop I doubt I would ever make it home! I would be a crazy mad scientist locked away in my lab.
Very nice job on the fuel tank!
...so do you own the machine shop or just work there? If I had access to a machine shop and a fabrication shop I doubt I would ever make it home! I would be a crazy mad scientist locked away in my lab.
Very nice job on the fuel tank!
Where did you get the floor bits with the prefab transmission tunnel sections? I could use something like that since I don't happen to have a slip roller laying about.
Thread Starter
TECH Fanatic
Joined: Jul 2008
Posts: 1,570
Likes: 173
Thread Starter
TECH Fanatic
Joined: Jul 2008
Posts: 1,570
Likes: 173
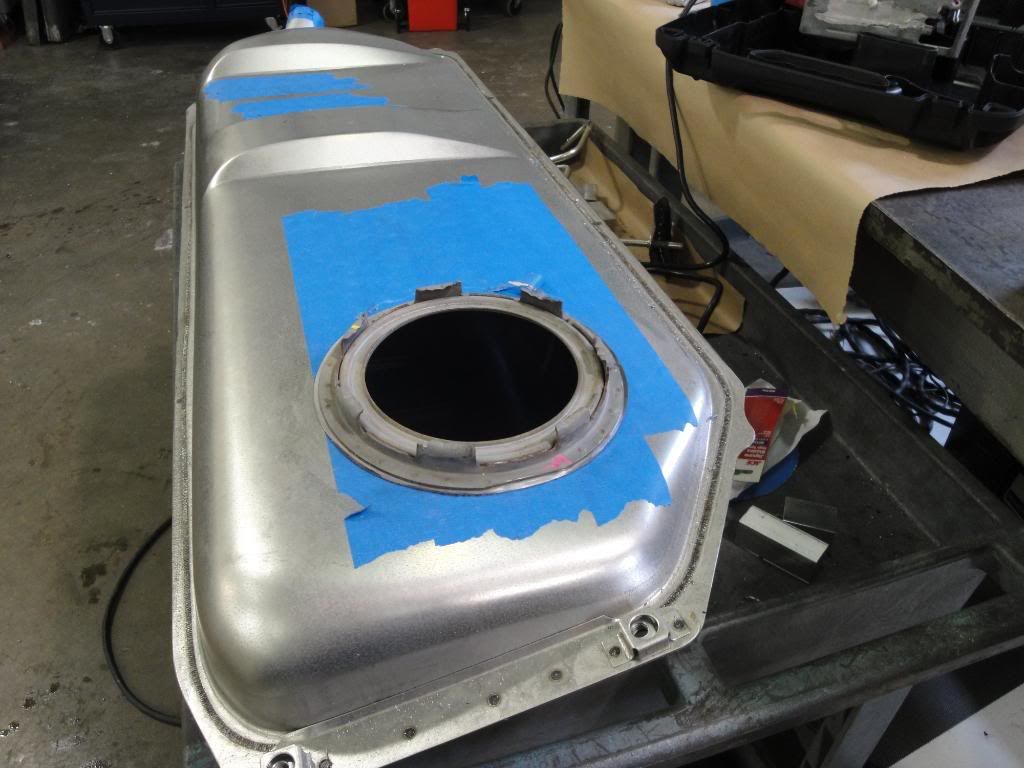
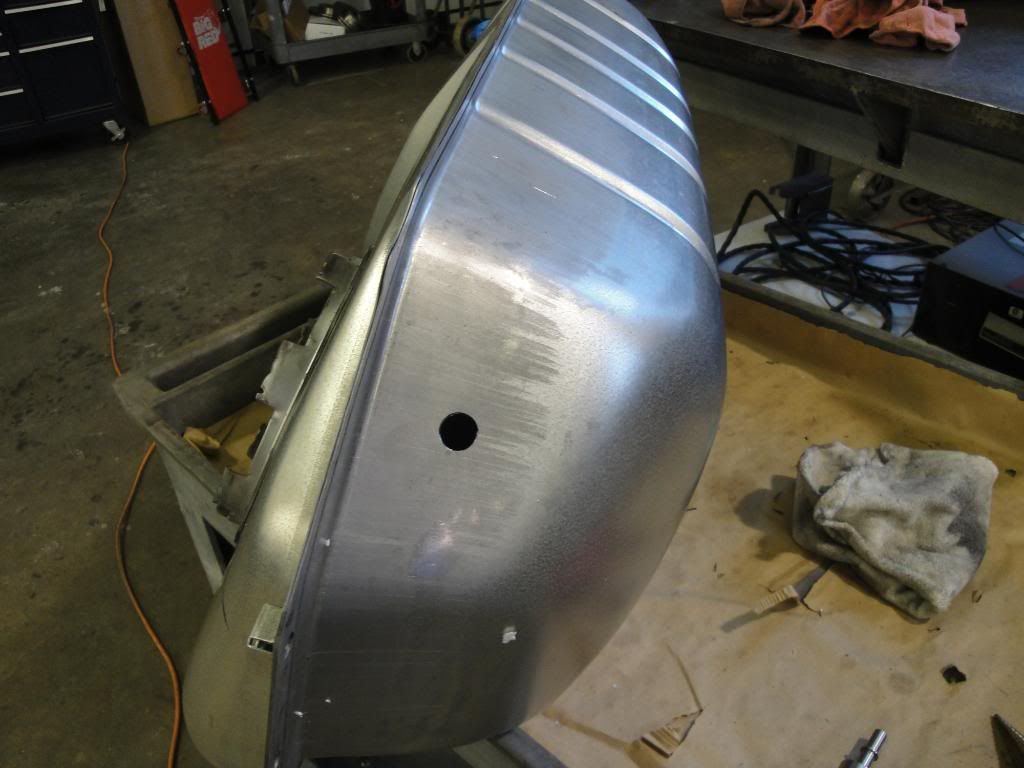
Finished up the fuel tank today and sprayed some Eastwood Tank Tone Paint on the welds to clean everything up..........Had a problem with the Pump assy......I had the float arm off the unit for fitting, and I lost the little plastic part that holds the arm in place so I had to buy another pump for that little $.50 part that's not available by itself.......Darn........Don't you hate when that happens..........
Ken
Ken
Thread Starter
TECH Fanatic
Joined: Jul 2008
Posts: 1,570
Likes: 173
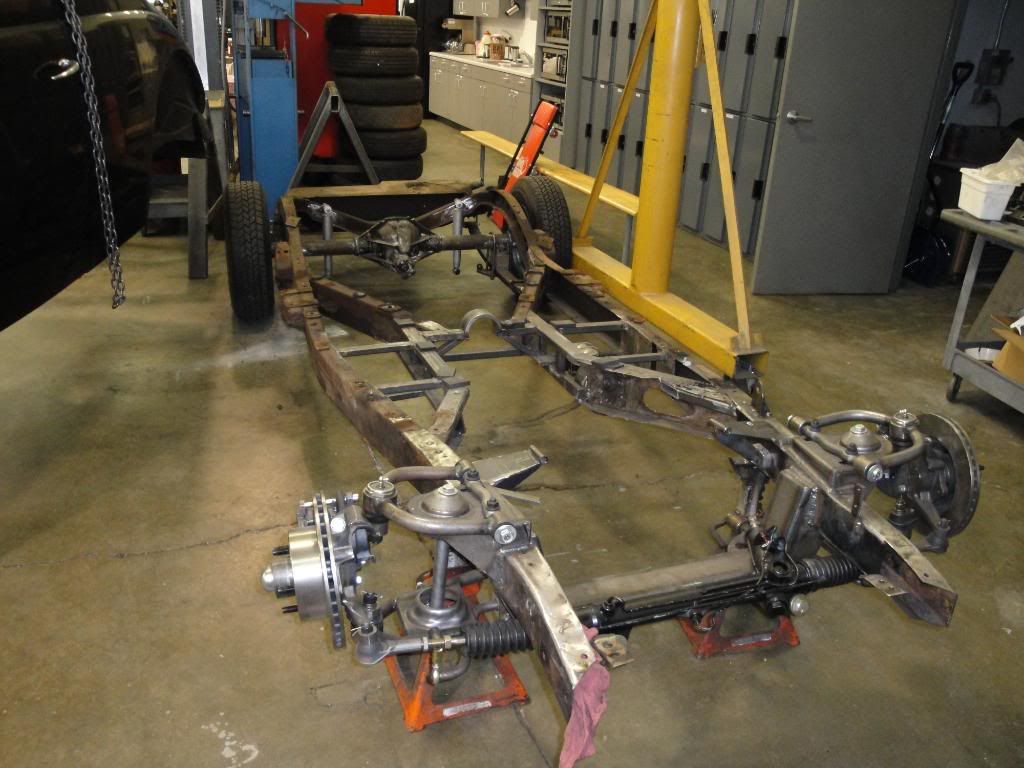
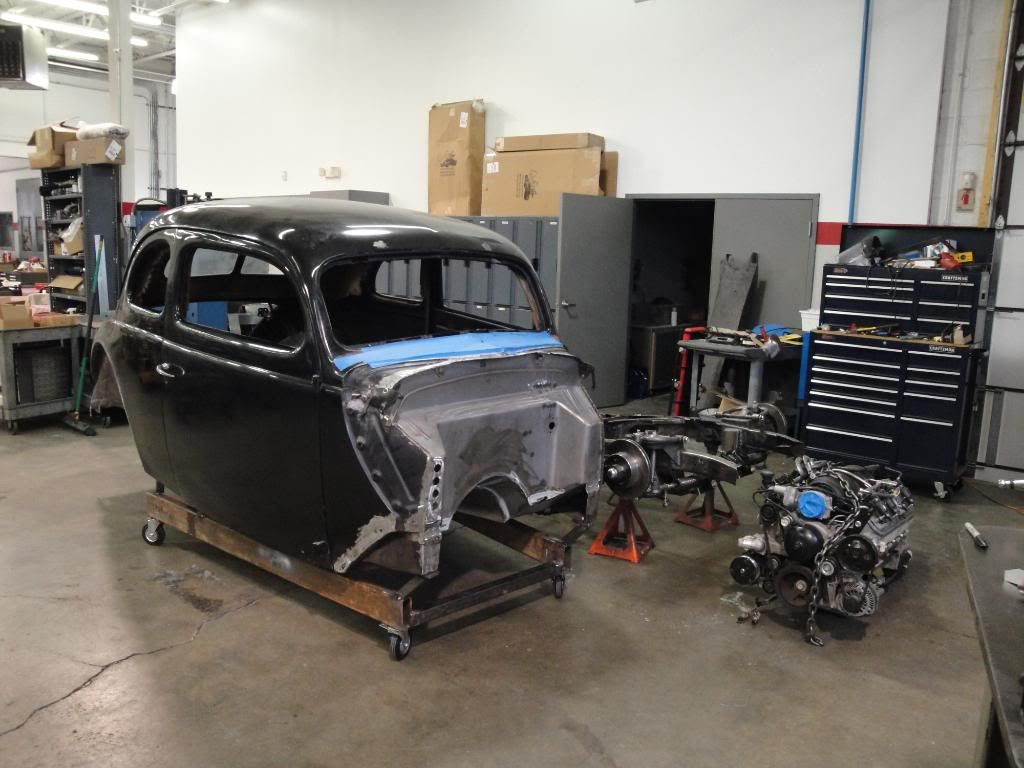
I sent the frame out for chemical stripping and it won't be back till next week......so, I started detailing and putting together parts to go on after I get it back......
Starting to be Fun..............
Ken
Starting to be Fun..............
Ken
Finished up the fuel tank today and sprayed some Eastwood Tank Tone Paint on the welds to clean everything up..........Had a problem with the Pump assy......I had the float arm off the unit for fitting, and I lost the little plastic part that holds the arm in place so I had to buy another pump for that little $.50 part that's not available by itself.......Darn........Don't you hate when that happens..........
 Sorry about that. Hopefully that is the only part the Gremlin's ate and they will quietly move to someone else's shop.
 Thanks for the info on the floor bits. I'm going to see if they have something that looks like I can make it work in my situation. What you have might actually do what I need with a little massaging.
The tank is looking really sharp! I love it.
Thread Starter
TECH Fanatic
Joined: Jul 2008
Posts: 1,570
Likes: 173
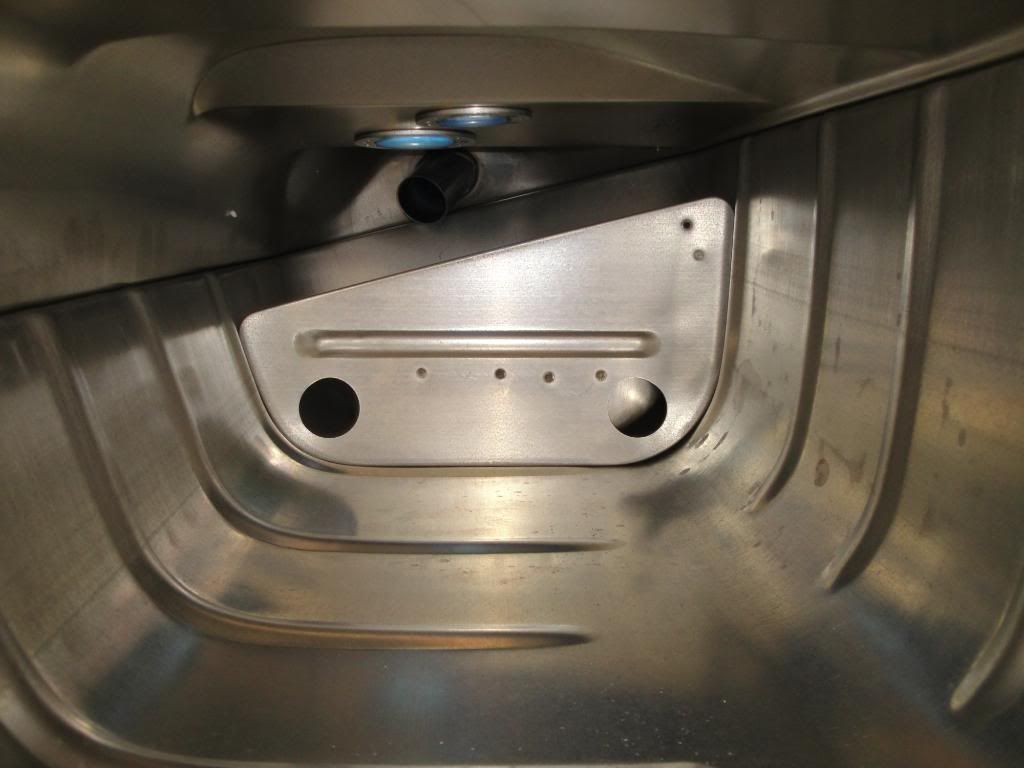
After thinking about what Oscar said.......I decided to be on the safe side and add a sump to the tank.........Here's a pic inside the tank while I was fabbing the parts for the sump.......
Prior to finish welding..................
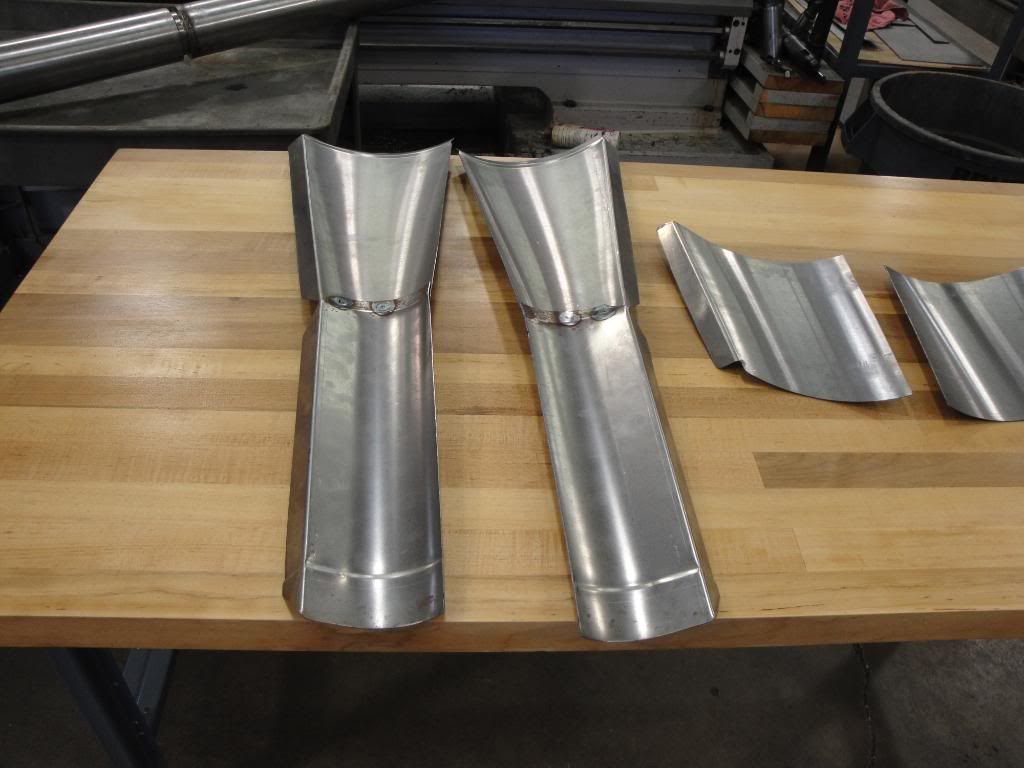
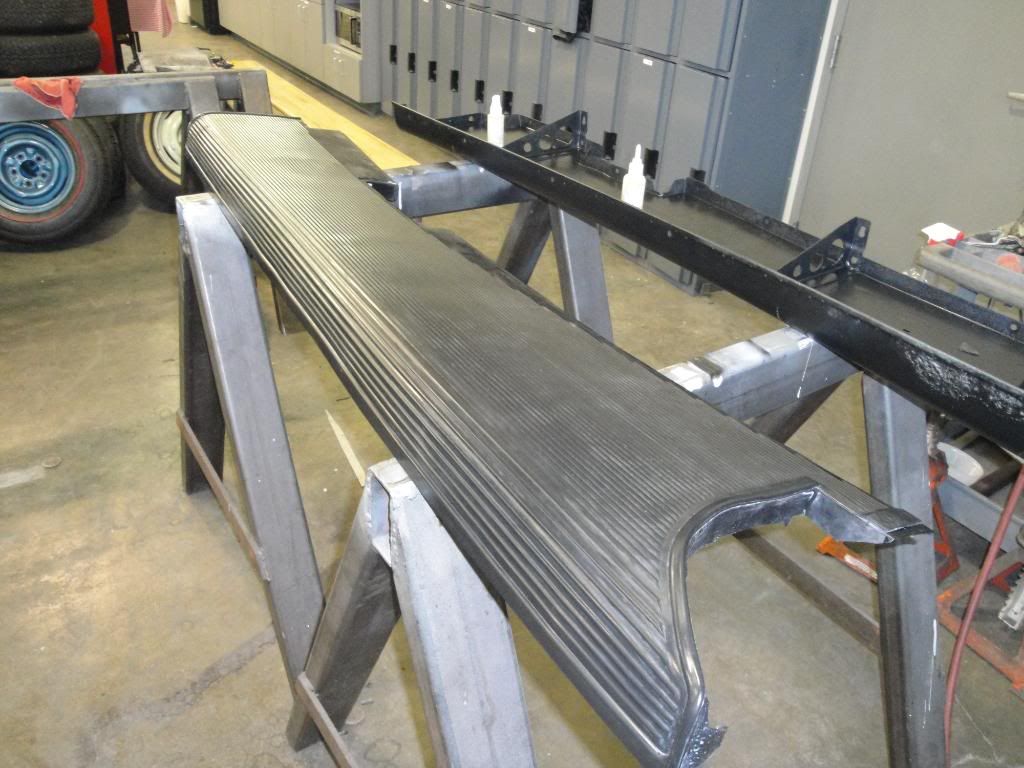
I also did the running board covers today...........
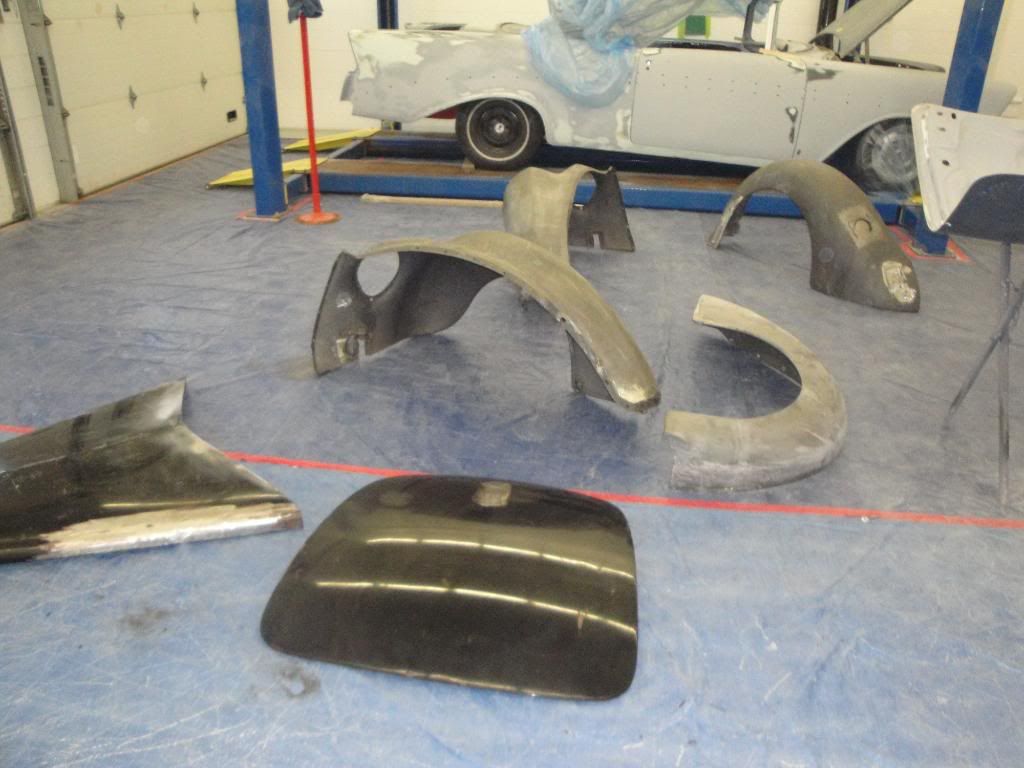
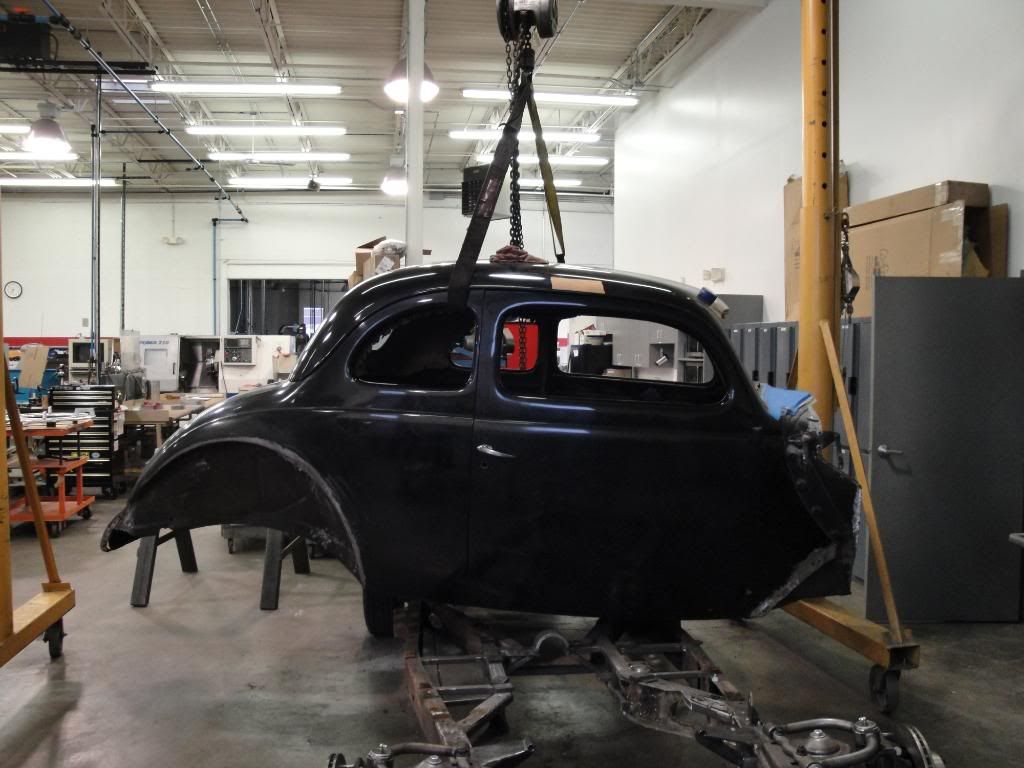
And, I also stopped at the body shop to see if they started on the car yet.........Boy!!.....what a surprise....
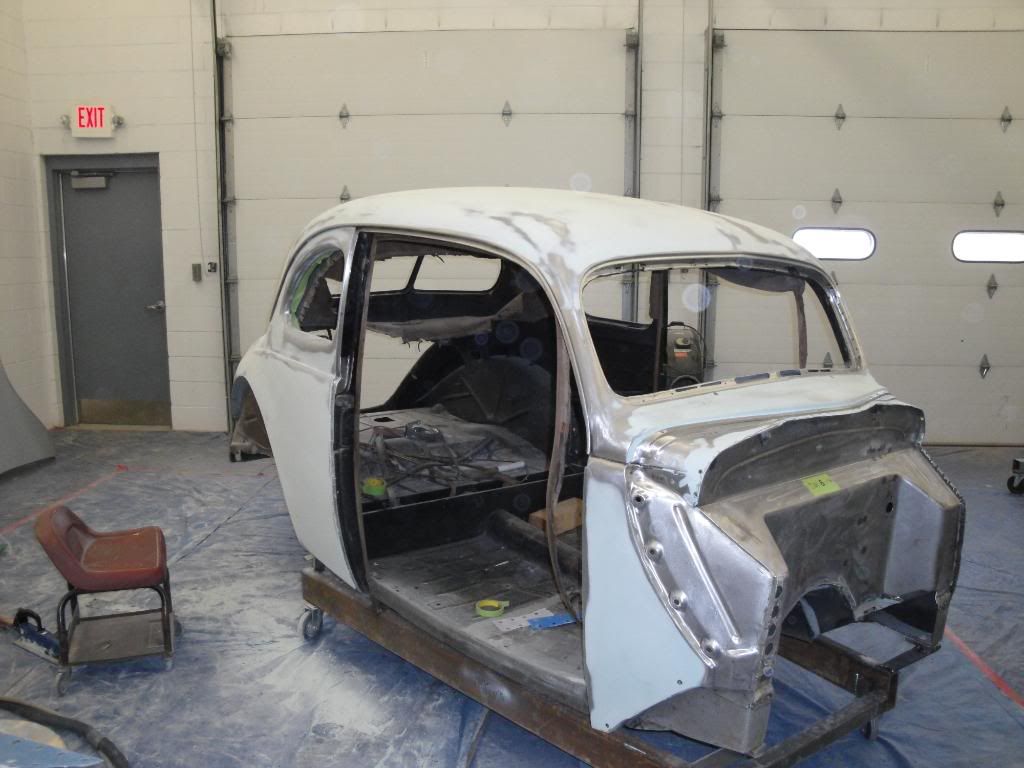

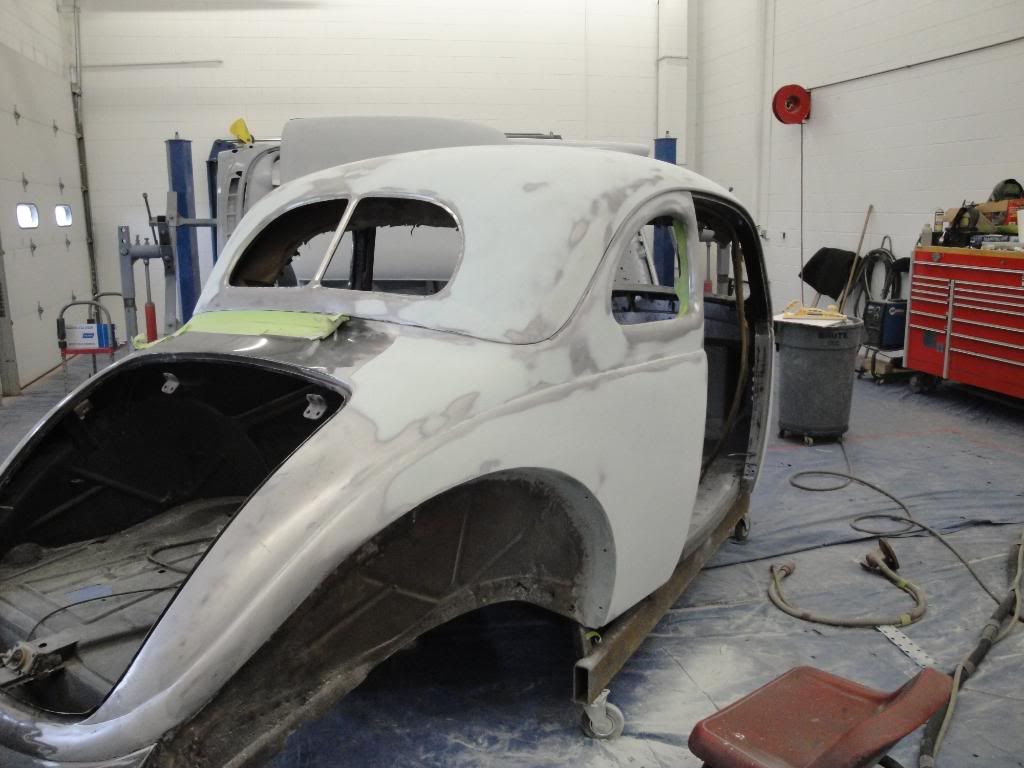
Moving right along..................
Ken
Prior to finish welding..................
I also did the running board covers today...........
And, I also stopped at the body shop to see if they started on the car yet.........Boy!!.....what a surprise....
Moving right along..................
Ken