

1937 Ford LS2 Install
 03-25-2010 | 03:42 PM
#281

Thread Starter
TECH Fanatic

Joined: Jul 2008
Posts: 1,566
Likes: 169
What are you thinking about using here, Dynamat type or Lizard Skin? I'm planning on using Lizard Skin in mine.
Mike
Mike
Ken
03-25-2010 | 04:11 PM
#282
Thread Starter
TECH Fanatic
Joined: Jul 2008
Posts: 1,566
Likes: 169
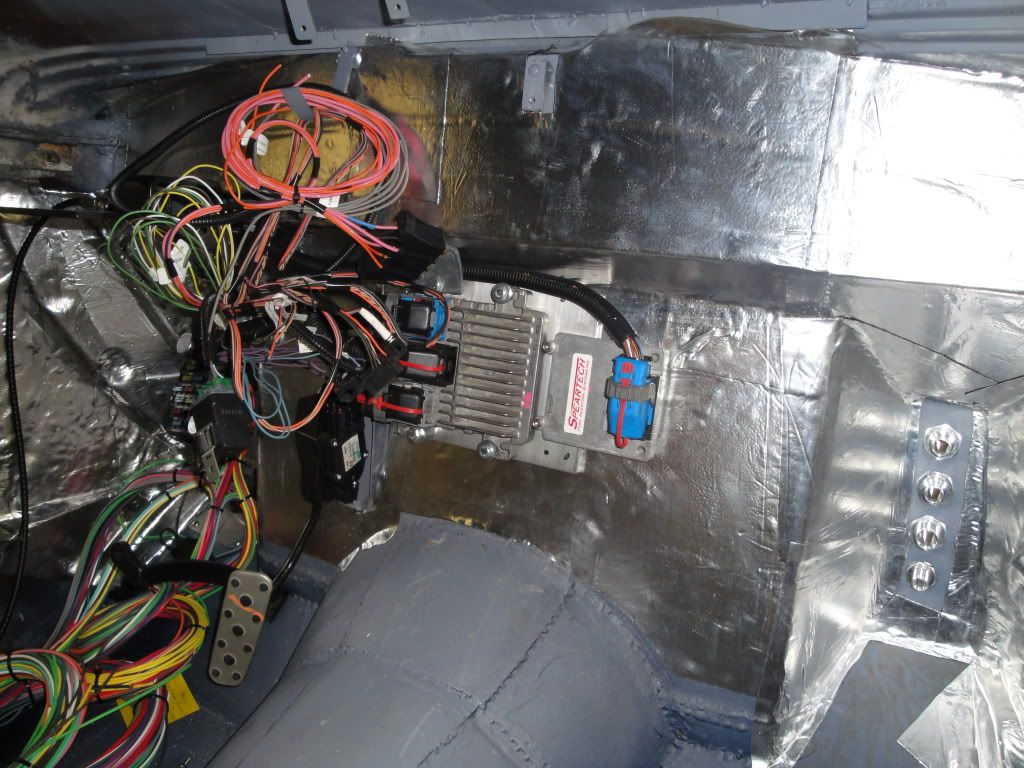
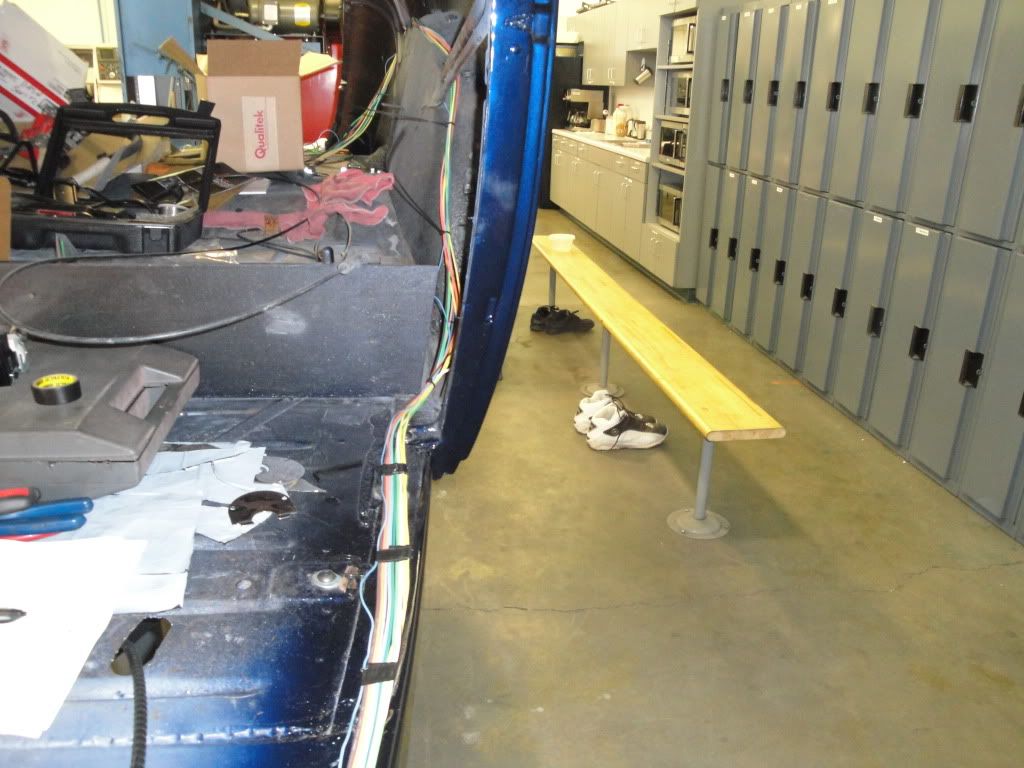
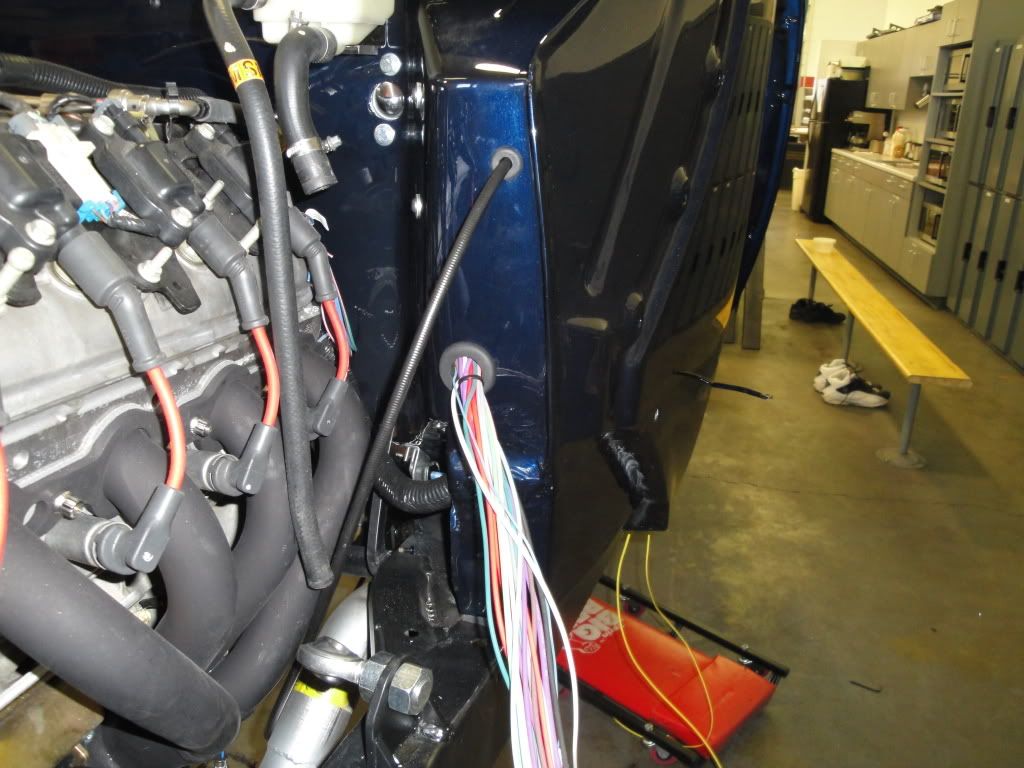
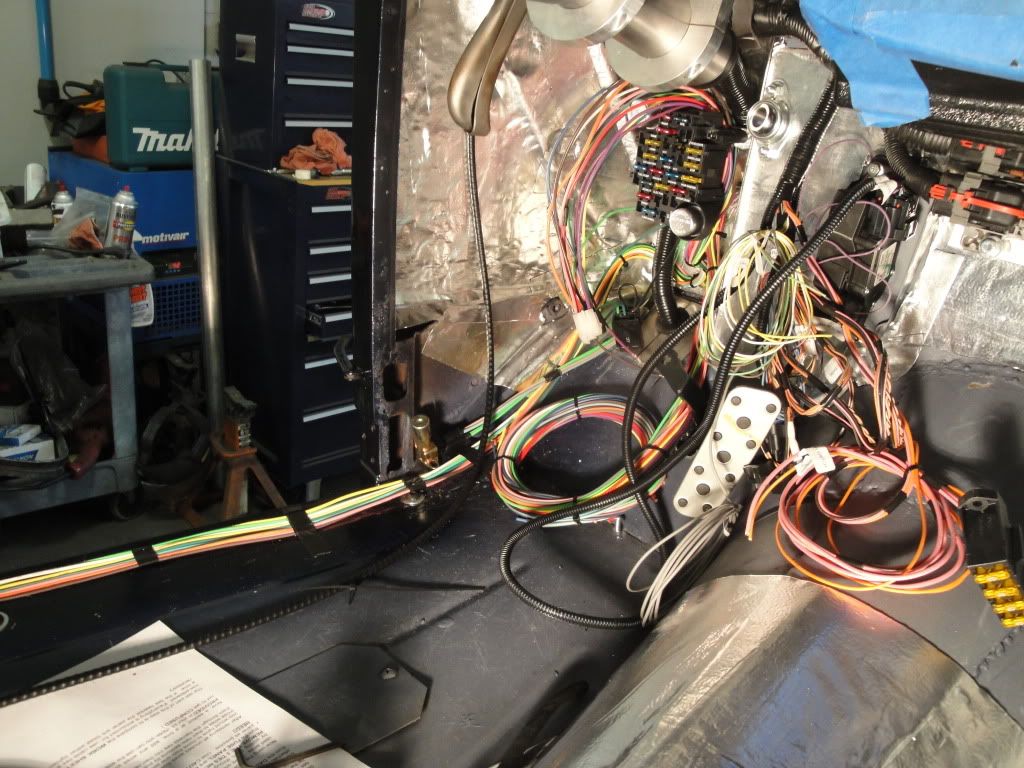
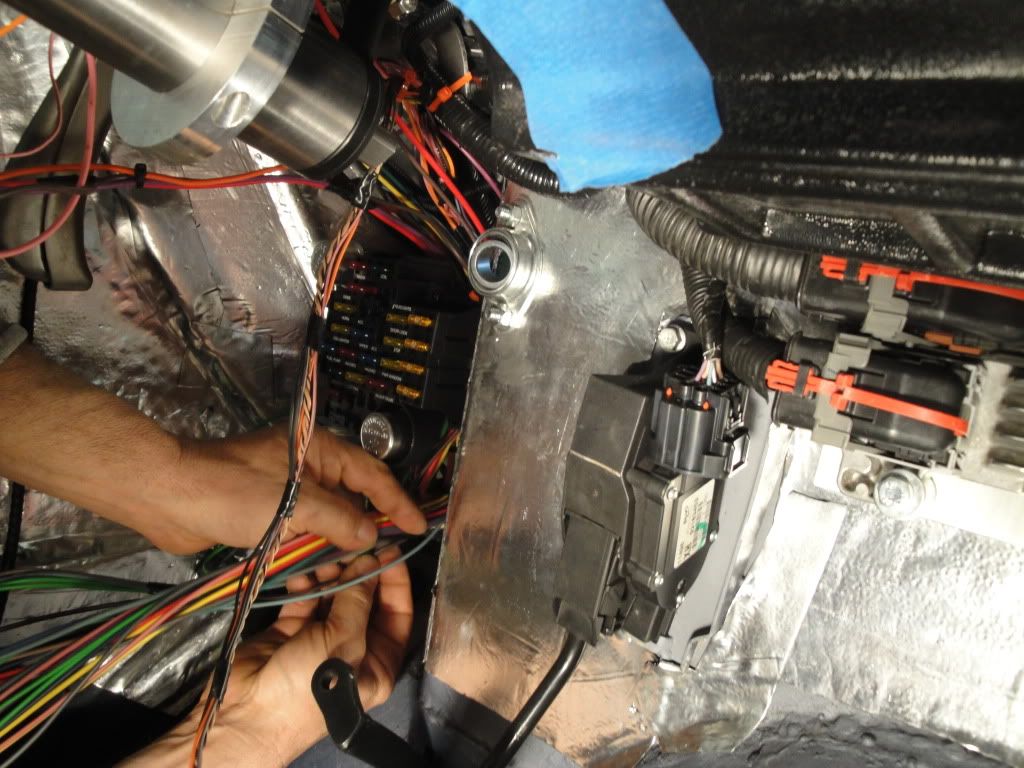
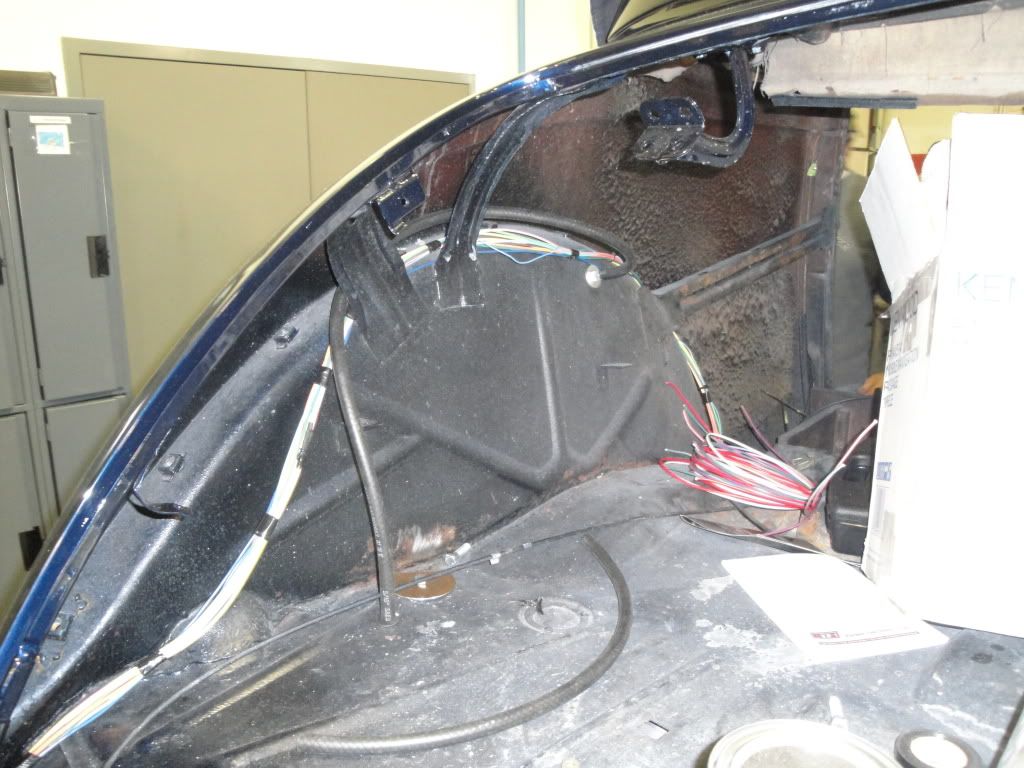
Got the transmission shifter cable up to the steering column area area ready to be hhoked up later.....also got the computer harness finished off where it came thru the floor and up the firewall with the hole finished off and the harness sealed and insulated with a big rubber gromett....I also made a plate for mounting the ECM and the trans module and got it mounted to the firewall and got the harness roughly mounted in place.....It actually fit pretty good..........
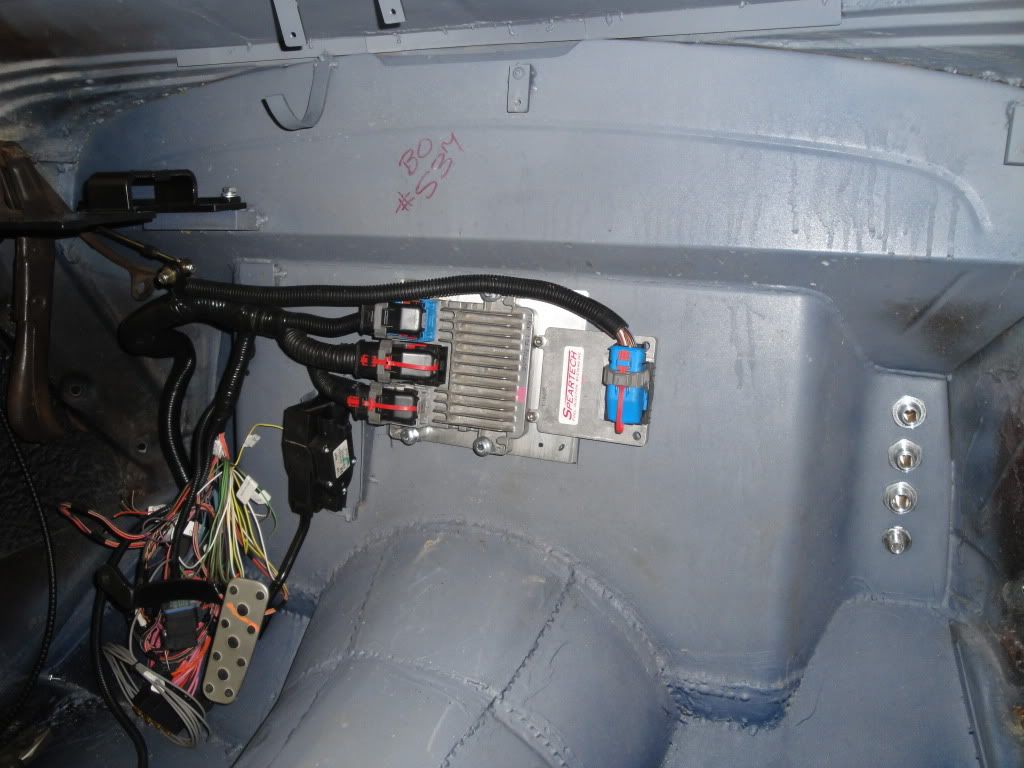
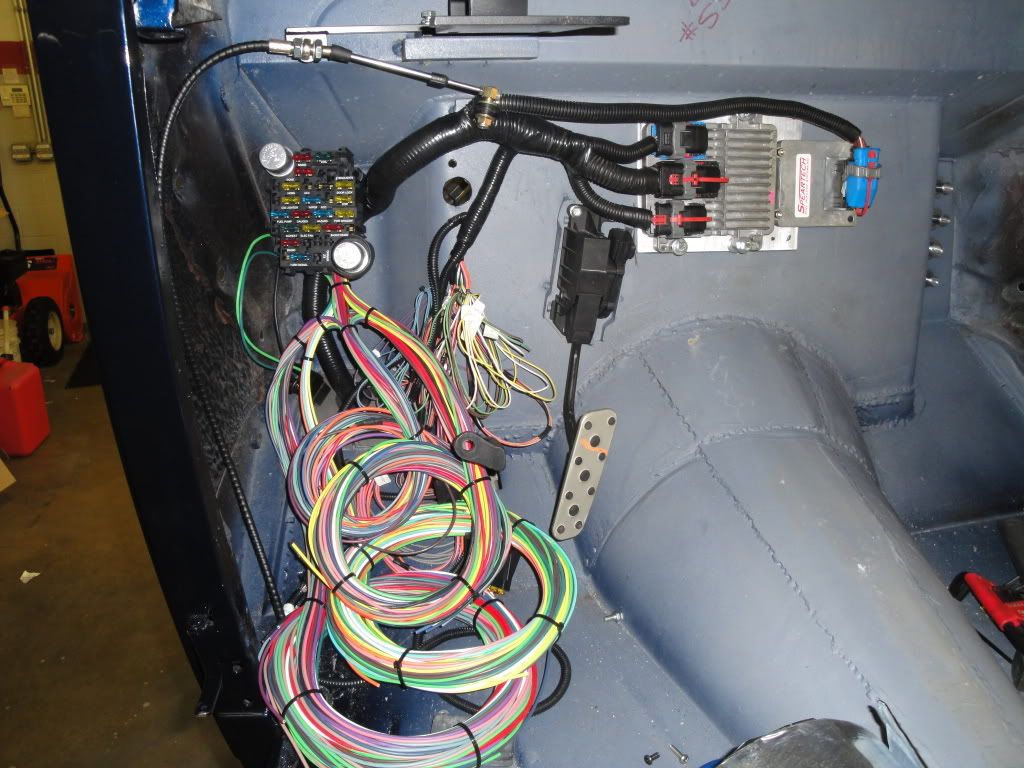
Evereything looks so neat in the above pic...here's a shot in the opposite direction.........LOL
And......I was feeling mighty good after getting that "Stuff" mounted......Then I opened up the "Other" harness box and got that "Sick" feeling again........
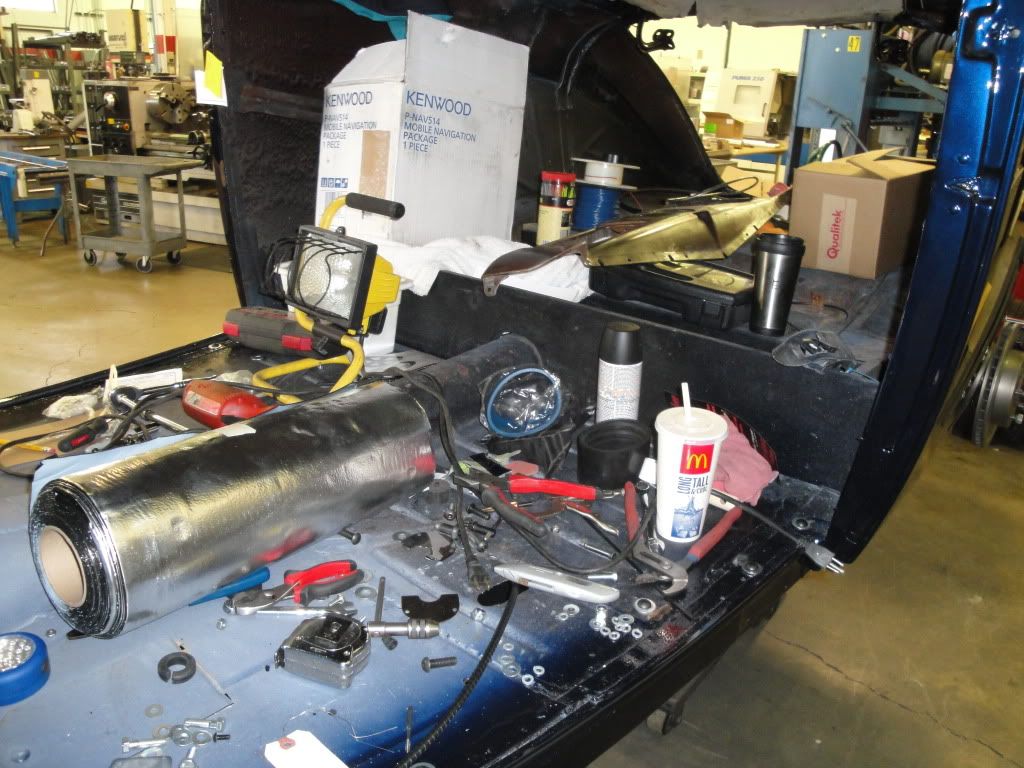
I'll get the new fuse panel mounted tomorrow then I'll take everything out for the installation of the sound deadener/insulation.........I also recruited one of my friends to tackle the wiring while deal with the other things that need to be finished off......
Ken :flag:
Evereything looks so neat in the above pic...here's a shot in the opposite direction.........LOL
And......I was feeling mighty good after getting that "Stuff" mounted......Then I opened up the "Other" harness box and got that "Sick" feeling again........
I'll get the new fuse panel mounted tomorrow then I'll take everything out for the installation of the sound deadener/insulation.........I also recruited one of my friends to tackle the wiring while deal with the other things that need to be finished off......
Ken :flag:
03-26-2010 | 09:12 AM
#283

What is the morse cable for?
I used that exact harness it looks like. Not as bad as you would think to install it even though I'm only about 75% done. Just take your time. You'll need to remove a few wires (coil, choke...) and add some like for the brakes to turn signal switch, door jamb ground circuit to the headlight switch...
I also removed the fuel pump wire since I have mine essentially "hot-wired" to a dedicated relay which I'd imagine you'll be doing. You'll also need a idiot light to wire into the alternator excitor circuit or just use a resistor.
I ran a 6 ga wire from the alternator to my power "box" that houses the computer and it's own power panel. Also in there is a remote jump (+) terminal where I tie together the Battery, starter wire, alternator wire an smaller power users like the fuse panel and fan relays.
I kinda like doing the wiring part of the job but it is tedious. To me, it is one of the most critical aspects of tying the whole car together. Just like doing your own fab work is important because only YOU know how you want it, wiring is just as personal.
I've got an air system, nitrous, lots of stereo stuff, a smoke screen system (ala James Bond) power windows, AC... It just made sense to me since I have more time than money.
I can't say enough positive things about your car, I even stole your hood latch idear a long time ago - even though the parts are in a box in the garage. The color is beautiful, really, really pretty color.
What's the interior plan? What gauges will you use?
I also used Dynomat on the inside but did the "home-brewed" Lizard skin on the bottom. It works but nothing like dynomat for quiet. I think it's more for heat and it does do that pretty well. "Home brewed" because it was $30 compared to $200.
Last edited by Nashty; 03-26-2010 at 09:14 AM. Reason: added detail
03-26-2010 | 04:41 PM
#284
Thread Starter
TECH Fanatic
Joined: Jul 2008
Posts: 1,566
Likes: 169
The Morse cable is for the column shifter..........and I am using the GTO gauge module.......gonna be interesting next week ......Got a lot done today but I forgot my camera at home.............More Pic's tomorrow....
Ken
Ken
03-27-2010 | 02:40 PM
#285
Thread Starter
TECH Fanatic
Joined: Jul 2008
Posts: 1,566
Likes: 169
Here's a picture of the floor plate and gromett that seals and insulates the computer harness as it comes thru the floor......couldn't have worked out any better as far as the length of the harness....
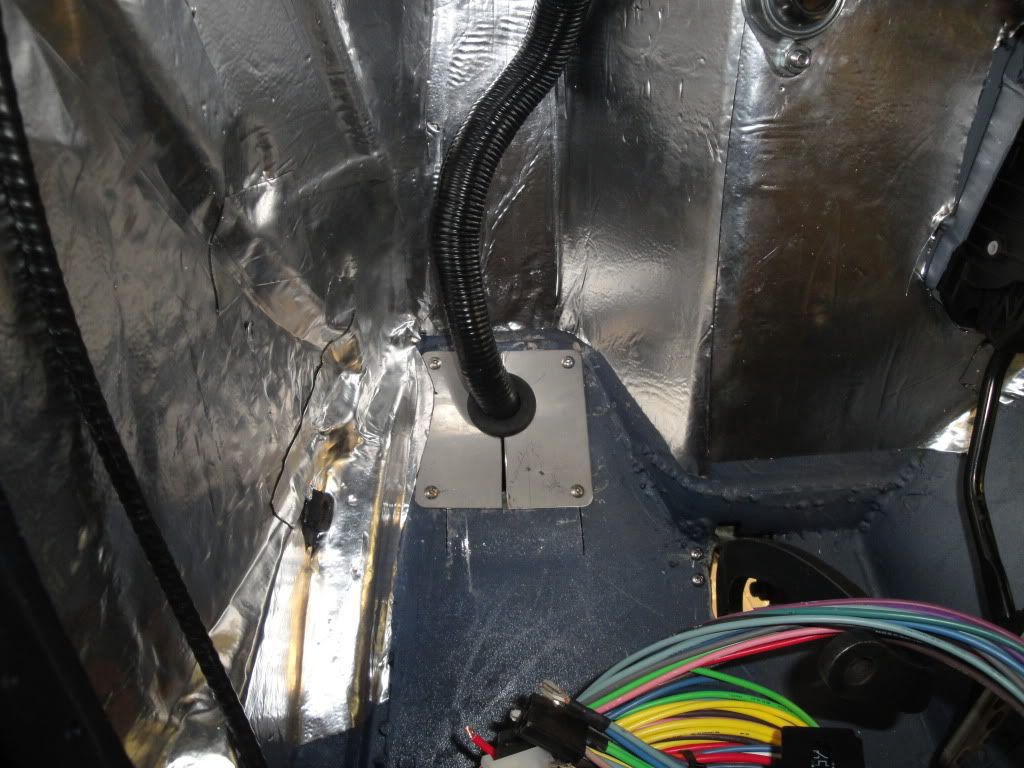
Also got a lot of the Insulation mat'l in place on the firewall and the computer doesn't (I hope) have to come off again
I also got the column back in for getting the wiring sorted out , hooked up the shifter to the cable assy, and I also got the Emergency brake figured out, mounted, and hooked up...........also the new fuse panel is installed
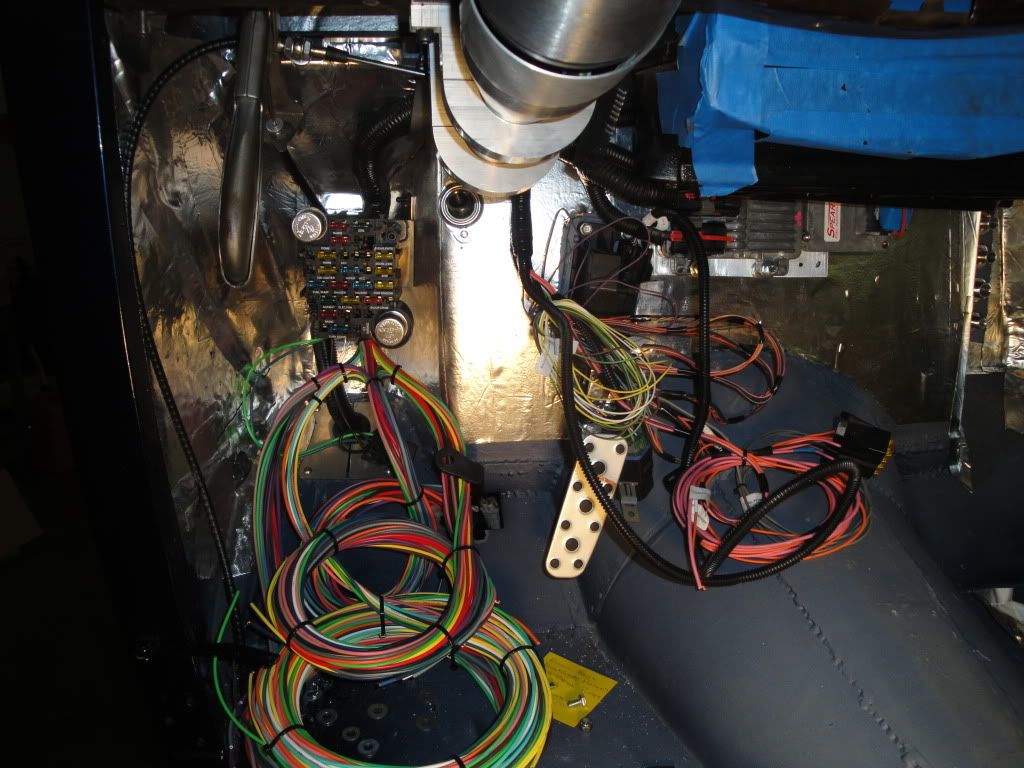
Wiring starts on Monday, Wheels and Tires will be in on Wednesday
Ken
Also got a lot of the Insulation mat'l in place on the firewall and the computer doesn't (I hope) have to come off again
I also got the column back in for getting the wiring sorted out , hooked up the shifter to the cable assy, and I also got the Emergency brake figured out, mounted, and hooked up...........also the new fuse panel is installed
Wiring starts on Monday, Wheels and Tires will be in on Wednesday
Ken
03-31-2010 | 06:52 PM
#286
Thread Starter
TECH Fanatic
Joined: Jul 2008
Posts: 1,566
Likes: 169
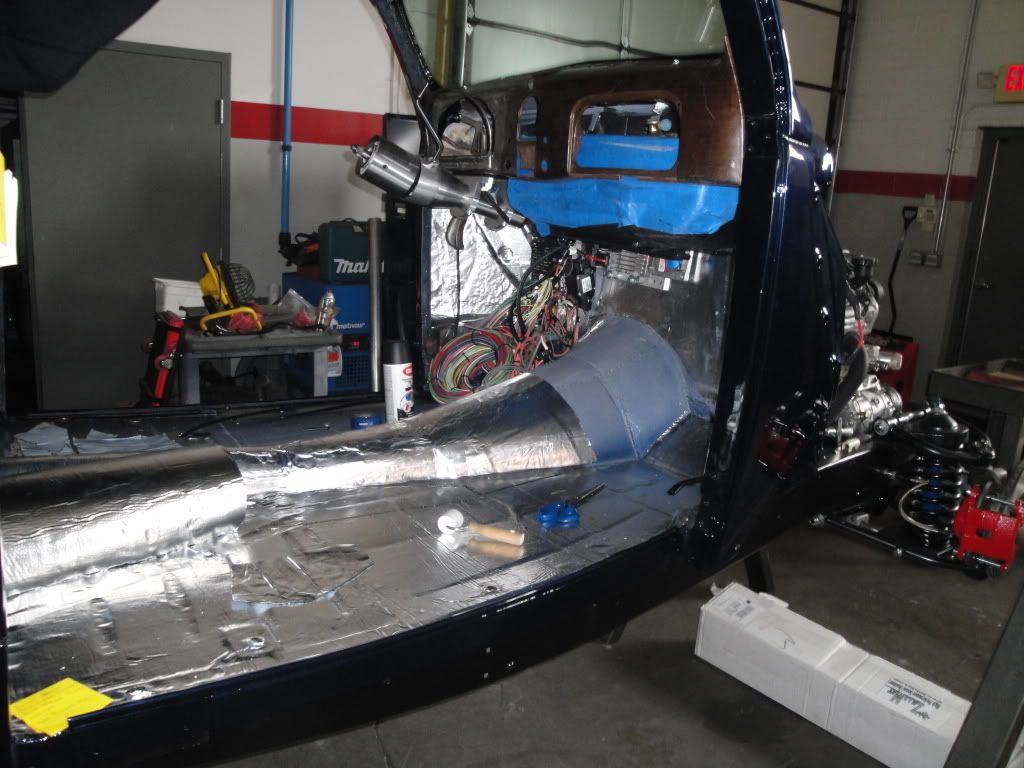
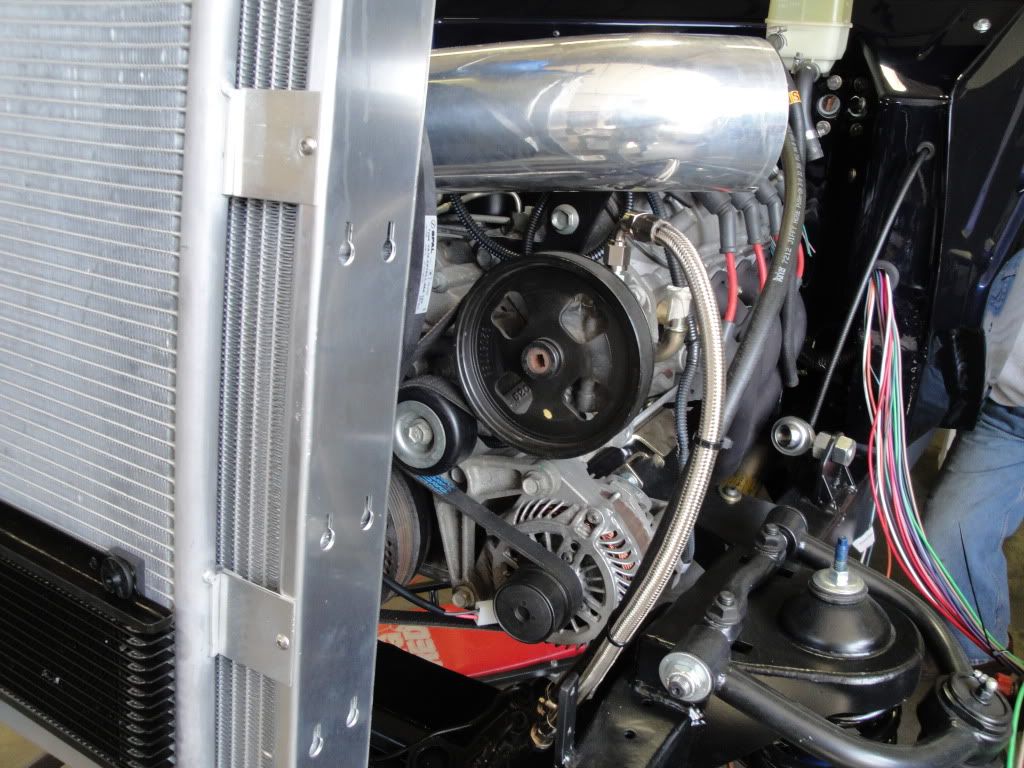
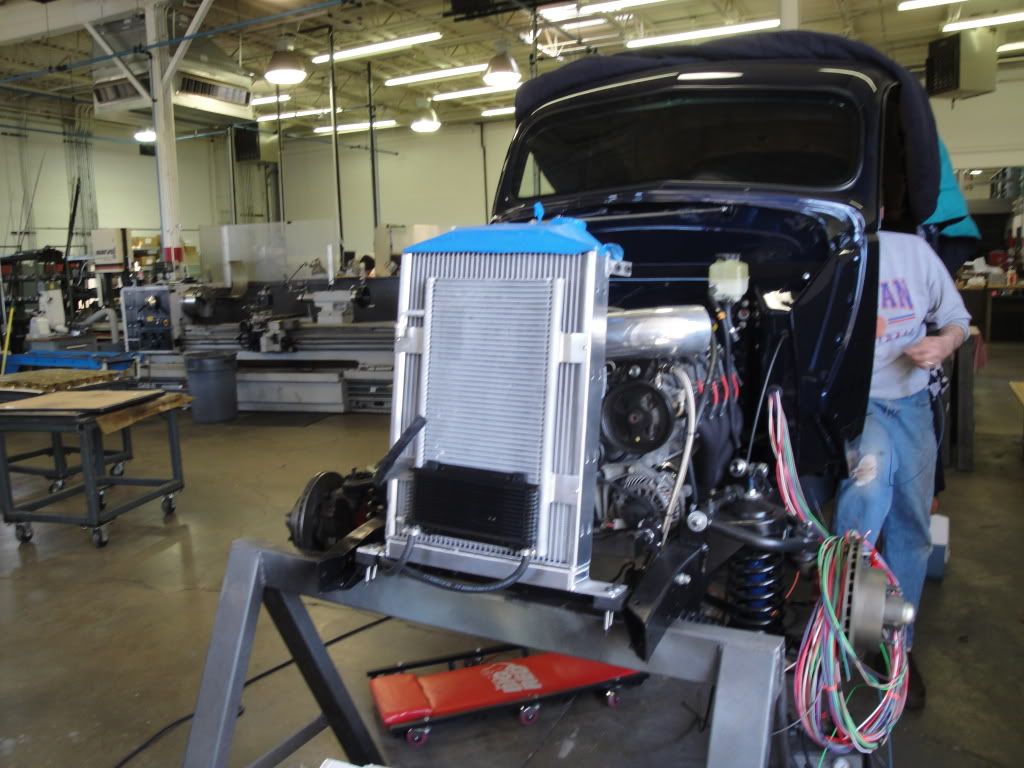
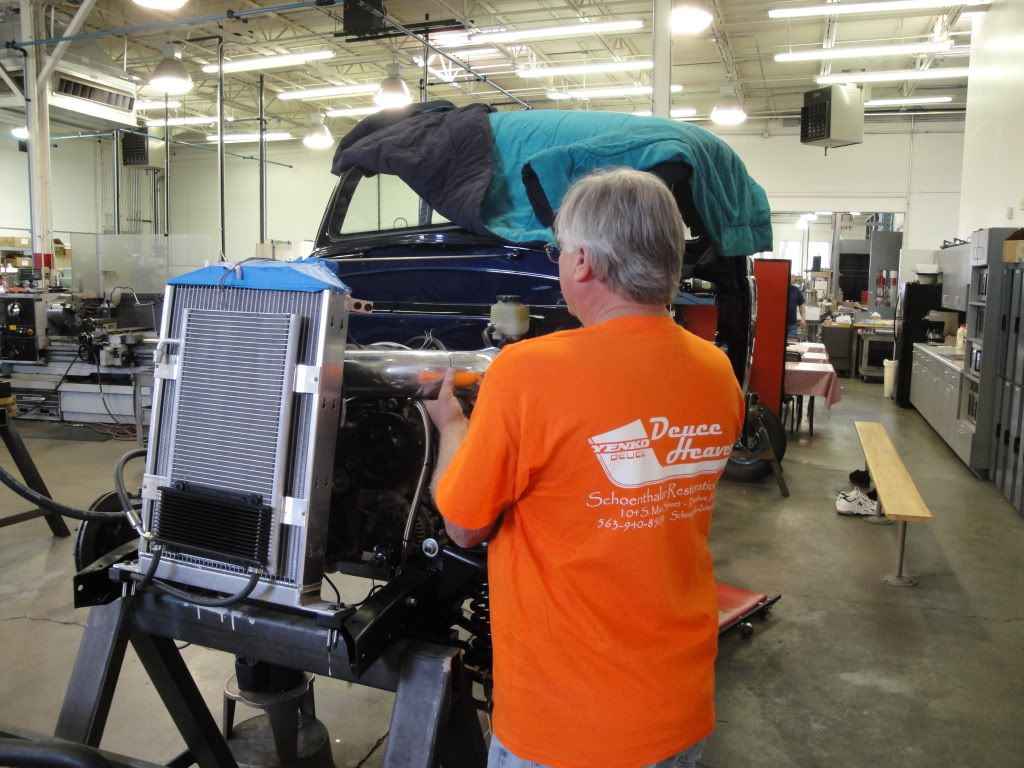
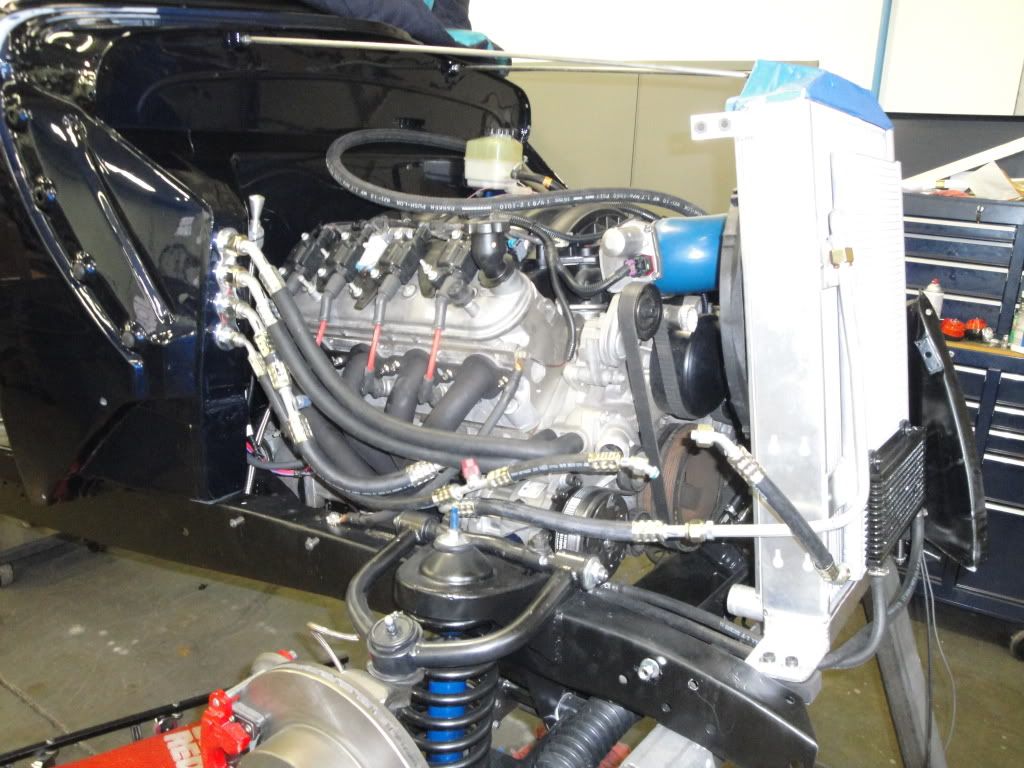
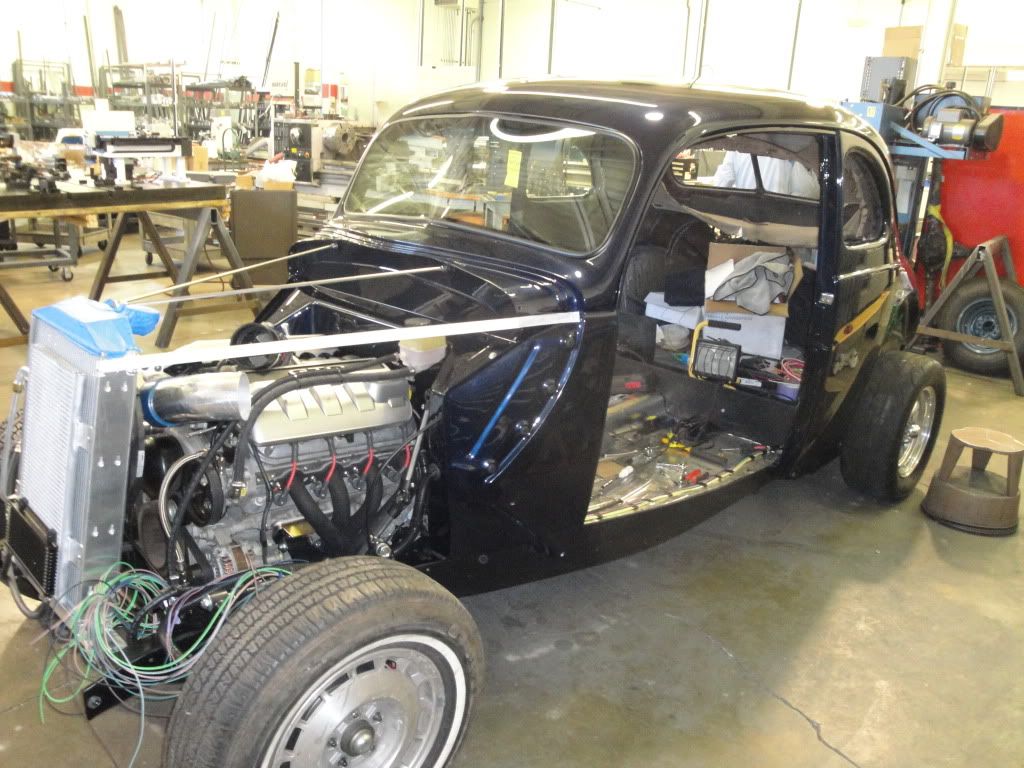
While Dave has been dealing with the wiring.....I started on Getting the Radiator in, getting the A.C. and heater hoses in.....didn't get them final crimped as of yet as I'm waiting on a fitting to complete the system....Got the trans cooler lines in , finished up the loose ends on the A.C. compressor mount...Got the Power steering hoses in.....Lot's of stuff getting crossed off the to do list...
Getting closer...............
Ken
Getting closer...............
Ken
03-31-2010 | 07:03 PM
#287
Thread Starter
TECH Fanatic
Joined: Jul 2008
Posts: 1,566
Likes: 169
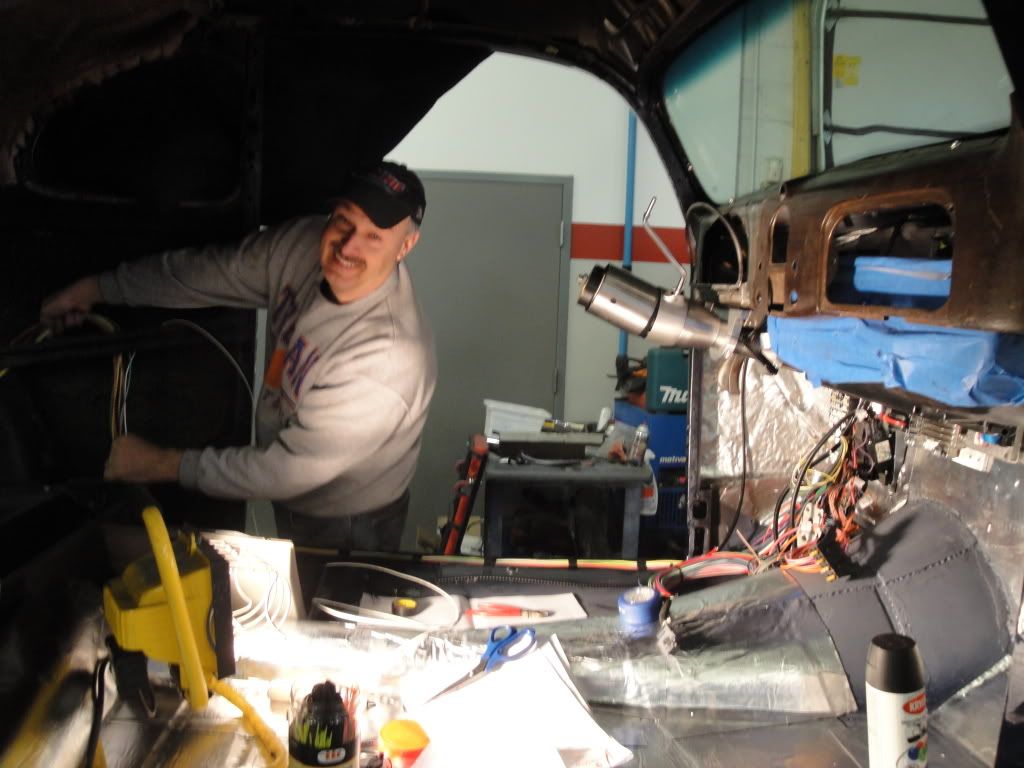
My friend Dave has taken the Bull by the Horns and tackled the wiring and is doing a great job.....I also want to thank John at Speartech for answering our questions promptly and thoroughly.....Great customer service and I highly recommend Speartech for any harness conversions.........Anyhow.....Dave took the wiring mess and has made great progress in a short period of time......When we turn on the key, things are starting to happen........Getting closer.........
Ken
Ken
 04-05-2010 | 04:38 PM
#290
Thread Starter
TECH Fanatic
Joined: Jul 2008
Posts: 1,566
Likes: 169
O.K............Getting back to the build....Spent the morning getting all the bugs out of the cable shift assy ... I had to add some length to the shift arm to get the Ratio of movement to match the column shift.....another thing crossed off the list........

Dave spent the morning hooking up some more wires and adding grounds.....we took the GTO gauge module and plugged it in and as it was going thru it's start-up dianognistics it gave a couple of errors.....one that there was a traction control issue and another that there was a problem with the fuel gauge......Dave sat down and double checked the schematics, but decided to give John at Speartech another call..........
While all that was going on I decided to start mocking up the Mass airflow sensor and cold air box..........
Went and got all the stuff to install the Battery and cables today for installation tomorrow....(been using a booster battery pack till now)maybe some of the computer issues are from low voltage from the pack.....??????? Hit the start key and the starter wanted to engage, but again a lack of voltage was an issue.....It's close to starting??
Ken :flag:
04-08-2010 | 07:13 AM
#292
Thread Starter
TECH Fanatic
Joined: Jul 2008
Posts: 1,566
Likes: 169
Having some issues getting the GTO gauge module to communicate with the system......found out I need a Powertrain Interface Module and possibly a BCM.....ordered both and waiting for them to show up.........This is where things get interesting and we are getting an education.................More Pic's to be posted later................
Ken
Ken
04-08-2010 | 12:16 PM
#293

TECH Senior Member
Joined: Jul 2009
Posts: 7,927
Likes: 607
I believe once you get the GTO cluster to work properly, you will turn alot of people onto it. The GTO cluster is one of the best GM clusters out and typically under $100.00 at salvage yards.
Kee u/p the good work.
---Jim---
Kee u/p the good work.
---Jim---
04-08-2010 | 05:11 PM
#294
Thread Starter
TECH Fanatic
Joined: Jul 2008
Posts: 1,566
Likes: 169
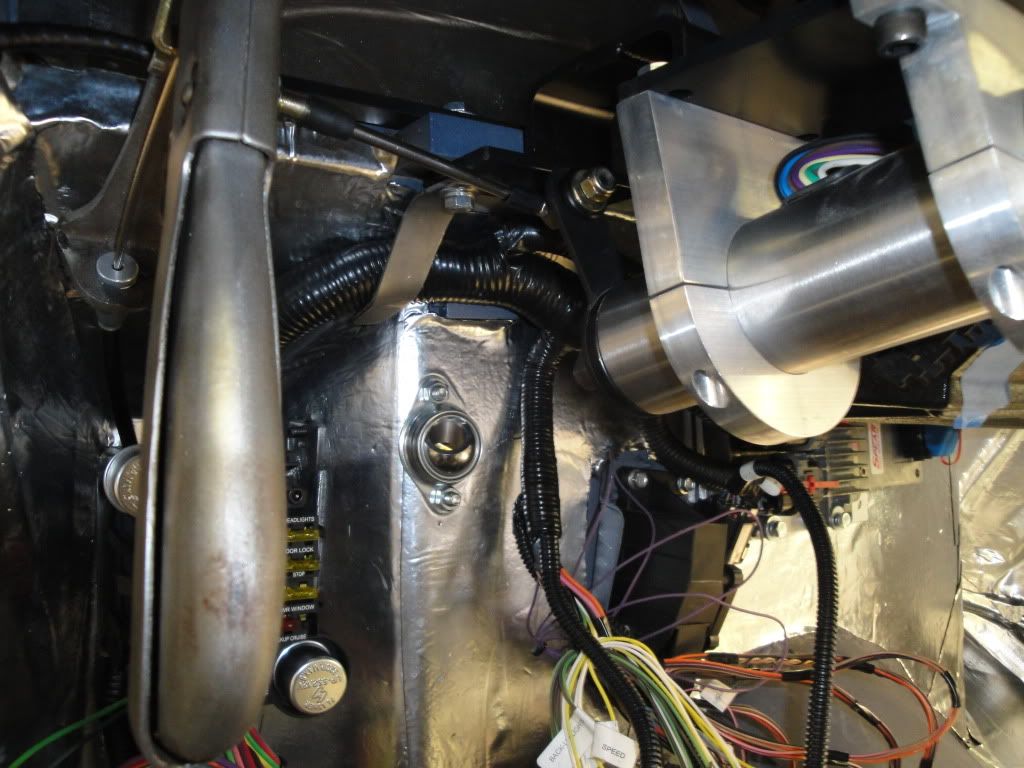
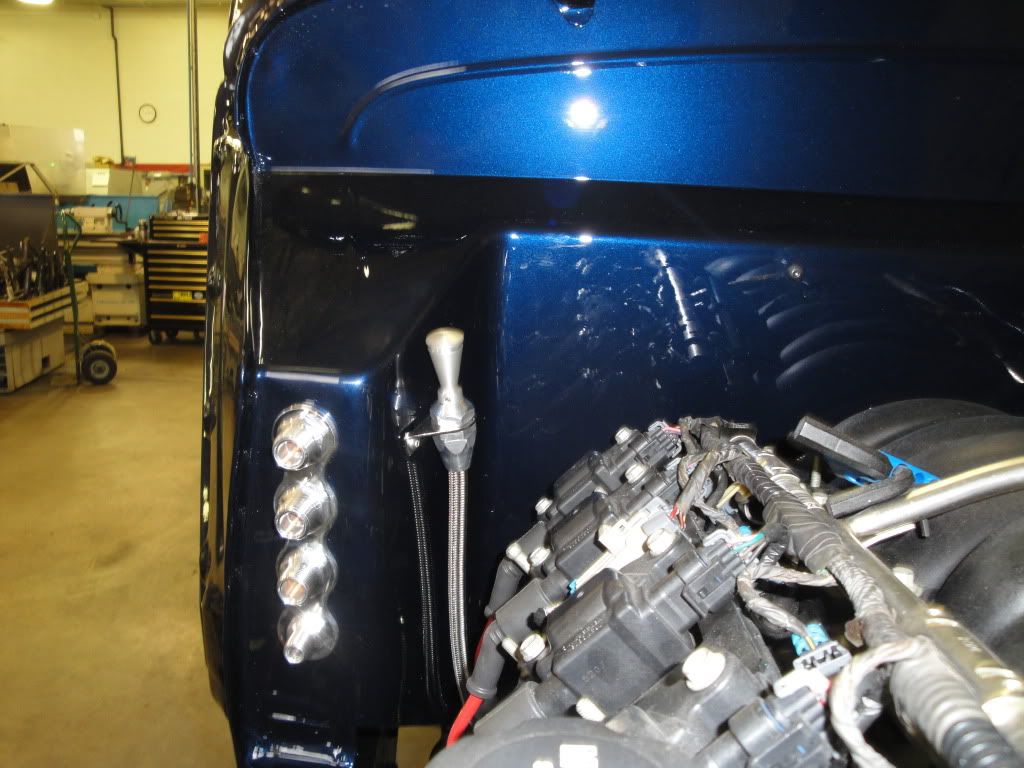
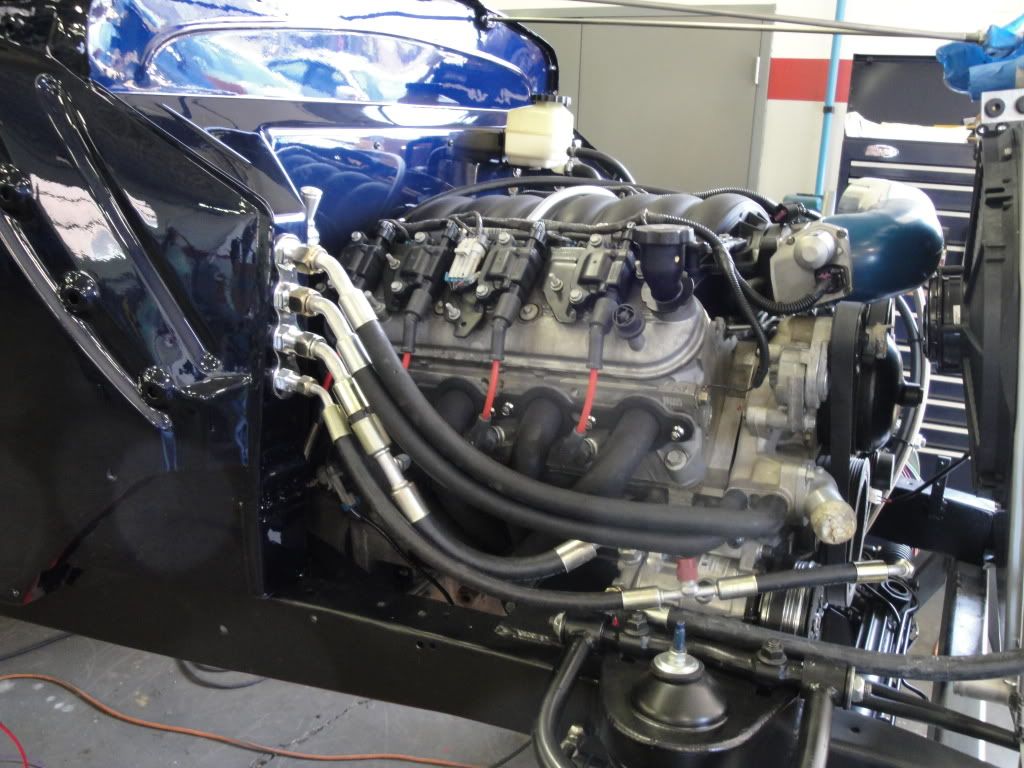
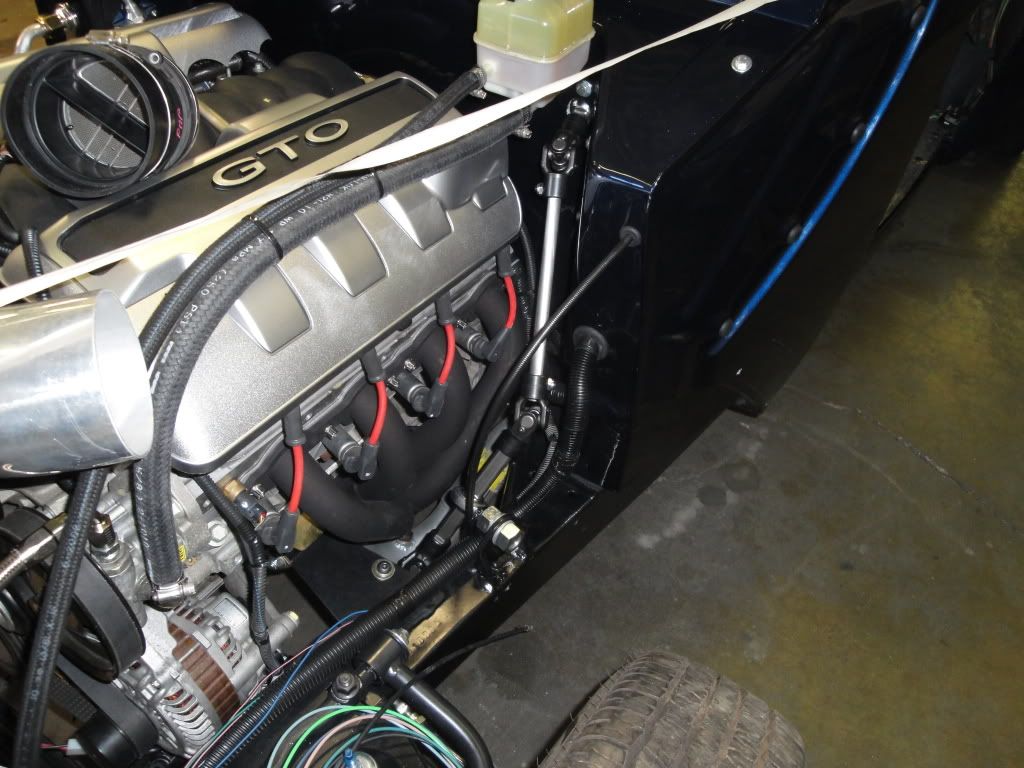
First off.............The "Tangle" of wires is disappearing.........
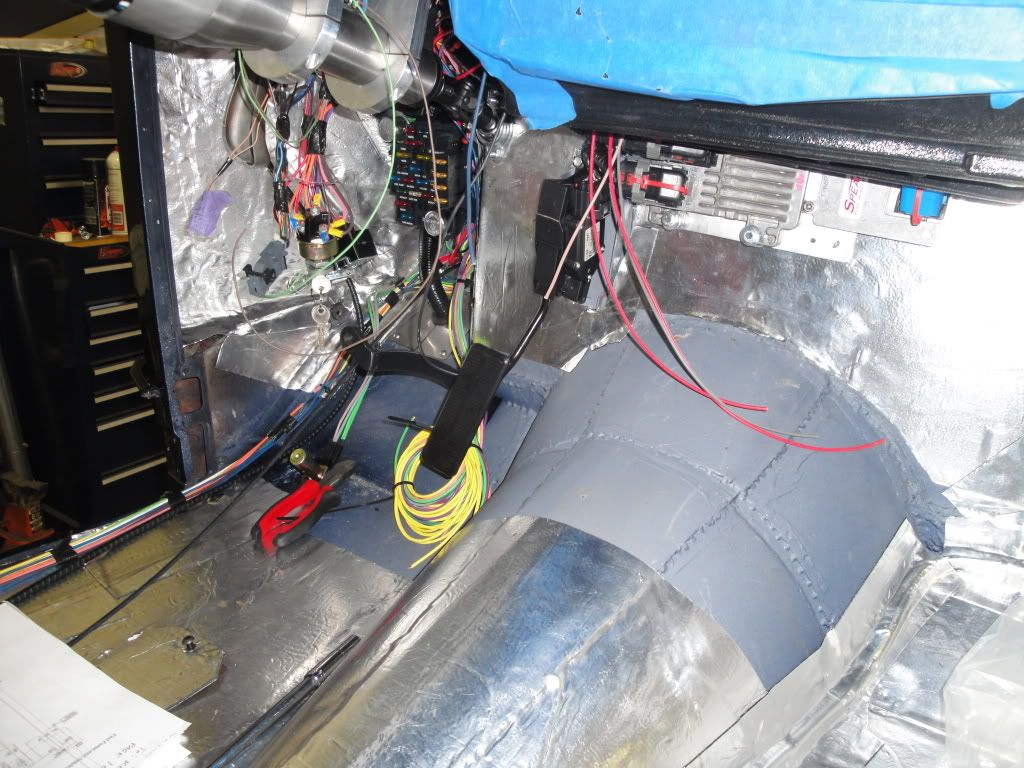
And I have all the outside A.C. and heater lines crimped and assembled.......the break in the two smaller lines in the pic is where the Filter/Drier goes.........
Also got the gas tank vent put in.......I positioned it high in the wheel well opening where it will be covered by the fender and high enough to do the job.....It has a small slotted screened area that is facing away from where the tire would throw stuff that is where the vent opening is

As I was digging around looking for some parts today I came across the coil covers and just for the heck of it I put them on....I didn't think they would fit, and they dropped right on.........
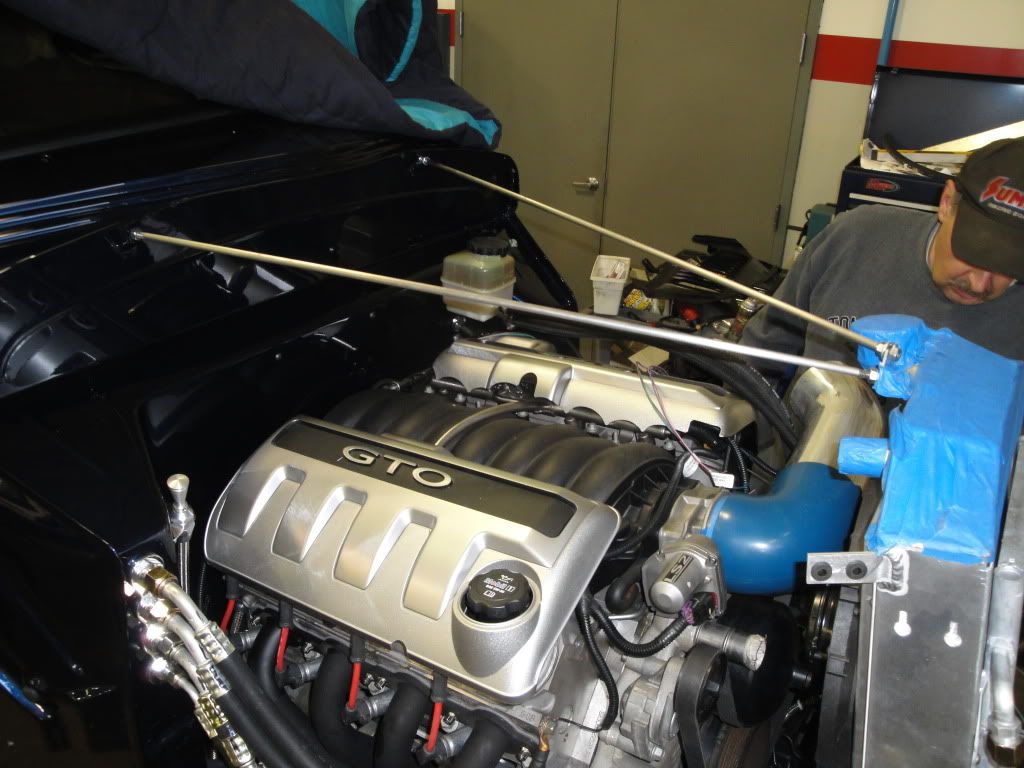
Now............At this point Dave said "Let's see if it will start"..........Hit the key and it started Imediately.....Wow!!.......I didn't have much faith in the engines starting with the complexity of the wiring and everything else.....Just go's to show that Dave and the GM Engineers know what they are doing......
Ken (with a smile on my face)
And I have all the outside A.C. and heater lines crimped and assembled.......the break in the two smaller lines in the pic is where the Filter/Drier goes.........
Also got the gas tank vent put in.......I positioned it high in the wheel well opening where it will be covered by the fender and high enough to do the job.....It has a small slotted screened area that is facing away from where the tire would throw stuff that is where the vent opening is
As I was digging around looking for some parts today I came across the coil covers and just for the heck of it I put them on....I didn't think they would fit, and they dropped right on.........
Now............At this point Dave said "Let's see if it will start"..........Hit the key and it started Imediately.....Wow!!.......I didn't have much faith in the engines starting with the complexity of the wiring and everything else.....Just go's to show that Dave and the GM Engineers know what they are doing......
Ken (with a smile on my face)
04-08-2010 | 05:28 PM
#295
Now............At this point Dave said "Let's see if it will start"..........Hit the key and it started Imediately.....Wow!!.......I didn't have much faith in the engines starting with the complexity of the wiring and everything else.....Just go's to show that Dave and the GM Engineers know what they are doing......
Ken (with a smile on my face)
Ken (with a smile on my face)
 Unlike the finicky carburetors of old... or even the "better than a carb in some situations" TBI and later TPI.
04-08-2010 | 05:50 PM
Unlike the finicky carburetors of old... or even the "better than a carb in some situations" TBI and later TPI.
04-08-2010 | 05:50 PM
#296
I am going to hate to see this build end, I look forward to checking the progress every day.....can you tear it all apart and start over.....
Seriously, excellent build, can't wait to see the wheels and tires......keep up the good work......
T,
Seriously, excellent build, can't wait to see the wheels and tires......keep up the good work......
T,
04-08-2010 | 06:05 PM
#297
Thread Starter
TECH Fanatic
Joined: Jul 2008
Posts: 1,566
Likes: 169
In addition to getting the dash module to communicate with the ECM.......I also thought that when the harness was reworked that the trans gear selector switch/ neutral safety switch would be working so I would get the gear selection in the dash module......but it seems that's not happening........gonna have to try and make that happen.........
Ken
Ken
 04-09-2010 | 04:20 PM
#299

Registered User
Joined: Mar 2010
Posts: 7
Likes: 0
Going back to "Traction Control" for just a second.
I subscribe to ESPN'S MIKE DUNNS' position:
Be ready to grab a hand full of Brake to control that wheel speed.
Awesome job Ken. You are the master
I subscribe to ESPN'S MIKE DUNNS' position:
Be ready to grab a hand full of Brake to control that wheel speed.
Awesome job Ken. You are the master
04-09-2010 | 09:32 PM
#300
Thread Starter
TECH Fanatic
Joined: Jul 2008
Posts: 1,566
Likes: 169
Spent the day today getting the car down on the ground and and setting the Pinion angle.....Wheels and tires are still not in..........
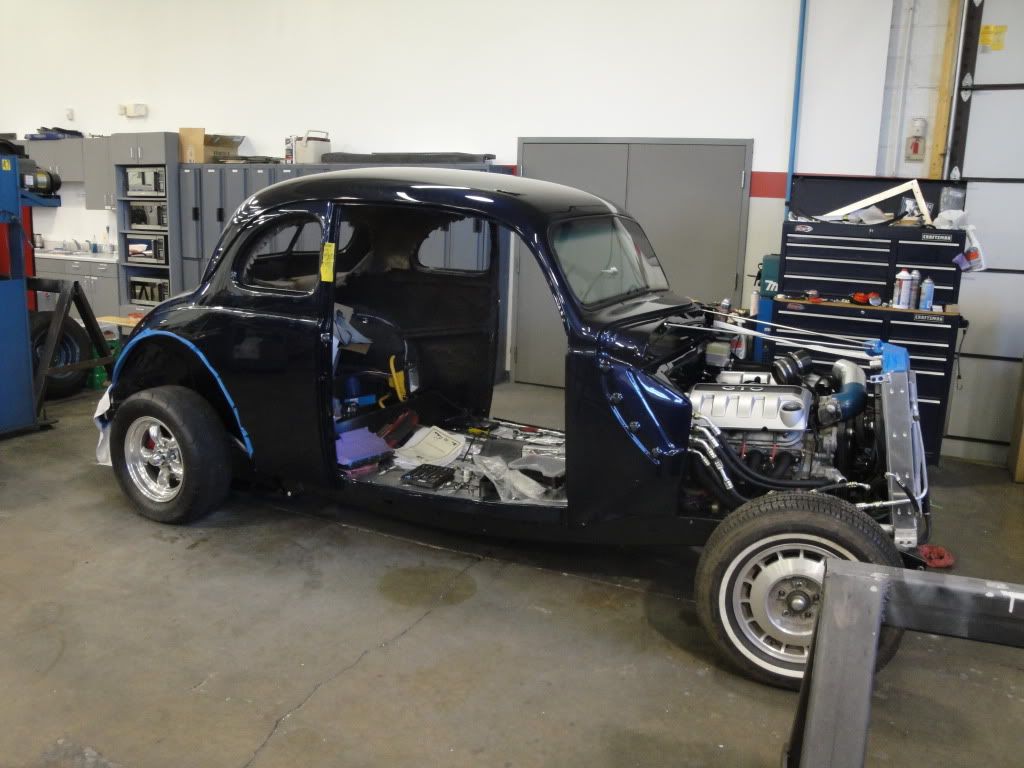
Got the steering linkage in and finished
Picked up all the new side and rear window glass also....Next week we will get all the inside hoses hooked up, get the heat and defrosters hooked up.....Radiator Hoses and get the Door internals installed and put the doors on.....Off to the upholstry shop in a week
Ken