

Foxbody EFI 6.0L LQ4 & T56 swap


Sloooooow going, fella's...

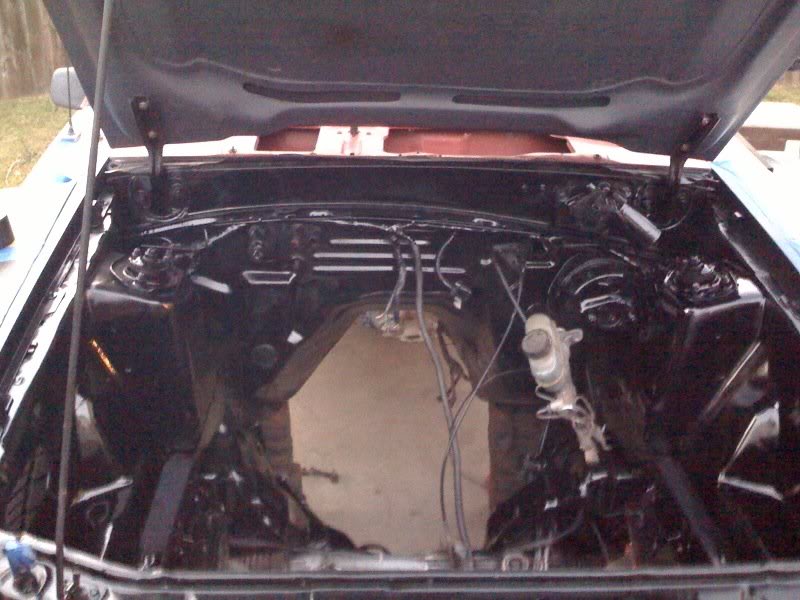
-I'm in the midst of the engine bay and paint and body at this moment and hate to bore you guys with pics that look the same over and over and over, lol.
I'm still gathering parts, and am really beginning to run out of room, lol. I gotta say I LIKE that part.

Right now, the welding and grinding on the engine bay is getting close to being overwith, and then the hammer and dolly work can commence which will be followed by a THIN skimcoat and then the paint. From there I'll start getting some pics back up here after it looks like I'm actually making progress, otherwise I'll have 3 pages of engine bay progress pics and everybody will be afraid to click on this thread, lol.
Once my Axles show up, I'll get some pics of the parts pile I've accumulated thus far, and then the goodies will assume positions under the car and we'll be looking like something again finally.
The motor is @ the machine shop, but I cant really "pull the trigger" until I handle a few things on my daily driver and what not. ALSO, I am saving cash up like a mad man more or less mainly because Cylinder Heads are EXPENSIVE for this motor.
 The wait will be worth it however, TRUST ME.
Thanks for checking in guys, I am still on it!
-Greg
Last edited by Littlemotor; Jan 2, 2010 at 12:46 AM.
-Little parts accumulation update with a few pics.....
Copied and pasted from another forum I have the build on;
Alright...... I figured out what the problem was with my photobucket, or ATLEAST how to GET AROUND IT..... For some reason it stopped jiving with my Firefox browser, so I am having to upload the photo's through Explorer.
ANYHOW, I have tooooo much **** to take large pics and cover it all, so I am taking them "a group at a time", so bear with me...
I'll probly be doing this for the next couple hours as I ATTEMPT to be more successful with my camera skills.
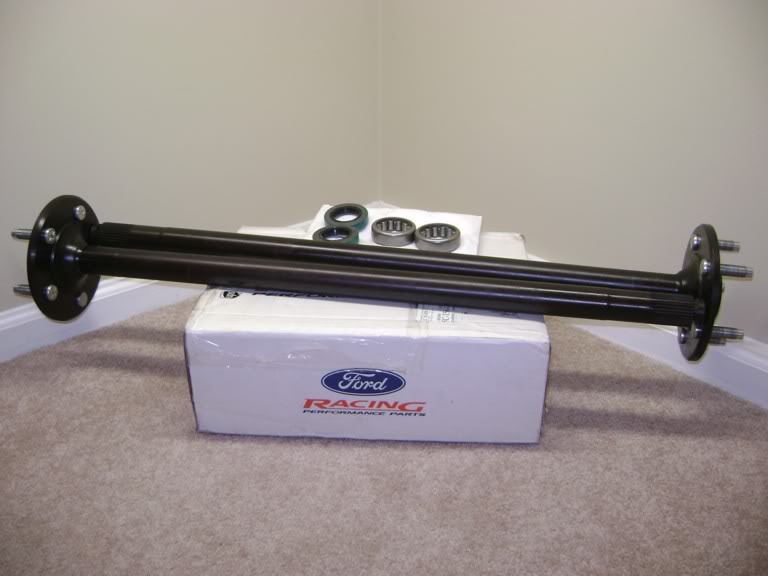
Here's the rear axle upgrades, and keep in mind this first pic is a trial run to make sure this **** is gonna post up and look OK.
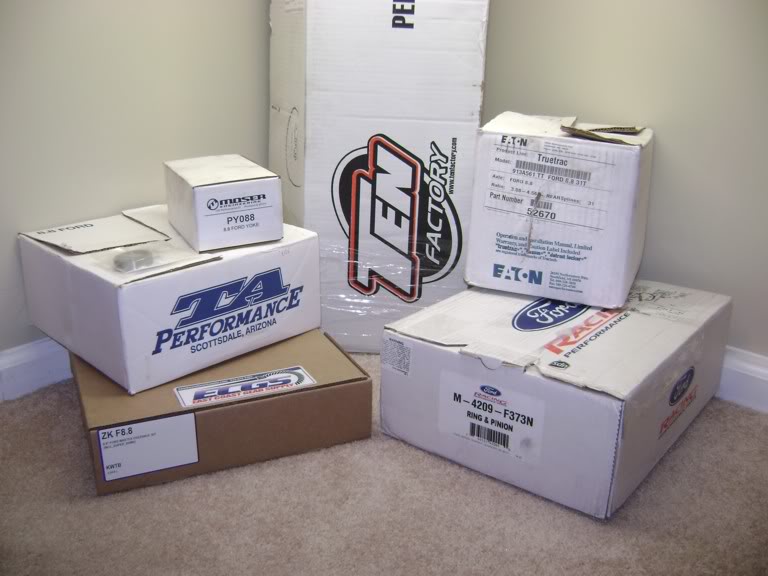
They SEEM to be turning out "OK" considering the **** poor conditions I am working with, but maybe I'm just an **** mother****er. :think:
Here we go, contents revealed:
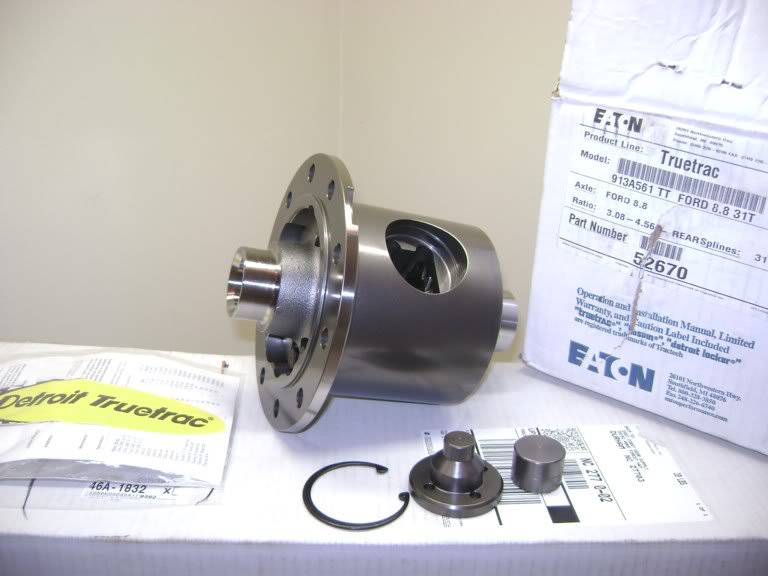
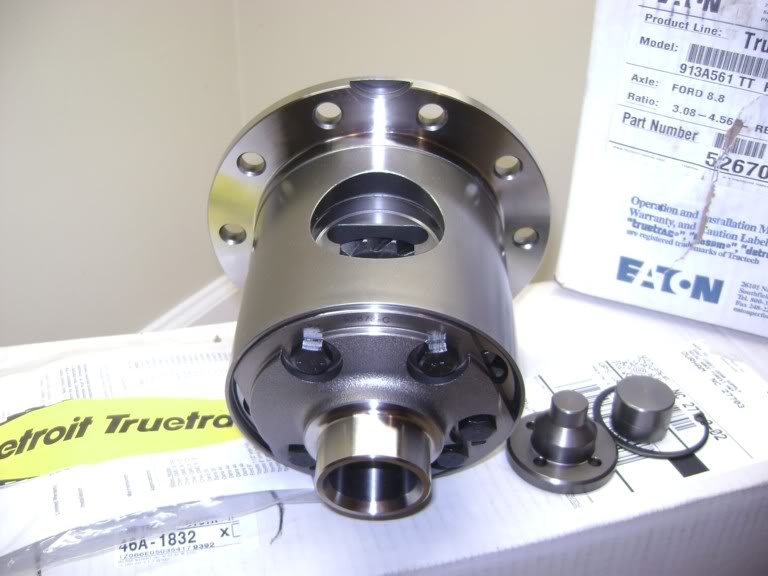
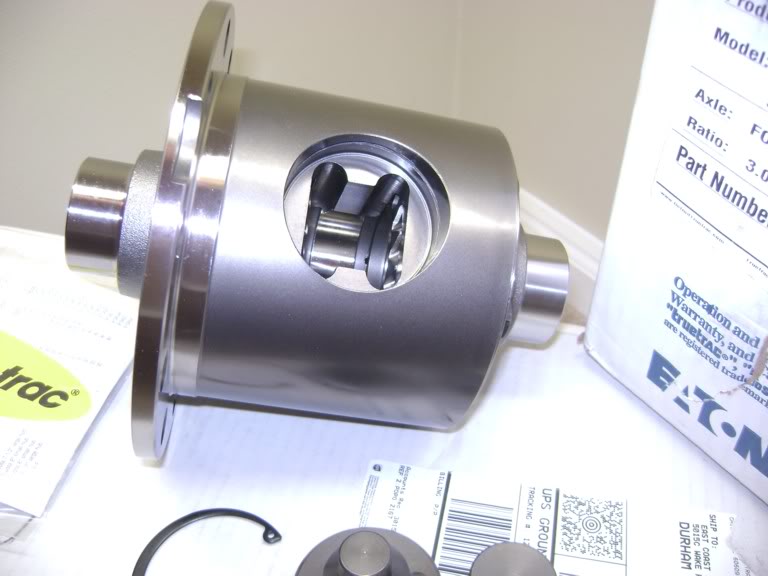
-Eaton/Detroit True-Trac Torsen style 8.8" 31-spline differential-
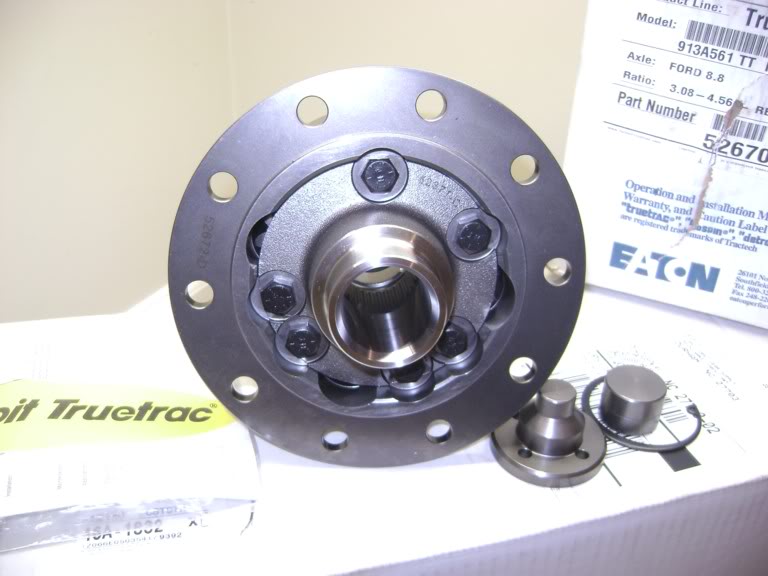

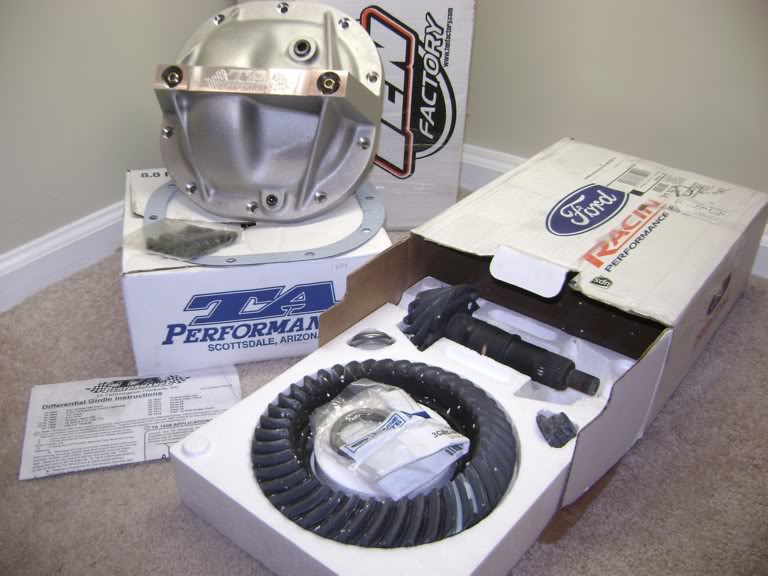
-FRPP 3.73 ring and pinion-, -TA Performance Girdled Diff Cover/Support (Low Profile to clear my Maximum Motorsports Panhard Bar Set-up)- (all for 8.8" ford)-
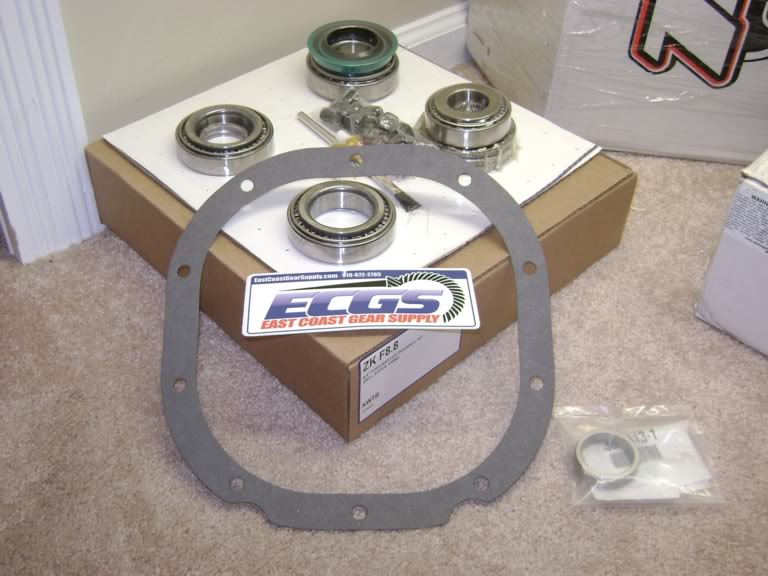
-Yukon Gear Deluxe Ring and Pinion/Carrier Install kit w/Koyo Bearings (Timken has begun outsourcing, and KOYO is top notch stuff IMHO) from East Coast Gear Supply in East Durham, -Richmond Gear SOLID Pinion bearing spacer and shim kit-
More in a few....
Copied and pasted from another forum I have the build on;
Alright...... I figured out what the problem was with my photobucket, or ATLEAST how to GET AROUND IT..... For some reason it stopped jiving with my Firefox browser, so I am having to upload the photo's through Explorer.
ANYHOW, I have tooooo much **** to take large pics and cover it all, so I am taking them "a group at a time", so bear with me...
I'll probly be doing this for the next couple hours as I ATTEMPT to be more successful with my camera skills.
Here's the rear axle upgrades, and keep in mind this first pic is a trial run to make sure this **** is gonna post up and look OK.
They SEEM to be turning out "OK" considering the **** poor conditions I am working with, but maybe I'm just an **** mother****er. :think:
Here we go, contents revealed:
-Eaton/Detroit True-Trac Torsen style 8.8" 31-spline differential-
-FRPP 3.73 ring and pinion-, -TA Performance Girdled Diff Cover/Support (Low Profile to clear my Maximum Motorsports Panhard Bar Set-up)- (all for 8.8" ford)-
-Yukon Gear Deluxe Ring and Pinion/Carrier Install kit w/Koyo Bearings (Timken has begun outsourcing, and KOYO is top notch stuff IMHO) from East Coast Gear Supply in East Durham, -Richmond Gear SOLID Pinion bearing spacer and shim kit-
More in a few....
Continued:
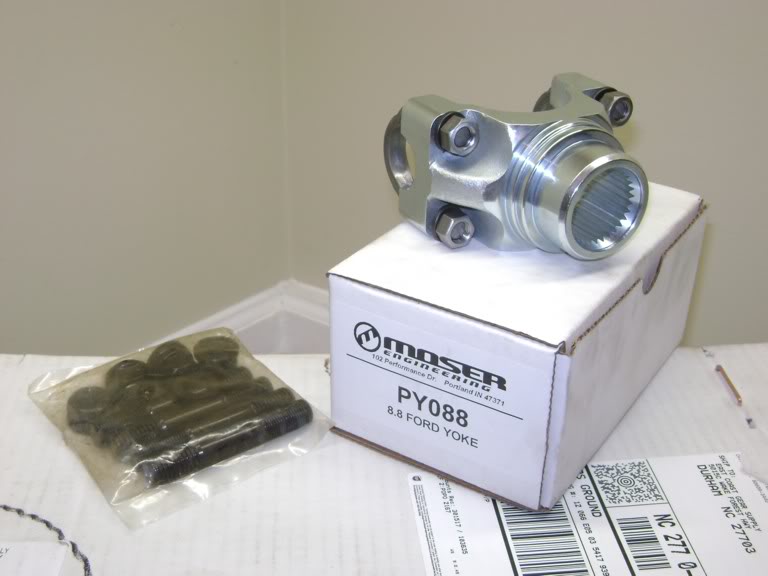
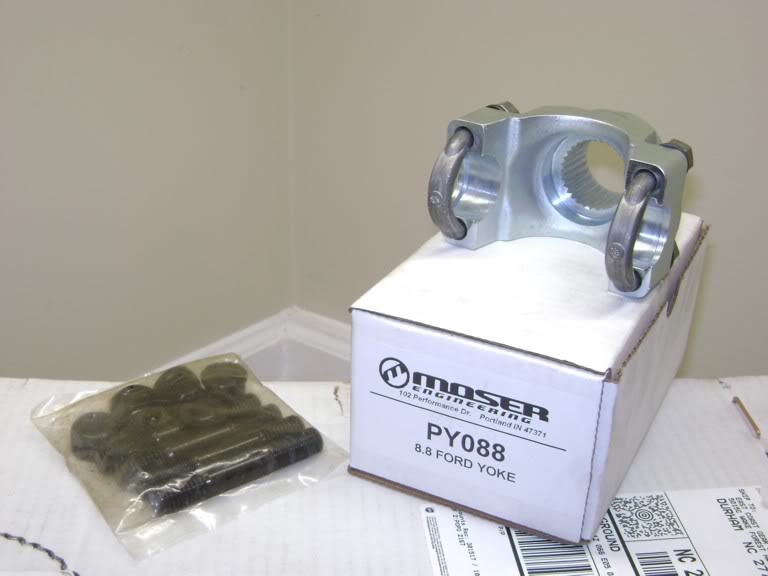
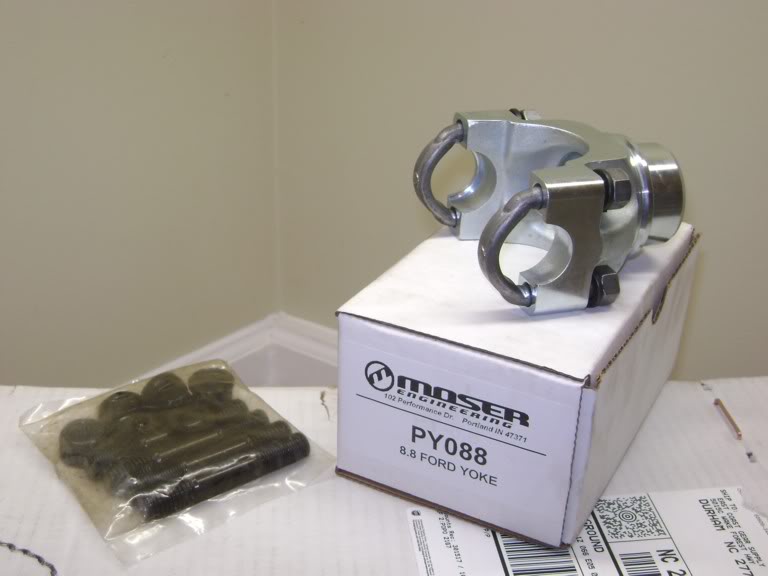
-Moser 30-Spline Billet Steel Pinion Yoke to accomodate stouter 1350 U-Joints for 8.8" ford-, ARP Diff. Carrier Main cap stud-kit for 8.8"-
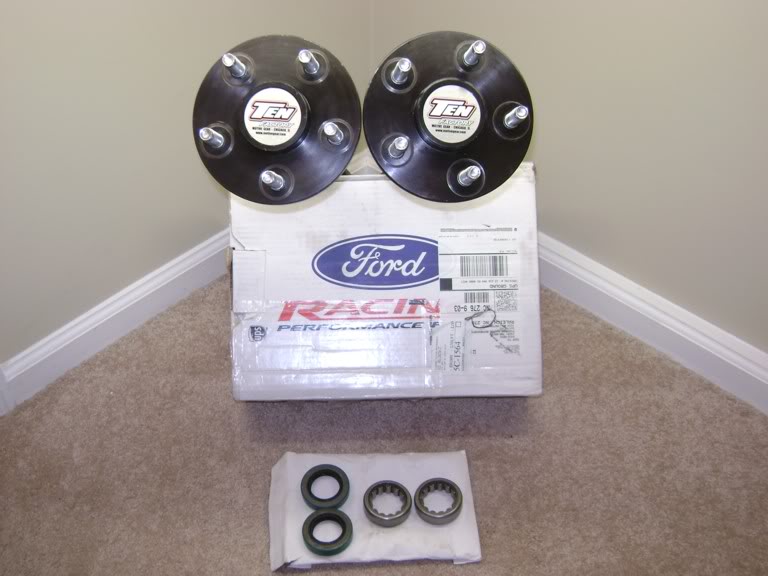
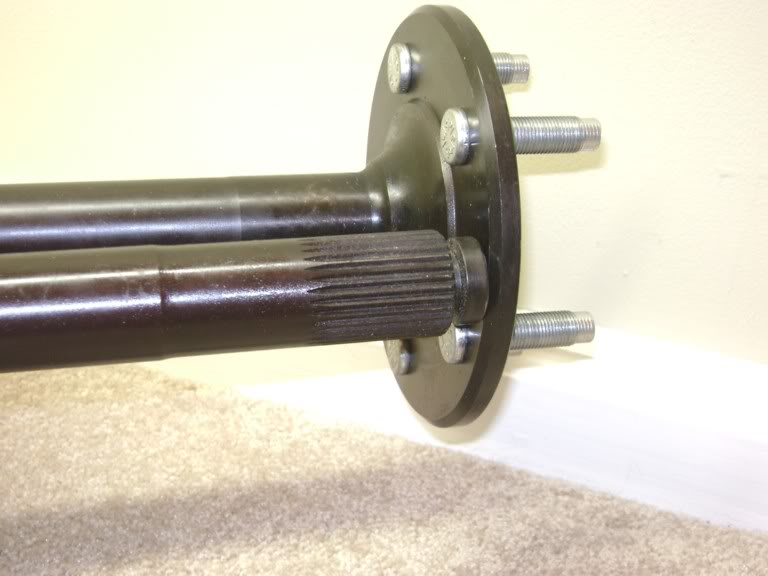
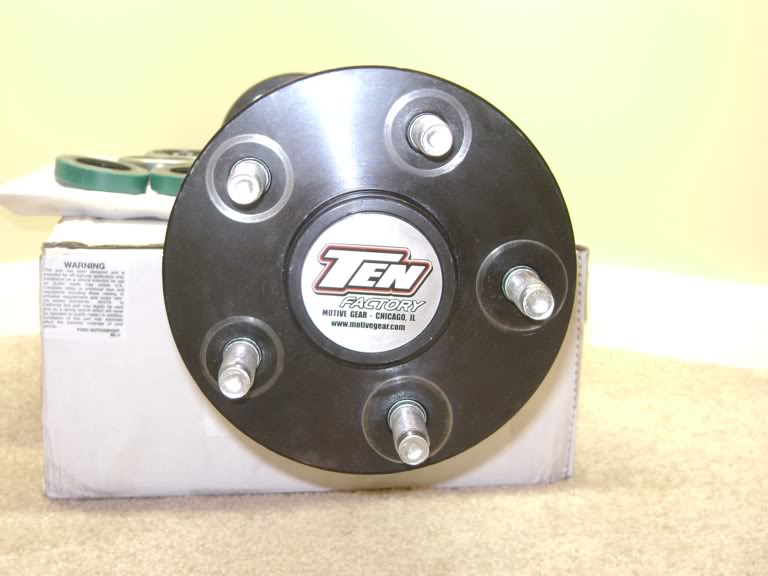
-TEN FACTORY 1541H 31-count COLD FORMED "rolled spline" C-Clip Coated 5-Lug Foxbody width Axles/studs/outer bearings/and housing seals for 8.8" (with 10 YEAR "no questions asked" WARRANTY)-

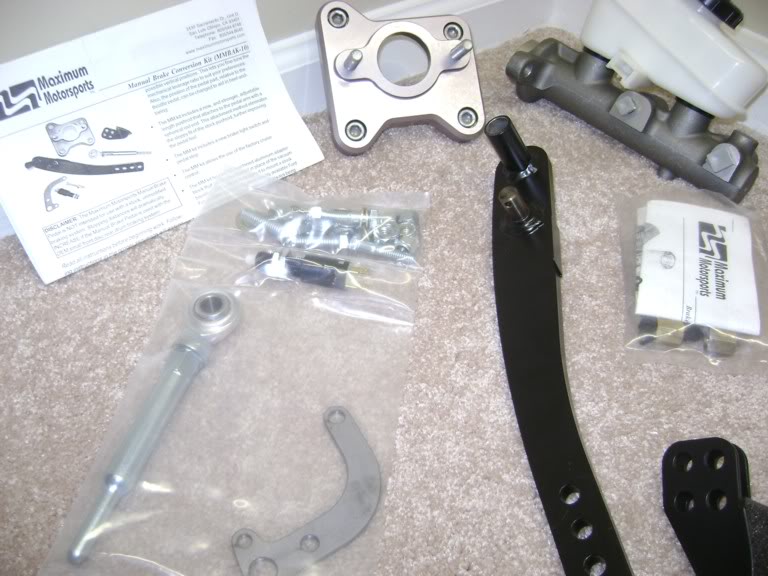
Alright, more pics, and I have more coming after these as well; -starting to get to the GOOD STUFF.....
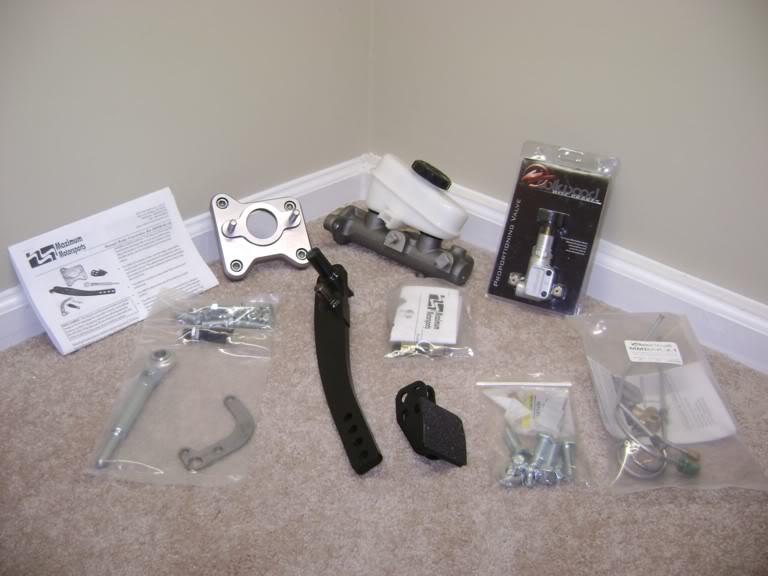
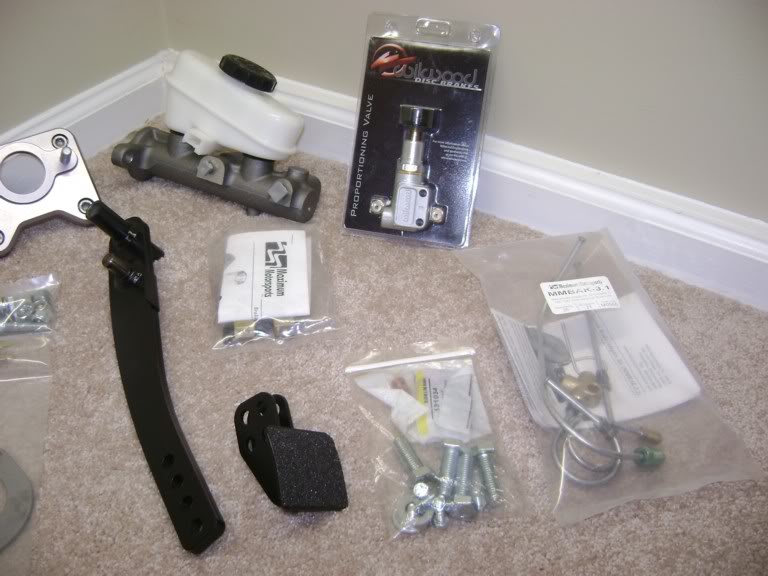
-Maximum Motorsports Manual brake conversion kit w/pedal assy-
-Maximum Motorsports Manual brake lines kit-
-Maximum Motorsports Factory Proportioning valve delete-
-Wilwood Brakes Adjustable **** style proportioning valve-
-Ford NEW 1994 GT, 1-1/16" bore master cylinder w/reservoir-
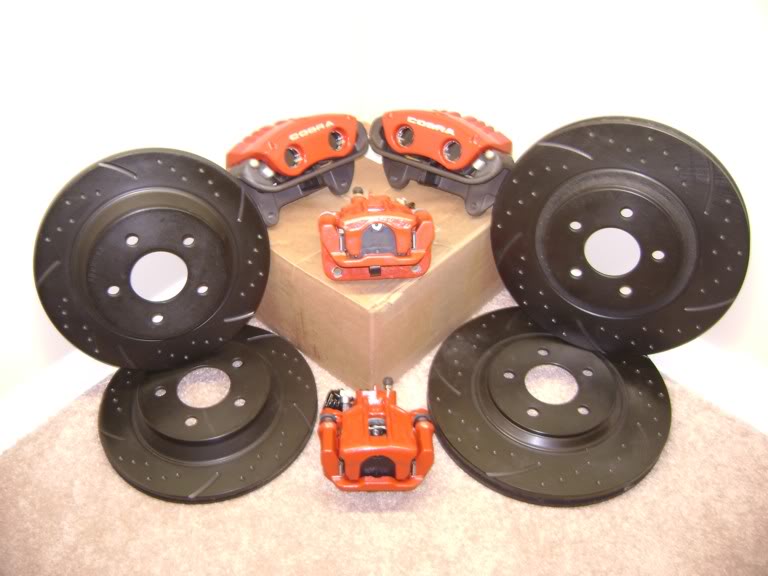
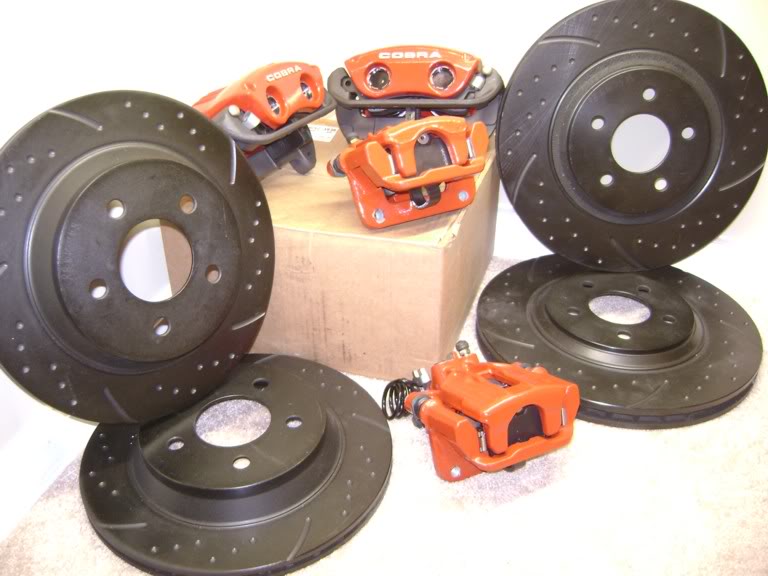
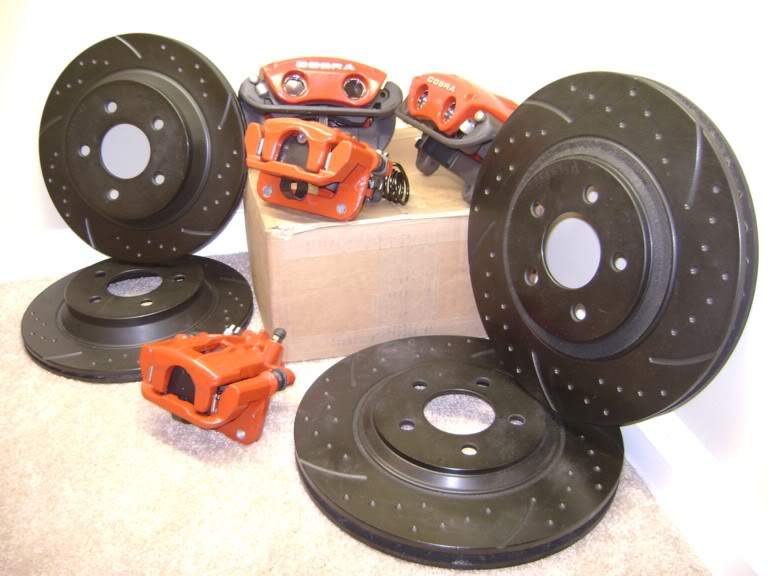
-Ford Racing Performance Parts 10th Anniversary 2003 SVT Cobra front and rear Loaded Calipers-
-13" and 11.65" 2003 SVT Cobra vented black zinc coated Dimple drilled and slotted brake rotors-

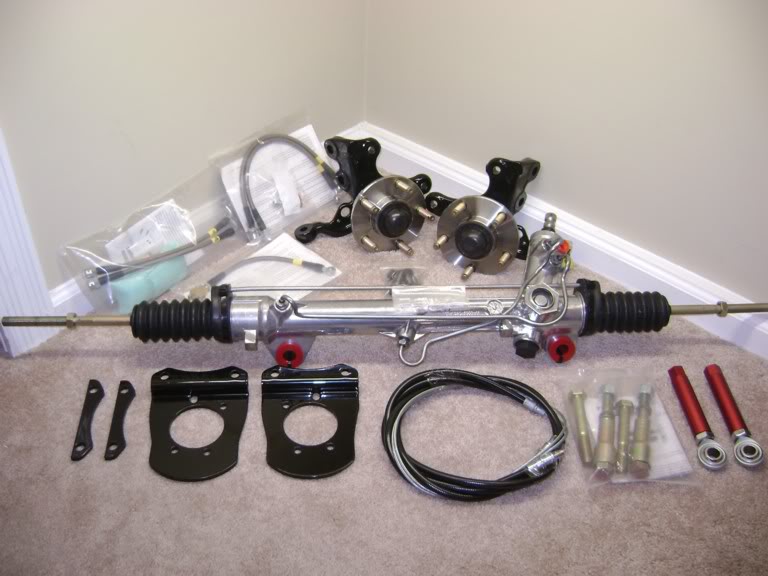
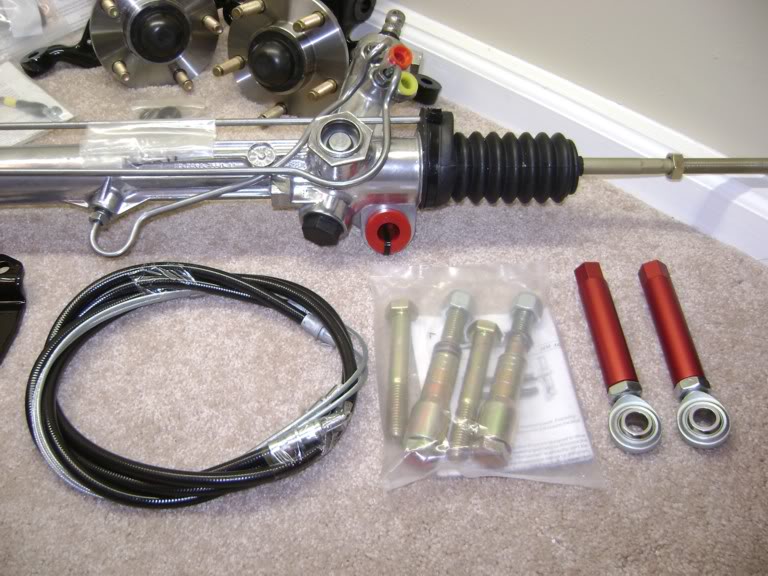
-AGR Trans-Am Quick Ratio power assist rack and pinion (Nothing wrong with my current one, I'm just ****. )-
)-
-Maximum Motorsports Bumpsteer correction kit/Tie-rods, spacers, 5/8" bolts, etc-
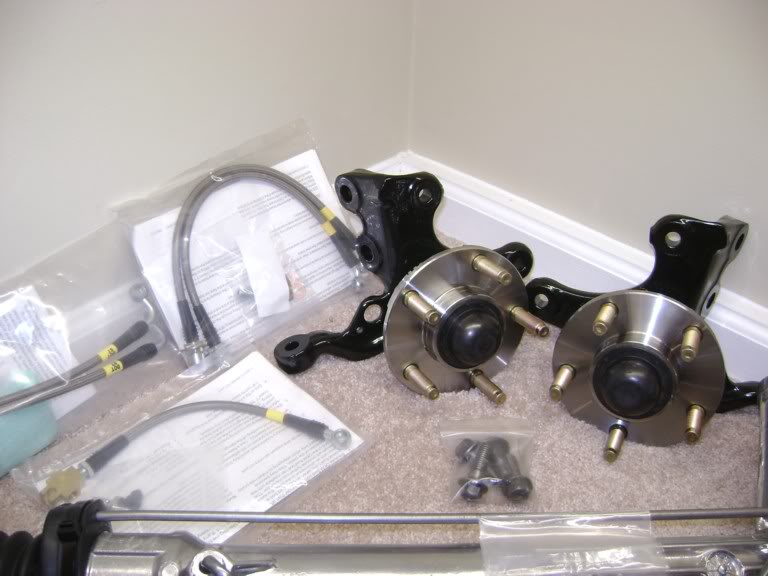
-Maximum Motorsports Front Stainless braided Teflon lined brake hoses and hardware for fox chassis to 2003 SVT Cobra calipers-
-Maximum Motorsports Rear Stainless braided Teflon lined brake hoses and hardware for fox chassis to 2003 SVT Cobra calipers-
-Maximum Motorsports center Stainless braided Teflon lined brake hose, distribution block and hardware for fox chassis-
-Ford Cobra Parking brake cables-
-NorthRaceCars 2003 SVT Cobra rear caliper brackets (Modified and Black Powdercoated)-
-1995 Mustang GT front spindles (Modified, smoothed, and Black Powdercoated), new Moog front sealed bearing hubs, and gold iridite wheel studs-
-Misc hardware

More to come, still uploading and resizing pics....
Thanks for following along, and all that. I appreciate the feedback, bad or good.
-Moser 30-Spline Billet Steel Pinion Yoke to accomodate stouter 1350 U-Joints for 8.8" ford-, ARP Diff. Carrier Main cap stud-kit for 8.8"-
-TEN FACTORY 1541H 31-count COLD FORMED "rolled spline" C-Clip Coated 5-Lug Foxbody width Axles/studs/outer bearings/and housing seals for 8.8" (with 10 YEAR "no questions asked" WARRANTY)-
Alright, more pics, and I have more coming after these as well; -starting to get to the GOOD STUFF.....
-Maximum Motorsports Manual brake conversion kit w/pedal assy-
-Maximum Motorsports Manual brake lines kit-
-Maximum Motorsports Factory Proportioning valve delete-
-Wilwood Brakes Adjustable **** style proportioning valve-
-Ford NEW 1994 GT, 1-1/16" bore master cylinder w/reservoir-
-Ford Racing Performance Parts 10th Anniversary 2003 SVT Cobra front and rear Loaded Calipers-
-13" and 11.65" 2003 SVT Cobra vented black zinc coated Dimple drilled and slotted brake rotors-
-AGR Trans-Am Quick Ratio power assist rack and pinion (Nothing wrong with my current one, I'm just ****.
-Maximum Motorsports Bumpsteer correction kit/Tie-rods, spacers, 5/8" bolts, etc-
-Maximum Motorsports Front Stainless braided Teflon lined brake hoses and hardware for fox chassis to 2003 SVT Cobra calipers-
-Maximum Motorsports Rear Stainless braided Teflon lined brake hoses and hardware for fox chassis to 2003 SVT Cobra calipers-
-Maximum Motorsports center Stainless braided Teflon lined brake hose, distribution block and hardware for fox chassis-
-Ford Cobra Parking brake cables-
-NorthRaceCars 2003 SVT Cobra rear caliper brackets (Modified and Black Powdercoated)-
-1995 Mustang GT front spindles (Modified, smoothed, and Black Powdercoated), new Moog front sealed bearing hubs, and gold iridite wheel studs-
-Misc hardware
More to come, still uploading and resizing pics....
Thanks for following along, and all that. I appreciate the feedback, bad or good.
Last batch is done. WHEW!!!:od:
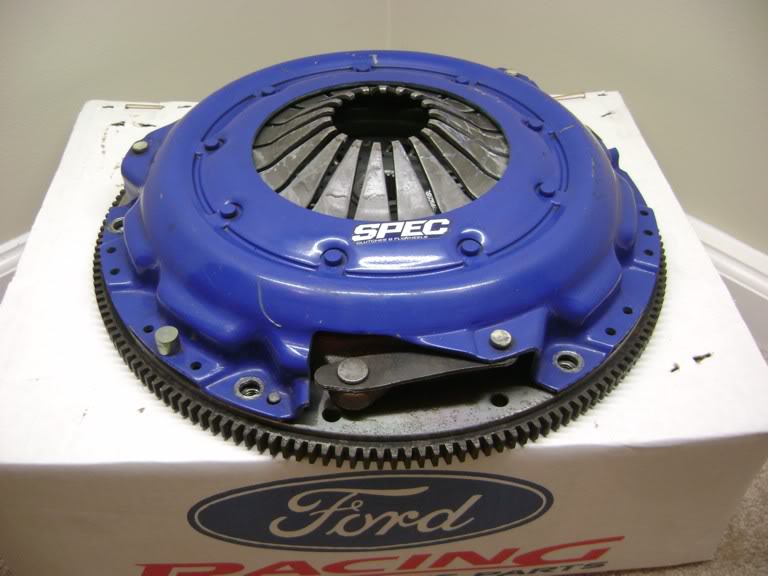
Here we go:
-SPEC Stage 3+ Clutch and pressure plate-
-Spec Steel Flywheel- (I got a BANGIN' DEAL on this and it's used, but seriously has like 50-100 miles on it.)
**Pay no attn. to the box it's sitting on, I just didnt want it sitting on the carpet. This clutch is for a 98-02 F-Body T-56 w/Hydraulic clutch**
Here's my Paint. As was said previous in the thread, the car will be matte black, and I got this from my buddy Jamie , and it's the EXACT PAINT that was used to spray the Polylok twin turbo coupe. I'll post (2) pics of that car for reference below the paint and hardener from Rubber Seal:
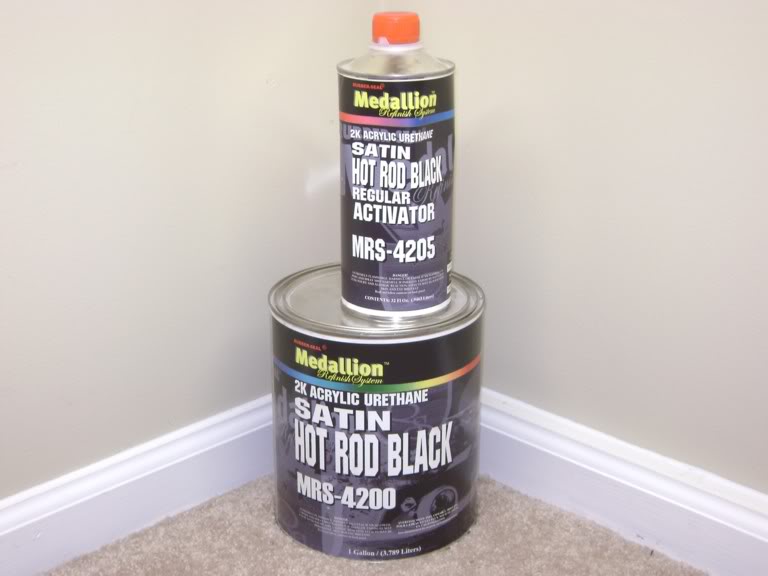
Here's the paint on the Polylok car:
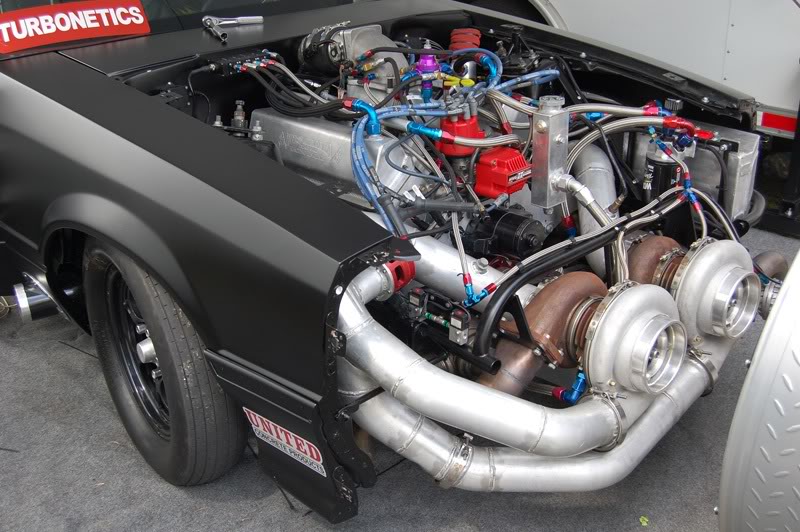
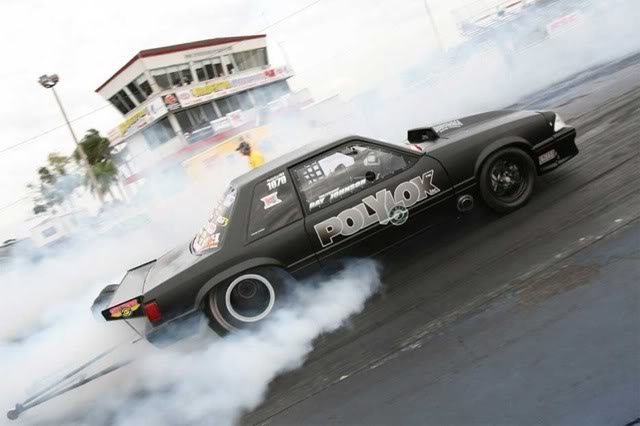
-Should look sick with my Black Powdercoated Saleens. :ohnoes: *And I KNOW; -Flat/Matte/Dull black is a "love it or hate it" thing, much like black wheels. I just happen to LOVE BOTH.
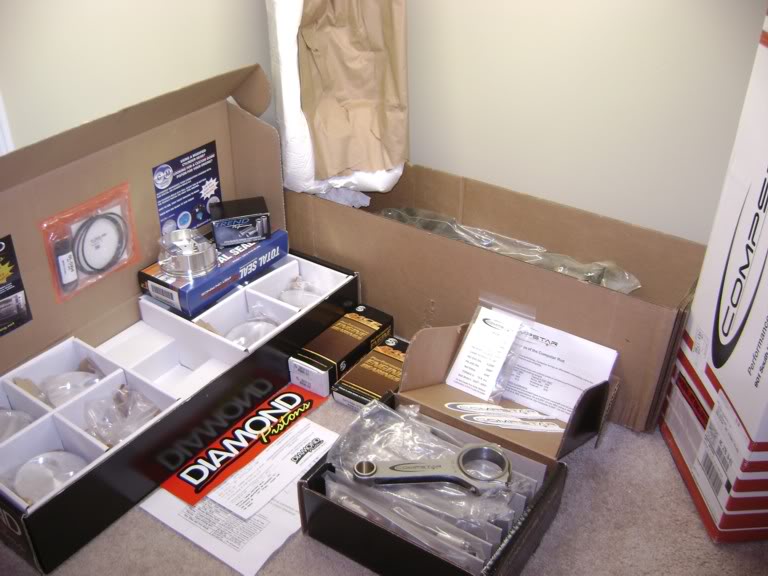
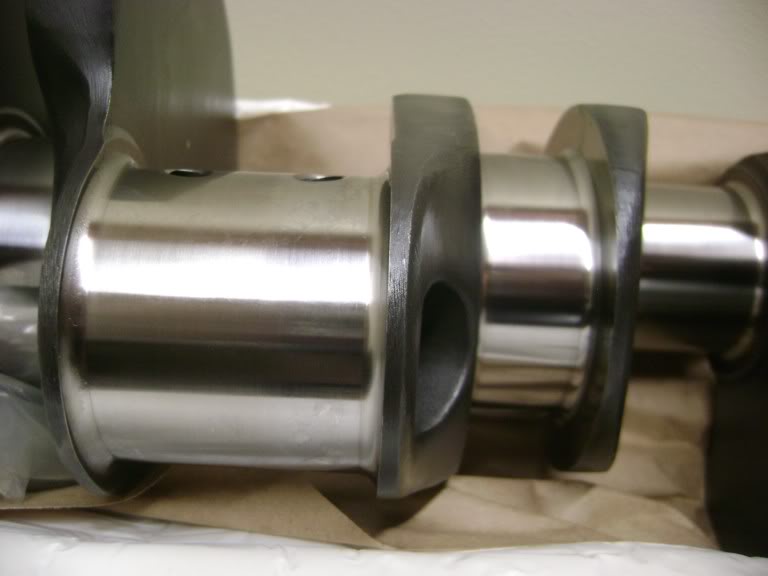
MONEY SHOT time!!!!
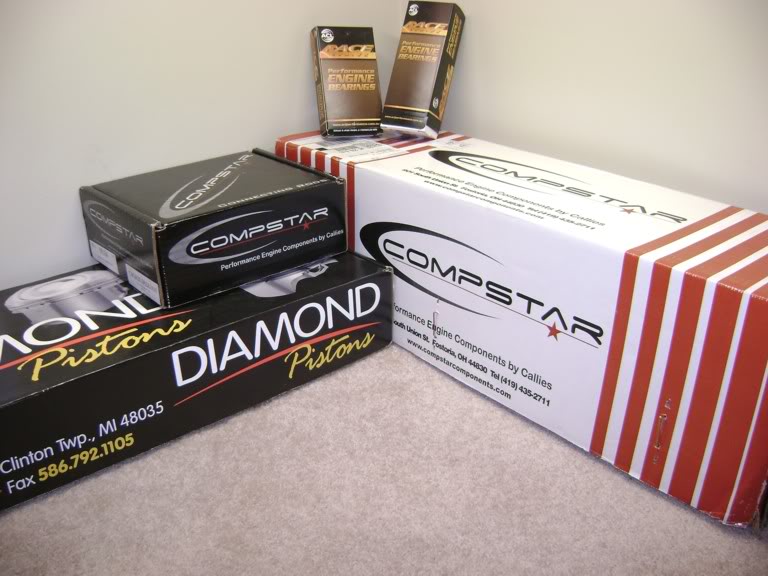
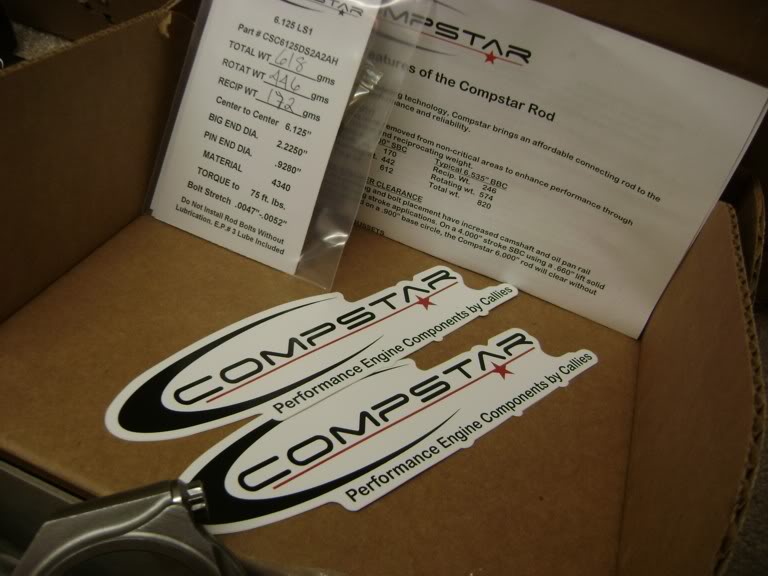
I'm not done by a long shot with the motor, but here is some of the stuff I have acquired thus far for it... As soon as I get the motor swapped out of my DD for a healthy one, I'll be pulling the trigger on the LSx for this project. It's at the Machine Shop right now, and hopefully Jeff and Jay havent forgotten what I look like already...
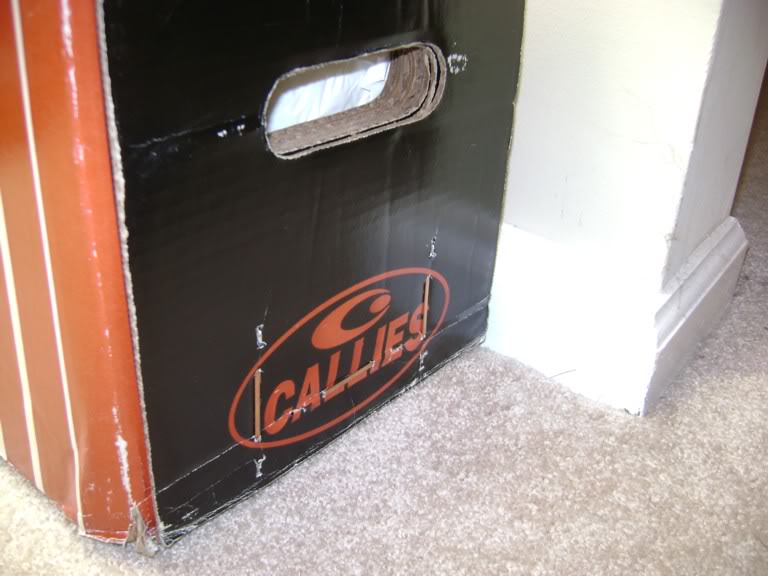
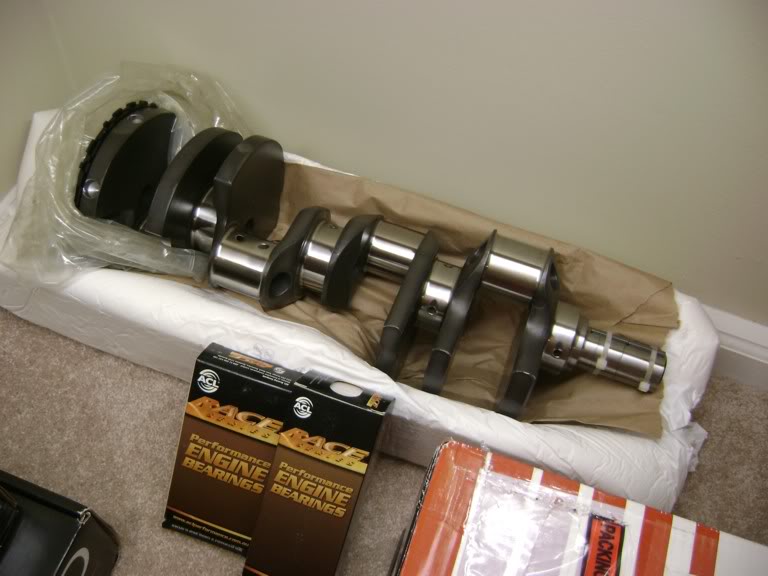
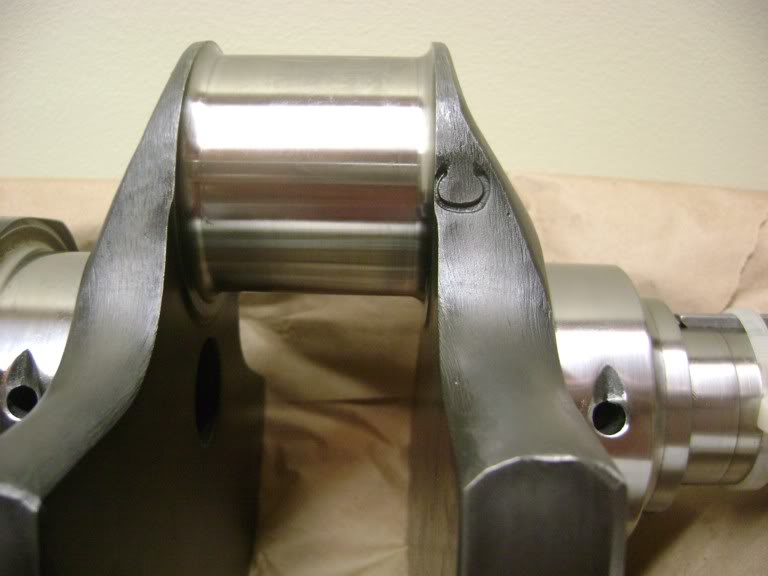
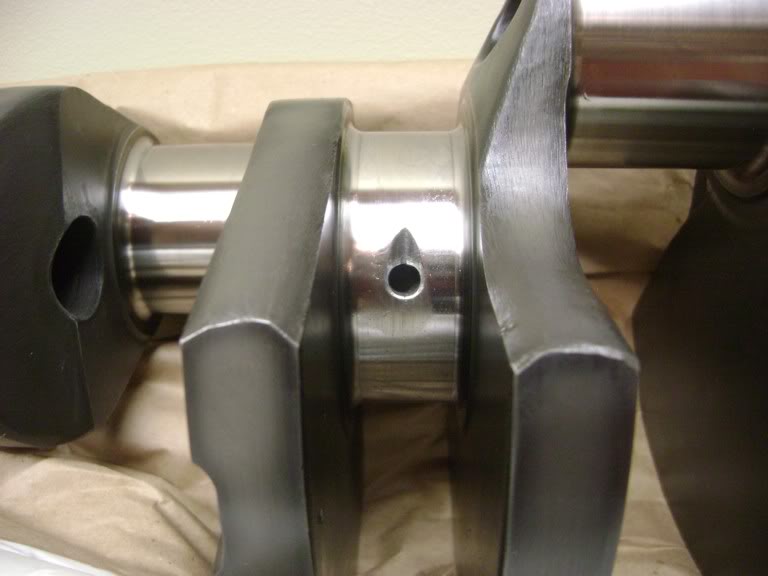
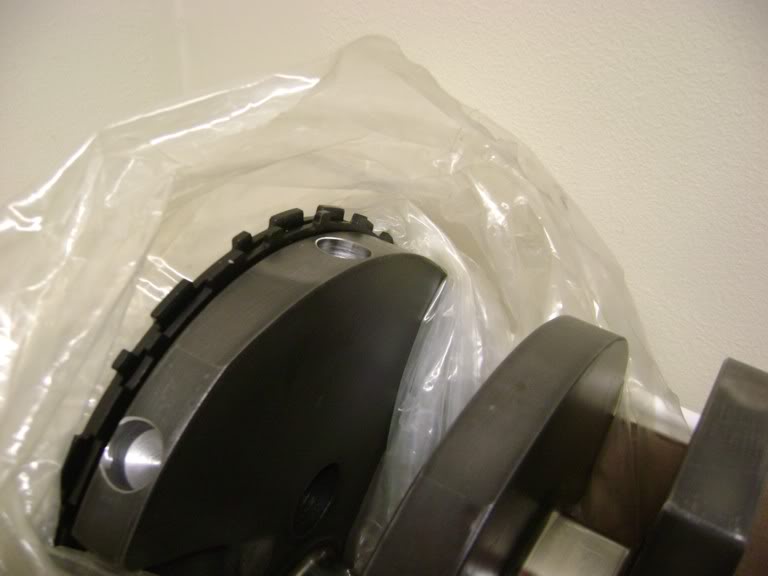
-Callies Compstar Forged Steel Crank-
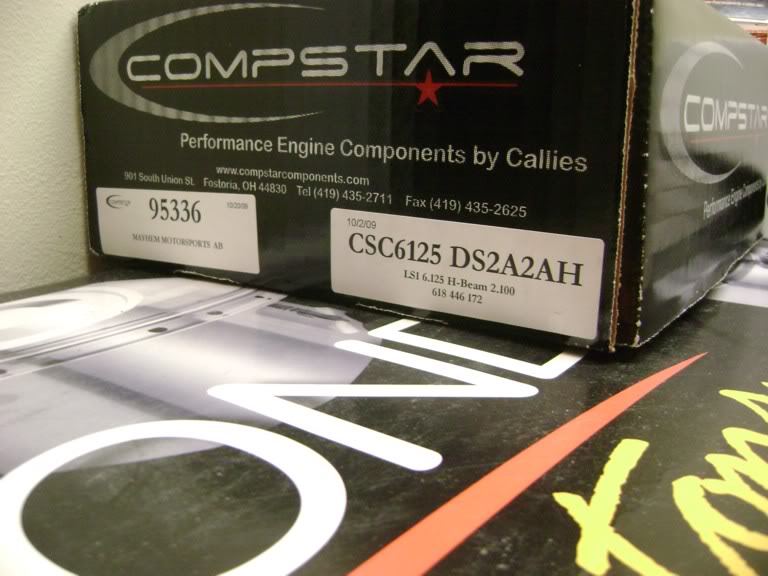
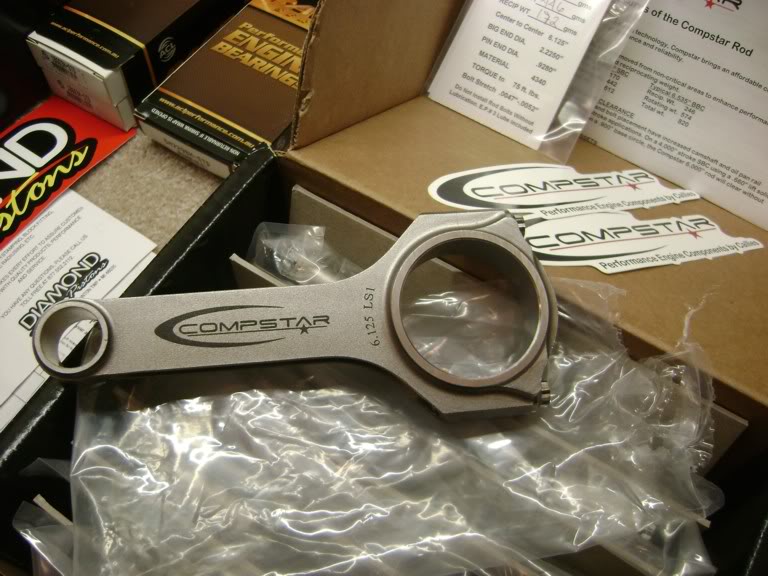
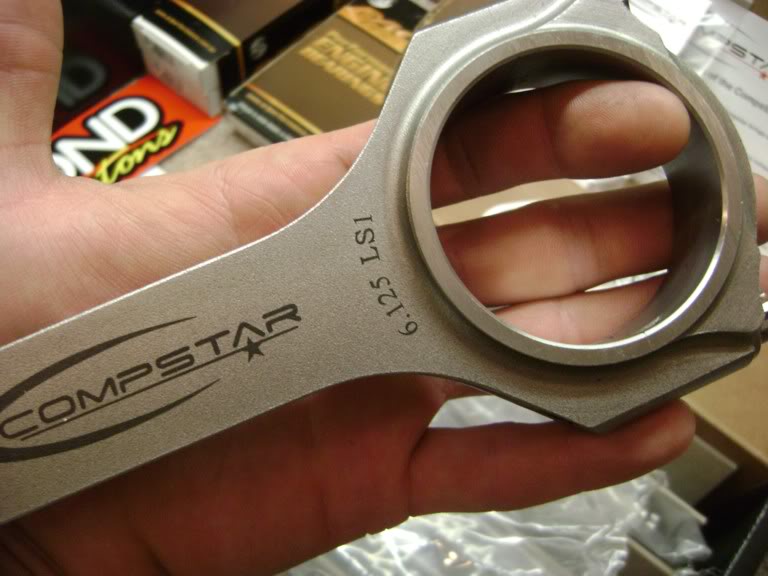
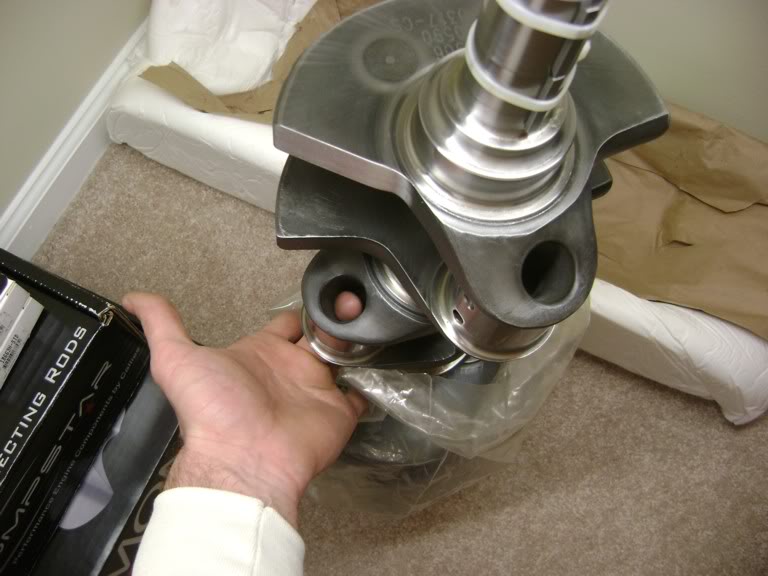
-Callies Compstar Forged H-Beams w/ ARP 2000 hardware-
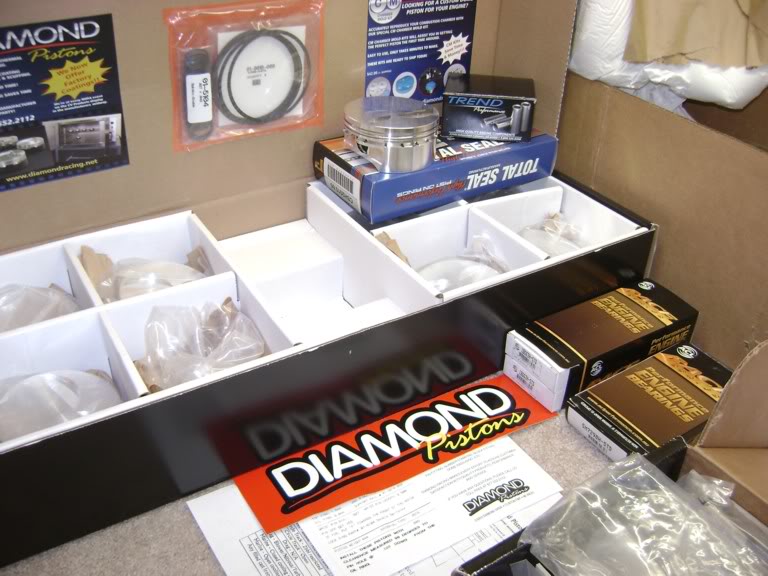
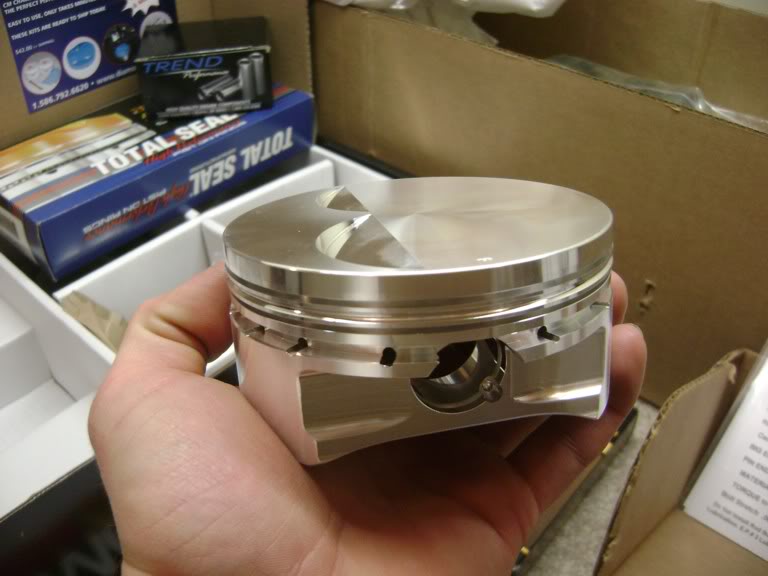
-Diamond Forged 2 valve relief flat-top pistons and pins w/Spiro-Locs-
-Total Seal Rings-
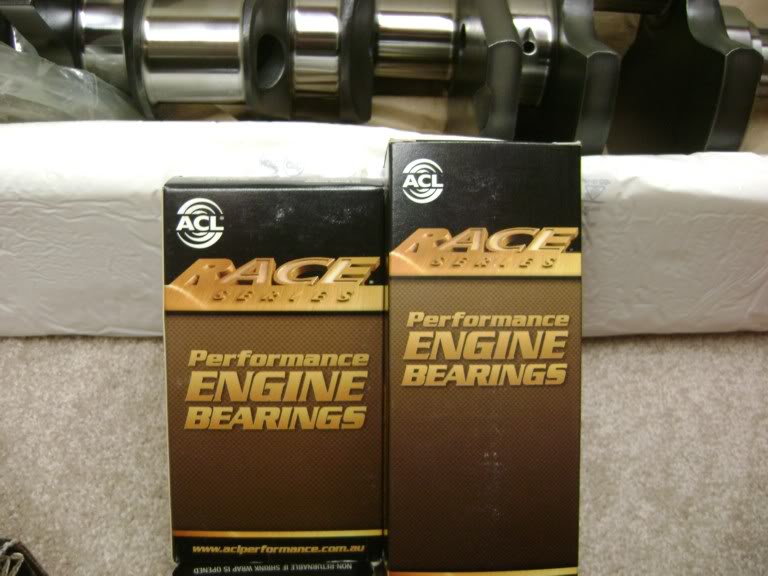
-ACL rod and main bearings-


I couldnt pull a "shocker" w/out dislocating my finger or my shoulder..... I have tooooo much money and PT in my shoulder to go for it, and I need my finger at work, and at home....
Here we go:
-SPEC Stage 3+ Clutch and pressure plate-
-Spec Steel Flywheel- (I got a BANGIN' DEAL on this and it's used, but seriously has like 50-100 miles on it.)
**Pay no attn. to the box it's sitting on, I just didnt want it sitting on the carpet. This clutch is for a 98-02 F-Body T-56 w/Hydraulic clutch**
Here's my Paint. As was said previous in the thread, the car will be matte black, and I got this from my buddy Jamie , and it's the EXACT PAINT that was used to spray the Polylok twin turbo coupe. I'll post (2) pics of that car for reference below the paint and hardener from Rubber Seal:
Here's the paint on the Polylok car:
-Should look sick with my Black Powdercoated Saleens. :ohnoes: *And I KNOW; -Flat/Matte/Dull black is a "love it or hate it" thing, much like black wheels. I just happen to LOVE BOTH.
MONEY SHOT time!!!!
I'm not done by a long shot with the motor, but here is some of the stuff I have acquired thus far for it... As soon as I get the motor swapped out of my DD for a healthy one, I'll be pulling the trigger on the LSx for this project. It's at the Machine Shop right now, and hopefully Jeff and Jay havent forgotten what I look like already...
-Callies Compstar Forged Steel Crank-
-Callies Compstar Forged H-Beams w/ ARP 2000 hardware-
-Diamond Forged 2 valve relief flat-top pistons and pins w/Spiro-Locs-
-Total Seal Rings-
-ACL rod and main bearings-
I couldnt pull a "shocker" w/out dislocating my finger or my shoulder..... I have tooooo much money and PT in my shoulder to go for it, and I need my finger at work, and at home....
Something tells me you may have only checked out what was posted today. Start at the first page if you wanna see progress, that's all that has been going on with this car over the past YEAR.

If you take the time to read or at least "skim over" the thread, you'll see that the car is under the knife in the engine bay and body work department @ a friend's house until we get it ready to bring back here (I have only a partially enclosed carport visible on page one of this thread) from the work we've been doing to it every other night in his garage.
In the mean time, I have been steadily accumulating parts (whether they are for the motor, or proper stopping/handling equipment) for the car, and will be pulling the trigger on the motor (machine work, etc.), upgrading the tranny, and assembling the car when the time is right, and things have been done in the order I see fit. I am in no rush during this build, just figured I'd have a documented build on a few different forums in case anyone is interested in following along.
More to come...
-Greg

TECH Senior Member


Joined: Jul 2009
Posts: 8,024
Likes: 659
Greg,
OMG dude. Looks awsome. I love the detail going into this build. I am a little **** too. I really like your detailed write ups. I wish everyone could be so detailed.
I will admit that I skim through the build up at times, but what stroke are you going with?
What is the main forum ( link to the build please, LOL ) you are posting on? Keep up the GREAT work.
thanks,
Jim
 that will help many people here!
Kinda, lol.. Like I say, I have been accumulating these parts as the budget allows (blown allll to hell... ) , but it is nice to get everything in similar piles and log 'em into the build threads for reference. It is INDEED a LOT of stuff.
Thanks Jim, and I really appreciate the detailed feedback. I know it's one hell of a long read, but I'm just doing my best to cover EVERYTHING. I have searched MANY threads here on LS1tech and elsewhere to get the most comprehensive angle on what I have ahead of me, and I am just going from there. FWIW, being this **** is a bitch @ times, but the devil is in the details, and it'll be well worth it in the end.
I also thank you for asking about the motor, you're actually the first on ANY of the forums to ask me about it, INCLUDING my local one where the build originated at. I WAS gonna keep "tight lipped" about it, but I am HORRIBLE at keeping things on the low. It's a 6.125" rod and 4.00" stroke 4340 Callies Compstar crankshaft that will yield a 414cid displacement w/my .060" overbore. I am running a set of TEA Ported TrickFlow Specialties 235cc heads, and want to have the biggest bore I can afford w/the LQ4 block to keep valve shrouding @ a minimum. SCR will come in as close to 12:1 as possible, and my machine shop does CNC boring and decking as well. The forum the build is on is somewhat of a Local forum, but there are members from all over. It's also a PRIVATE forum, but it's free, and you are more than welcome to join and have a look around. It's about 2 minutes to register, then you'll get verified, and it doesnt cost a dime. My screenname is the same over there, so just use me as a referral. WWW.Horsepowerjunkies.com and the link to my build in the "Projects Section" is http://www.horsepowerjunkies.com/for...ad.php?t=75040
Thanks bro, I'm hoping it will!!! Thanks for the kind words as well!
Thank you too buddy! I'll get more pics up as I make more progress. I swore I wouldnt post any more of the engine bay until it's ready for primer though, lol. It wont be much longer.
Thanks again for all the kind words, encouragement and interest guys!
-Greg
) , but it is nice to get everything in similar piles and log 'em into the build threads for reference. It is INDEED a LOT of stuff. Greg,
OMG dude. Looks awsome. I love the detail going into this build. I am a little **** too. I really like your detailed write ups. I wish everyone could be so detailed.
I will admit that I skim through the build up at times, but what stroke are you going with?
What is the main forum ( link to the build please, LOL ) you are posting on? Keep up the GREAT work.
thanks,
Jim
I also thank you for asking about the motor, you're actually the first on ANY of the forums to ask me about it, INCLUDING my local one where the build originated at. I WAS gonna keep "tight lipped" about it, but I am HORRIBLE at keeping things on the low. It's a 6.125" rod and 4.00" stroke 4340 Callies Compstar crankshaft that will yield a 414cid displacement w/my .060" overbore. I am running a set of TEA Ported TrickFlow Specialties 235cc heads, and want to have the biggest bore I can afford w/the LQ4 block to keep valve shrouding @ a minimum. SCR will come in as close to 12:1 as possible, and my machine shop does CNC boring and decking as well. The forum the build is on is somewhat of a Local forum, but there are members from all over. It's also a PRIVATE forum, but it's free, and you are more than welcome to join and have a look around. It's about 2 minutes to register, then you'll get verified, and it doesnt cost a dime. My screenname is the same over there, so just use me as a referral. WWW.Horsepowerjunkies.com and the link to my build in the "Projects Section" is http://www.horsepowerjunkies.com/for...ad.php?t=75040
Thanks bro, I'm hoping it will!!! Thanks for the kind words as well!
Thank you too buddy! I'll get more pics up as I make more progress. I swore I wouldnt post any more of the engine bay until it's ready for primer though, lol. It wont be much longer.
Thanks again for all the kind words, encouragement and interest guys!
-Greg
Little update.....
There's been a slight change of plans......
Brand new Ceramic Dynatech headers and Forged 12:1 DIAMOND Pistons are for sale.... Swapping my FRPP 3.73's out from the shop I picked 'em up @ for a set of 3.27's too.
I think y'all can figure out where this is headed now.
More to come.
There's been a slight change of plans......
Brand new Ceramic Dynatech headers and Forged 12:1 DIAMOND Pistons are for sale.... Swapping my FRPP 3.73's out from the shop I picked 'em up @ for a set of 3.27's too.
I think y'all can figure out where this is headed now.
More to come.
Well, kind of a bummer....... I ruined my back @ work, was out of work for a little over 2 weeks, and it doesnt look like I'm gonna be able to do much with this build for the time being. Medical bills are coming in, I cant get around like a WAS, and I've started parting out the entire build and car as a roller. This really sucks, I JUST DID score an RPM Transmissions Level V T56 with Quicktime SFI bell, Viper mainshaft, Viper slipyoke, aftermarket gearset, etc., etc. Now I dont have the means to finish this thing off, let alone be able to drive it after I'm done.
Thanks for following along y'all, I hate to see it come to this, as I wasnt too awful far from having a ridiculous ride.
Thanks for following along y'all, I hate to see it come to this, as I wasnt too awful far from having a ridiculous ride.