

Pro-Touring 68 Acadian (Nova) with L92
 02-12-2010, 02:32 PM
#41
On The Tree
Thread Starter
iTrader: (4)

Join Date: Mar 2009
Location: British Columbia, Canada
Posts: 132
Likes: 0
Received 0 Likes
on
0 Posts
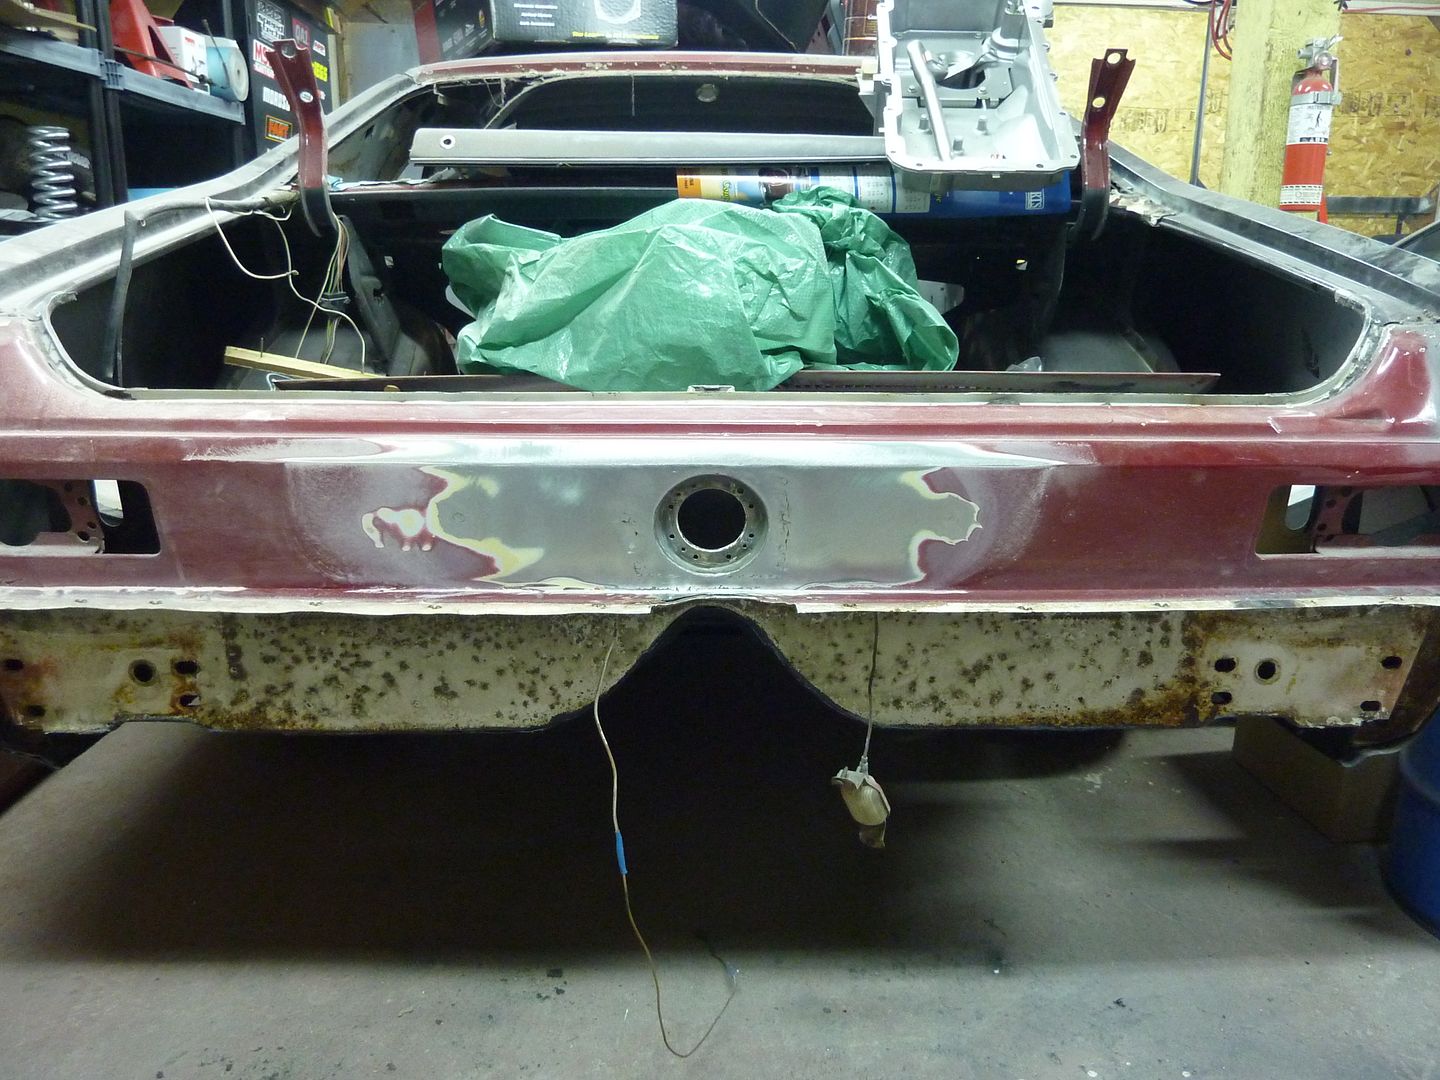
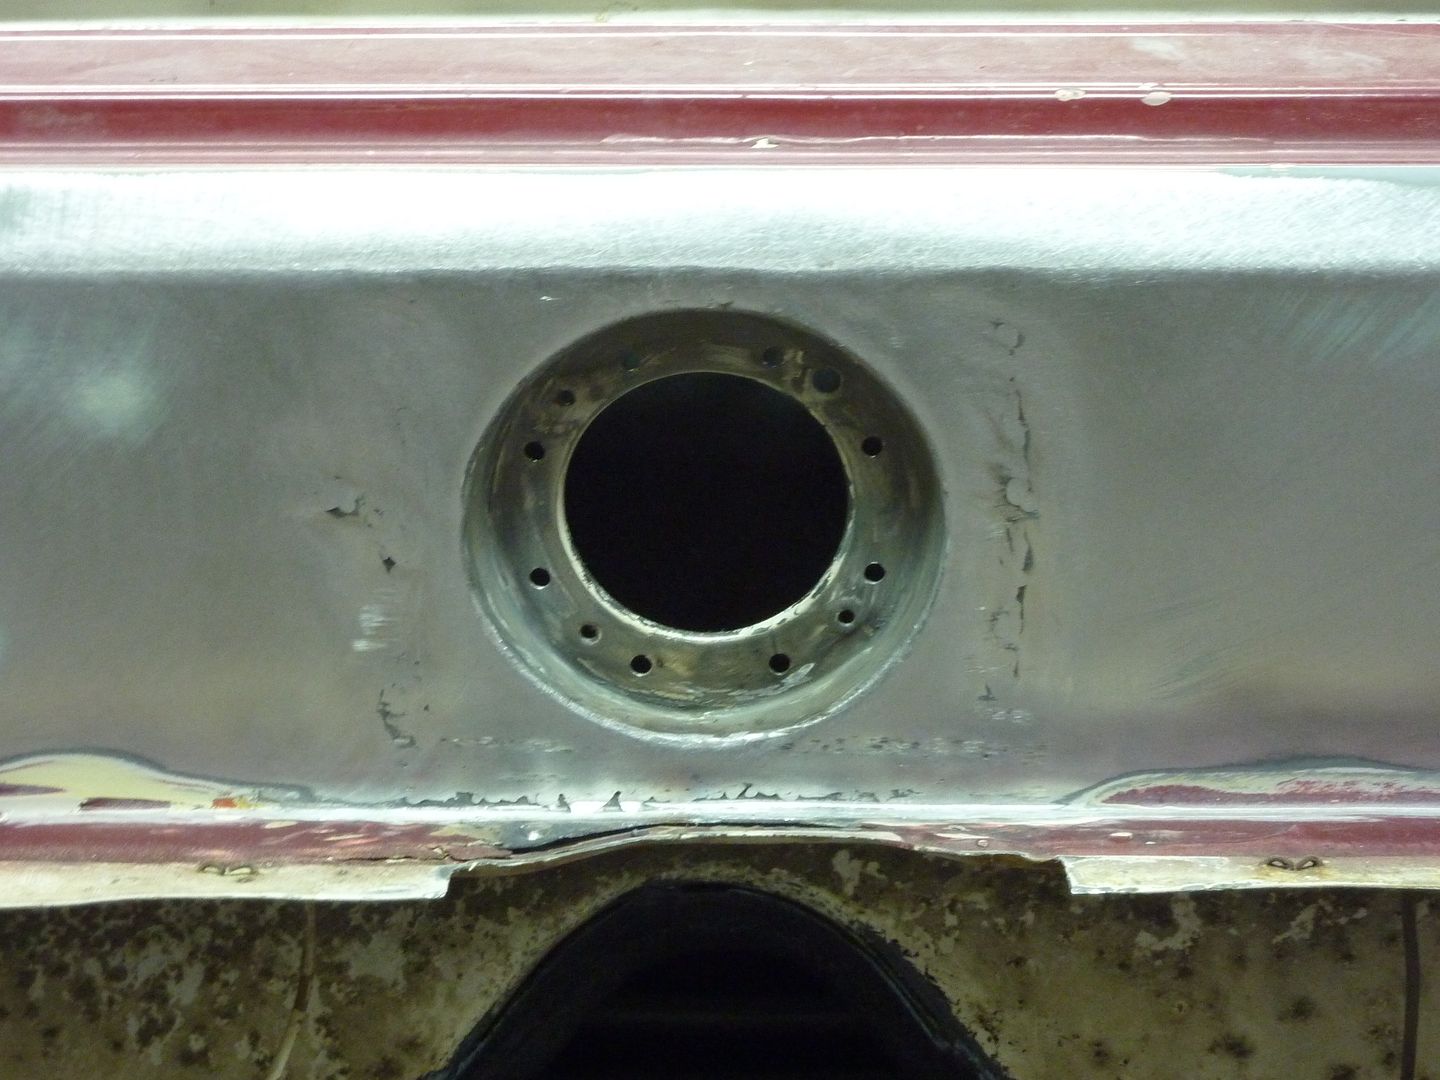
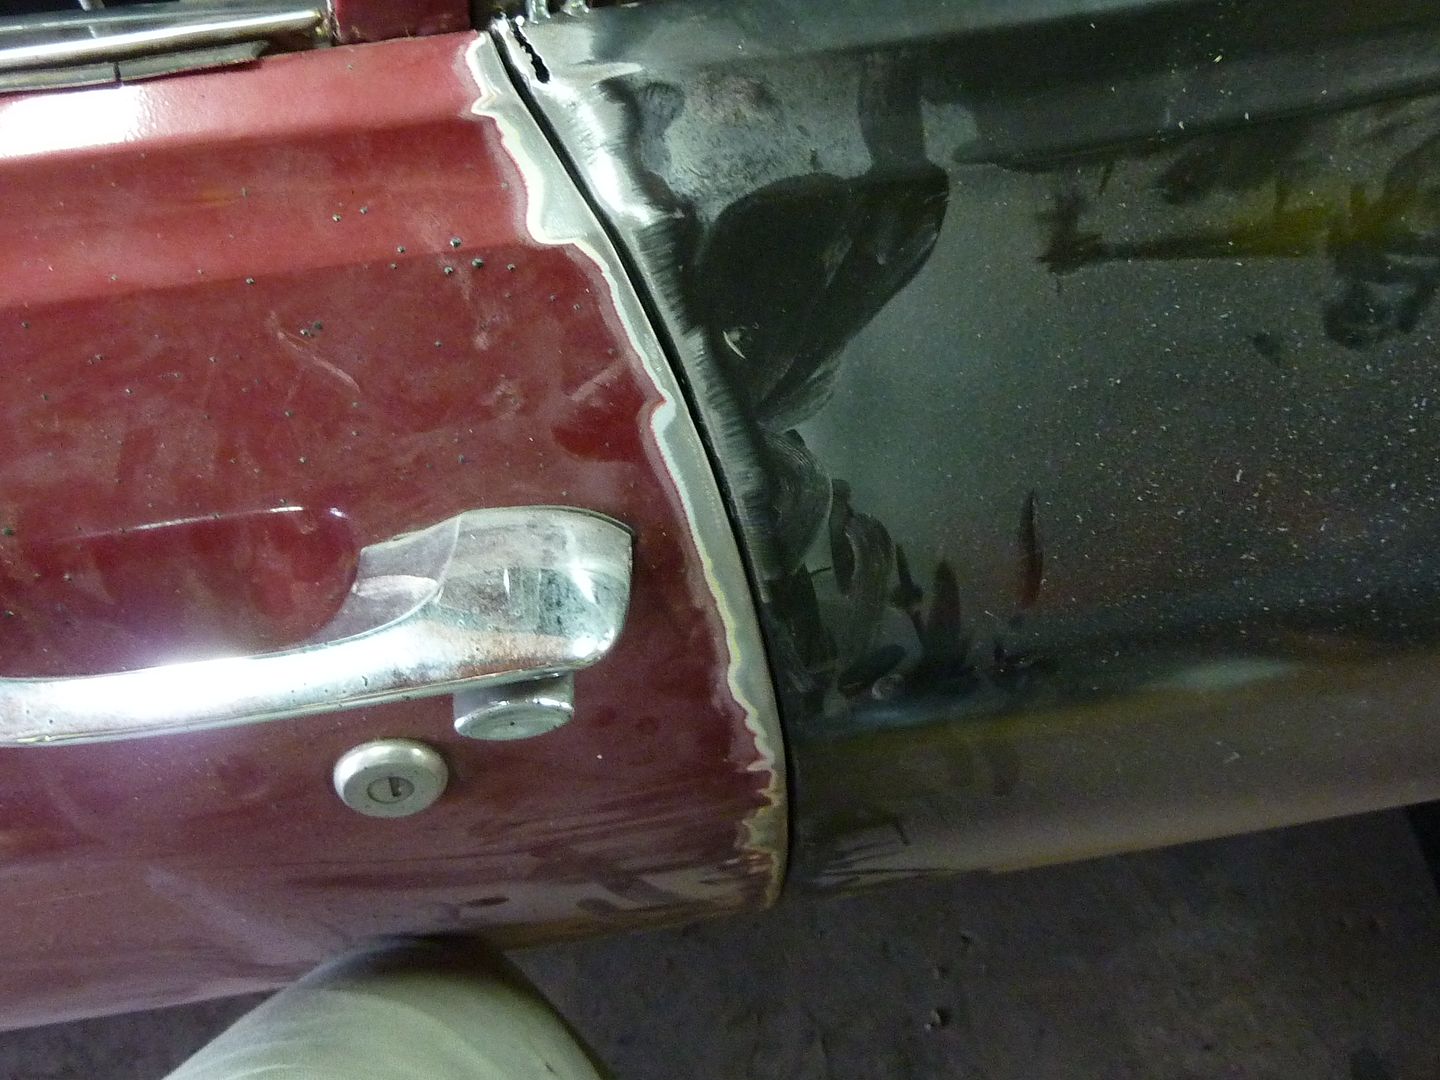
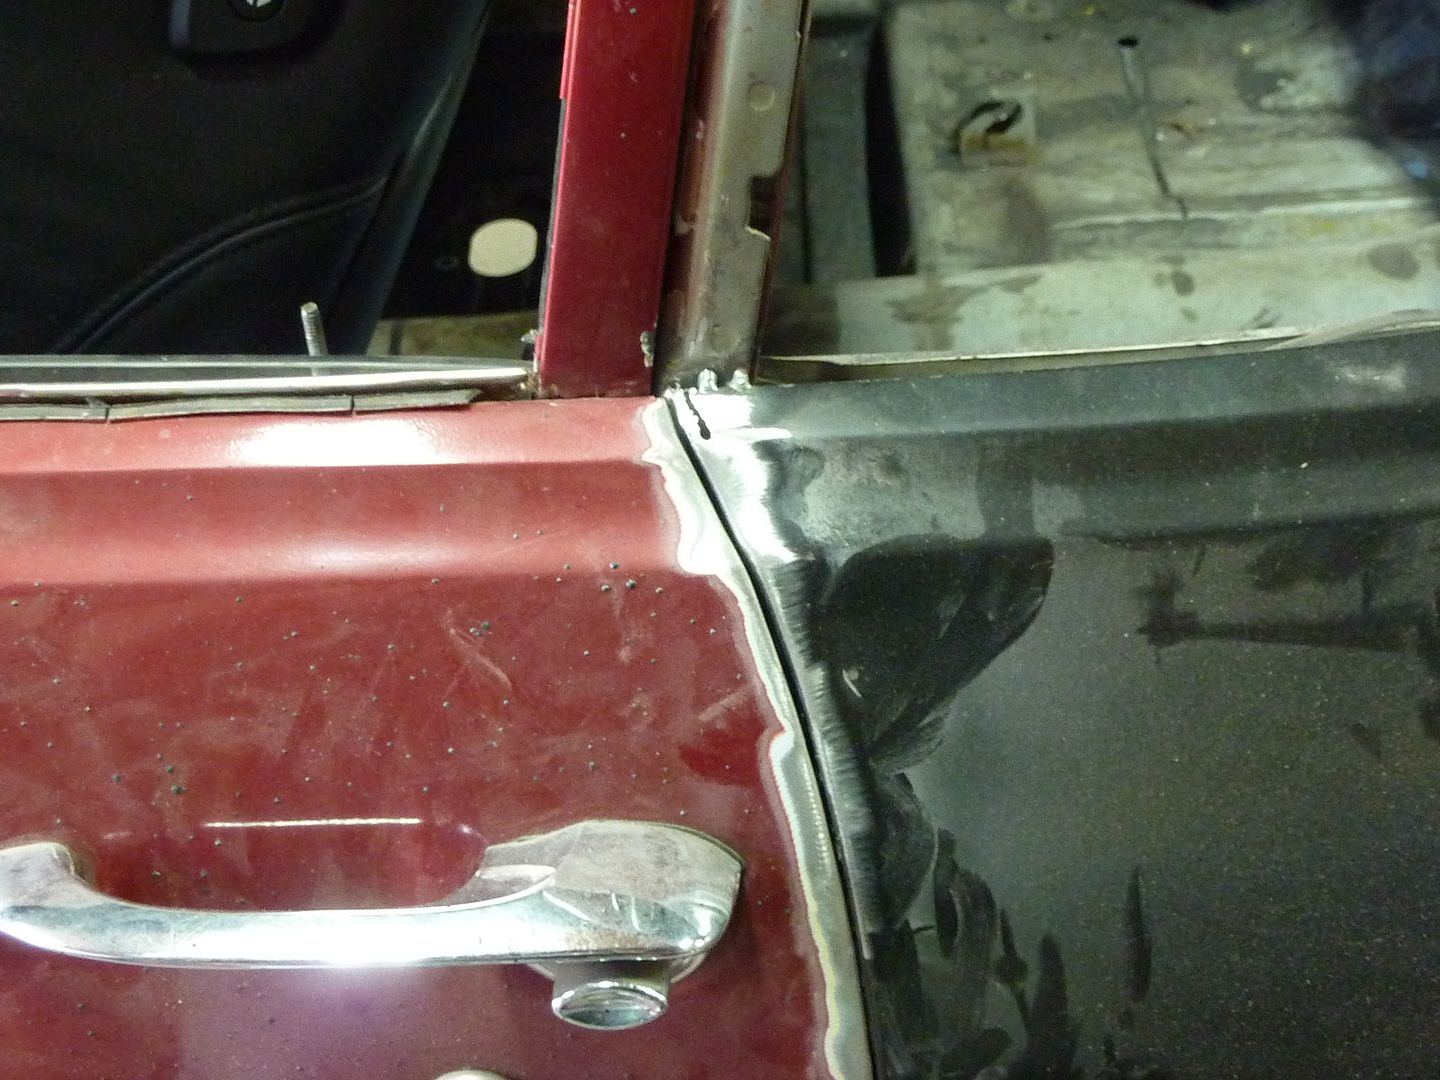
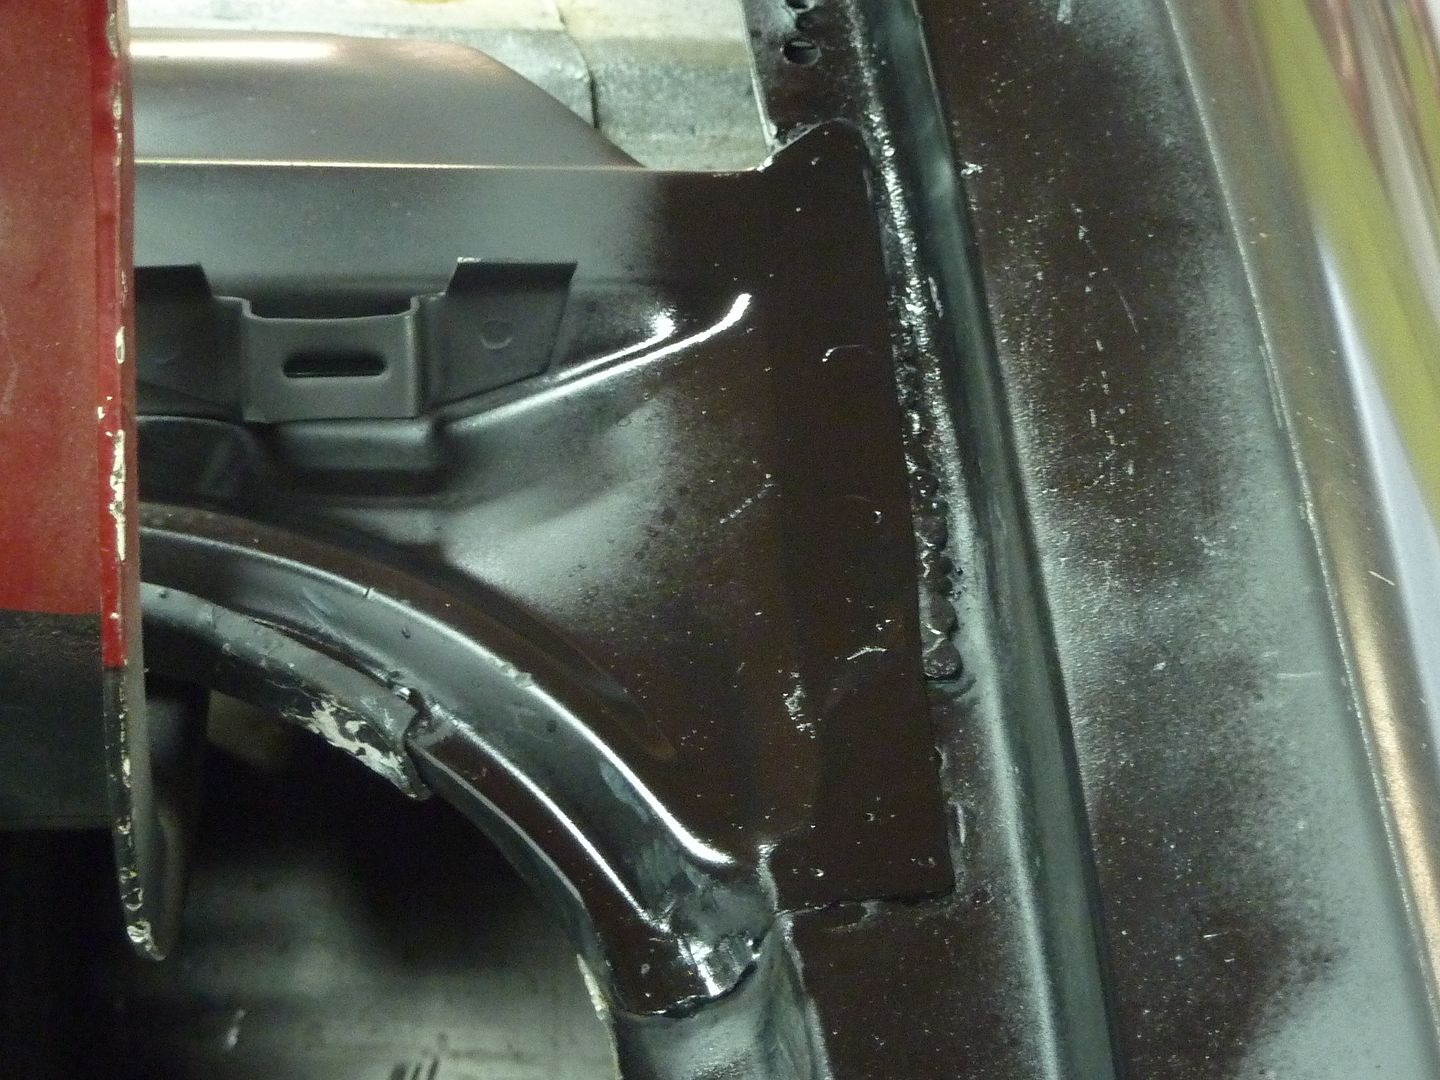
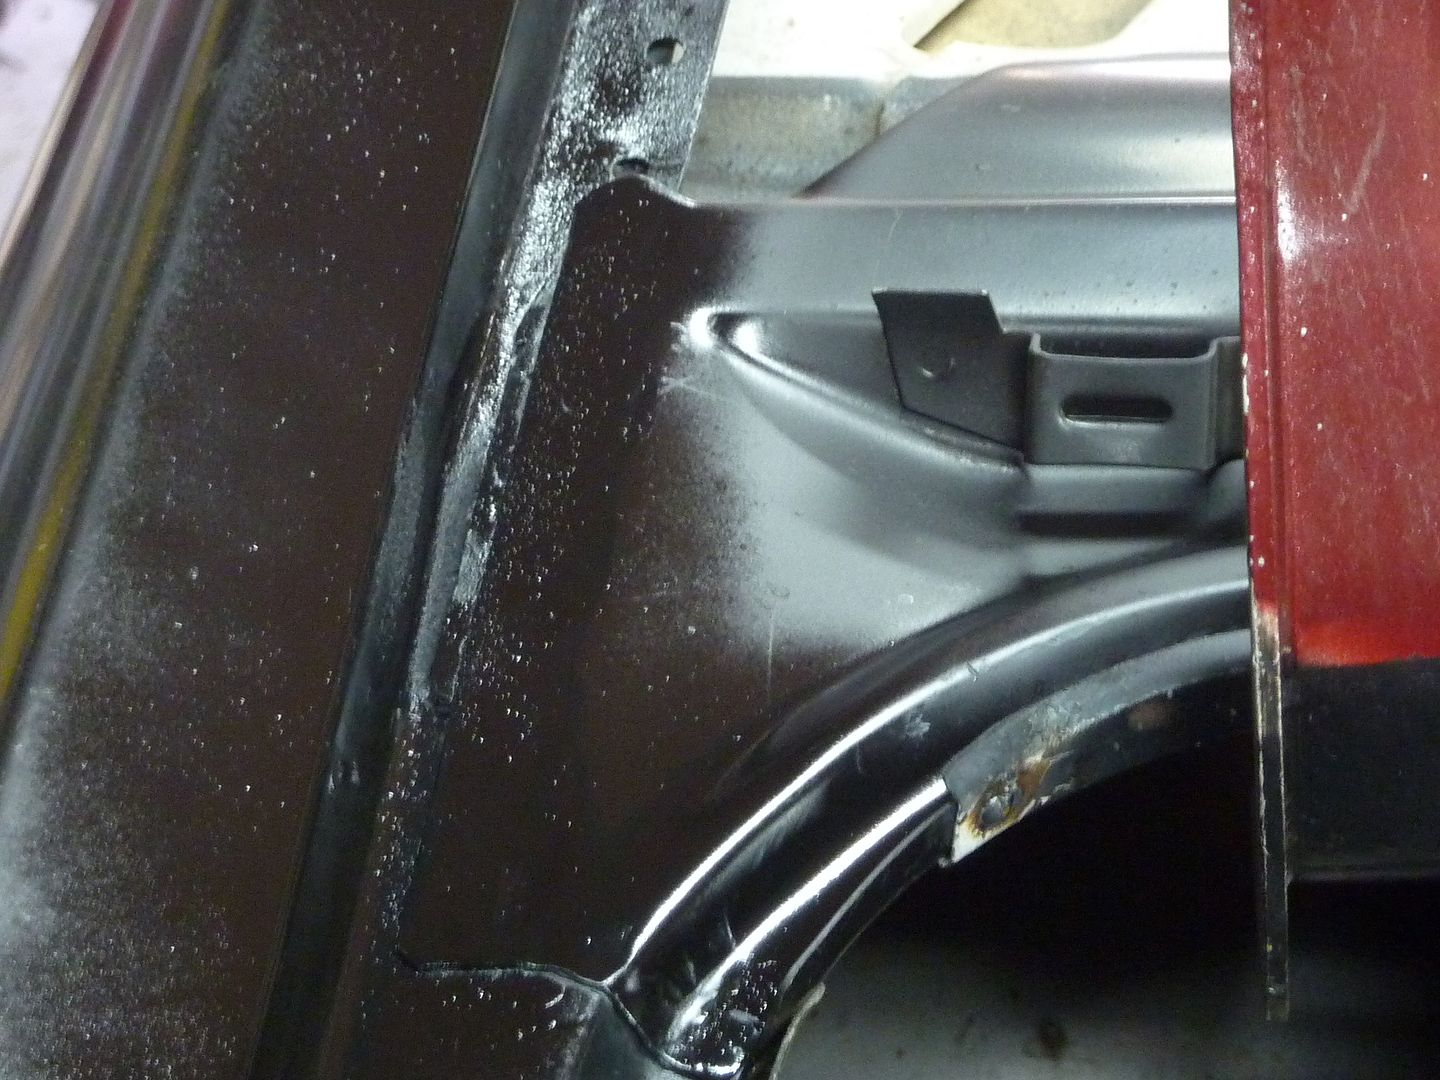
Not much of an update, but it's one anyways. After looking at where I have the gas filler panel, I thought it might be sitting too low once the bumper was on. I put the tail lights on and measured and found that the bumper likely would have been right at the bottom of the filler cap so I decided to move it up slightly. I also spent some time cleaning up the welds. The area that has some crack/lines/whatever you would call them is a bit indented so I will need to do a bit of mud work there so I'm not really concerned. Next plan is to get some exhaust the same diameter as the filler neck and figure out where I need to drill a hole through the floor. Here's the pics:
You can see how much I moved it up. It's about 1/4".

All cleaned up
You can see how much I moved it up. It's about 1/4".
All cleaned up


 08-13-2010, 04:47 PM
#45
Been a few months - any updates?
I think you can drill & tap that stock piece for a pressure sending unit if you want. There is a little blurb about it in my SA design book "How to swap GM LS series engines into almost anything". I'll have to look at the LY6 I have at home - I believe on mine that piece is replaced with an adapter to go out to an oil cooler.
I think you can drill & tap that stock piece for a pressure sending unit if you want. There is a little blurb about it in my SA design book "How to swap GM LS series engines into almost anything". I'll have to look at the LY6 I have at home - I believe on mine that piece is replaced with an adapter to go out to an oil cooler.
 09-17-2010, 03:24 PM
#46

scherp69
Nice build! So I take it, you have auto body experience? How hard was replacing the quarters?
thanks,
Jim
Nice build! So I take it, you have auto body experience? How hard was replacing the quarters?
thanks,
Jim
09-25-2010, 11:48 PM
#49
On The Tree
Thread Starter
iTrader: (4)
Join Date: Mar 2009
Location: British Columbia, Canada
Posts: 132
Likes: 0
Received 0 Likes
on
0 Posts
Thanks for all the comments guys. I really appreciate it. I completely forgot I had the thread going here too. I have a few updates since then and I'm just going to to copy and paste them from the other forum.
Jim....to be honest I have absolutely no mechanical/autobody back ground at all. I just like getting my hands dirty and am too cheap to pay anyone to do the work for me. I've been working on cars for several years now and have learned from forums, the internet and just trying it. I even taught myself to weld. As for replacing the quarters, they weren't that bad. I just took my time and only cut a bit off a time until I got to where I needed it. When I did the quarters, I replaced the outer wheel houses and deep tubbed it at the same time so it was a little more involved making sure everything was lined up.
On to the updates. There are a few:
Well it's been a while since I had any updates. To be honest, I haven't been all that motivated to actually work on the car. There has been zero overtime at work so no new parts coming in and I feel like I'm in over my head with this build. As I stated before, I've decided to do as much as I can without having to get new parts. This update is also going to have quite a few questions, so if you can answer any of them that would be greatly appreciated.
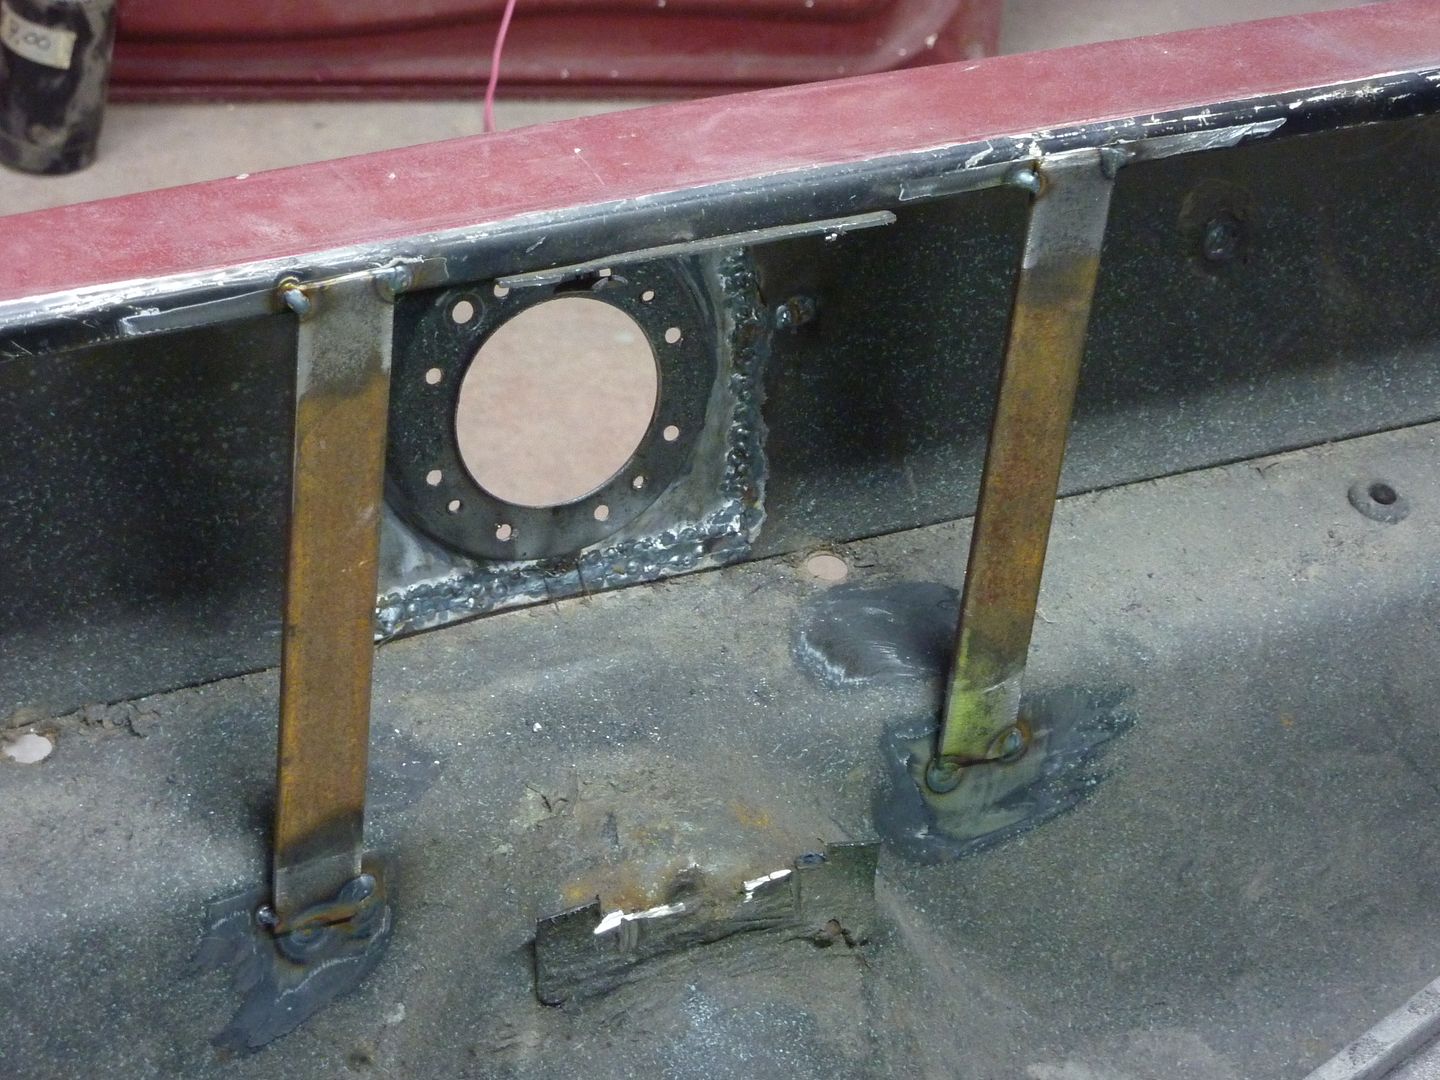
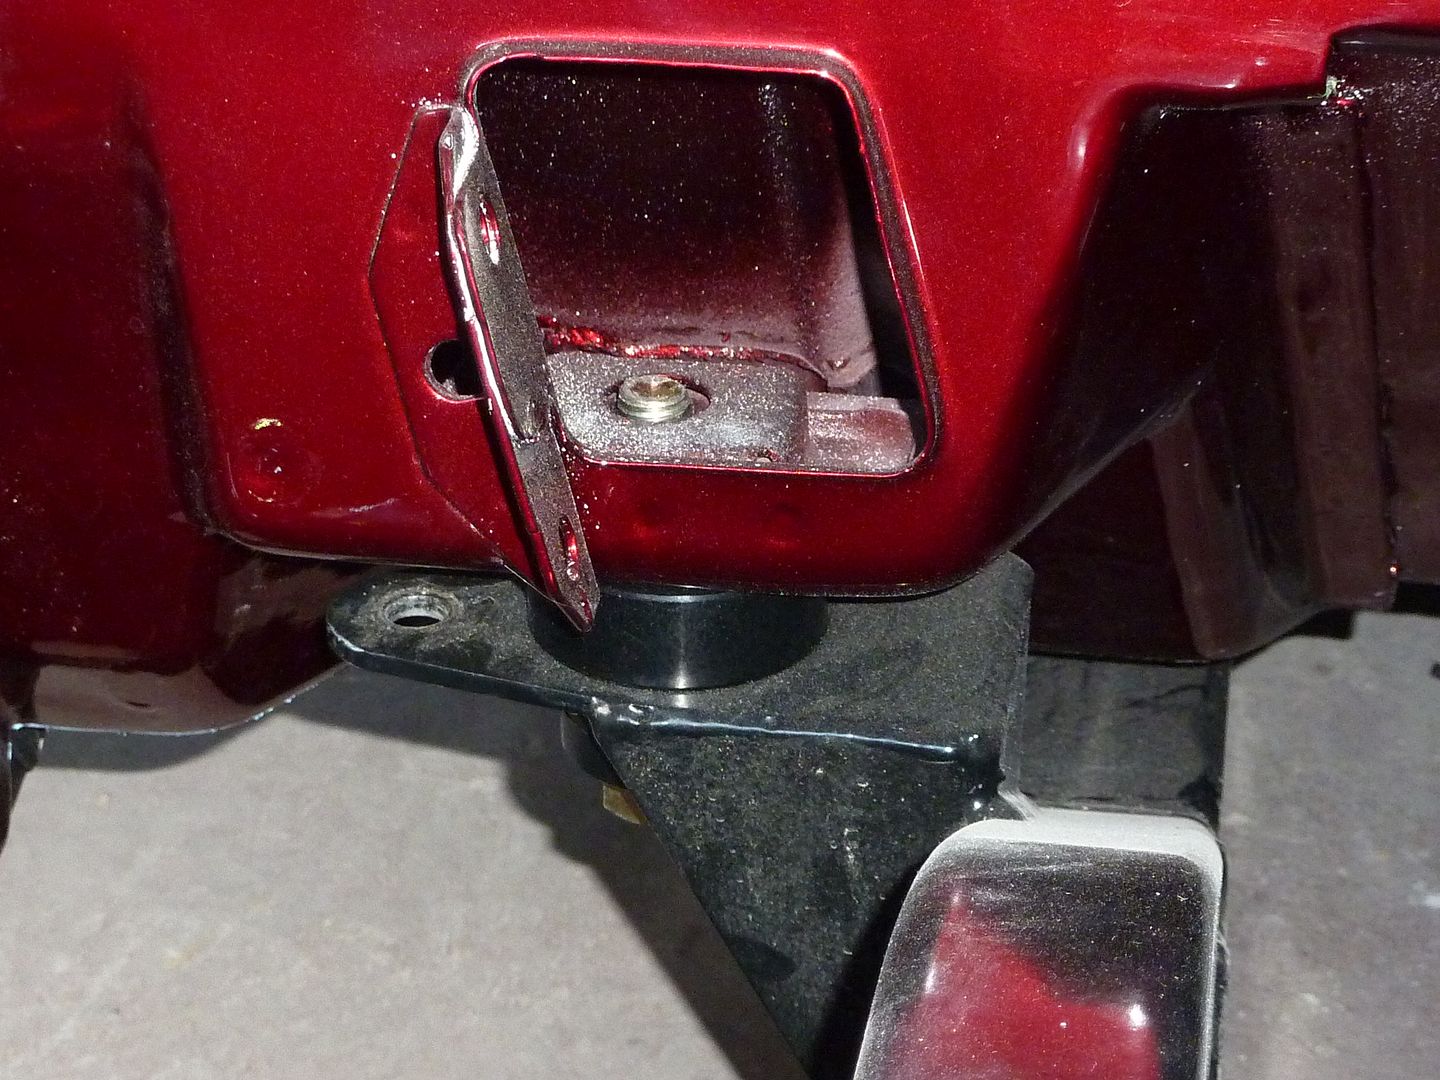
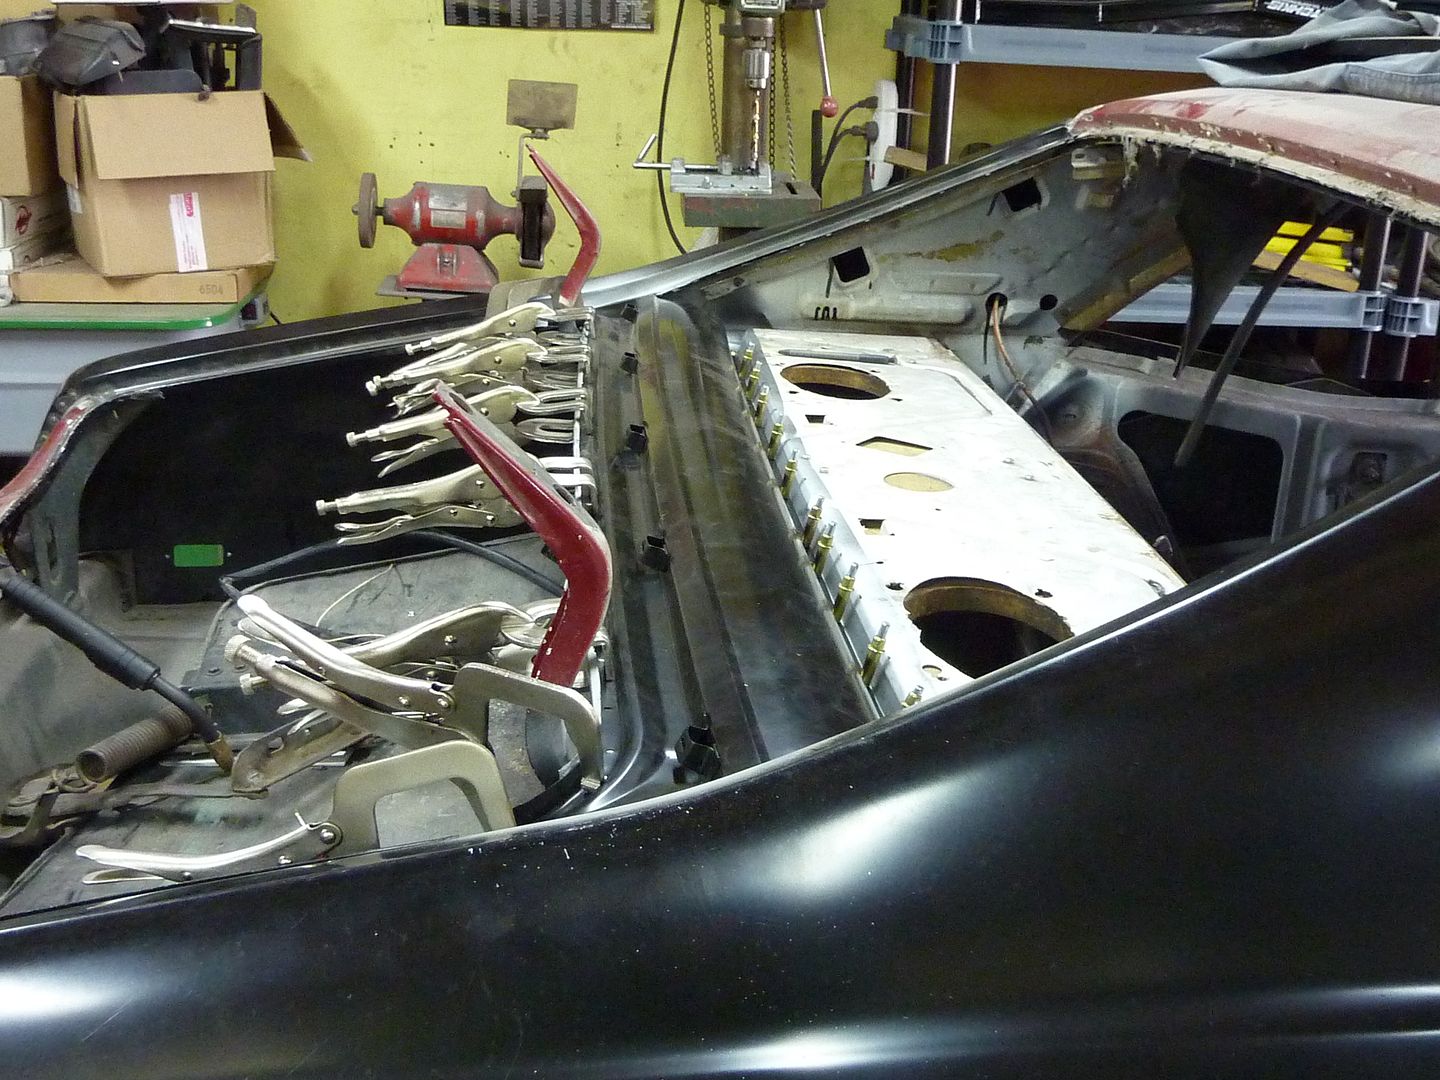
After welding in the rear fuel filler panel, I decided I was going to work on routing the filler tube through the trunk. I tried working around the trunk latch but the filler neck wouldn't fit, so I decided to remove it for the time being. I welded in some support braces

After taking a bunch of measurements, I cut the latch out
Unfortunately that's still how's it sitting. I was trying to figure out how to run the filler neck. The one that came with the Alston filler cap is designed for a Camaro so it goes off to the right instead of straight down. I can get a universal one that comes straight out from the filler cap and then I would have to run it down somehow. My first question....if I decided to get the straight one would I be able to use exhaust tube for the rest of the filler neck? Would there be any issue having gas gown down exhaust tube? I was thinking about drilling a hole though the trunk floor and running the exhaust tube with different bends so it came out where the filler tube on a stock tank would meet it. I was then going to weld the exhaust tube to the trunk so it doesn't move. I would then put the trunk latch back on to cover all this up. I would likely have to use a 90 degree piece of rubber tube to join the filler cover and the exhaust tube running down. Does this sound like it would work???
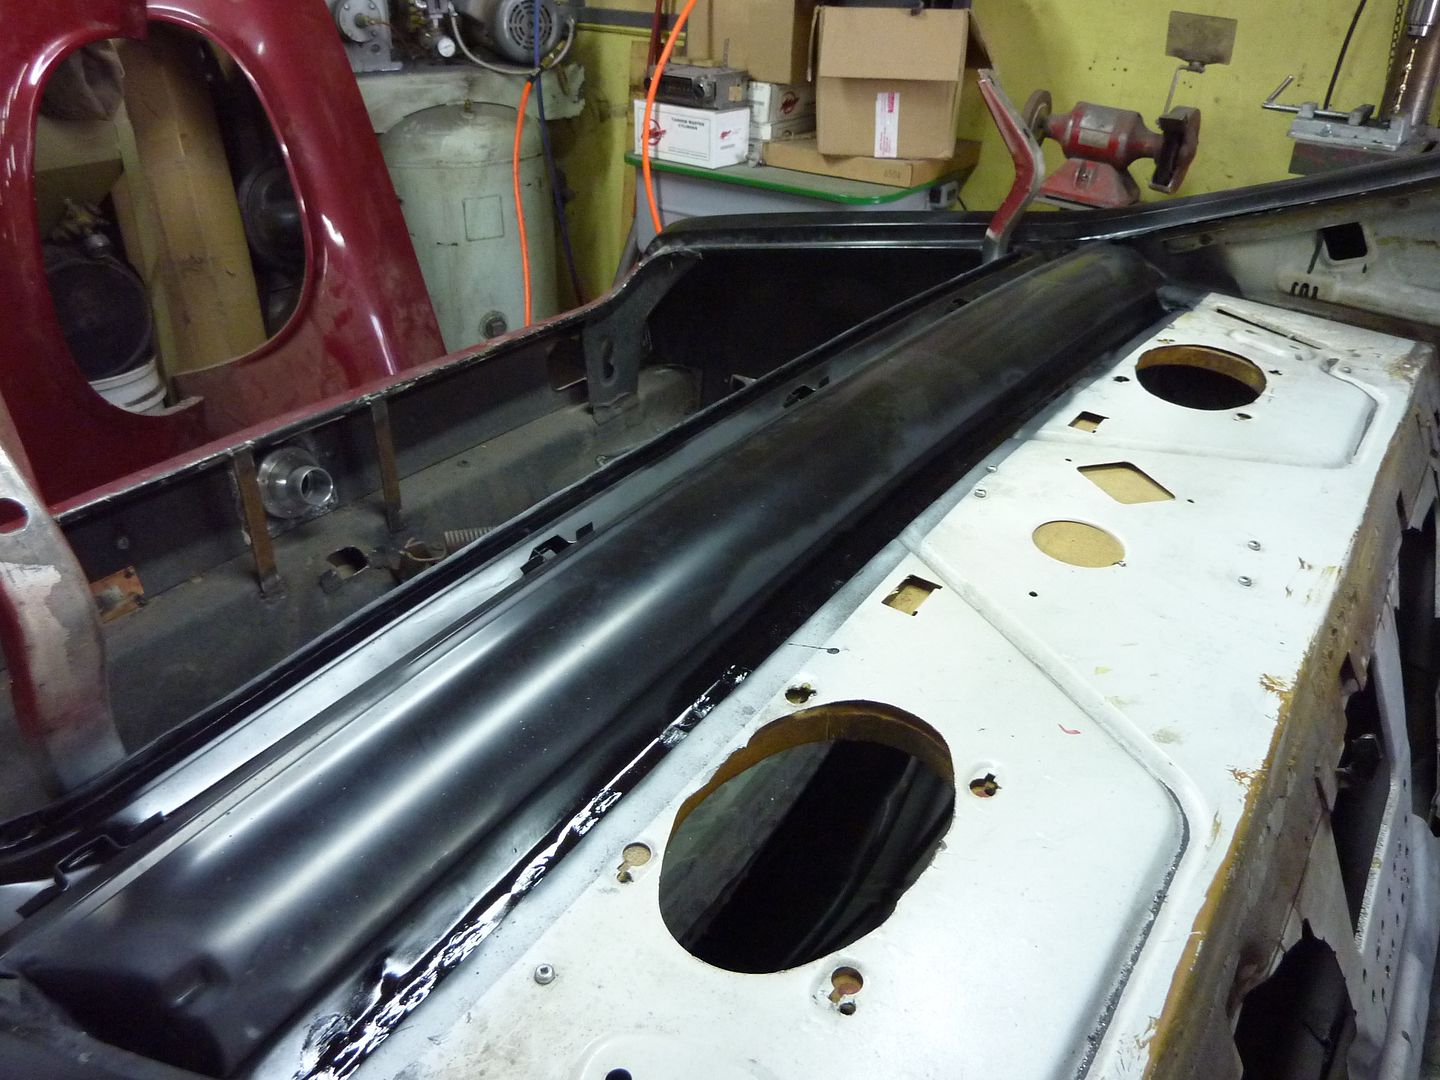
The next thing I started to do was to get the subframe aligned and push the motor back. The subframe was pretty close and I didn't have to do a lot of moving it. I can't remember where online I found the diagram with measurements, but I used a hole on the rear frame rails and measured to the alignment hole on the subframe beside where the firewall body mounts sit. I got the subframe so it was within 1/4" of the factory measurements. Is that close enough??
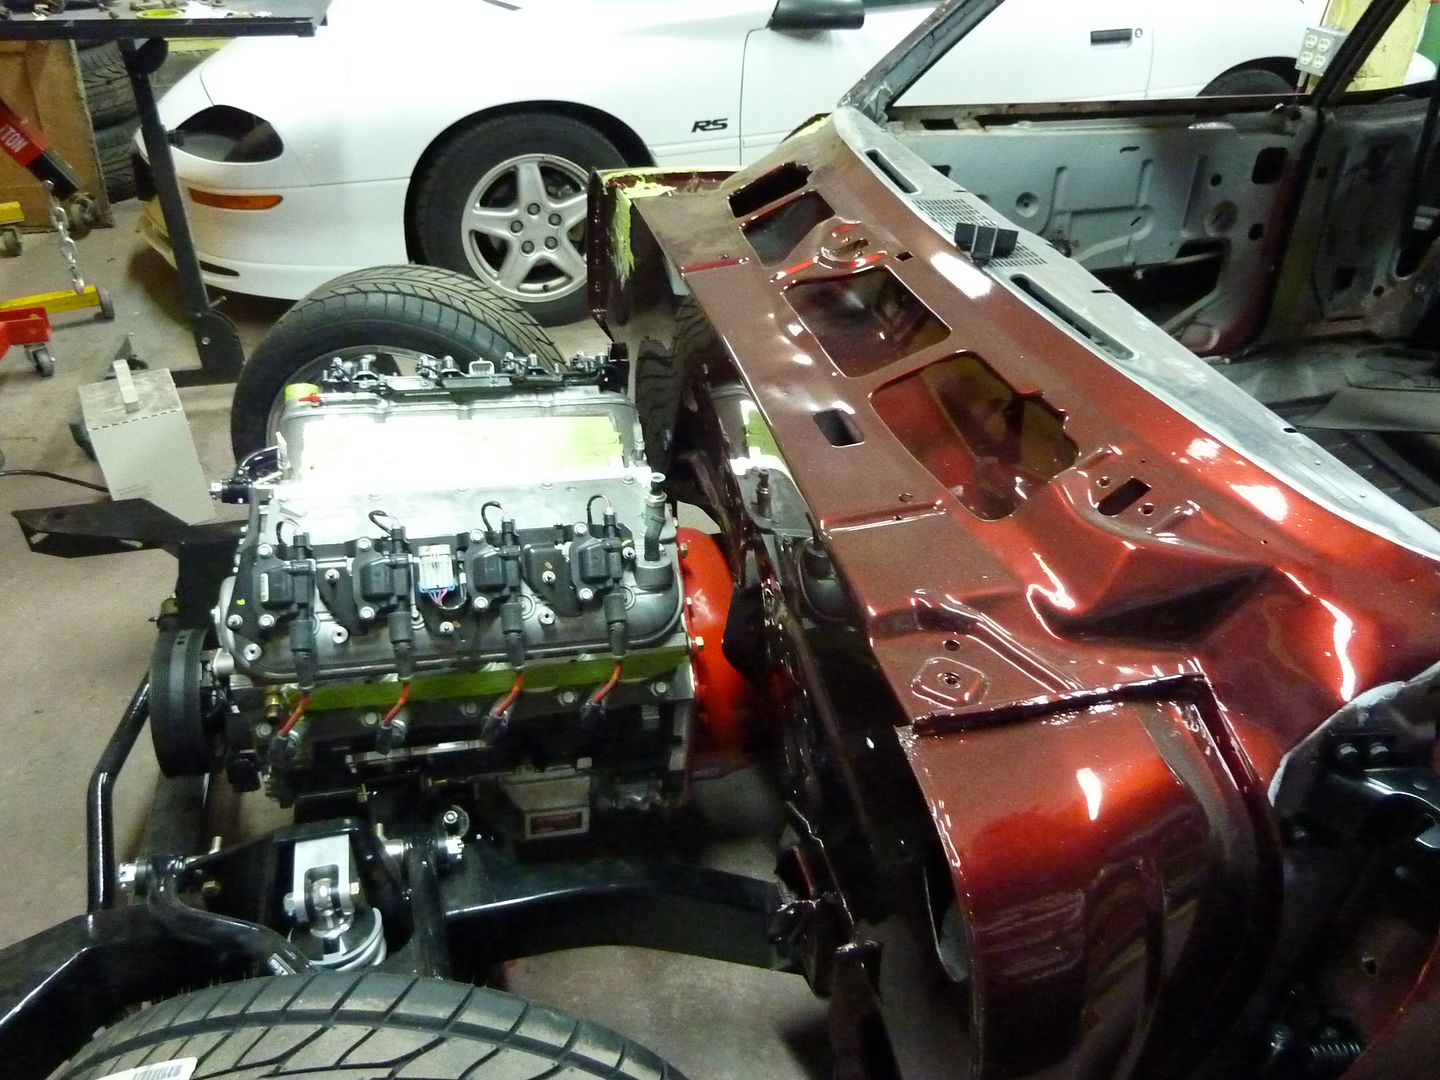
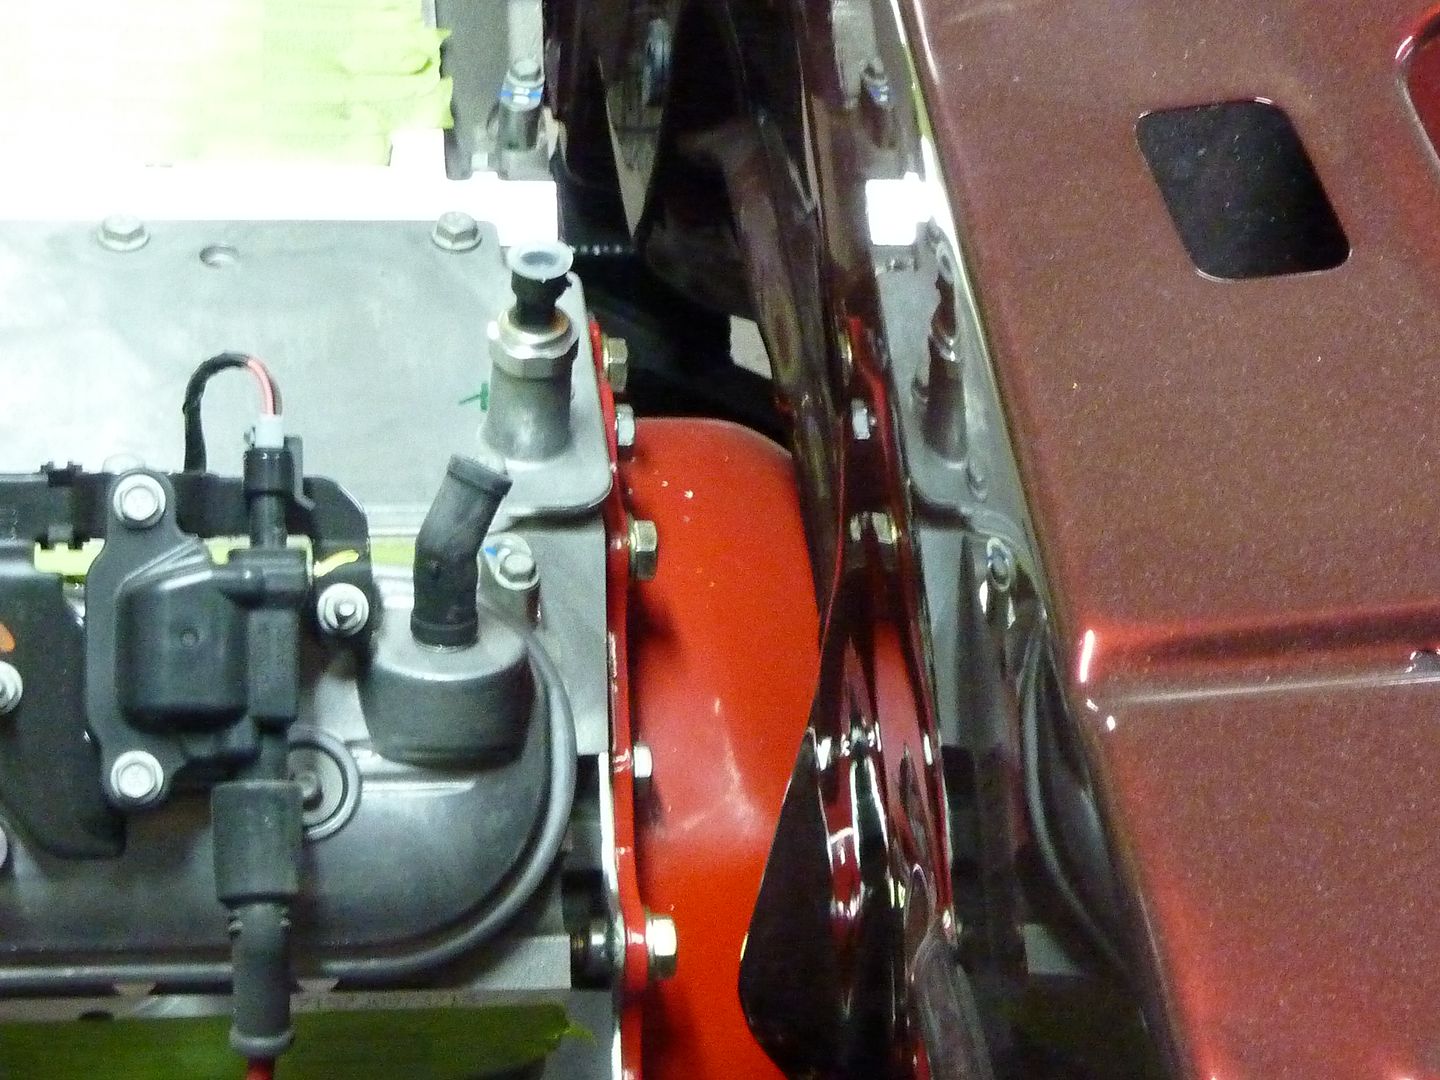
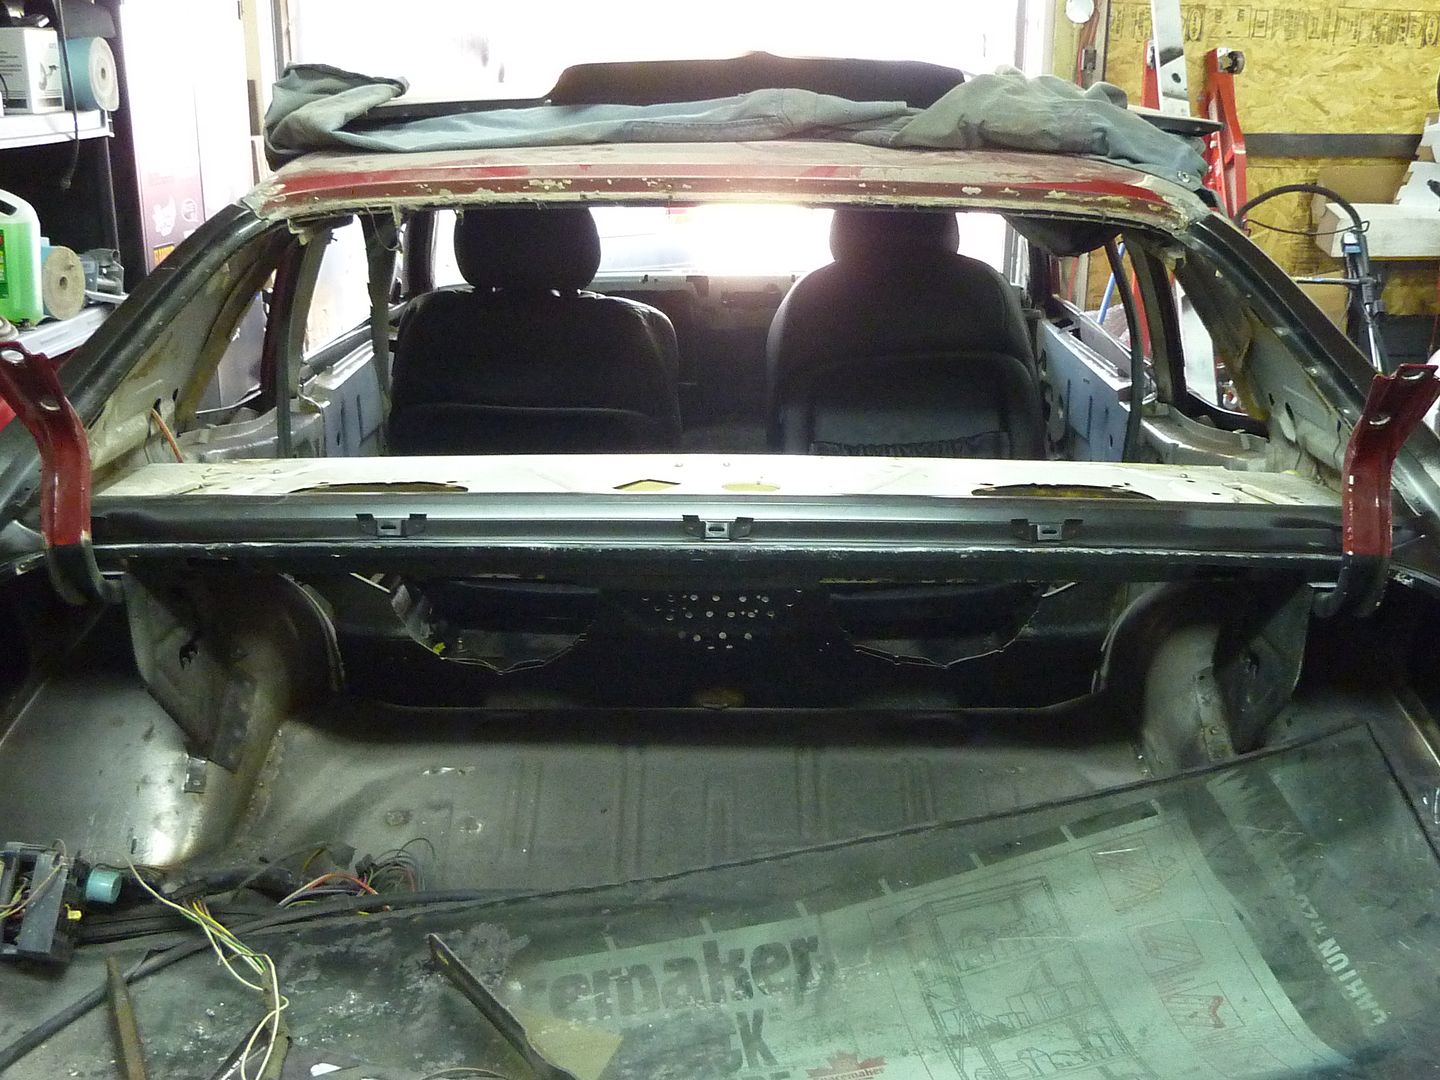
Once the frame was aligned, I pushed the motor back as far as I could. There's still quite a bit of room to the firewall
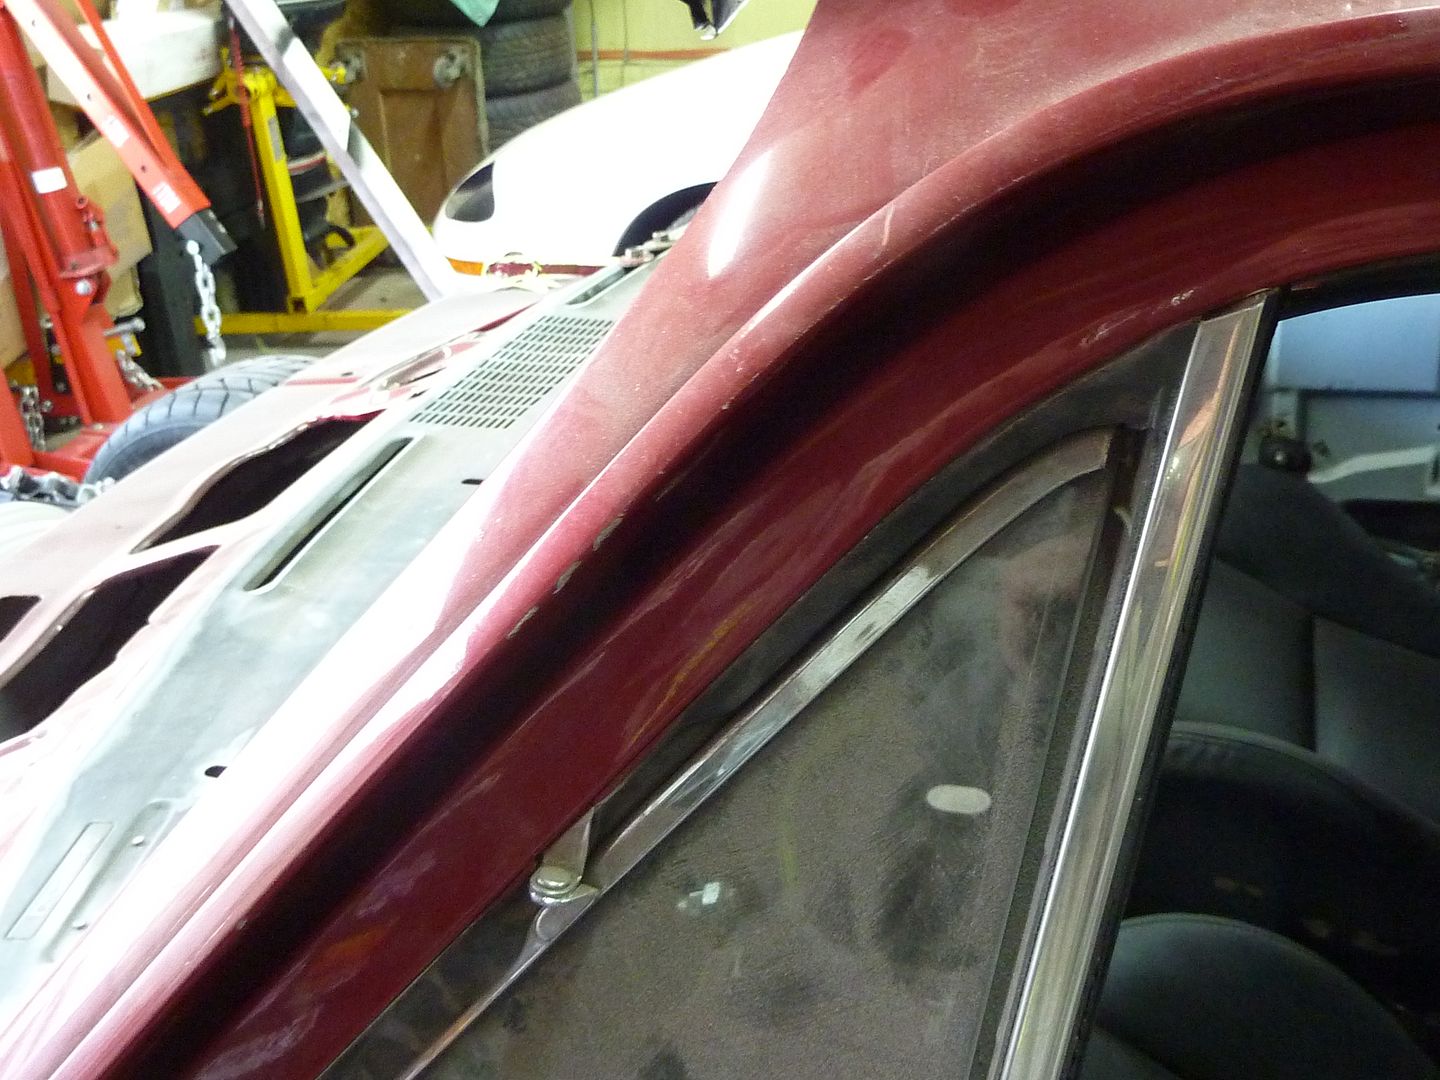
I then started hanging the sheet metal. I fought with getting the doors aligned. I have new Goodmark hinges and now I've read I would have been better off rebuilding the old ones. Oh well. I was told to take the strikers out...that helped. I also ripped out all the old weather stripping..that really helped. Here's the passenger door. The driver's door gap is almost the same. Will have some fixing to do.
I started to hang the fenders and found that things were fitting very well. I ended up needing to find a stock set of body mount washers to put on top of the body mounts. Called Dave at Tin Man's and got a pair for $25.
Without them in
With them in

Started hanging the fenders

Jim....to be honest I have absolutely no mechanical/autobody back ground at all. I just like getting my hands dirty and am too cheap to pay anyone to do the work for me. I've been working on cars for several years now and have learned from forums, the internet and just trying it. I even taught myself to weld. As for replacing the quarters, they weren't that bad. I just took my time and only cut a bit off a time until I got to where I needed it. When I did the quarters, I replaced the outer wheel houses and deep tubbed it at the same time so it was a little more involved making sure everything was lined up.
On to the updates. There are a few:
Well it's been a while since I had any updates. To be honest, I haven't been all that motivated to actually work on the car. There has been zero overtime at work so no new parts coming in and I feel like I'm in over my head with this build. As I stated before, I've decided to do as much as I can without having to get new parts. This update is also going to have quite a few questions, so if you can answer any of them that would be greatly appreciated.
After welding in the rear fuel filler panel, I decided I was going to work on routing the filler tube through the trunk. I tried working around the trunk latch but the filler neck wouldn't fit, so I decided to remove it for the time being. I welded in some support braces
After taking a bunch of measurements, I cut the latch out
Unfortunately that's still how's it sitting. I was trying to figure out how to run the filler neck. The one that came with the Alston filler cap is designed for a Camaro so it goes off to the right instead of straight down. I can get a universal one that comes straight out from the filler cap and then I would have to run it down somehow. My first question....if I decided to get the straight one would I be able to use exhaust tube for the rest of the filler neck? Would there be any issue having gas gown down exhaust tube? I was thinking about drilling a hole though the trunk floor and running the exhaust tube with different bends so it came out where the filler tube on a stock tank would meet it. I was then going to weld the exhaust tube to the trunk so it doesn't move. I would then put the trunk latch back on to cover all this up. I would likely have to use a 90 degree piece of rubber tube to join the filler cover and the exhaust tube running down. Does this sound like it would work???
The next thing I started to do was to get the subframe aligned and push the motor back. The subframe was pretty close and I didn't have to do a lot of moving it. I can't remember where online I found the diagram with measurements, but I used a hole on the rear frame rails and measured to the alignment hole on the subframe beside where the firewall body mounts sit. I got the subframe so it was within 1/4" of the factory measurements. Is that close enough??
Once the frame was aligned, I pushed the motor back as far as I could. There's still quite a bit of room to the firewall
I then started hanging the sheet metal. I fought with getting the doors aligned. I have new Goodmark hinges and now I've read I would have been better off rebuilding the old ones. Oh well. I was told to take the strikers out...that helped. I also ripped out all the old weather stripping..that really helped. Here's the passenger door. The driver's door gap is almost the same. Will have some fixing to do.
I started to hang the fenders and found that things were fitting very well. I ended up needing to find a stock set of body mount washers to put on top of the body mounts. Called Dave at Tin Man's and got a pair for $25.
Without them in
With them in
Started hanging the fenders
Last edited by scherp69; 09-26-2010 at 12:41 AM.
09-25-2010, 11:49 PM
#50
On The Tree
Thread Starter
iTrader: (4)
Join Date: Mar 2009
Location: British Columbia, Canada
Posts: 132
Likes: 0
Received 0 Likes
on
0 Posts
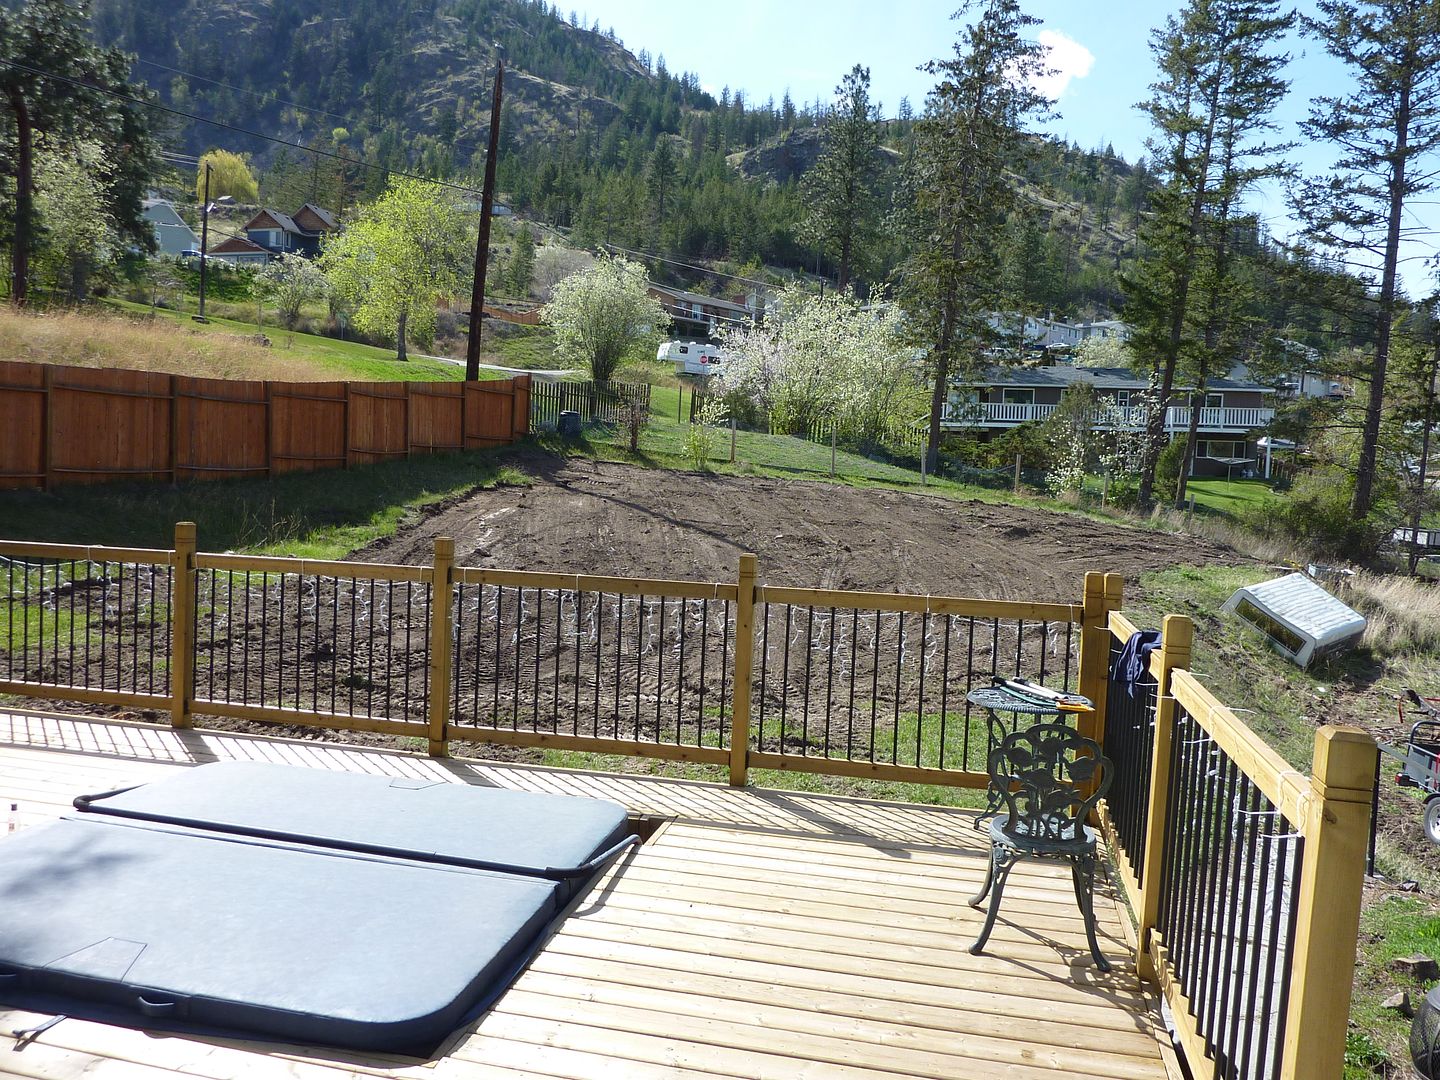
Unfortunately I haven't been back in the shop to do anything else. Last weekend I rented a mini excavator and re-graded a big chunk of my back yard. Now I have a giant litter box in the back for all our cats. Hope to get it all seeded this weekend, then back to the car.
As stated, not much to update. I did end up getting a set of bucket seat brackets from a 74 SS from Dave at Tin Man. Thanks again Dave. Now I just need to get them cleaned up and weld them in. New parts coming May 15 Going to see the Eagles the night of the 14th, then pick up new stuff on the way back. Will post pics of the goodies when I get them.
Pics of the bucket seat brackets:
As stated, not much to update. I did end up getting a set of bucket seat brackets from a 74 SS from Dave at Tin Man. Thanks again Dave. Now I just need to get them cleaned up and weld them in. New parts coming May 15
Going to see the Eagles the night of the 14th, then pick up new stuff on the way back. Will post pics of the goodies when I get them.Pics of the bucket seat brackets:
09-25-2010, 11:49 PM
#51
On The Tree
Thread Starter
iTrader: (4)
Join Date: Mar 2009
Location: British Columbia, Canada
Posts: 132
Likes: 0
Received 0 Likes
on
0 Posts
The best way to get re-motivated................NEW PARTS!!!!!!!!!!!!!!!
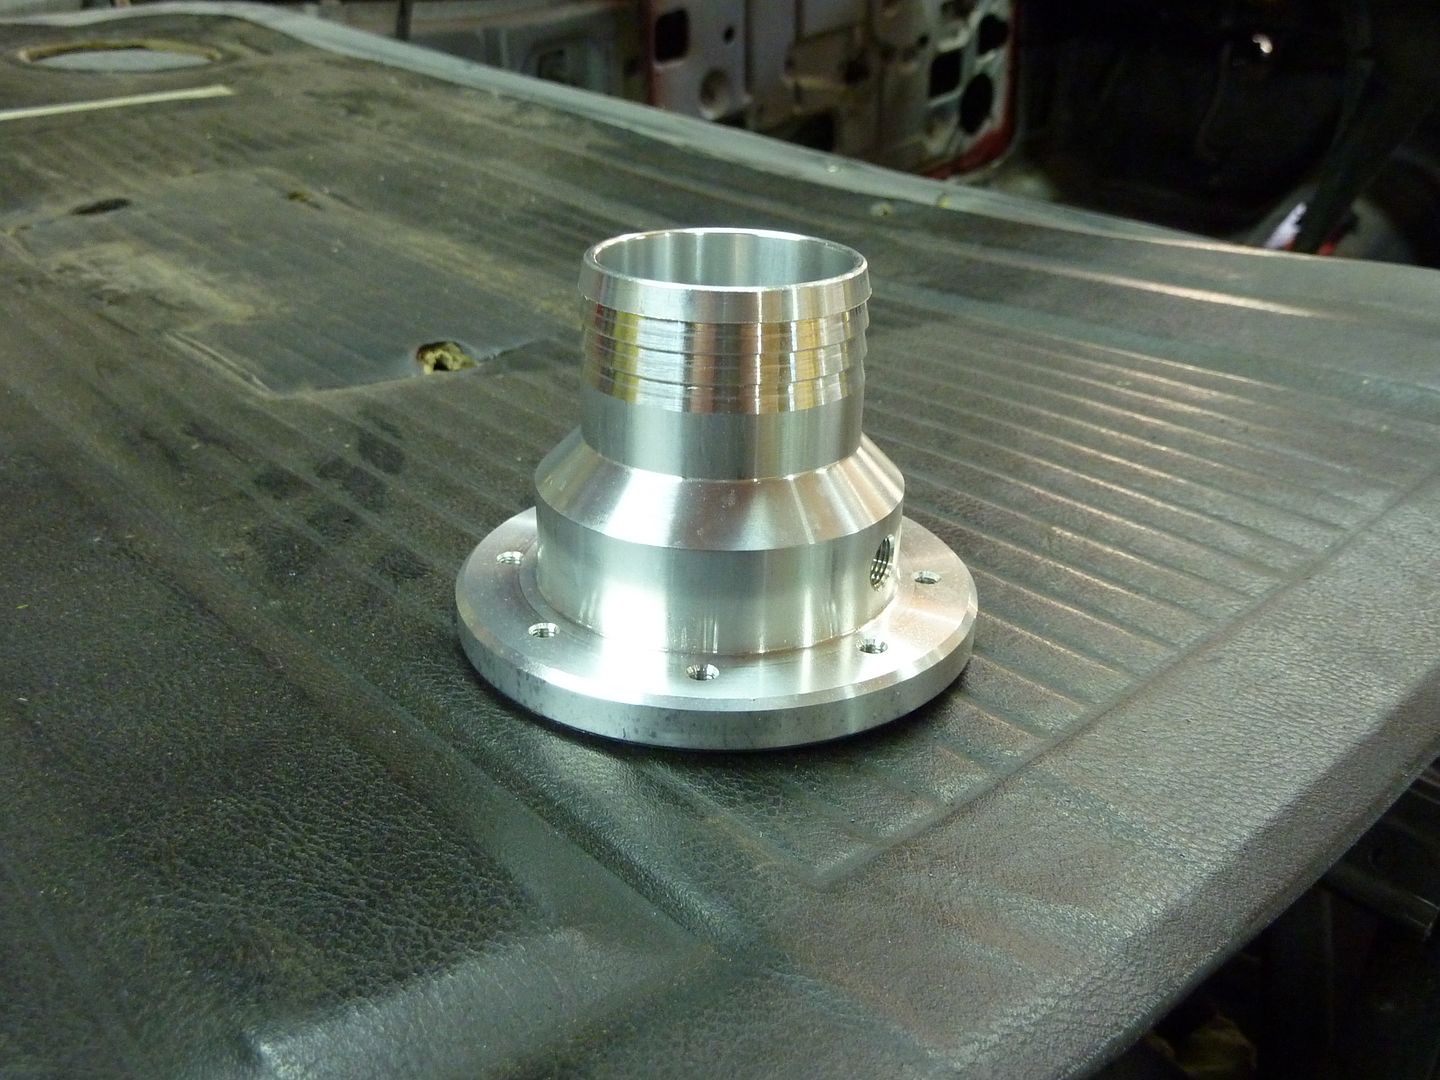
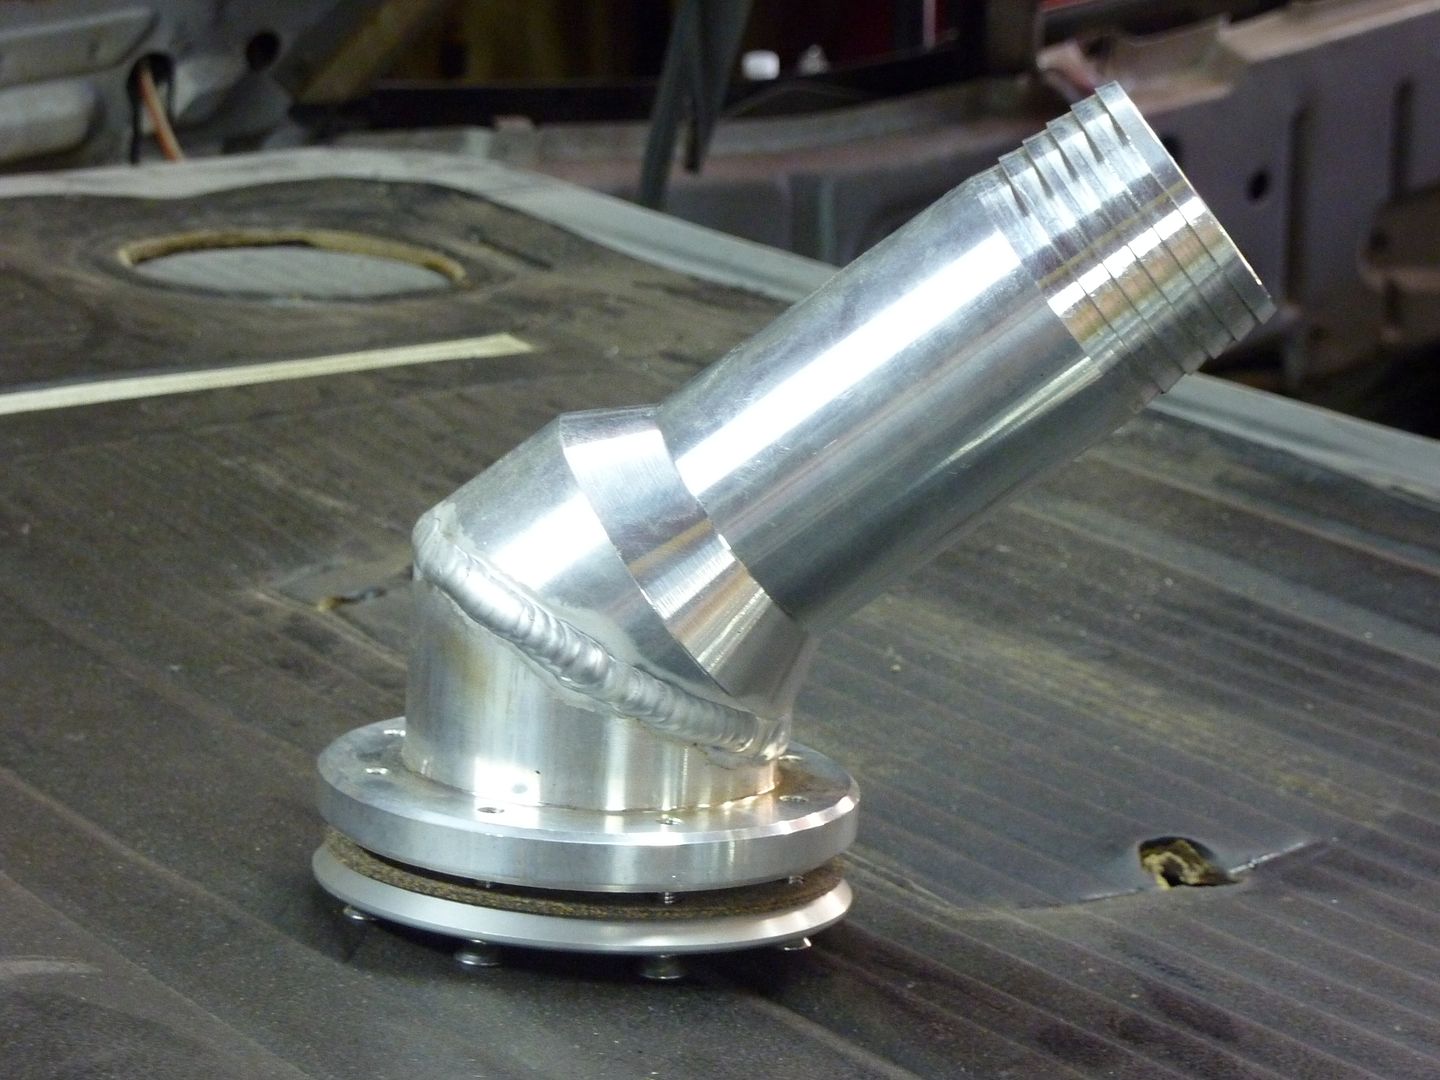
Decided to get a new filler neck. This is Ridetech's universal one. The other one that I have is for a Camaro. I thought this one might be easier to use as now I can run the rest of the filler neck straight as the Camaro one slants to the passenger side.
One for Camaro (if anyone needs one of these let me know as now I have an extra)
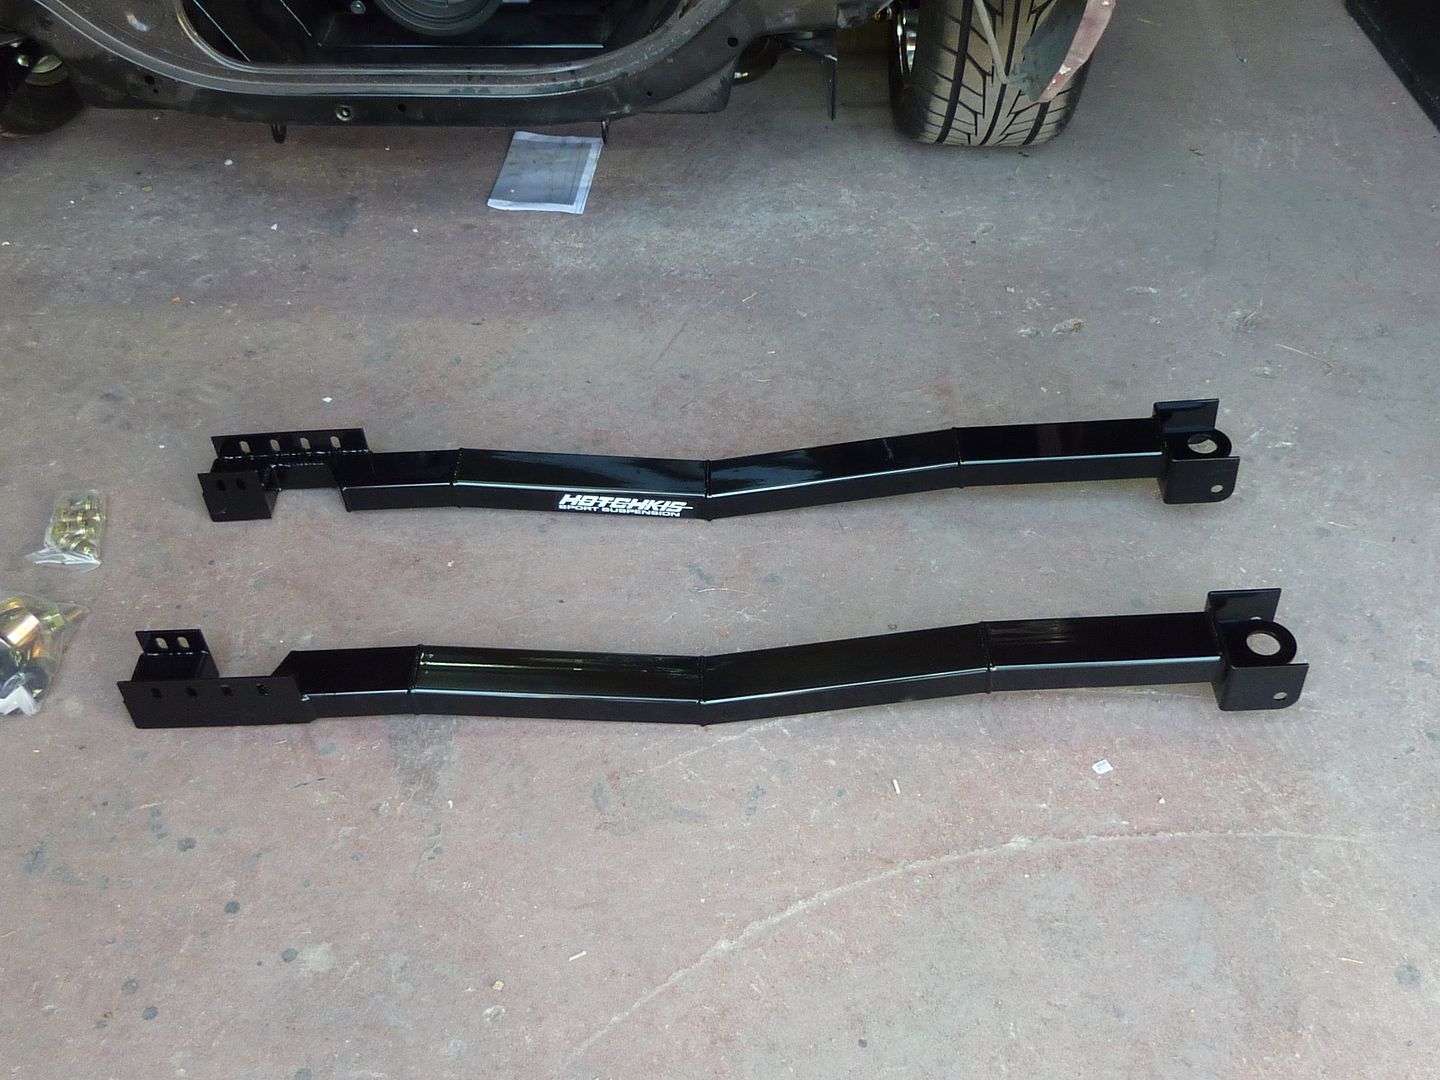
Hotchkis subframe connectors
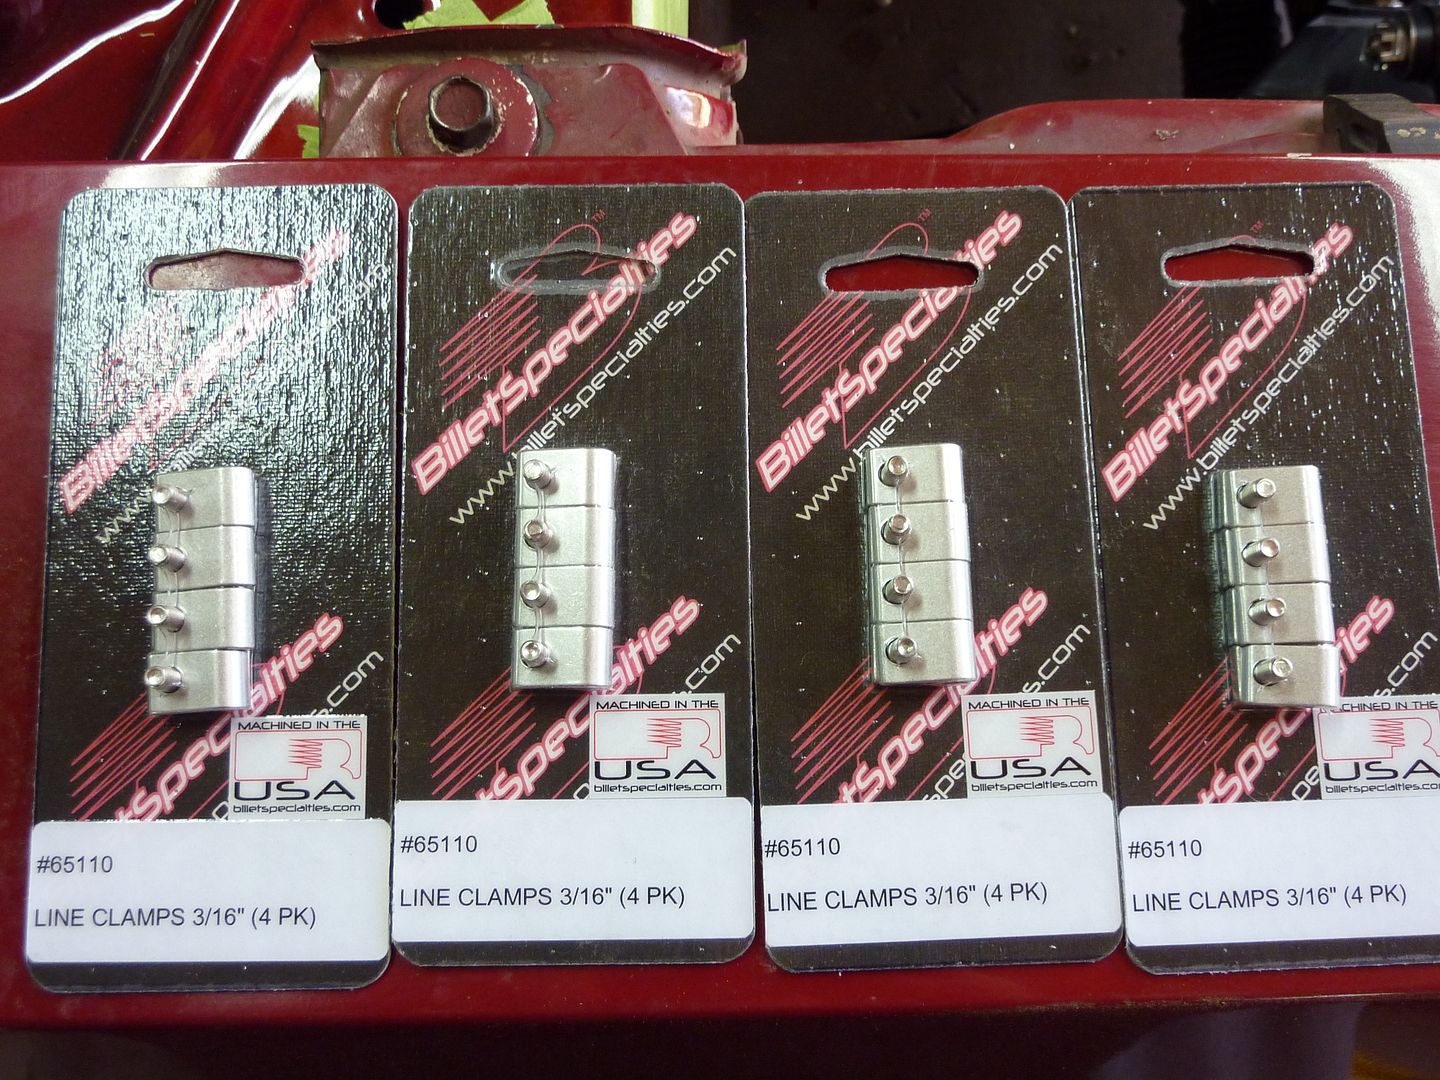
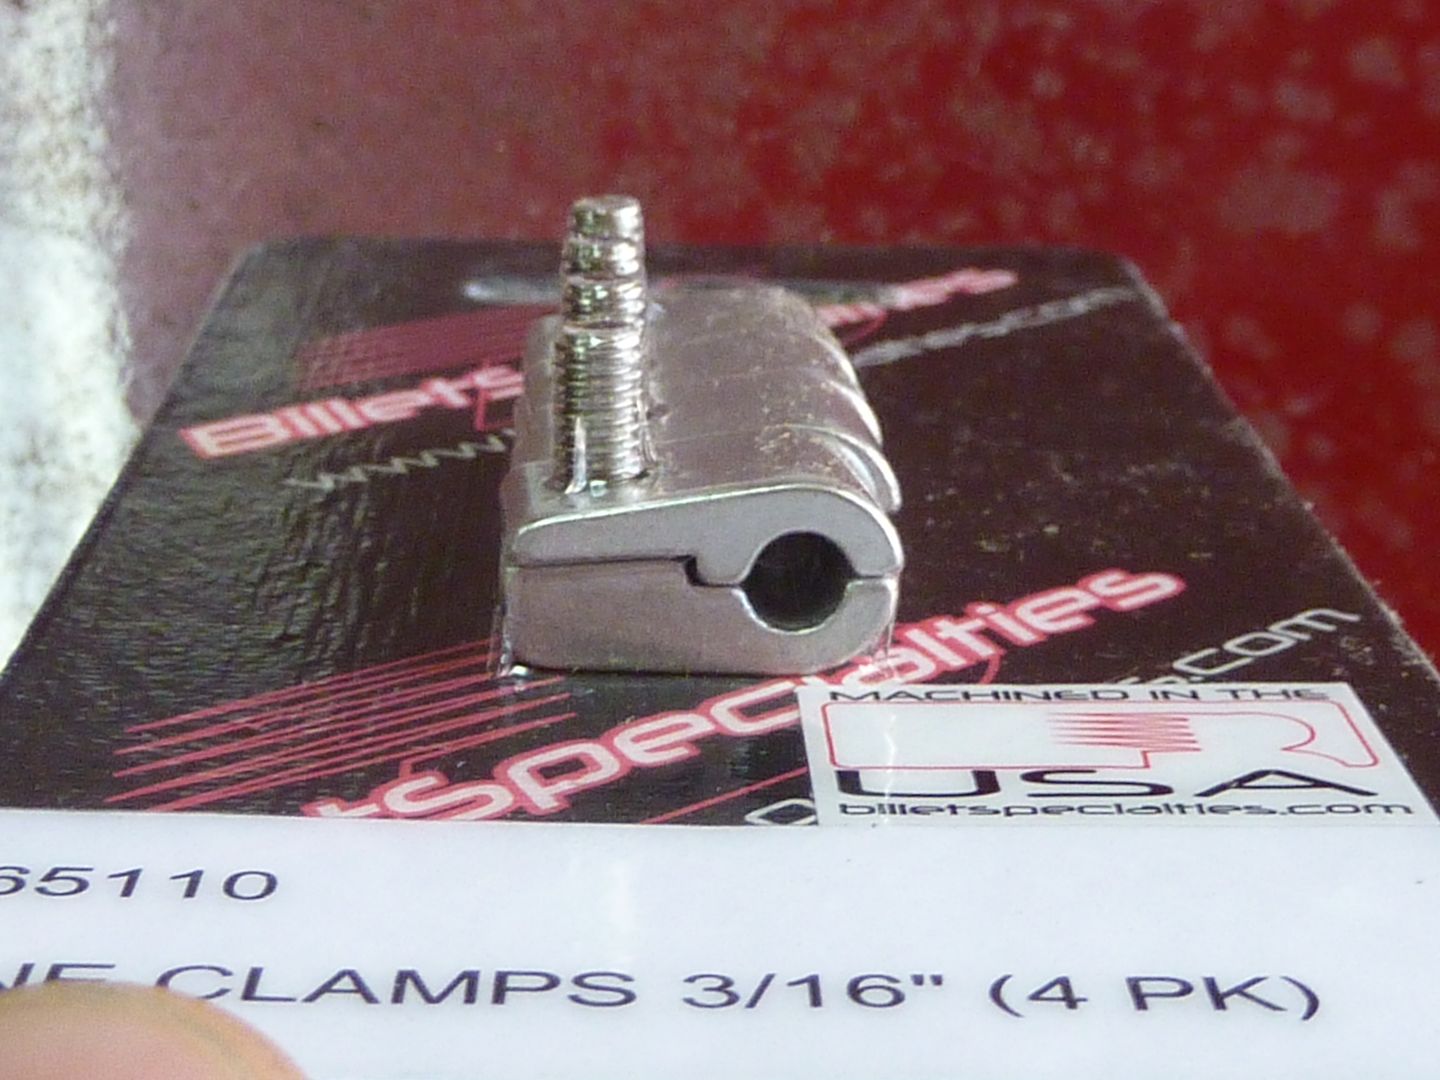
Billet Specialties 3/16" line clamps for when I start running the brake lines.
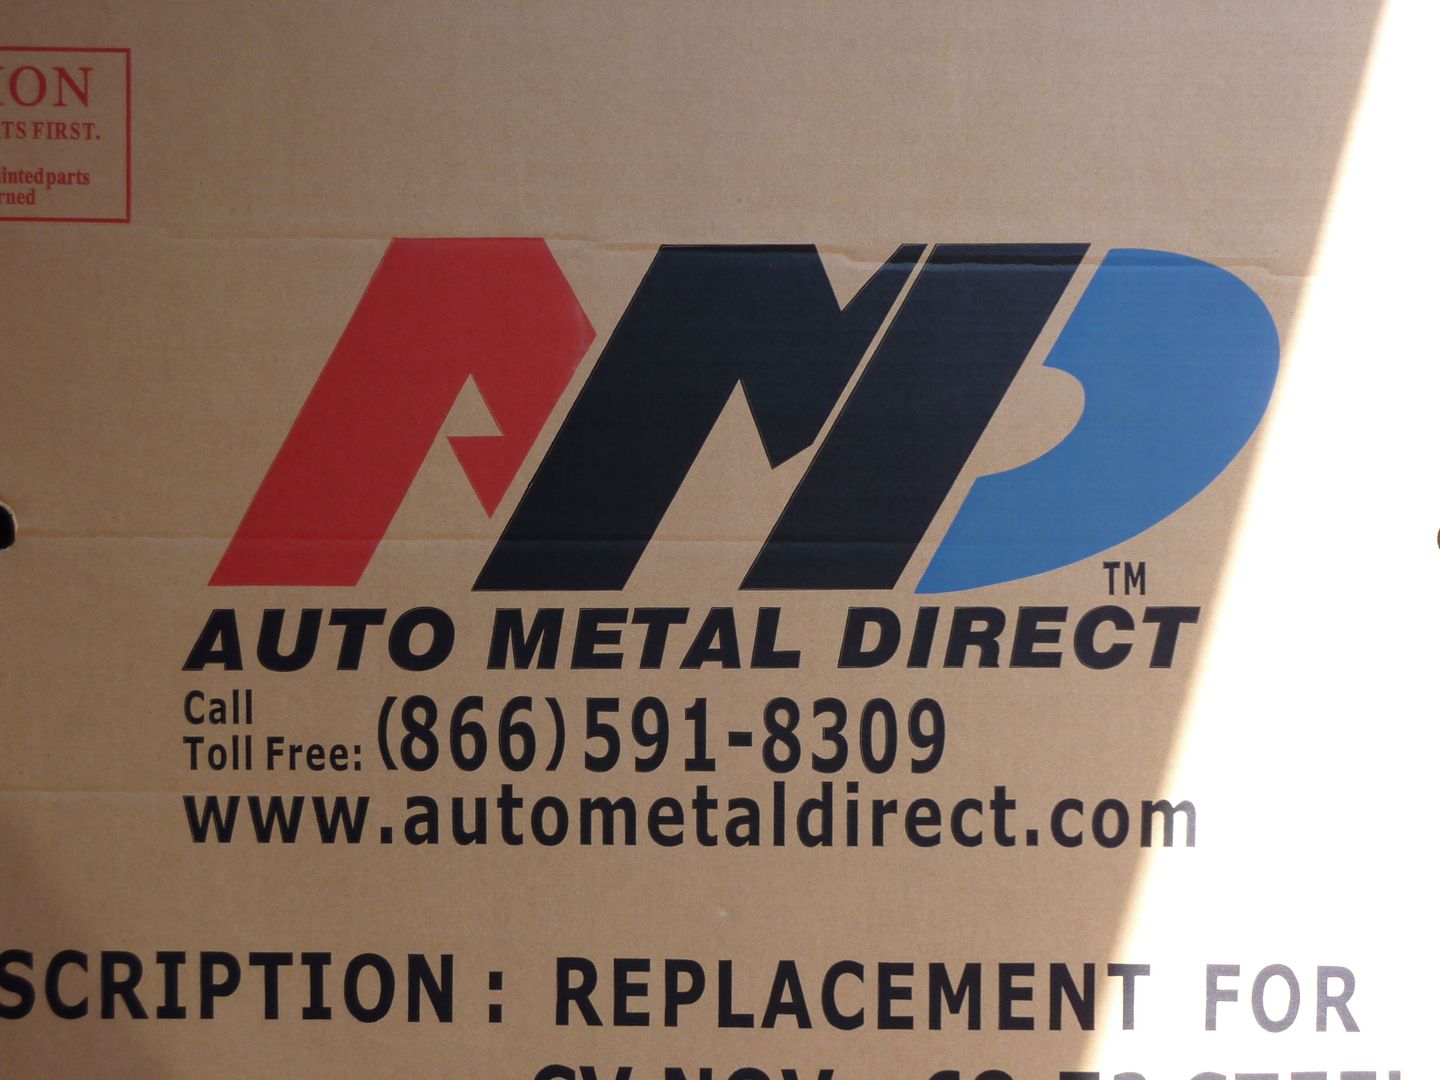
AMD inner fenders

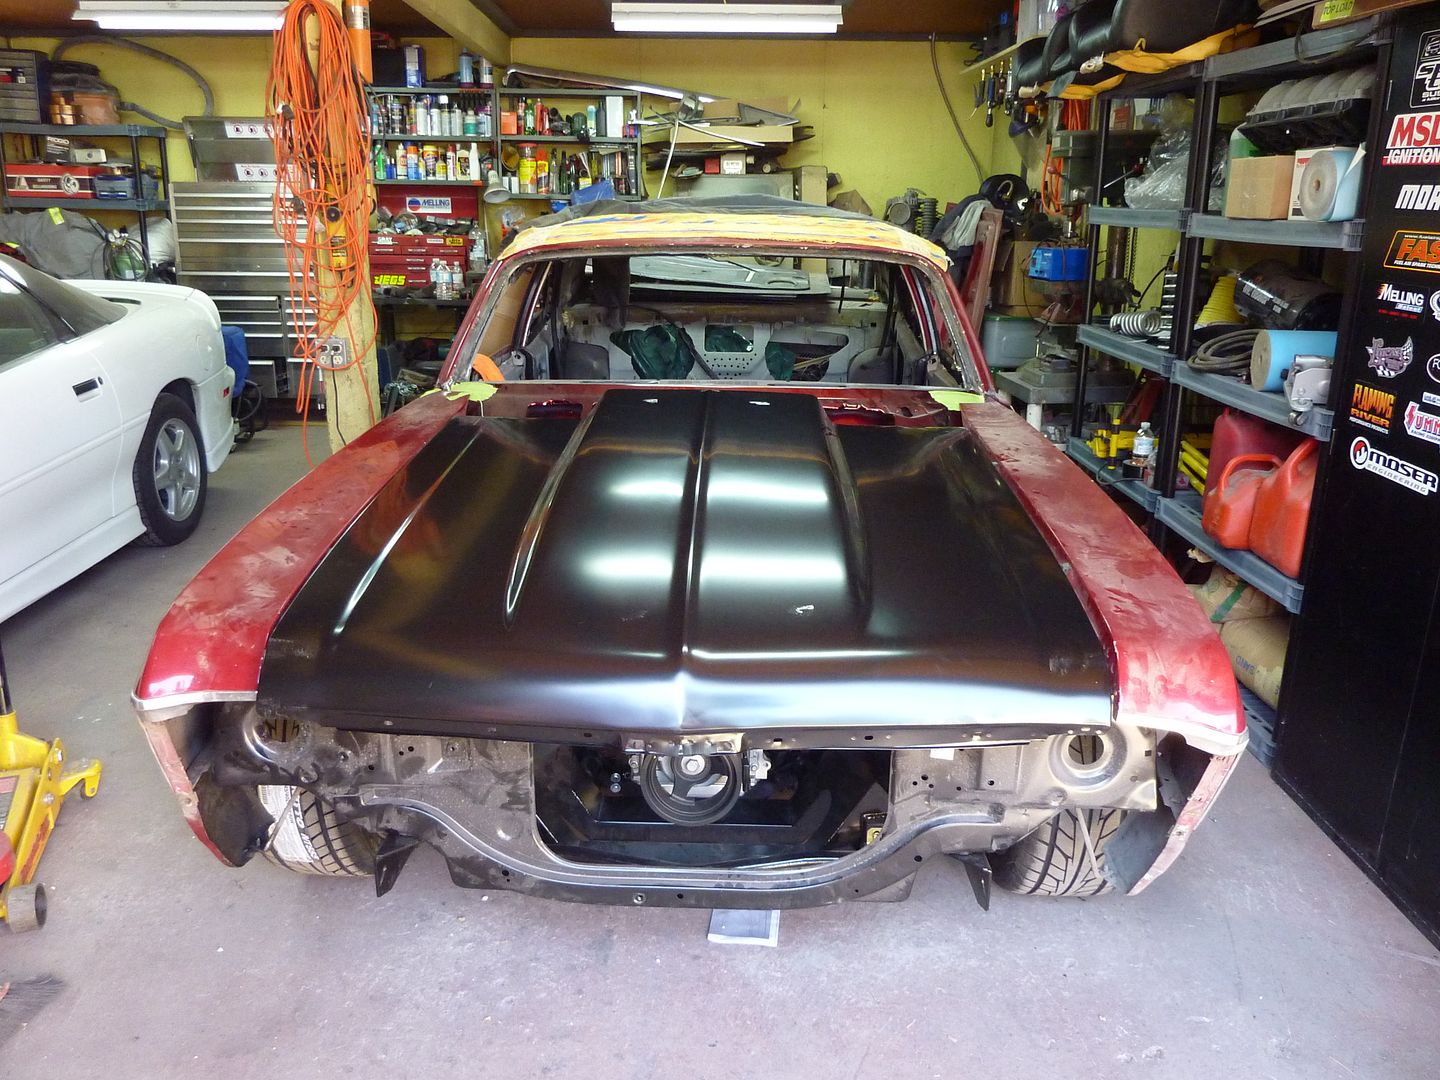
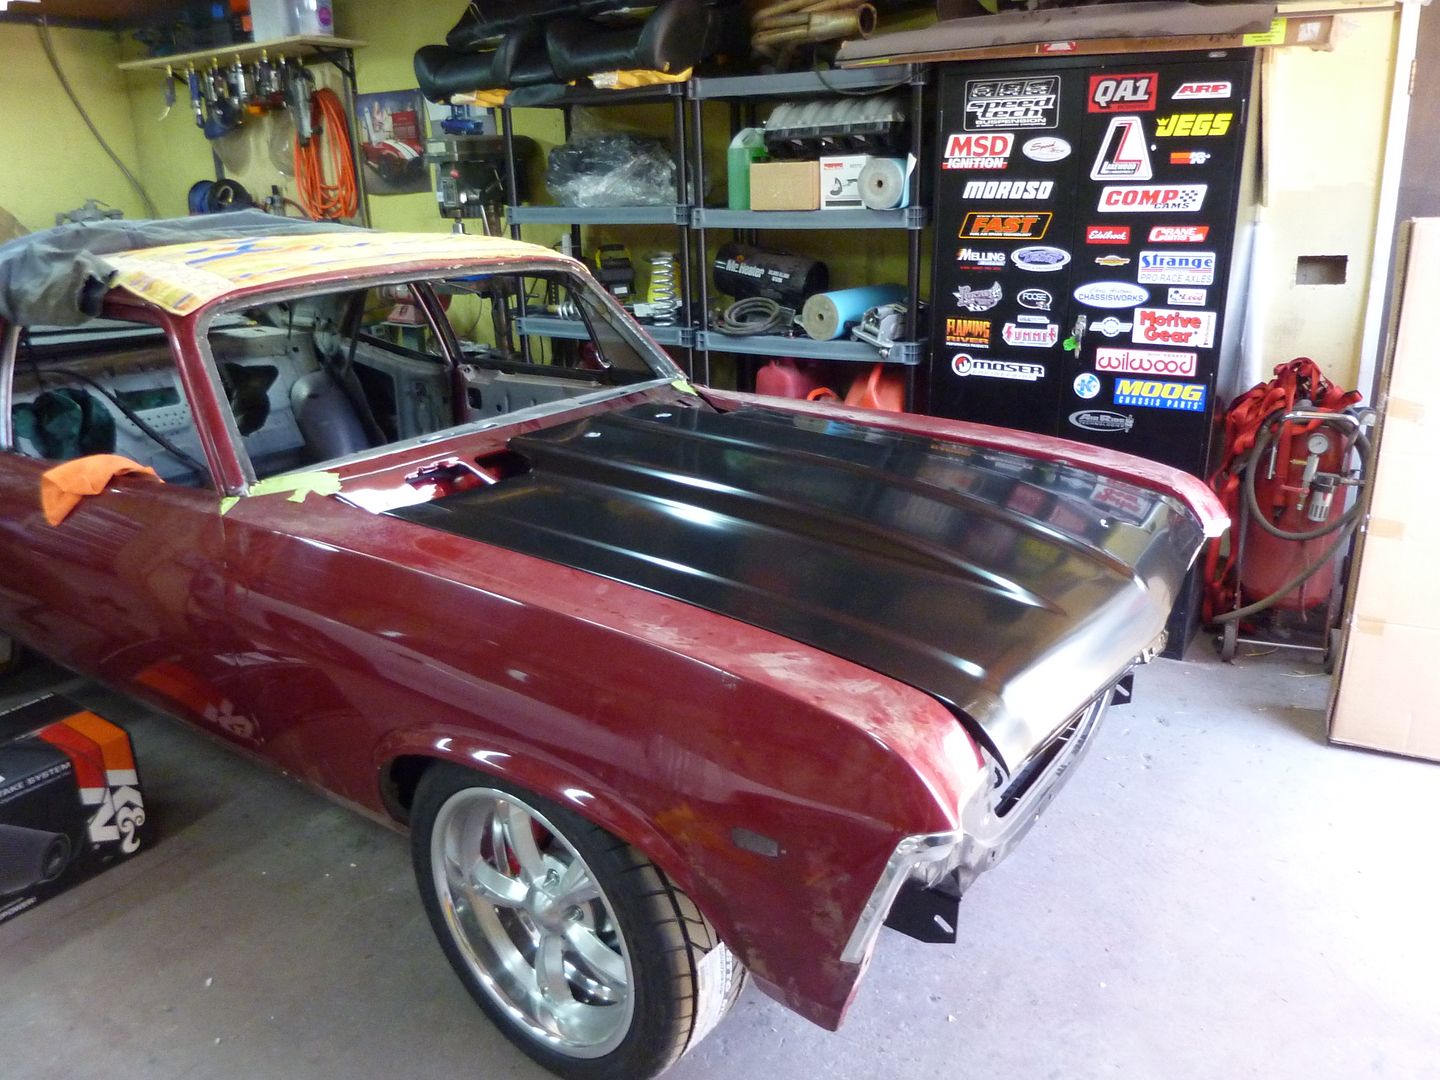
AMD 2" cowl hood - damn this thing is going to look sweet
Don't worry....I have towels underneath
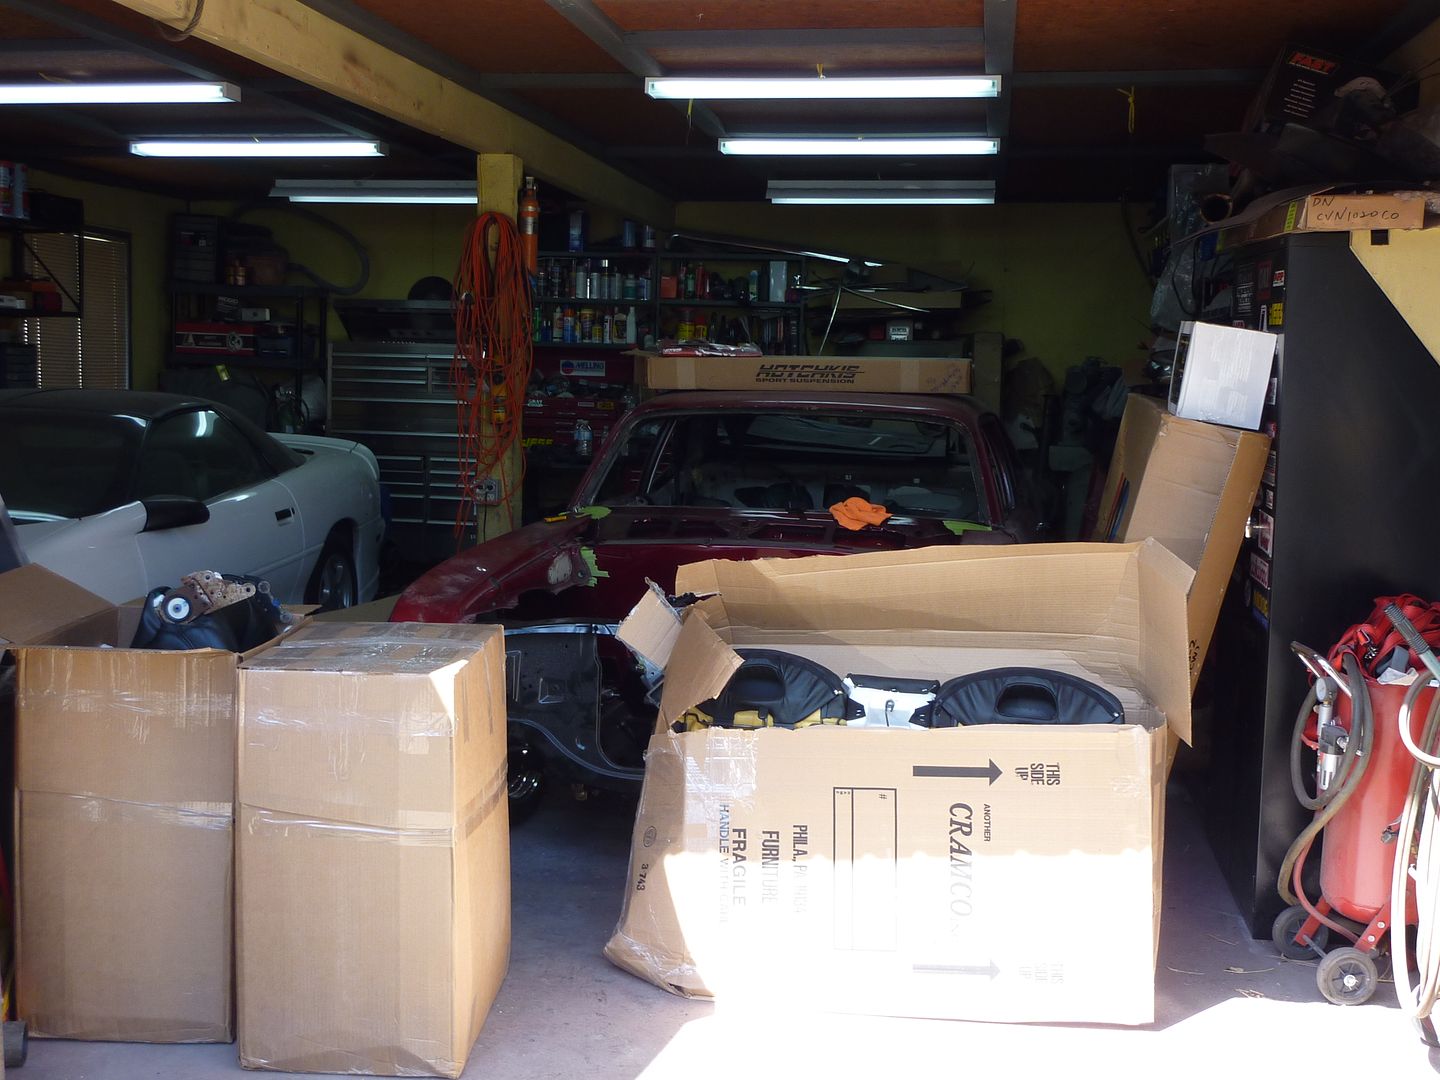
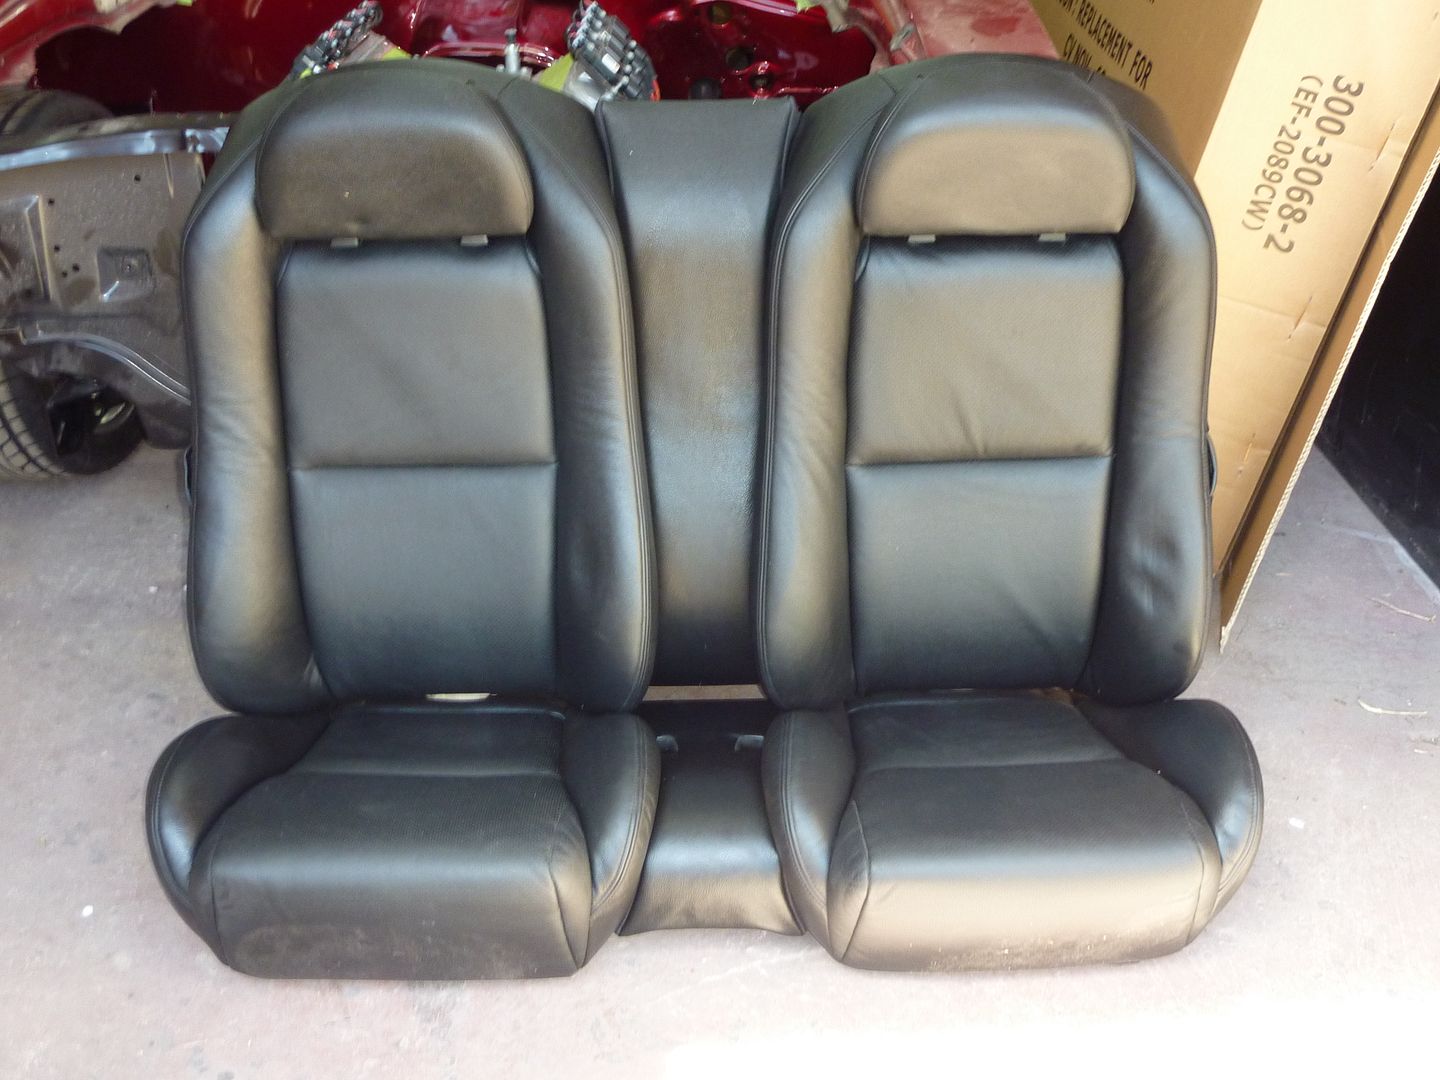
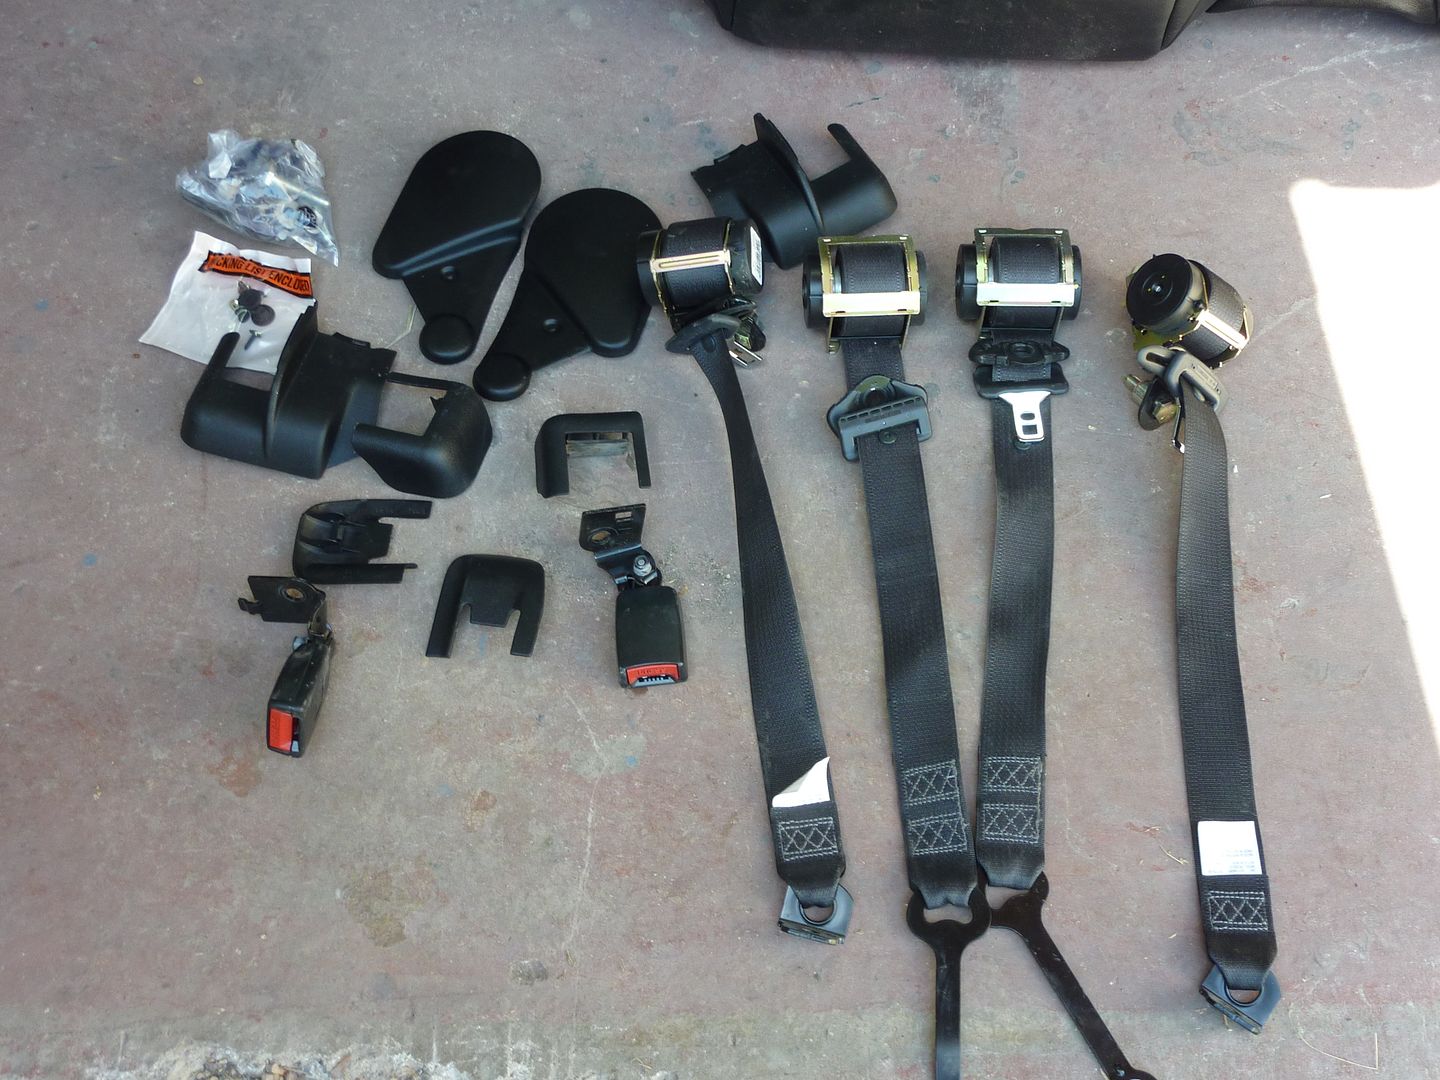
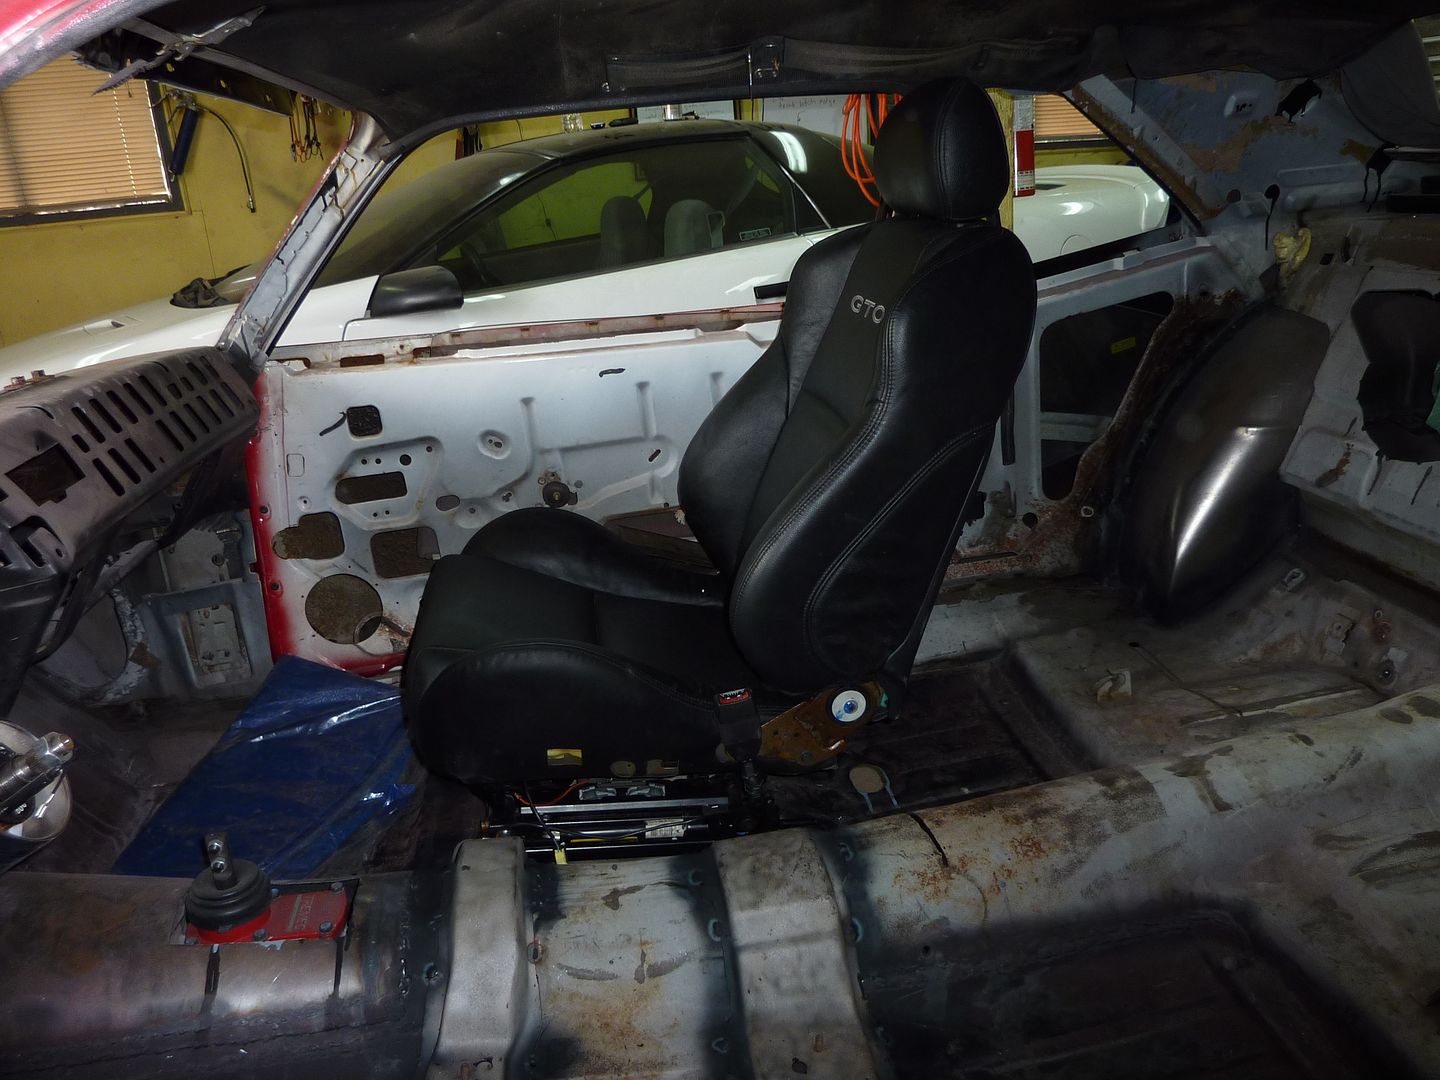
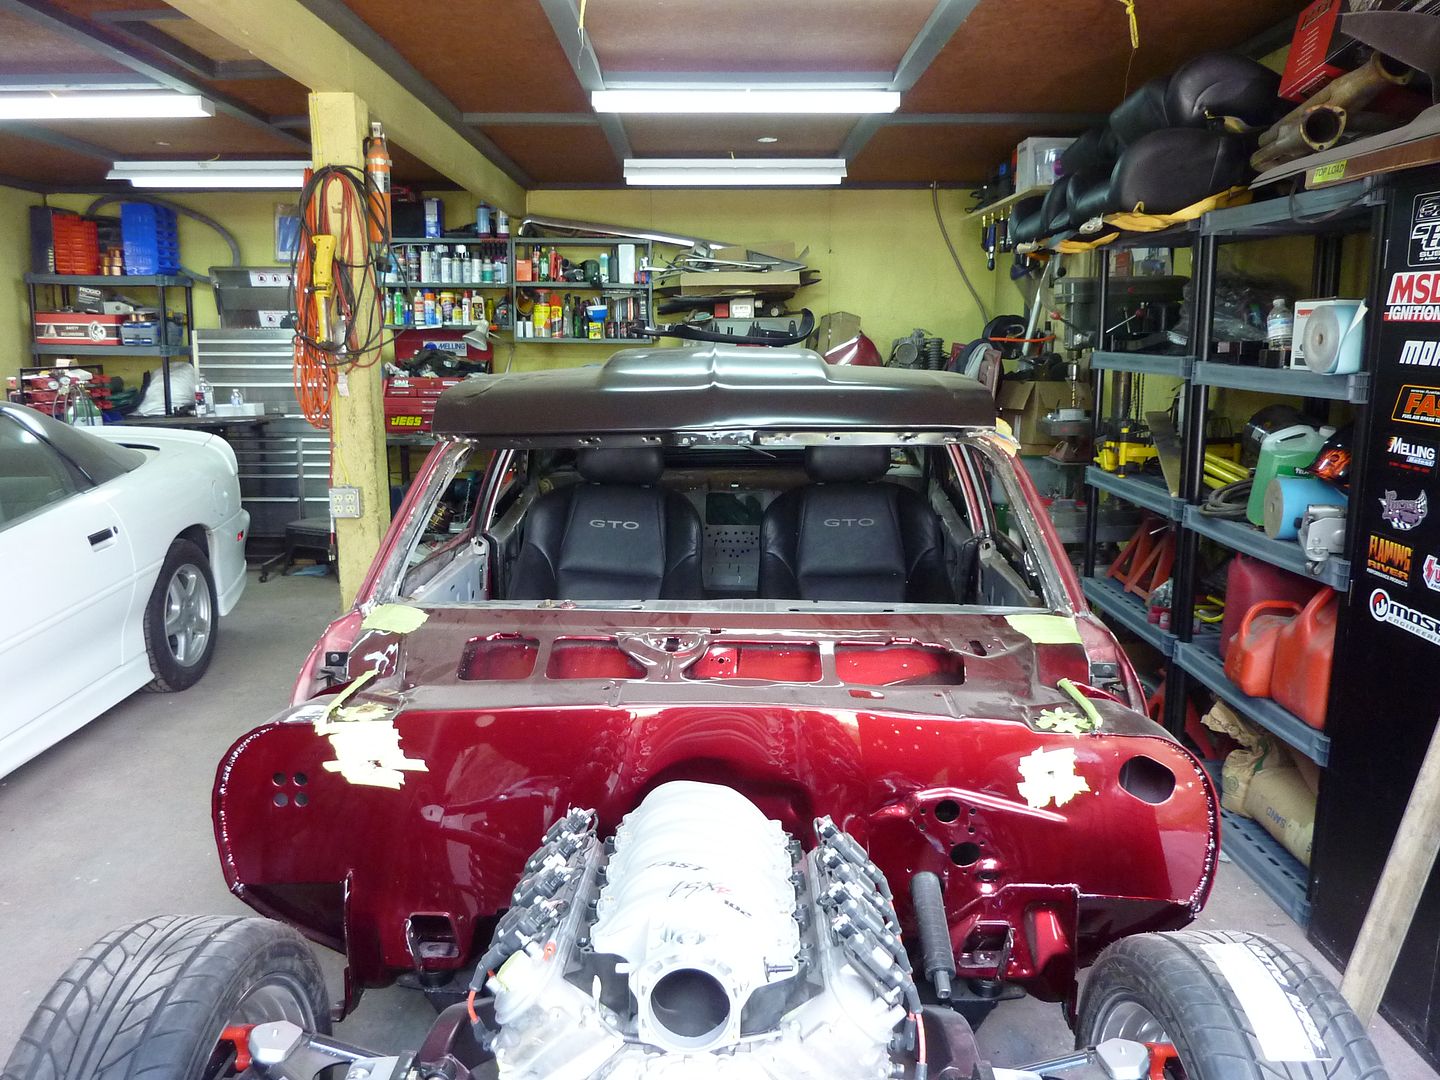
And finally.....I decided to go with leather seats out of a 2005 GTO. I got fronts, back and seat belts for $525 + shipping. Can't go wrong with that. They are in great shape too. I'll have to clean up some of the metal and re-paint it. Damn are they comfy. Now the fun begins trying to make these things fit.

I plan on spending quite a bit of time in the shop as I don't go back to work until Thursday. Watch for updates, hopefully daily.
Decided to get a new filler neck. This is Ridetech's universal one. The other one that I have is for a Camaro. I thought this one might be easier to use as now I can run the rest of the filler neck straight as the Camaro one slants to the passenger side.
One for Camaro (if anyone needs one of these let me know as now I have an extra)
Hotchkis subframe connectors
Billet Specialties 3/16" line clamps for when I start running the brake lines.
AMD inner fenders
AMD 2" cowl hood - damn this thing is going to look sweet
Don't worry....I have towels underneath
And finally.....I decided to go with leather seats out of a 2005 GTO. I got fronts, back and seat belts for $525 + shipping. Can't go wrong with that. They are in great shape too. I'll have to clean up some of the metal and re-paint it. Damn are they comfy. Now the fun begins trying to make these things fit.
I plan on spending quite a bit of time in the shop as I don't go back to work until Thursday. Watch for updates, hopefully daily.
09-25-2010, 11:52 PM
#52
On The Tree
Thread Starter
iTrader: (4)
Join Date: Mar 2009
Location: British Columbia, Canada
Posts: 132
Likes: 0
Received 0 Likes
on
0 Posts
So I made it into the shop. Didn't get as much done as I was hoping. It's amazing what a couple crappy sleeps will do to you. The couch feels so comfortable. I started by putting the rear seats in just to see how much work they are going to be. Going to be some work!!! Didn't take any pics yet. With a car without mini tubs I don't think it would be as bad.
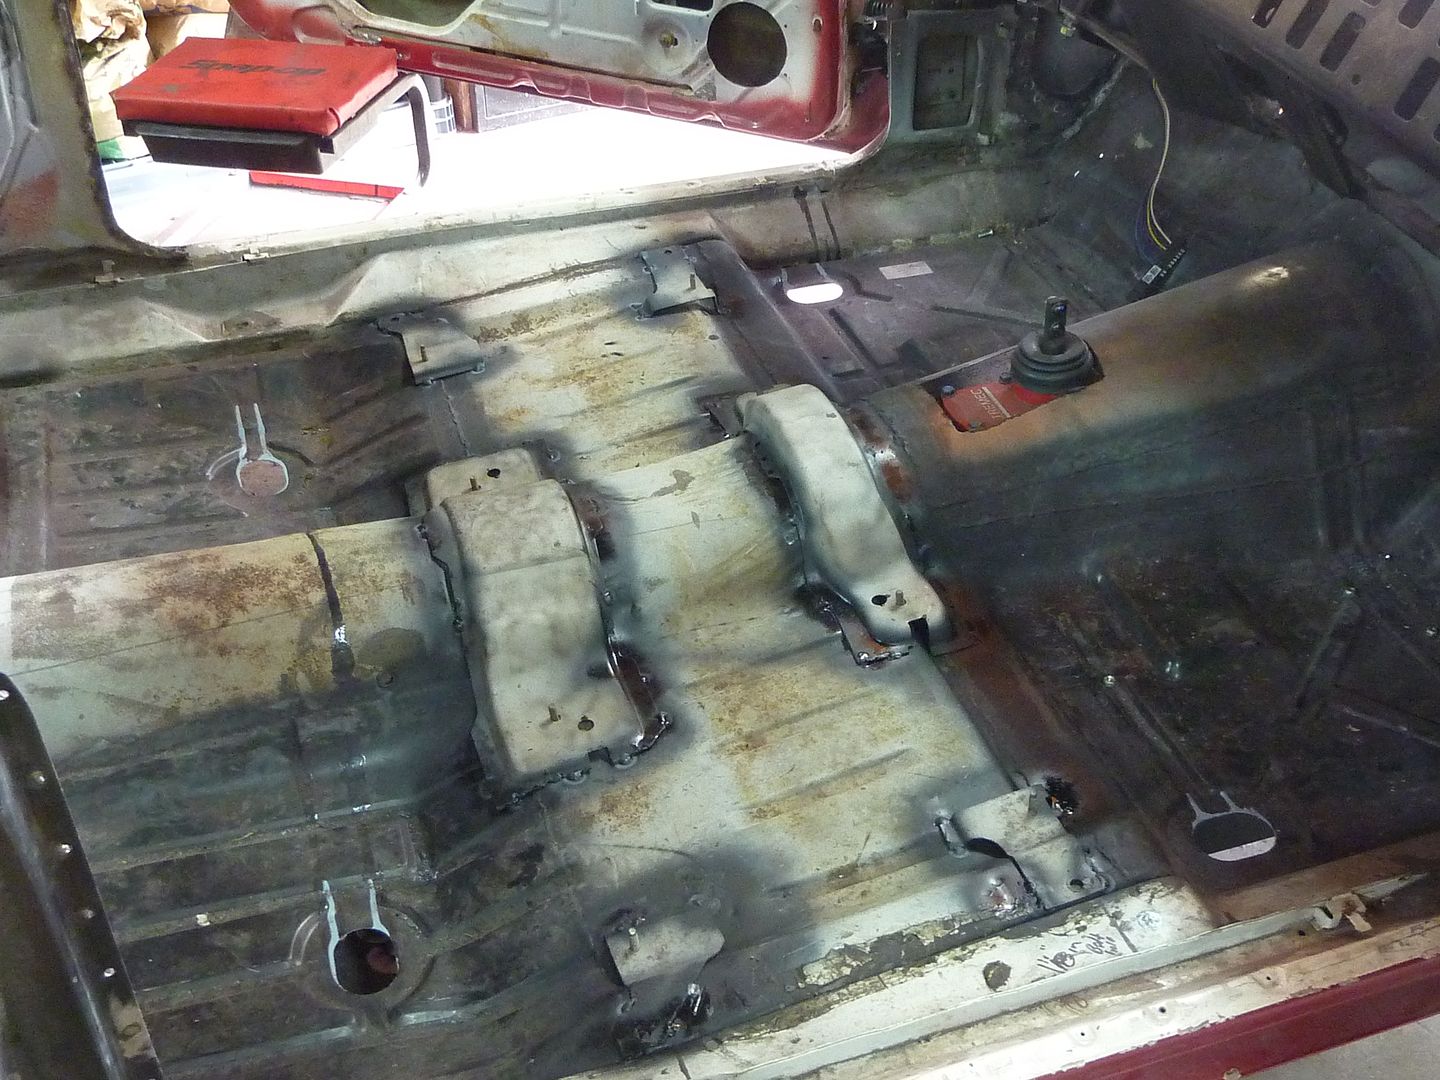
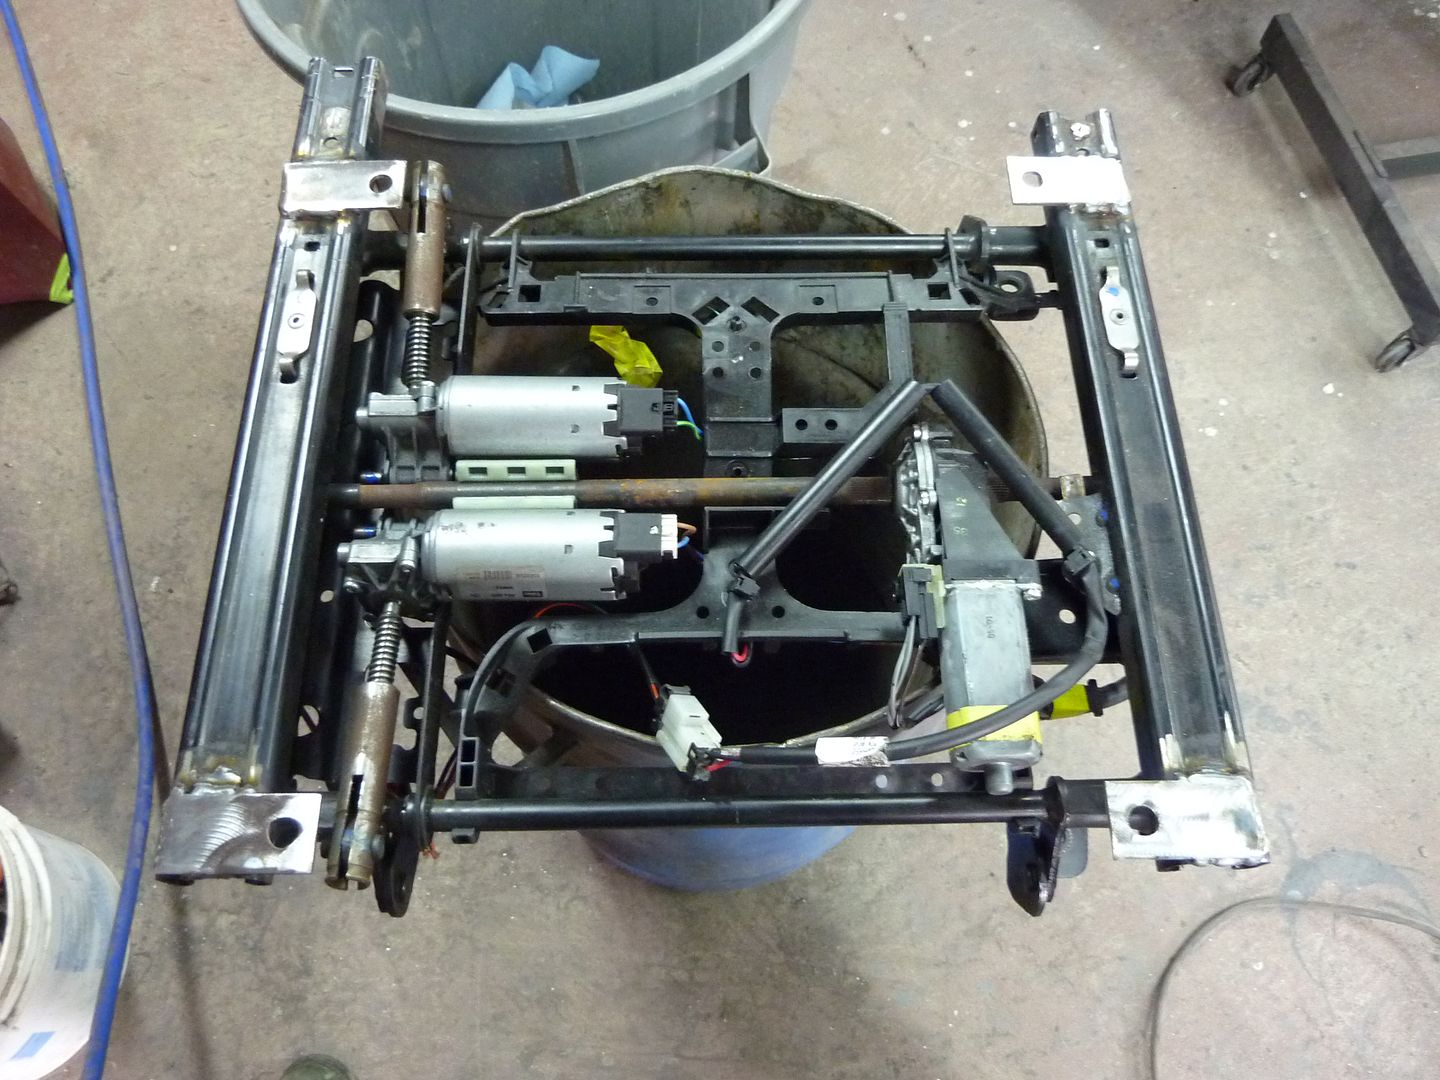
I got the bucket seat brackets welded in. I tried to get them as far apart as they would go, but could only get the bolts to be 11.5" apart from the hump to the rocker. They are 14.24" apart front to back. The worst thing about putting these in now is that if you've been following my build, you know that I had the bottom of the car already done. Haven't looked underneath yet to see what it did to the bedliner.
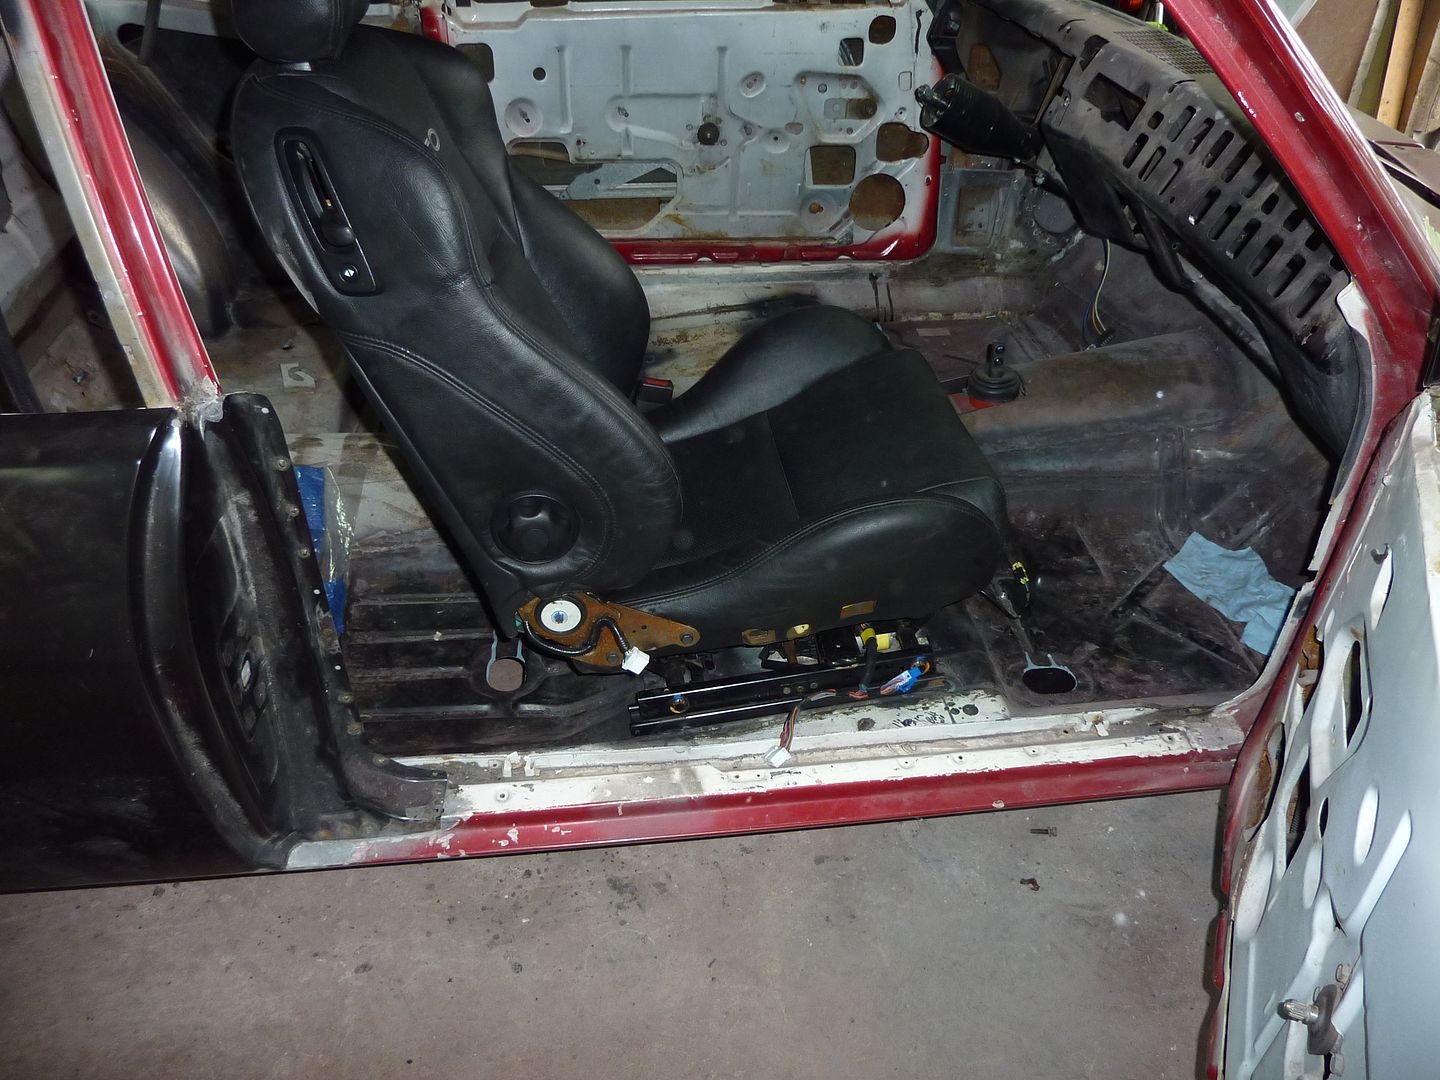
I then started on fitting the front seats. I decided the easiest was to take off the tracks first. Very easy to take off. It is held on by 4 nuts. There are a few wires that need to be disconnected, but pretty easy to figure out.
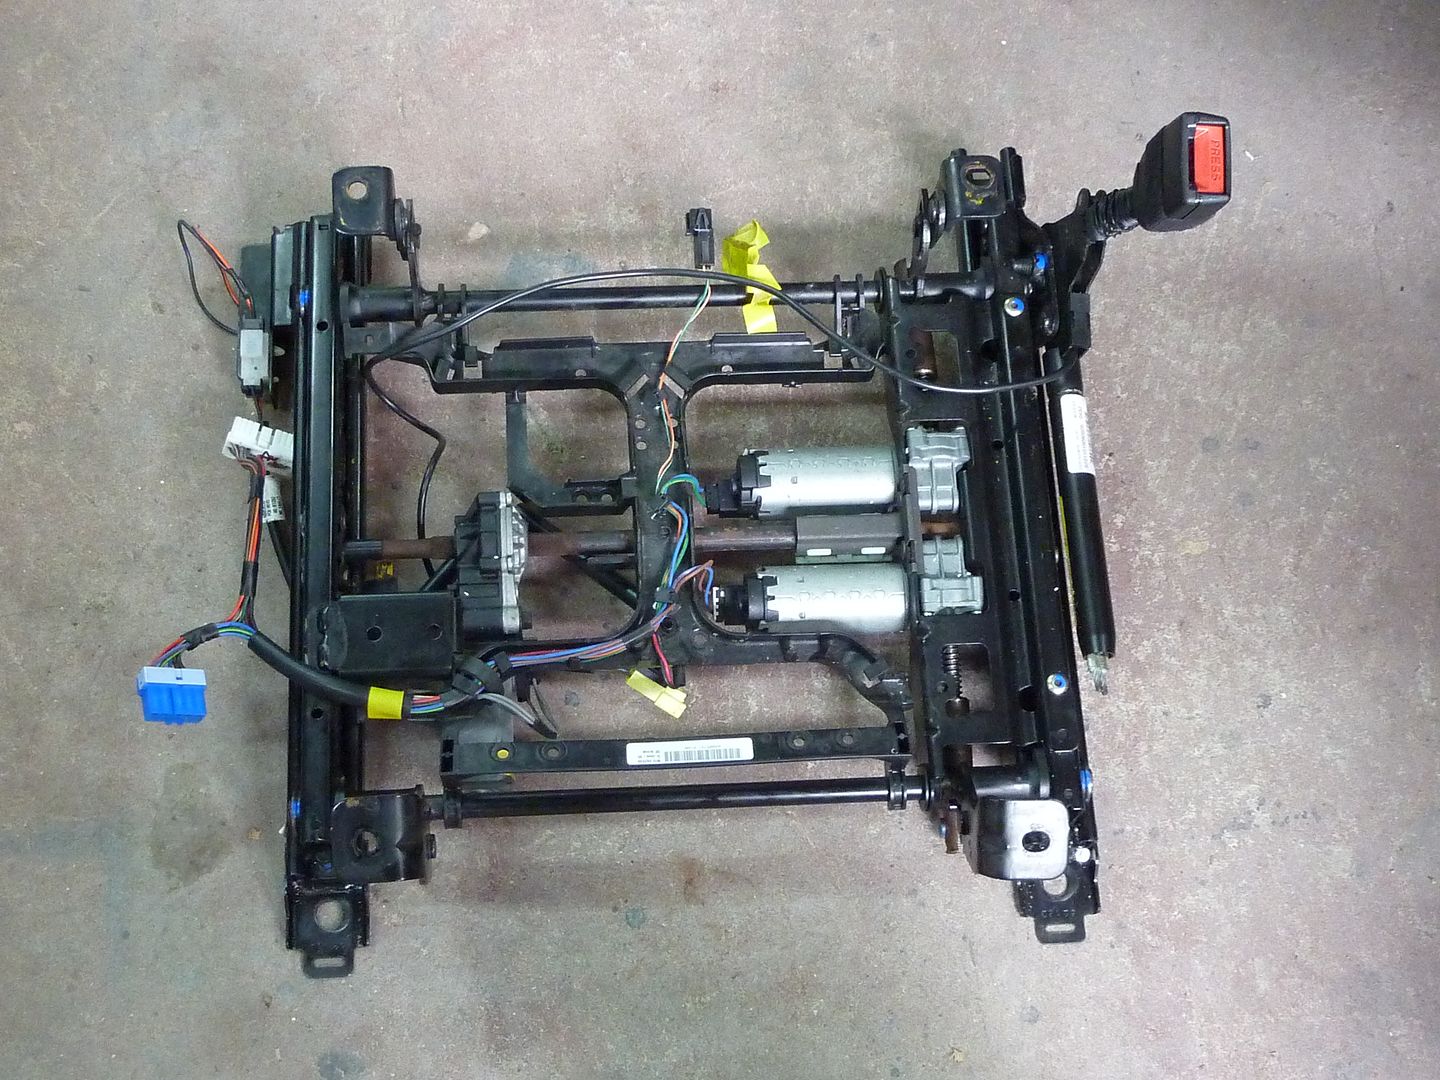
I then put the track into the car...damn this thing is wide. If I remember correct, the holes are 16 or 17" across from each other.

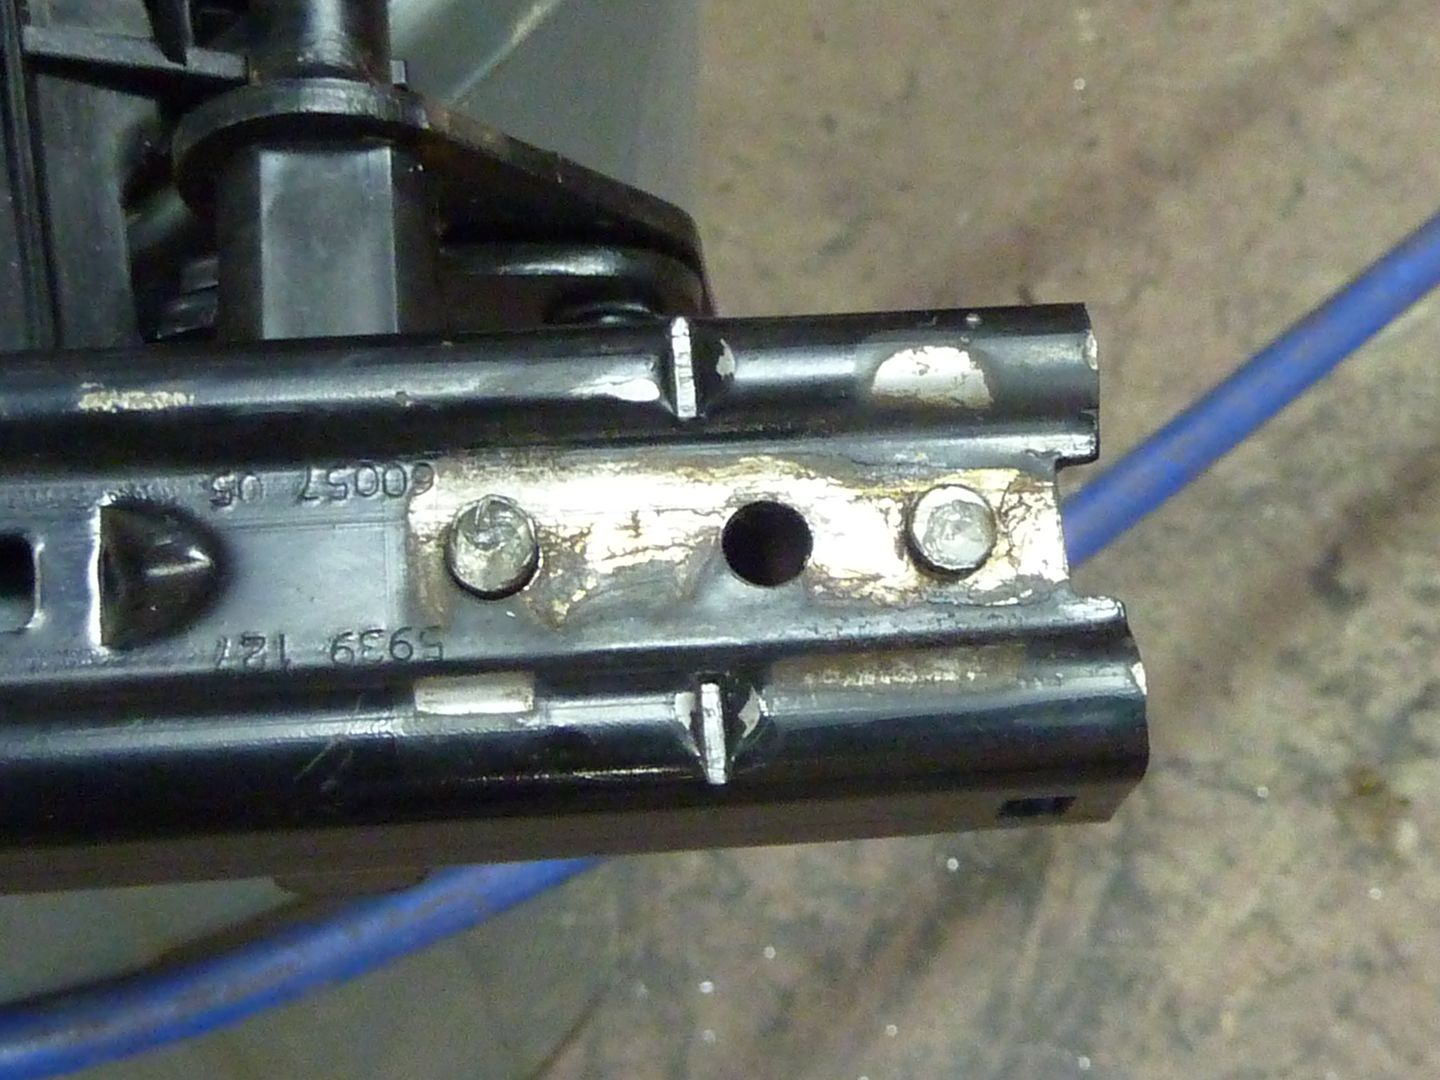
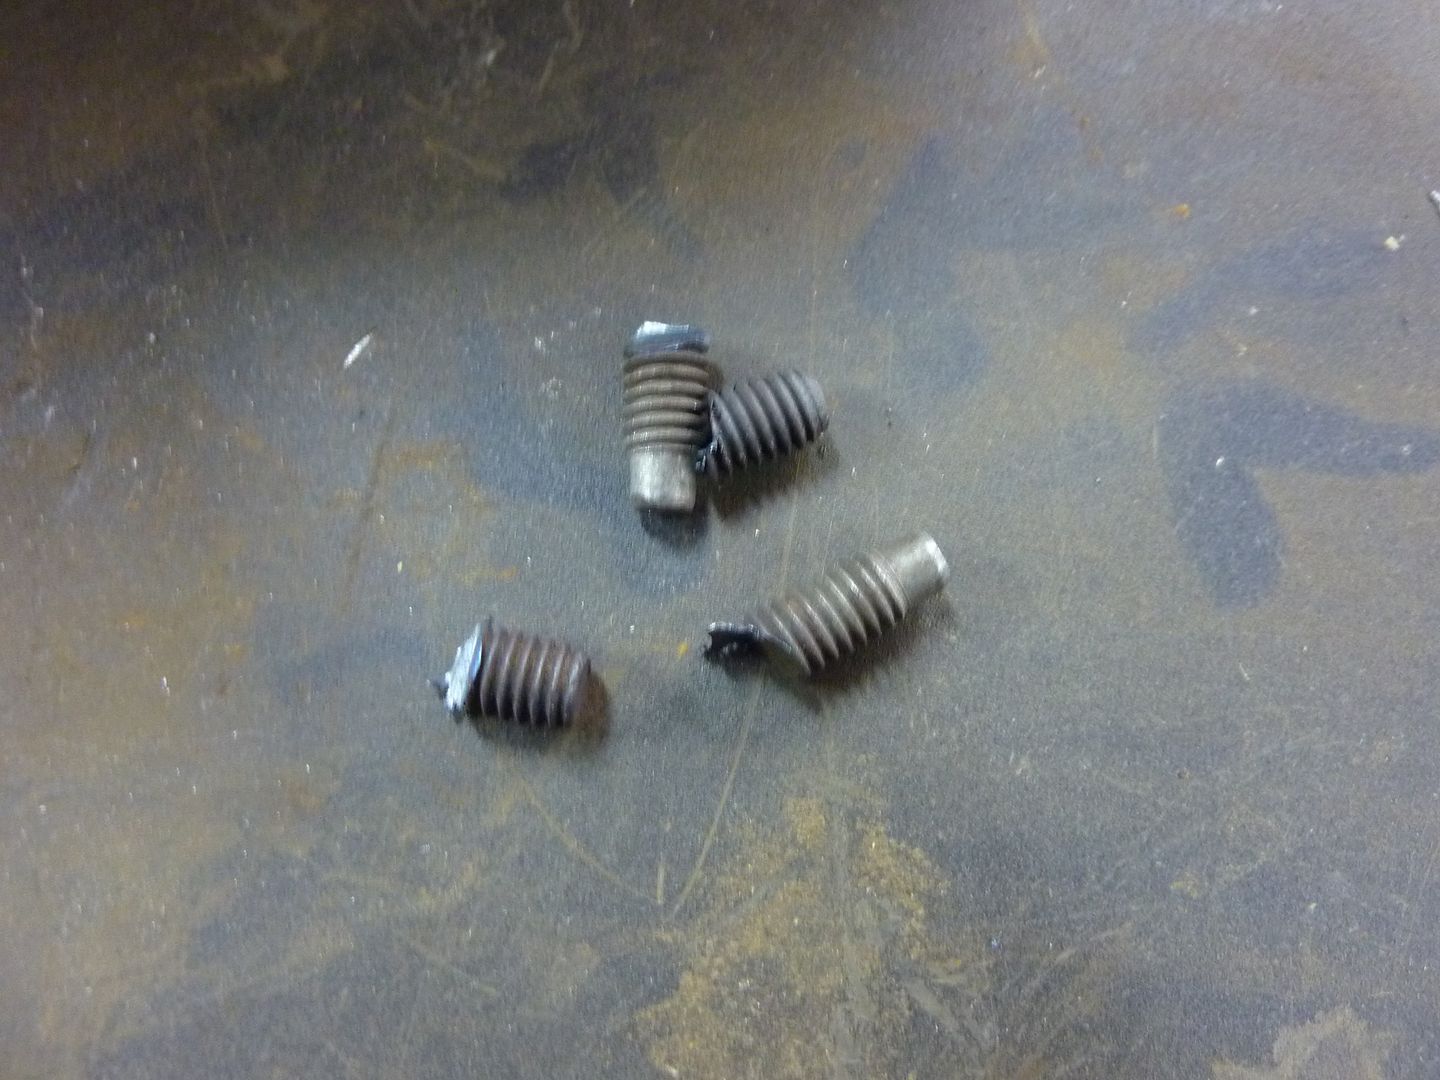
First thing to go...the stock mounting brackets. They were pretty easy to get off. They are held on by a pin in the middle of them and some welds on either side.
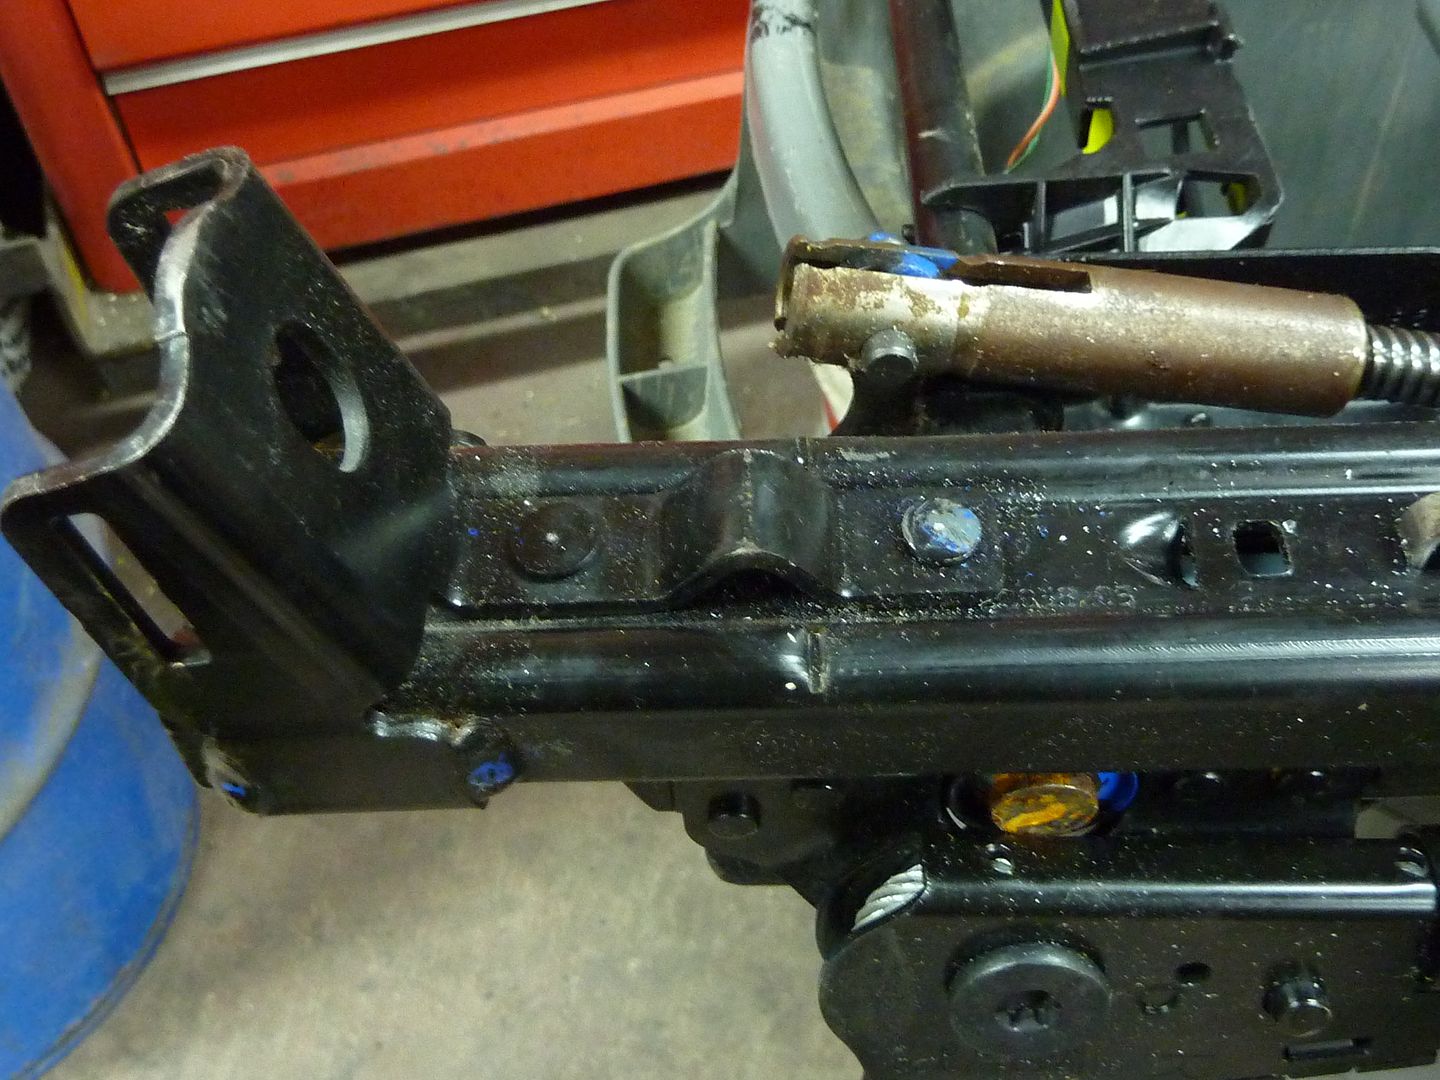
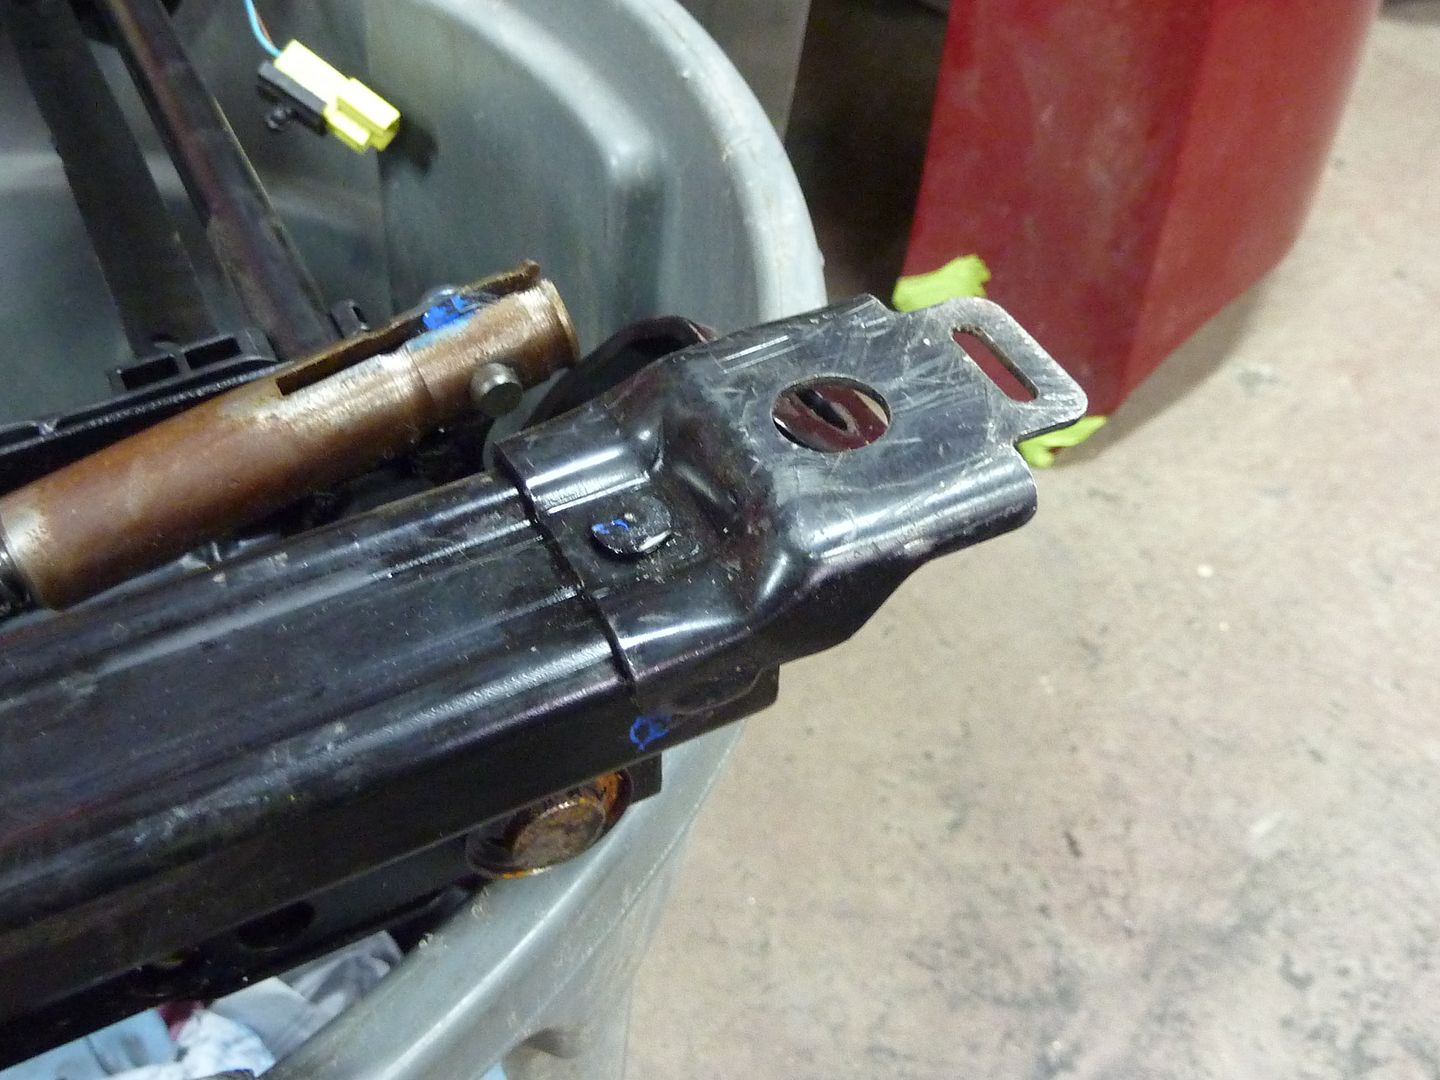
When you are taking these off, don't do like I did originally and pound the pins out. They appear to actually serve a purpose. I had to fight with them and get them back into the holes. I then welded them to the frame.
Once the stock mounting brackets were off, I put the whole thing back into the car. Fits much better now, but still need to mock up some new mounting brackets.
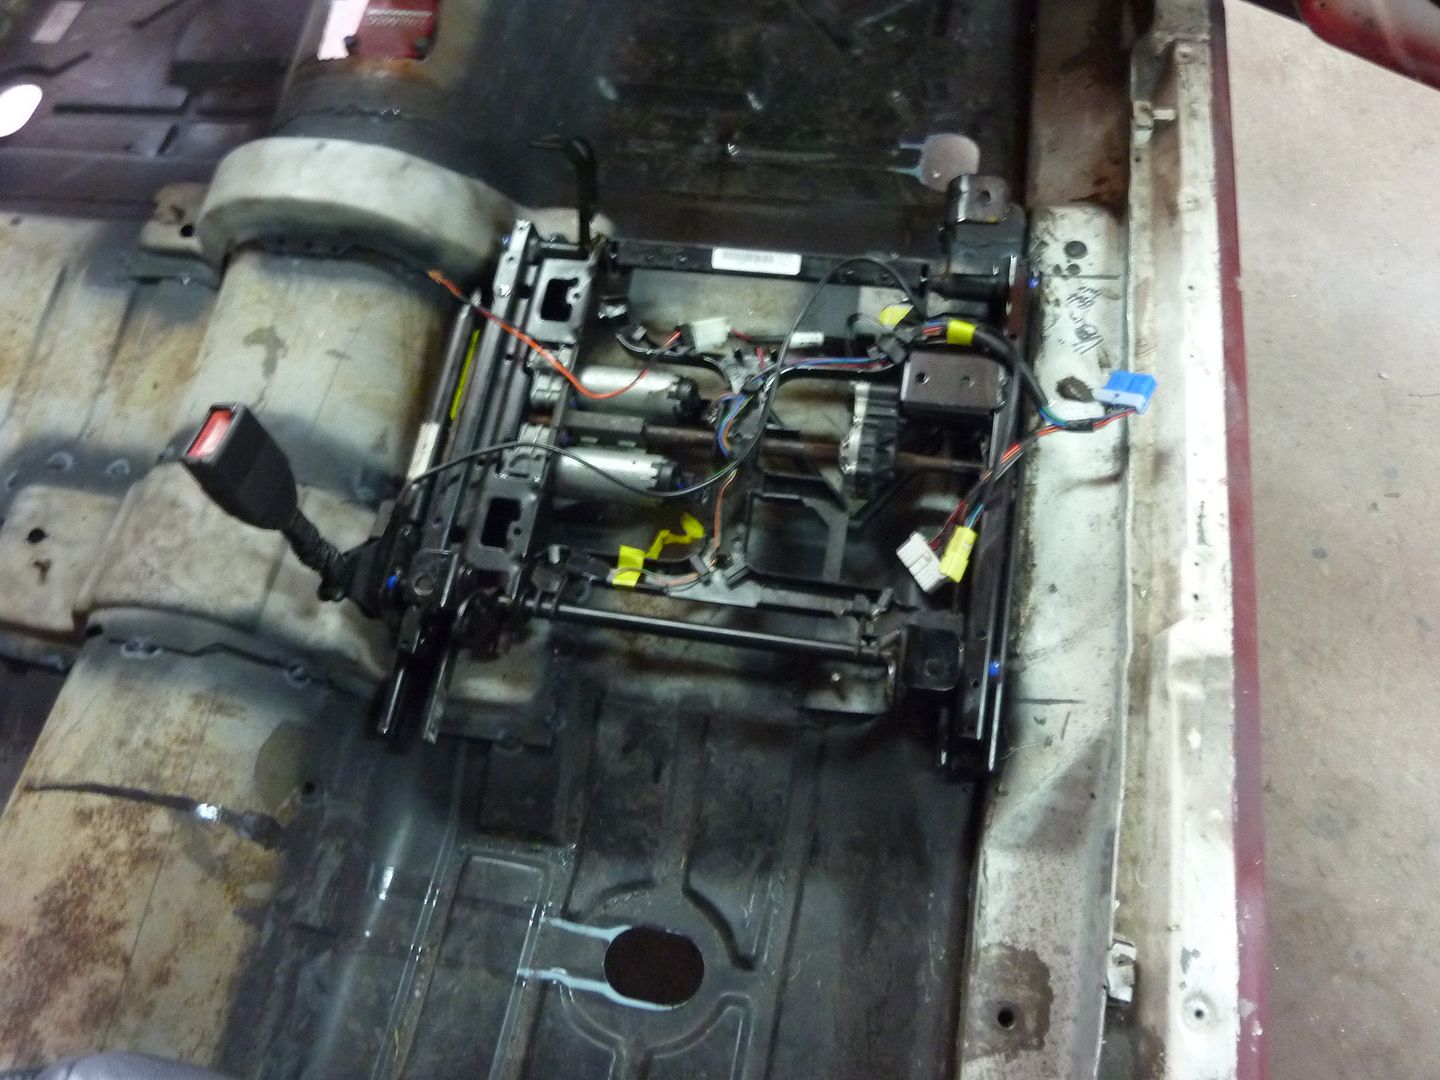
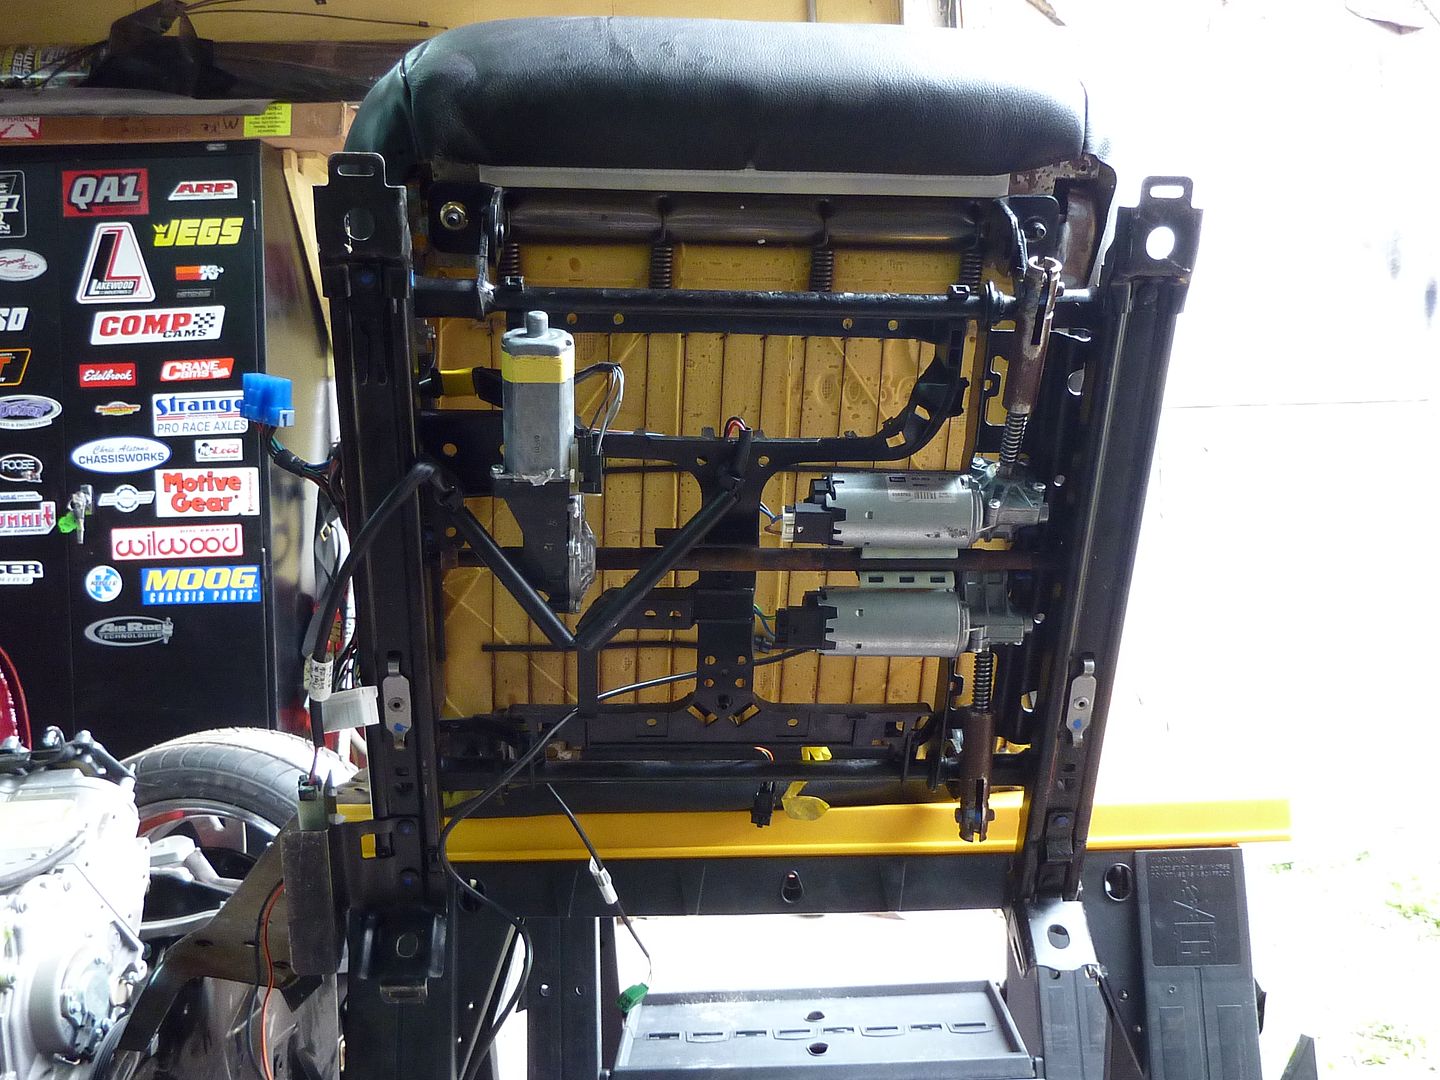
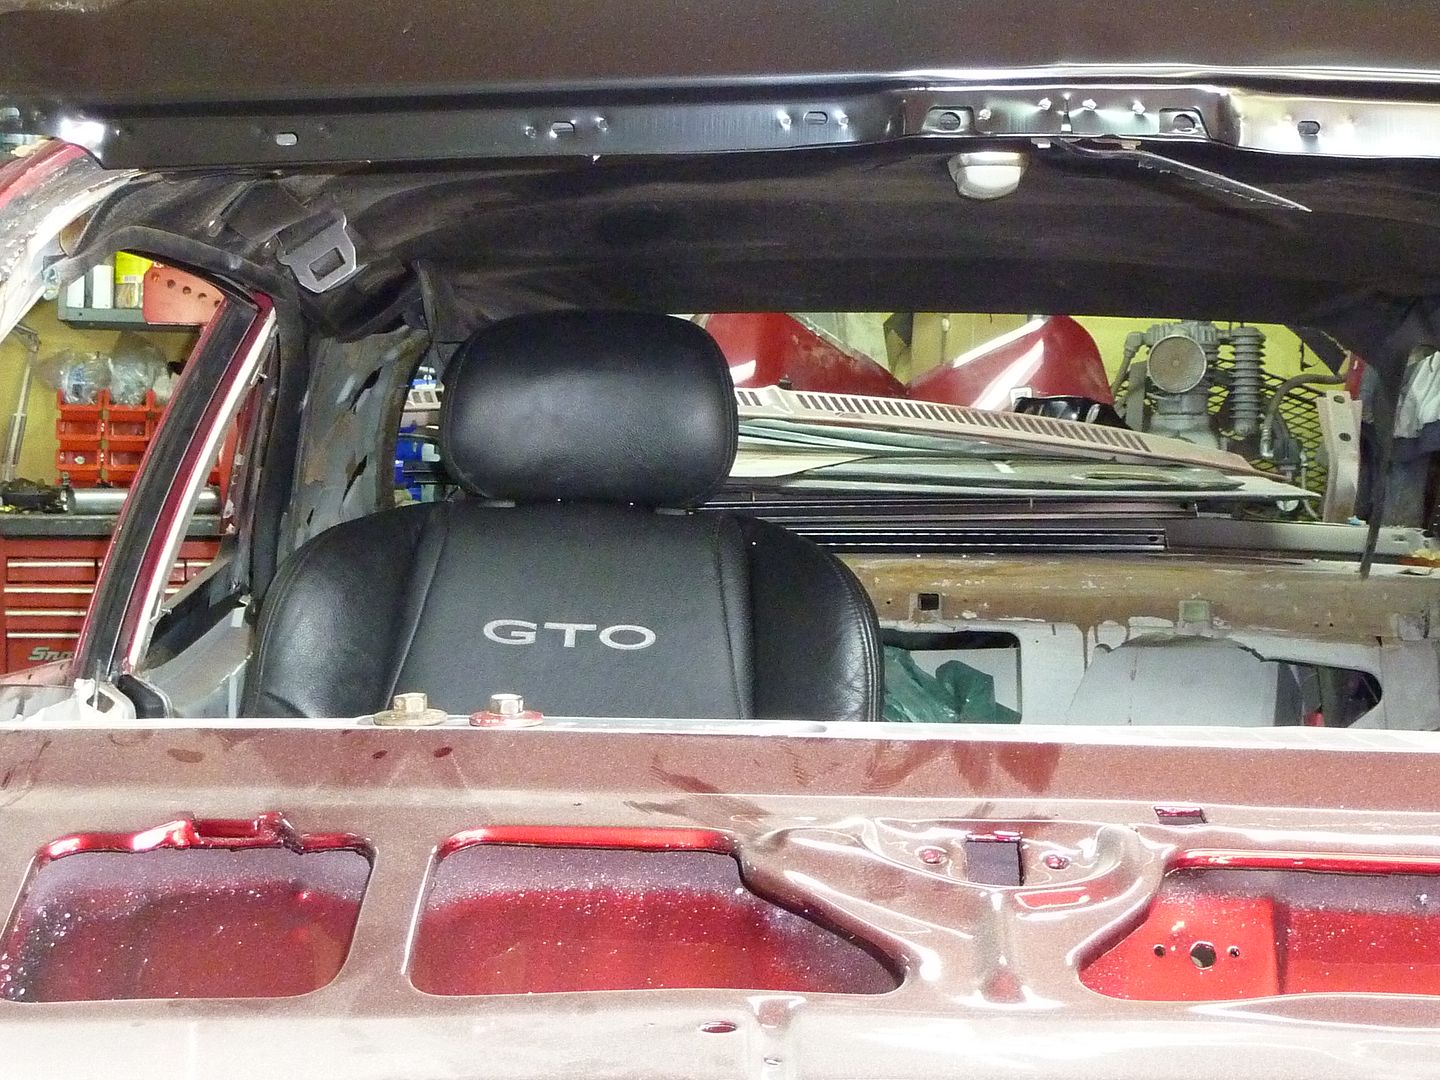
Unfortunately I didn't have any metal to start fabbing up the brackets, so the seats are on hold until I get some stuff. I'll head in tomorrow and grab an assortment of angle iron, round bar, square tube, etc. so I have a good selection. In the mean time though, I put the seat back onto the base to see how it would look in the car. It fits fairly high up on the floor, but that's because of the all the power stuff. I like the way it looks. I'll probably take off the headrest and see how it looks without it and decide from there which I like better.
Since I couldn't do anything else with the seats, I thought I would start working on the filler neck. Yesterday I bought a new pipe bender:
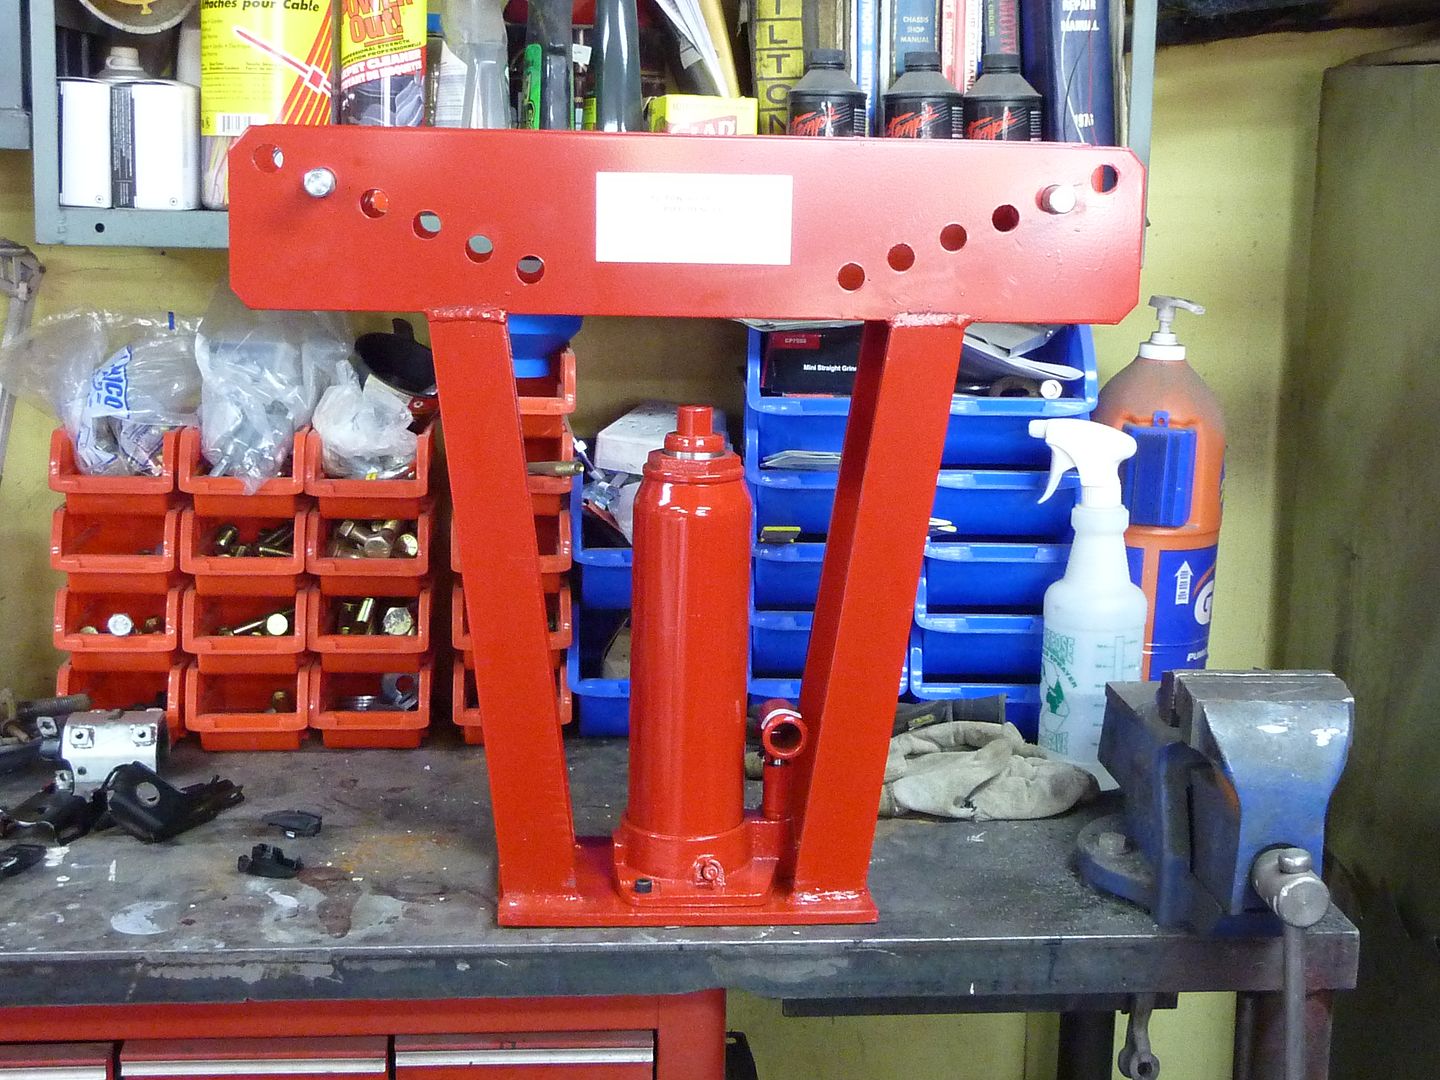
What a P.O.S.!!! I tried bending a 2" piece of exhaust tube. It bent it some, but actually flattened it out more than it actually bent it. Think I'll be taking that thing back. A buddy of mine was supposed to come over yesterday or today and help me finish aligning the doors, but he got stuck all day in court only to have the case adjourned before he got on the stand. The joys of our job!! Spend your time off sitting in a court house waiting to put rats in jail. But, at least it's all double bubble I likely won't get back into the shop now until Monday or Tuesday as I go back to work soon. Will post more pics when I get something else done.
I got the bucket seat brackets welded in. I tried to get them as far apart as they would go, but could only get the bolts to be 11.5" apart from the hump to the rocker. They are 14.24" apart front to back. The worst thing about putting these in now is that if you've been following my build, you know that I had the bottom of the car already done. Haven't looked underneath yet to see what it did to the bedliner.
I then started on fitting the front seats. I decided the easiest was to take off the tracks first. Very easy to take off. It is held on by 4 nuts. There are a few wires that need to be disconnected, but pretty easy to figure out.
I then put the track into the car...damn this thing is wide. If I remember correct, the holes are 16 or 17" across from each other.
First thing to go...the stock mounting brackets. They were pretty easy to get off. They are held on by a pin in the middle of them and some welds on either side.
When you are taking these off, don't do like I did originally and pound the pins out. They appear to actually serve a purpose. I had to fight with them and get them back into the holes. I then welded them to the frame.
Once the stock mounting brackets were off, I put the whole thing back into the car. Fits much better now, but still need to mock up some new mounting brackets.
Unfortunately I didn't have any metal to start fabbing up the brackets, so the seats are on hold until I get some stuff. I'll head in tomorrow and grab an assortment of angle iron, round bar, square tube, etc. so I have a good selection. In the mean time though, I put the seat back onto the base to see how it would look in the car. It fits fairly high up on the floor, but that's because of the all the power stuff. I like the way it looks. I'll probably take off the headrest and see how it looks without it and decide from there which I like better.
Since I couldn't do anything else with the seats, I thought I would start working on the filler neck. Yesterday I bought a new pipe bender:
What a P.O.S.!!! I tried bending a 2" piece of exhaust tube. It bent it some, but actually flattened it out more than it actually bent it. Think I'll be taking that thing back. A buddy of mine was supposed to come over yesterday or today and help me finish aligning the doors, but he got stuck all day in court only to have the case adjourned before he got on the stand. The joys of our job!! Spend your time off sitting in a court house waiting to put rats in jail. But, at least it's all double bubble
I likely won't get back into the shop now until Monday or Tuesday as I go back to work soon. Will post more pics when I get something else done.
09-25-2010, 11:53 PM
#53
On The Tree
Thread Starter
iTrader: (4)
Join Date: Mar 2009
Location: British Columbia, Canada
Posts: 132
Likes: 0
Received 0 Likes
on
0 Posts
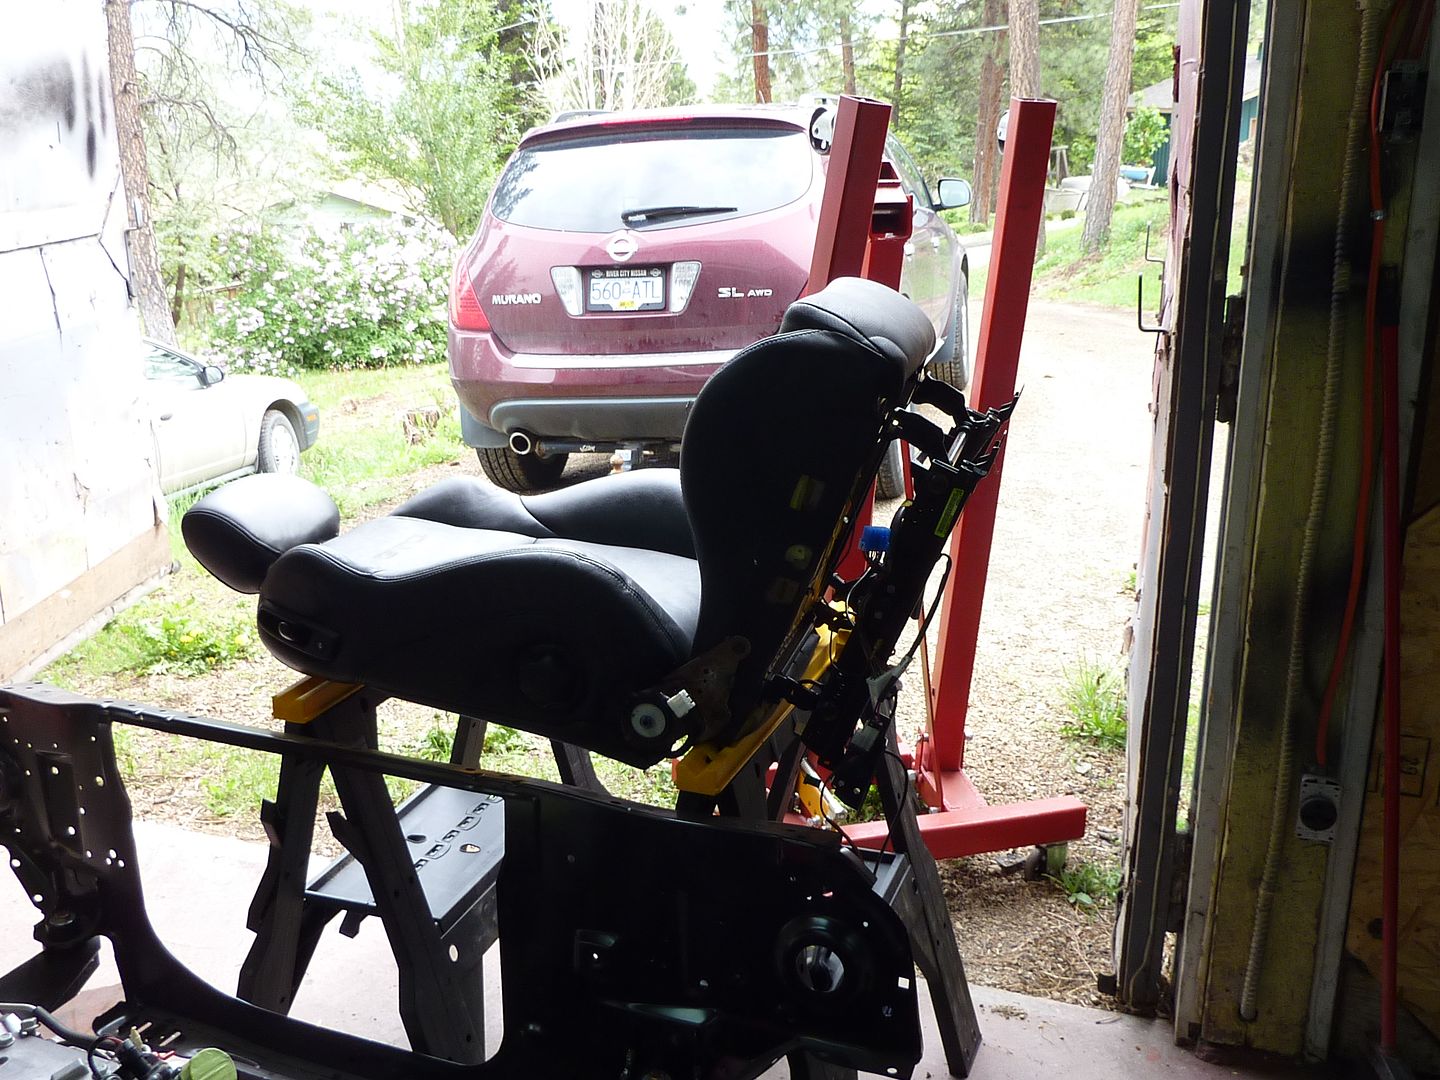
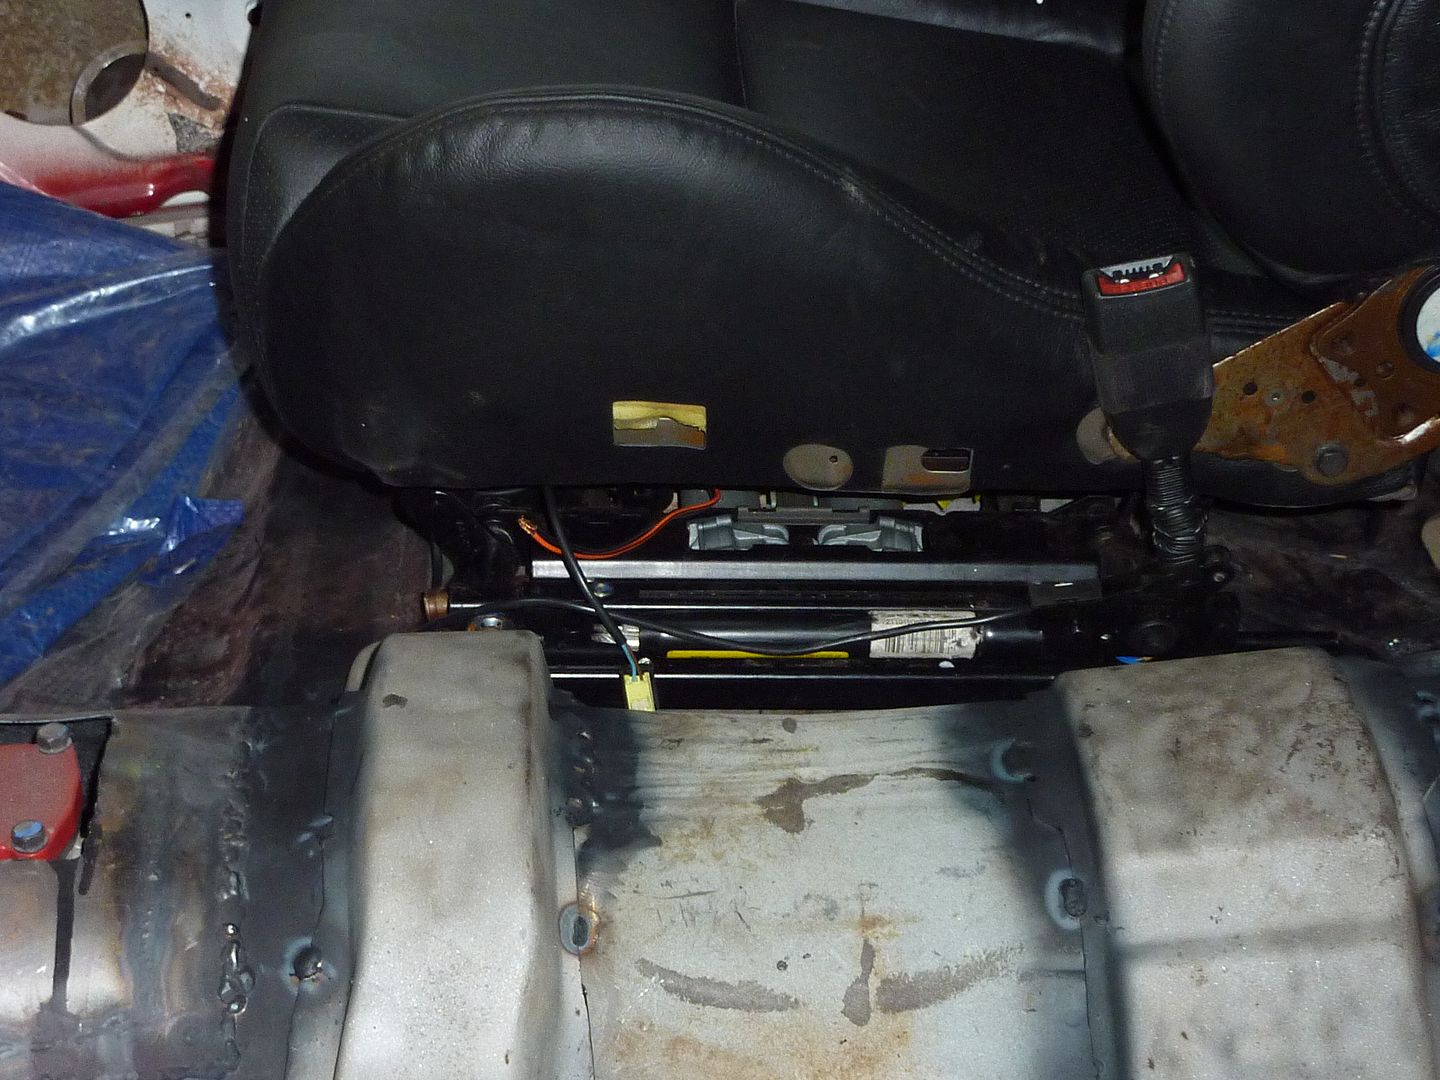
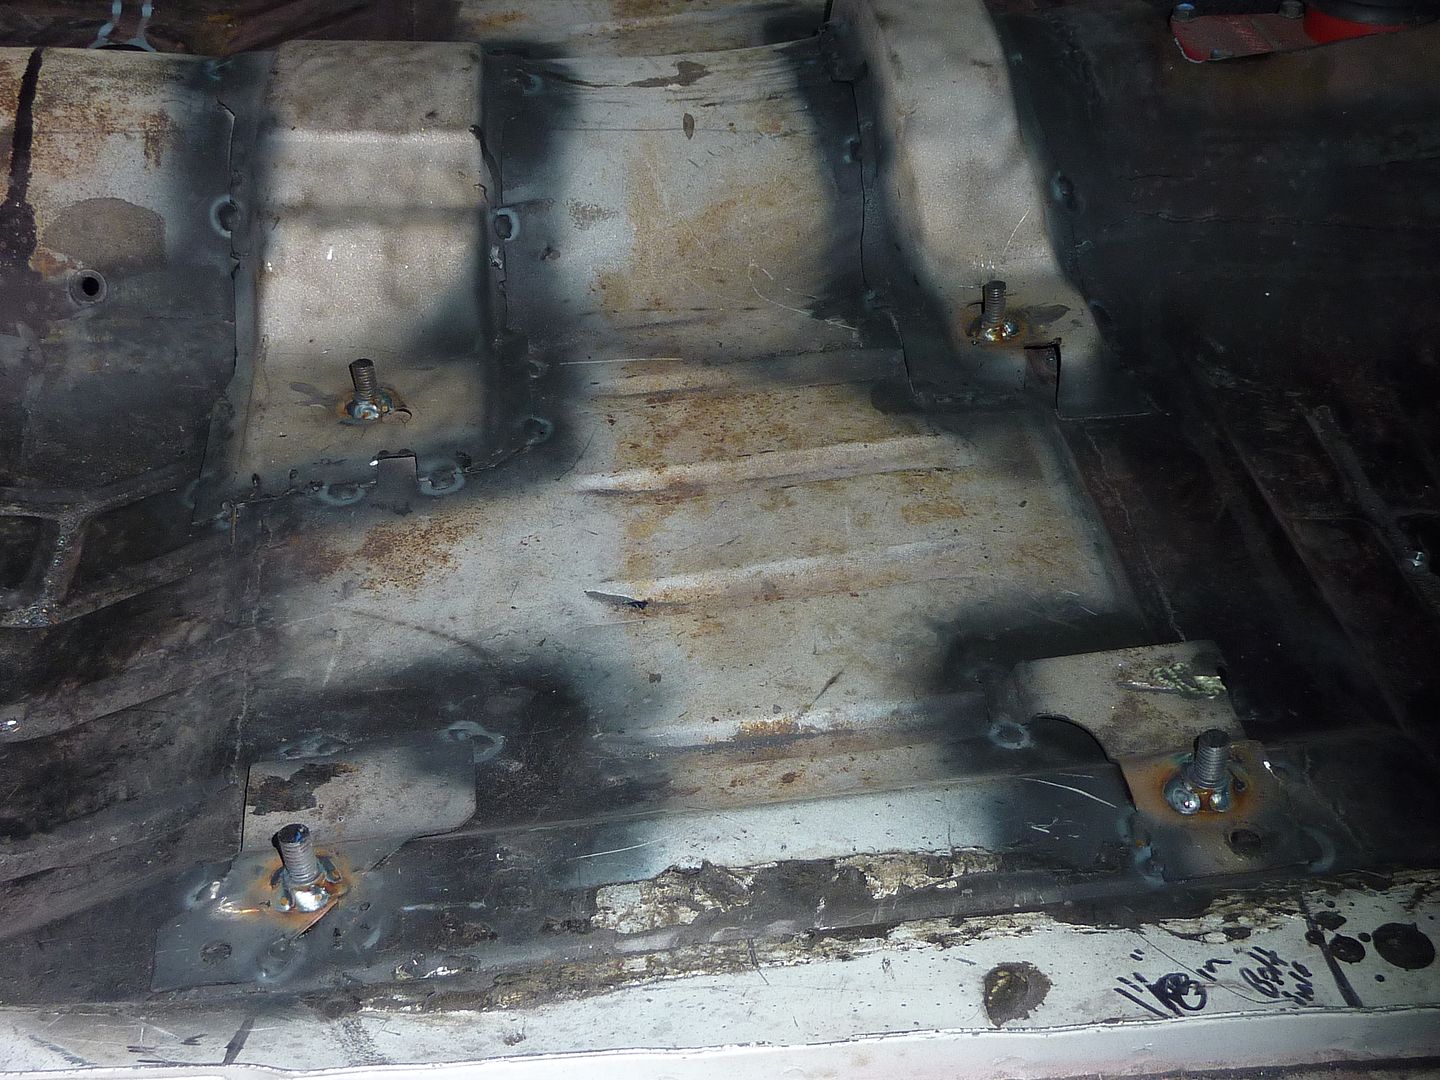
I finally got the passenger seat mounted. I sat beside the car staring at how to get these damn seats in and I found that the bolts were just too close to the bracket and a pain to try and use them, so I solved that issue.
Once the bolts on the floor were gone, I could put new ones anywhere I wanted. I finally decided on a very easy, but time consuming, set up.
I started by welding in a small piece of steel onto the ends to give some area to weld into.
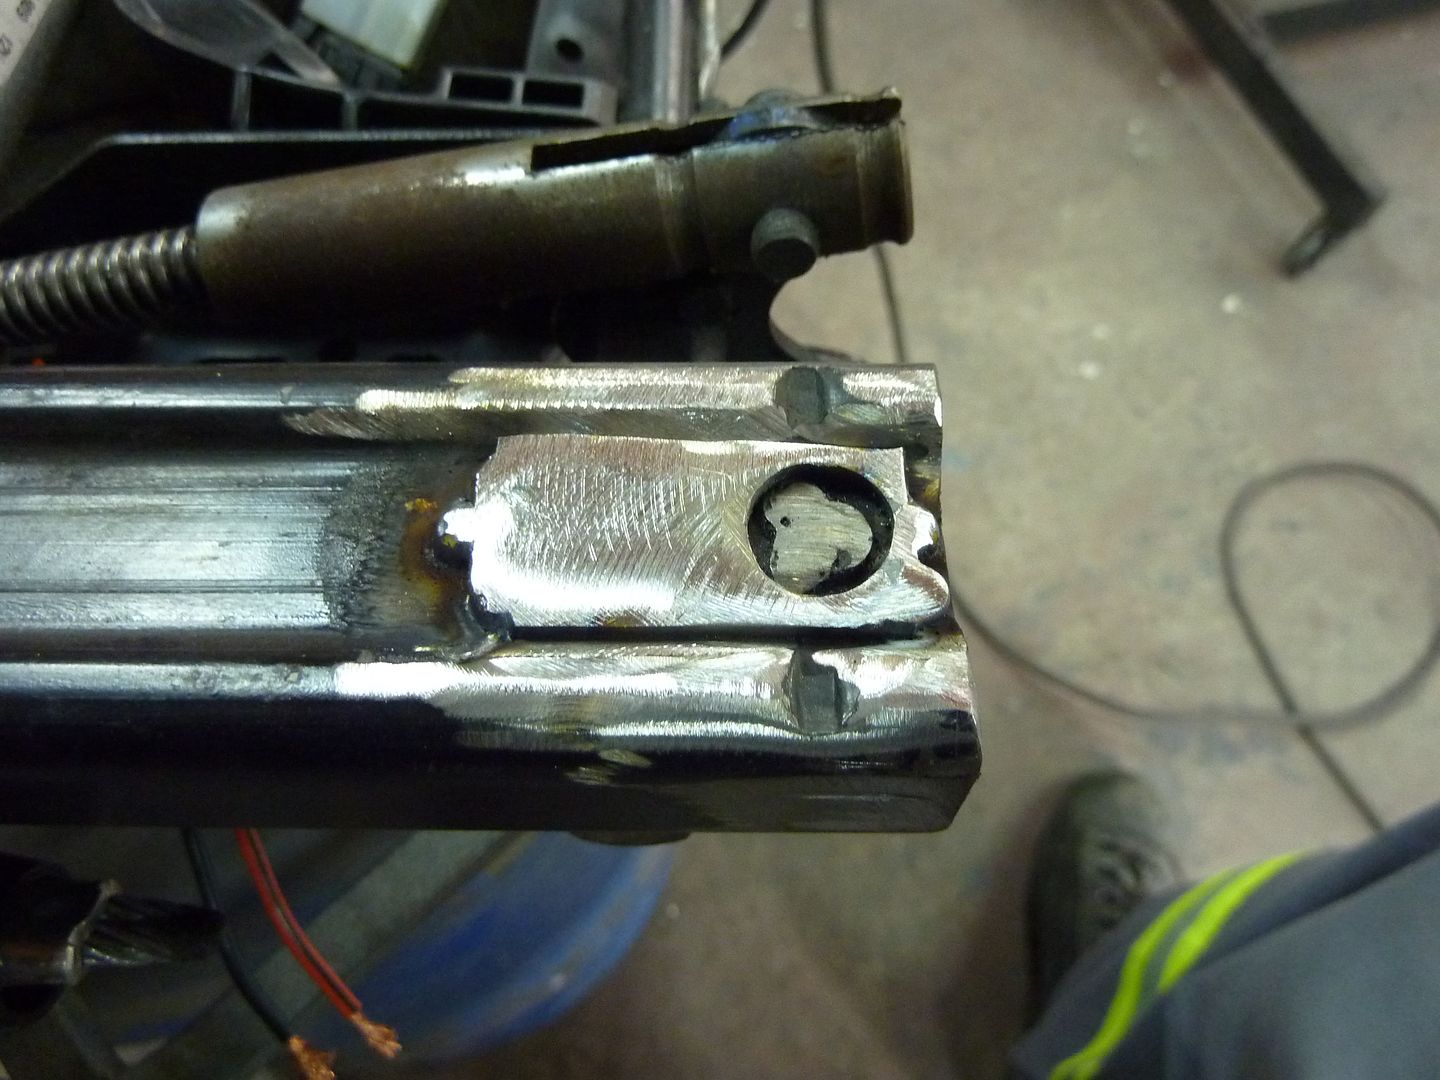
Once those were in place, I made some brackets.
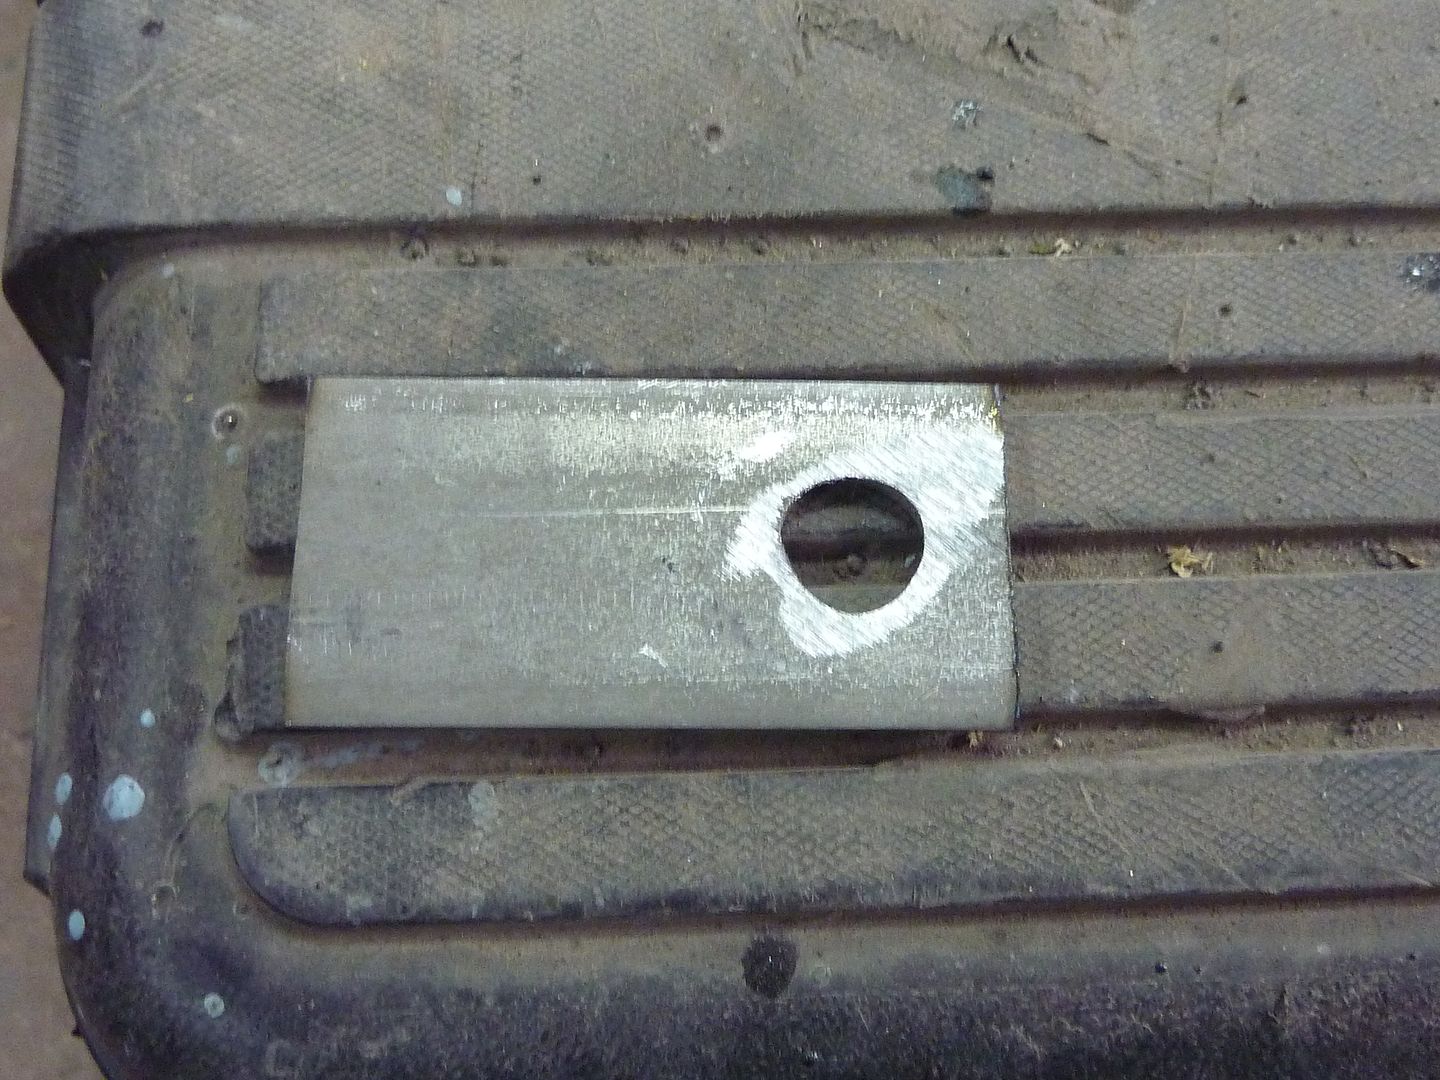
And welded it into place.
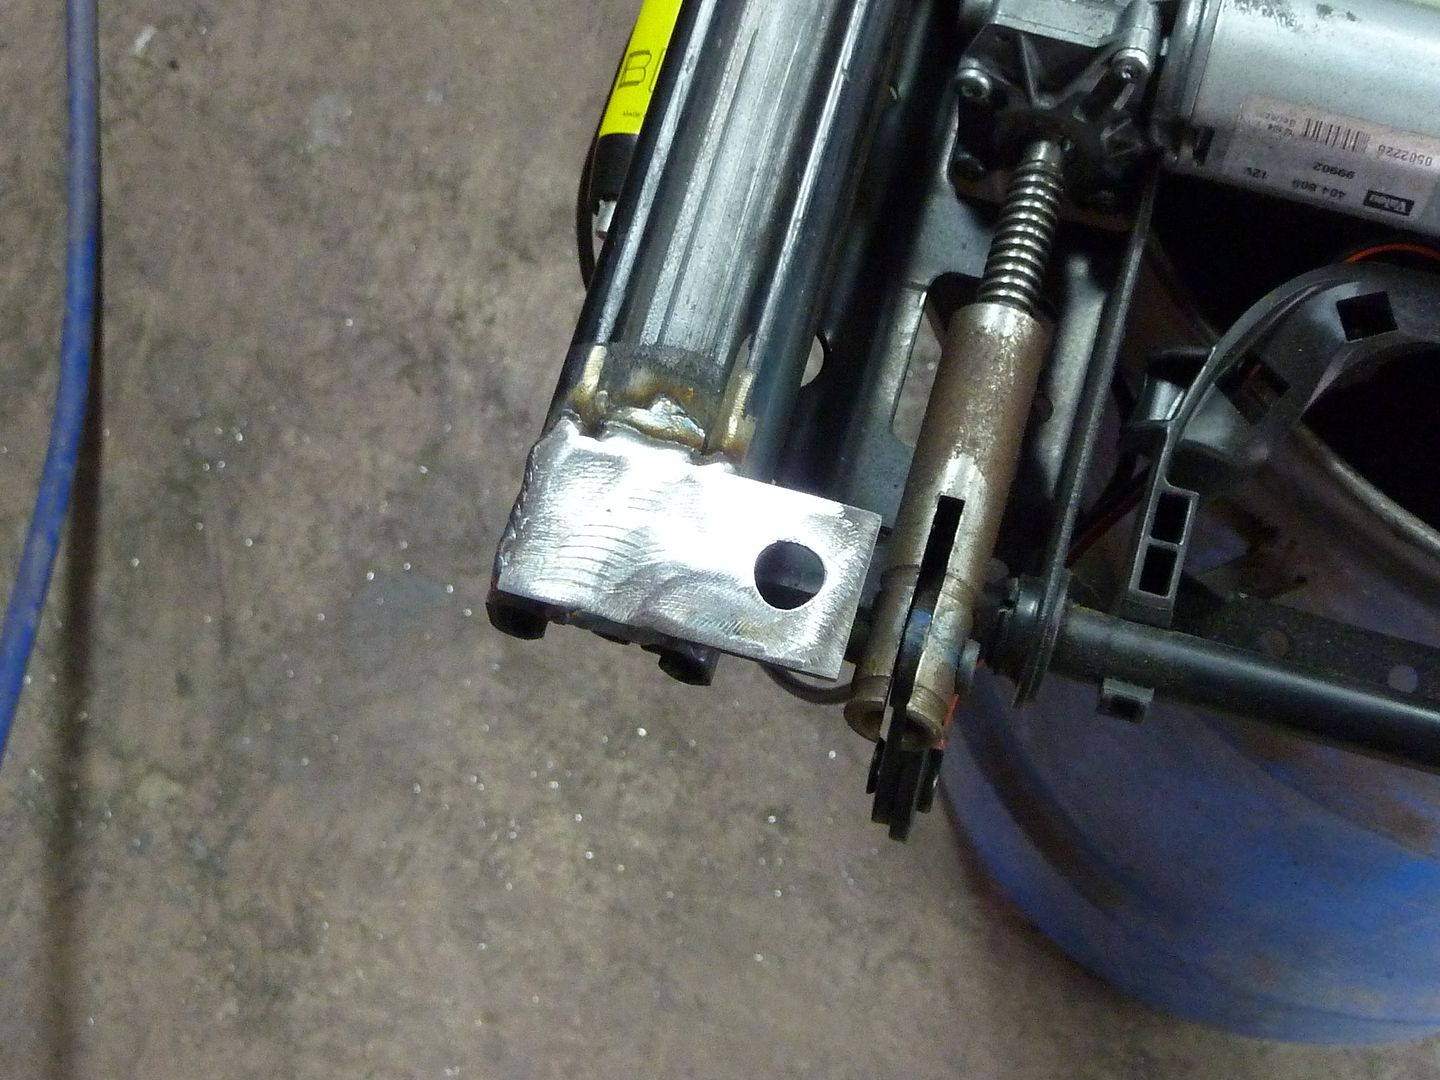
Did the other three corners.
I then put some bolts into the bracket holes and put it into the car. After some measuring, I tacked the bolts, removed the bracket and finished welding the bolts into place. I wanted to get the bolts as flush to the floor as possible, but found that welding the bolt, with the heads, to the floor was the easiest and probably stronger. I plan on welding in some washers around the bolt heads so the brackets are not just resting on the bolt heads.
Attached the bracket back to the seat and tried it out.
When looking at the brackets, they are set up quite high right now. I'm almost positive that when I get some power hooked up, the seats will come down putting them closer to the ground. Right now, the bottom of the seats are just under 6" from the floor...way too high. I was looking at a bunch on ebay, and they all look quite a bit lower.
Here's how high they sit right now.

Next week I hope to get the driver's side done and then onto the rear.
Once the bolts on the floor were gone, I could put new ones anywhere I wanted. I finally decided on a very easy, but time consuming, set up.
I started by welding in a small piece of steel onto the ends to give some area to weld into.
Once those were in place, I made some brackets.
And welded it into place.
Did the other three corners.
I then put some bolts into the bracket holes and put it into the car. After some measuring, I tacked the bolts, removed the bracket and finished welding the bolts into place. I wanted to get the bolts as flush to the floor as possible, but found that welding the bolt, with the heads, to the floor was the easiest and probably stronger. I plan on welding in some washers around the bolt heads so the brackets are not just resting on the bolt heads.
Attached the bracket back to the seat and tried it out.
When looking at the brackets, they are set up quite high right now. I'm almost positive that when I get some power hooked up, the seats will come down putting them closer to the ground. Right now, the bottom of the seats are just under 6" from the floor...way too high. I was looking at a bunch on ebay, and they all look quite a bit lower.
Here's how high they sit right now.
Next week I hope to get the driver's side done and then onto the rear.
09-25-2010, 11:54 PM
#54
On The Tree
Thread Starter
iTrader: (4)
Join Date: Mar 2009
Location: British Columbia, Canada
Posts: 132
Likes: 0
Received 0 Likes
on
0 Posts
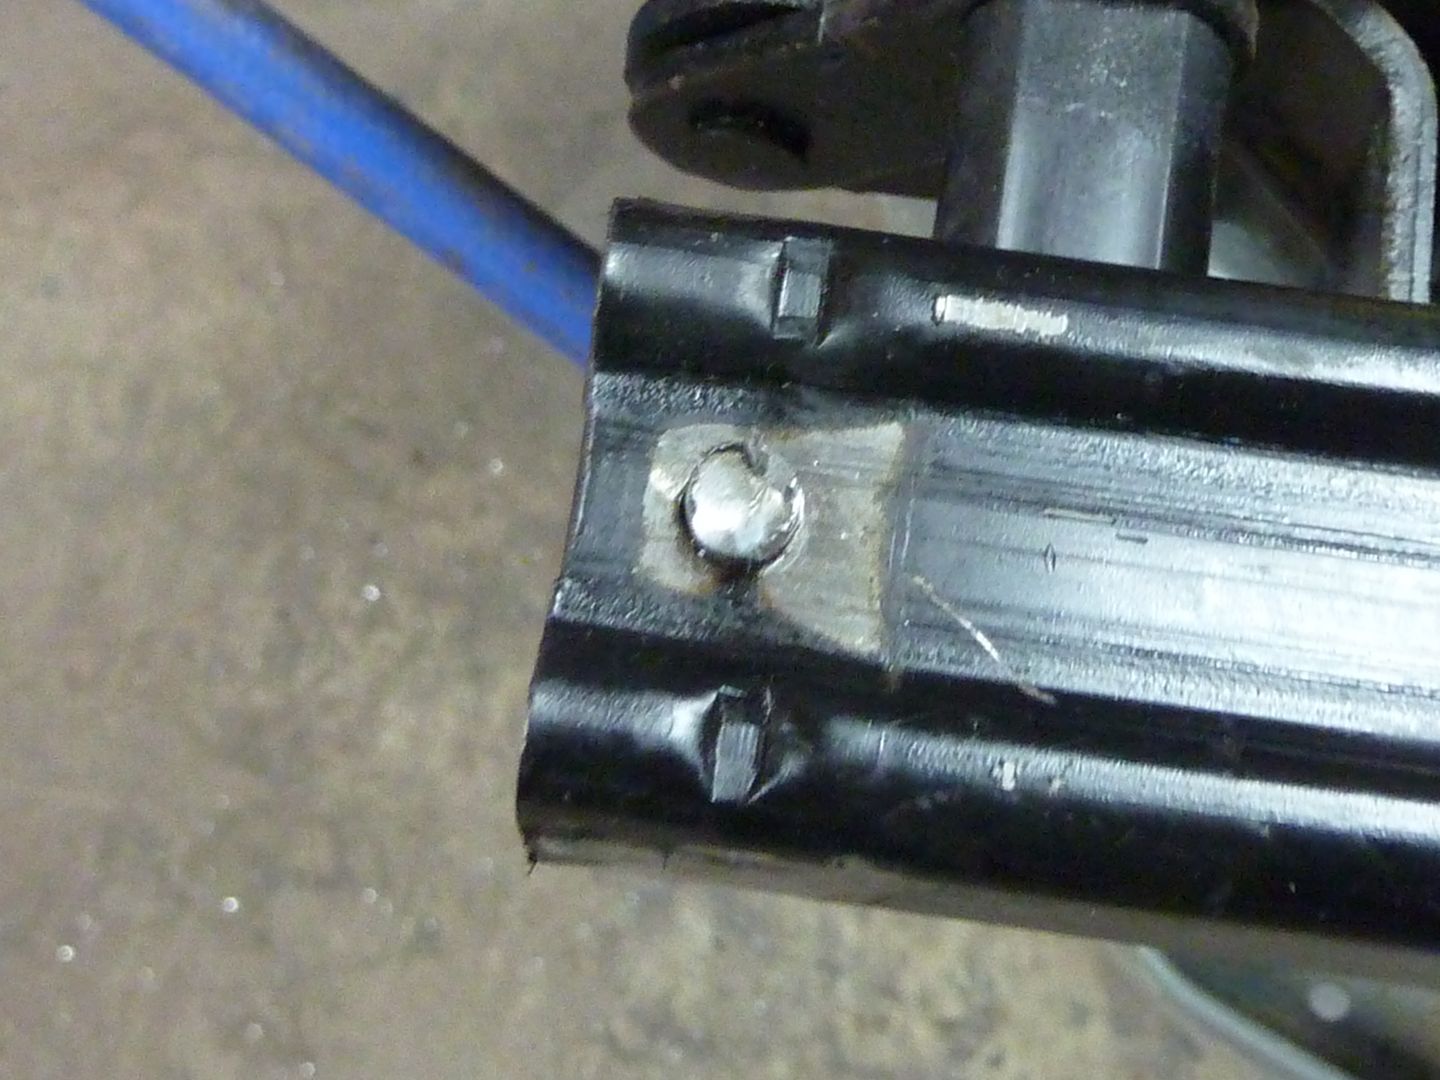
So after I got the passenger side seat put in, I sat in it and it felt like it wasn't square. I didn't think much of it until I was laying in bed a few nights later and realized that it wasn't square. When I measured the frame, I measured from the back points of it, not taking into consideration that one side was longer than the other. You can see it in this picture here. The top left frame rail is longer than the one on the right.
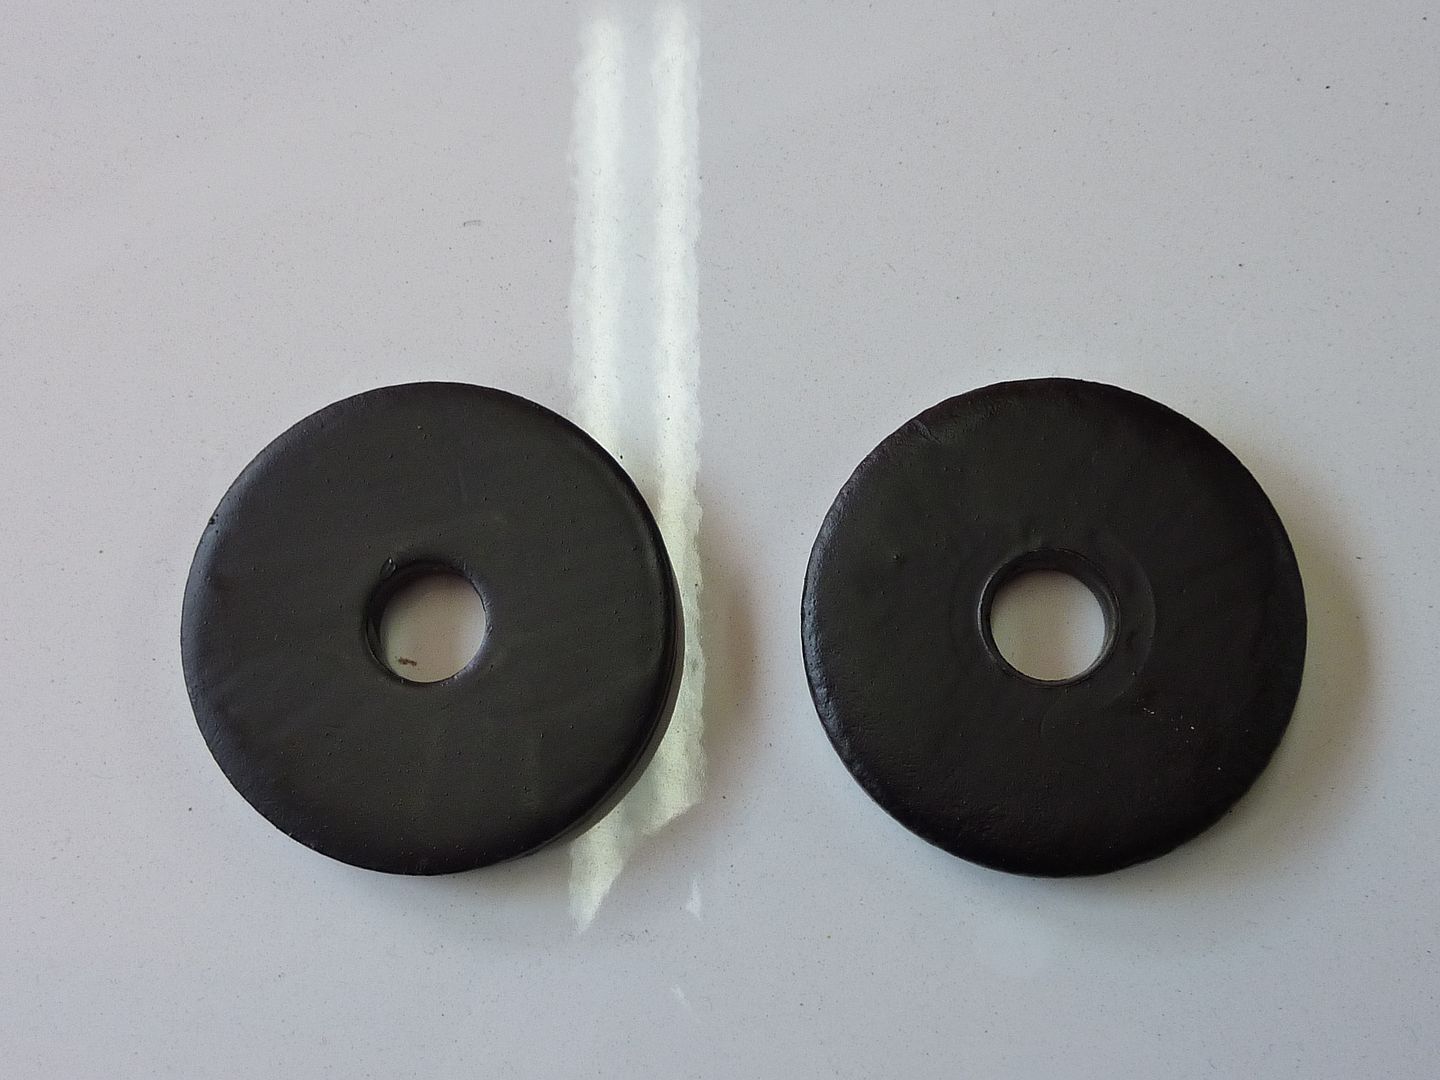
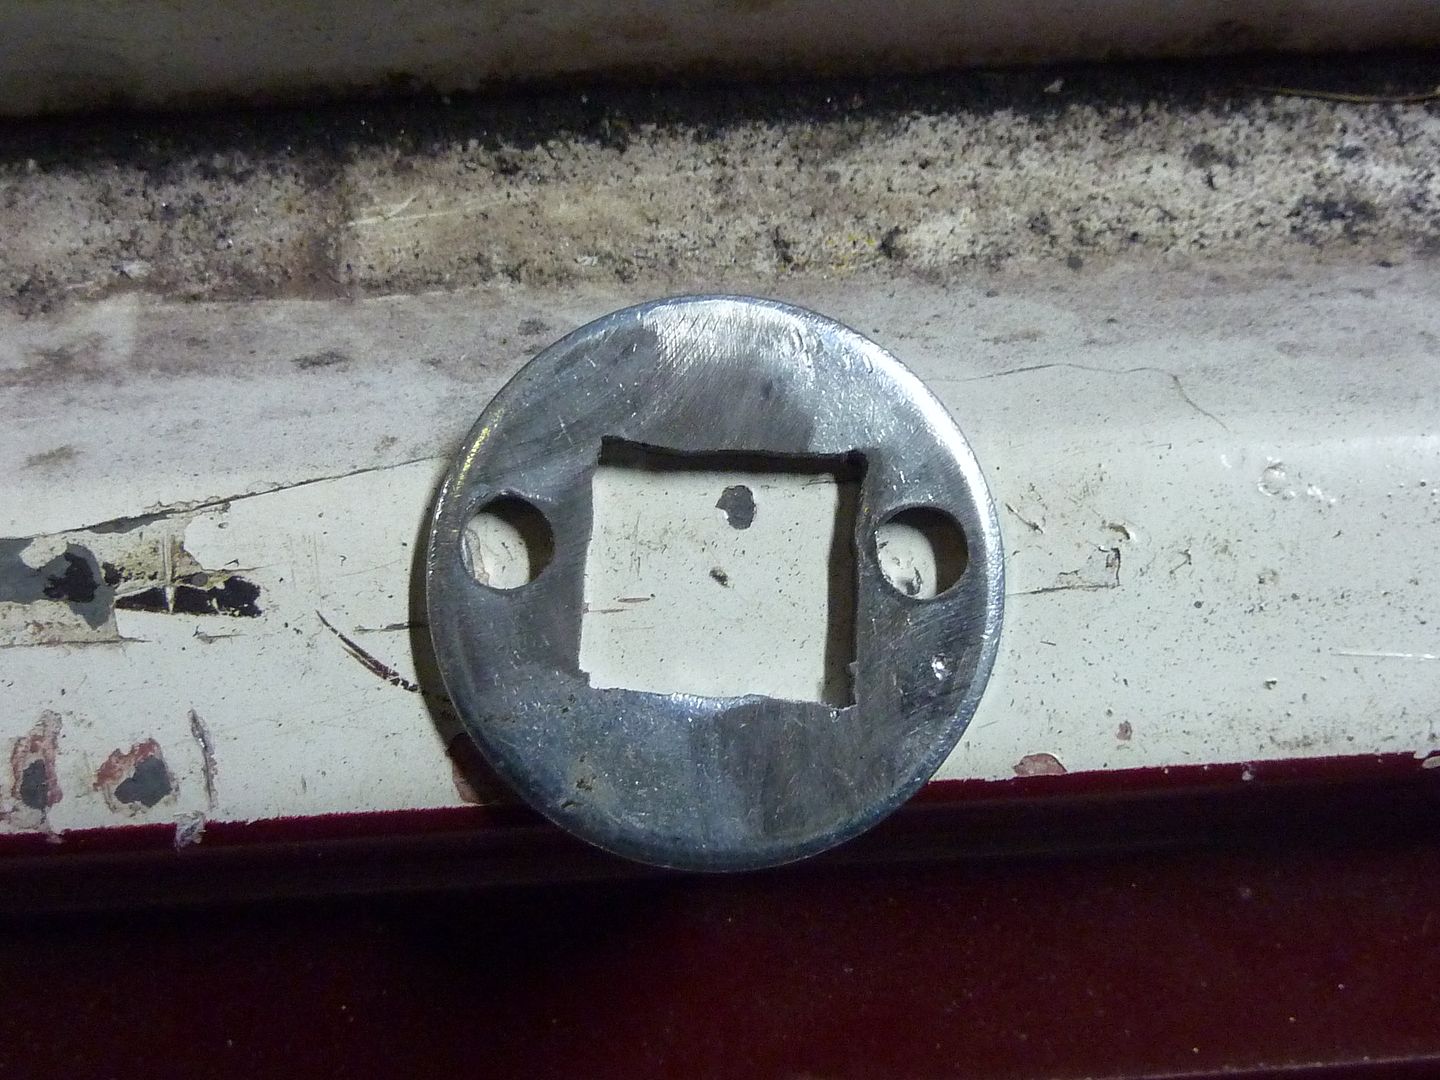
So I ended up cutting out the bolts that I had welded in. This turned out to be a good thing anyways as I decided to put in 3/8" bolts instead of the 7/16" ones that I had. The 3/8" fit nicer and have more room to turn the nuts. Once I had the bolts welded into place, I didn't like the idea of the seat brackets sitting on the head of the bolts and off the floor. I took some washers and cut out the centers so they would fit around the bolts. I had to grind some of the welds, but they fit around the bold nicely. I then filled in the holes with more weld and the brackets had a more solid place to sit.
Picture of the washer. The two holes are just to plug weld to the floor. I thought I took pics of them welded in place, but I guess I didn't.
I then got the driver's side put in. The passenger side is not bolted down that's why it's leaning to one side.
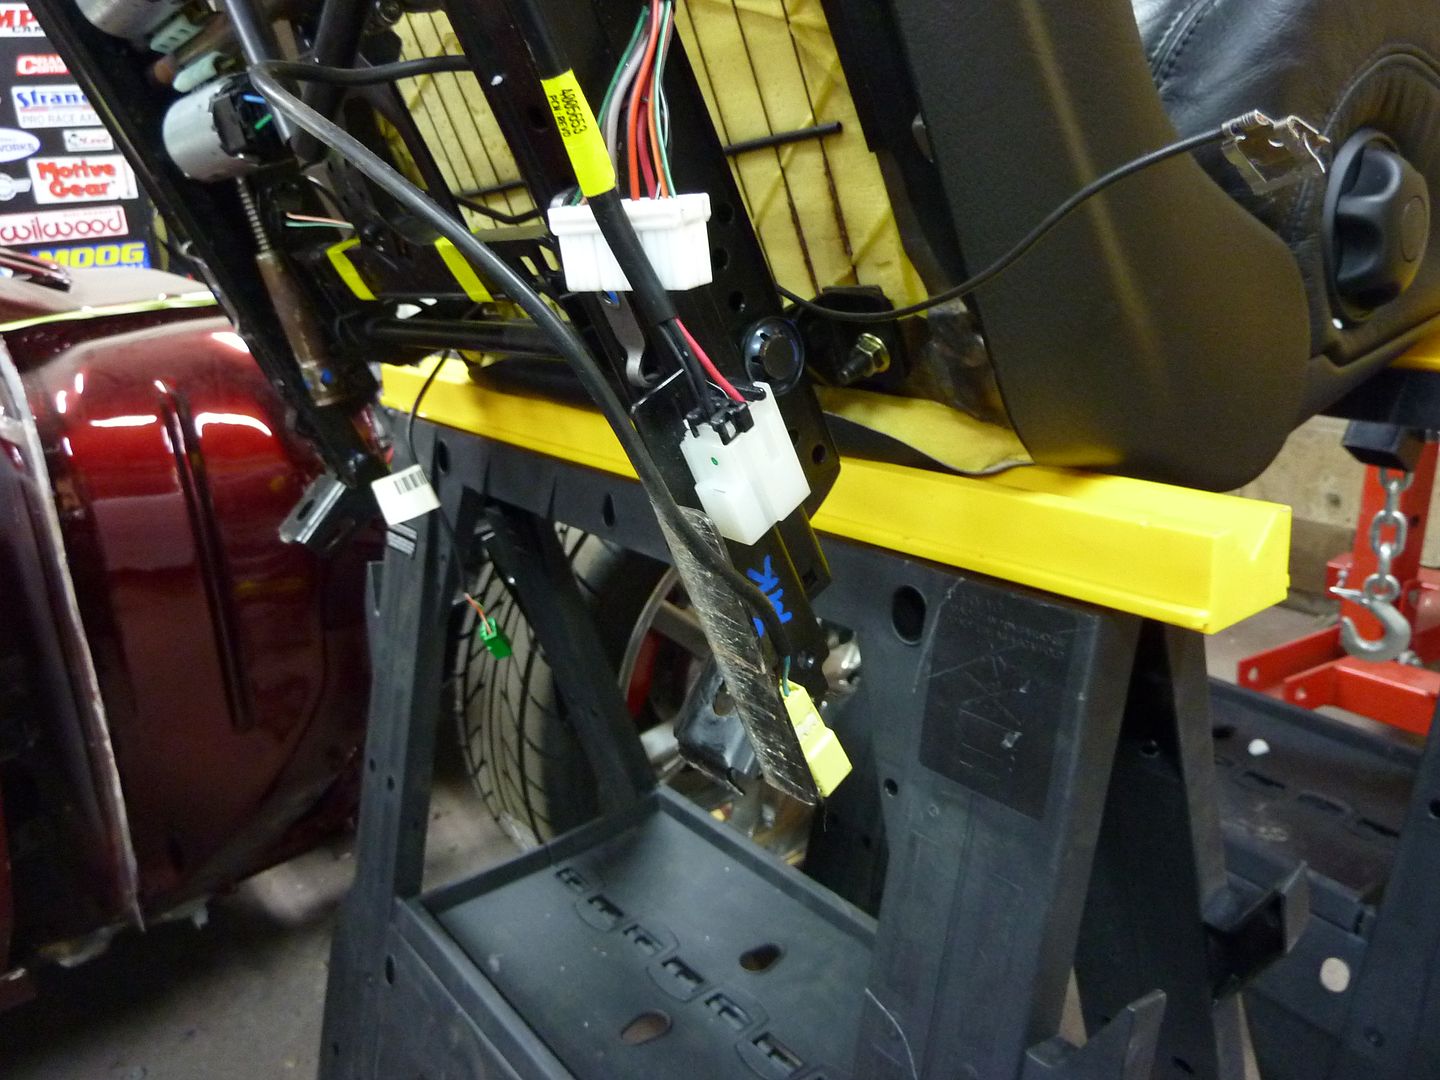
I think I have most of the wiring figured out, except for two wires that were connected to the side of the seat. Does anyone know where these two wires hook up. It's the white connector and the yellow connectors that I'm wondering about.
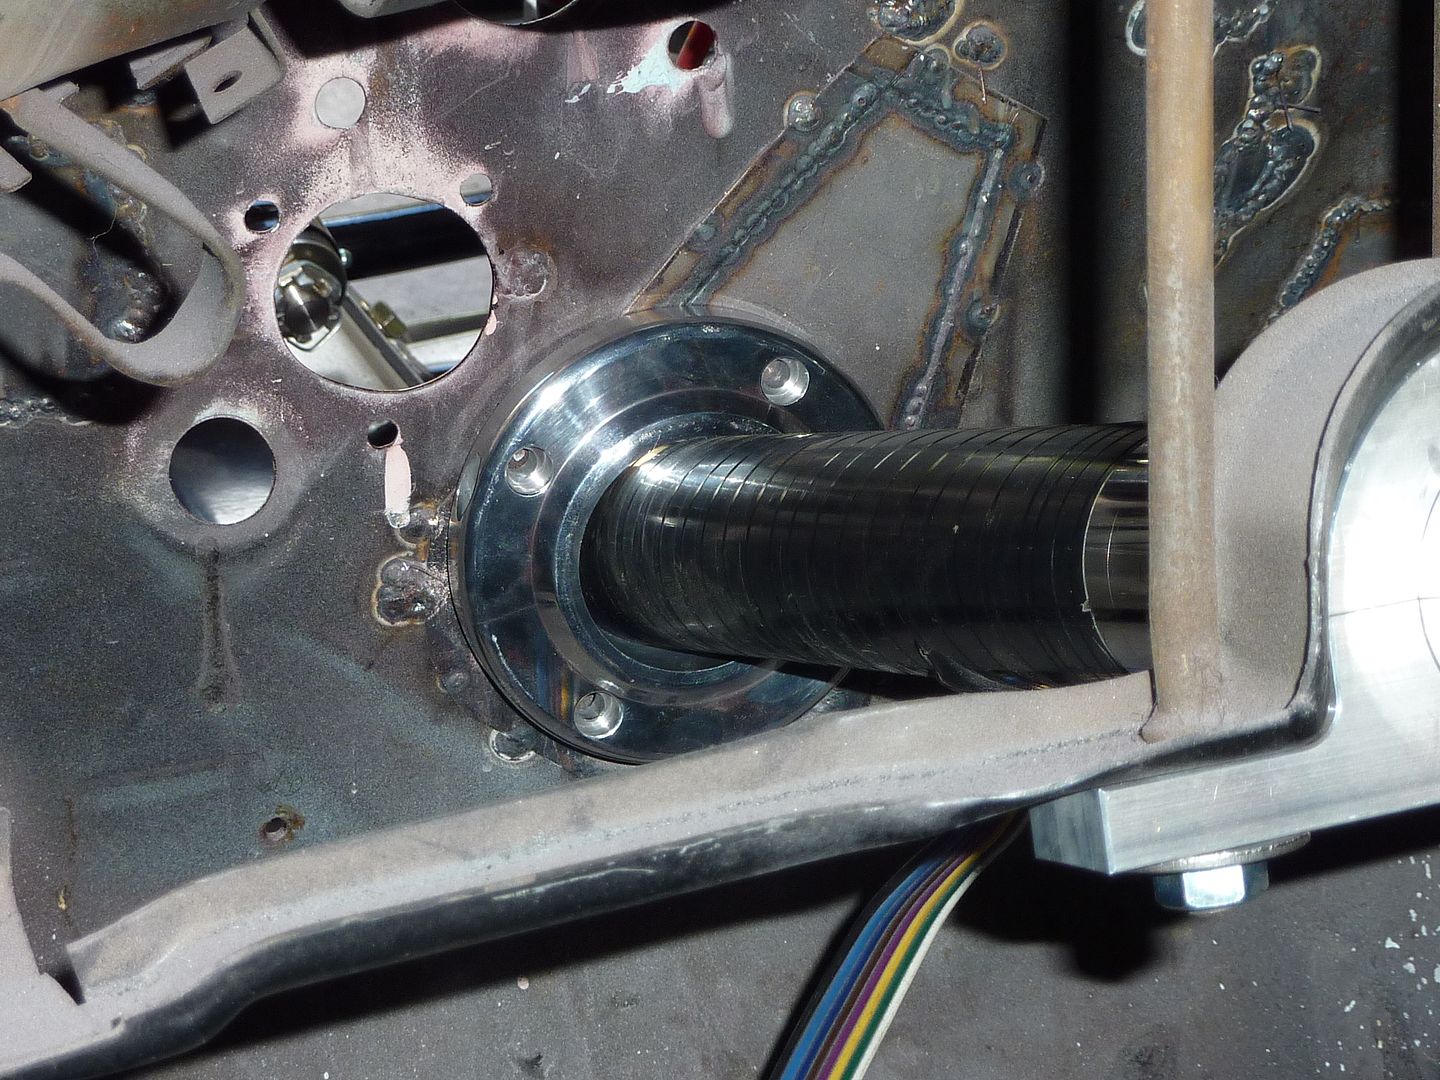
Along with realizing that the seat was crooked, I also started thinking about my steering column (had a hard time sleeping that night). I went out and checked my suspicion and was right. A while back in this thread, I mentioned how the Flaming River column bracket would not work. Well I couldn't have been more wrong (and if anyone from Flaming River is reading this, my sincere apologies for the emails I sent). When I was trying to fit the bracket, I had the stock bracket in there as well. No s**t it's not going to fit with the 2 brackets in there :awkward:

So I cut off the exhaust tube that I welded onto the column. It left a few scratches on the nice polished column, but hopefully none of them will be seen anyways.
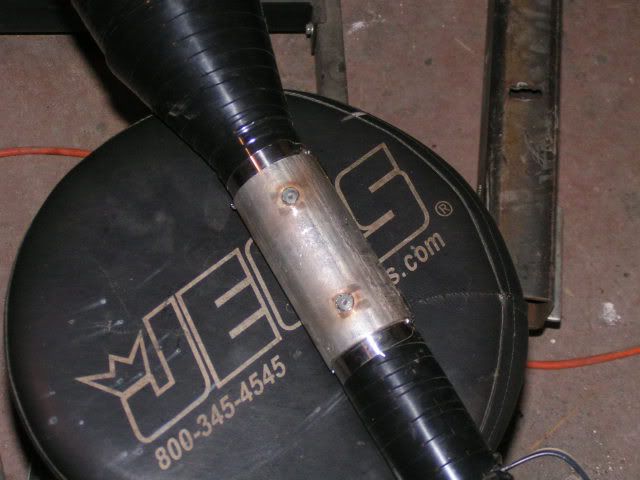
Hooked up the bracket that Flaming River supplied and it fit quite nicely.
:slap::slap::slap::doh::doh::doh:
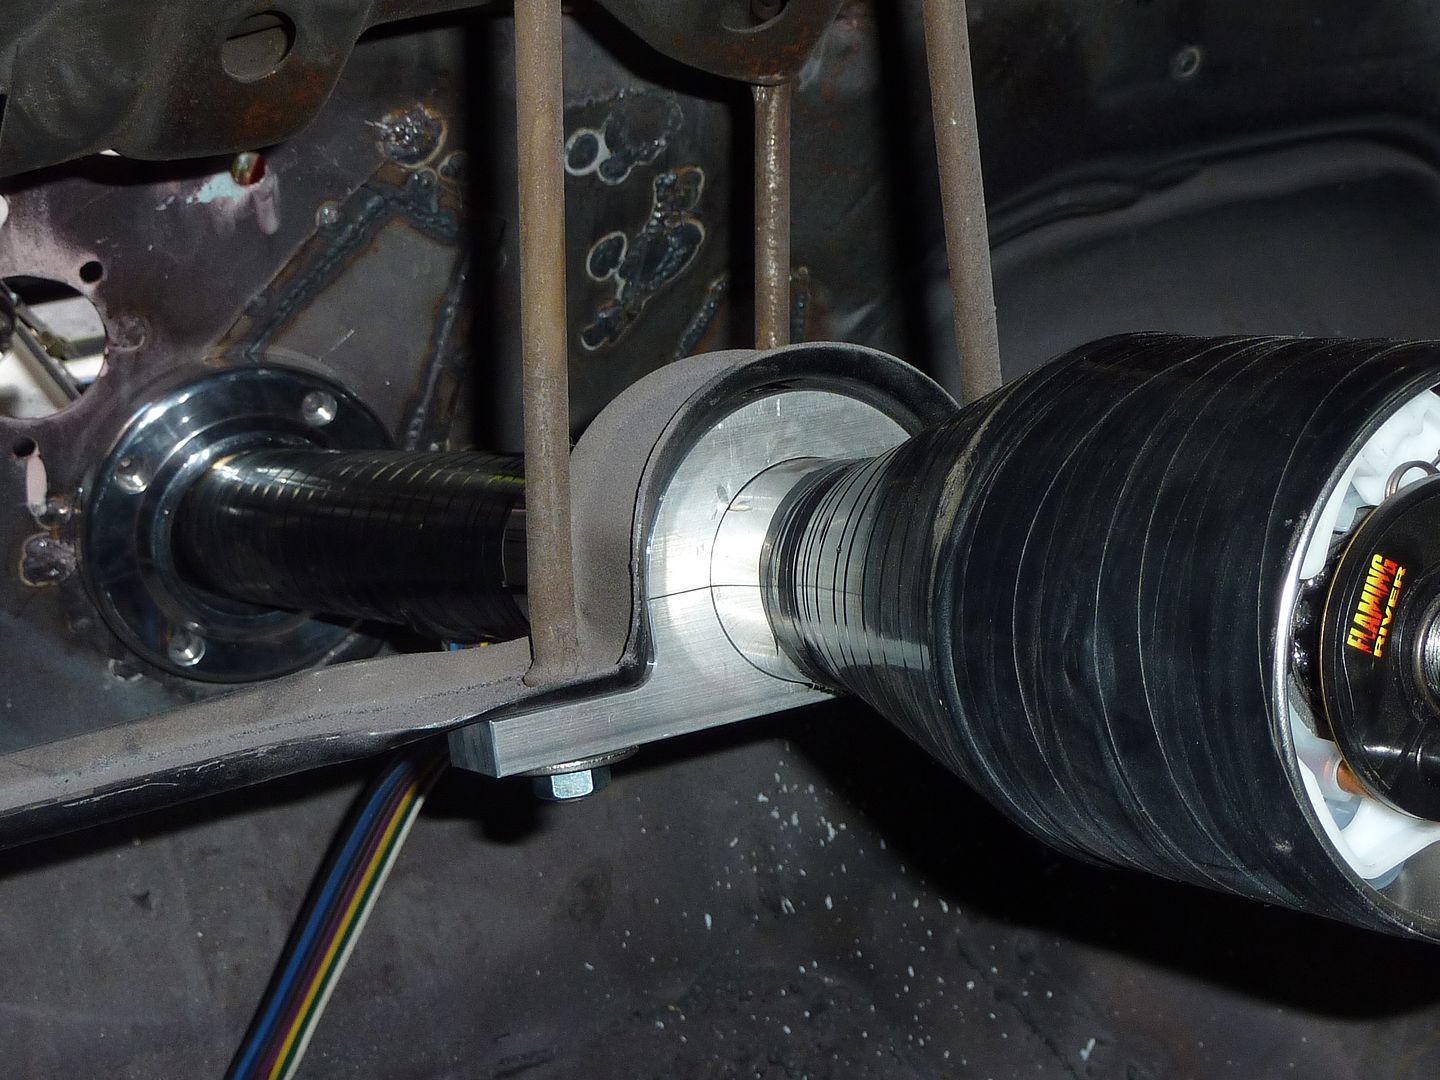
Once I had the bracket in place, I want to see how the floor mounts would look. I realized that the hole in the firewall is not quite in the right spot as the inside floor mount doesn't sit flush, although it's not far off. I'm just going to grind the top part of the mount so the column fits through and the mount will sit flush. I'm not that concerned about the angle as I will be running two u-joints from the column to the r&p.
You can see where the top of the column is hitting the mount.
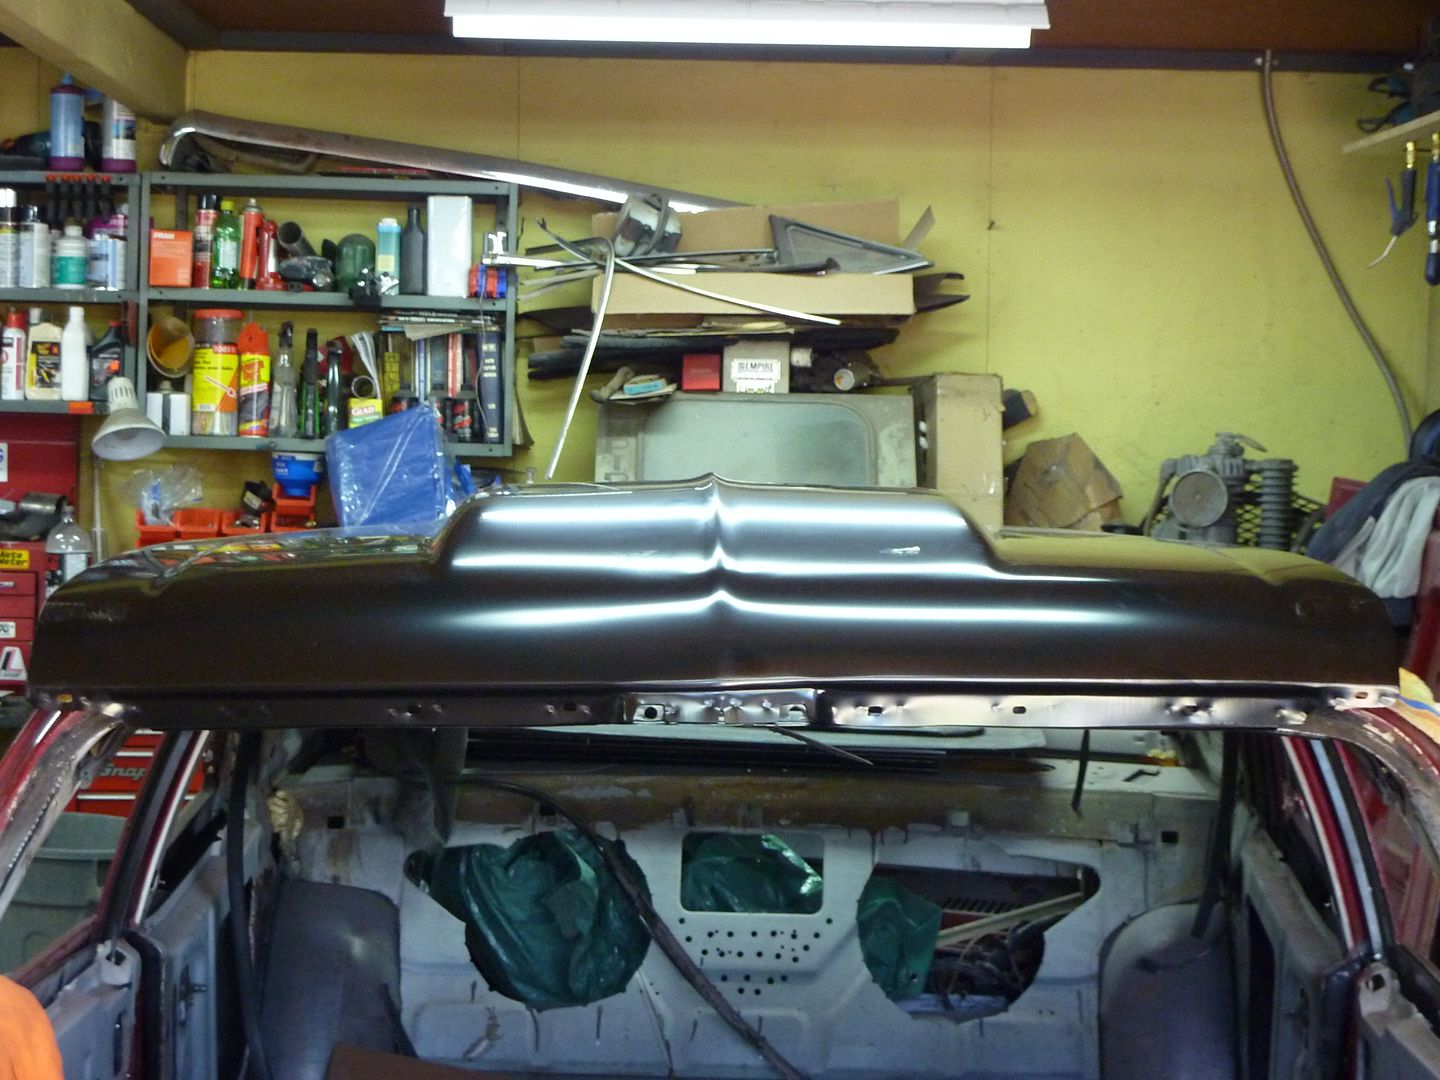
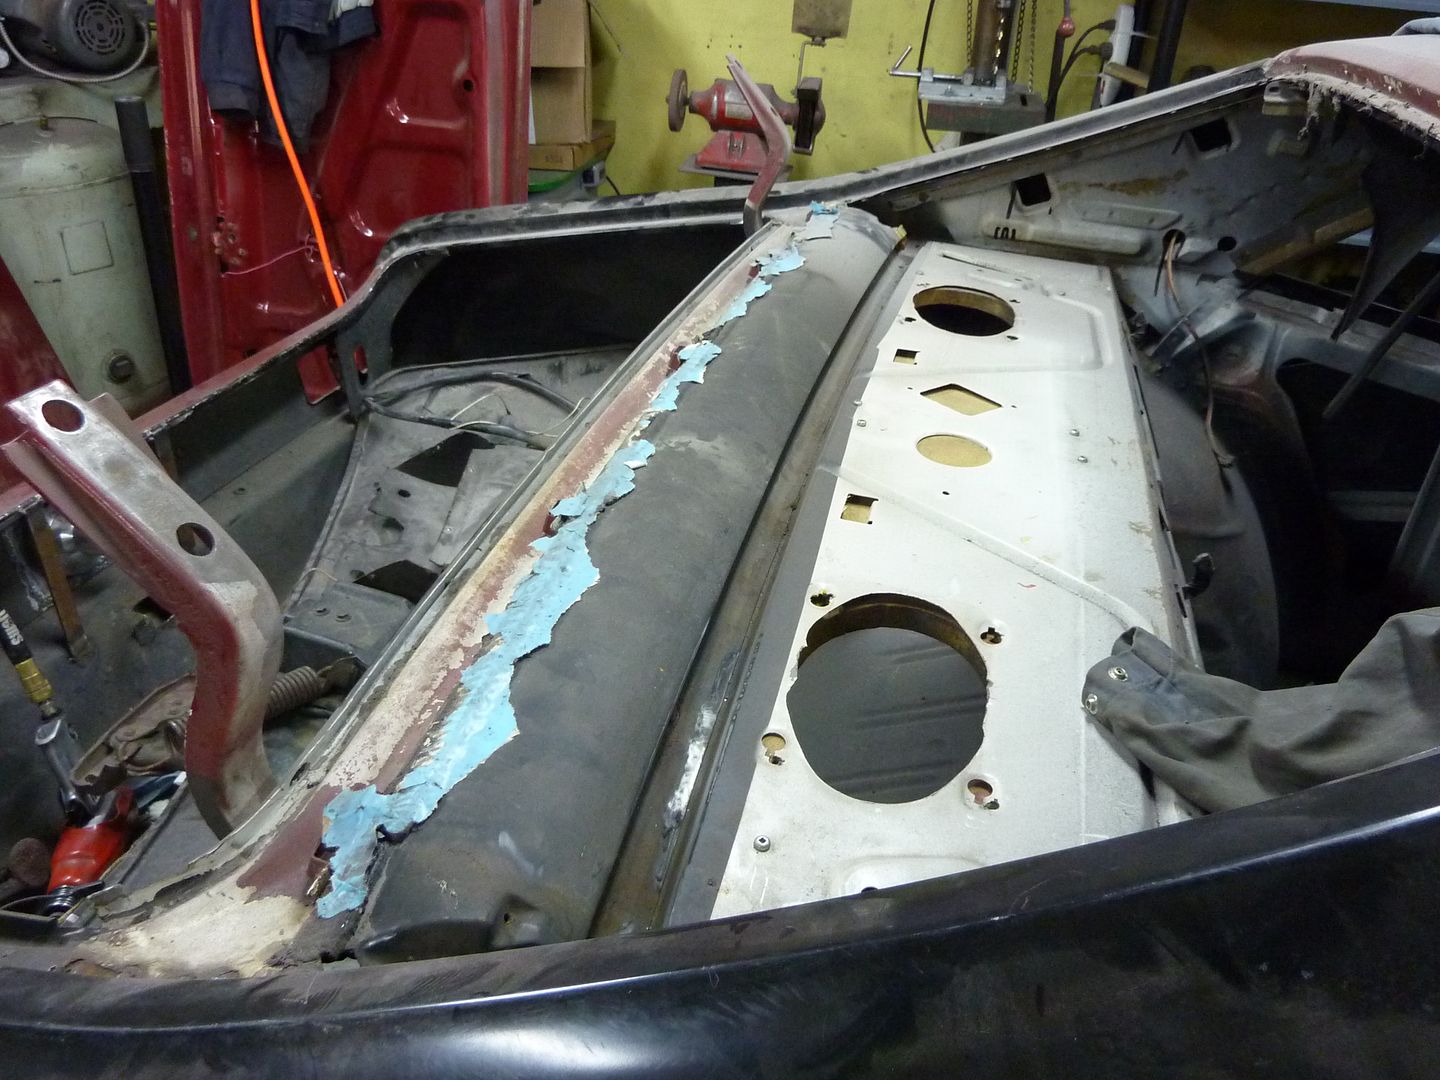
One thing that was a pleasant surprise, I was cleaning up in the shop and found a Goodmark box. I looked at the side and it came back to me. When I ordered some Goodmark stuff off Nightshade, Goodmark shipped a deck panel to me also, which I didn't order. Nightshade checked his records and he hadn't been charged either. So we agreed that I will keep it. This works out great as I was looking at my deck panel and where it connects to the quarters, it's rusting through. So I have now added 'replace deck panel' to my list of to dos.
And finally, some of you may have saw the thread I had about wondering if I could remove the post in the center of my shop. The main reason for this was I was getting sick of working around it. If I wanted to work on the inside of the car, I would have to push the car forward and then back when I was done. If I wanted to work on the driver's side, I would have to turn the wheels, push car forward, turn wheels again, push back, turn wheels, and on and on. I'm sure you get the point. As I don't have the steering column hooked up, I had to literally turn the front wheels and since everything is new and tight, was harder to do while on the ground. So yesterday I found a cheap and easy solution. Not sure why I didn't do this before.
Car dollies:
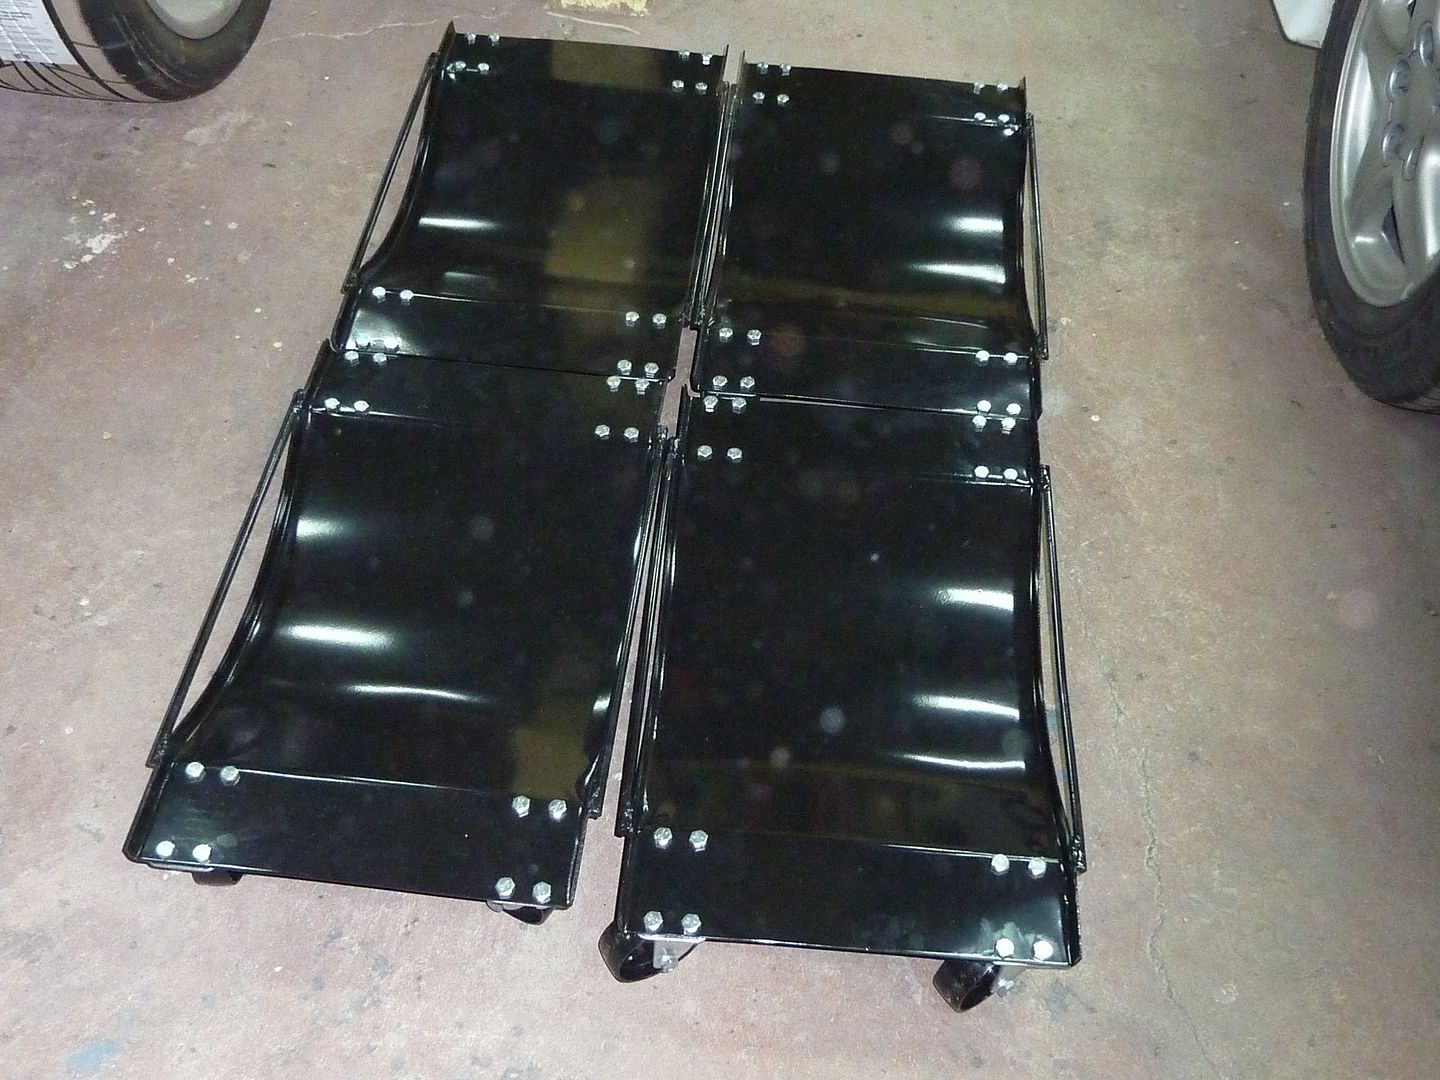
Car rolls around quite easily now. Hopefully more updates next week. On a good note, my job will be changing in the next couple weeks. My new position will be more overtime opportunities and will be making more money. More money = more parts.
So I ended up cutting out the bolts that I had welded in. This turned out to be a good thing anyways as I decided to put in 3/8" bolts instead of the 7/16" ones that I had. The 3/8" fit nicer and have more room to turn the nuts. Once I had the bolts welded into place, I didn't like the idea of the seat brackets sitting on the head of the bolts and off the floor. I took some washers and cut out the centers so they would fit around the bolts. I had to grind some of the welds, but they fit around the bold nicely. I then filled in the holes with more weld and the brackets had a more solid place to sit.
Picture of the washer. The two holes are just to plug weld to the floor. I thought I took pics of them welded in place, but I guess I didn't.
I then got the driver's side put in. The passenger side is not bolted down that's why it's leaning to one side.
I think I have most of the wiring figured out, except for two wires that were connected to the side of the seat. Does anyone know where these two wires hook up. It's the white connector and the yellow connectors that I'm wondering about.
Along with realizing that the seat was crooked, I also started thinking about my steering column (had a hard time sleeping that night). I went out and checked my suspicion and was right. A while back in this thread, I mentioned how the Flaming River column bracket would not work. Well I couldn't have been more wrong (and if anyone from Flaming River is reading this, my sincere apologies for the emails I sent). When I was trying to fit the bracket, I had the stock bracket in there as well. No s**t it's not going to fit with the 2 brackets in there :awkward:
So I cut off the exhaust tube that I welded onto the column. It left a few scratches on the nice polished column, but hopefully none of them will be seen anyways.
Hooked up the bracket that Flaming River supplied and it fit quite nicely.
:slap::slap::slap::doh::doh::doh:
Once I had the bracket in place, I want to see how the floor mounts would look. I realized that the hole in the firewall is not quite in the right spot as the inside floor mount doesn't sit flush, although it's not far off. I'm just going to grind the top part of the mount so the column fits through and the mount will sit flush. I'm not that concerned about the angle as I will be running two u-joints from the column to the r&p.
You can see where the top of the column is hitting the mount.
One thing that was a pleasant surprise, I was cleaning up in the shop and found a Goodmark box. I looked at the side and it came back to me. When I ordered some Goodmark stuff off Nightshade, Goodmark shipped a deck panel to me also, which I didn't order. Nightshade checked his records and he hadn't been charged either. So we agreed that I will keep it. This works out great as I was looking at my deck panel and where it connects to the quarters, it's rusting through. So I have now added 'replace deck panel' to my list of to dos.
And finally, some of you may have saw the thread I had about wondering if I could remove the post in the center of my shop. The main reason for this was I was getting sick of working around it. If I wanted to work on the inside of the car, I would have to push the car forward and then back when I was done. If I wanted to work on the driver's side, I would have to turn the wheels, push car forward, turn wheels again, push back, turn wheels, and on and on. I'm sure you get the point. As I don't have the steering column hooked up, I had to literally turn the front wheels and since everything is new and tight, was harder to do while on the ground. So yesterday I found a cheap and easy solution. Not sure why I didn't do this before.
Car dollies:
Car rolls around quite easily now. Hopefully more updates next week. On a good note, my job will be changing in the next couple weeks. My new position will be more overtime opportunities and will be making more money. More money = more parts.
09-25-2010, 11:54 PM
#55
On The Tree
Thread Starter
iTrader: (4)
Join Date: Mar 2009
Location: British Columbia, Canada
Posts: 132
Likes: 0
Received 0 Likes
on
0 Posts
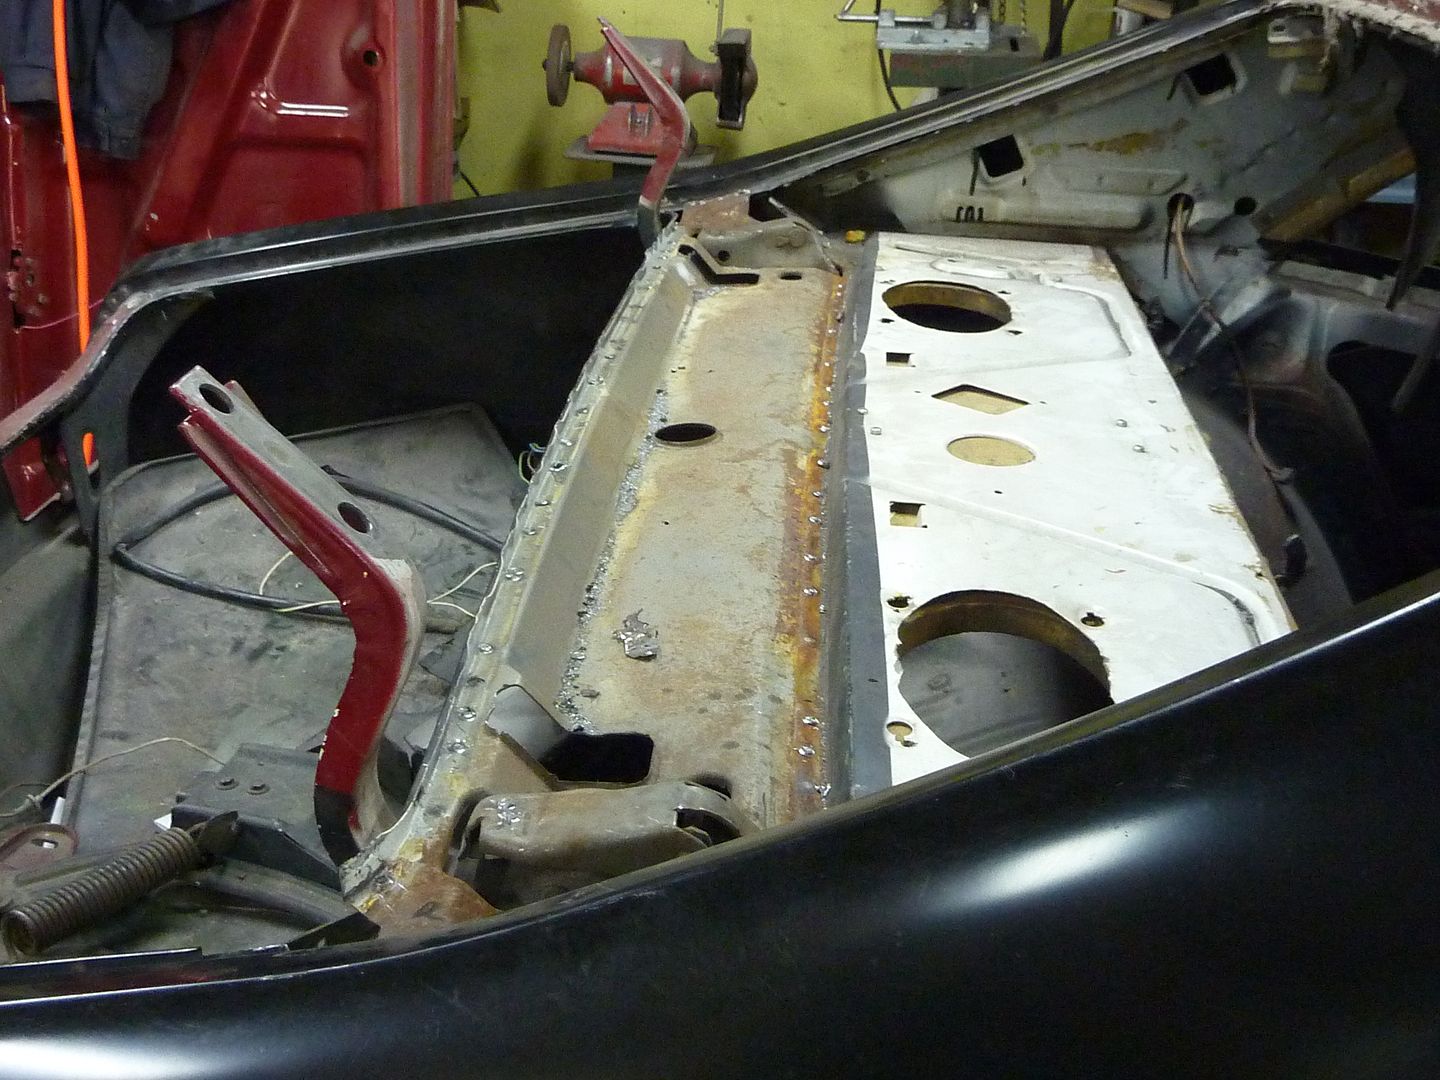
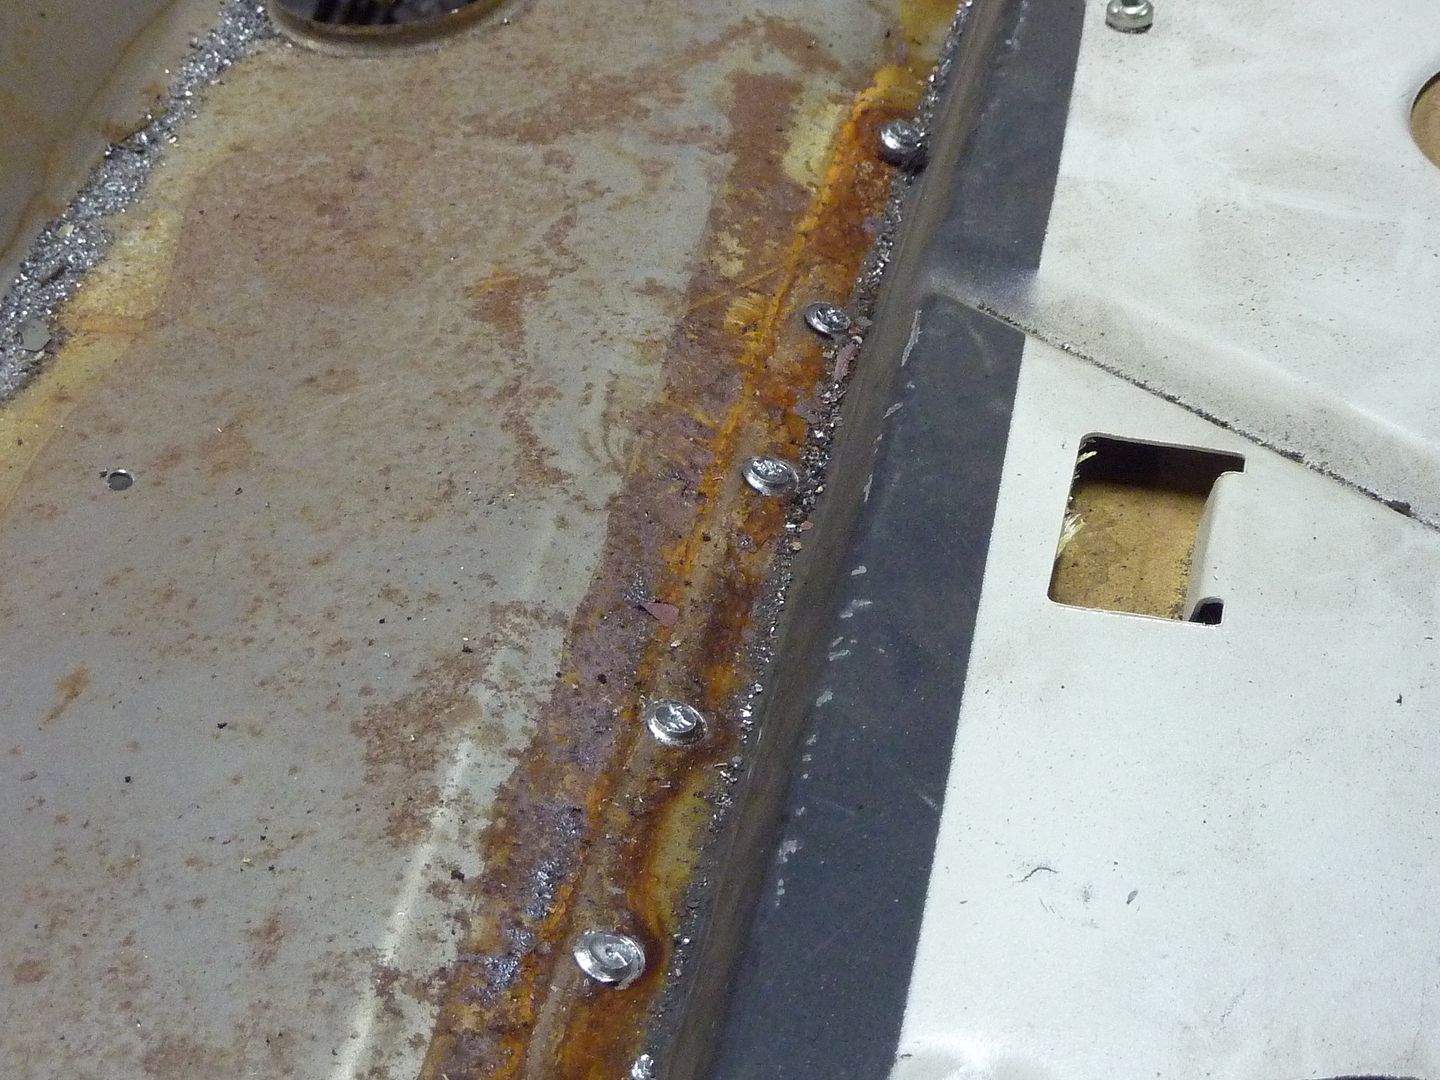
I started working on getting the deck filler panel off. Overall it wasn't in that bad of shape, except for where they meet up with the quarters. If I didn't have this one laying around, I likely would have just cut out the rusty sections and welded in new pieces.
Old deck filler panel
And it's off. Took about an hour and a bit to get the old one off. Just had to drill out a bunch of spot welds.
It's in pretty good condition, just a bit of surface rust underneath. Nothing some por15 won't stop.
New panel sitting in place, not welded in yet though as I ran out of 2" prep discs. Going to see if I can get a good deal on a case of them.
One question I have though, where the filler panel meets the quarter panels, does the filler panel sit on top like it is in this photo or does it go underneath the quarter. I put it on top when I put the quarters on.
09-25-2010, 11:55 PM
#56
On The Tree
Thread Starter
iTrader: (4)
Join Date: Mar 2009
Location: British Columbia, Canada
Posts: 132
Likes: 0
Received 0 Likes
on
0 Posts
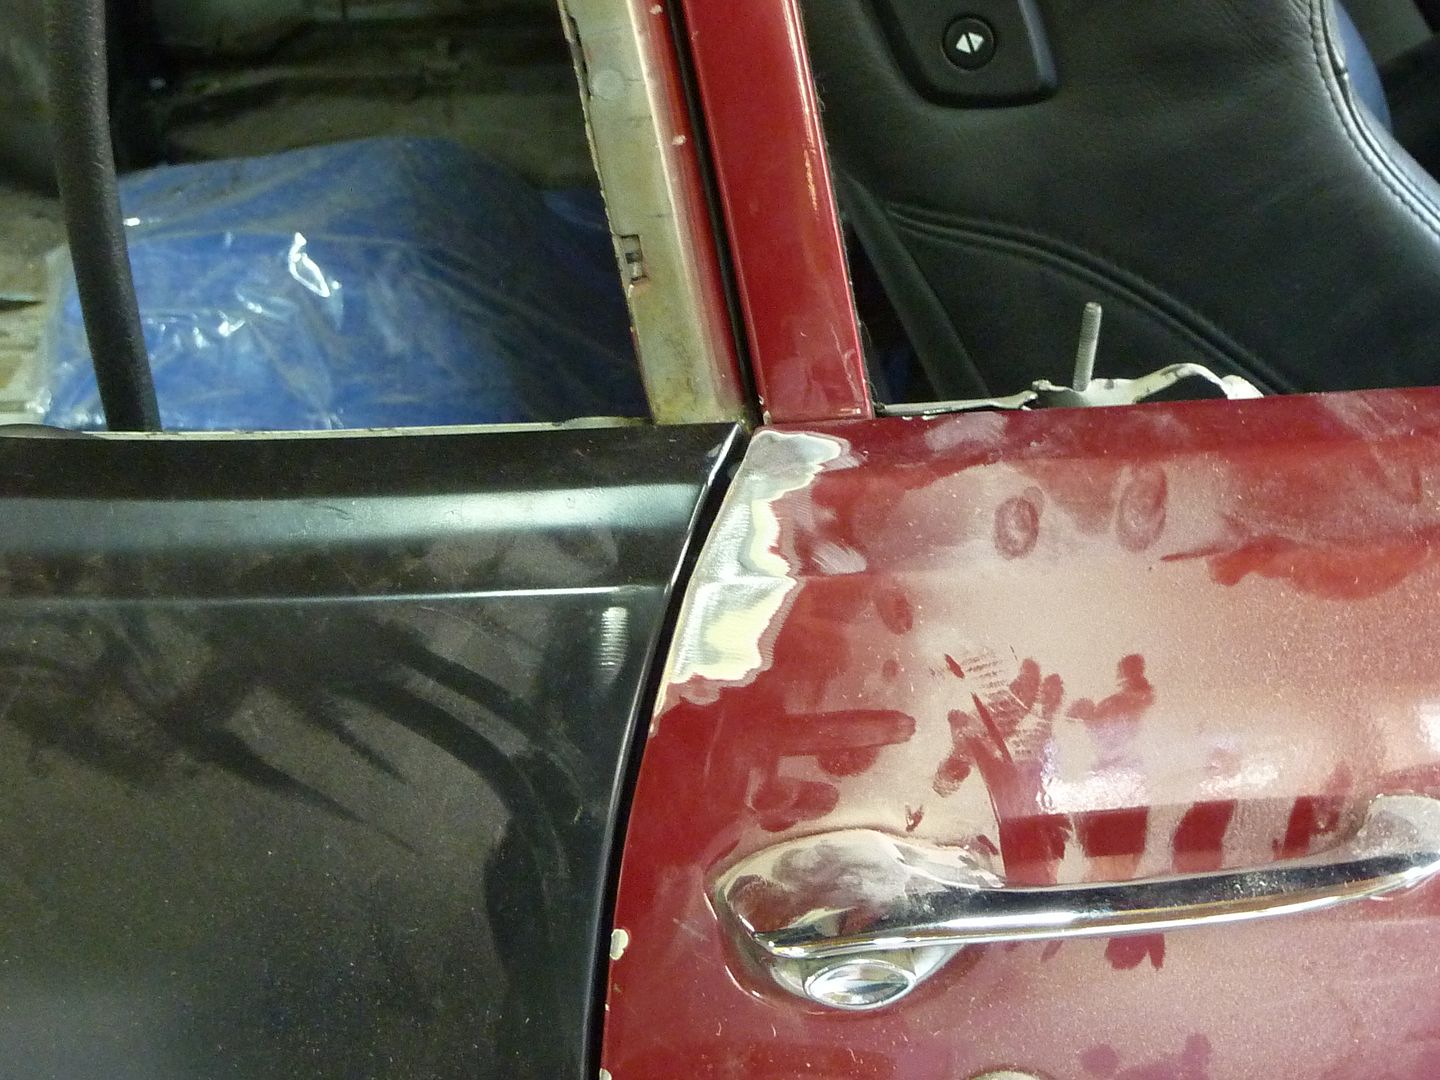
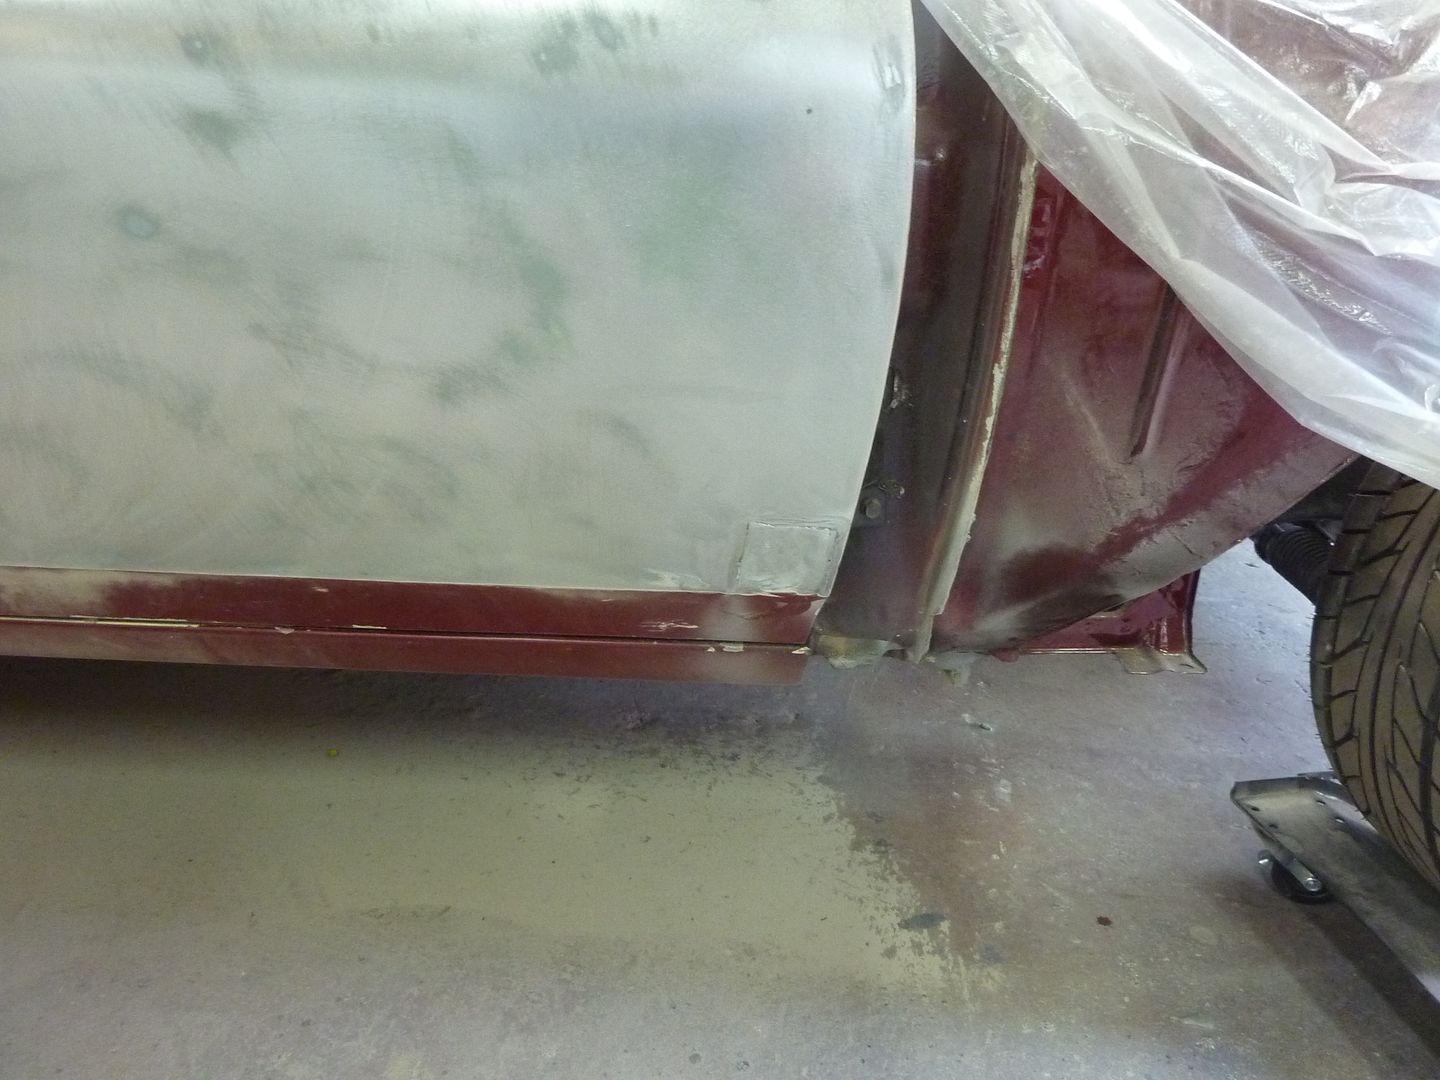
A buddy of mine came over today and we tried aligning the doors. Unfortunately we hit some issues. We also got the subframe aligned and it's within 1/4" of the factory specs so I'm pretty happy with that. Back to the doors. We started with the passenger side and I got the quarter/door gaps to 1/8" and the body lines matched up nicely and thought it was good. Then I realized some other issues.
Gap to quarter panel. It's about 1/8"
The top part of the door is hitting the screw along the frame
I didn't take a picture of it, but the gap along the bottom is between 1/4" and 1/2". I know I can fill it in, but that's a lot to fill in isn't it? If I try and move the door down, the body lines won't match up. What about if I cut into the quarter panel along the gap and welded it back in place about 1/8" back?
The passenger side wasn't a whole lot better. The gap with the quarter panel was tight and the body lines match up pretty good.
Along the front/top of the door, I have a gap that's about 1/4" to 1/2".
The rocker gap is good, but it's sunk in at the front. I kept trying to adjust it, but when I align the door to the quarter, this happens.
Any suggestions?? Tomorrow I plan on finishing up the deck filler panel.
09-25-2010, 11:57 PM
#57
On The Tree
Thread Starter
iTrader: (4)
Join Date: Mar 2009
Location: British Columbia, Canada
Posts: 132
Likes: 0
Received 0 Likes
on
0 Posts
GregWeld made a good point on another forum. Other members made similar comments which made me think. Here's the post from Greg.
Last night I kept looking at the pics of the gaps and Greg's right, it's an old car and this isn't a high dollar build. I'm doing it in my garage and it's my first attempt at something this big. And as I've read over and over again, the aftermarket stuff does not fit like the OEM stuff. With that in mind, I have aftermarket quarter panels and aftermarket hinges so I'm battling the aftermarket stuff on either end. I was looking at the driver's side and if I can get the door to come forward a bit, other than the bottom which I'll work on, I'll be happy. When I was looking at the hinges yesterday, I noticed that they won't go further any more. I'm just going to ream the holes out a bit to bring the door forward. As long as the doors work and look good I'll be happy. Here's some more pics of the doors as they sit now.
Driver's side. You can see on the driver's side quarter where I've already had to cut it to make it fit better.

Passenger side
Today I got the deck filler panel finished
Looks way better now. Still needs to be cleaned up better.
I really like the look of new sheet metal. I'm so tempted to buy new fenders and doors. I'll wait and see how these ones looks once I get them down to the metal.
Mike -- unless you're prepared to do a complete weld and grind - and add and fill.... REMEMBER that working with what you have is about SPLITTING the distance -- so it's half of what "would be" perfect... you can't expect an old stock body to have gaps that are like a high dollar custom build... just get them "good" - and splitting hairs here and a little there...
I helped with a 57 Limo -- 4 doors PER SIDE... we split the window frames to get the gaps at the top "right" --- and had to add welding rod to the door edge to close gaps up etc.... it's A LOT of work to get this old stuff "right".
I helped with a 57 Limo -- 4 doors PER SIDE... we split the window frames to get the gaps at the top "right" --- and had to add welding rod to the door edge to close gaps up etc.... it's A LOT of work to get this old stuff "right".
Driver's side. You can see on the driver's side quarter where I've already had to cut it to make it fit better.
Passenger side
Today I got the deck filler panel finished
Looks way better now. Still needs to be cleaned up better.
I really like the look of new sheet metal. I'm so tempted to buy new fenders and doors. I'll wait and see how these ones looks once I get them down to the metal.
09-25-2010, 11:59 PM
#58
On The Tree
Thread Starter
iTrader: (4)
Join Date: Mar 2009
Location: British Columbia, Canada
Posts: 132
Likes: 0
Received 0 Likes
on
0 Posts
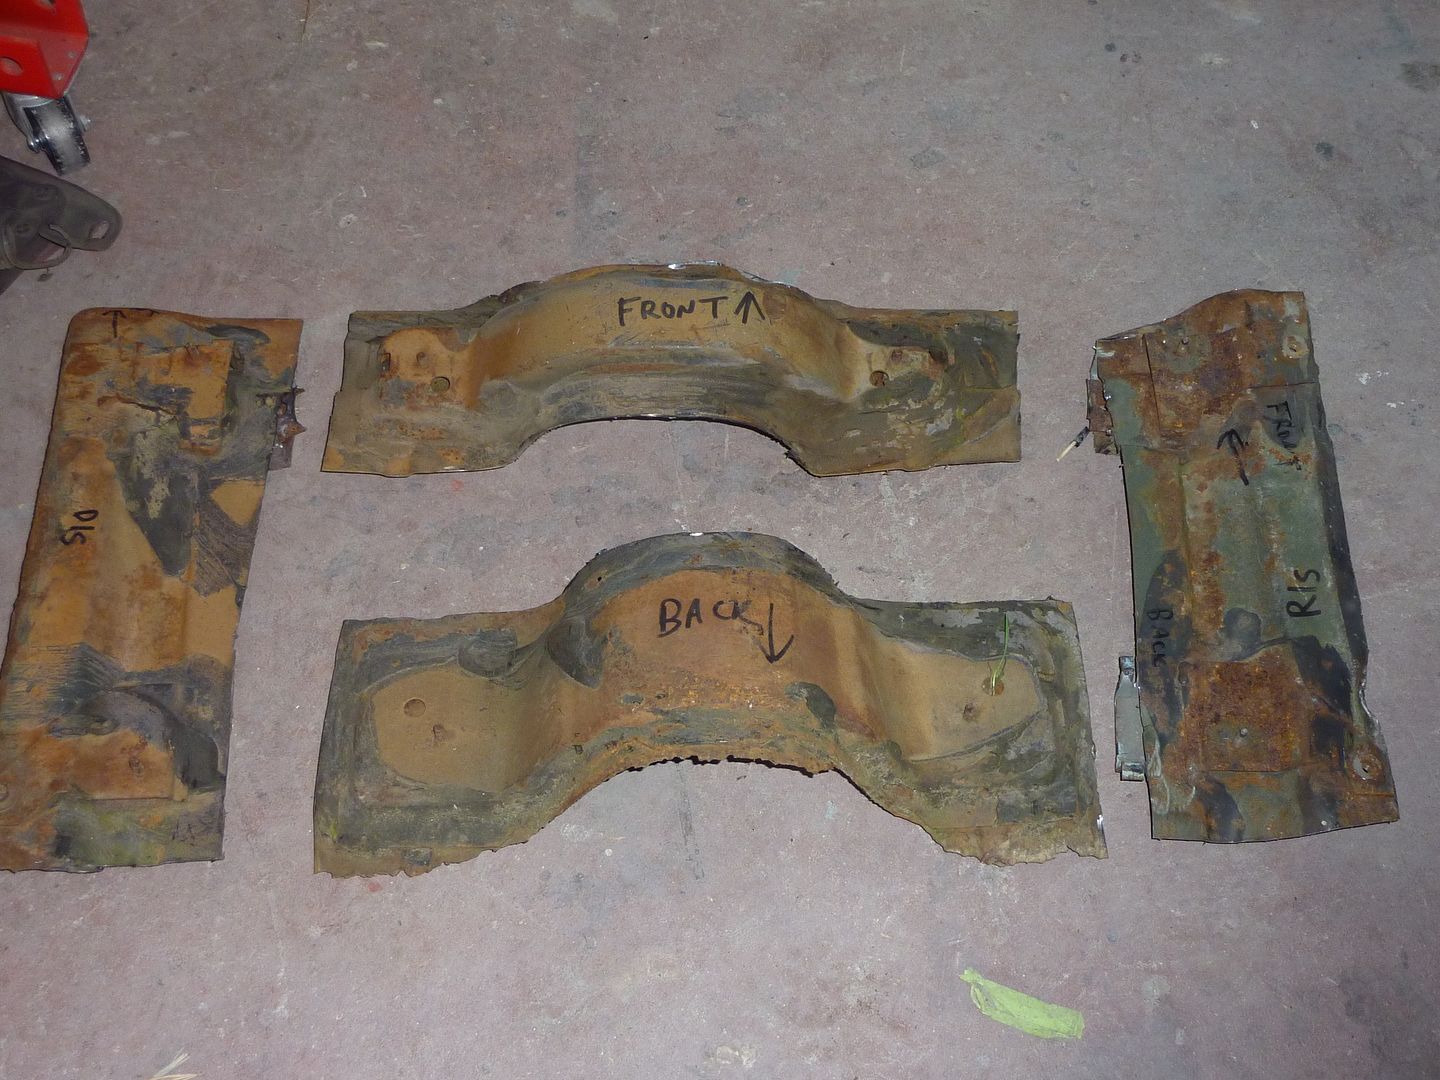
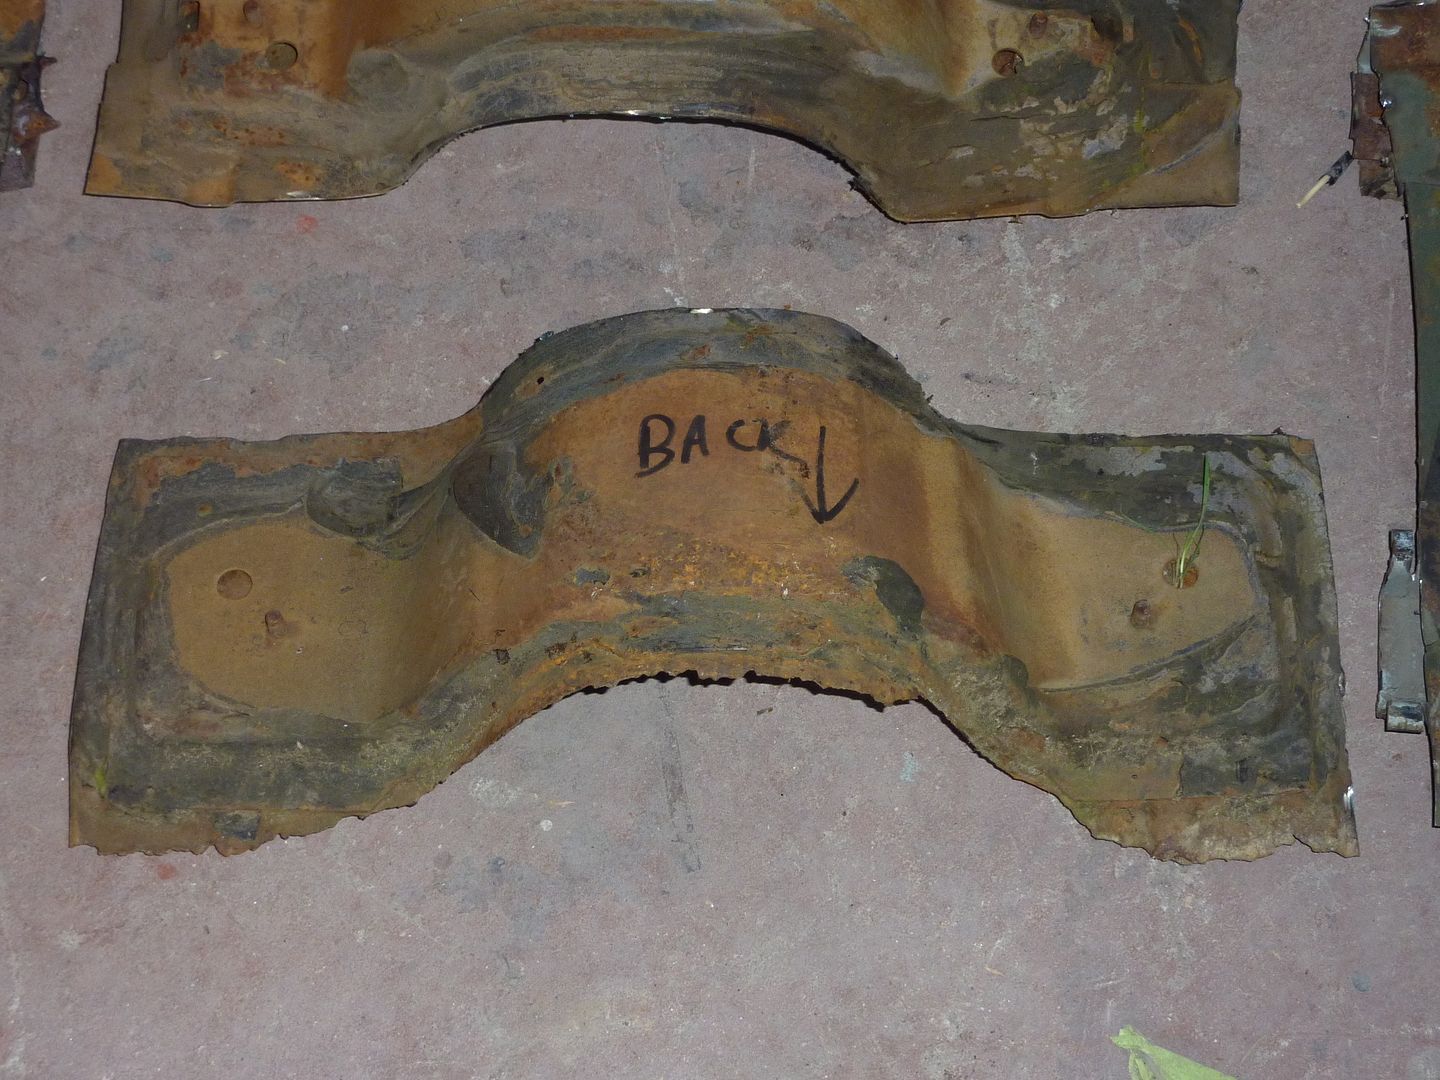
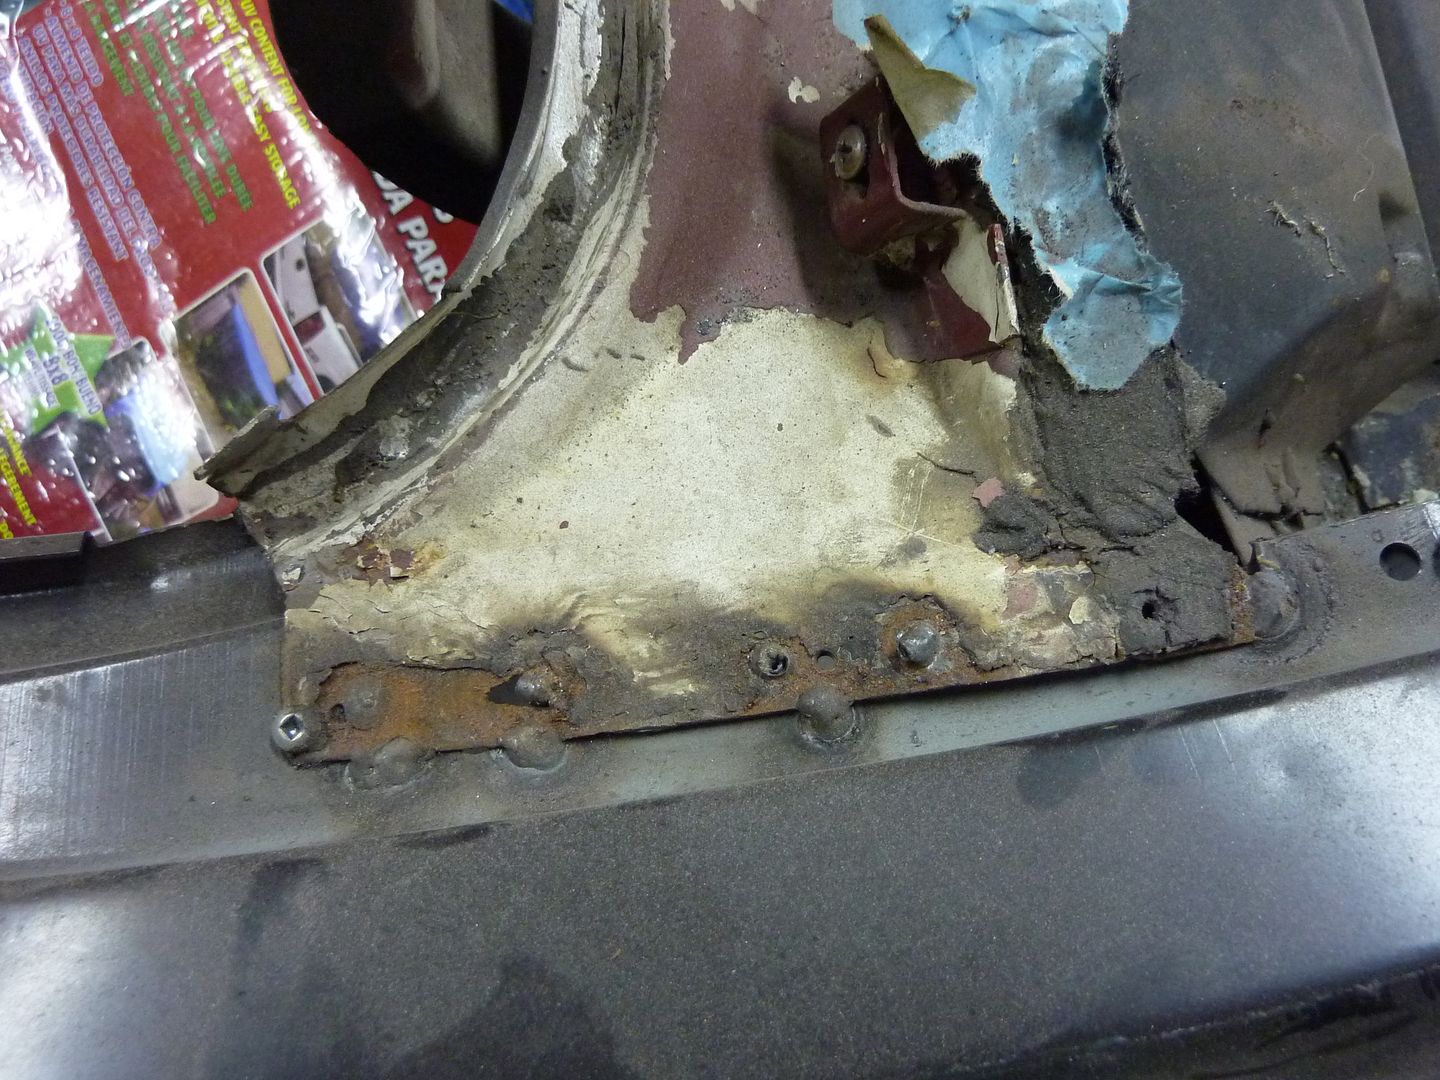
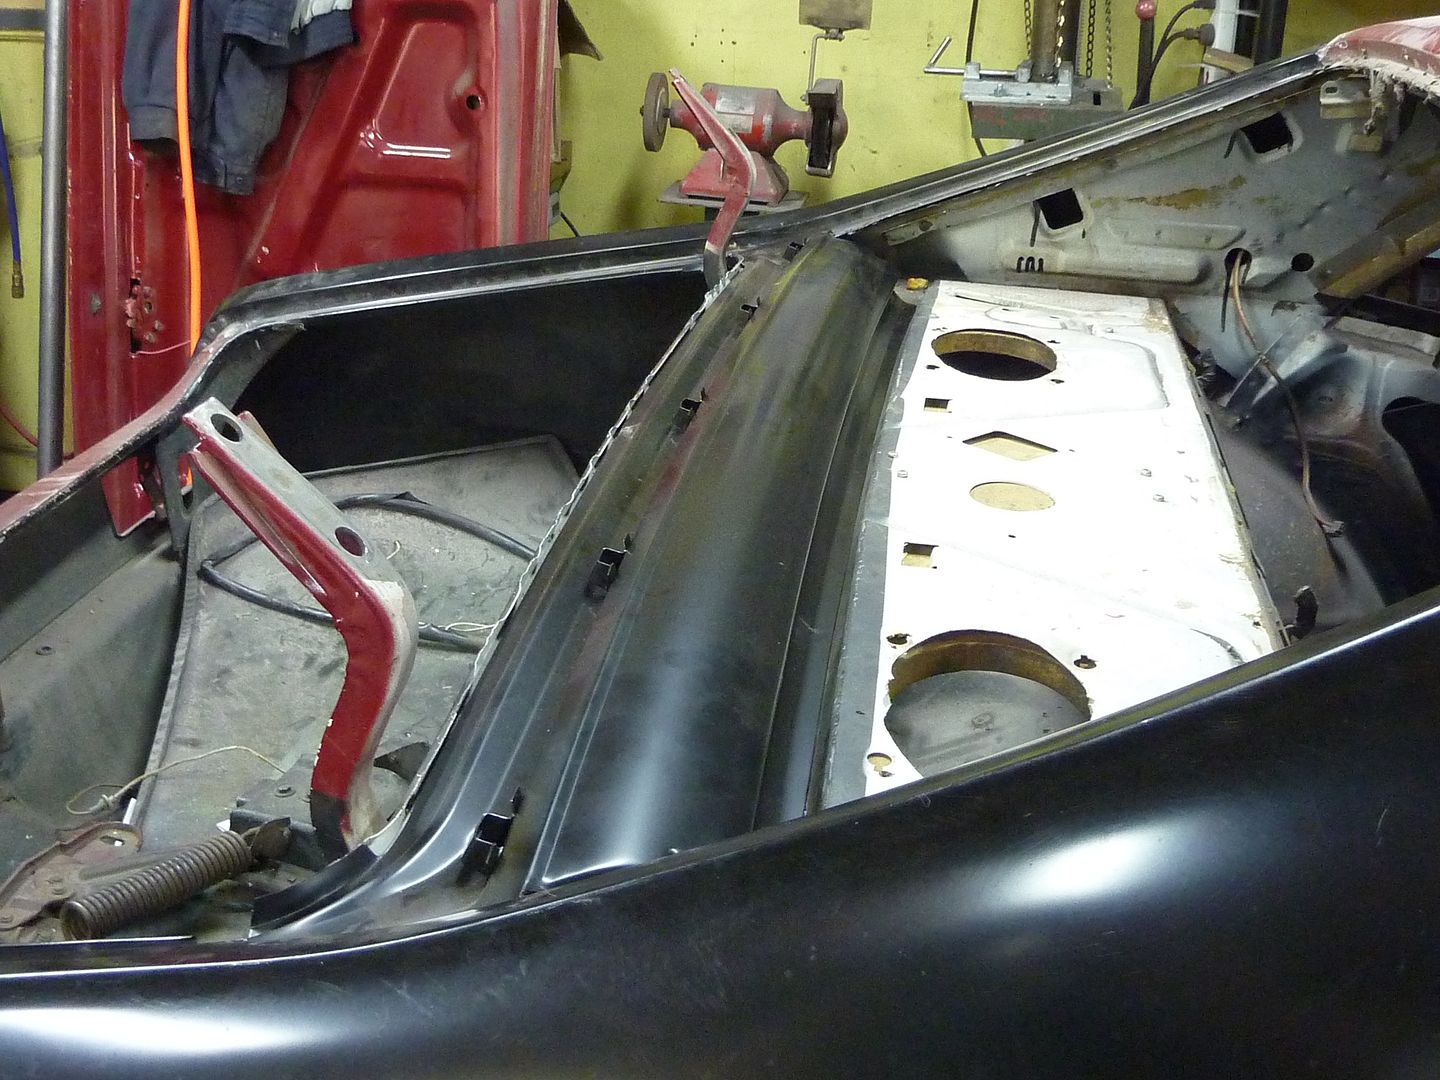
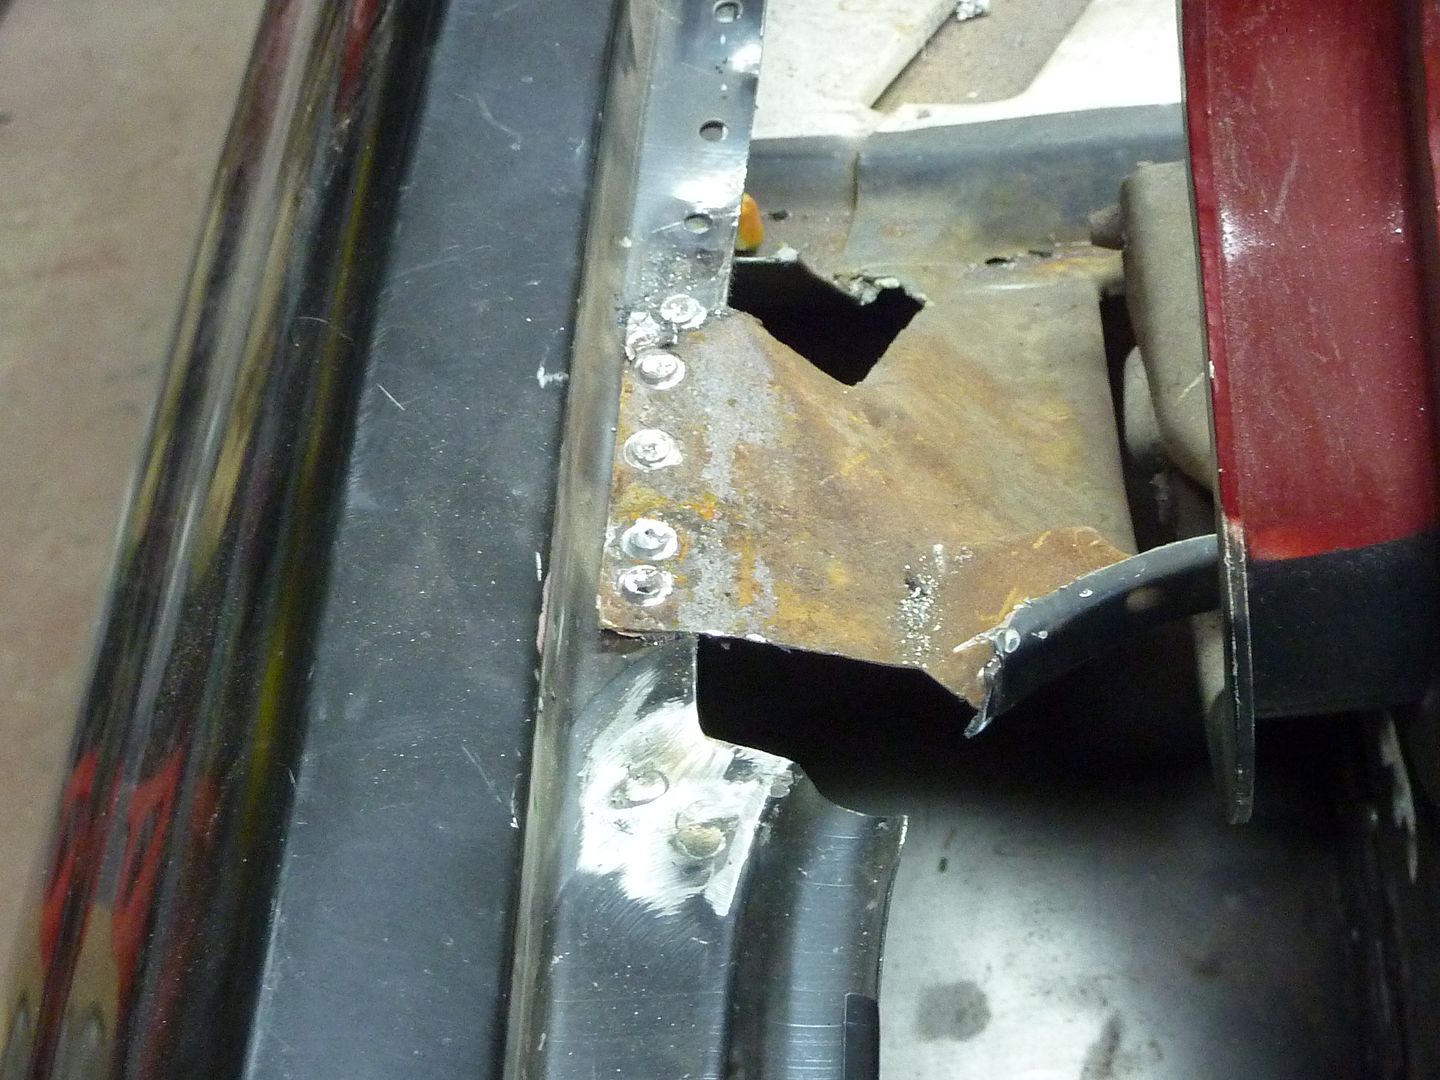
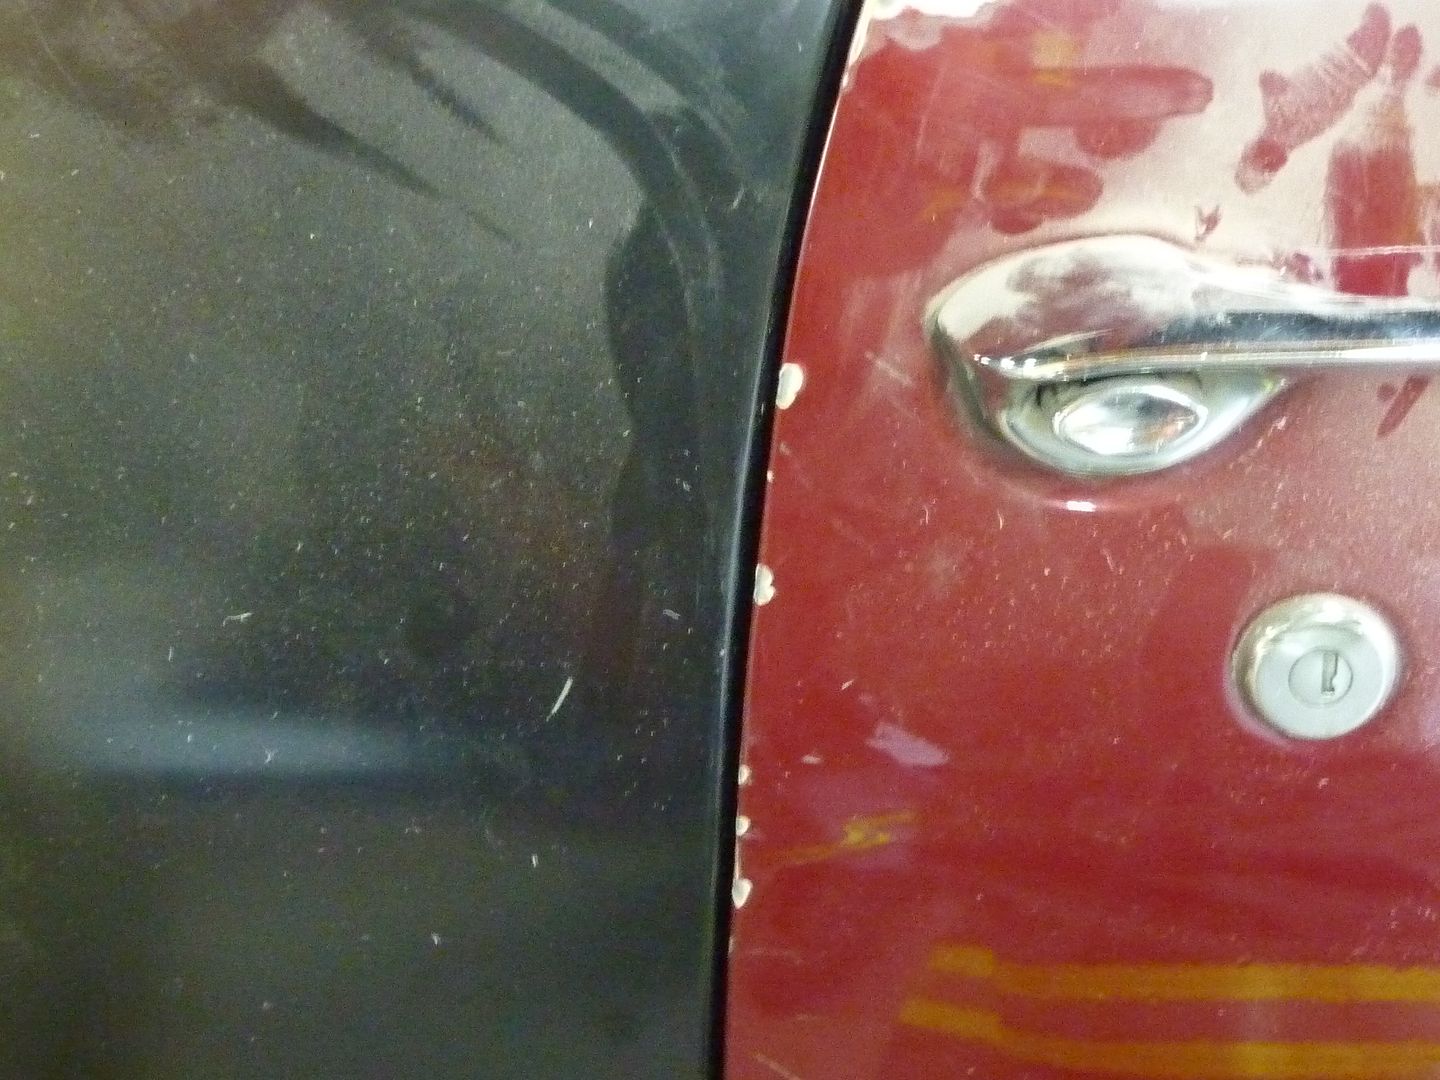
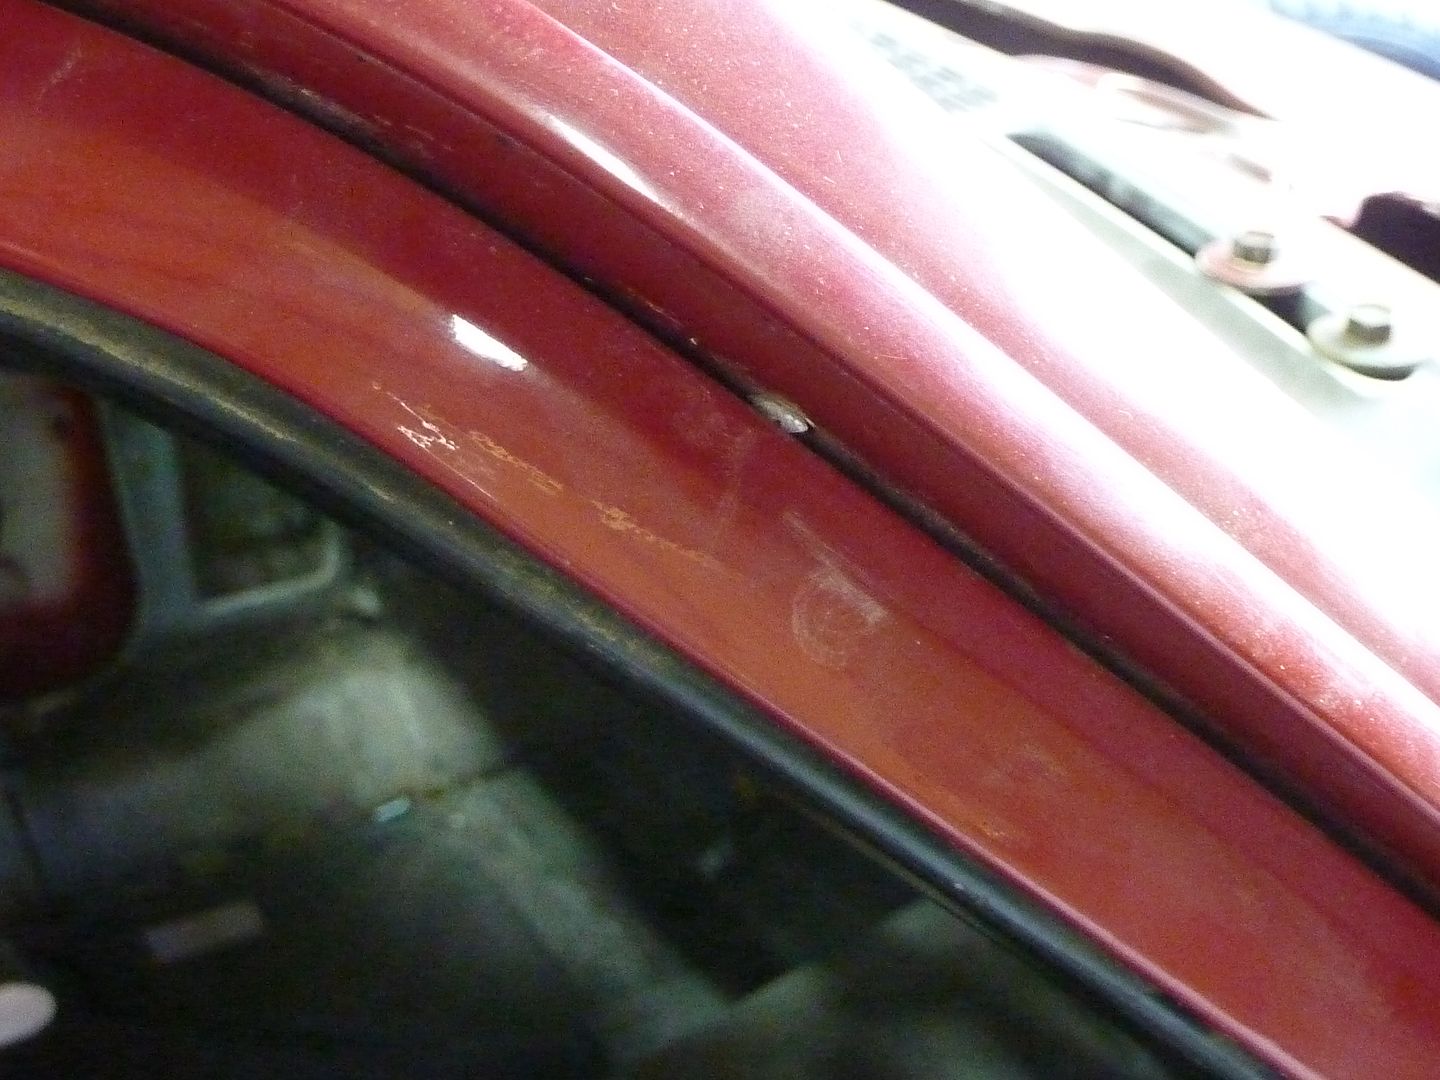
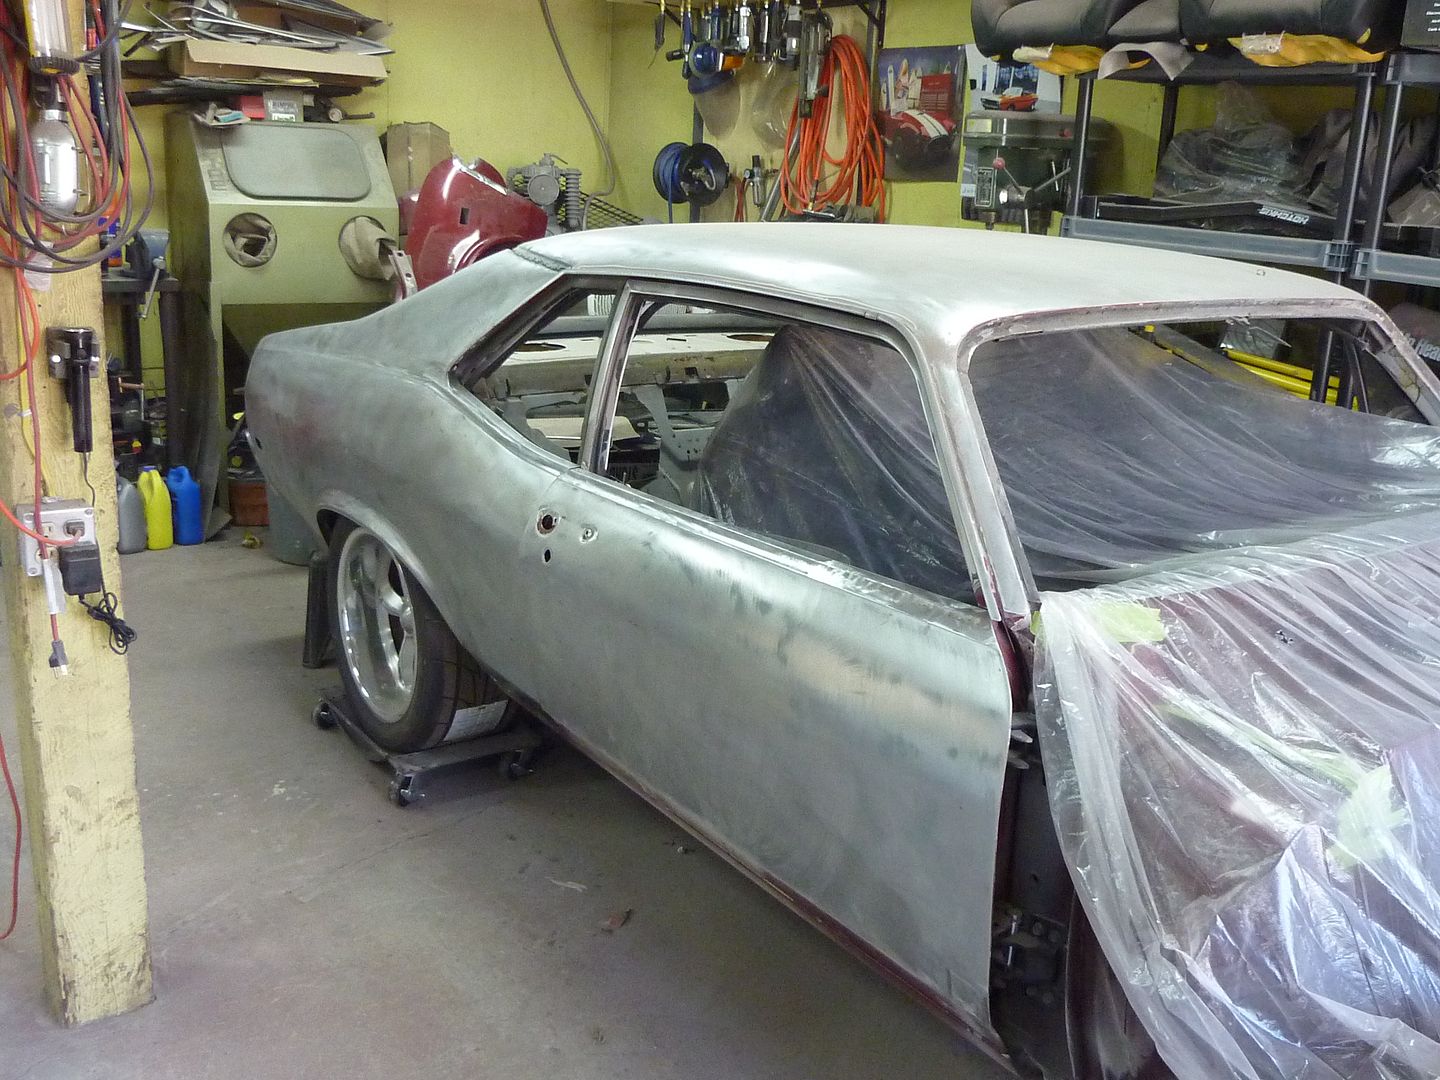
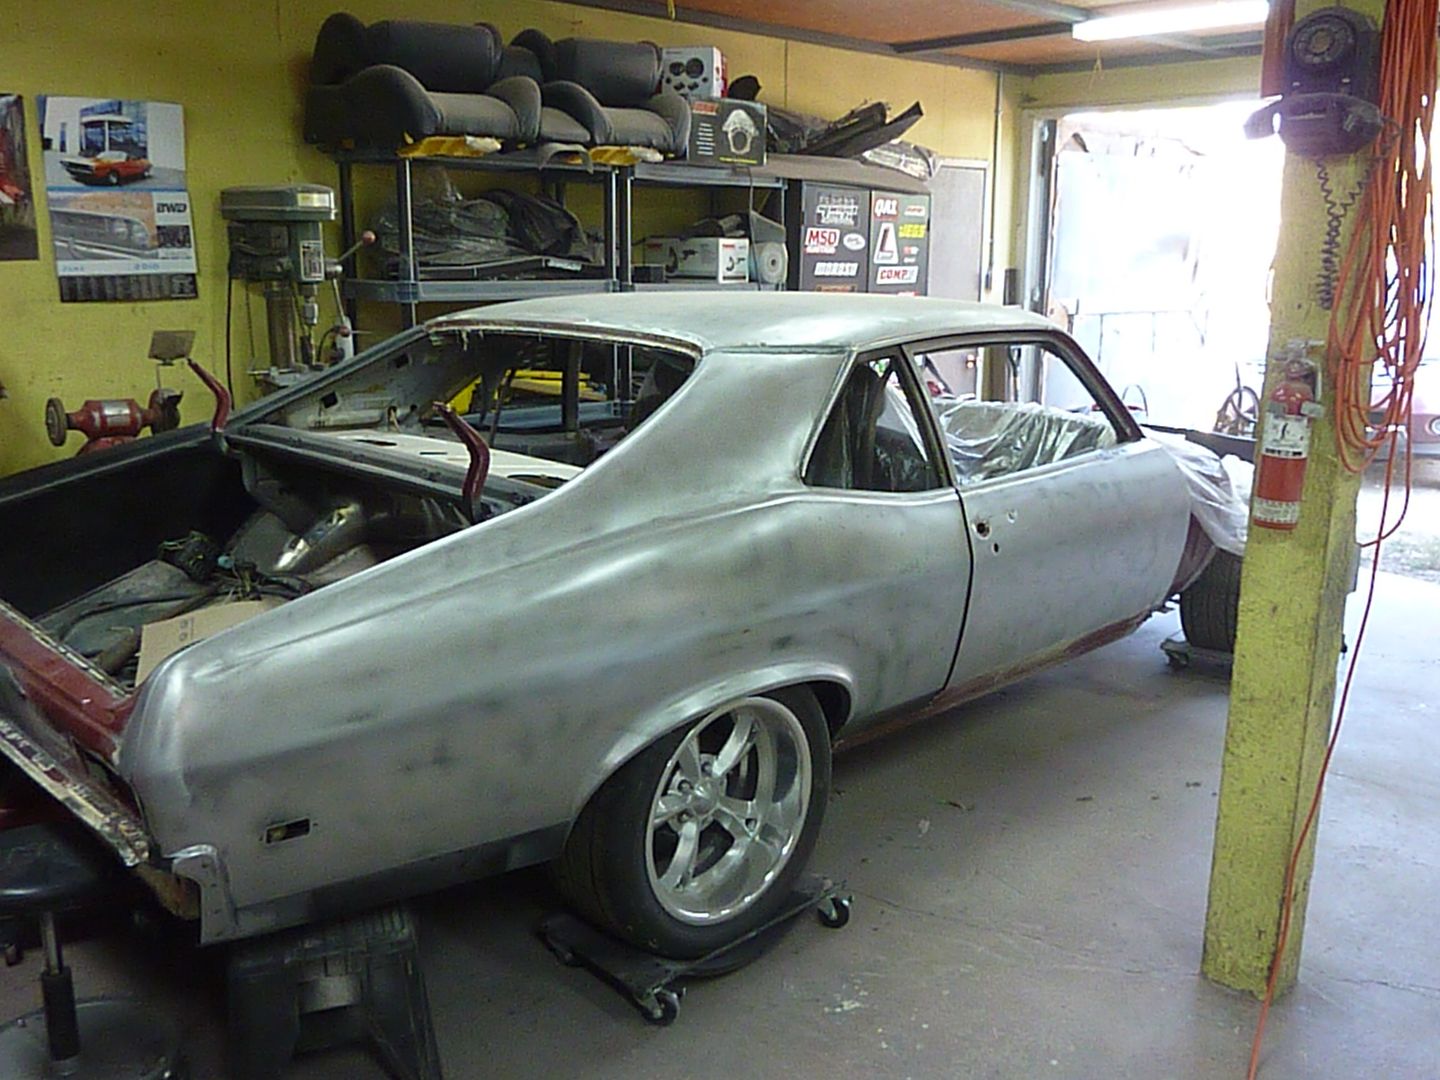
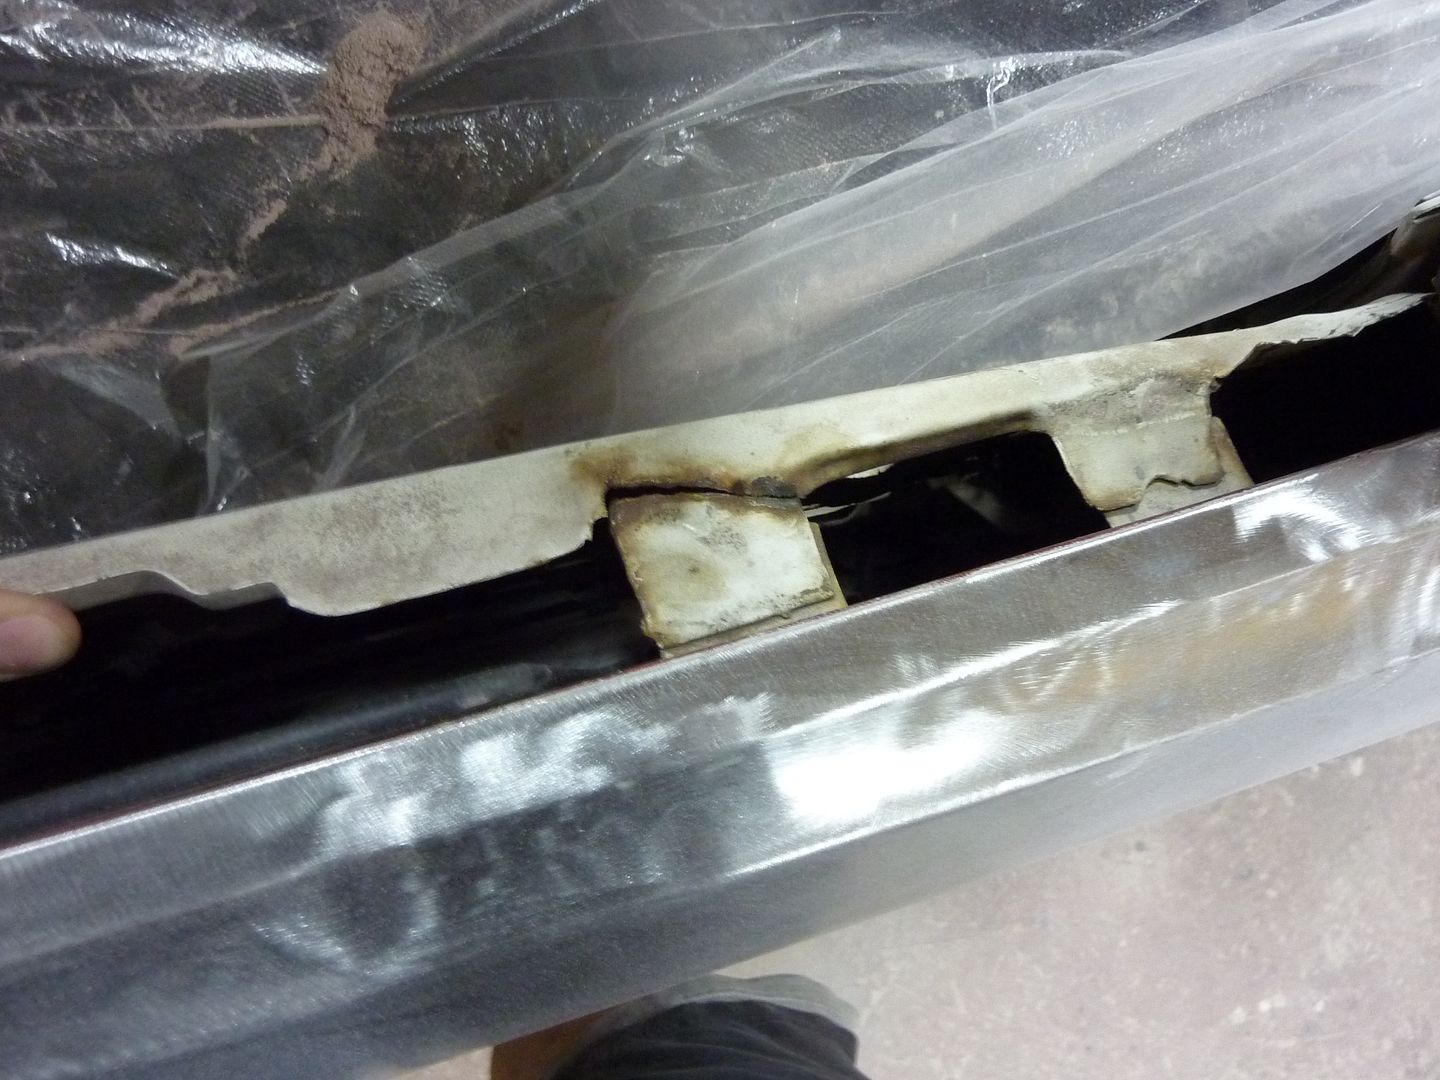
Well I've gotten around to getting some done on the car. I want to try and have it in primer before this winter so have been working on stripping the car. I also have most of the driver's side quarter done.
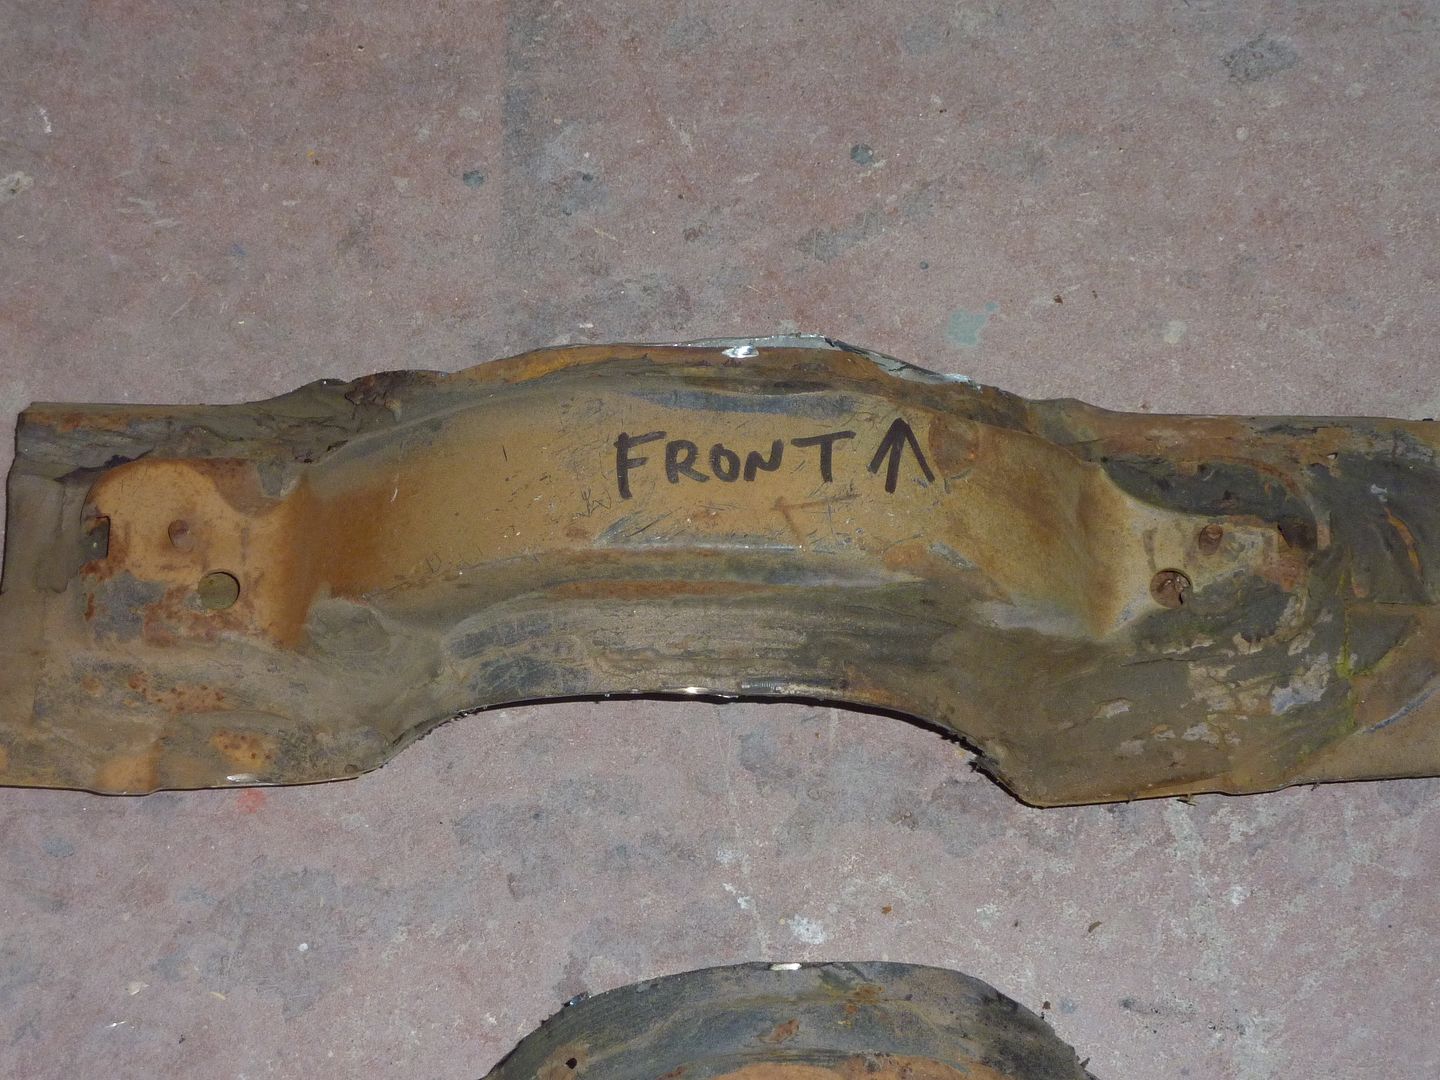
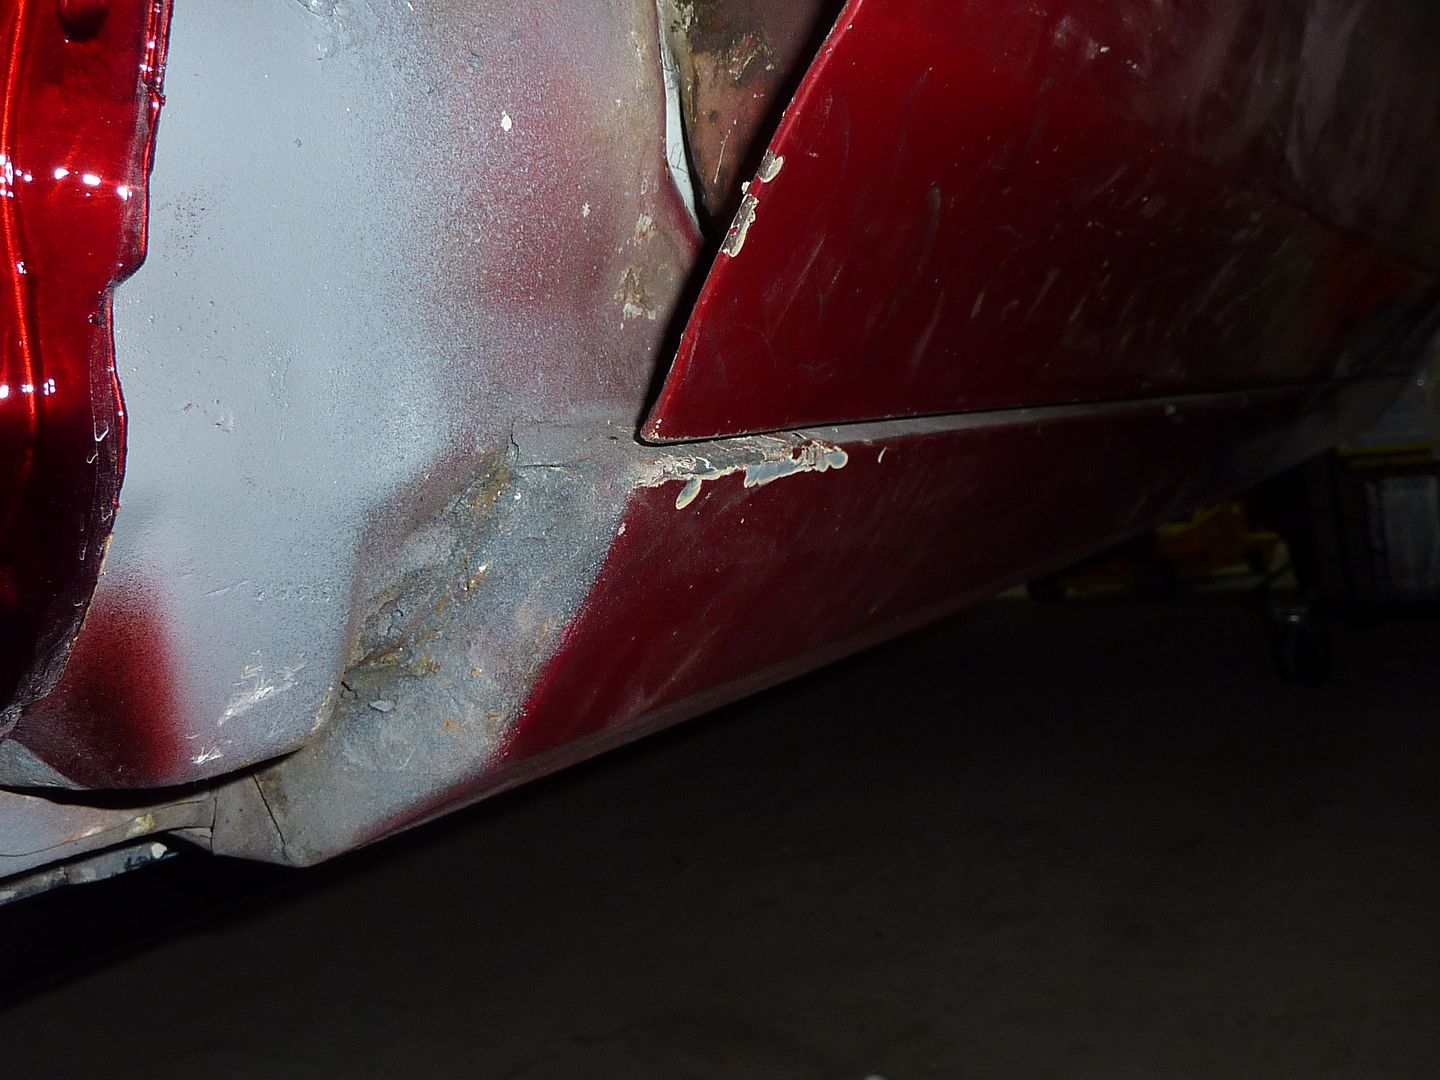
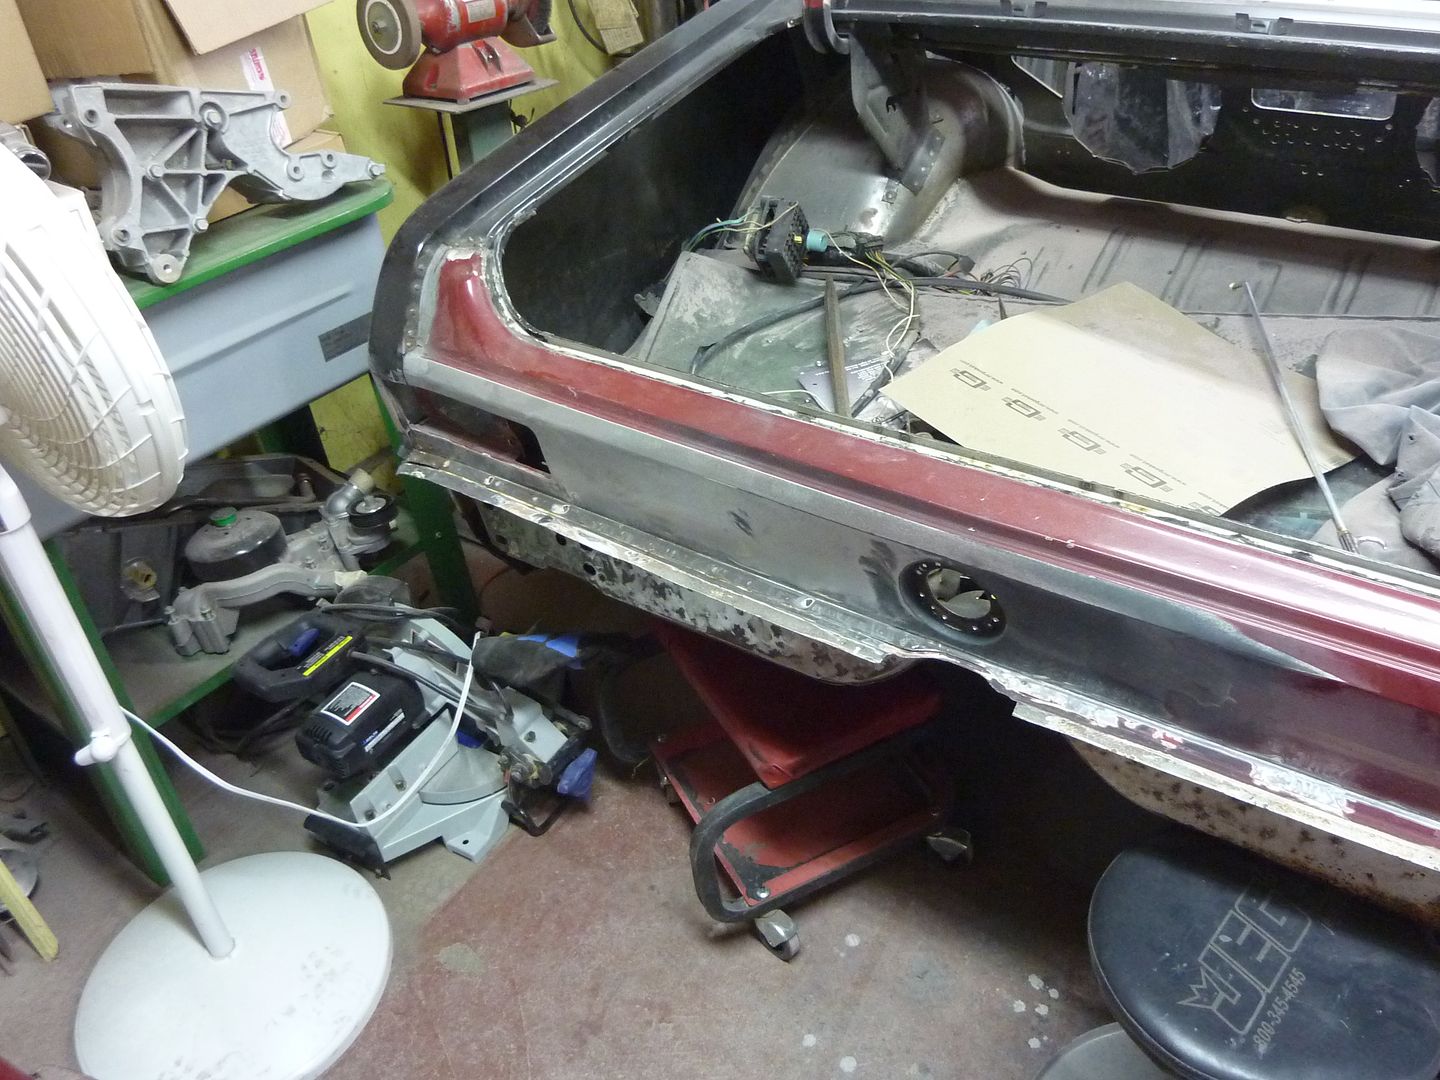
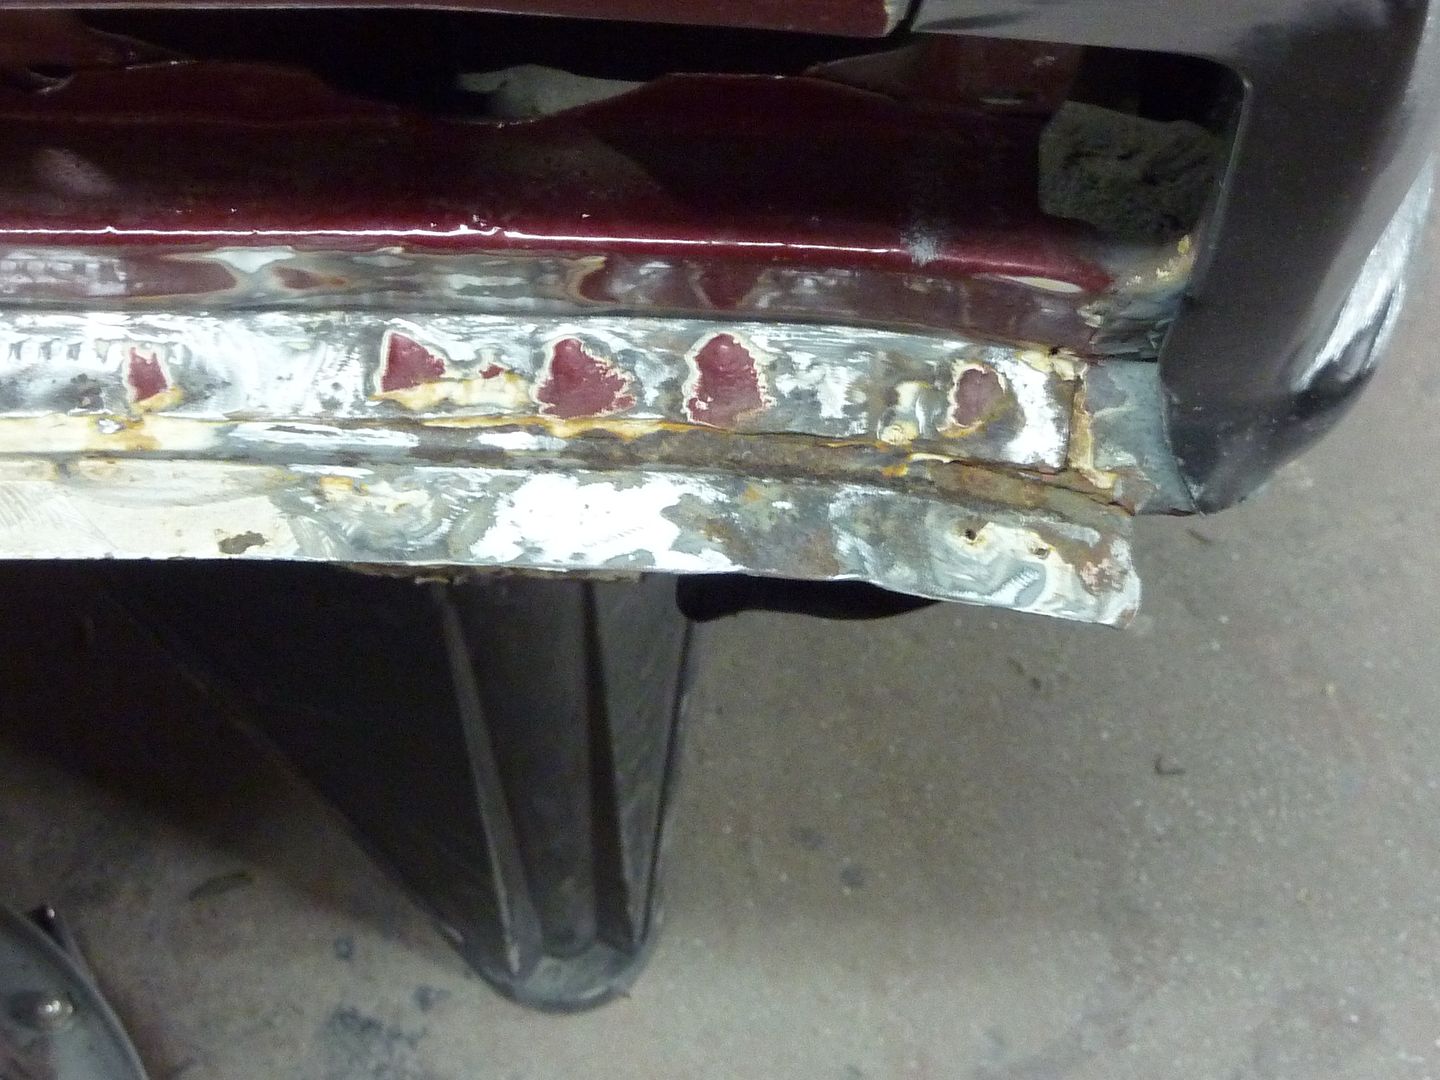
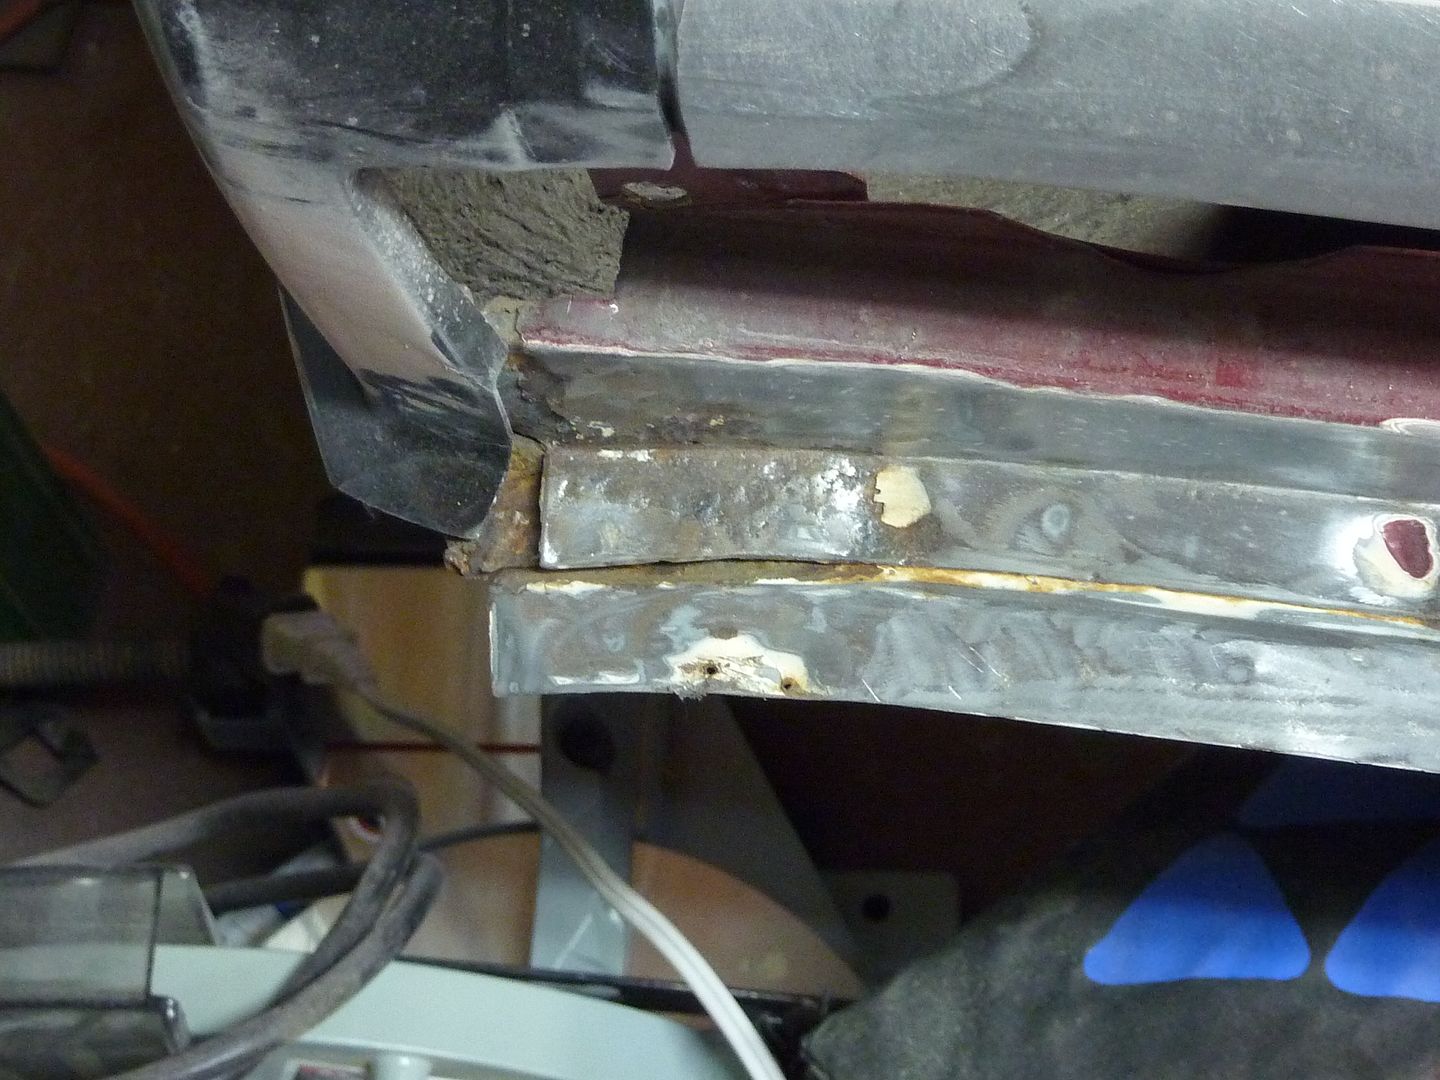
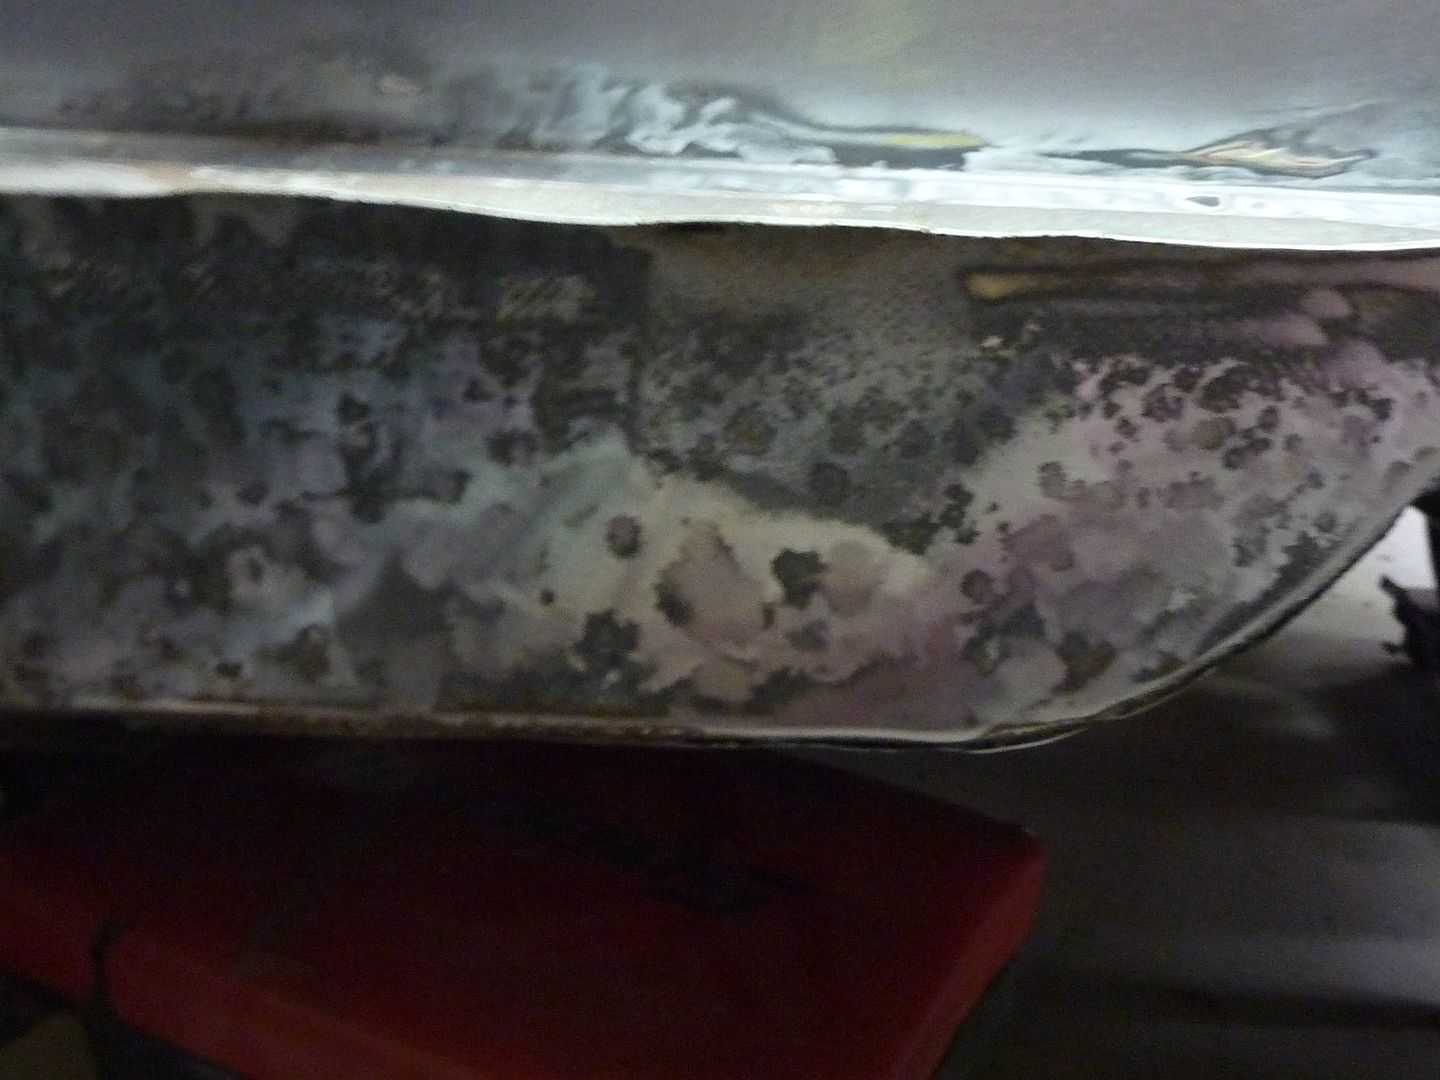
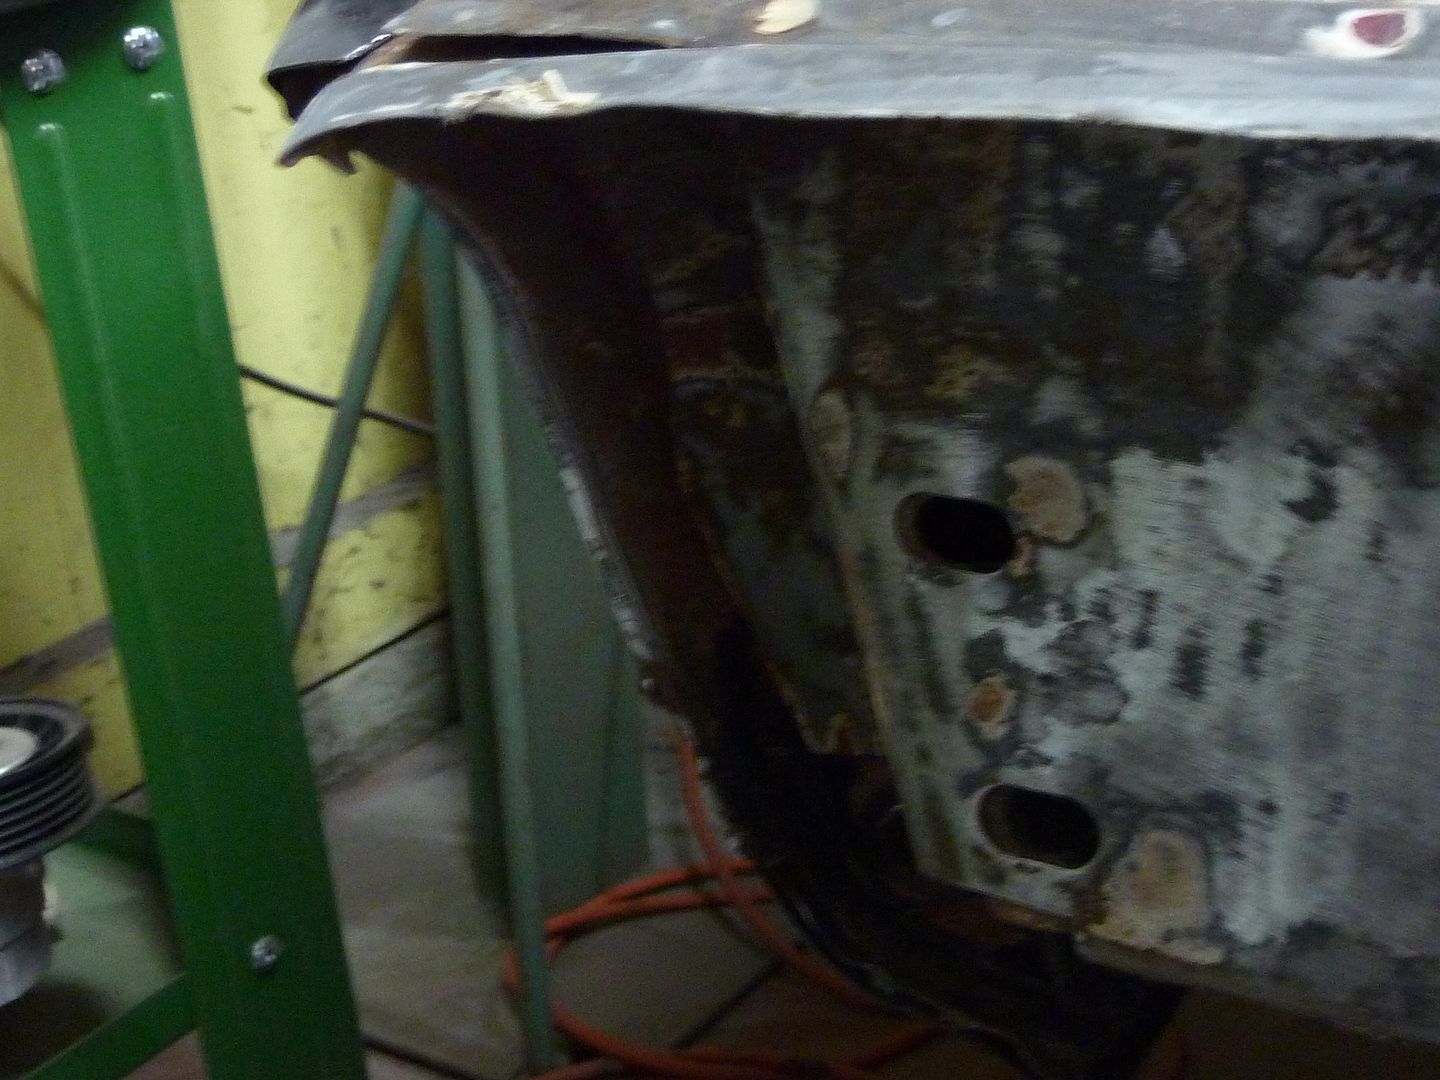
Found a few areas of concern in the rear tail panel. I'm leaning towards getting both sections new from Auto Metal Direct. A new tail light panel is $150 and the rear trunk crossmember is $130. Better to get rid of the trouble areas.
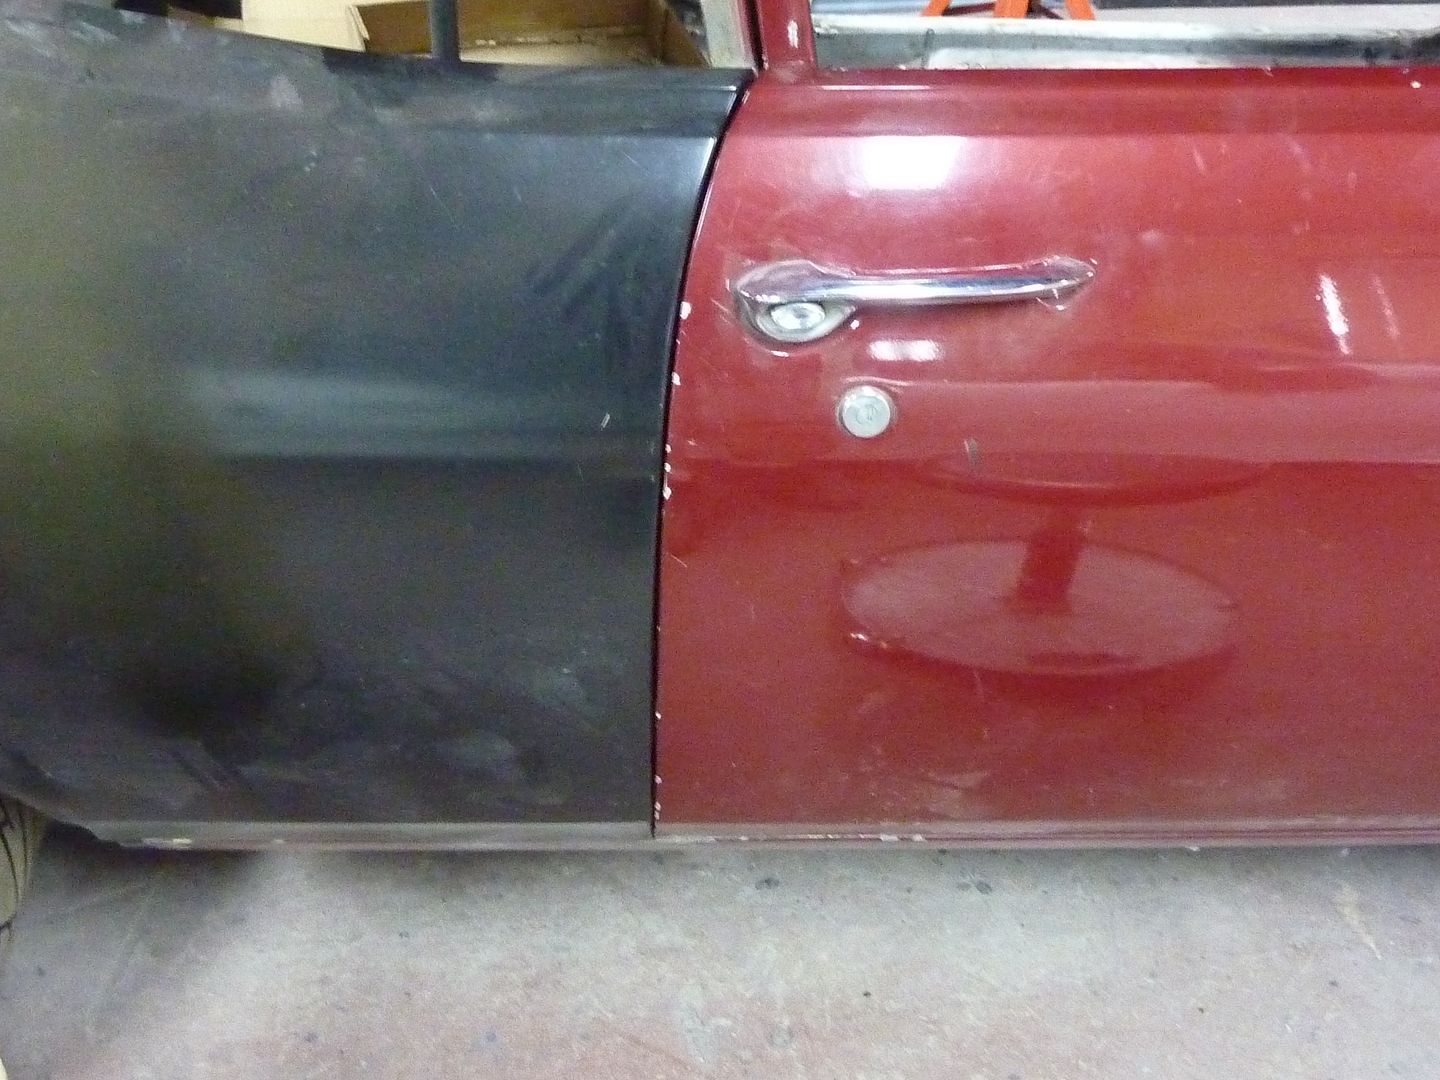
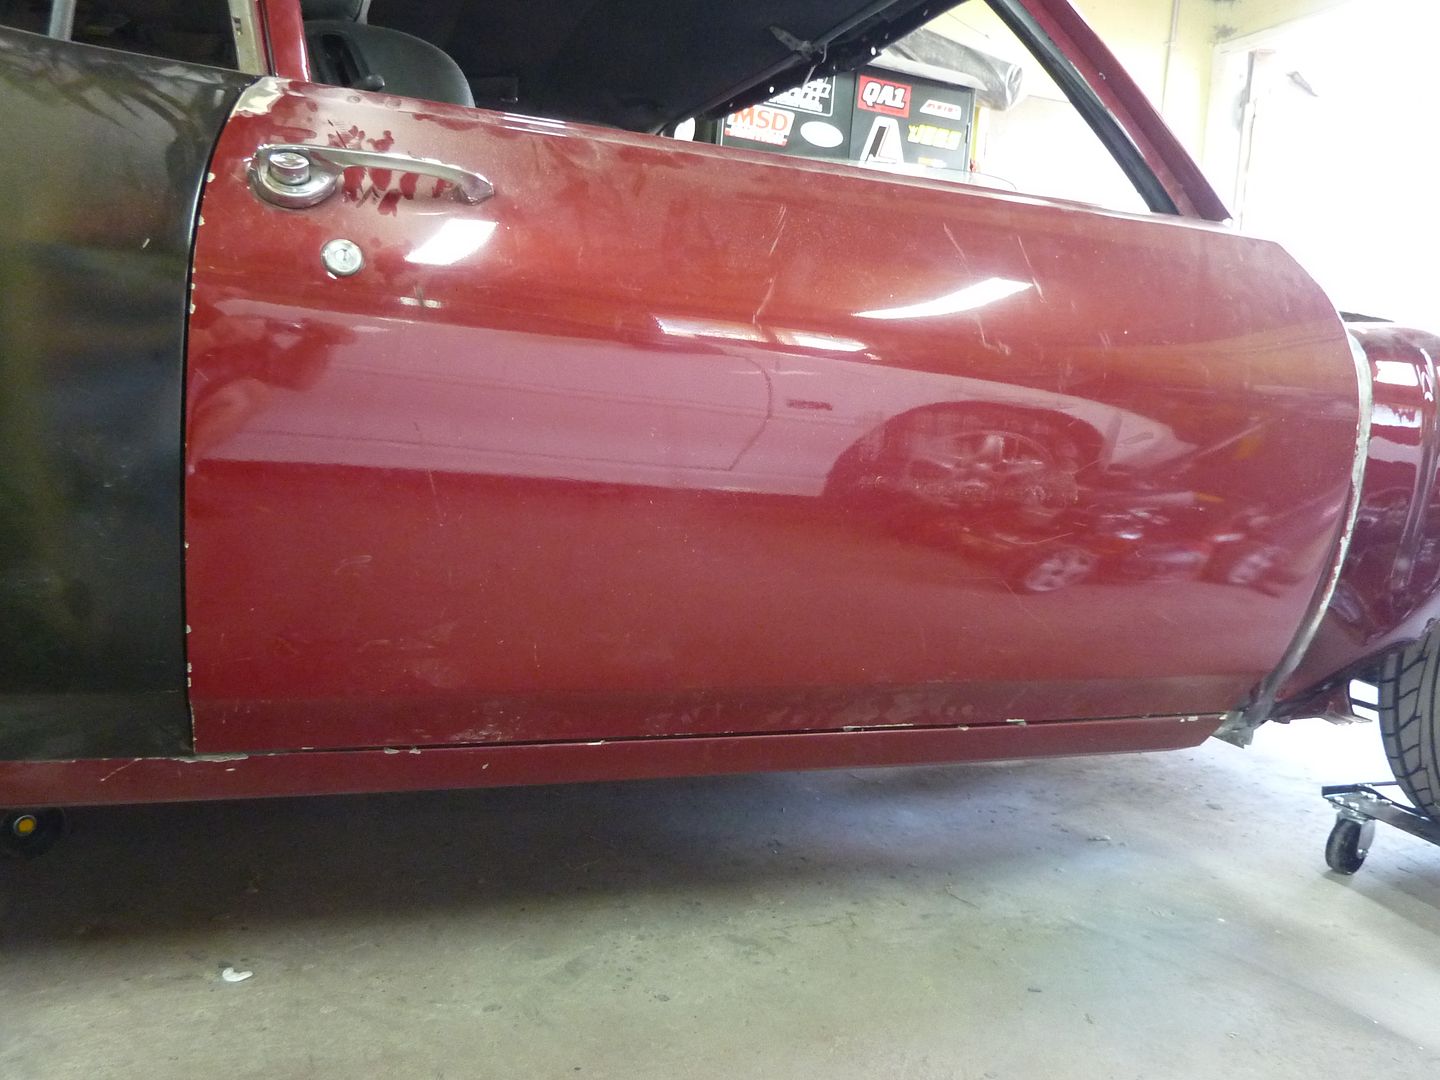
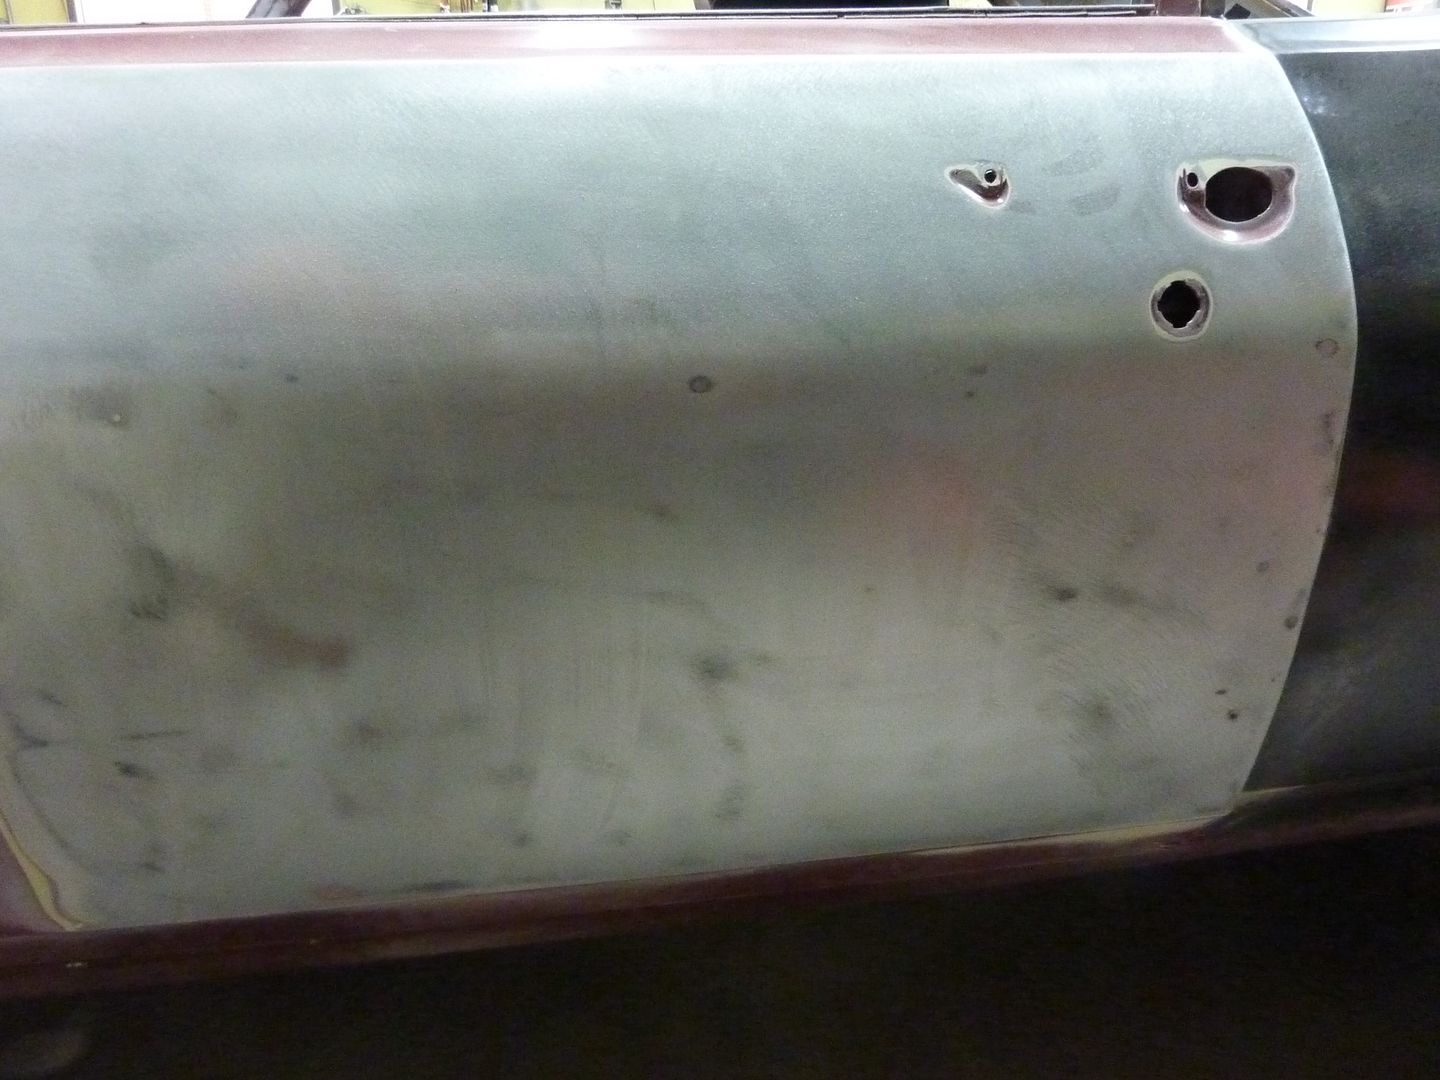
I also found a couple issues on the passenger door. Should be easy fixes though.
I've also been trying to figure out how to run the gas filler neck. I went and looked at all kinds of pieces of exhaust tubing and all the bends weren't tight enough or weren't a mandrel bend so they were flat. In the end, I think the original filler neck I got with the gas cap will work. The one thing I didn't like with it is that is designed for camaros so it is slightly off to the right. I wanted mine to be through the middle. So I figured I would cut it in half and I'll just get it rewelded to be straight. I'll still need to run some exhaust tube through the trunk, but this will fit quite nicely under the rear trunk lock support.
The original filler neck
After I cut it. Just need to get it welded back together. I'm also thinking about cutting the neck part of it to make it a bit shorter.
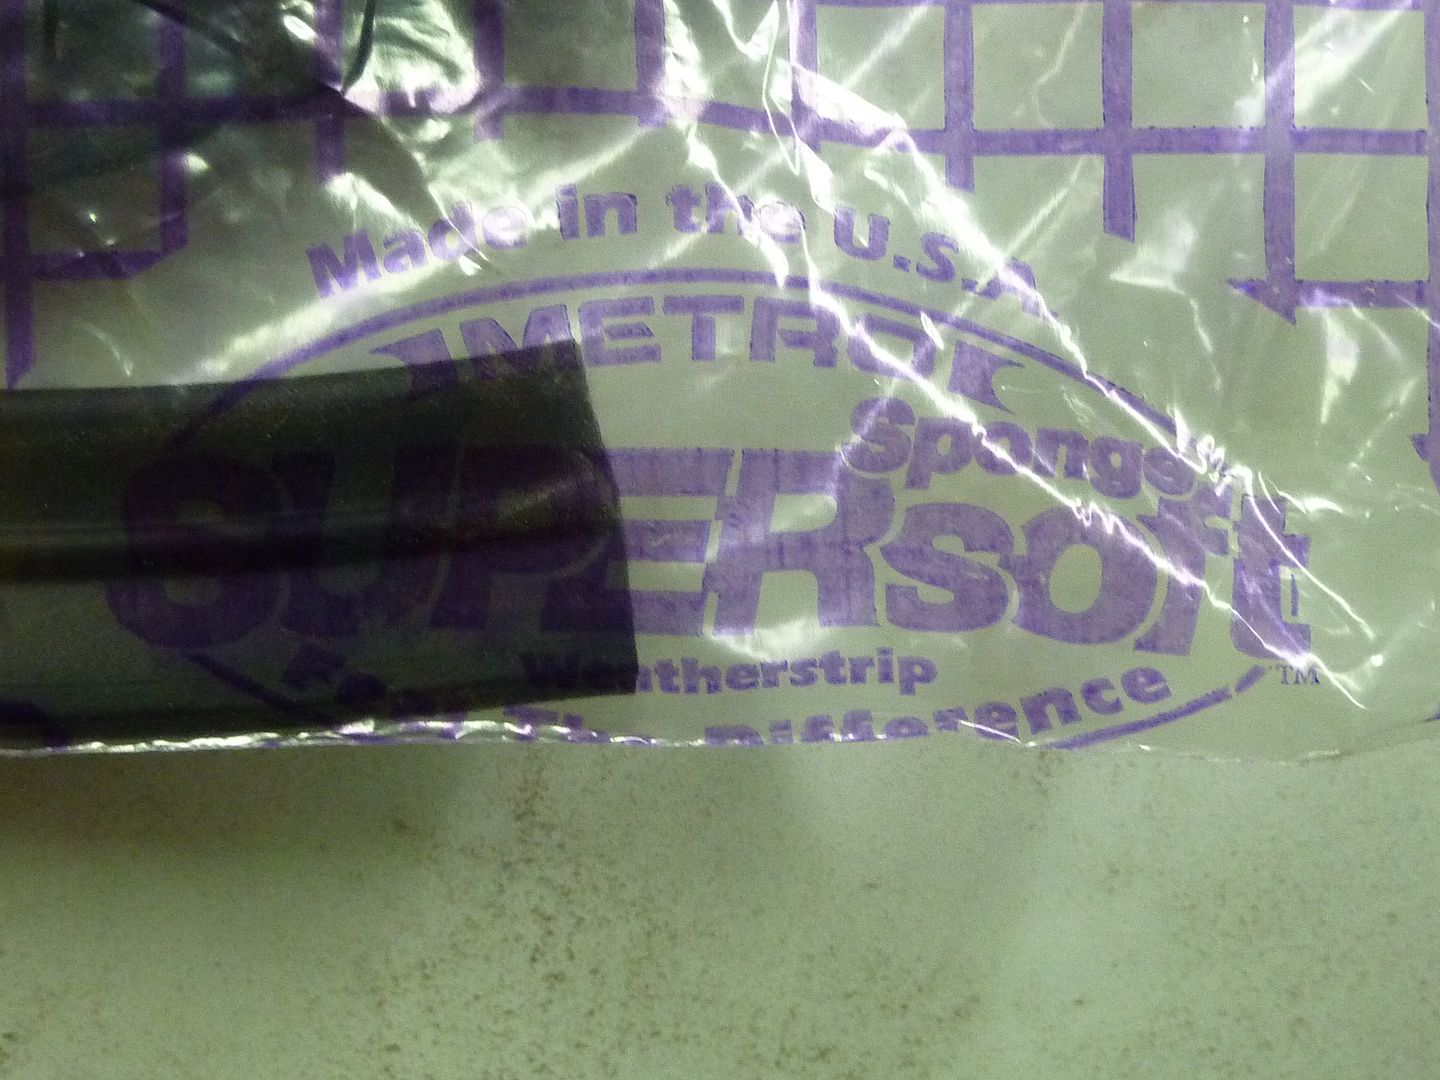
I also picked up some weather stripping for the doors and trunk so I can get them aligned properly.
Found a few areas of concern in the rear tail panel. I'm leaning towards getting both sections new from Auto Metal Direct. A new tail light panel is $150 and the rear trunk crossmember is $130. Better to get rid of the trouble areas.
I also found a couple issues on the passenger door. Should be easy fixes though.
I've also been trying to figure out how to run the gas filler neck. I went and looked at all kinds of pieces of exhaust tubing and all the bends weren't tight enough or weren't a mandrel bend so they were flat. In the end, I think the original filler neck I got with the gas cap will work. The one thing I didn't like with it is that is designed for camaros so it is slightly off to the right. I wanted mine to be through the middle. So I figured I would cut it in half and I'll just get it rewelded to be straight. I'll still need to run some exhaust tube through the trunk, but this will fit quite nicely under the rear trunk lock support.
The original filler neck
After I cut it. Just need to get it welded back together. I'm also thinking about cutting the neck part of it to make it a bit shorter.
I also picked up some weather stripping for the doors and trunk so I can get them aligned properly.
09-26-2010, 12:00 AM
#59
On The Tree
Thread Starter
iTrader: (4)
Join Date: Mar 2009
Location: British Columbia, Canada
Posts: 132
Likes: 0
Received 0 Likes
on
0 Posts
Time for a bit of an update. Last week I started stripping the driver's side door and did not like what I found. I found the entire front section of the door was all bondo....and thick. Looks like it was almost 1/4-1/2" thick in some spots. I also found bondo all over the rest of the door.

So this morning I called up Frank and ordered new door skins for both sides. I thought with the door skins, I also might be able to cheat with them and help align the gaps a bit better. I also ordered a new tail light panel and the rear cross rail. I also decided to get some Vintage Air proline louvers in a brushed aluminum look. They weren't cheap but will look so sweet. I'm just waiting to hear back from Jon at Thunder Road and I will also be ordering an instrument panel. Will post pics once I get all the stuff.
So this morning I called up Frank and ordered new door skins for both sides. I thought with the door skins, I also might be able to cheat with them and help align the gaps a bit better. I also ordered a new tail light panel and the rear cross rail. I also decided to get some Vintage Air proline louvers in a brushed aluminum look. They weren't cheap but will look so sweet. I'm just waiting to hear back from Jon at Thunder Road and I will also be ordering an instrument panel. Will post pics once I get all the stuff.
09-26-2010, 12:01 AM
#60
On The Tree
Thread Starter
iTrader: (4)
Join Date: Mar 2009
Location: British Columbia, Canada
Posts: 132
Likes: 0
Received 0 Likes
on
0 Posts
I haven't gotten much done on the car over the past month. I blasted the passenger door, but the glass that I used was a bit too coarse so I'm going to redo it with walnut and see how it turns out. I might end up having to run the DA over it.
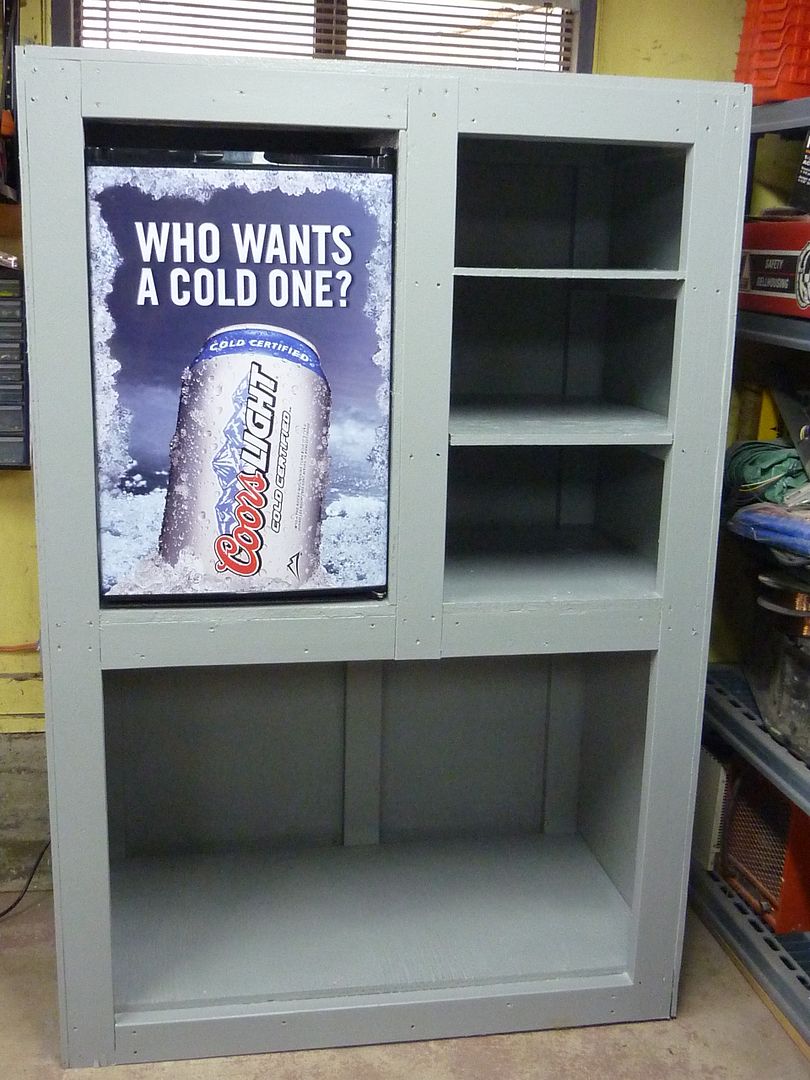
A couple weeks ago one our local pub had a draw for a free Coor's Light fridge. One entry for every Coors Light product you buy. Well that so happens to be the beer that my wife and I drink the most at that pub and guess what...the wife won it. Right away she gave it to me for the shop.

Once I had the fridge, I decided to make a storage compartment where it was more at the right height to get at it. You can never have too much storage. The cabinet is 4 feet wide by 2 feet deep and about 6 feet high. Nice big storage on the bottom and I plan on moving all my paint into one of the shelves.
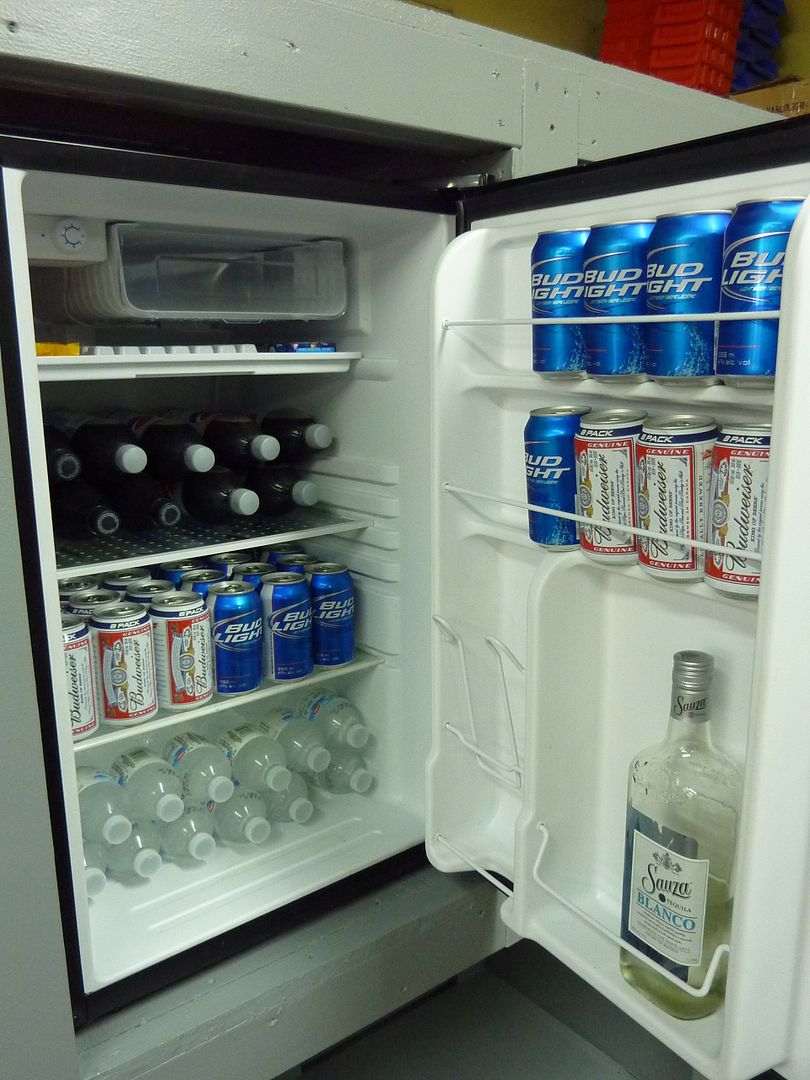
A little bit for every occasion. Quantities change occasionally depending on how the time in the shop's going I know..Budweiser in a Coor's Light fridge.
Tomorrow I plan on putting a spare 20" tv out there. I already have cable running to the shop for the stereo, so I'll just run a splitter.
Made a run to the border and picked up some more sheet metal.
Got some new door skins. I was hoping to get Auto Metal Direct skins but unfortunately they won't have their own ready for six months or longer. Not sure who's these are, but they are pretty thick and seem to be pretty good quality.
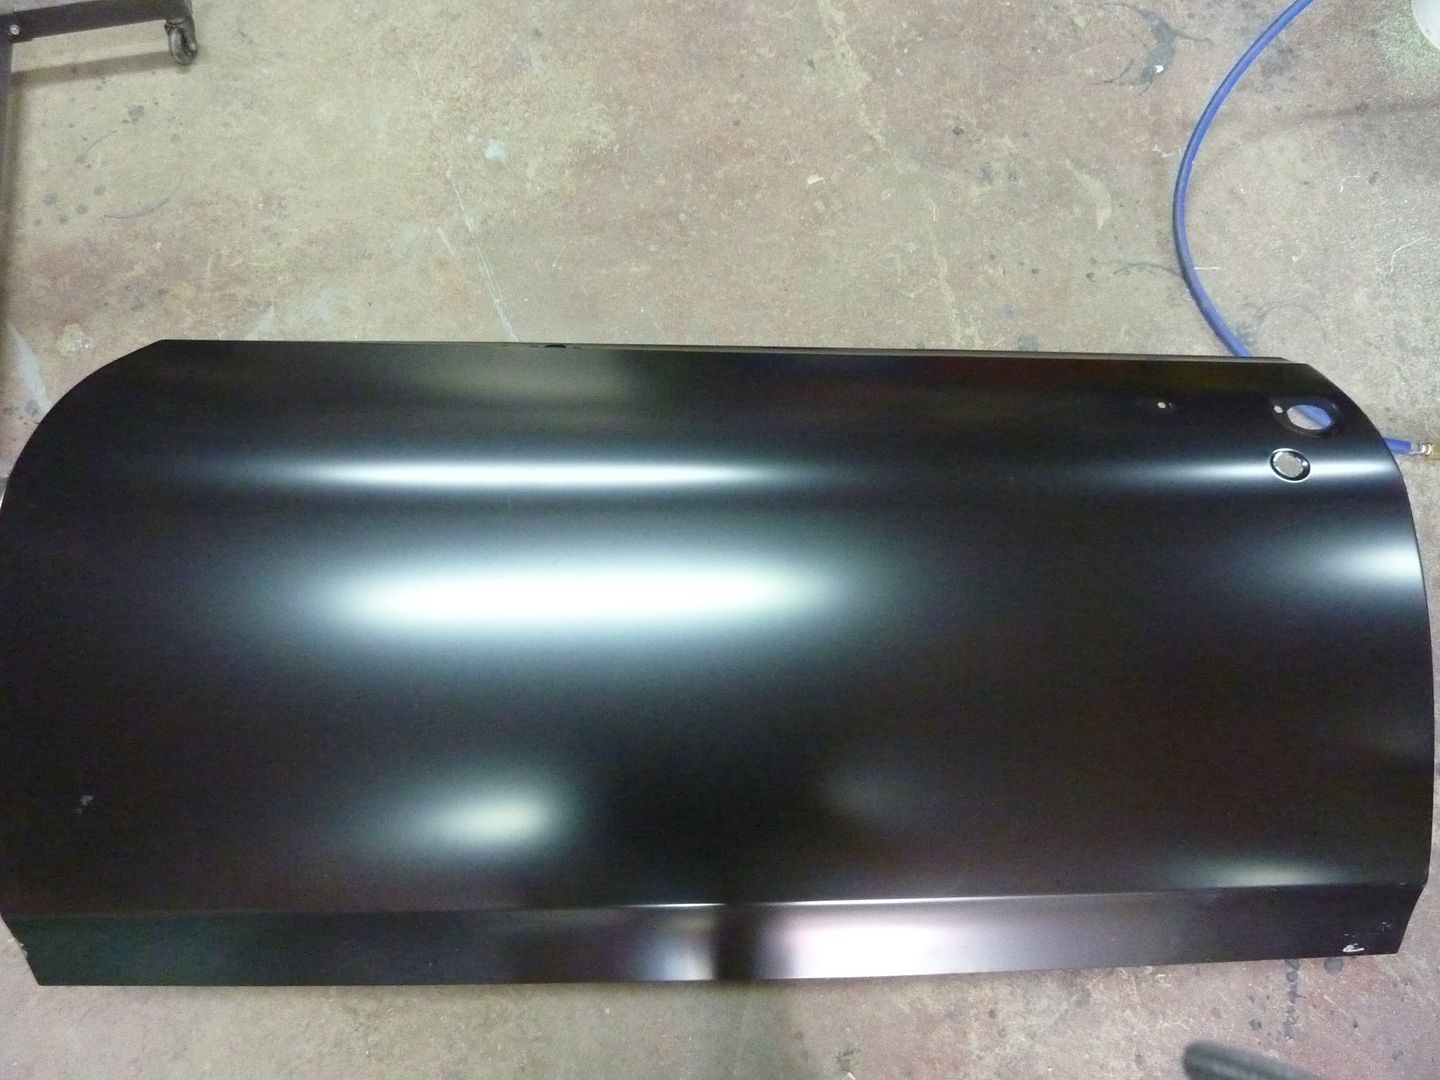

The other parts are Auto Metal Direct. They are such good quality and quite a bit thicker than the other sheet metal that I have gotten.
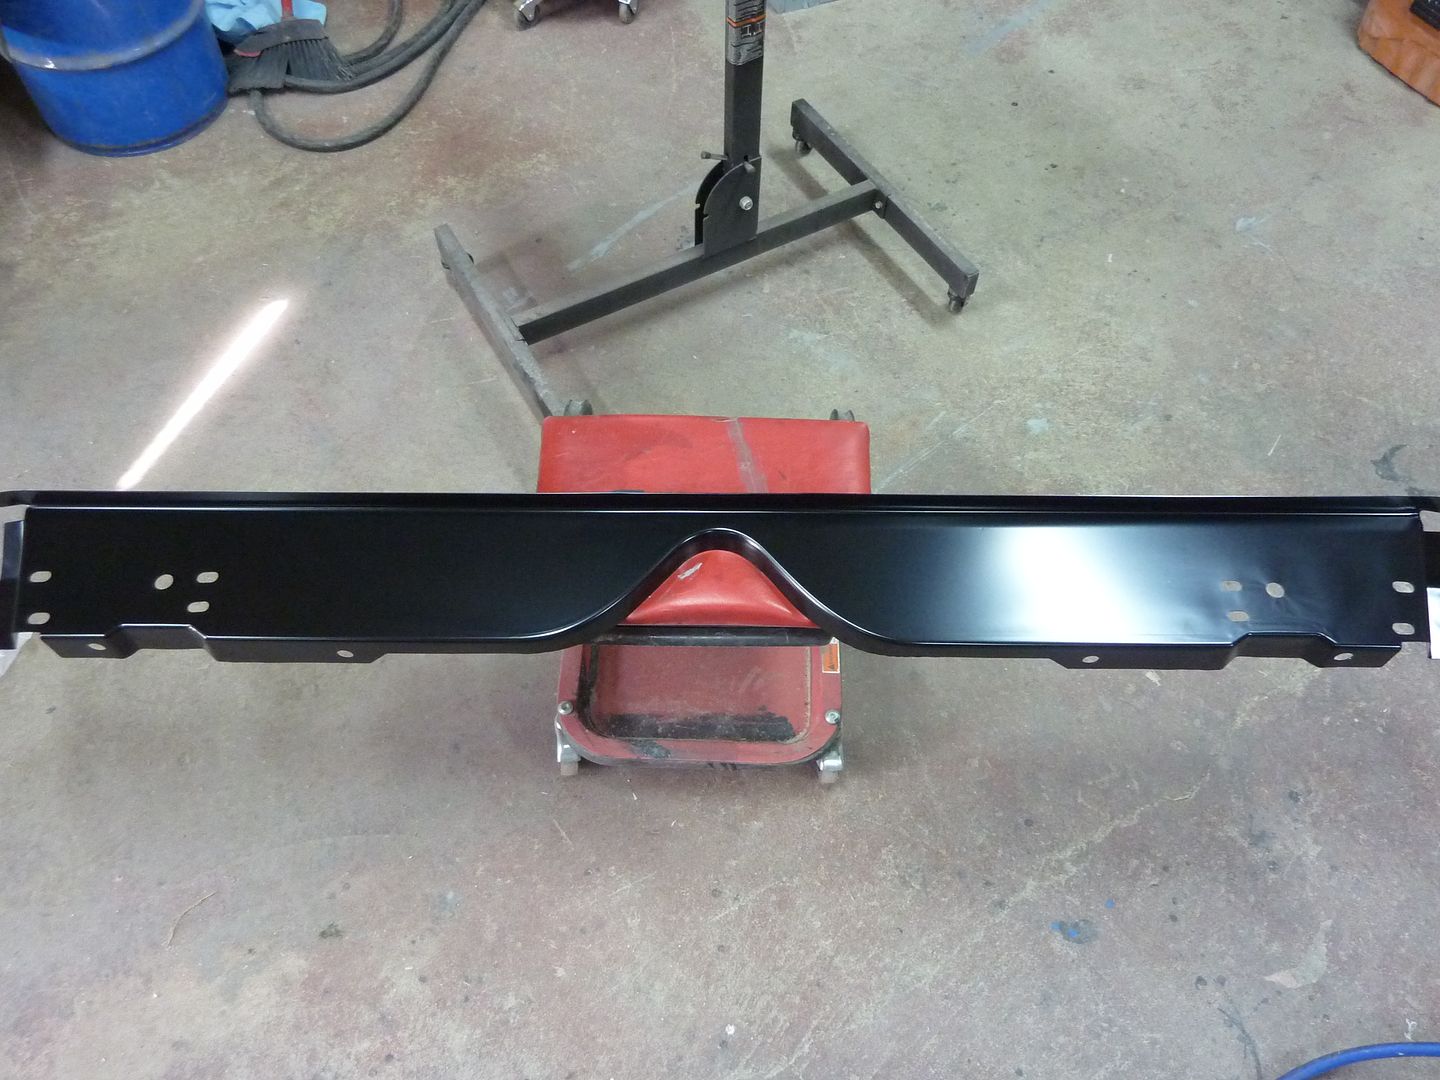
New rear cross rail
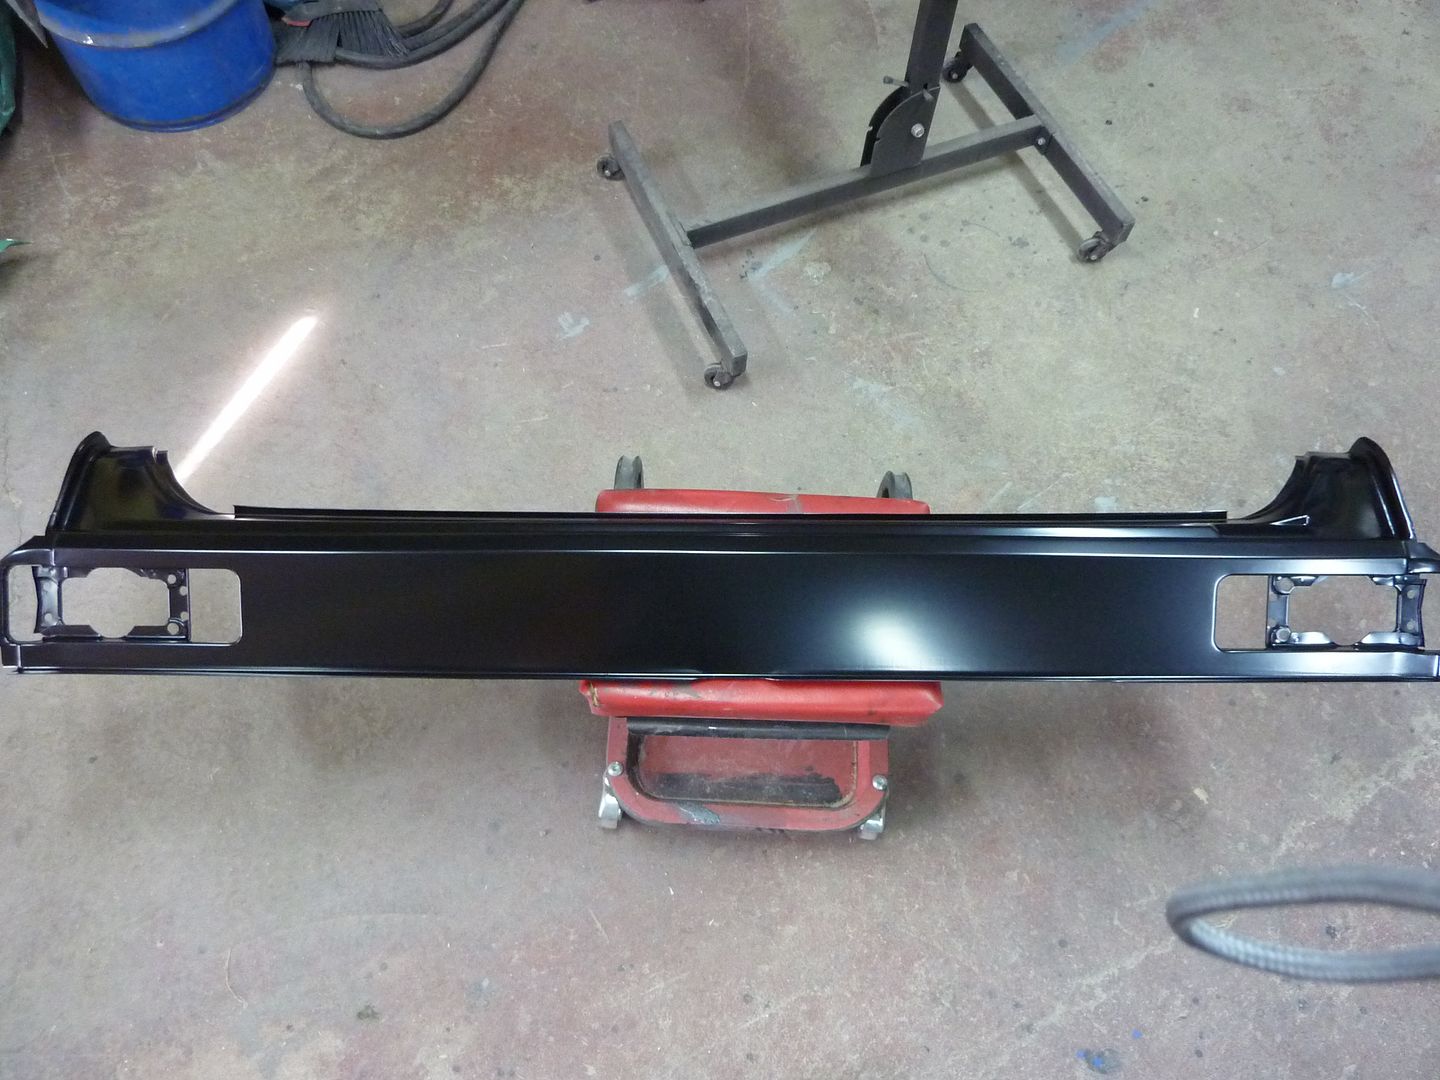
New tail light panel
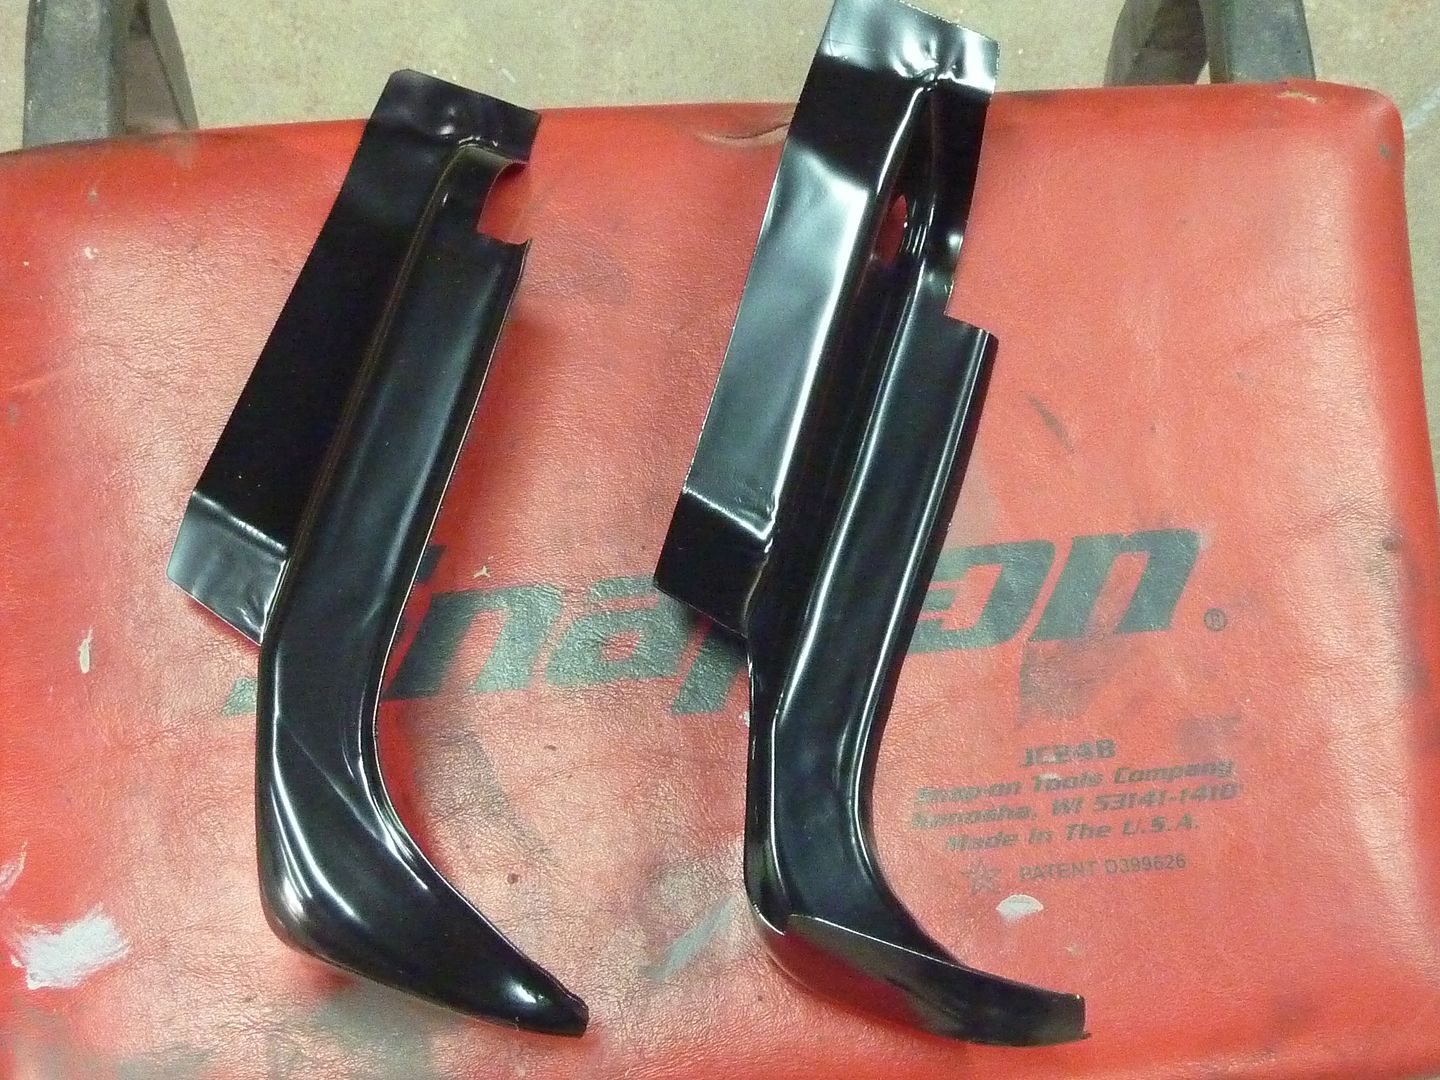
And not sure if I will need them or not, but I got them..new trunk extension end caps
And finally................
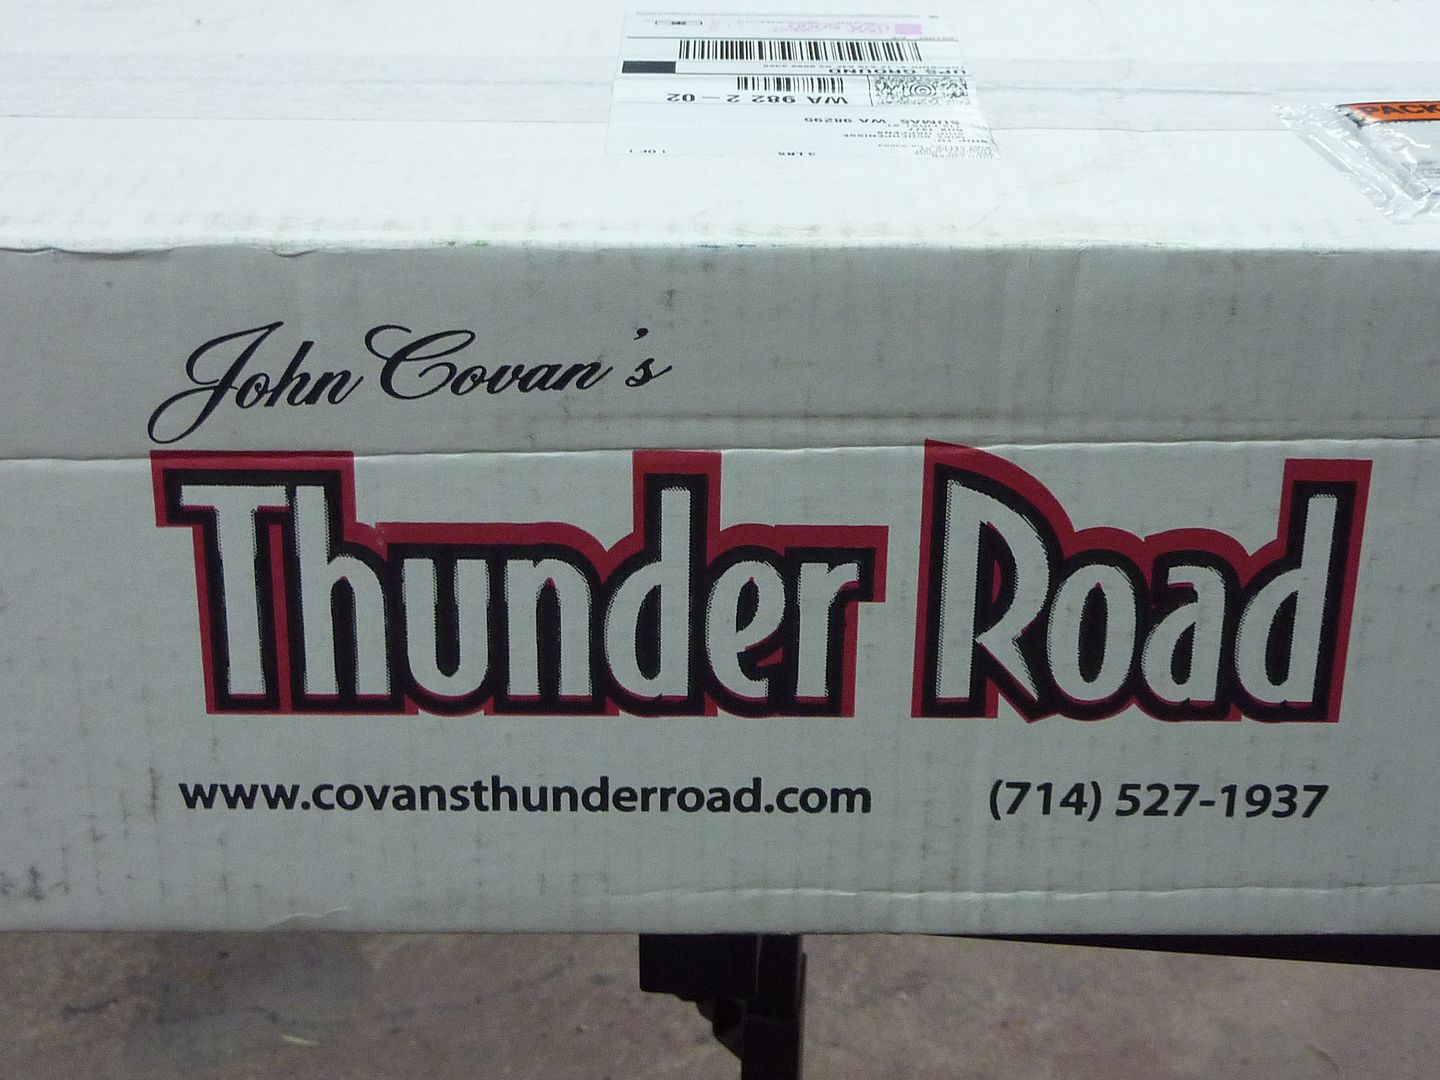
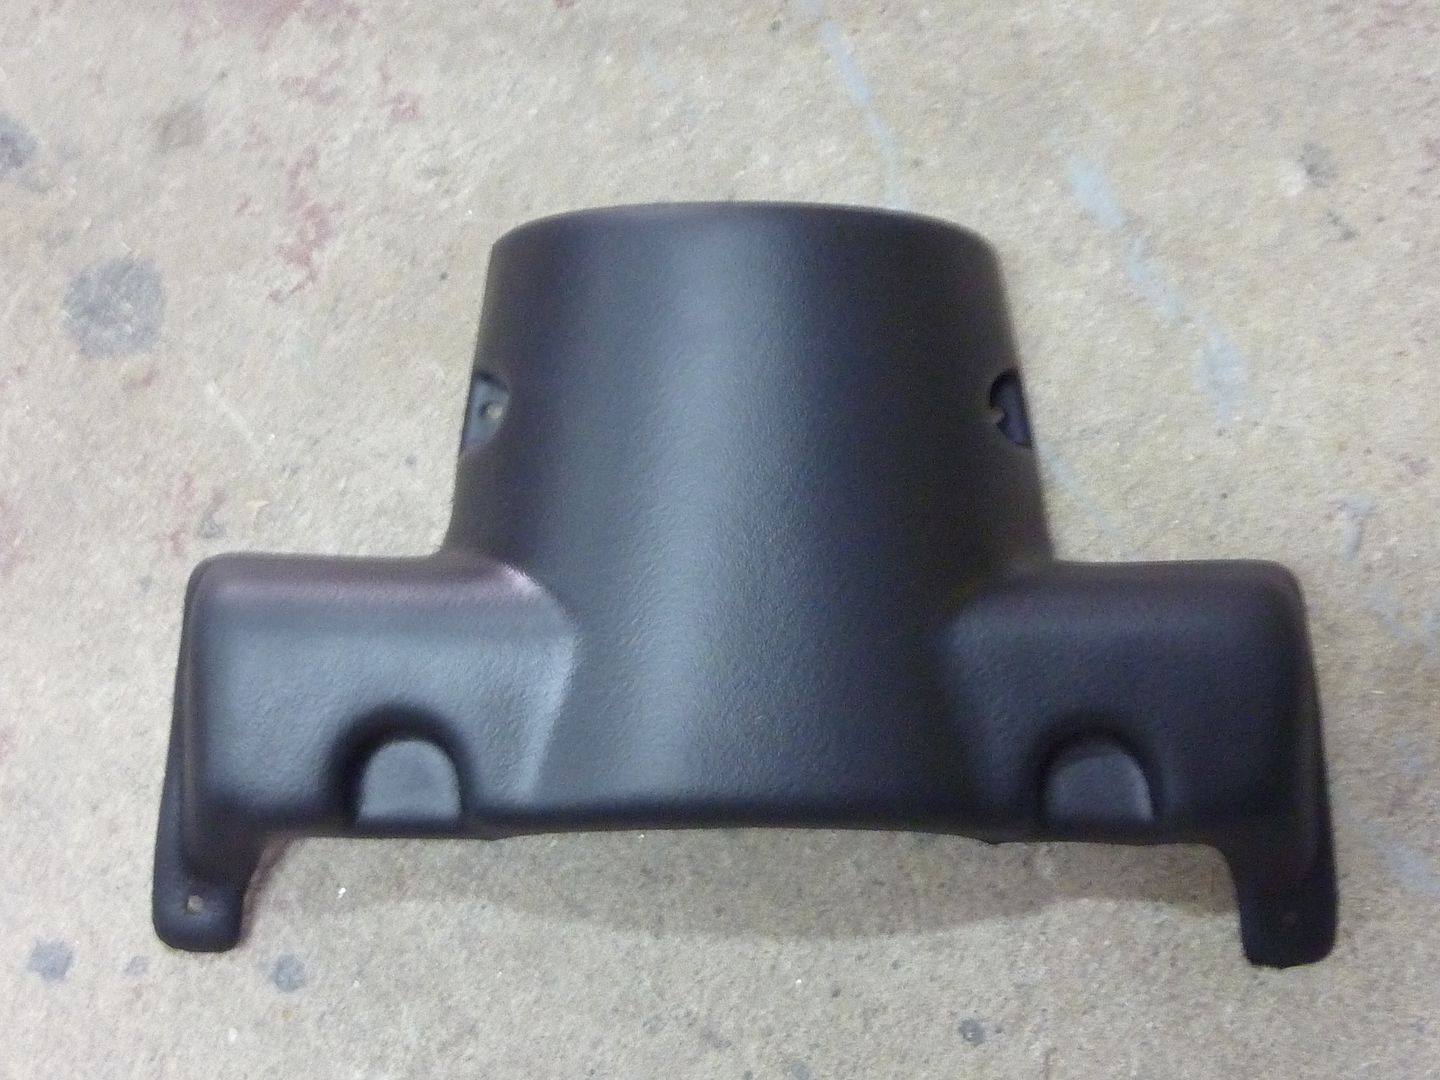
One of the first Thunder Road consoles for a 68 Nova. Even got it without the heater control hole so I can mount the electric controls in the center console (yet to be built).
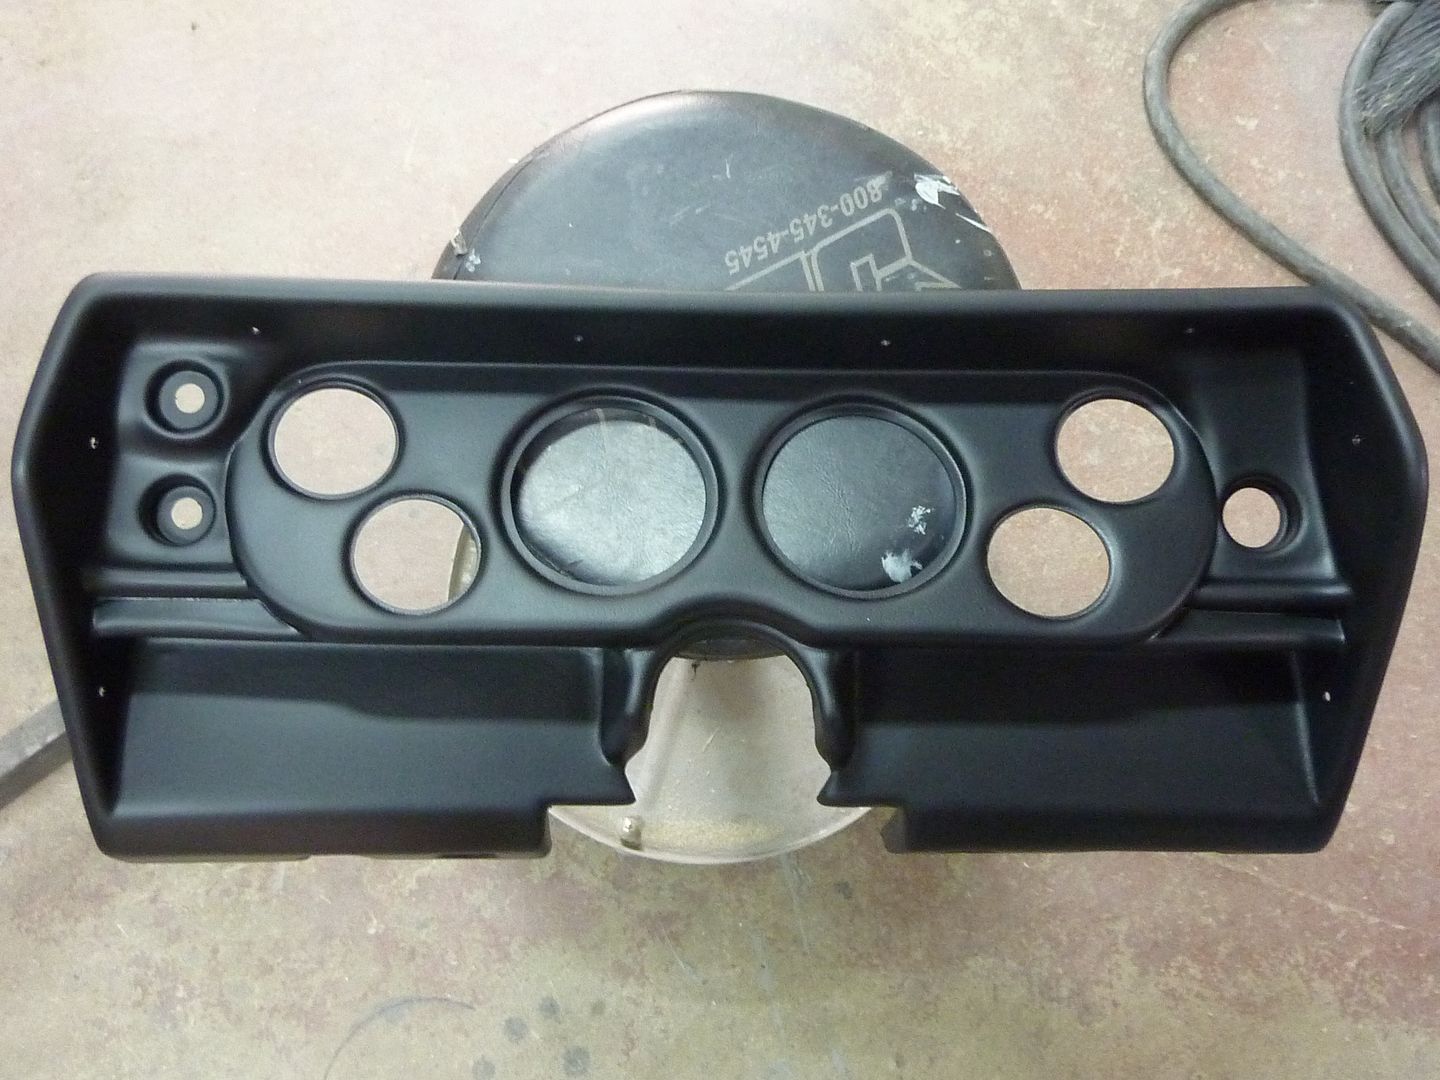
They even come with the steering column cover. The neat thing about this part was I contacted John Covan a while ago to see if they were coming out with a 68 Nova panel. He said they were but he was looking for a steering column cover to make a mold from. Luck had it....my stock panel fell off a shelf and broke, but I never got around to getting rid of it yet so I still had the steering column cover. Shipped it off to John to make a new part. John was a great guy to deal with and he gave me a smoking deal on the panel.
Next week I have 4 days off that I will get to spend in the shop, then I have to work 2 day shifts than I took all my night shifts off so will have 7 more days to work in the shop. Plus the wife will be away on two separate courses so will have lots of time. I hope to get all the new sheet metal on, finish stripping the car and get it into primer. Need to get it done before the cold weather hits. Will update as I go.
A couple weeks ago one our local pub had a draw for a free Coor's Light fridge. One entry for every Coors Light product you buy. Well that so happens to be the beer that my wife and I drink the most at that pub and guess what...the wife won it. Right away she gave it to me for the shop.
Once I had the fridge, I decided to make a storage compartment where it was more at the right height to get at it. You can never have too much storage. The cabinet is 4 feet wide by 2 feet deep and about 6 feet high. Nice big storage on the bottom and I plan on moving all my paint into one of the shelves.
A little bit for every occasion. Quantities change occasionally depending on how the time in the shop's going
I know..Budweiser in a Coor's Light fridge. Tomorrow I plan on putting a spare 20" tv out there. I already have cable running to the shop for the stereo, so I'll just run a splitter.
Made a run to the border and picked up some more sheet metal.
Got some new door skins. I was hoping to get Auto Metal Direct skins but unfortunately they won't have their own ready for six months or longer. Not sure who's these are, but they are pretty thick and seem to be pretty good quality.
The other parts are Auto Metal Direct. They are such good quality and quite a bit thicker than the other sheet metal that I have gotten.
New rear cross rail
New tail light panel
And not sure if I will need them or not, but I got them..new trunk extension end caps
And finally................
One of the first Thunder Road consoles for a 68 Nova. Even got it without the heater control hole so I can mount the electric controls in the center console (yet to be built).
They even come with the steering column cover. The neat thing about this part was I contacted John Covan a while ago to see if they were coming out with a 68 Nova panel. He said they were but he was looking for a steering column cover to make a mold from. Luck had it....my stock panel fell off a shelf and broke, but I never got around to getting rid of it yet so I still had the steering column cover. Shipped it off to John to make a new part. John was a great guy to deal with and he gave me a smoking deal on the panel.
Next week I have 4 days off that I will get to spend in the shop, then I have to work 2 day shifts than I took all my night shifts off so will have 7 more days to work in the shop. Plus the wife will be away on two separate courses so will have lots of time. I hope to get all the new sheet metal on, finish stripping the car and get it into primer. Need to get it done before the cold weather hits. Will update as I go.