
AFR LS2/69 Camaro
 03-05-2010, 07:19 PM
#21


Looking good. Glad to see you didn't go CARB.
 03-05-2010, 08:19 PM
#22
Staging Lane
iTrader: (2)
Join Date: Sep 2009
Location: Dallas, Texas
Posts: 92
Likes: 0
Received 0 Likes
on
0 Posts
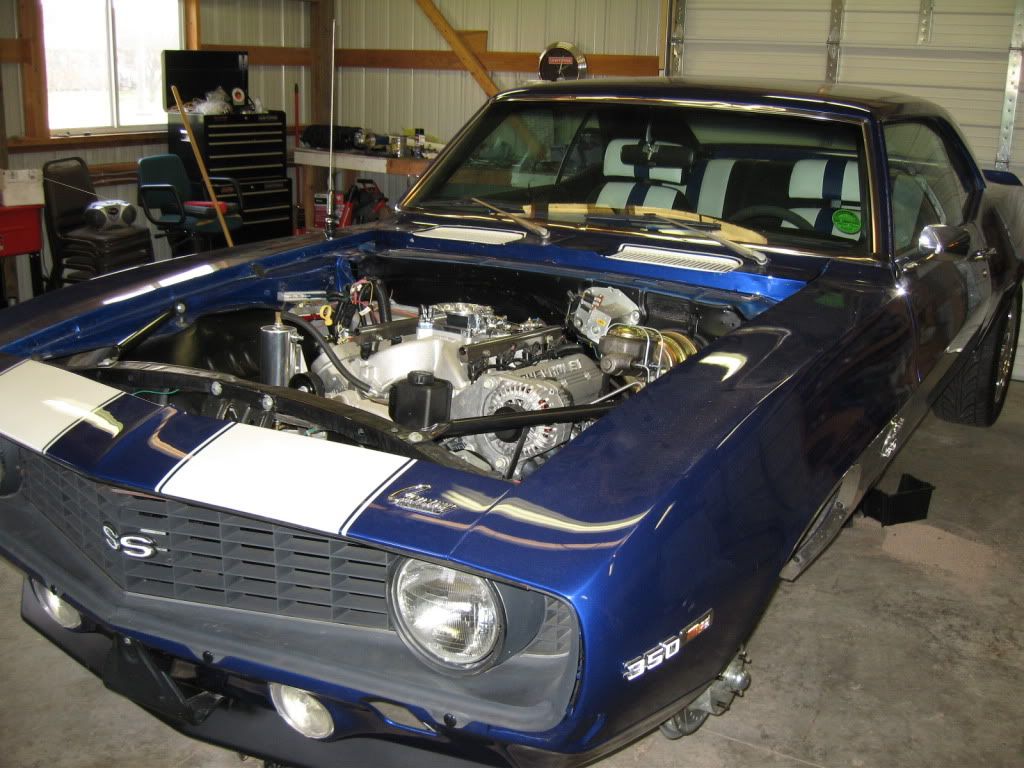
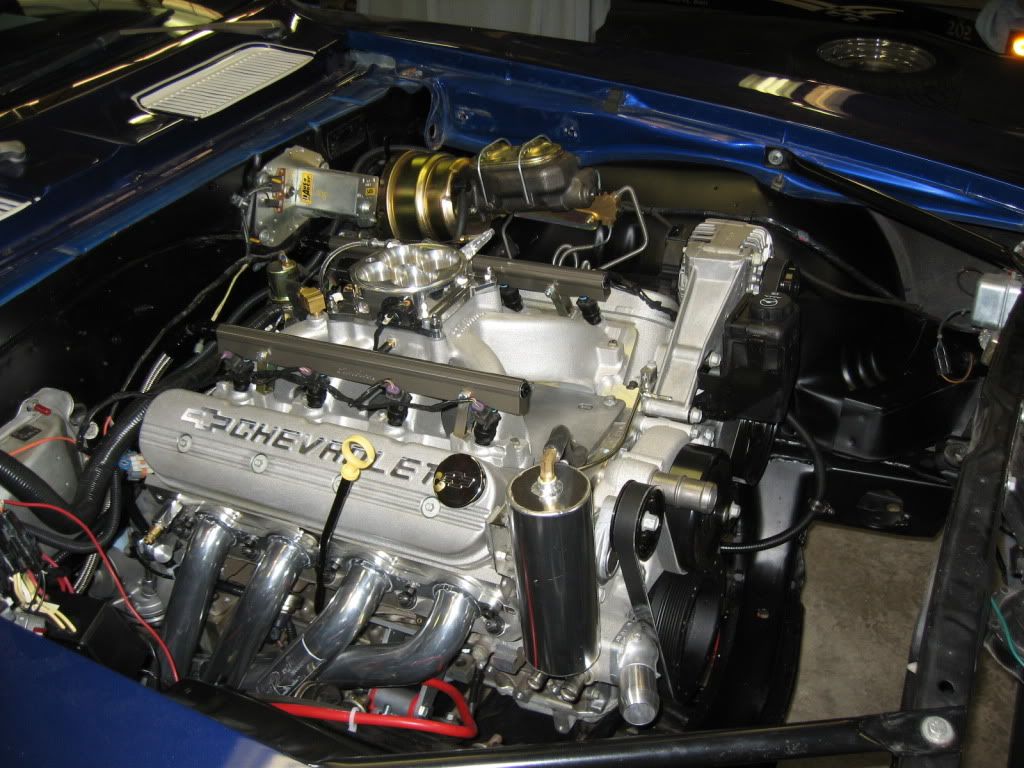
Is th engine all the way in place in the side view photo? If so, the distance from the back of the head to the firewall is shocking on the passenger side. I don't know that would hurt anything. Personally, I think it would be good to have much of the weight distributed toward the rear. Mine is too close and I think this was might a little too far? Just curious about thought on the placement.
03-05-2010, 09:37 PM
#23

Is th engine all the way in place in the side view photo? If so, the distance from the back of the head to the firewall is shocking on the passenger side. I don't know that would hurt anything. Personally, I think it would be good to have much of the weight distributed toward the rear. Mine is too close and I think this was might a little too far? Just curious about thought on the placement.

very nice build on the car. that engine looks amazing
03-06-2010, 02:17 PM
#24
11 Second Club
Thread Starter
iTrader: (12)
Join Date: Nov 2005
Location: Ottawa, KS
Posts: 402
Likes: 0
Received 0 Likes
on
0 Posts
You guys are right, the BRP mounts move the engine forward quite a bit. I wasn't sure that I wanted to run these mounts because of that. Then I talked to a guy that has a 69 camaro with BRP mounts, an edelbrock carb intake and a SS hood like mine. He said the mounts lined the air cleaner up perfect with the SS hood cutout for the cowl. I had planned on running this 4 barrel TB setup like this all along. I figure whatever traction issues I'm going to mess up with the 2" forward, I will gain back with the caltracs.
03-06-2010, 04:21 PM
#25
Staging Lane
iTrader: (2)
Join Date: Sep 2009
Location: Dallas, Texas
Posts: 92
Likes: 0
Received 0 Likes
on
0 Posts
I am sensitive to this subject as I have done a crazy amount of research, yet it amazes me how many differing opinions, options, and combinations there are for the LS swaps in the 1st gen. I currently have the Hooker mounts and headers and I am not truly convinced this is going to work as my 4L60E seems to be touching to firewall in a couple of places. This set up gives me clearance where I need it elsewhere, but it seems you solve one issue and create another. At least this has been my experience thus far. I guess if it was easy anyone could do it.... right?
BTW - Nice car and it looks as though you are doing a great job. I wish I was moving as quickly on mine.
BTW - Nice car and it looks as though you are doing a great job. I wish I was moving as quickly on mine.
03-06-2010, 05:15 PM
#26
11 Second Club
Thread Starter
iTrader: (12)
Join Date: Nov 2005
Location: Ottawa, KS
Posts: 402
Likes: 0
Received 0 Likes
on
0 Posts
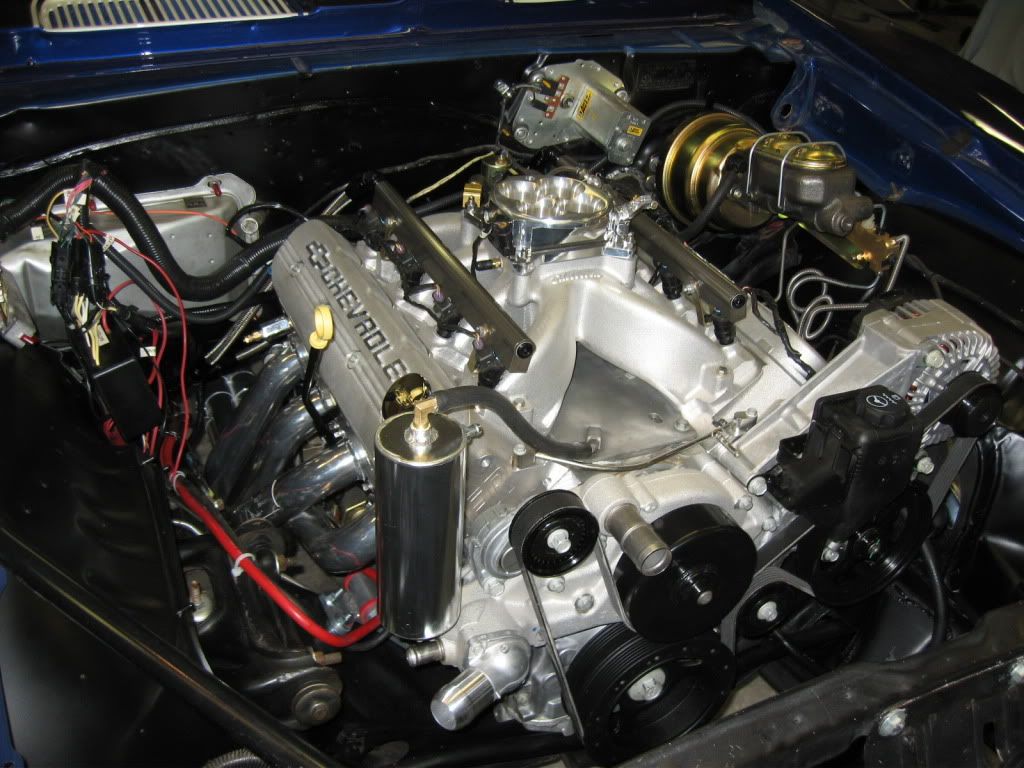
Thanks blue67. I know there are a ton of ways to go, but I wanted the 4 barrel TB for the looks and performance and these were the only mounts that will line the motor up with the SS hood cowl cutout.
I am going to leave the pics smaller this time around so it doesn't make people scroll from side to side. I had previous pics of my fuel pump with the stupid 45 degree fitting and long tubing. I cut both of those lines off (they had some tight, crimped bends) and had our welders at work weld on a 6 AN (37 degree) fitting for me. I removed the pump to do this so no contaminates got into it and no chance of arcing within the pump. I added new clamps as I destroyed the crimp on clamps. I then taped and painted the lines because the zinc coating came off. I quickly adapted up to 8 AN as the rest of my line is. I had to get rid of the the nasty flow killing crimps. I think my 550hp is going to be asking a lot out of the pump and killing the flow is not what I need. Check out what I did.
I am going to leave the pics smaller this time around so it doesn't make people scroll from side to side. I had previous pics of my fuel pump with the stupid 45 degree fitting and long tubing. I cut both of those lines off (they had some tight, crimped bends) and had our welders at work weld on a 6 AN (37 degree) fitting for me. I removed the pump to do this so no contaminates got into it and no chance of arcing within the pump. I added new clamps as I destroyed the crimp on clamps. I then taped and painted the lines because the zinc coating came off. I quickly adapted up to 8 AN as the rest of my line is. I had to get rid of the the nasty flow killing crimps. I think my 550hp is going to be asking a lot out of the pump and killing the flow is not what I need. Check out what I did.
Last edited by frito1; 03-06-2010 at 05:21 PM.

 04-01-2010, 10:24 AM
#29
Did you prime the engine before you installed it? Please don't say you are going to disconnect the coils/fuel and bump or turn it over to build pressure. I can't believe people sink $800-$6500 or more into a engine and too cheap or lazy to properly prime a engine. Either new or one thats been sitting in a salvage yard for probably years.
04-01-2010, 10:24 AM
#30
yeah. it looks
04-01-2010, 10:25 AM
#31
Great
04-01-2010, 09:02 PM
#33
 1st LS swap. You'd be supprised how many people on here say they just disable it and bump it
  04-01-2010, 09:52 PM
#34
Staging Lane
iTrader: (2)
Join Date: Sep 2009
Location: Dallas, Texas
Posts: 92
Likes: 0
Received 0 Likes
on
0 Posts
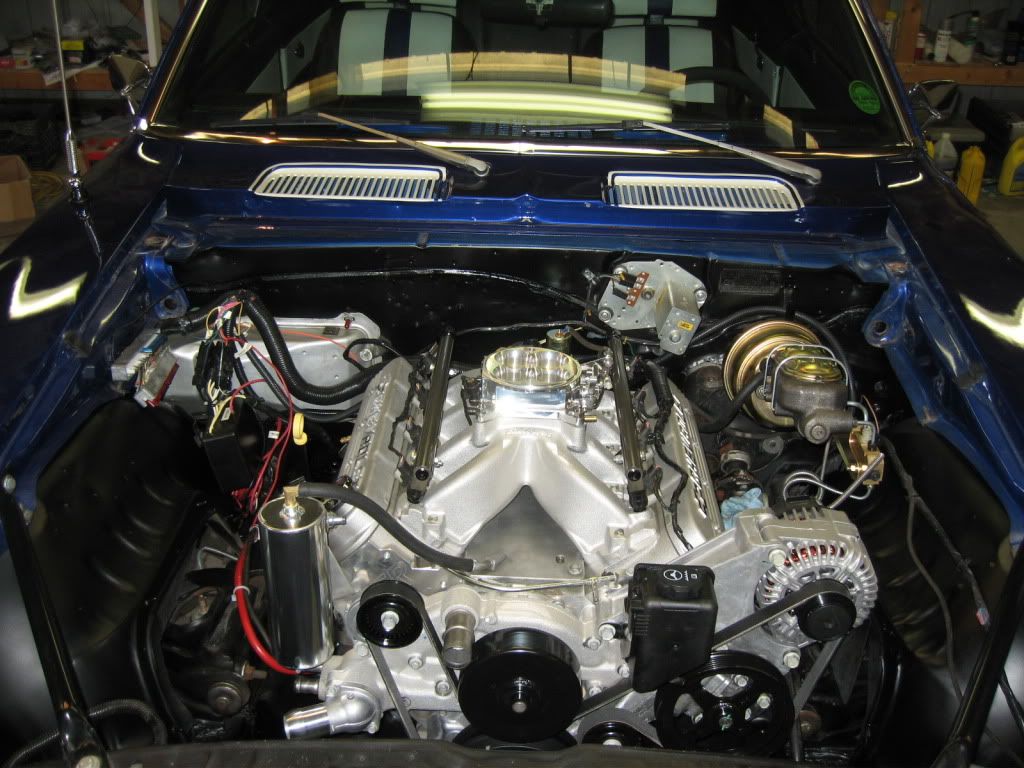
Frito 1 - your install looks great. What did you do for power steering lines? Most use custom made braided lines, but your appears to be rubber hose with factory appearance? What gear box are you running?
Thanks....
Thanks....
04-02-2010, 09:46 AM
#35
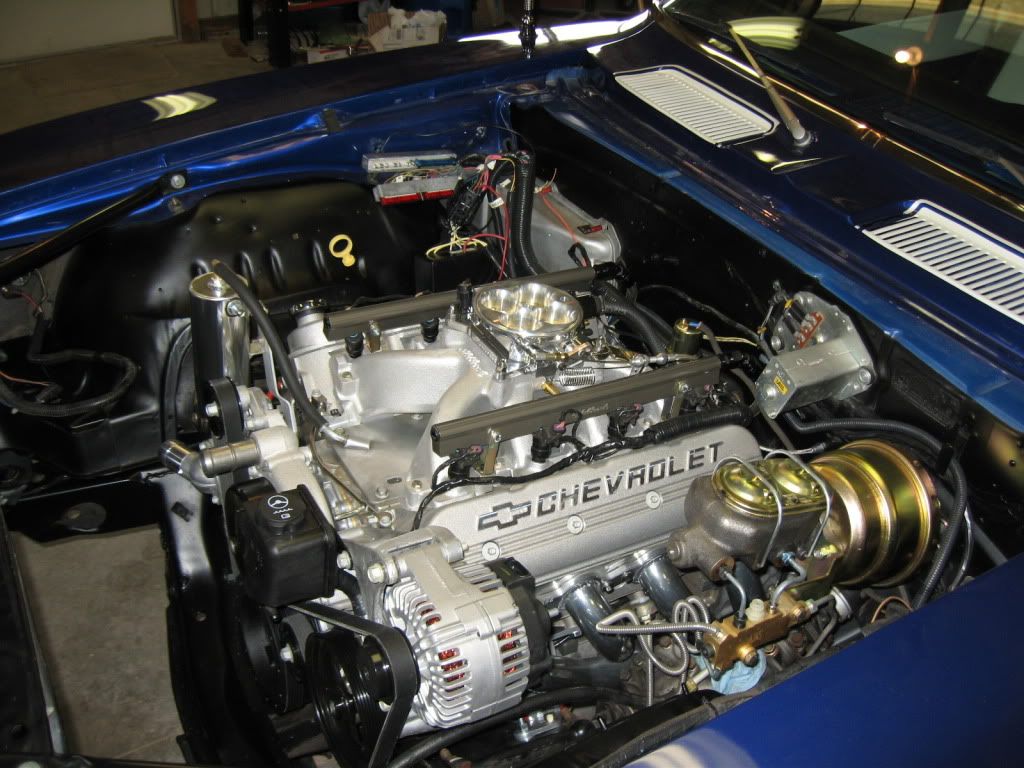
It is a SWWEEEEEEEEEEEt looking ride for sure. And a purtty engine. I love the look of a aluminum eng.
Last edited by Jimbo1367; 09-02-2012 at 09:20 PM.
04-03-2010, 06:18 PM
#36
11 Second Club
Thread Starter
iTrader: (12)
Join Date: Nov 2005
Location: Ottawa, KS
Posts: 402
Likes: 0
Received 0 Likes
on
0 Posts
Yeah I wanted to retain that factory look. I really don't like stainless braided running everywhere... not for this build. I had to buy a 2002 corvette hose to clear the corvette pump pulley, cut it off and make an inverted flare to fit the stock gearbox.
04-03-2010, 06:40 PM
#37
11 Second Club
Thread Starter
iTrader: (12)
Join Date: Nov 2005
Location: Ottawa, KS
Posts: 402
Likes: 0
Received 0 Likes
on
0 Posts
Here is an initial startup for the guys that wanted it. I have 42 lb/hr injectors and the computer doesn't know that yet so it's running extremely rich. The sound quality is pretty bad on my end because of the super loud headers, but rest assured, it sounds like a race car!  I'm hoping the exhaust and tune will take some of that out. It is pretty choppy now. That is the 110 LSA talking
I'm hoping the exhaust and tune will take some of that out. It is pretty choppy now. That is the 110 LSA talking
04-04-2010, 10:11 AM
#39