


The Blue Lagoon - BMW e30 - LS1

Thread Starter
Teching In
Joined: Nov 2009
Posts: 29
Likes: 0
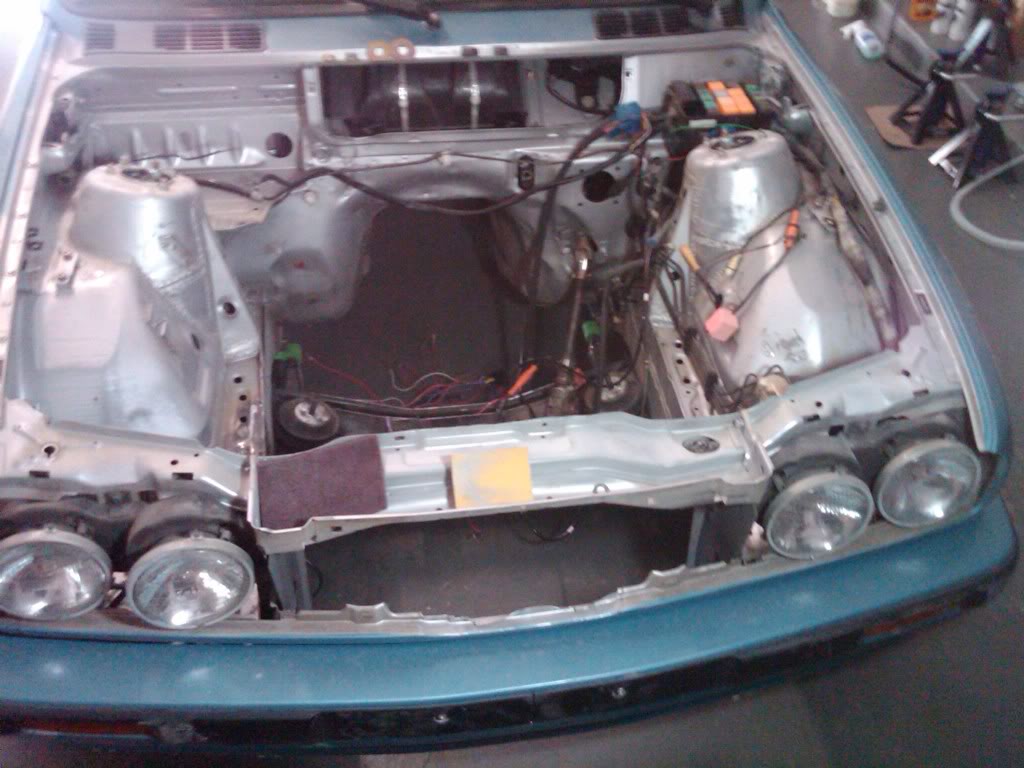
We mounted the radiator last night, and pulled the wiring harness to wrap it.
Had to cut the oem radiator mounts off to make the Mishimoto clear. This radiator could not be a better fit. It fits perfectly between the frame rails, and sets down on to the little lip in the first pic.
Im gonna run a pusher fan setup, so no need for the LS2 water pump or CTSv tensioner.
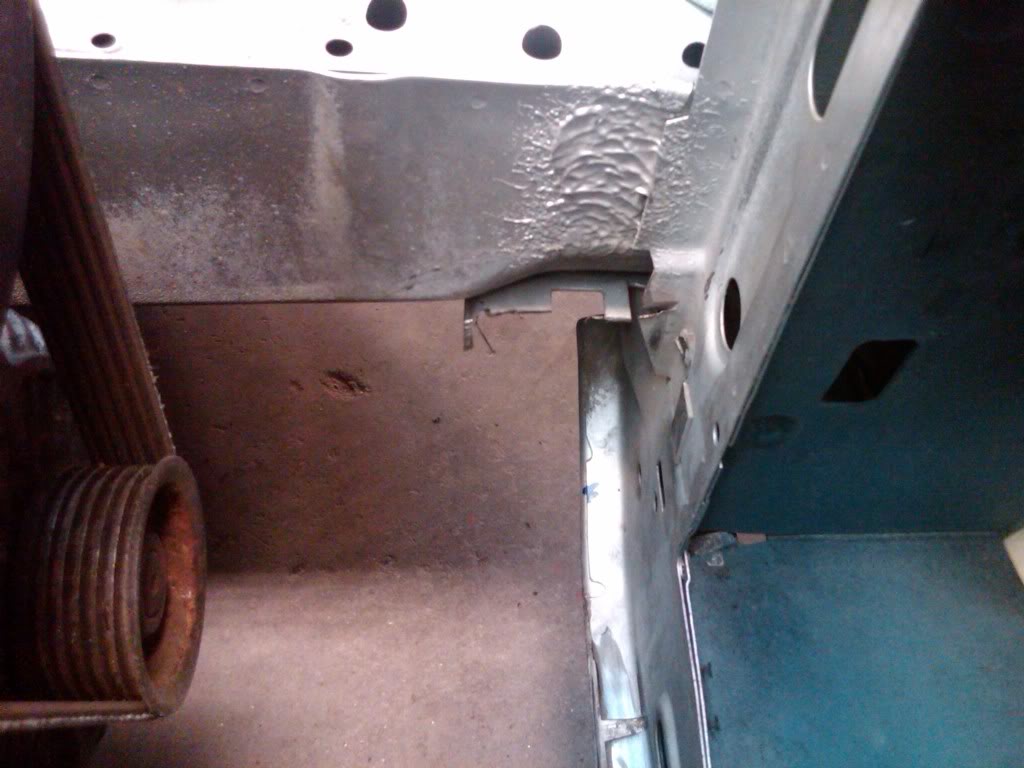
Had to cut the oem radiator mounts off to make the Mishimoto clear. This radiator could not be a better fit. It fits perfectly between the frame rails, and sets down on to the little lip in the first pic.
Im gonna run a pusher fan setup, so no need for the LS2 water pump or CTSv tensioner.
Thread Starter
Teching In
Joined: Nov 2009
Posts: 29
Likes: 0
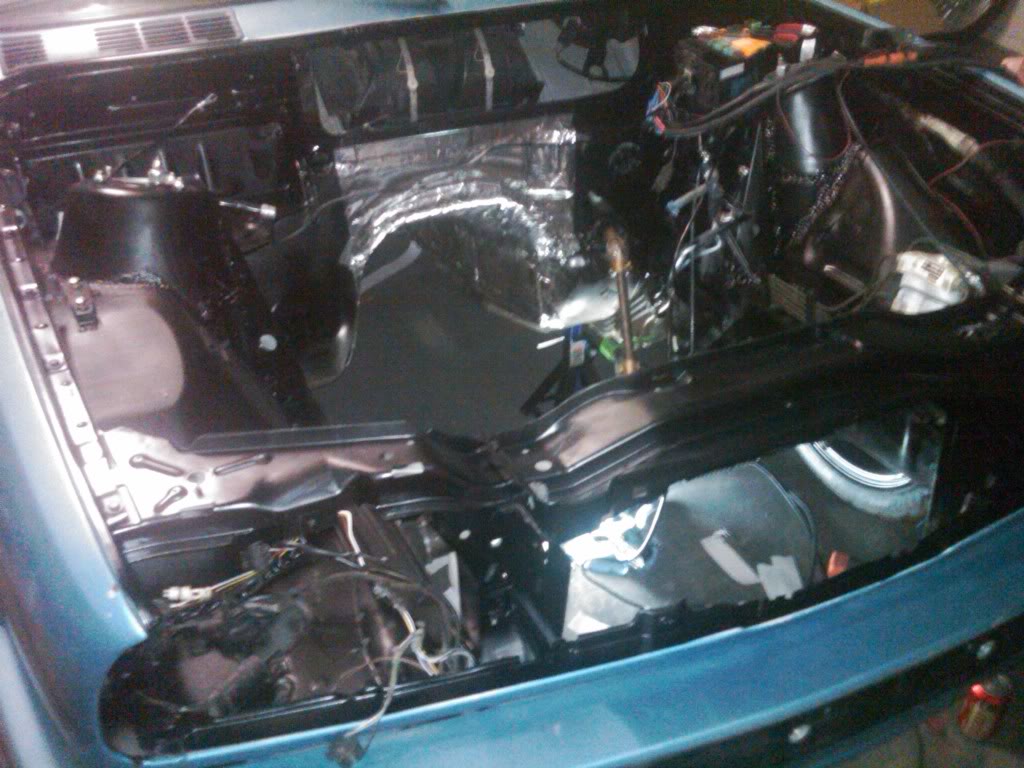
Not much lately. Painted the engine bay. Ivan?
sanded
cleaned and prepped
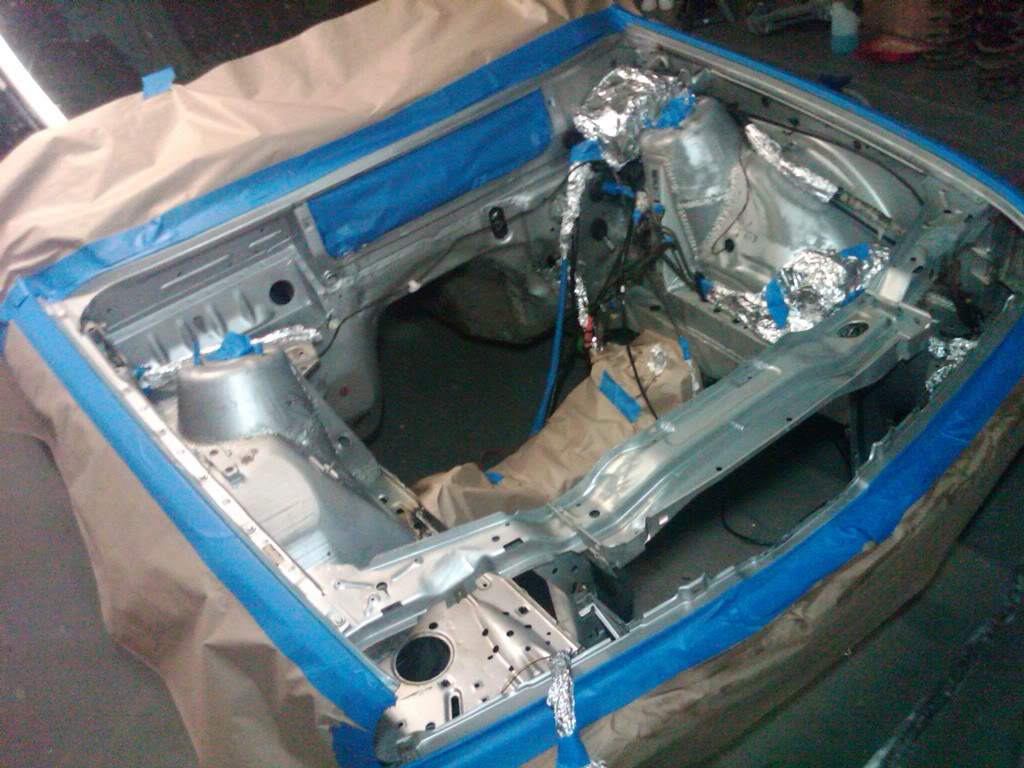
primed
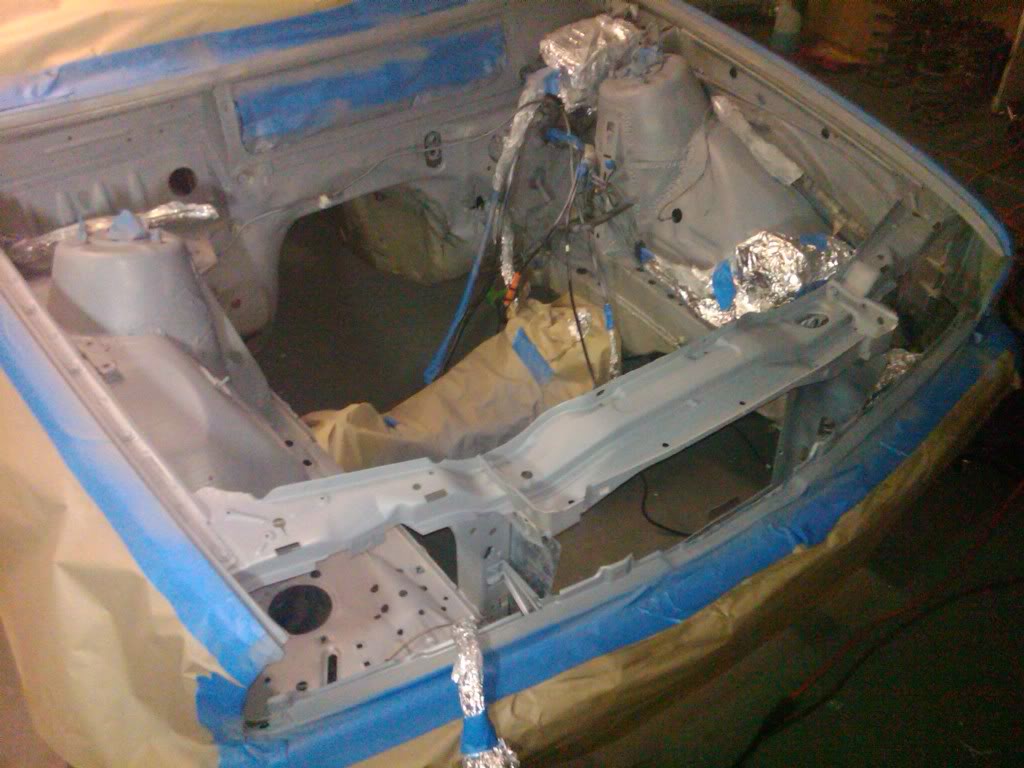
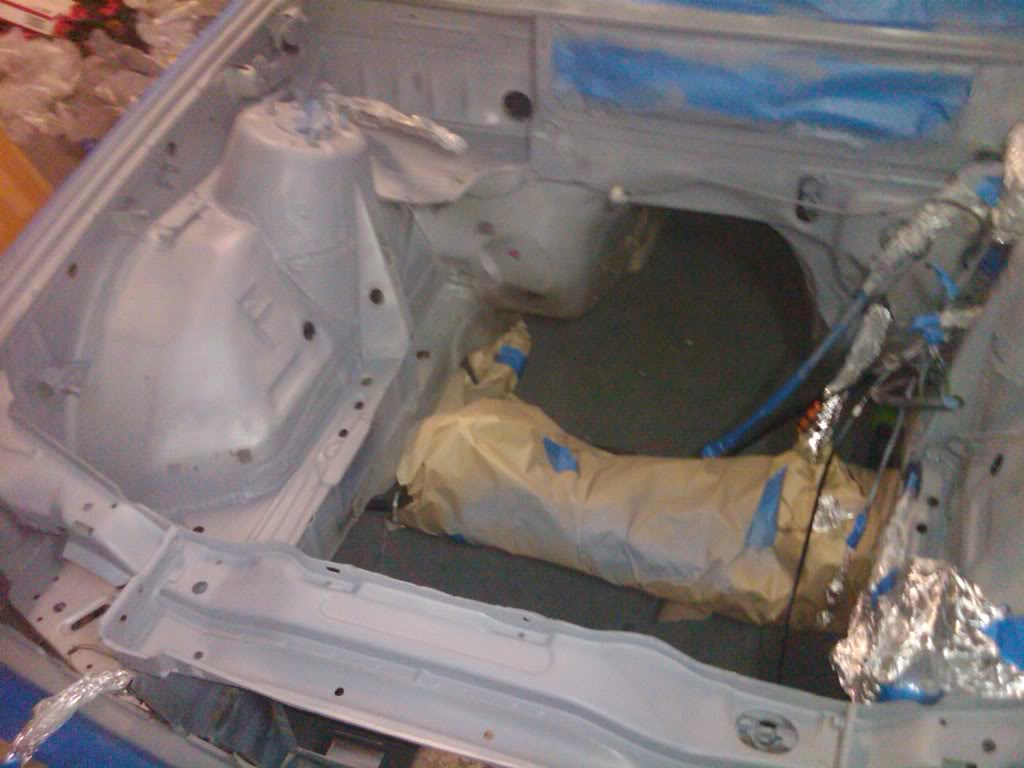
painted satin black
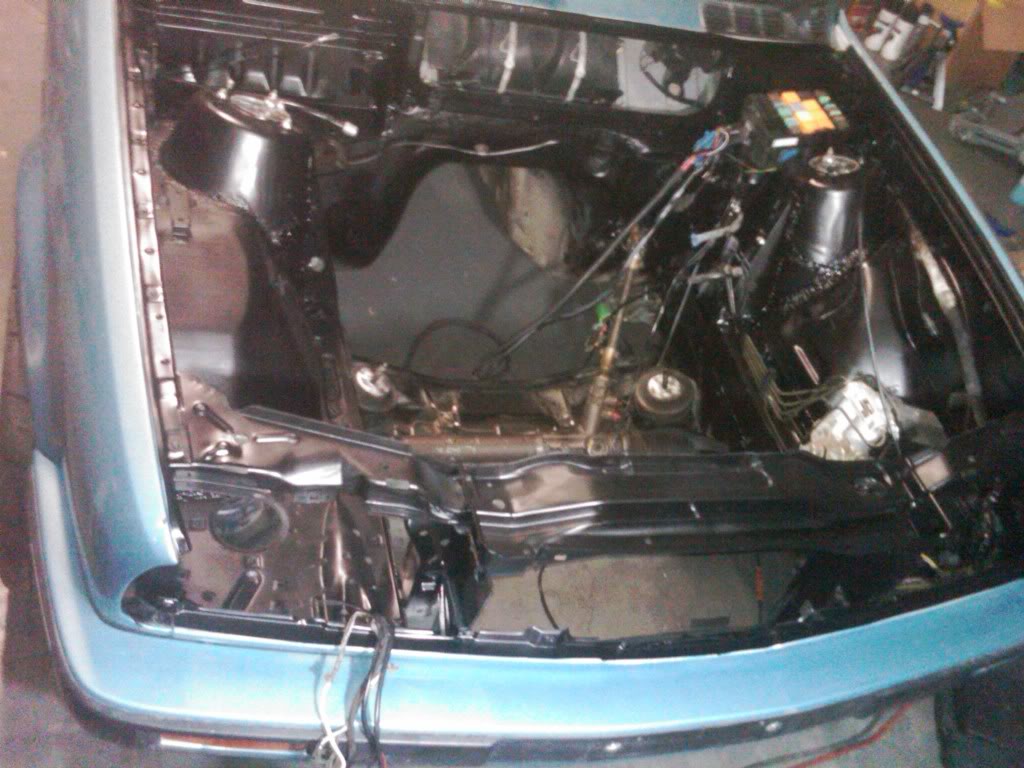

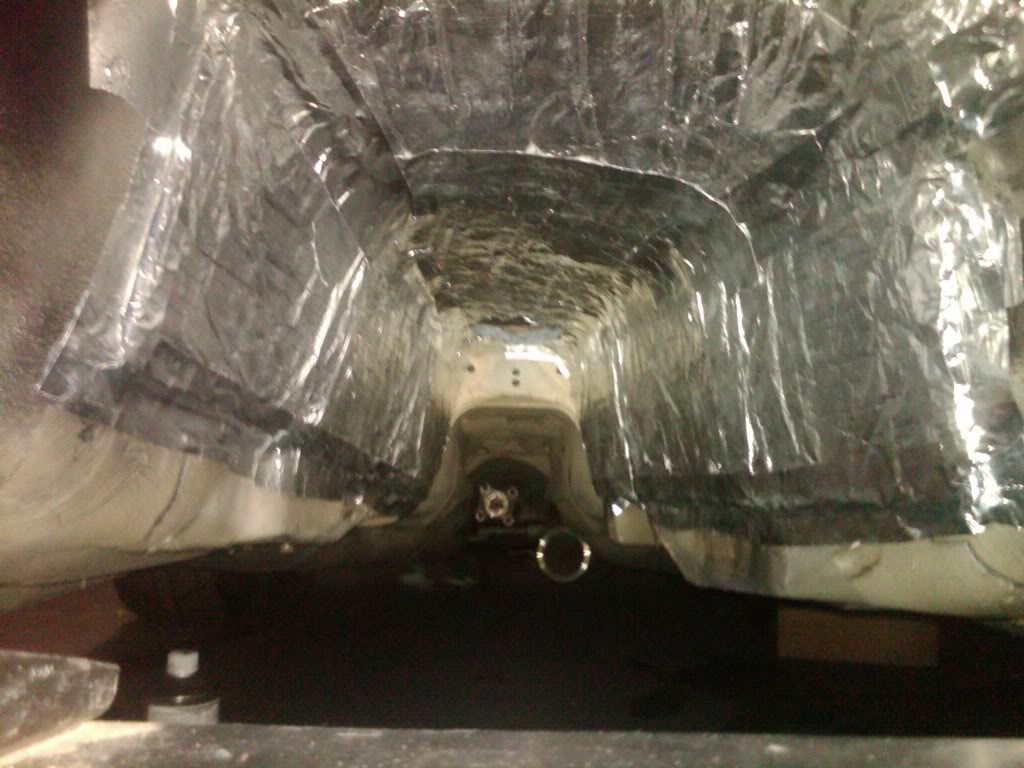
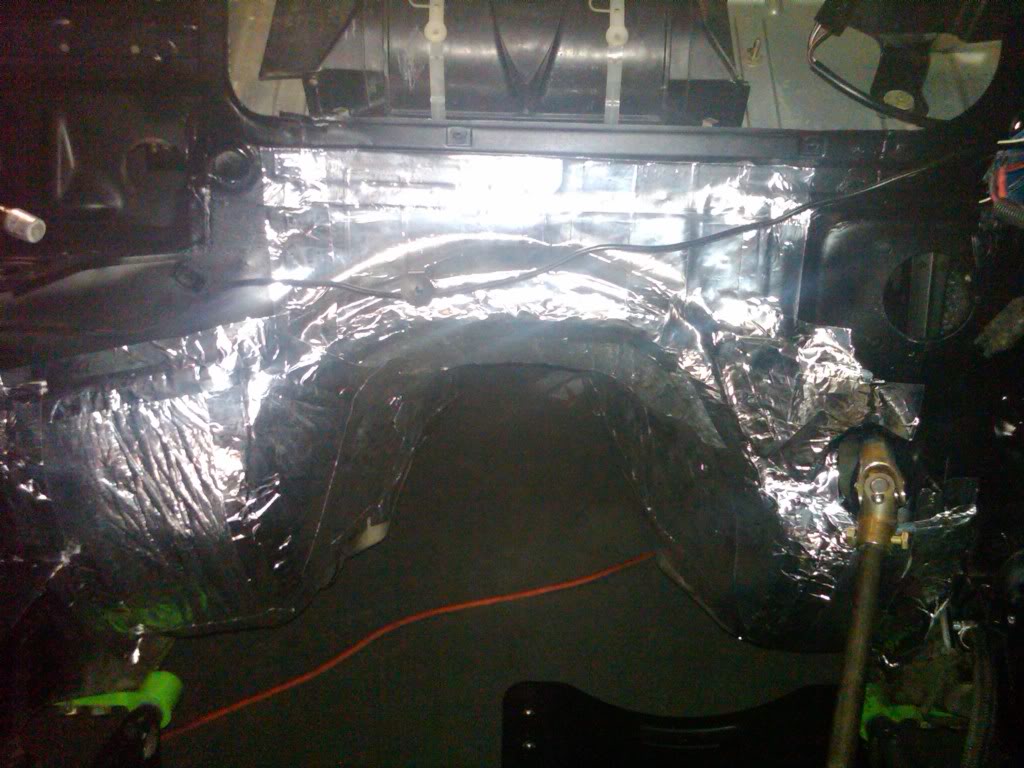
added heat insulation


Teching In
Joined: Jun 2010
Posts: 12
Likes: 0
LS1 Tech Stories
The Best V8 Stories One Small Block at Time

Topdon ONE vs. Artidiag 800 BT2: Which is the Diagnostic Tablet For You?
Pouria Savadkouei
Gas Monkey Built a 6-Wheel Ferrari Testarossa With a Corvette LT4 Engine
Verdad Gallardo
7 Most Reliable High-Performance Engines GM Has Ever Built
Verdad Gallardo
Amazing '71 Camaro Restomod Is Modern Muscle Car Under the Skin
Verdad Gallardo
6 Common C5 Corvette Failures and What's Involved In Repairing Them
Pouria Savadkouei
Retro Modern Bandit Pontiac Trans AM Comes With Burt Reynolds' Autograph
Verdad Gallardo
Top 10 Greatest Cadillac V Series Performance Models Ever, Ranked
Pouria Savadkouei
Top 10 Most Powerful Chevy Trucks Ever Made!

Hennessey's New Supercharged Silverado ZR2 Has 700 HP
Verdad Gallardo
Thread Starter
Teching In
Joined: Nov 2009
Posts: 29
Likes: 0
Thread Starter
Teching In
Joined: Nov 2009
Posts: 29
Likes: 0
Hey guys, after much delay, I have made some progress.
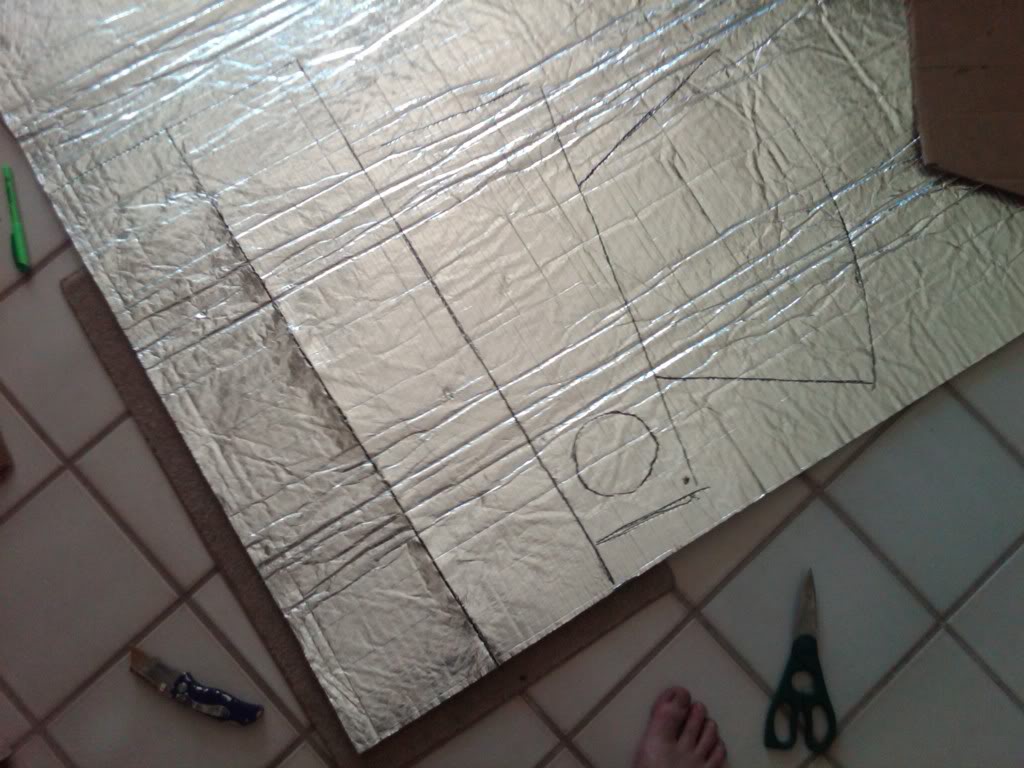
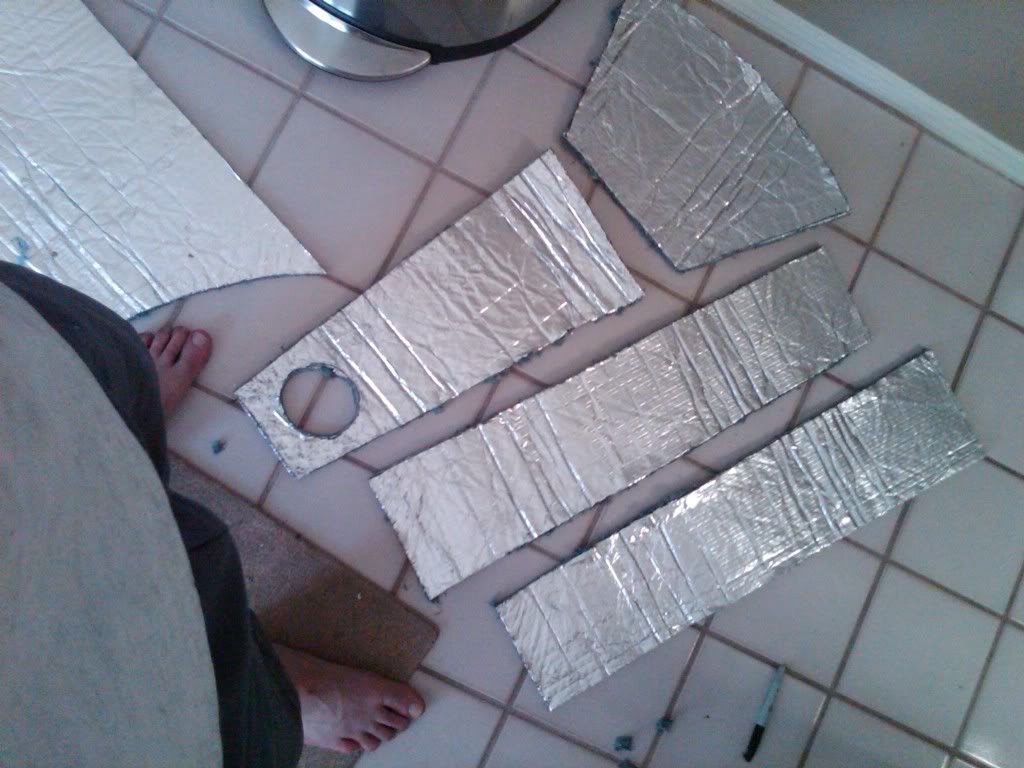
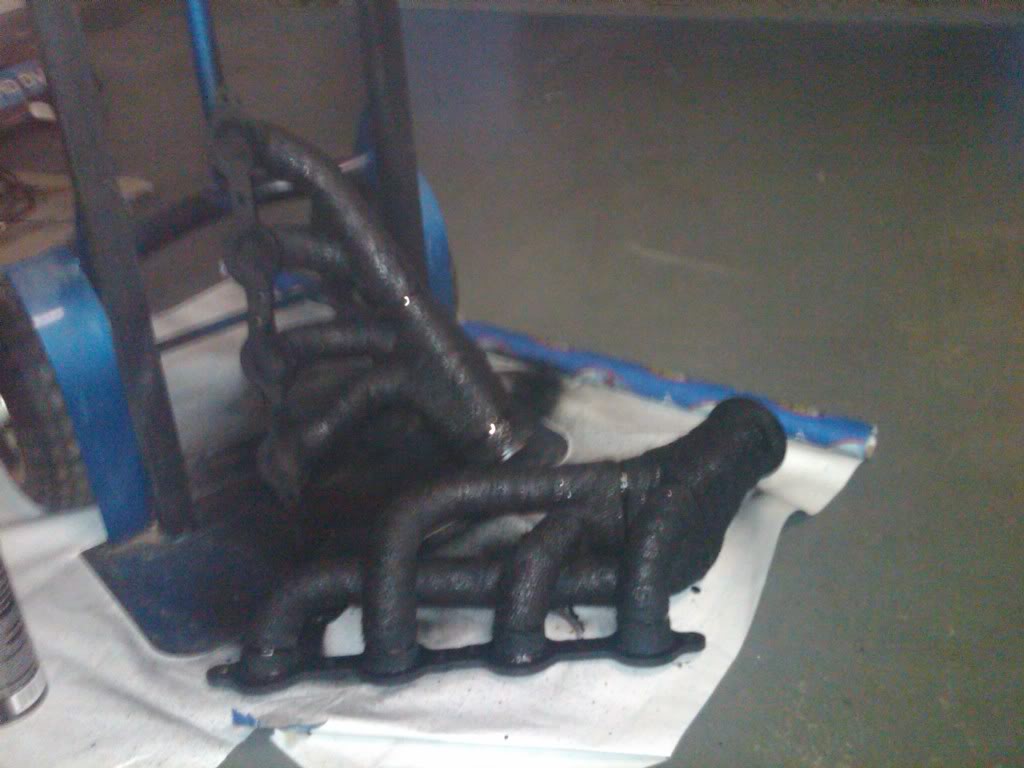
Added some more heat shielding out onto the firewall

Also gave my headers another coat of silicone
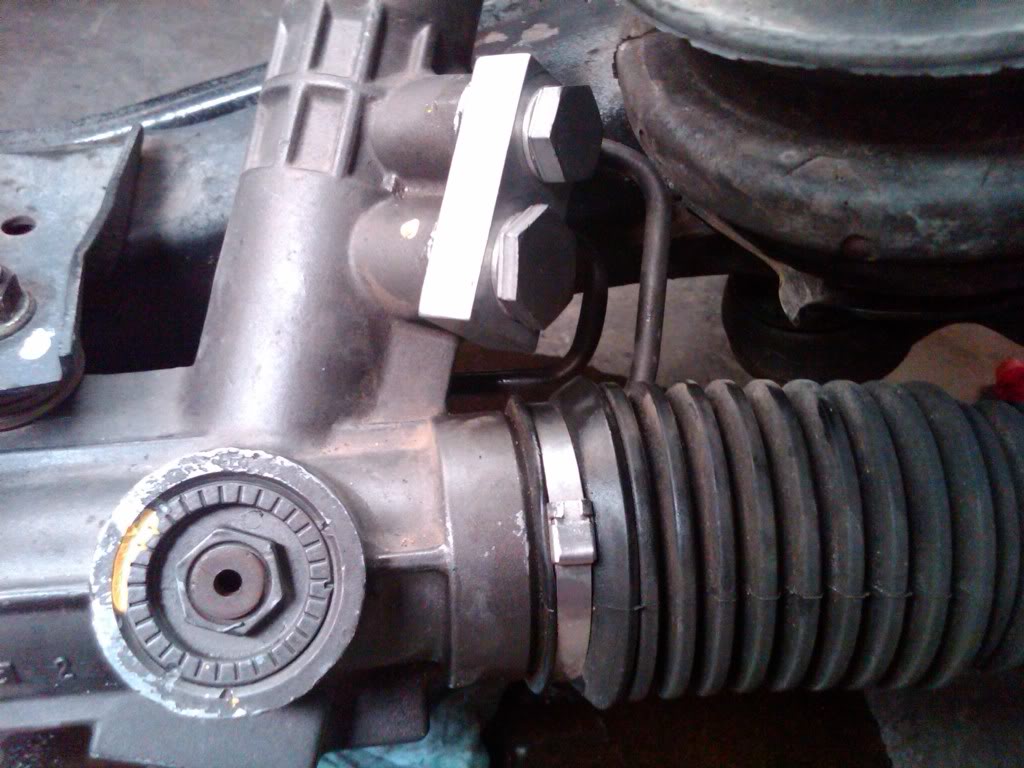
put in a PS delete
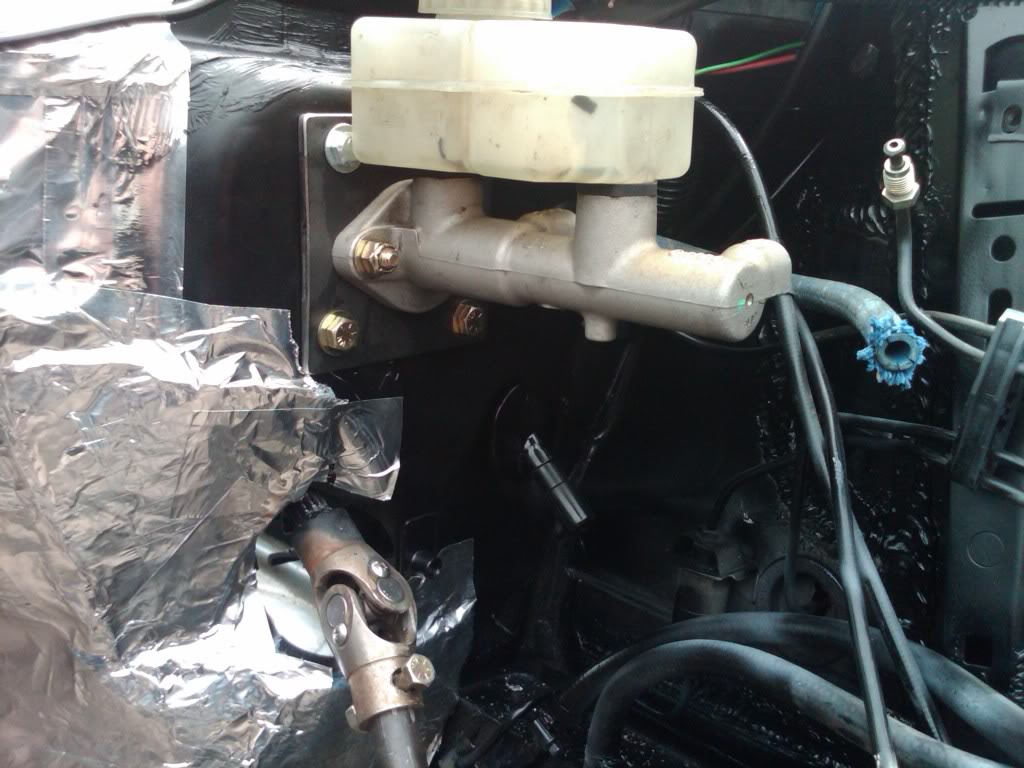
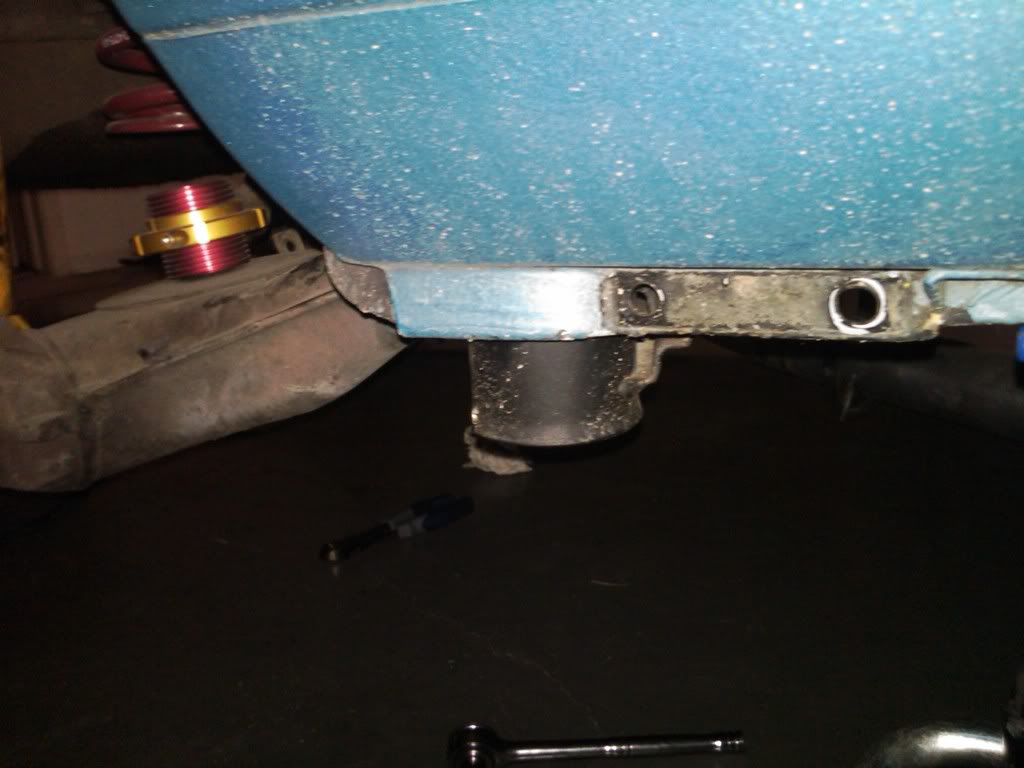
Nick cut me a plate to mount the MC directly to the firewall. We had to chop up and flare some donor brake lines, cause the stockers weren't long enough anymore..
then i brought the car home for the final assembly
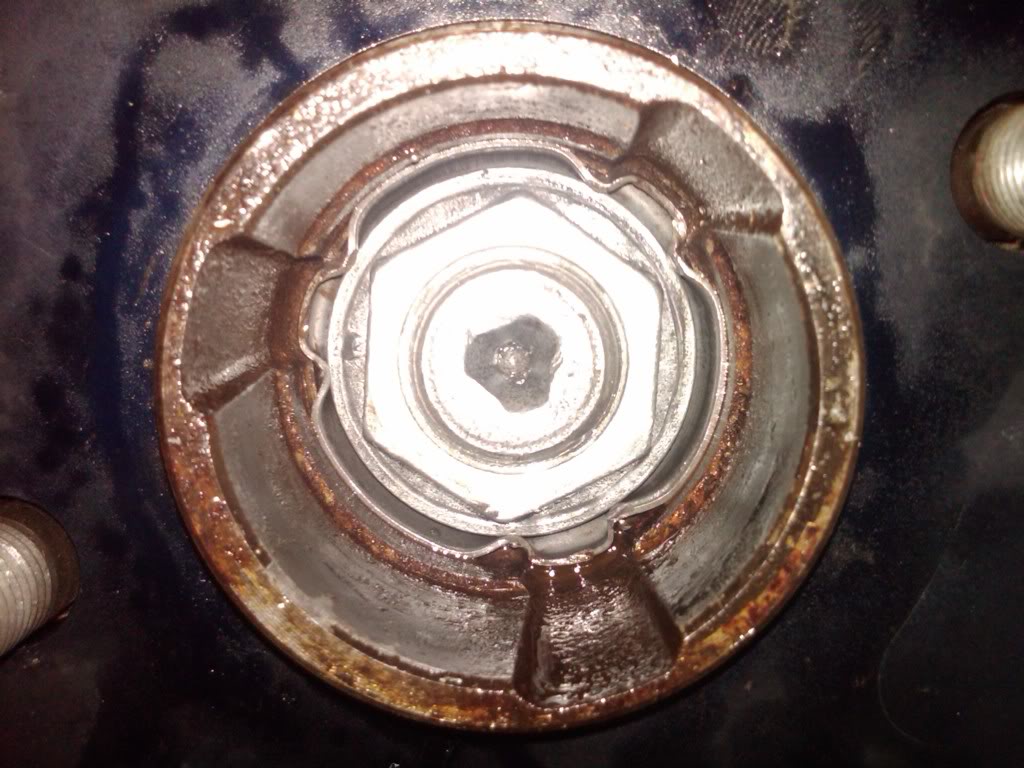
finally got my ******* half shafts out from the hubs. It took 3 people and a monster sledgehammer
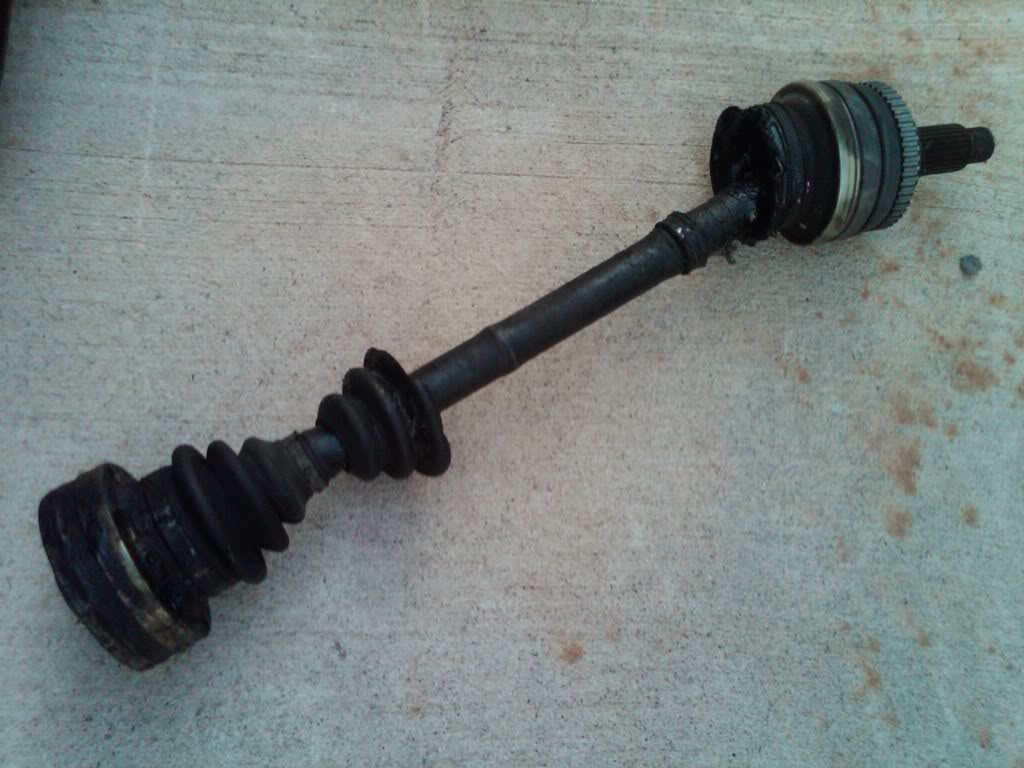
installed the new shafts
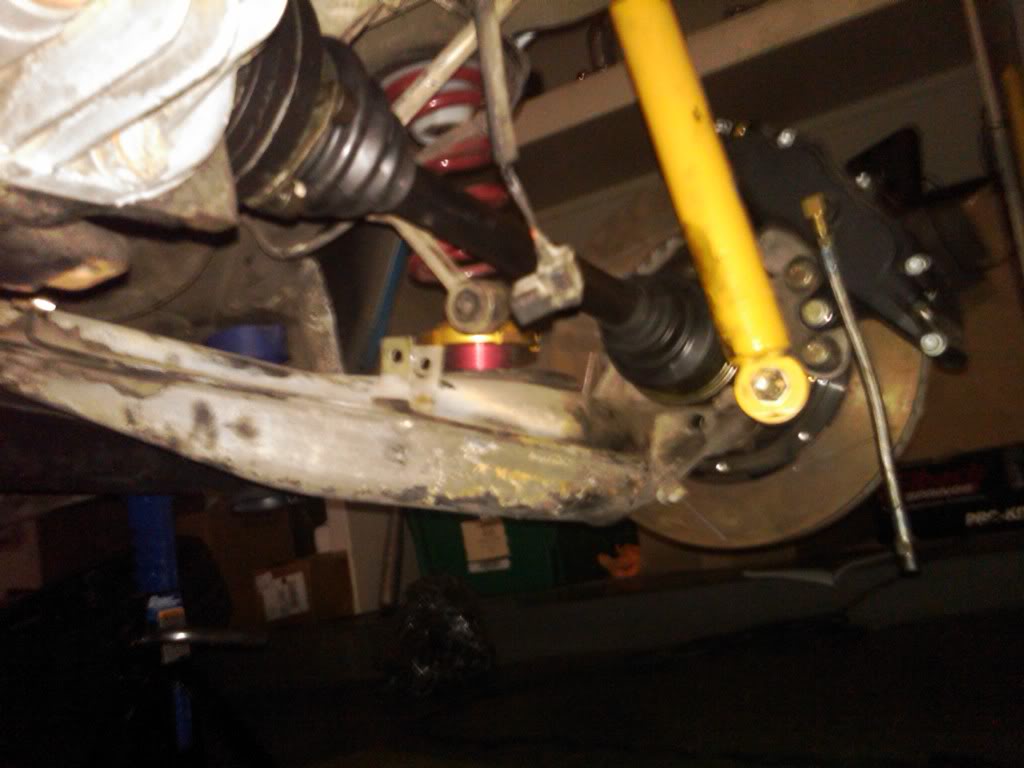
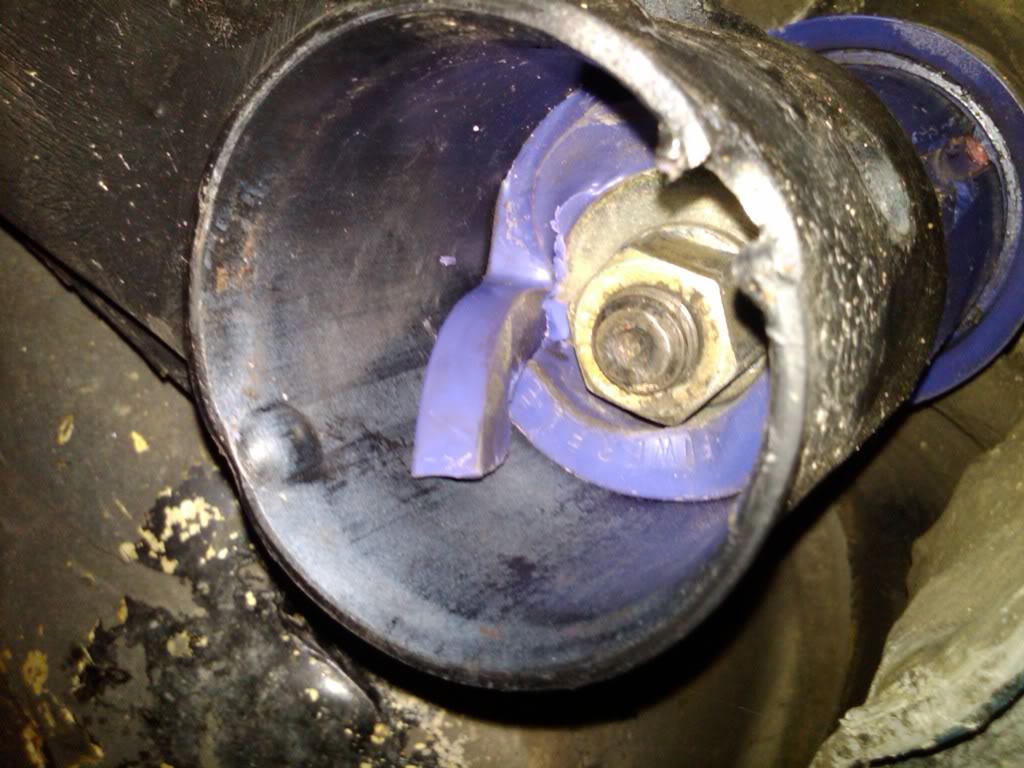
check this bs out! my powerflex bushing inverted up into the subframe. WTF?
dropped the motor/tranny in
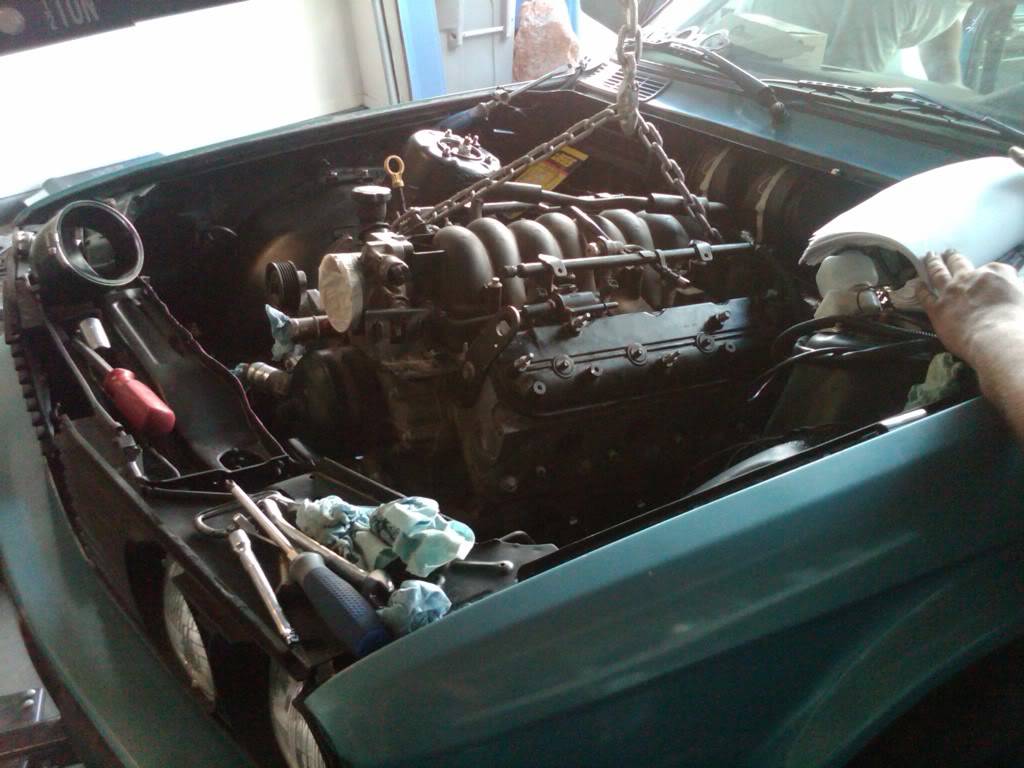
the brake MC interferes with one of the coils. Im gonna figure out a way to remote mount the coil. More on that later.
After alot of trial and error with wiring, and with the help of my friends Julian and Brian, we got it started. Hopefully this video works...
VIDEO

More progress on the way. Thanks for looking. -Matt
Added some more heat shielding out onto the firewall
Also gave my headers another coat of silicone
put in a PS delete
Nick cut me a plate to mount the MC directly to the firewall. We had to chop up and flare some donor brake lines, cause the stockers weren't long enough anymore..
then i brought the car home for the final assembly
finally got my ******* half shafts out from the hubs. It took 3 people and a monster sledgehammer
installed the new shafts
check this bs out! my powerflex bushing inverted up into the subframe. WTF?
dropped the motor/tranny in
the brake MC interferes with one of the coils. Im gonna figure out a way to remote mount the coil. More on that later.
After alot of trial and error with wiring, and with the help of my friends Julian and Brian, we got it started. Hopefully this video works...
VIDEO
More progress on the way. Thanks for looking. -Matt
Thread Starter
Teching In
Joined: Nov 2009
Posts: 29
Likes: 0
Update: Progress was slow for a while. I broke a finger on my right hand, and it was casted for 5 weeks, and useless for another 2. Ive been in the garage quite a bit lately, and with the help of some friends made some good progress! My friend Julian has been a huge help; especially with the wiring.
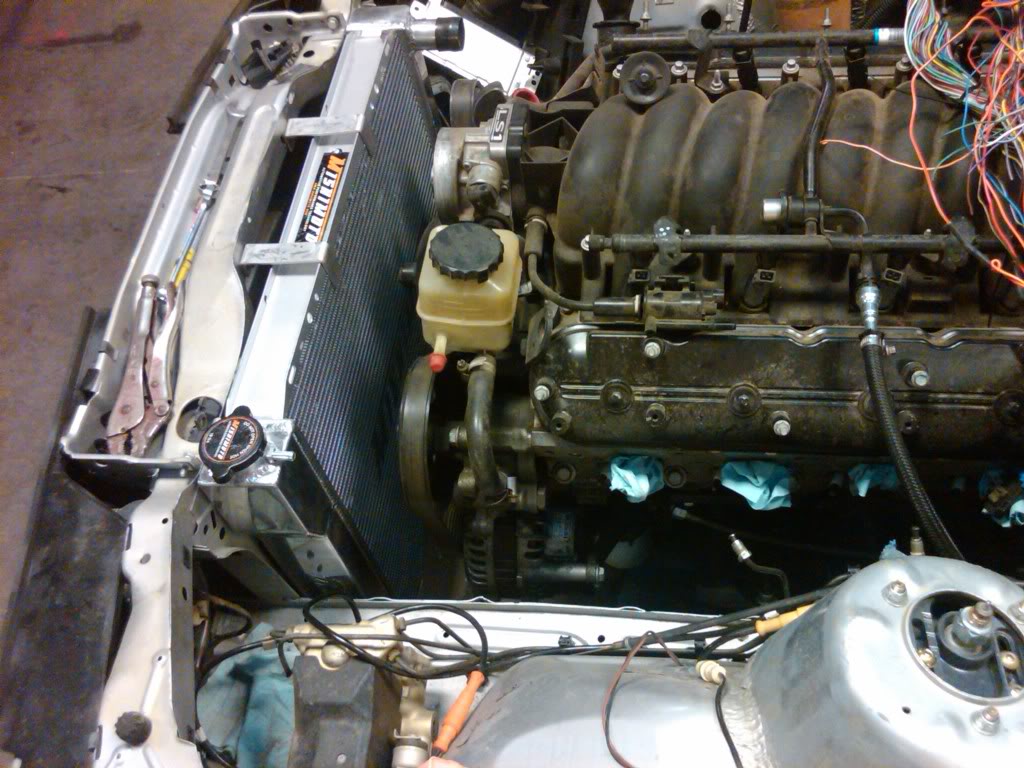
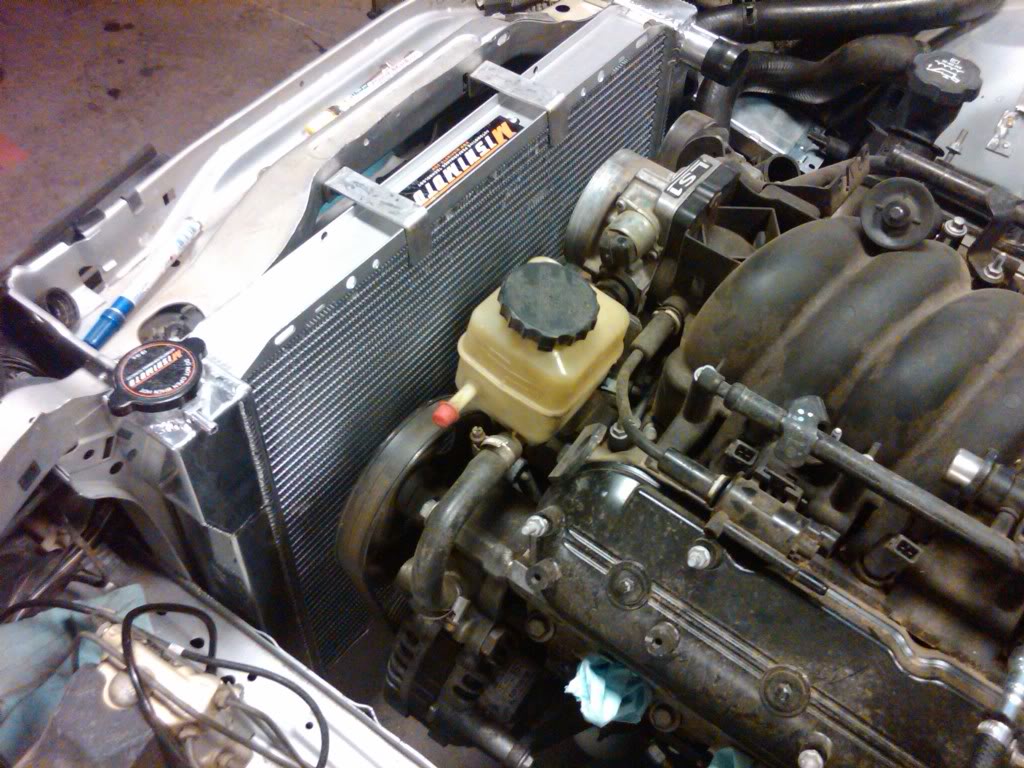
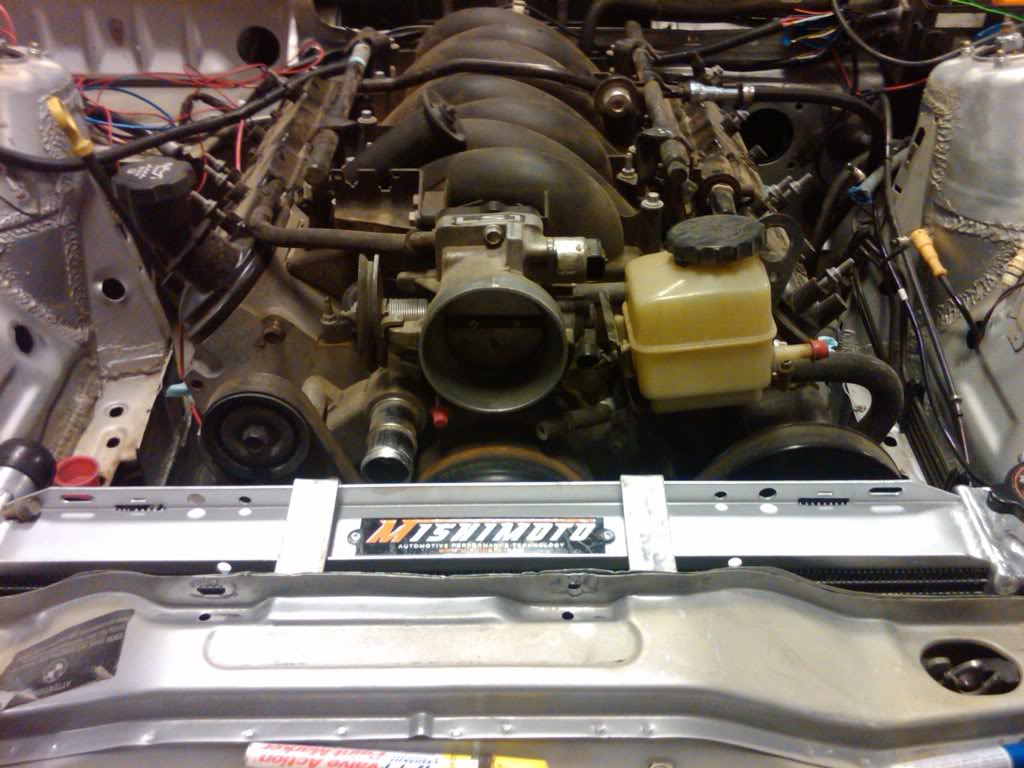
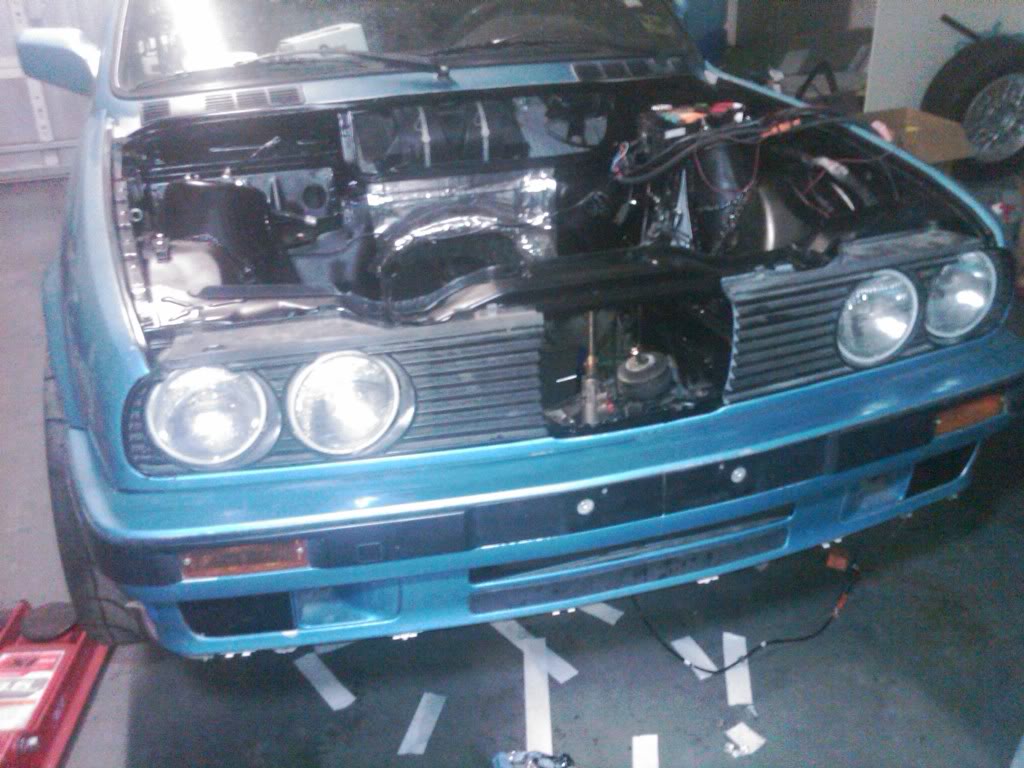
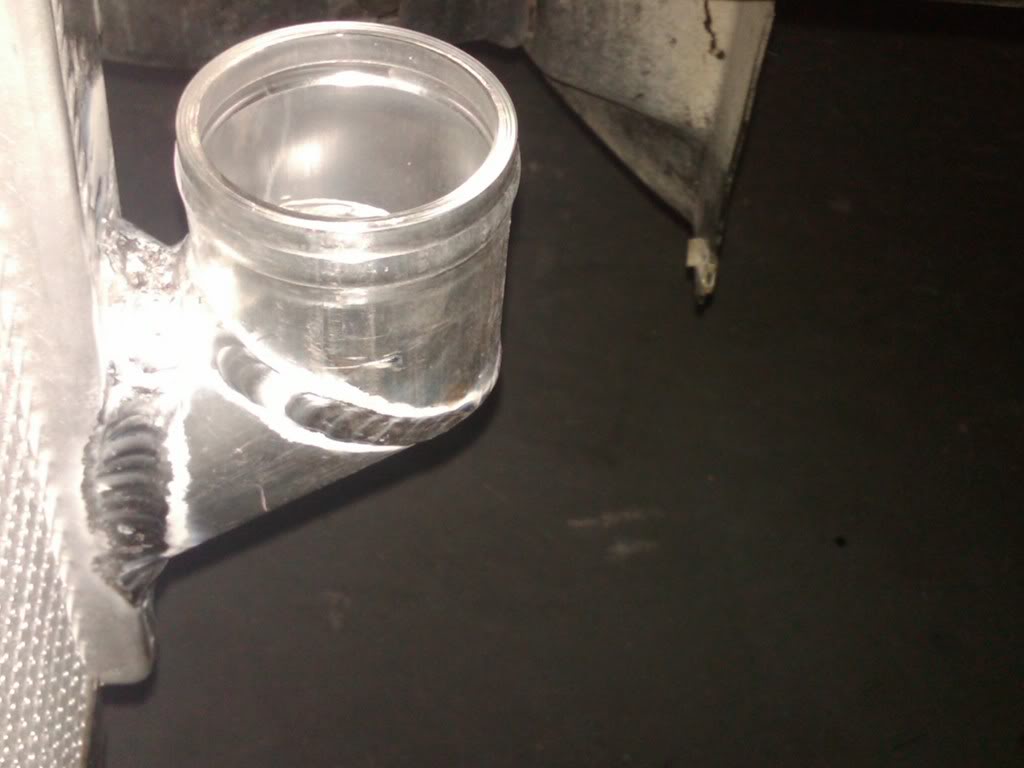
modified my radiator for some clearance, and so I wouldnt have to go on a search for some elaborate hoses. Both the inlet and outlet are now welded at 90 degrees. I also had Rick weld an aluminum adapter to the inlet for a coolant temp sensor
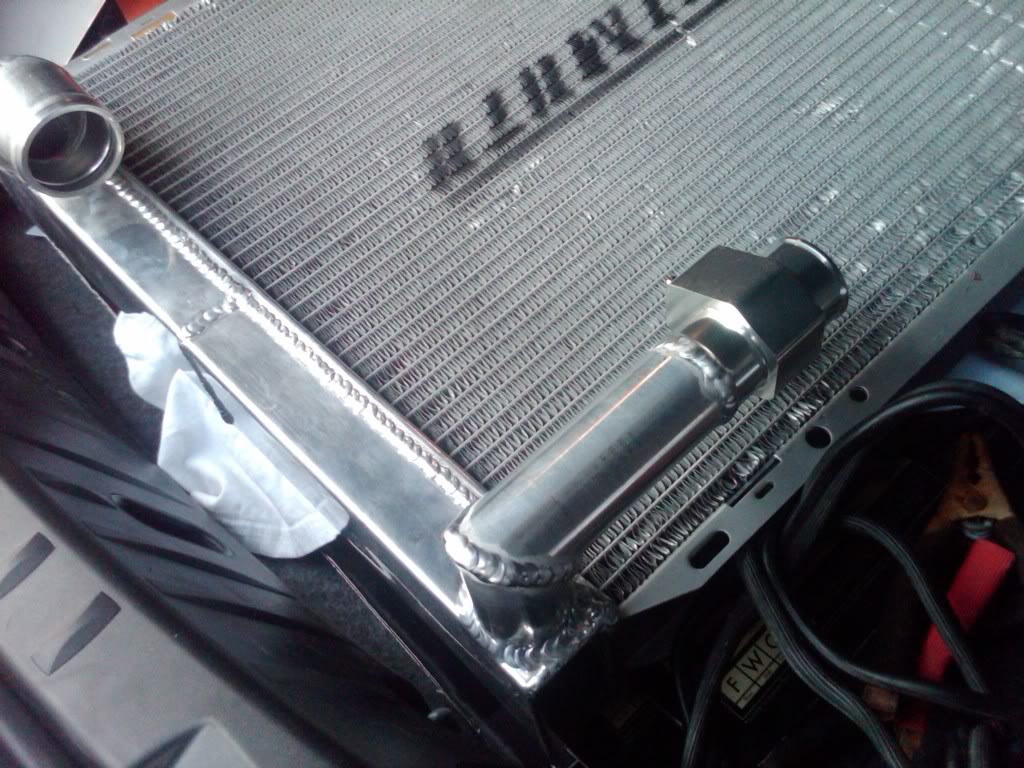
The outlet on the radiator is now 2" connection on the water pump was 1.5". I had a hell of a time finding a hose that worked, but here it is
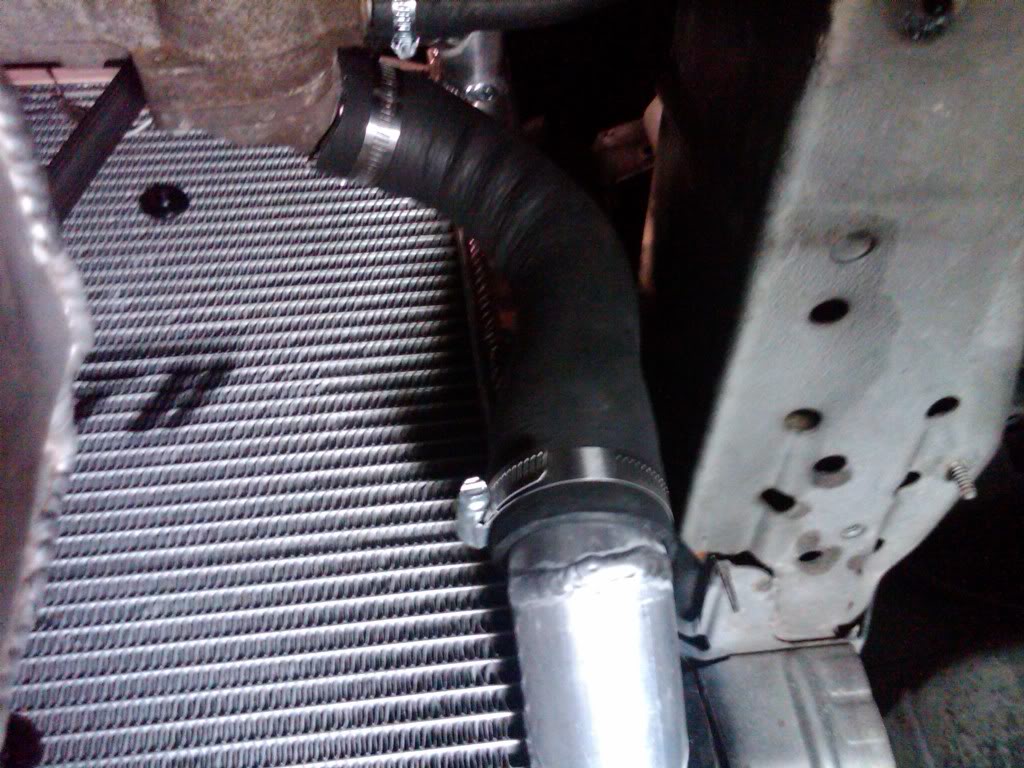
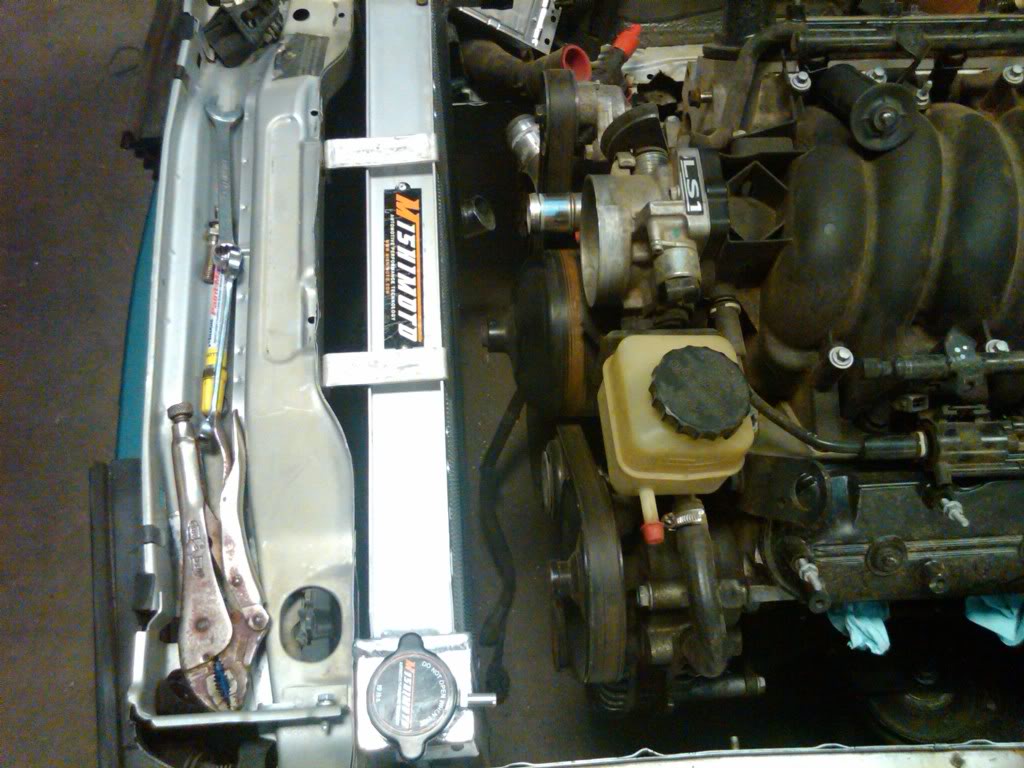
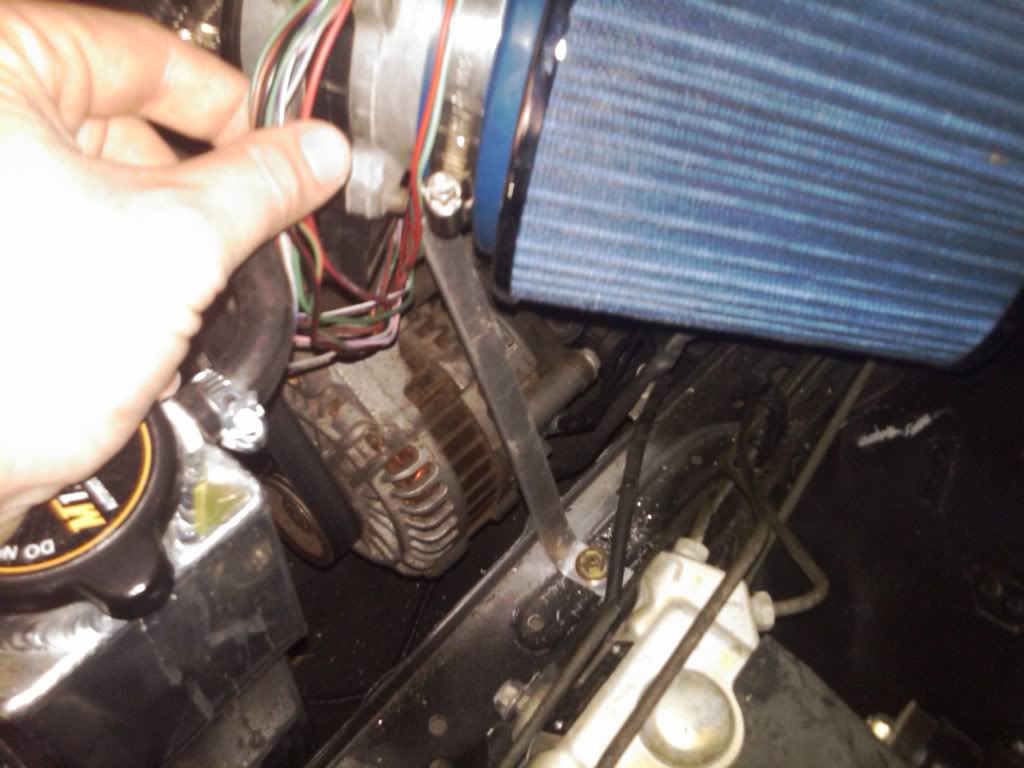
This setup provides some decent clearance for the intake and belt tensioner considering the size of this engine bay

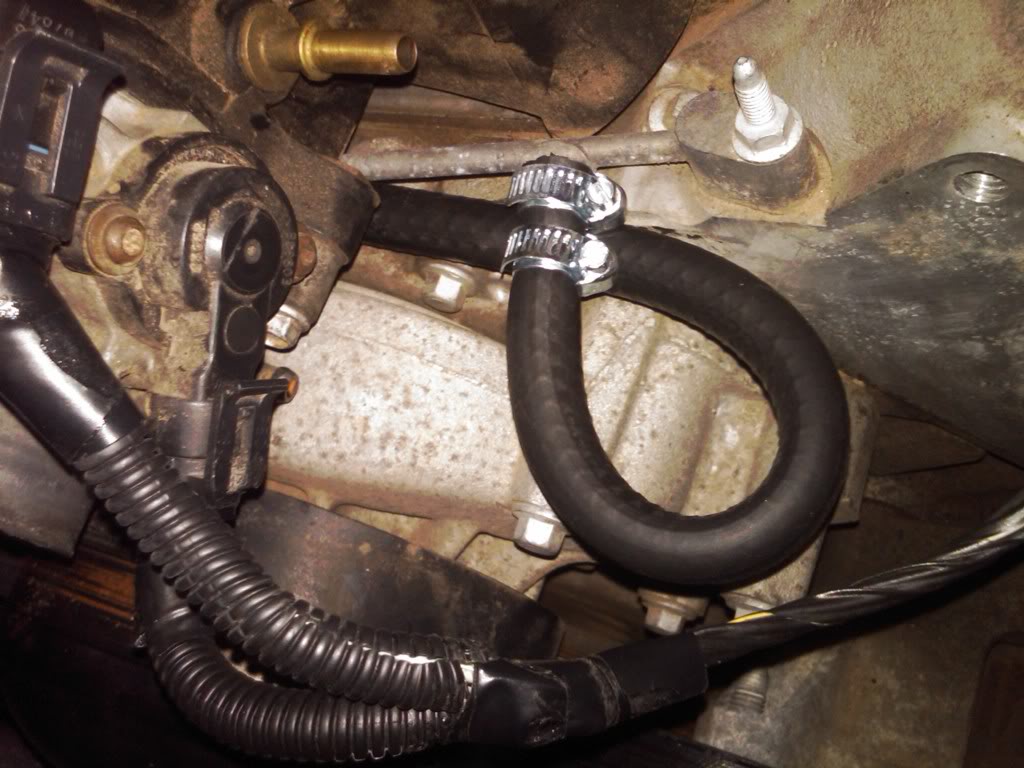
I then had to figure out a way to plump the steam vent back into the cooling system. I ran a line from the vent and tee'd it into a looped section where the heater lines were.

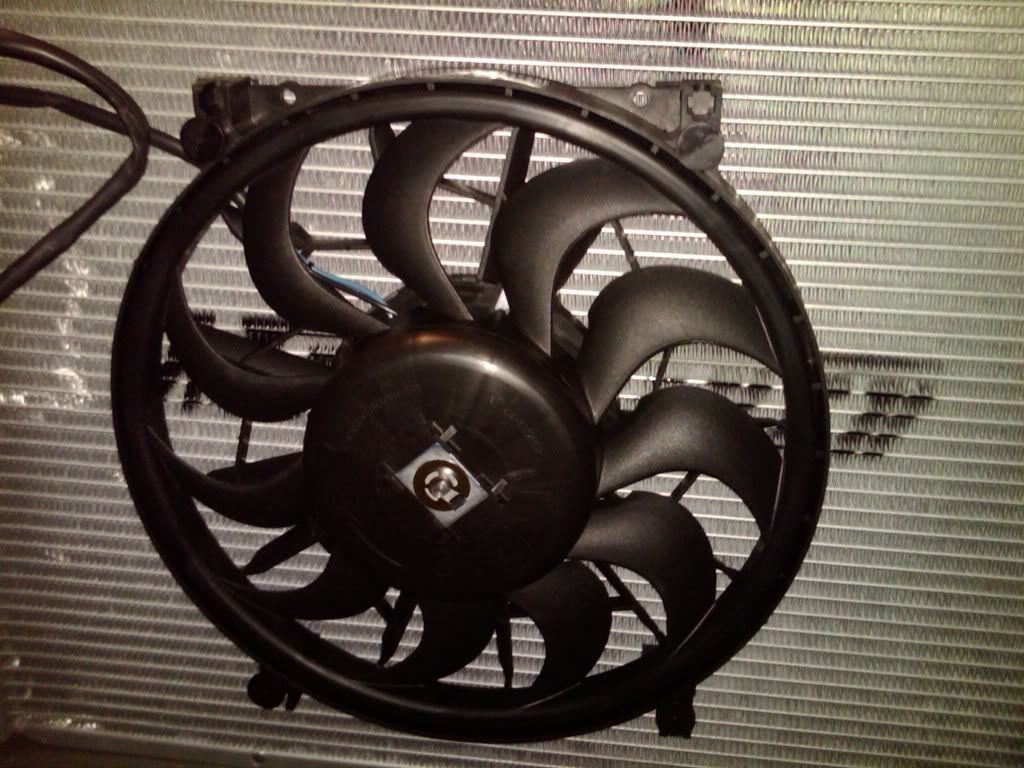
Installed this Derale pusher fan. Its only 12.5", but it moves 2150 cfm.
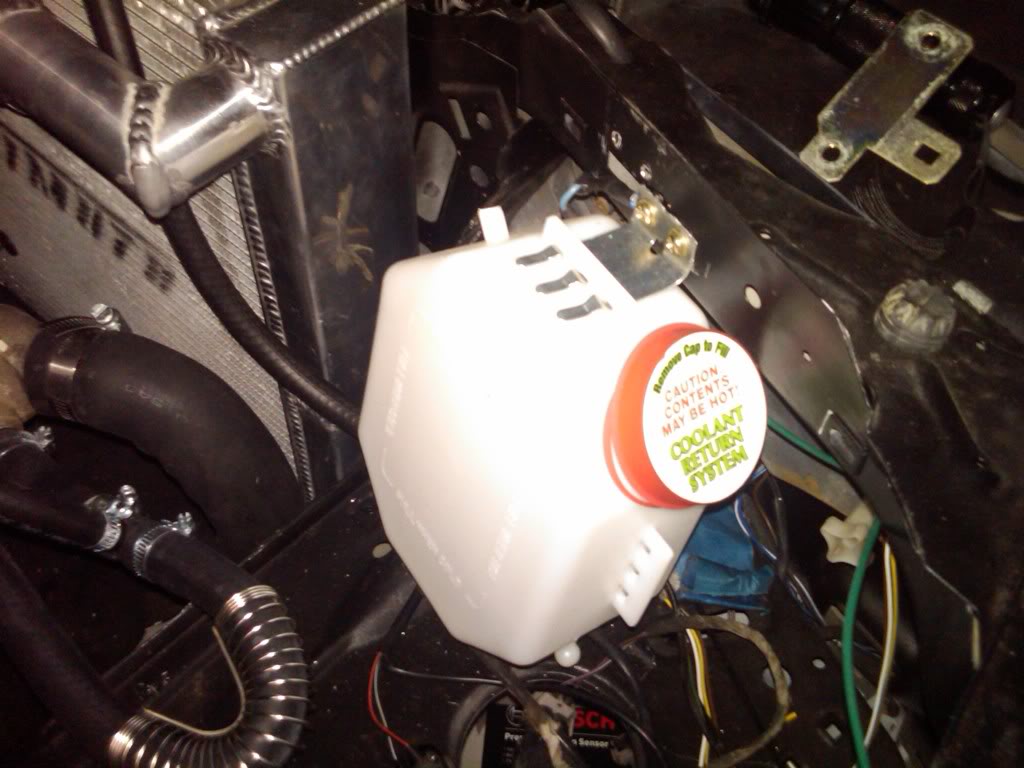
Also plumbed in this gorgeous overflow tank lol.
Next is started working on the gauges. I have a water temp, oil temp, and oil pressure gauge

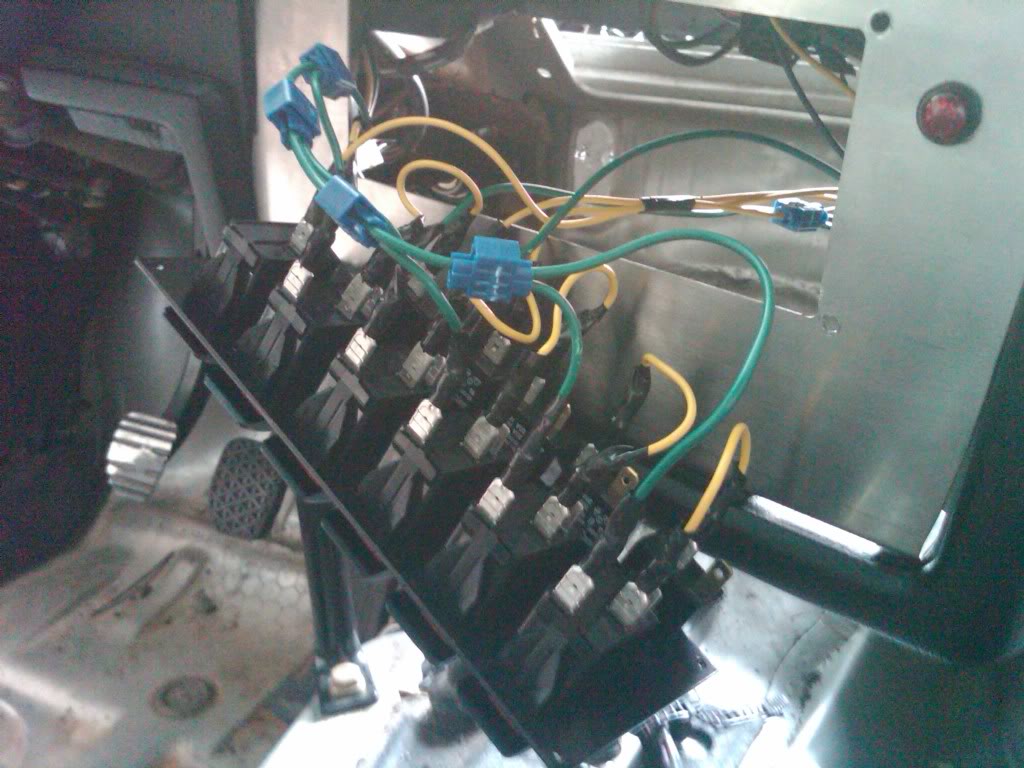
I made a template and had Rick make me this plate for a switch pannel
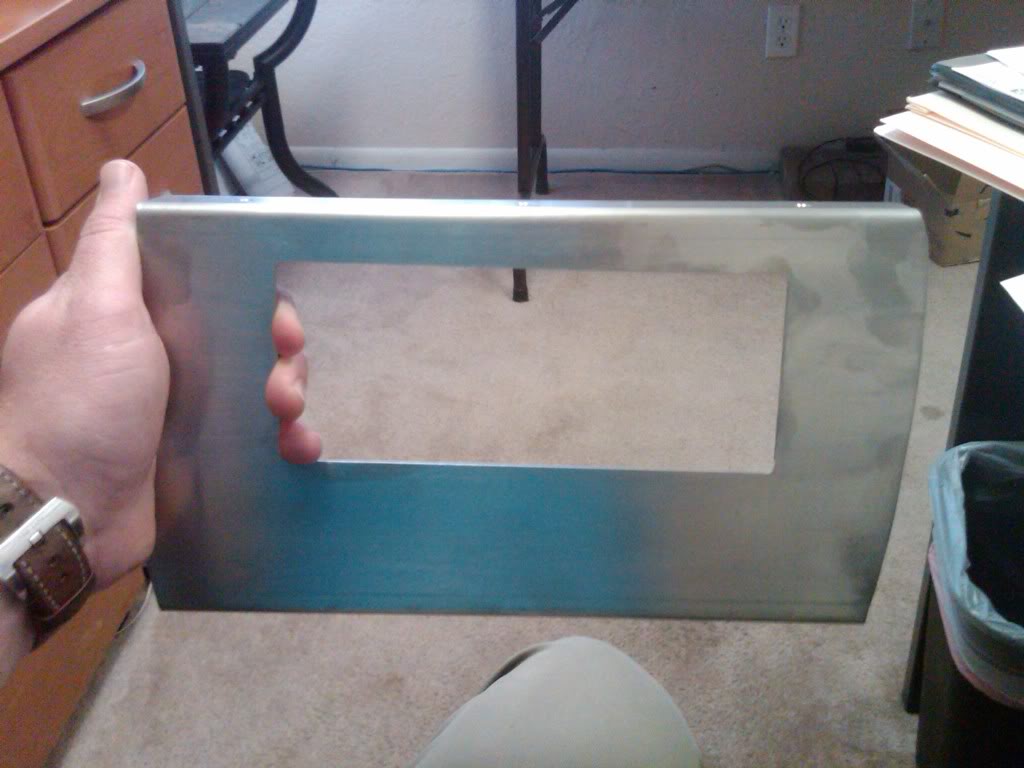
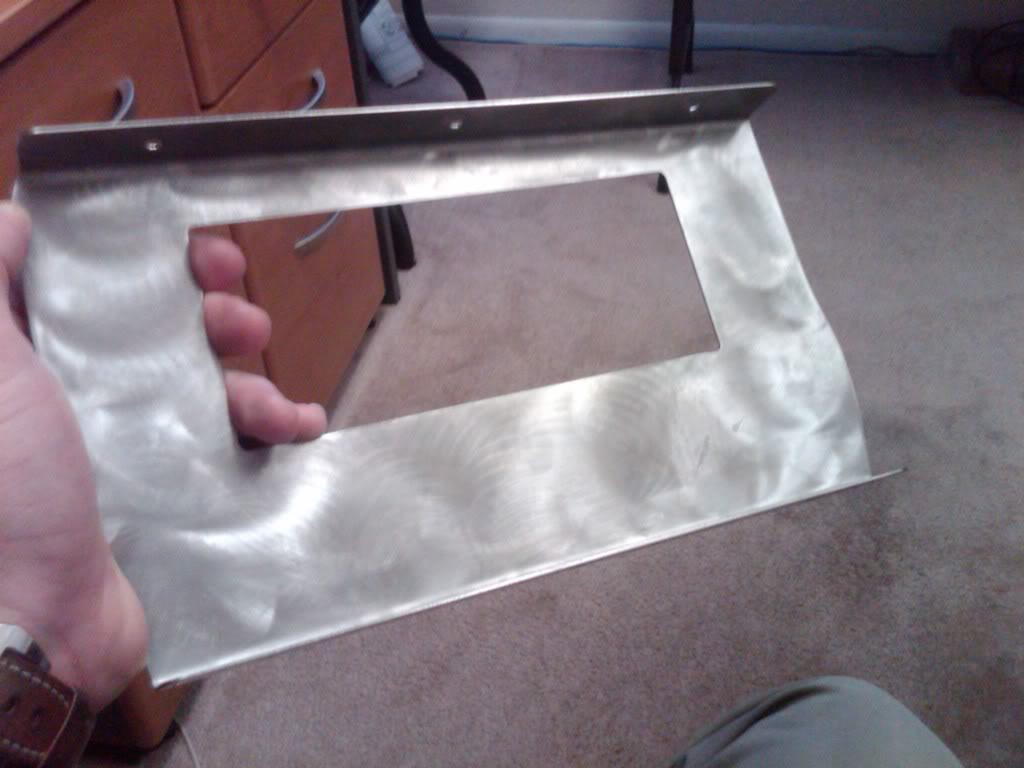
the panel has a switch for my fan setup, for my gauge, and a toggle for push button start.

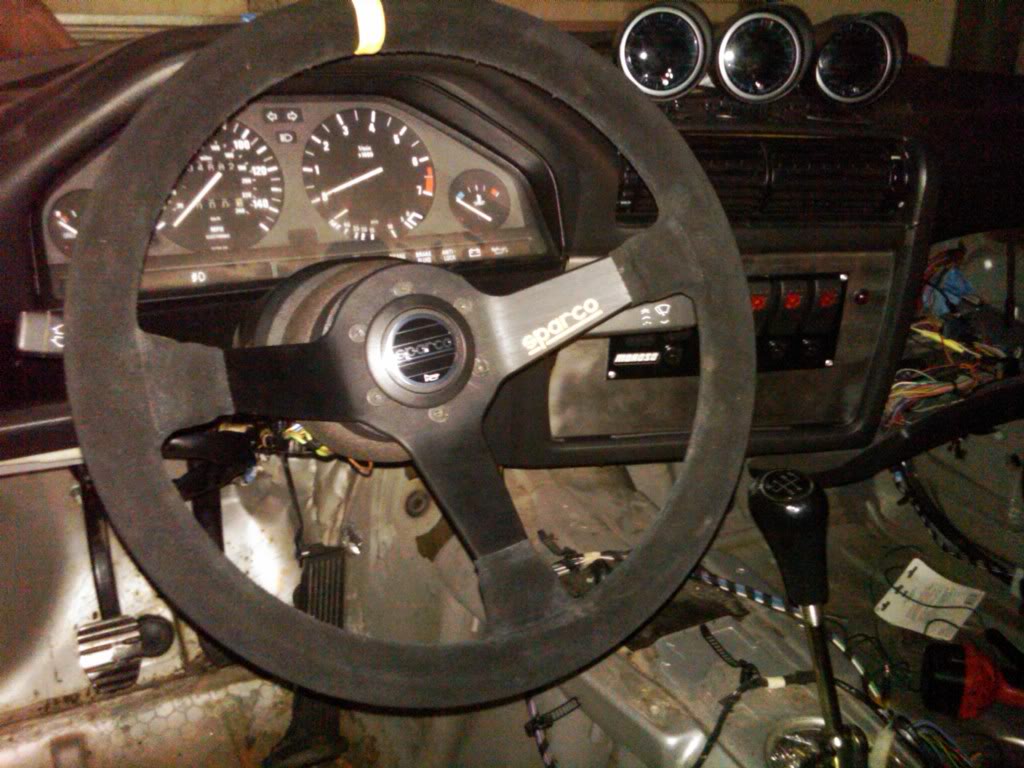
I also put in a 350mm Sparco steering wheel
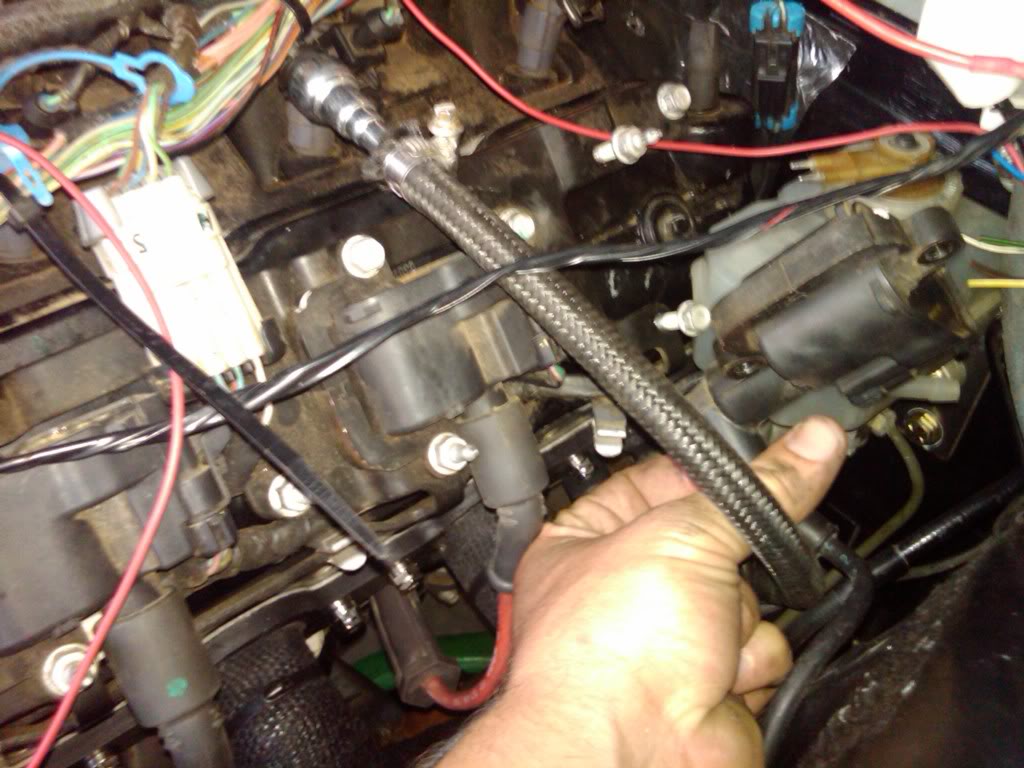
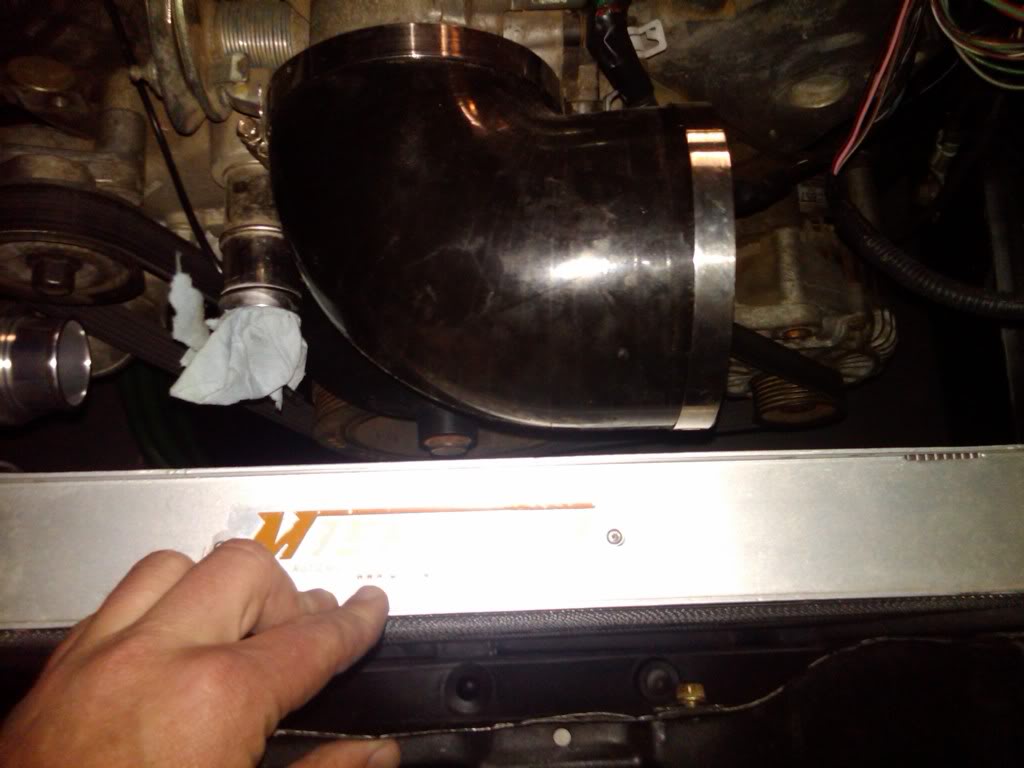
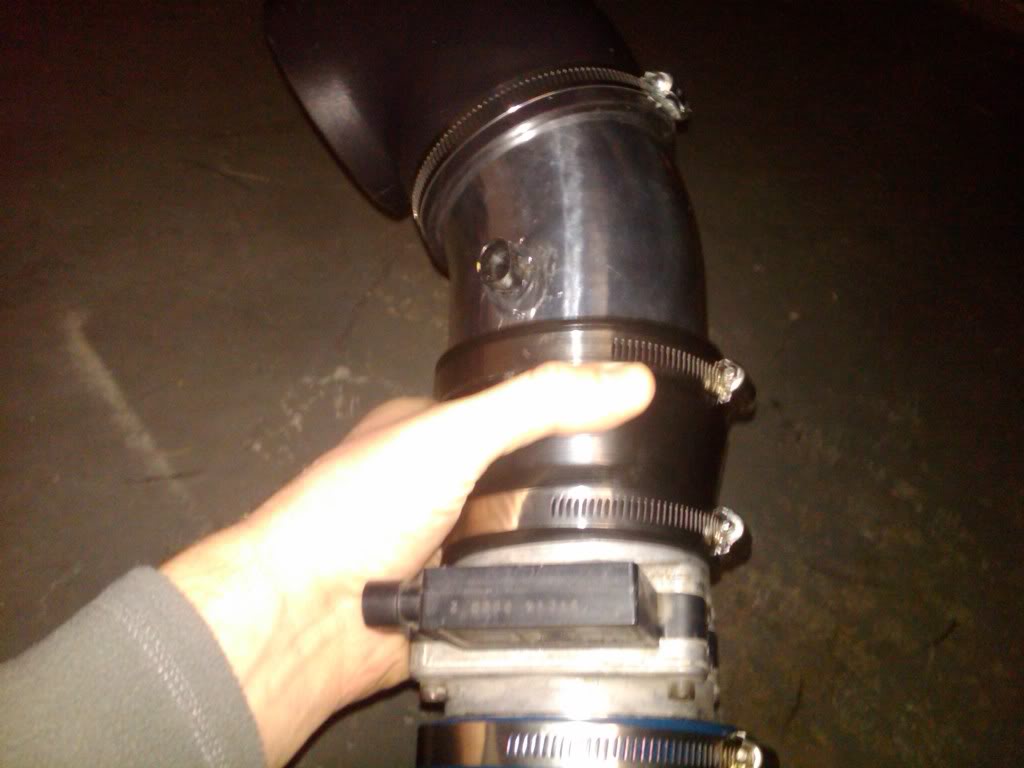
put all the pieces of my intake together, and tapped it for the intake temp sensor. I made a support bracket out of some aluminum flat stock
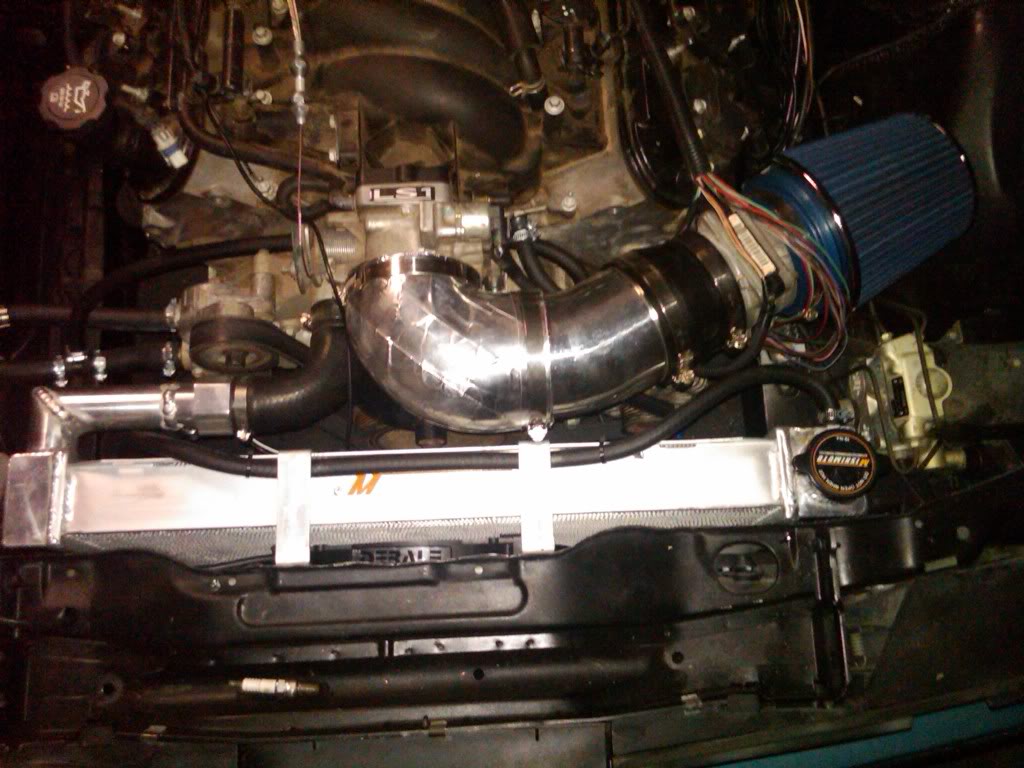
Here is the engine bay as it sits. I wrapped the intake elbow in some 1500 degree insulation tape. You can also see the line for the overflow tank and the throttle cable.
I drove the car for the first time this past weekend, which was a huge milestone for me. I wanted to drive it before the new yr. The car is running really rich because I didnt have the o2 sensors connected, which fouled out the plugs. I went and bought new plugs and some o2 sensors today. I also took my y-pipe to have 02 sensor bungs added today. This week I plan on putting the y pipe back in, adding some clearance at the rear subframe for the driveshaft, and looming the wiring.
-Matt
modified my radiator for some clearance, and so I wouldnt have to go on a search for some elaborate hoses. Both the inlet and outlet are now welded at 90 degrees. I also had Rick weld an aluminum adapter to the inlet for a coolant temp sensor
The outlet on the radiator is now 2" connection on the water pump was 1.5". I had a hell of a time finding a hose that worked, but here it is
This setup provides some decent clearance for the intake and belt tensioner considering the size of this engine bay
I then had to figure out a way to plump the steam vent back into the cooling system. I ran a line from the vent and tee'd it into a looped section where the heater lines were.
Installed this Derale pusher fan. Its only 12.5", but it moves 2150 cfm.
Also plumbed in this gorgeous overflow tank lol.
Next is started working on the gauges. I have a water temp, oil temp, and oil pressure gauge
I made a template and had Rick make me this plate for a switch pannel
the panel has a switch for my fan setup, for my gauge, and a toggle for push button start.
I also put in a 350mm Sparco steering wheel
put all the pieces of my intake together, and tapped it for the intake temp sensor. I made a support bracket out of some aluminum flat stock
Here is the engine bay as it sits. I wrapped the intake elbow in some 1500 degree insulation tape. You can also see the line for the overflow tank and the throttle cable.
I drove the car for the first time this past weekend, which was a huge milestone for me. I wanted to drive it before the new yr. The car is running really rich because I didnt have the o2 sensors connected, which fouled out the plugs. I went and bought new plugs and some o2 sensors today. I also took my y-pipe to have 02 sensor bungs added today. This week I plan on putting the y pipe back in, adding some clearance at the rear subframe for the driveshaft, and looming the wiring.
-Matt


