
67 Camaro - Dad and Son build
 04-30-2012, 12:04 PM
#181

He sure has gotten big! Looks right at home in that seat. I've been thinking about putting some latch points in the back of my Nova when the time comes; how else will I get the boy to cruise nights? Of course by the time I get mine back on the road, he'll probably be in college.
Great to see all the progress. Very nice work!
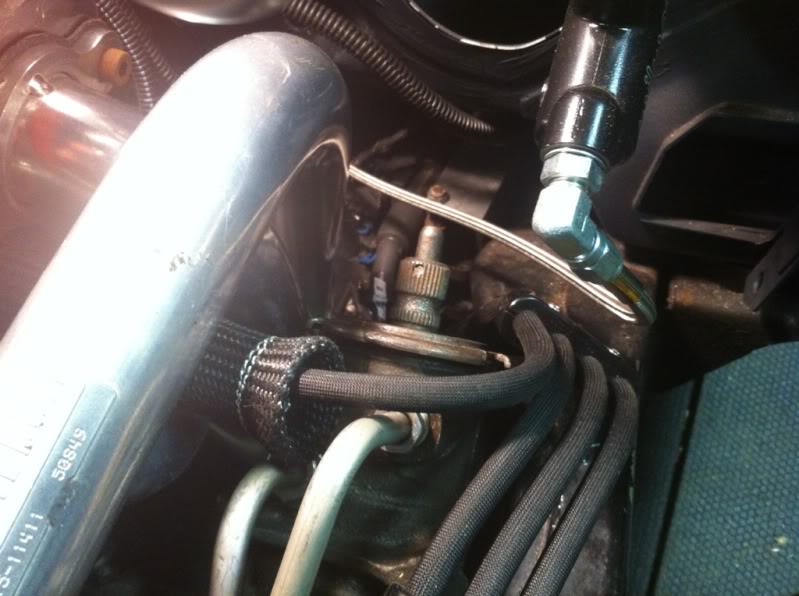
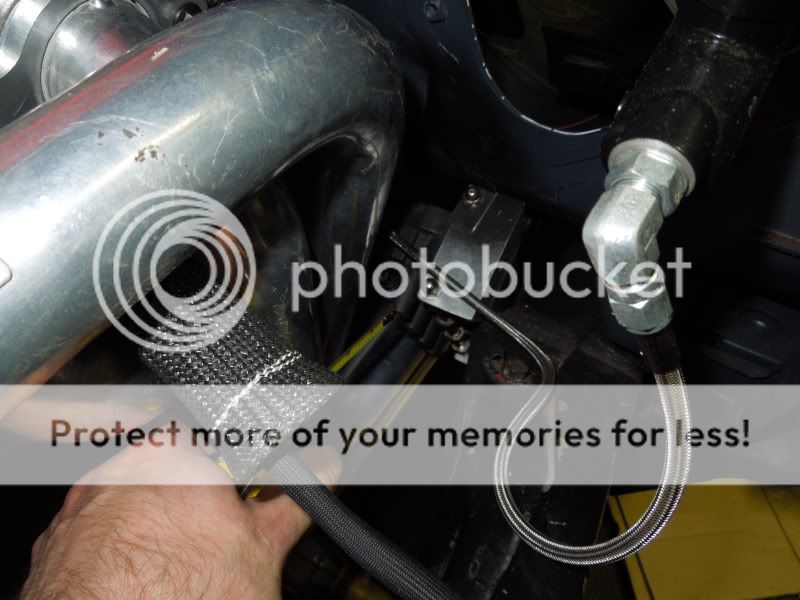
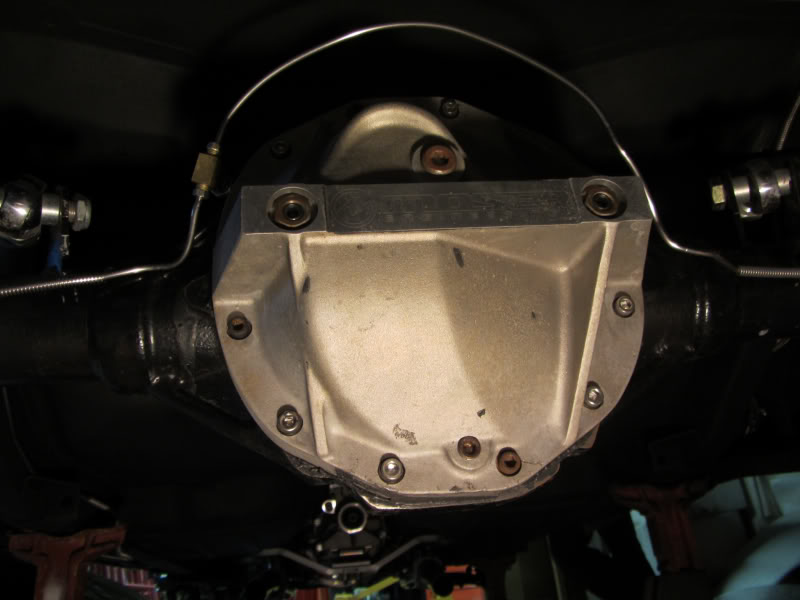
What fitting did you use in this picture to adapt from the valley cover oil pressure sender port?
Great to see all the progress. Very nice work!
What fitting did you use in this picture to adapt from the valley cover oil pressure sender port?
Last edited by -TheBandit-; 05-01-2012 at 09:51 AM.
 04-30-2012, 07:42 PM
#182
On The Tree
Thread Starter

Join Date: May 2010
Posts: 159
Likes: 0
Received 0 Likes
on
0 Posts
Hey man thanks for stopping by and looking. They sure do grow like weeds dont they?
For that adapter its made by autometer. Cost around 10 bucks and it's part number is 2268. It's 1/8"npt to m16 x 1.5
For that adapter its made by autometer. Cost around 10 bucks and it's part number is 2268. It's 1/8"npt to m16 x 1.5
05-01-2012, 09:46 AM
#183
Are you going with unassisted brakes?
Look forward to seeing where you put your coils.
05-03-2012, 09:48 AM
#184
On The Tree
Thread Starter
Join Date: May 2010
Posts: 159
Likes: 0
Received 0 Likes
on
0 Posts
Yeah it's just amazing how fast they grow and change. Wont be long before he's sitting behind the wheel driving! I appreciate the info on the adapter. Just one of those little things to put on my list.
Are you going with unassisted brakes?
Look forward to seeing where you put your coils.
Are you going with unassisted brakes?
Look forward to seeing where you put your coils.

So it�s been a long couple of nights. I ordered and received the map sensor for the motor to complete the engine side of the wiring other than the coil packs. The port on the sensor was to big so I had to drill the hole on the intake to 15/32 and it fits good now. Just have to extend the wiring for the plug.
The brake lines have showed up from inline and I needed a couple more fittings so I�m waiting on the "T" that goes on the rear axle and the hold down clips for the frame. Then I will run the lines and bleed the system. Also waiting on the radiator to show up which should be soon. To complete the motor side of things I've started to piece together the intake with what I'll need and that will be ordered soon. Other than that just have to figure out what I�m going to do for exhaust. I really wanted to have side pipes, 3" ovals is what I was thinking but due to lack of room, expense I may just run dumps before the rear. We�ll see.
The main power source on the drivers firewall is complete. All main power wires have been ran and tightened. I need to finish up the gauge wiring, couple wires on the ecu, run relays for the headlights & fans when they get here and some miscellaneous stuff and that should be the rest of the wiring. I�ll be glad when that day is. Not too much longer before the car actually is able to fire.
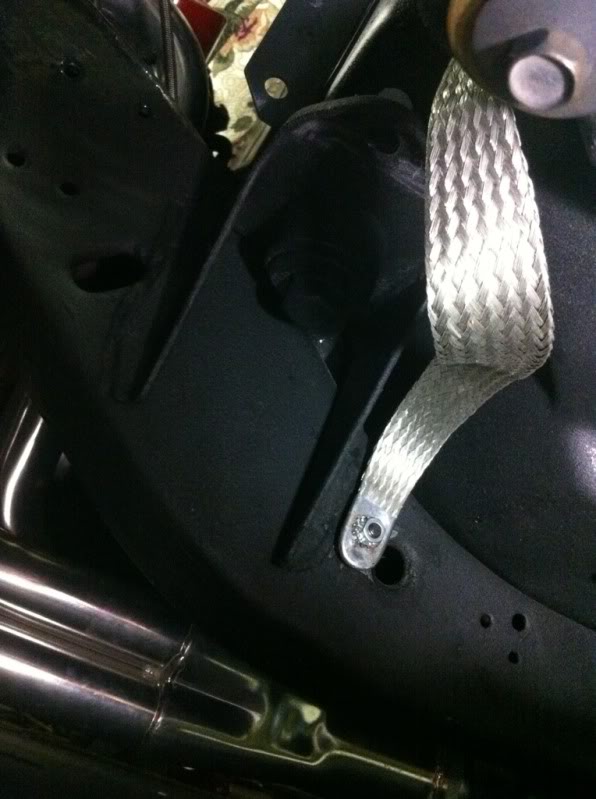
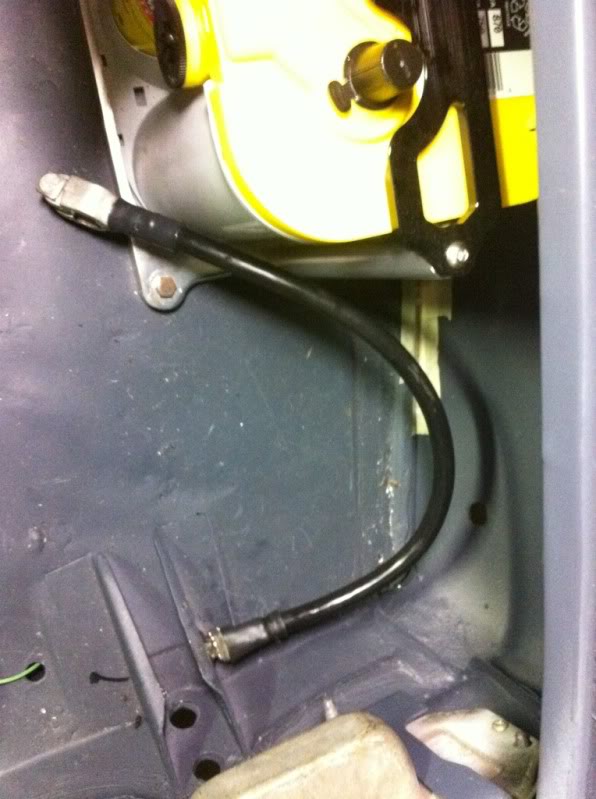
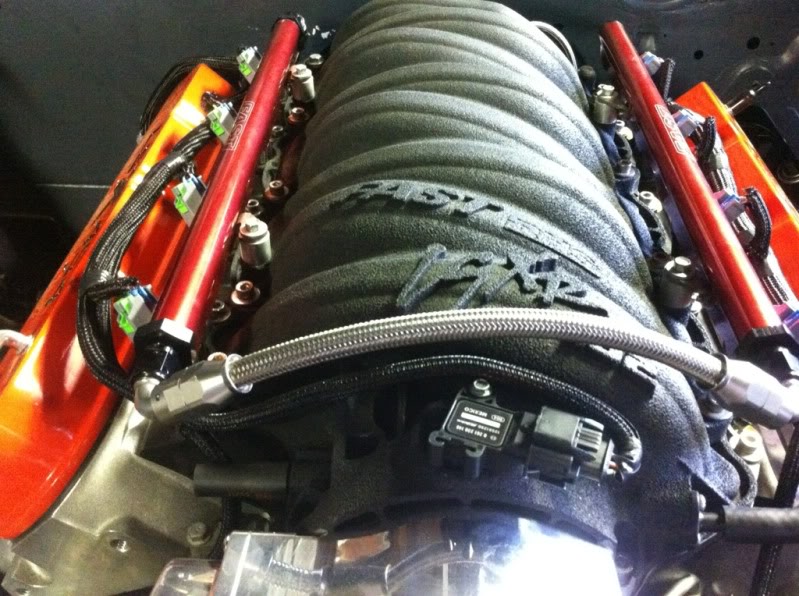
Timmy came over last night as I really wanted to try to crank the car and check for leaks and make sure I had oil pressure. The main thing that still needed to be done was the main ground straps needed to be hooked up. One for each side of the frame to body, and one from the engine to frame, one in the rear for the main battery hook up, and a small one under the dash for ecu, gauges..ect. Instead of drilling and using bolts on everything I had him bring the welder and he welded the bolts right to the body/frame. This way there is one less thing to come loose and it�s a much better connection. While he did that I finished up the wiring for the starter and did the temporary wiring for the oil pressure gauge to see what was going on. After all the grounds where hooked up we gave it a go and everything went well, other than a small oil leak at the adapter that screws into the intake. I need to take it off clean it off and put some teflon tape on any pipe treads. It was a relief to finally here it turn over and confirm that the wiring so far is correct. Now it�s time to get the rest of the stuff buttoned up so I can actually fire it. Once I fire it up Ill only let it run for 30-60 seconds as it has to be broken in. I talked to my chevy dealership that I bought the motor off of and he said if I take the car to a certified mechanic and have them go over it and break the motor in I can gain back all the warranty that I have lost while the motor was sitting. So that�s what I'm going to do. I talked to a shop called Injection connection and they are going to go over the whole car once complete, break the motor in per the GM instructions, change the oil and strap her to the dyno. I want to start the car to check for leaks, make sure everything is working so I�m not paying shop rate because I have a leak in a fuel line..ect. Anyway here is a quick video and some pictures from the past few days.


http://s18.photobucket.com/albums/b1...t=d3205b82.mp4
 05-06-2012, 04:05 PM
#186
On The Tree
Thread Starter
Join Date: May 2010
Posts: 159
Likes: 0
Received 0 Likes
on
0 Posts
Thanks man, it's been a long road but I can see the light I think. Also thanks for following along.
I ordered the last piece that I can think of to wrap the motor up. Radiator and all the pieces for the intake. All that should be here early next week. Then just have to finish some small wiring, mount the ecu, wrap up the gauges, either extend the coil wire plugs or get extensions, mount the coils, put the gaskets on the headers and tighten them down, fill the motor/radiator with coolant, run/route the PVC system. Cycle the key and check for leaks in the fuel system and coolant system and then let the heaven sing the sweet tunes of fire breathing power. Whoa I'm getting all excited...
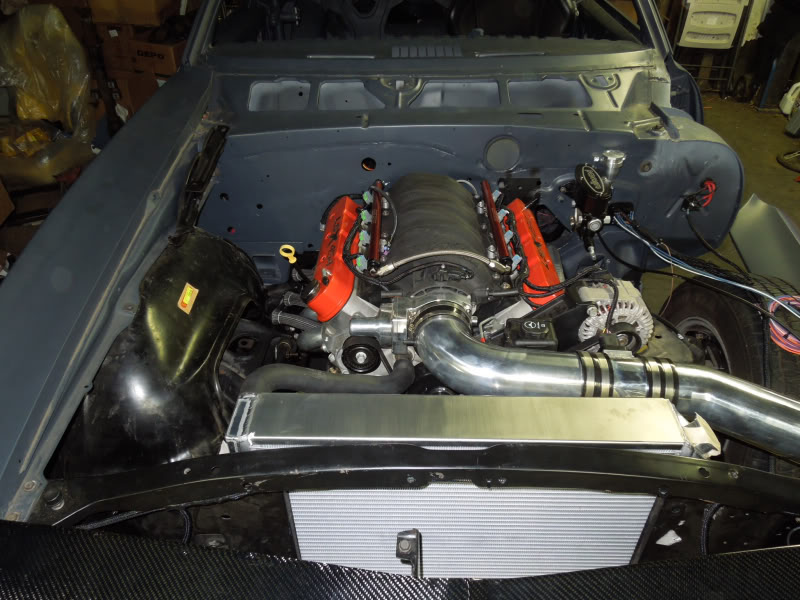
So this weekend the old man came buy and we worked on tiddying up some lose wires, routing and securing the plug wires, fixing the oil leak at the adapter for the oil pressure gauge, running the power wire for the fuel system, and extending the wires for the map and cleaning that up. Next weekend I believe Timmy is going to come over so we can mount the pedal, ecu, and vaporworx stuff and mount the gauge cluster. Onto some quick pictures..

More to come soon..
I ordered the last piece that I can think of to wrap the motor up. Radiator and all the pieces for the intake. All that should be here early next week. Then just have to finish some small wiring, mount the ecu, wrap up the gauges, either extend the coil wire plugs or get extensions, mount the coils, put the gaskets on the headers and tighten them down, fill the motor/radiator with coolant, run/route the PVC system. Cycle the key and check for leaks in the fuel system and coolant system and then let the heaven sing the sweet tunes of fire breathing power. Whoa I'm getting all excited...
So this weekend the old man came buy and we worked on tiddying up some lose wires, routing and securing the plug wires, fixing the oil leak at the adapter for the oil pressure gauge, running the power wire for the fuel system, and extending the wires for the map and cleaning that up. Next weekend I believe Timmy is going to come over so we can mount the pedal, ecu, and vaporworx stuff and mount the gauge cluster. Onto some quick pictures..
More to come soon..
05-06-2012, 11:45 PM
#188
Getting closer!
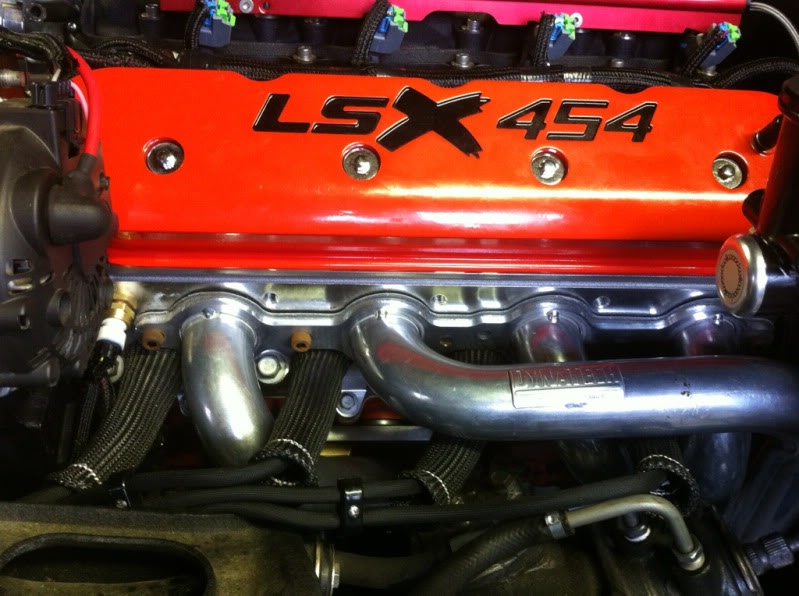
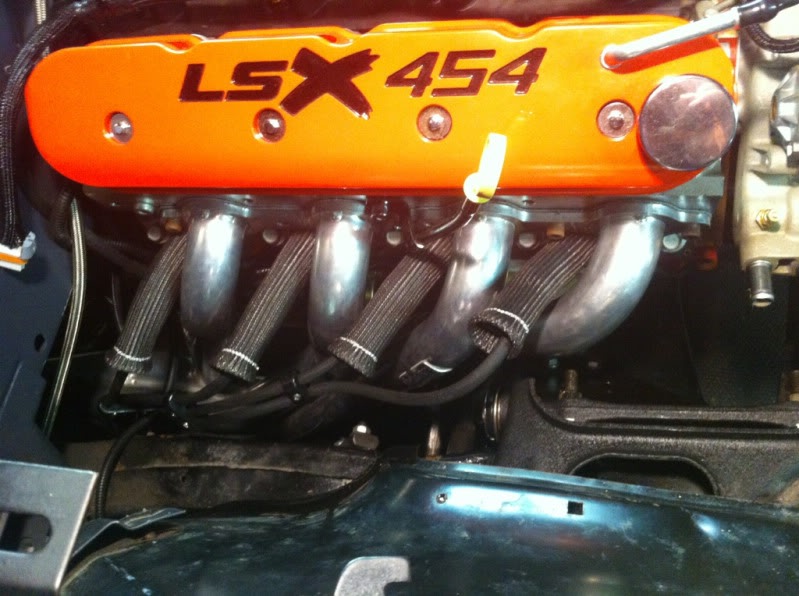
Be careful with spacing those plug wires. A few of them look awfully close to the exhaust, for example the #2 wire looks close to the #2 primary where it goes into that 4 wire clamp/organizer/separator. I can't tell from the picture, but the #3 wire looks like the heat shield may be touching the #1 primary. Also #7 looks like it's running over the upper control arm, which will move and potentially wear through the wire.
Don't forget to put your sway bar in!
Last edited by -TheBandit-; 05-07-2012 at 12:30 PM.
05-08-2012, 09:43 AM
#190
On The Tree
Thread Starter
Join Date: May 2010
Posts: 159
Likes: 0
Received 0 Likes
on
0 Posts
Thanks man, dont worry the updates will keep coming till the end.
No problem, If you need any more help feel free to give me a call.
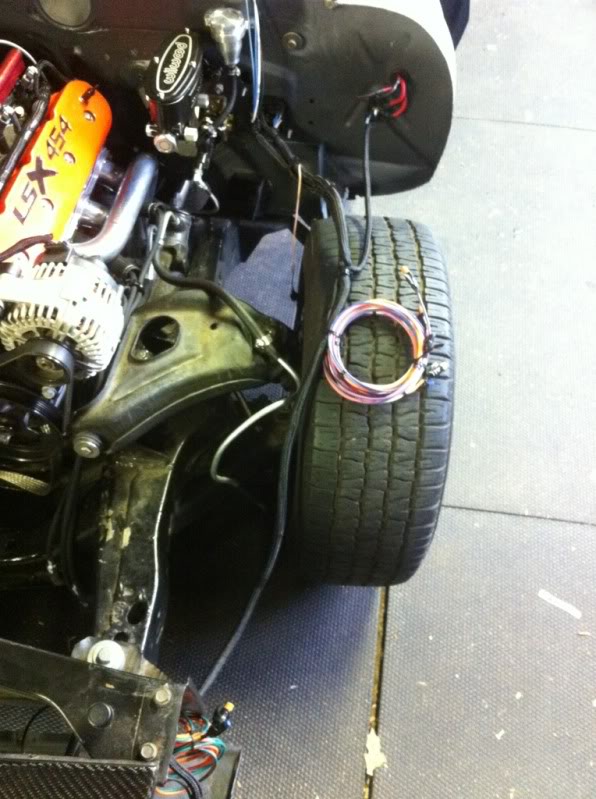
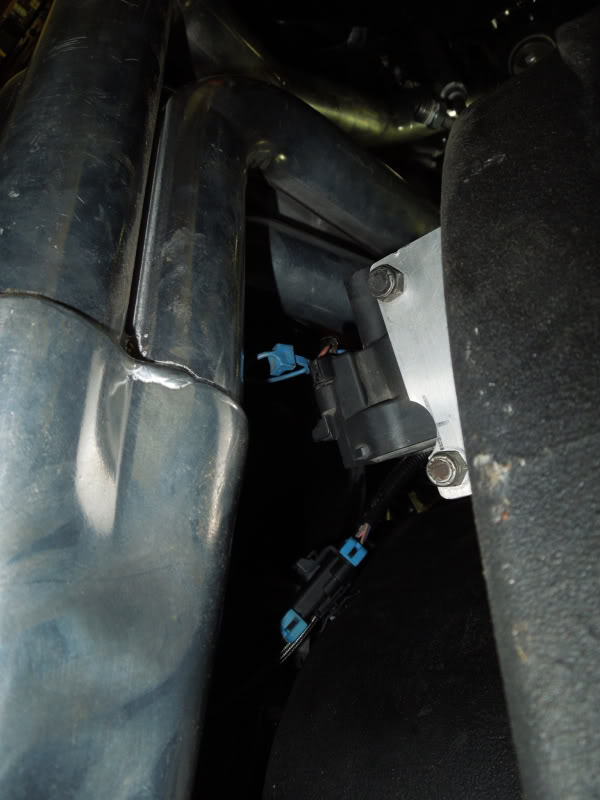
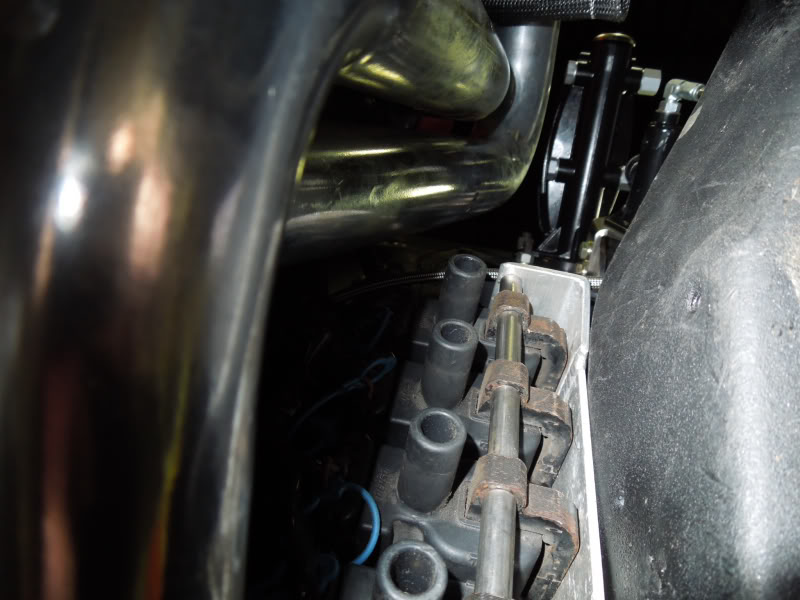
Its funny you said that after thinking about it for a few days I didnt like how the wires where running over the control arms. So last night I pulled each side off and switched them to see if I could find a nice spot to mount the coils. The problem side is the drivers side as there is the steering box, brake stuff, clutch stuff, and headers. I found a good spot that should work on the underside of the firewall. Ill weld a mounting bracket to the firewall. Once mounted the closest point from header to coil should be no less than 2". Its closer than I like but if I burn up a coil Ill move them inside under the dash. Its part of hotrodding I guess. Im going to make up a heat shield also so that should help. Here are some pictures.. I have to get some better ones of the coils once mounted to show clearance.


Getting closer!
Be careful with spacing those plug wires. A few of them look awfully close to the exhaust, for example the #2 wire looks close to the #2 primary where it goes into that 4 wire clamp/organizer/separator. I can't tell from the picture, but the #3 wire looks like the heat shield may be touching the #1 primary. Also #7 looks like it's running over the upper control arm, which will move and potentially wear through the wire.
Don't forget to put your sway bar in!
05-09-2012, 01:46 AM
#191
Registered User

Join Date: Mar 2012
Location: bay area
Posts: 8
Likes: 0
Received 0 Likes
on
0 Posts
be grateful you have a dad like that I had noone growing up still haven't gor anything I've been buying my own clothes since 13 got my first car 2000 mits eclipse at 18 and just bought a 98 z28 that ima sell and buy a 70 chevelle.at 19 and not having anyone is tuff be grateful your dad seems awesome and hopefully I can be a father like that instead of being one like mines.
05-10-2012, 09:16 AM
#192
On The Tree
Thread Starter
Join Date: May 2010
Posts: 159
Likes: 0
Received 0 Likes
on
0 Posts
So Timmy came over last night to hopefully finish up the welding on the car. Poor Timmy every time he comes close to the car I’m adding stuff for him to tackle. For such a young guy I can’t say enough. Truly an artist and amazes me with the pride he takes in the smallest thing. So the main goals where to mount the pedal, and mount the coils packs. Which both are now done. The coil packs are close to the headers but far enough away I don’t see it being a problem. Just to be safe I’m going to have Timmy make a metal shield to combat some of the heat. I am also going to take apart the coil harness and clean it up as it just looks old/messy. I’ll get some better pictures of the coils and mounting location once they are all done and complete. It was late, the shop was a mess and the lighting was horrible. The pedal box was also welded to the inside once we figured out where it would work best. After some grinding and fitting it’s done. I threw some black paint on it quickly to make sure it doesn't start rusting, got to close while painting and its a bit runny. Not that anyone will see it but I like to show everyone what/how its done..not just the finished project. So go easy on me painters. Timmy also finished mounting the dash lights for the turn signal, check engine light, and high beam lights. It came out great.
I also received the intake piping from summit so I pieced that together and I’m still up in the air if I’m going to paint the pipes some sort of black. Also figured out where we are going to mount the ecu/fuse panel which will be on top of the gauge pod. This way I can get to it but it’s not easily seen. The OBD port will also be mounted to the driver side of the gauge pod, again out of direct sight but easy to access. Last but not least the radiator will be here before the weekend...so that’s the next big to do. Once I get it Ill wire up the fans off the ecu and plumb the steam vent, fill it with coolant and check for leaks. Where getting close. I’m going to schedule the break in/tune sometime next week as long as everything goes smoothly. Onto the pictures..


I also received the intake piping from summit so I pieced that together and I’m still up in the air if I’m going to paint the pipes some sort of black. Also figured out where we are going to mount the ecu/fuse panel which will be on top of the gauge pod. This way I can get to it but it’s not easily seen. The OBD port will also be mounted to the driver side of the gauge pod, again out of direct sight but easy to access. Last but not least the radiator will be here before the weekend...so that’s the next big to do. Once I get it Ill wire up the fans off the ecu and plumb the steam vent, fill it with coolant and check for leaks. Where getting close. I’m going to schedule the break in/tune sometime next week as long as everything goes smoothly. Onto the pictures..
05-11-2012, 09:39 AM
#194
On The Tree
Thread Starter
Join Date: May 2010
Posts: 159
Likes: 0
Received 0 Likes
on
0 Posts
05-13-2012, 09:18 PM
#196
On The Tree
Thread Starter
Join Date: May 2010
Posts: 159
Likes: 0
Received 0 Likes
on
0 Posts
Thanks man!!
Got over to the car this weekend. Trying to wrap up the some of the small stuff and get ready for the car to be fired. First off was to rewrap the old wiring for the coil packs. That was done on the driver side as Timmy took the passenger side to make a heat shield. The one coil is a little over an inch away hopefully it will be fine. Well see..I also cleaned the header mounting surface off put the gasket in and put the apr bolts in with some anti-seize , torqued them to spec. Once I get the other coil pack back I'll finish the passenger side.
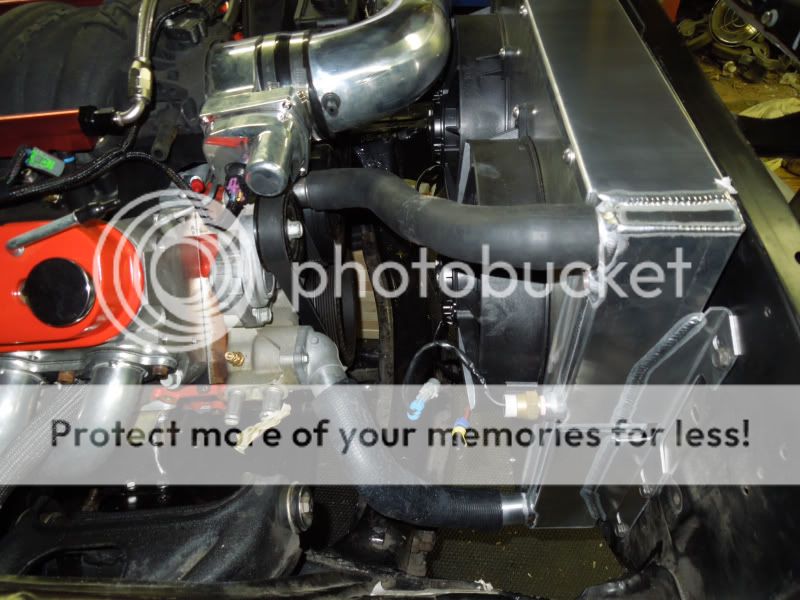
The radiator showed up on friday so I put that in also and my hoses fit but the lower is just too short. Im going to the auto store soon and see what I can come up with. other than that it should be simple. The wiring harness is really nice and simple. What a great piece compared to others that are close to double in price.
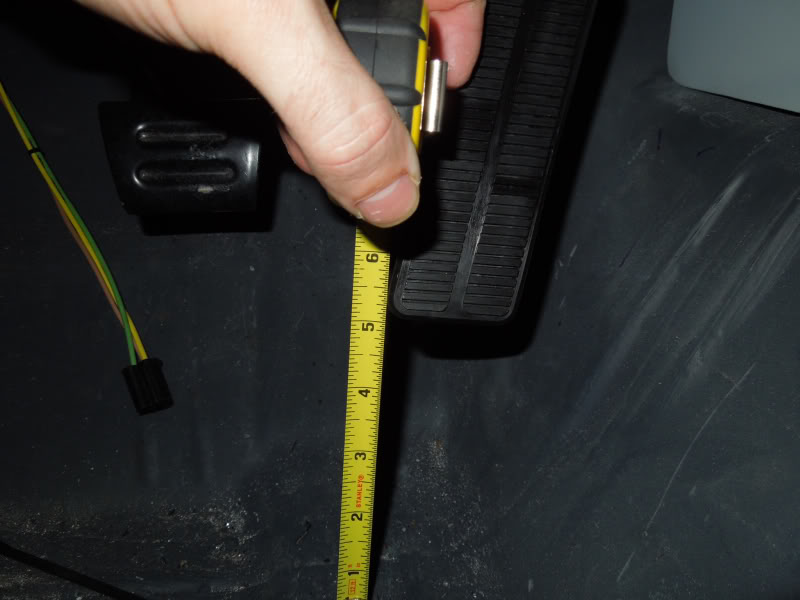
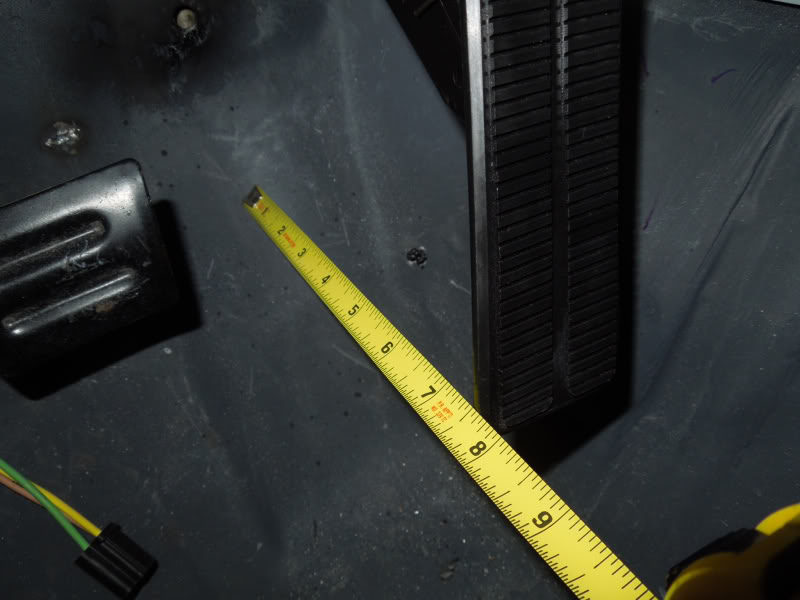
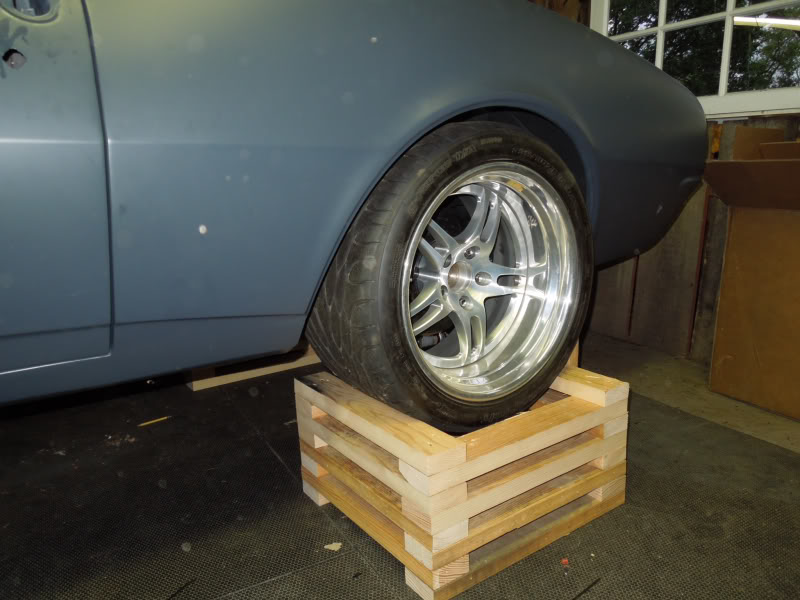
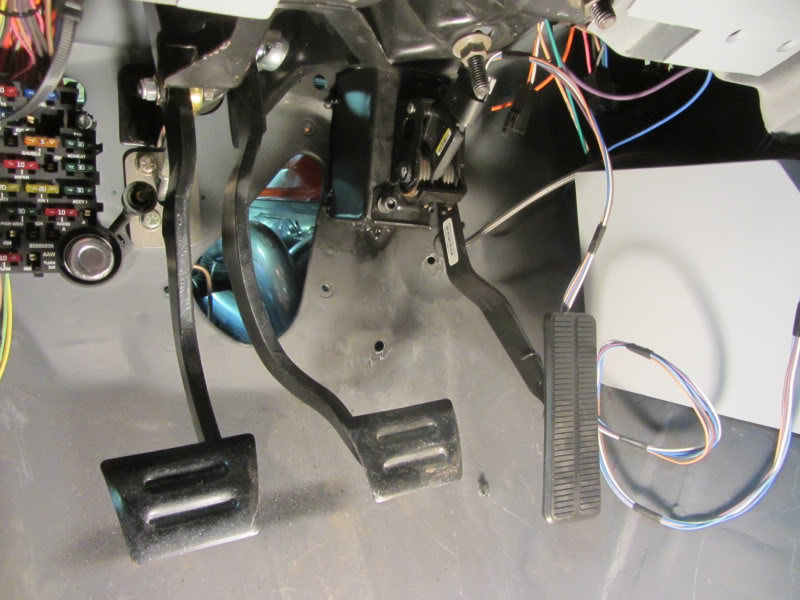
Me and my brother in law made wood blocks to get the car in the air to install and work on easier. So after we made them I put the car on them. The dimensions are 21" x 23" - 8 per block so a total of 32 each. I also got some shots of the of the pedal as people where asking how the travel is limited and exactly where it is located.


Got over to the car this weekend. Trying to wrap up the some of the small stuff and get ready for the car to be fired. First off was to rewrap the old wiring for the coil packs. That was done on the driver side as Timmy took the passenger side to make a heat shield. The one coil is a little over an inch away hopefully it will be fine. Well see..I also cleaned the header mounting surface off put the gasket in and put the apr bolts in with some anti-seize , torqued them to spec. Once I get the other coil pack back I'll finish the passenger side.
The radiator showed up on friday so I put that in also and my hoses fit but the lower is just too short. Im going to the auto store soon and see what I can come up with. other than that it should be simple. The wiring harness is really nice and simple. What a great piece compared to others that are close to double in price.
Me and my brother in law made wood blocks to get the car in the air to install and work on easier. So after we made them I put the car on them. The dimensions are 21" x 23" - 8 per block so a total of 32 each. I also got some shots of the of the pedal as people where asking how the travel is limited and exactly where it is located.
05-23-2012, 09:37 PM
#197
On The Tree
Thread Starter
Join Date: May 2010
Posts: 159
Likes: 0
Received 0 Likes
on
0 Posts
Ok so may photobucet is down..hate that sometimes anyway.. Been really pushing on the car could have done it with out the help from family, friends, John over at psi and Carl at vaporworx..both great companies to work with. For the first start the car would run 2-3 seconds and stall. We then scanned for codes and where getting cam and crank. After talking to John we realized the cam signal was wrong and fixed it, again thank you John. The car then fired but was running rough...realizing there is two large vacuums at the back of the manifold that need to be plugged. Once those where closed with my buddies finger here's what we have...
http://s1163.photobucket.com/albums/...t=2475b1dd.mp4
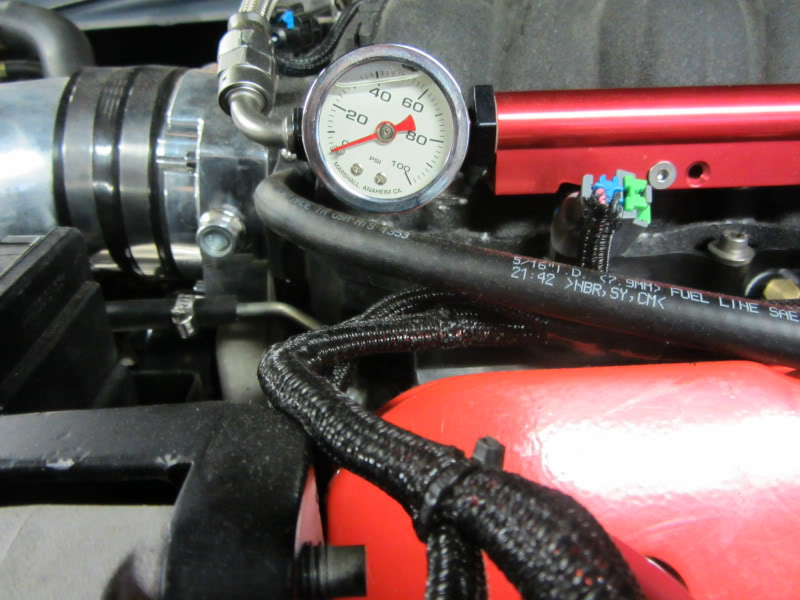
Now the crank code is still coming up which im told I need to get a tech II and do a relearn. Going to address that get some plugs for the intake and I also ordered a fuel pressure gauge to dial in the fuel pressure to make sure she's getting enough fuel.. Hopefully they should get her running well.
Other than all that I need to get the car ready for the engine break-in and tune..which means it has to be drivable. The brake lines are roughly ran but need to be finalized and all the end need to be cut and reflarred to fit the wilwood distribution valve, then bleed. Need to fill both rear and transmission with fluid, put the drive shaft in, bleed the clutch, put the steering box in and steering column back in, and button up all loose end/bolts.
Much more to come..
http://s1163.photobucket.com/albums/...t=2475b1dd.mp4
Now the crank code is still coming up which im told I need to get a tech II and do a relearn. Going to address that get some plugs for the intake and I also ordered a fuel pressure gauge to dial in the fuel pressure to make sure she's getting enough fuel.. Hopefully they should get her running well.
Other than all that I need to get the car ready for the engine break-in and tune..which means it has to be drivable. The brake lines are roughly ran but need to be finalized and all the end need to be cut and reflarred to fit the wilwood distribution valve, then bleed. Need to fill both rear and transmission with fluid, put the drive shaft in, bleed the clutch, put the steering box in and steering column back in, and button up all loose end/bolts.
Much more to come..
Last edited by boostin05blacksti; 05-23-2012 at 09:44 PM.
06-05-2012, 09:23 AM
#198
On The Tree
Thread Starter
Join Date: May 2010
Posts: 159
Likes: 0
Received 0 Likes
on
0 Posts
So I’m still here plugging away to get the car on the road.. Got the intake plugged up, installed the fuel pressure gauge and dialed that in. The engine was running a bit longer now but still stalling out. After talking to the tuner and john at psi it was recommended to unplug the maf and have the ecu go into limp mode. After doing that she finally runs and stays running. The tune is too far off at the moment and once tuned it should correct all the problems. I have a tune date set up for this coming Saturday to drop the car off. Ill probably have to push that back some as there is still a lot to be done as seen below:
Mount ecu/relay panel
Wire turn signal lights inside the car
Fill transmission with fluid
Fill rear with fluid
Tighten all rear bolts/hardware
Temporarily mount driver coil packs
Re-bleed brakes
Bleed clutch
Install steering box & column
Tighty up wires for ecu/under dash
Install passenger seat
Install front and rear glass
Install coolant overflow
Install driveshaft
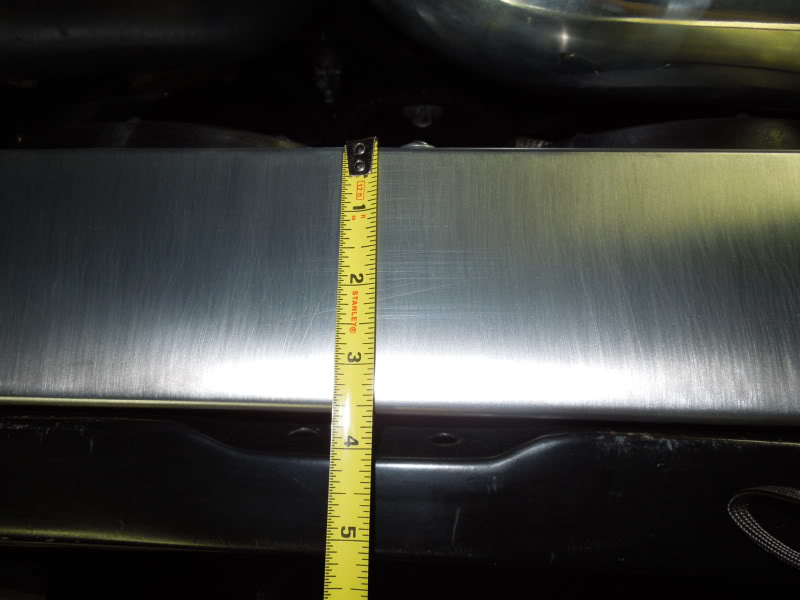
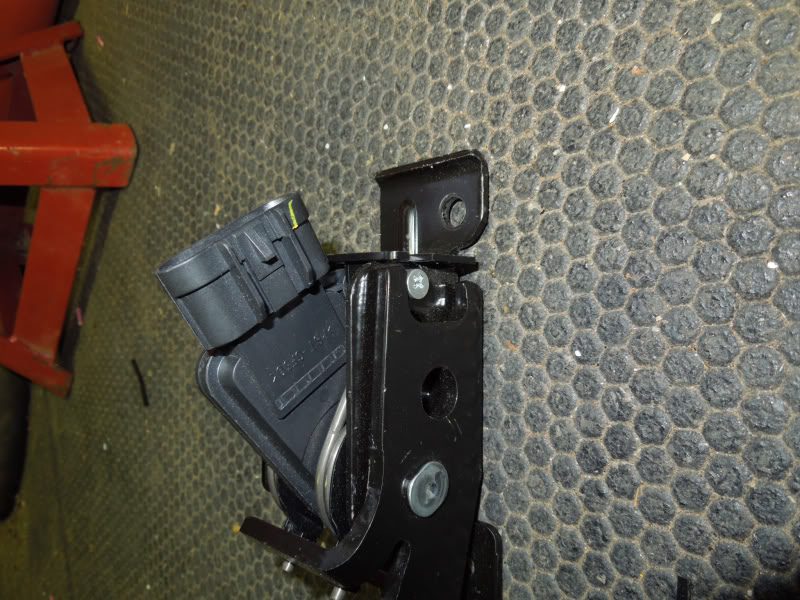
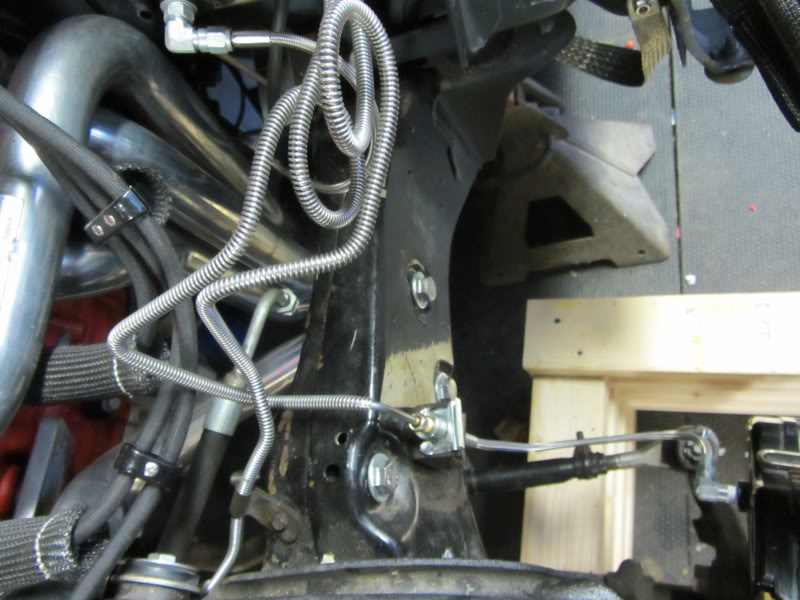
This past week I hooked up the master to the pedal with a heavy duty ball joint link from mcmaster-carr part number - 60745K841. It was not fun getting it in and hopefully I have enough pedal to not have to mess with it again. Later in the week my buddy John helped me start on running the brake lines and getting everything together. Then on Saturday afternoon me and the old man finished up the brake system and bleed the whole system. Not too bad overall there were a couple small leaks that needed to be addressed but a couple quick tightens and everything is fine. I had to make the two small lines from the master to the distribution block and the first main line going to the rear out of the brake line kit I got from frank at prodigy. The rest of my kit is from inline tube the 8 piece kit for stock in stainless. The rear line is 1/2 from the factory but the wilwood distribution block only accepts 3/16 line. I went to the local napa and they had a 3/16 to 1/2 line that made the transition as seen in the pictures on the drivers’ rocker. The only other modification was because my rear has been narrowed I had to cut the drivers rear axle line about 6" and re-flare the stainless. Here are some pictures.


Mount ecu/relay panel
Wire turn signal lights inside the car
Fill transmission with fluid
Fill rear with fluid
Tighten all rear bolts/hardware
Temporarily mount driver coil packs
Re-bleed brakes
Bleed clutch
Install steering box & column
Tighty up wires for ecu/under dash
Install passenger seat
Install front and rear glass
Install coolant overflow
Install driveshaft
This past week I hooked up the master to the pedal with a heavy duty ball joint link from mcmaster-carr part number - 60745K841. It was not fun getting it in and hopefully I have enough pedal to not have to mess with it again. Later in the week my buddy John helped me start on running the brake lines and getting everything together. Then on Saturday afternoon me and the old man finished up the brake system and bleed the whole system. Not too bad overall there were a couple small leaks that needed to be addressed but a couple quick tightens and everything is fine. I had to make the two small lines from the master to the distribution block and the first main line going to the rear out of the brake line kit I got from frank at prodigy. The rest of my kit is from inline tube the 8 piece kit for stock in stainless. The rear line is 1/2 from the factory but the wilwood distribution block only accepts 3/16 line. I went to the local napa and they had a 3/16 to 1/2 line that made the transition as seen in the pictures on the drivers’ rocker. The only other modification was because my rear has been narrowed I had to cut the drivers rear axle line about 6" and re-flare the stainless. Here are some pictures.
06-14-2012, 09:50 AM
#199
On The Tree
Thread Starter
Join Date: May 2010
Posts: 159
Likes: 0
Received 0 Likes
on
0 Posts
In the past week we have mounted the drivers coil pack in the drivers fender out of the way from heat being that I felt it was too close to the header. I also ordered and recieved a full magnaflow exhaust (15899) for the car. After some tweeking and a little welding it is on..full 3" dumping right before the rear..I have to get some pictures..In other news I bought a used anvil spoiler from a member on here..Thanks Brian. So I had Timmy mount that last night..Let me tell you that having your brand new carbon trunk lid drilled into is not a pleasant thing..but shes all done now..
So im hoping the car can go to be broke in/tuned this saturday and then I can wrap up the small things to get the car on the road for a shake down this summer. Between me, my brother, cousin, friends and the old man a lot of man hours have been put in recently to get her ready. There is still a lot to be done but the car is far enough alone at the moment to be tuned. Or so I hope...
Heres my done list as of right now...
Mount ecu/relay panel - done
Fill transmission with fluid - done
Fill rear with fluid - done
Tighten all rear bolts/hardware - done
Mount driver coil packs - done
Bleed clutch - done
Tighty up wires for ecu/under dash - done
Install coolant overflow - done
Install driveshaft - done
Still needs to be done...
Install E-Brake
Recheck the driveline angle, adjust
Put clamps on the filler neck
Re-bleed brakes
Install steering box & column - box is done...still have to do the column
Hook up return for power steering line
Wire turn/Healight signal lights inside the car
Install VSS pigtail
Install passenger seat
Install front, rear, windows
Figure out why tach is not working
Figure out why volt is not working
Do final run for water temp wire
06-18-2012, 09:00 AM
#200
On The Tree
Thread Starter
Join Date: May 2010
Posts: 159
Likes: 0
Received 0 Likes
on
0 Posts
So the car was set up to go to the tuner on Saturday. After a long Friday night it was as ready as it could be. They will be breaking the motor in and then tuning it all on the dyno. So my dad and brother got over on Saturday and we loaded the car up. Well the car is so low that the headers/exhaust where giving us problems. Once I get it back I will be addressing all these problems. I’m thinking that either way the headers are coming off and I'm going to have them pulled closer to the floor for more clearance. I will probably have to raise the front of the car a bit also and do some rolling/pulling to the front fenders to not have any issues in the future. Other than that the front chin spoiler was making me nervous so we pulled that off before loading it. We get to the shop and start to unload it but half way down the ramp the car stops. Final we drag it off jack the rear of the car up and try to spin the wheel. Won't move at all. So I crack the bleeder screw and then they turn. The head shop guy named Dale thinks either there was too much fluid and it wasn’t breathing?? Anyone have any suggestions or herd of this..? Makes no sense to me...they are going to dig in and hopefully fix it without costing me too much. More progress as I hear it..Here are some pictures from the weekend.


Also here is the video from last week that my brother took with the exhaust on dumped before the rear axle.
Also here is the video from last week that my brother took with the exhaust on dumped before the rear axle.