
1973 RS Camaro LSX Swap
 02-05-2011, 09:43 AM
#281

Looking good. The glasstek hoods are very high quality. I had a 4" on my s10 and it took very little prep work for paint. I installed my dzus on it, scuffed it, primed it once, blocked it and it was ready for paint. I think the inner fender you have is from a later model like 78-81 ish. They have a shorter mounting bracket with the holes further down. My 72 is the same as your 73. The progress is looking great. My car is back on the road after a 2 year upgrade with the brakes and some one small stuff. I am thinking about doing a similar cage on mine I like the door bars and overall look of yours.
 02-06-2011, 10:01 PM
#282
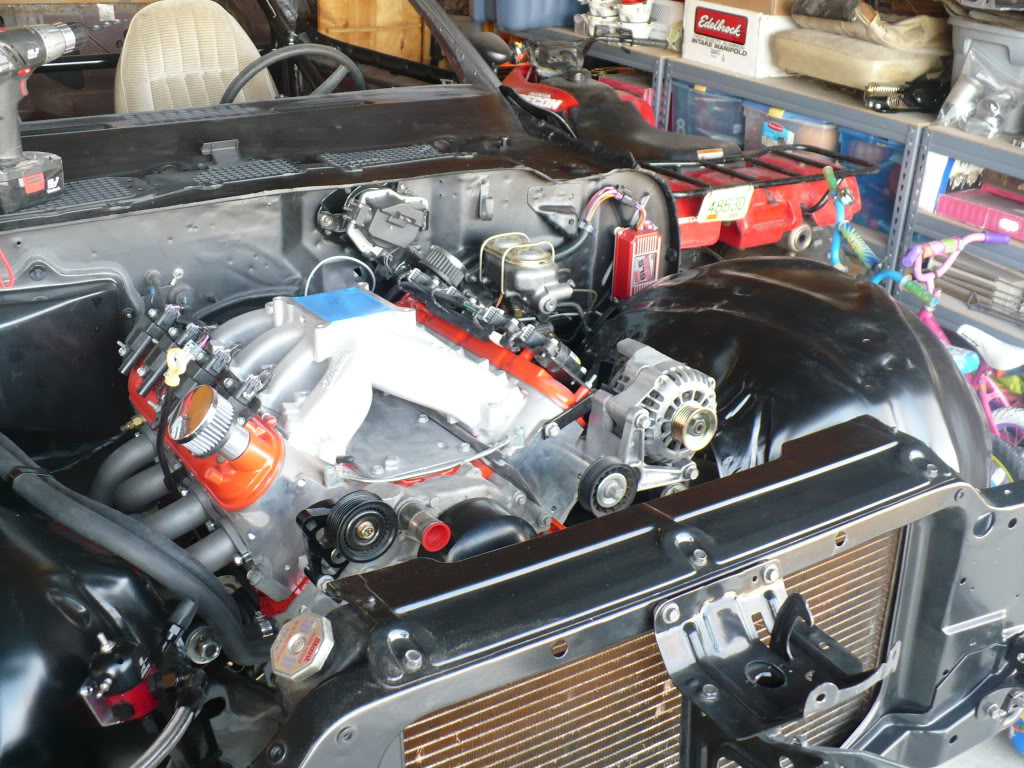
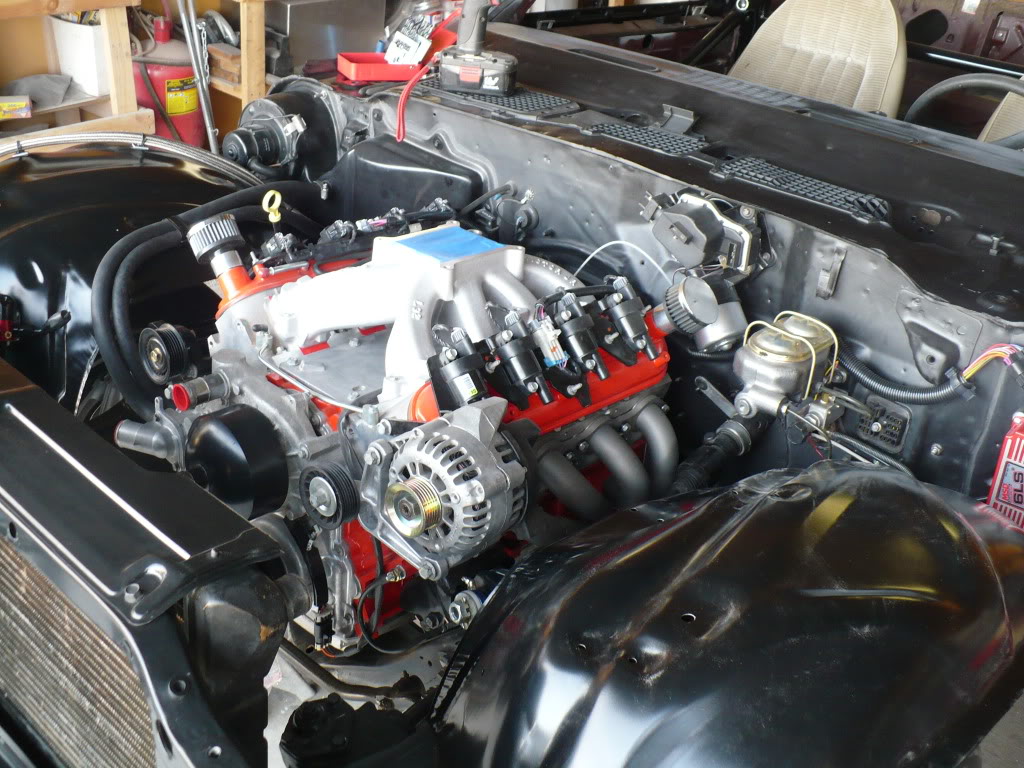
I got a few more things done today before the game. First I installed my inner fenders and got the fuel pressure regulator mounted. Then I was able to secure the fuel lines and heater hoses to the passenger side. Here’s a few shots.
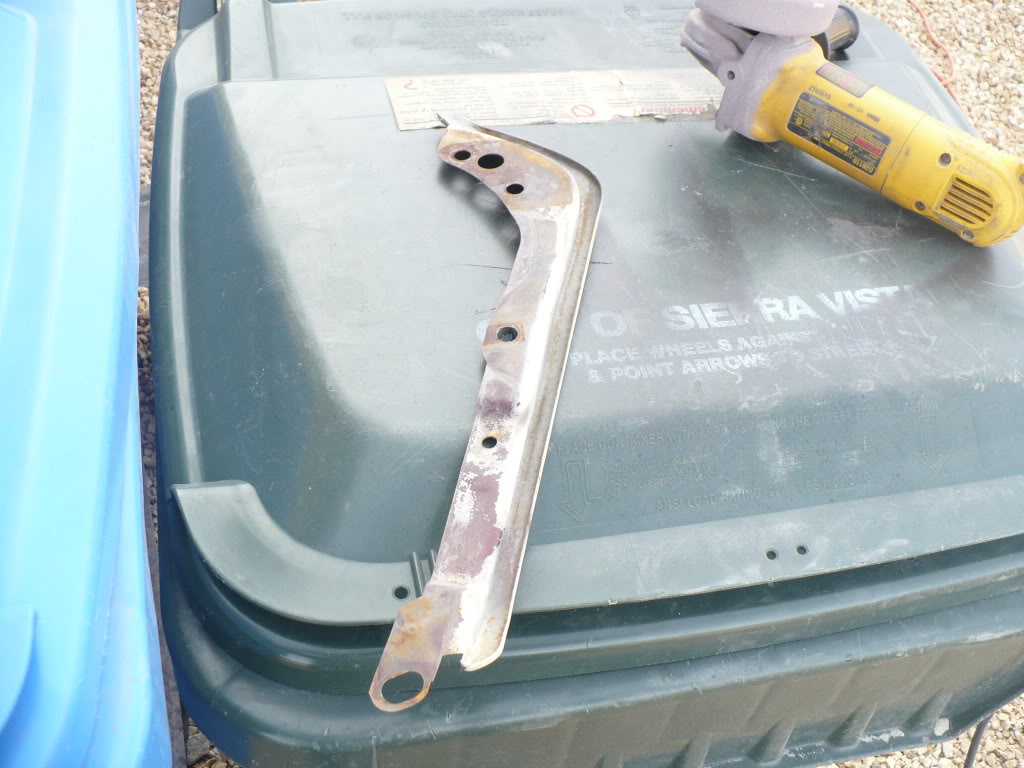
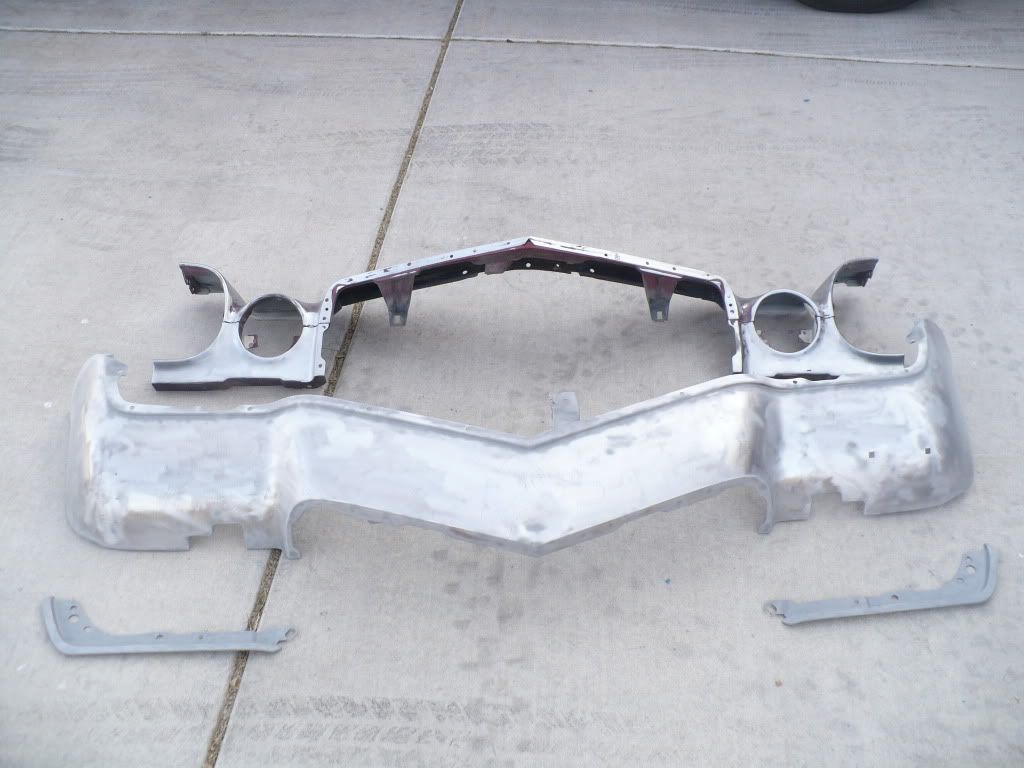
Next I started working on stripping some front end sheet metal. The paint shop I’m thinking of using told me not to worry about doing any more stripping on the car; they would handle the rest of it. But what I’m concerned about is the back sides of the panels where the factory paint is thin at best and the panel edges where they seam together with one another. These seem like really good places for rust to start (or should I say continue), so I’m taking care of these areas myself. The plan is to get it all stripped and then use POR-15 on the back sides of the panels. Here are some spots on the insides of the upper and lower valance where I have some surface rust issues as well as on the pieces that sandwich between that support the outer bumper brackets.
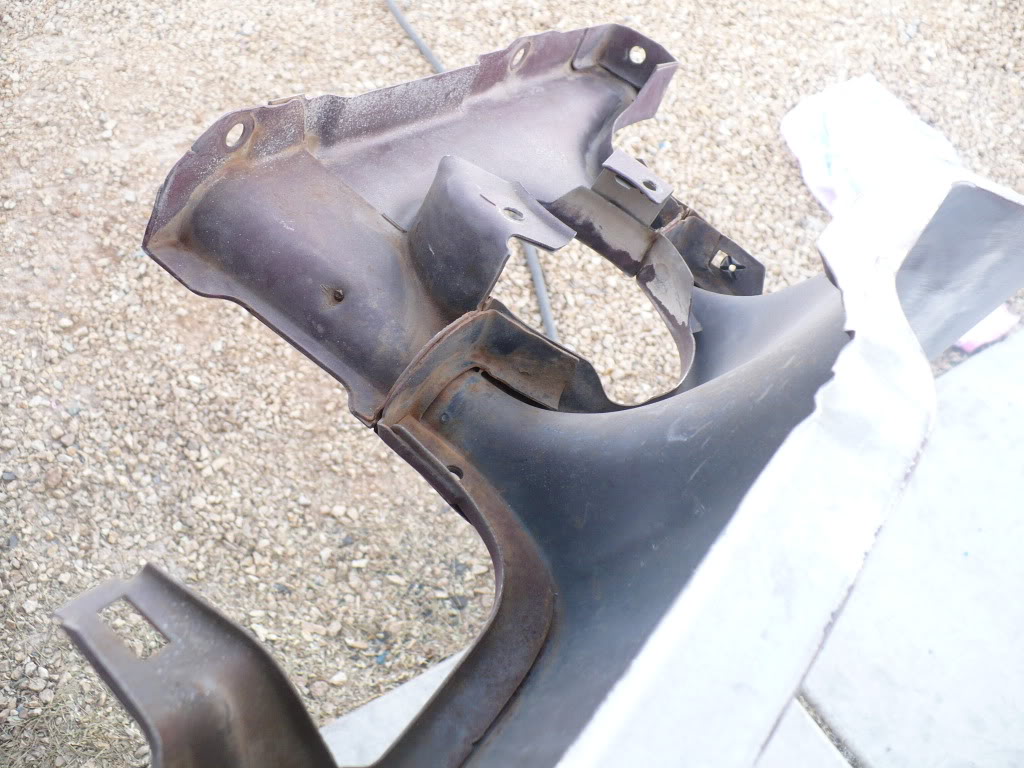
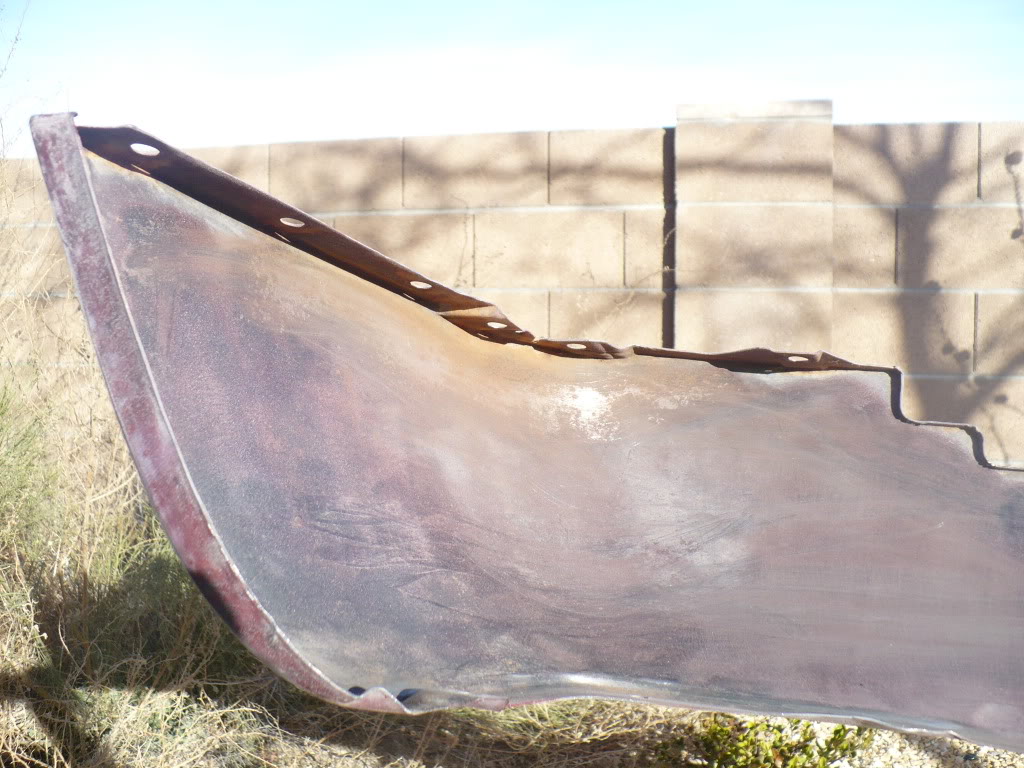


A wire wheel takes off the top layer of paint on the exterior of the panels but only heats and smears the original lacquer beneath it. I always end up using a stripping disc on my angle grinder to remove the lacquer and sand blast the really hard to get areas. This has been the routine for the whole car so far. Here's what the upper looked like after only wire wheeling.
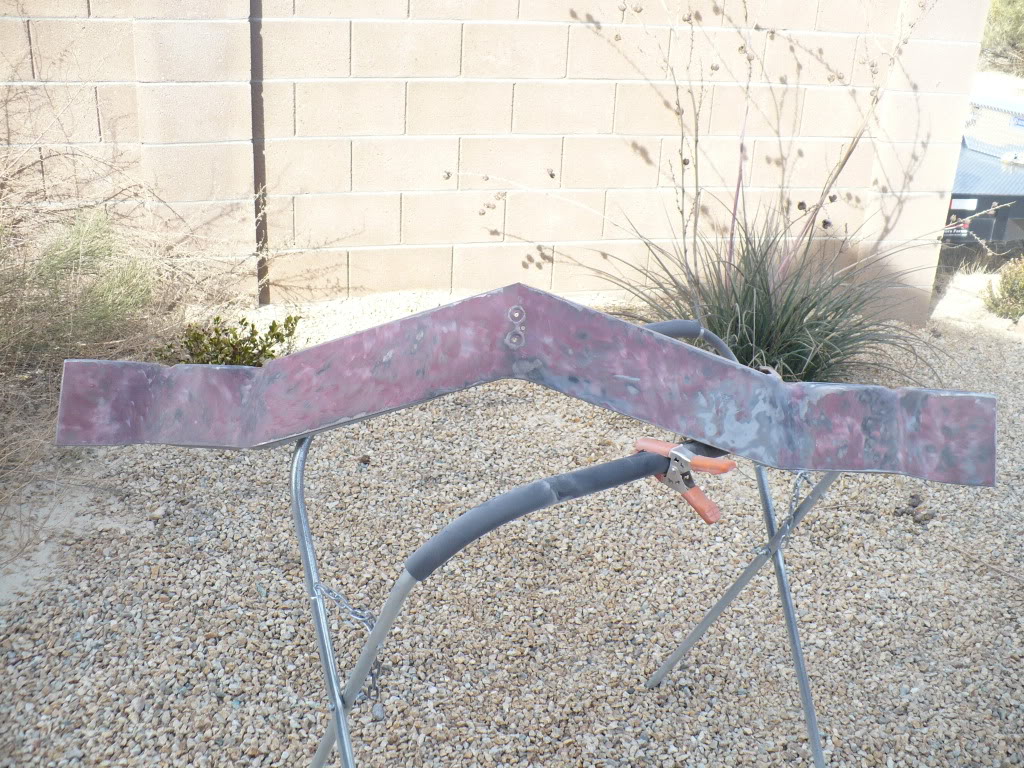
By about 3pm I was out of sand, stripping discs, and time. In the end I got the lower valance and both bumper pieces fully stripped but still have a lot of work to do on the back side of the upper valance. Oh well, progress is progress no matter how slow.
Next I started working on stripping some front end sheet metal. The paint shop I’m thinking of using told me not to worry about doing any more stripping on the car; they would handle the rest of it. But what I’m concerned about is the back sides of the panels where the factory paint is thin at best and the panel edges where they seam together with one another. These seem like really good places for rust to start (or should I say continue), so I’m taking care of these areas myself. The plan is to get it all stripped and then use POR-15 on the back sides of the panels. Here are some spots on the insides of the upper and lower valance where I have some surface rust issues as well as on the pieces that sandwich between that support the outer bumper brackets.
A wire wheel takes off the top layer of paint on the exterior of the panels but only heats and smears the original lacquer beneath it. I always end up using a stripping disc on my angle grinder to remove the lacquer and sand blast the really hard to get areas. This has been the routine for the whole car so far. Here's what the upper looked like after only wire wheeling.
By about 3pm I was out of sand, stripping discs, and time. In the end I got the lower valance and both bumper pieces fully stripped but still have a lot of work to do on the back side of the upper valance. Oh well, progress is progress no matter how slow.
02-07-2011, 02:58 PM
#284

Gary,
Looks good. I was hoping to have a Diversion tig to everdure/braze the back side of all my fender/valances braces. I also wanted to braze the exterior seam near the directional lights too Might be worth taking it to a weld shop to ensue you NEVER have rust creeping in the seams. Just a thought.
Jim
Looks good. I was hoping to have a Diversion tig to everdure/braze the back side of all my fender/valances braces. I also wanted to braze the exterior seam near the directional lights too Might be worth taking it to a weld shop to ensue you NEVER have rust creeping in the seams. Just a thought.
Jim
02-08-2011, 05:18 PM
#285
Thanks man.
Thanks Jim. That's a good thought. I may have to consider doing something like that. All I know is my most recent goal was to drop the car off at a paint shop by President's day weekend and I know now that aint happening. There's just too much left to do before I'm at that stage.
Gary,
Looks good. I was hoping to have a Diversion tig to everdure/braze the back side of all my fender/valances braces. I also wanted to braze the exterior seam near the directional lights too Might be worth taking it to a weld shop to ensue you NEVER have rust creeping in the seams. Just a thought.
Jim
Looks good. I was hoping to have a Diversion tig to everdure/braze the back side of all my fender/valances braces. I also wanted to braze the exterior seam near the directional lights too Might be worth taking it to a weld shop to ensue you NEVER have rust creeping in the seams. Just a thought.
Jim


 02-10-2011, 11:08 AM
#291
On The Tree
iTrader: (14)
Join Date: Sep 2004
Location: Houston, TX
Posts: 138
Likes: 0
Received 0 Likes
on
0 Posts

Very nice build. The satisfaction of the done project could never be equaled by that of having the work done by someone else. It can take a lot of will power to not cut corners just to get it on the road. You will be very glad you spent all the time on the details now when you are out enjoying it at the track. Won't be long now!
02-10-2011, 12:47 PM
#292
Very nice build. The satisfaction of the done project could never be equaled by that of having the work done by someone else. It can take a lot of will power to not cut corners just to get it on the road. You will be very glad you spent all the time on the details now when you are out enjoying it at the track. Won't be long now!
02-14-2011, 10:40 AM
#293
On The Tree
Join Date: Feb 2011
Location: Katy, Texas
Posts: 116
Likes: 0
Received 0 Likes
on
0 Posts
Hey man great build. I read through almost every page last night and I don't think anyone responded about your wiring and how to wire the alternator.
I have been wiring race cars and classics for over 15 years. The best way to wire a car with the batter in the trunk is to run a #8 or #6 wire from the alternator directly to the battery using marine type battery terminals with the wing nut on the top. You can also go to the battery side of the master disconnect switch along with the main battery cable. When you shut the master disconnect off it will instantly kill the car and all the electrical components. (I go to the battery with the wing nuts as its easier to disconnect the alternator for any kind of servicing or testing).
As for battery cable bigger is always better and like to use #2 through 2awg. If you have an 18 wheeler supply/parts store in your area you can usually find that size cable on a reel in red for positive and black for negative. Along with red and black heat shrink for the large cable that has the guugh in it that makes it corrosion proof. They will also have all the different cable ends you will need. If you don't have a way to crimp the ends on you can use a propane torch and some large solder and heat the connector up till its glowing in a vice and fill it half full of solder and then insert the stripped cable (careful not to burn yourself).
As far as your factory wiring. If it is in good shape and has not been butchered by radio installers then use it. Remember this amperage demand is what determines the size of the wire. Even if your alternator puts out more amps it does not change the amperage demand of the factory headlights or turn signals. You can in theory run the factory wiring for a 16 volt system if the amperage demands haven't changed on the factory items.
That being said use relays on all your electrical high performance items like electric fans, fuel pumps, Nos system, water pump, whatever your using that was not factory installed. If you change to the new style headlights with sealed beam bulbs then use relays on them also.
Think of relays as a way to pass the more amperage to a device via larger wire with minimal amp draw on the switch itself.
The nicest way to wire all the "performance items" on a race car is with spaghetti menders switch panel and relay system. You won't need more than the 5 bay switch system if you use the factory fuse panel for the body items like the headlights and turn signals. Here is a link for them. If these guys are not sponsors they need to be and someone should reach out to them.
http://www.spaghettimenders.com/RCS.html
If you have anymore questions feel free to ask. I will try to find some pics of my work and post them on here and give you some ideas.
02-15-2011, 12:15 PM
#294
Hey man great build. I read through almost every page last night and I don't think anyone responded about your wiring and how to wire the alternator.
I have been wiring race cars and classics for over 15 years. The best way to wire a car with the batter in the trunk is to run a #8 or #6 wire from the alternator directly to the battery using marine type battery terminals with the wing nut on the top. You can also go to the battery side of the master disconnect switch along with the main battery cable. When you shut the master disconnect off it will instantly kill the car and all the electrical components. (I go to the battery with the wing nuts as its easier to disconnect the alternator for any kind of servicing or testing).
As for battery cable bigger is always better and like to use #2 through 2awg. If you have an 18 wheeler supply/parts store in your area you can usually find that size cable on a reel in red for positive and black for negative. Along with red and black heat shrink for the large cable that has the guugh in it that makes it corrosion proof. They will also have all the different cable ends you will need. If you don't have a way to crimp the ends on you can use a propane torch and some large solder and heat the connector up till its glowing in a vice and fill it half full of solder and then insert the stripped cable (careful not to burn yourself).
As far as your factory wiring. If it is in good shape and has not been butchered by radio installers then use it. Remember this amperage demand is what determines the size of the wire. Even if your alternator puts out more amps it does not change the amperage demand of the factory headlights or turn signals. You can in theory run the factory wiring for a 16 volt system if the amperage demands haven't changed on the factory items.
That being said use relays on all your electrical high performance items like electric fans, fuel pumps, Nos system, water pump, whatever your using that was not factory installed. If you change to the new style headlights with sealed beam bulbs then use relays on them also.
Think of relays as a way to pass the more amperage to a device via larger wire with minimal amp draw on the switch itself.
The nicest way to wire all the "performance items" on a race car is with spaghetti menders switch panel and relay system. You won't need more than the 5 bay switch system if you use the factory fuse panel for the body items like the headlights and turn signals. Here is a link for them. If these guys are not sponsors they need to be and someone should reach out to them.
http://www.spaghettimenders.com/RCS.html
If you have anymore questions feel free to ask. I will try to find some pics of my work and post them on here and give you some ideas.
I have been wiring race cars and classics for over 15 years. The best way to wire a car with the batter in the trunk is to run a #8 or #6 wire from the alternator directly to the battery using marine type battery terminals with the wing nut on the top. You can also go to the battery side of the master disconnect switch along with the main battery cable. When you shut the master disconnect off it will instantly kill the car and all the electrical components. (I go to the battery with the wing nuts as its easier to disconnect the alternator for any kind of servicing or testing).
As for battery cable bigger is always better and like to use #2 through 2awg. If you have an 18 wheeler supply/parts store in your area you can usually find that size cable on a reel in red for positive and black for negative. Along with red and black heat shrink for the large cable that has the guugh in it that makes it corrosion proof. They will also have all the different cable ends you will need. If you don't have a way to crimp the ends on you can use a propane torch and some large solder and heat the connector up till its glowing in a vice and fill it half full of solder and then insert the stripped cable (careful not to burn yourself).
As far as your factory wiring. If it is in good shape and has not been butchered by radio installers then use it. Remember this amperage demand is what determines the size of the wire. Even if your alternator puts out more amps it does not change the amperage demand of the factory headlights or turn signals. You can in theory run the factory wiring for a 16 volt system if the amperage demands haven't changed on the factory items.
That being said use relays on all your electrical high performance items like electric fans, fuel pumps, Nos system, water pump, whatever your using that was not factory installed. If you change to the new style headlights with sealed beam bulbs then use relays on them also.
Think of relays as a way to pass the more amperage to a device via larger wire with minimal amp draw on the switch itself.
The nicest way to wire all the "performance items" on a race car is with spaghetti menders switch panel and relay system. You won't need more than the 5 bay switch system if you use the factory fuse panel for the body items like the headlights and turn signals. Here is a link for them. If these guys are not sponsors they need to be and someone should reach out to them.
http://www.spaghettimenders.com/RCS.html
If you have anymore questions feel free to ask. I will try to find some pics of my work and post them on here and give you some ideas.
So in other project news my chassis guy, Clay, called me Sunday morning and say that he had made a mistake on my roll bar. Apparently this was the first 6-point he had done. He typically does at least full 8.5 cert cages, and usually up to 25.5 cars, I think. Anyway, he mistakenly thought that a 6-point could use 1 5/8 tube so long as it was chromoly, so that is what my bar was built out of. I feel pretty stupid about this too because I KNEW it had to be 1 3/4, but short of actually measuring the tube myself, I just took it for granted that he used the correct tube size. I know guys that work around this stuff every day would have picked right up on it, but not me I guess. The only thing that caught my eye was that the cross bar behind the seats was the same diameter as the rest of the bars, so I kinda wondered why he didn't use the 1 5/8 tube there. But I didn't comment on it like I should have because I was just so happy with how everything else looked. I guess maybe I just didn't want to find anything wrong at that point?
Anyway, he called me immediately upon realizing his mistake and is determined to make things right with me. He is three hours away from me, so he even wants to pay for my gasoline to trailer the car back to him. From there, he has offered these two solutions:
1. He cuts everything back out of the car and builds a new 6-point out of the proper 1 3/4 tube.
OR
2. He adds a halo and front bars to what I already have to make it a full cage so that the entire thing being built out of 1 5/8 tube will be pefectly legal.
I think I'm going to go with the full cage option, so I'm taking the car back up to him this Friday to drop it off again. Once again, I just want to repeat that this is in no way meant to bash Clay or his work. On the contrary, I think it shows that he's a stand up guy! I am only posting this because I have a build thread going on here and on another site and it would otherwise be kinda hard to explain how my six-point roll bar became an a full cage overnight.....LOL. More to follow. Hopefully sometime within the next month or so I'll be posting an open header start up vid!
02-16-2011, 02:06 AM
#295
On The Tree
Join Date: Feb 2011
Location: Katy, Texas
Posts: 116
Likes: 0
Received 0 Likes
on
0 Posts
Your welcome I'm glad my advice was useful. I agree it sounds like that guy is stand up and I would go with more cage as long as he keeps it tight like the rest of the cage and takes the front down bars through the dash and not around it and the dash bar behind the dash then you will have plenty of room inside the cockpit. If the guy is really good he can make the window net mounts at the same time that make it easy to remove the entire net for street driving. I would go ahead and get it certified cause it won't take long to get this car in the 9's with a nice speedtech plate kit. If you haven't bought a carb yet Pro Systems new SV 1 is the most street able carb I have ever used and Patrick is a great guy.
02-19-2011, 07:52 PM
#296
My progress has been ALL OVER the place since last weekend, which I suppose is OK as long as it’s all forward progress. But since it’s all been so random, I figured I had better update this before I forget what all has happened. So this stuff probably won’t be necessarily in the order I did it. Instead, I’ll try and list stuff by category.
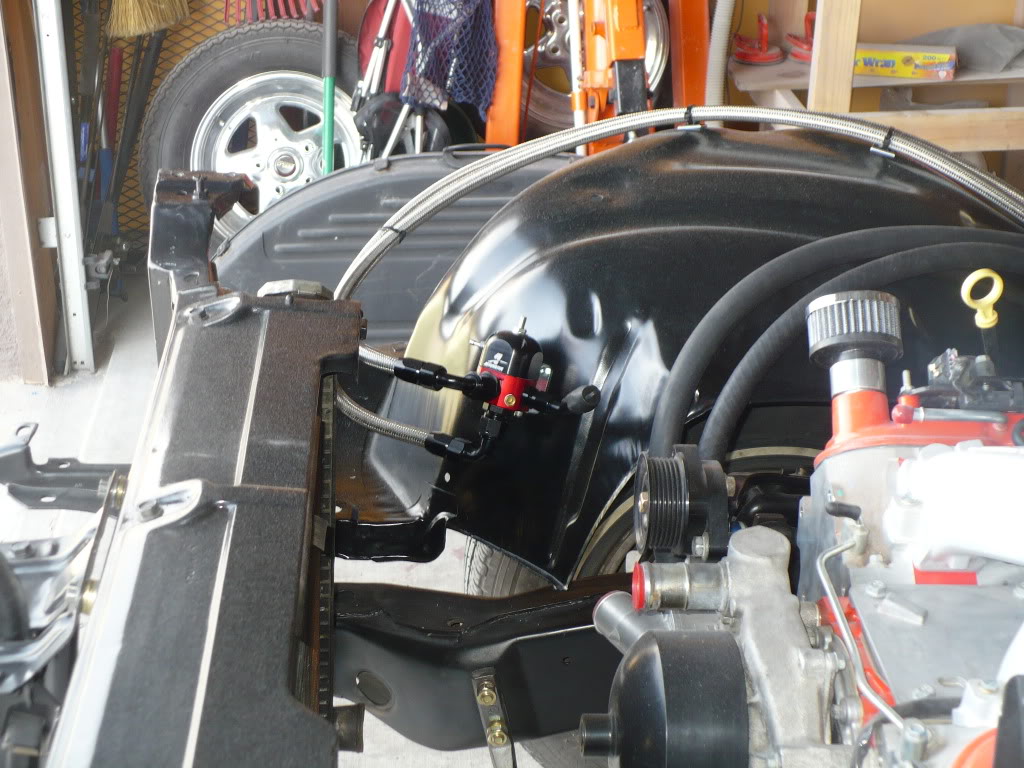
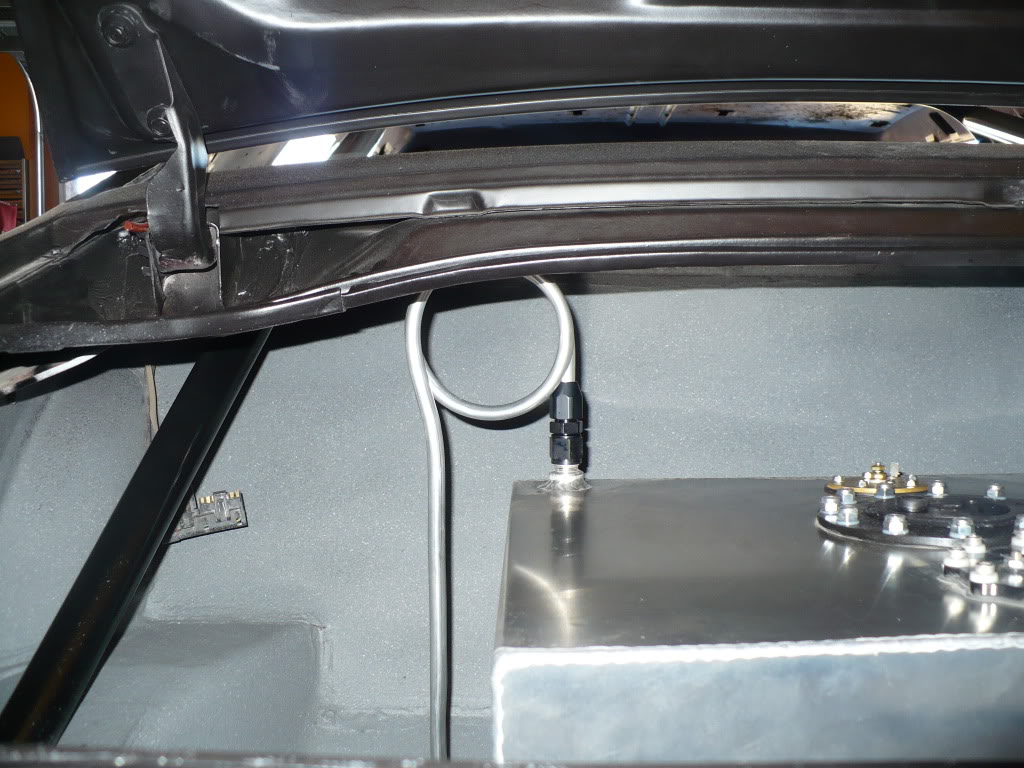
Air and Fuel System: Since I decided to get the motor running before I reassemble the front end and take the car for paint, I reinstalled the fuel cell last weekend. This wasn’t a big job since I had already test fit it, but the last time I didn’t install the vent tube. So this time I just needed to drill the hole for it, install a grommet, and put the vent tube in.

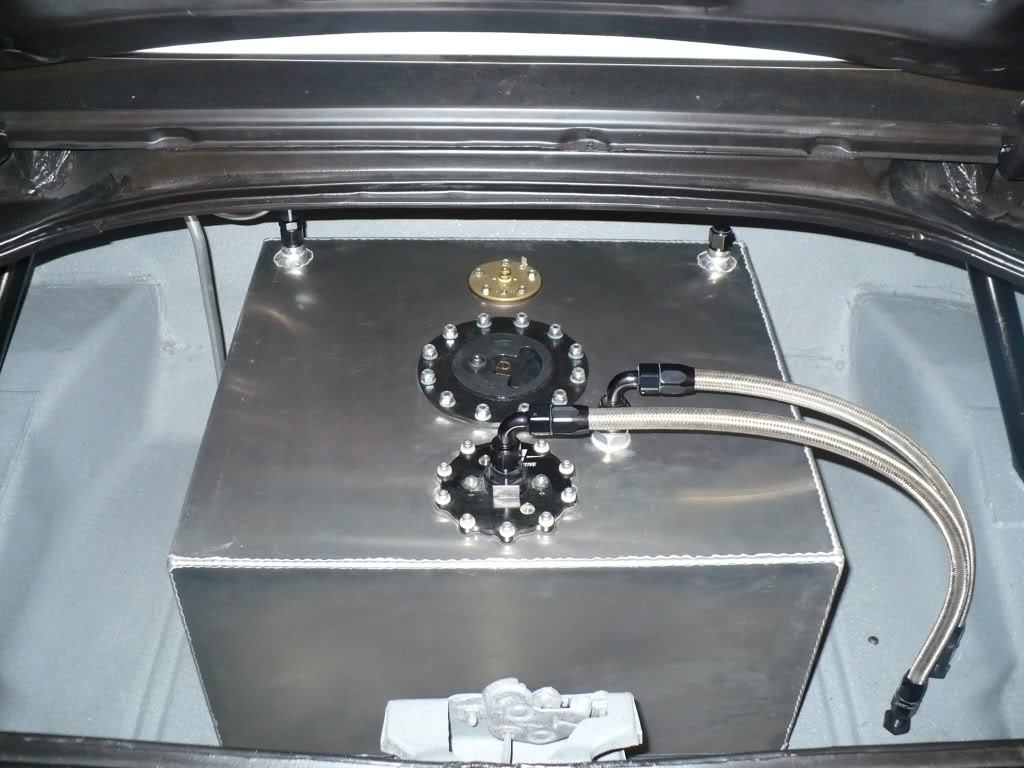
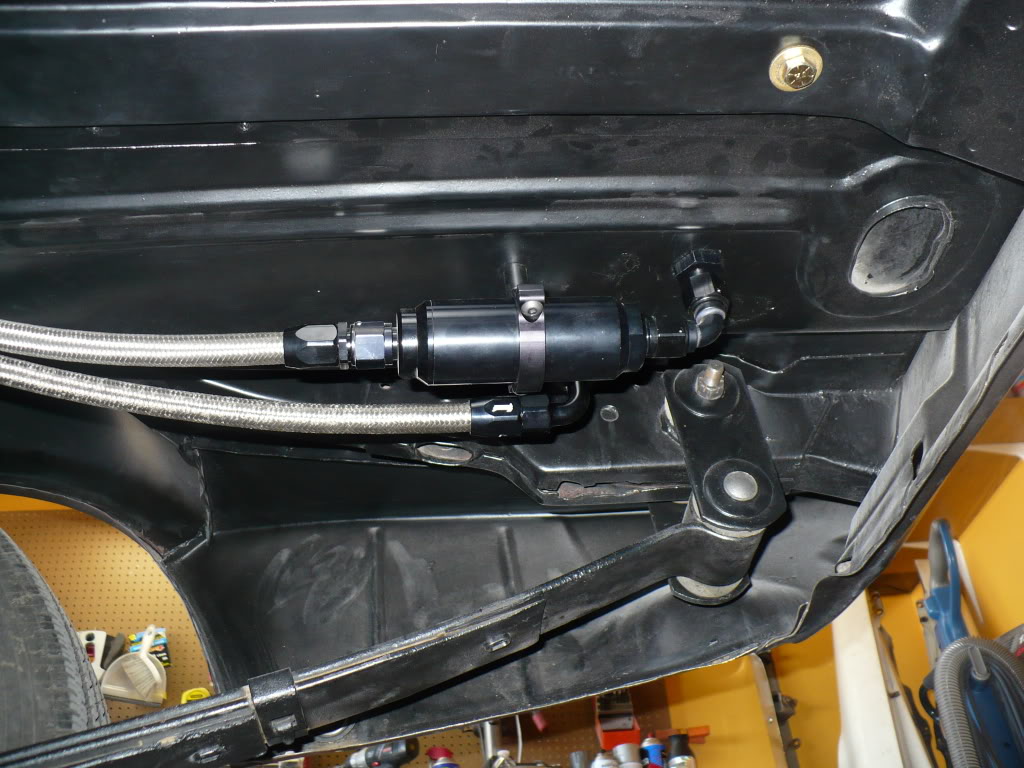
I also wanted to add a brace of some sort to my fuel filter. It’s a Summit billet filter that is 1 ľ diameter. Try as I may, I just couldn’t find a true fuel filter bracket for this thing in the proper diameter. So instead, I bought an 1 ľ roll bar accessory bracket. Since it’s intended for mounting an accessory on a tube with a Ľ inch bolt, I built a simple spacer and ran a Ľ inch bolt down through the trunk pan and into the bracket. It worked out pretty well. Just don’t mind all the dust down there……
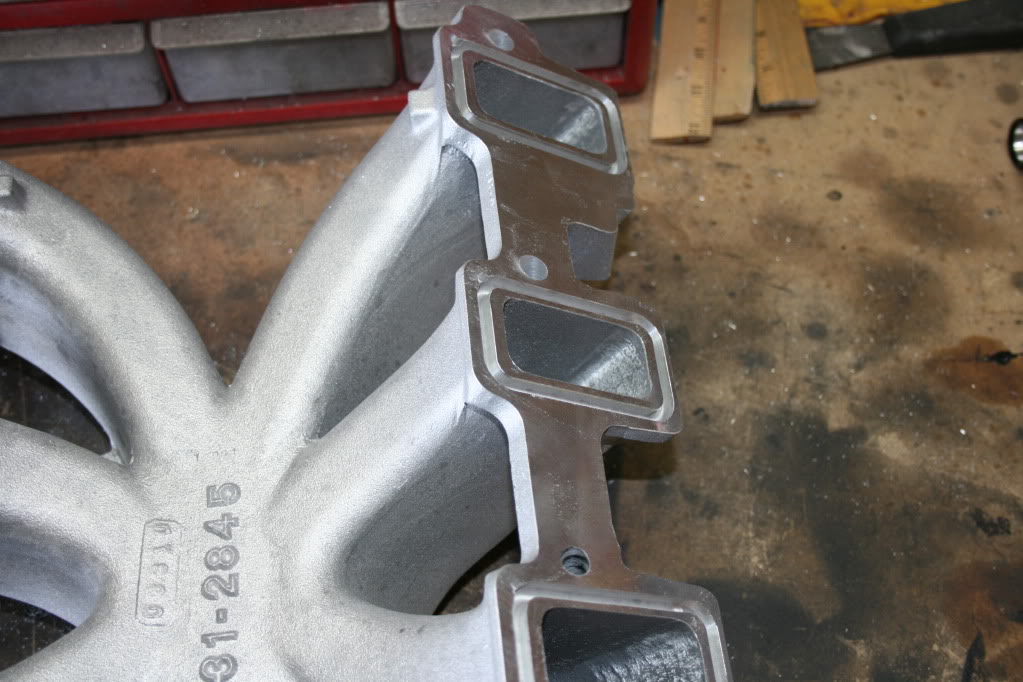
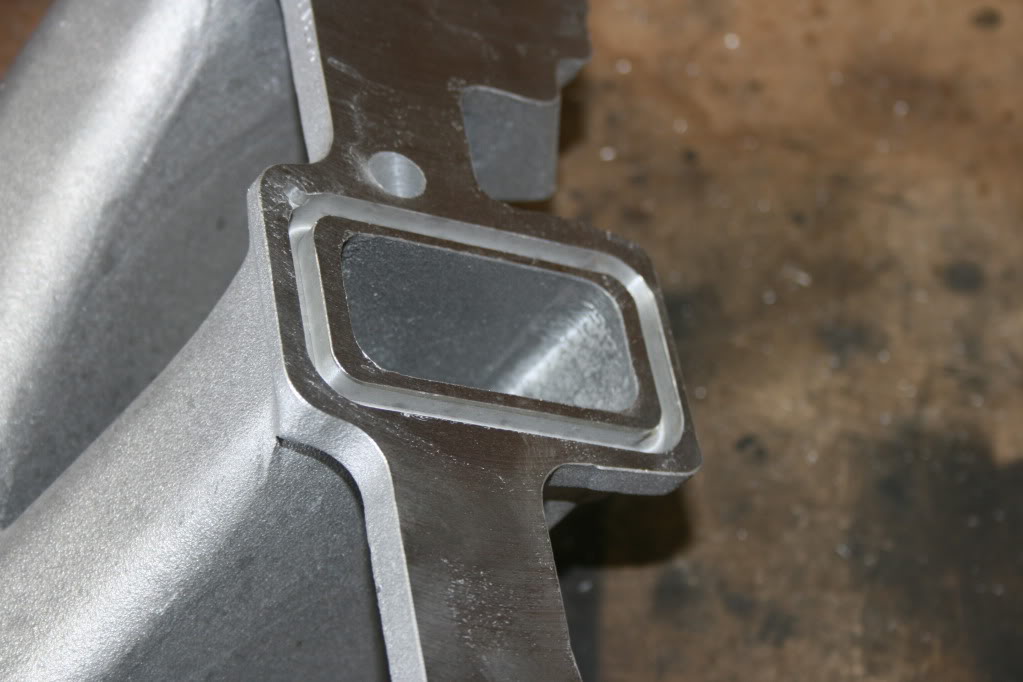
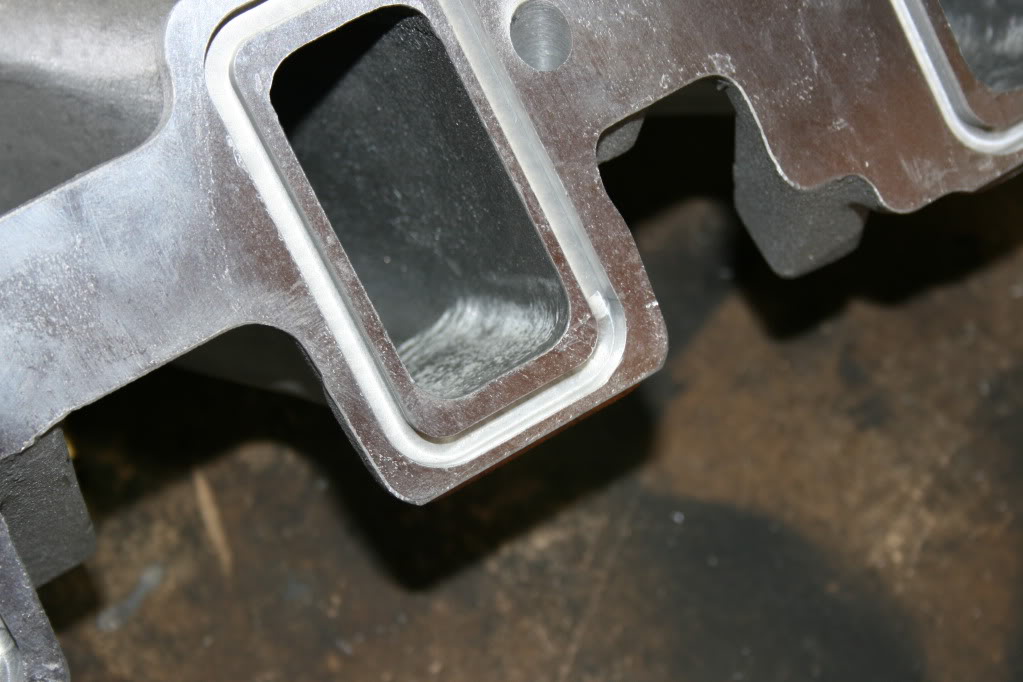
Both the injected and carb’d versions of Edelbrock Victor Jr. LSX intakes share the same casting, so both versions leave the injector bosses protruding into the intake runners.
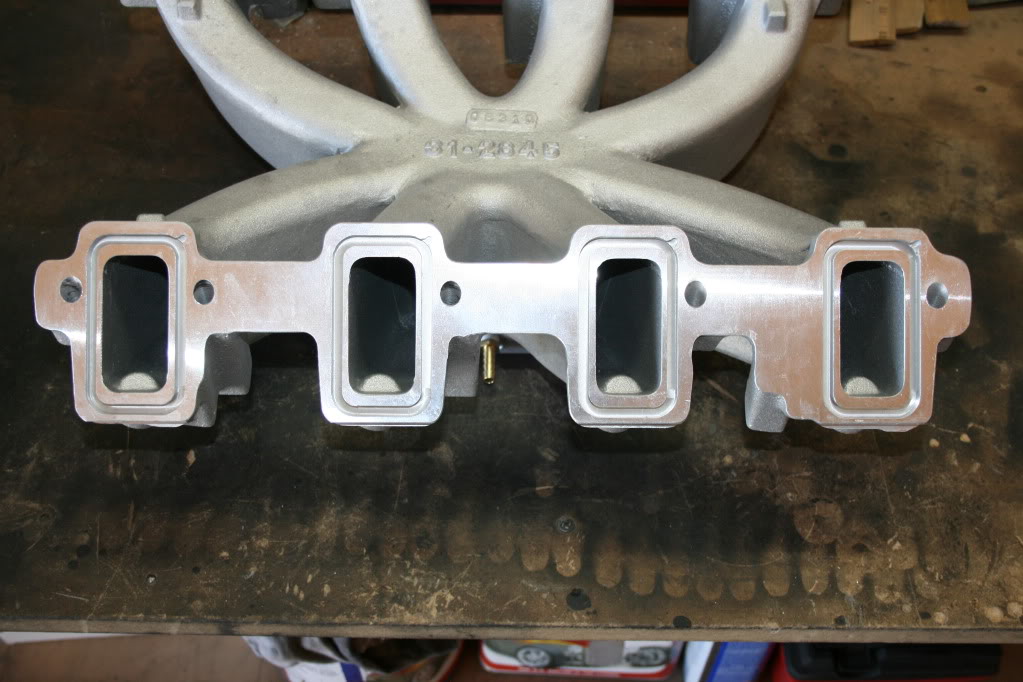
Well, that just won’t do, so I spent some quality time with the Dremel tool this weekend. I might not have done the best job on them, but I certainly didn’t make them flow any worse.

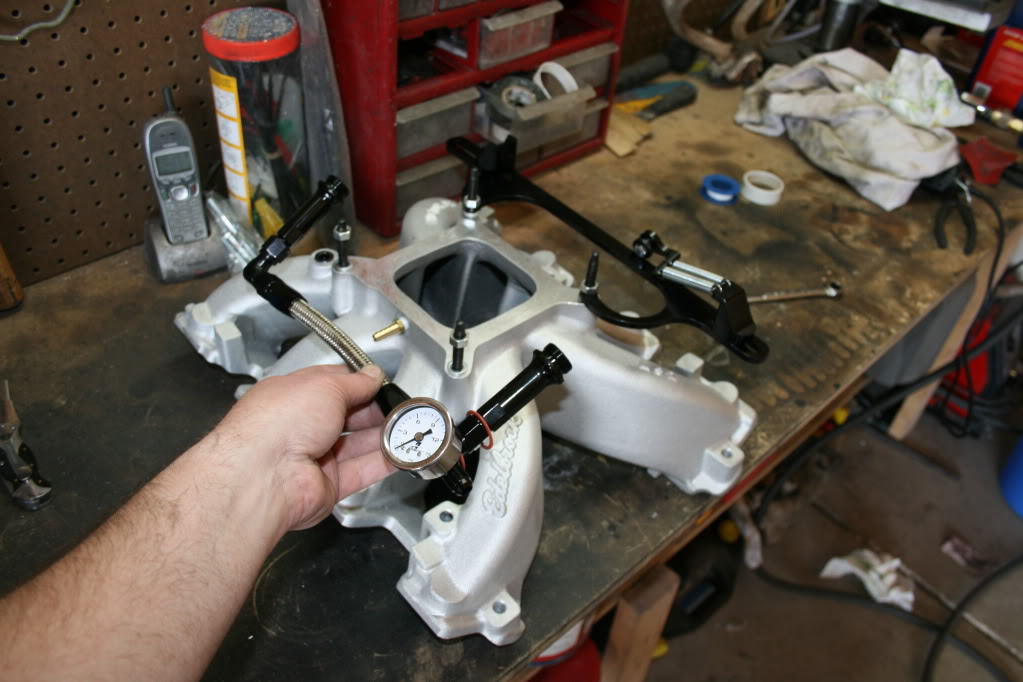
I’m not sure, but I think something is missing here……..Oh yeah…..a carb. Well, I ordered up a new 4150 from Prosystems on Monday. It should be here later this week!
Air and Fuel System: Since I decided to get the motor running before I reassemble the front end and take the car for paint, I reinstalled the fuel cell last weekend. This wasn’t a big job since I had already test fit it, but the last time I didn’t install the vent tube. So this time I just needed to drill the hole for it, install a grommet, and put the vent tube in.
I also wanted to add a brace of some sort to my fuel filter. It’s a Summit billet filter that is 1 ľ diameter. Try as I may, I just couldn’t find a true fuel filter bracket for this thing in the proper diameter. So instead, I bought an 1 ľ roll bar accessory bracket. Since it’s intended for mounting an accessory on a tube with a Ľ inch bolt, I built a simple spacer and ran a Ľ inch bolt down through the trunk pan and into the bracket. It worked out pretty well. Just don’t mind all the dust down there……
Both the injected and carb’d versions of Edelbrock Victor Jr. LSX intakes share the same casting, so both versions leave the injector bosses protruding into the intake runners.
Well, that just won’t do, so I spent some quality time with the Dremel tool this weekend. I might not have done the best job on them, but I certainly didn’t make them flow any worse.
I’m not sure, but I think something is missing here……..Oh yeah…..a carb. Well, I ordered up a new 4150 from Prosystems on Monday. It should be here later this week!
02-19-2011, 07:52 PM
#297
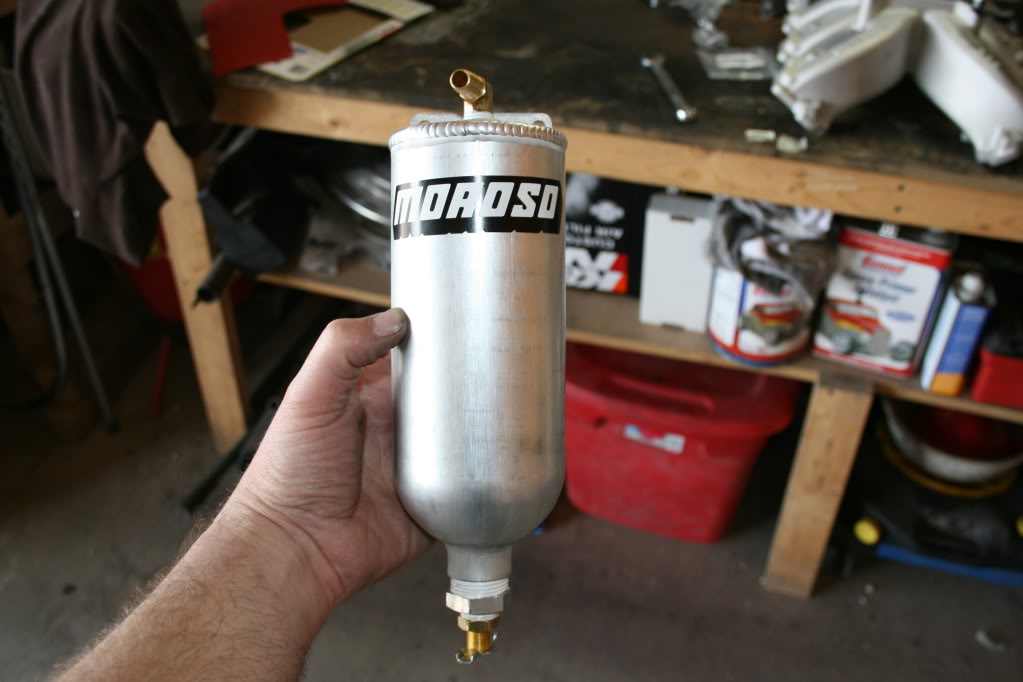
Cooling: I’m still working on a solution for a radiator, but for now I got this Moroso coolant overflow tank. It may be a bit overkill, but I wanted a re-circulating cooling system. I can’t install it yet since I dropped the car back at the chassis shop yesterday, but for today I installed the fittings with teflon tape.
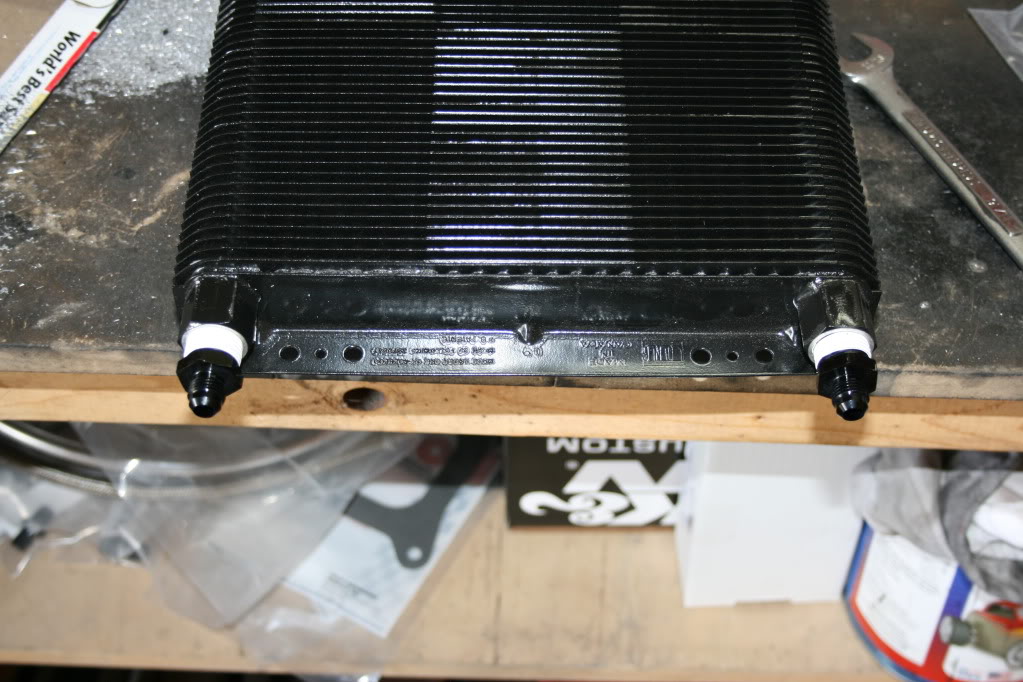
Transmission: Again, couldn’t do any installing, but since all the braided lines and fittings for my transmission lines came in my Summit order, I figured I could get ahead of the game by at least installing the -6 fittings in my B&M Super Cooler.
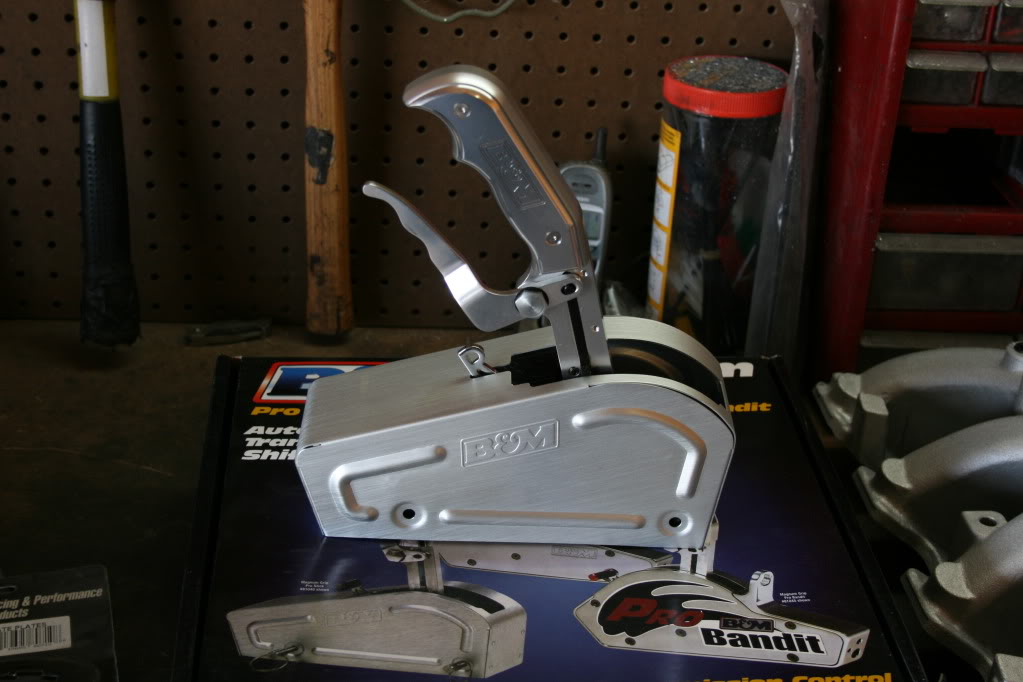
I also couldn’t resist playing around with my new Pro Stick. Since my TH400 has a reverse pattern manual valve body, I went ahead and swapped out the forward pattern gate plate for a reverse pattern plate. I also installed the neutral safety switch, but I still need to pick up an additional micro switch for the back up lights. No pics of that stuff, but here’s the shifter.
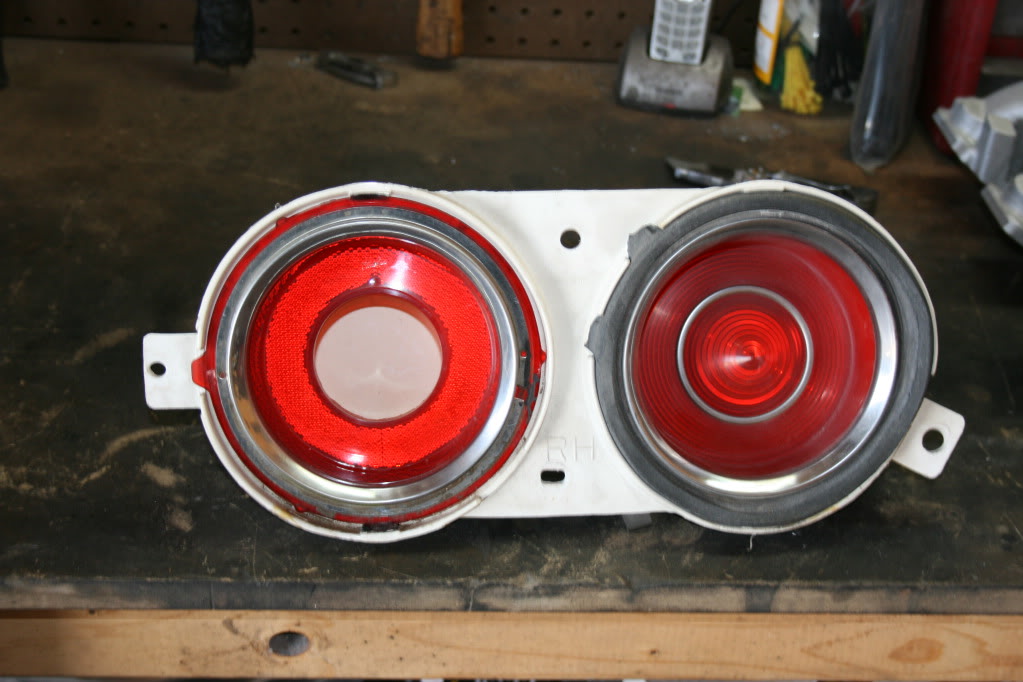
Electrical: Oh, speaking of back up lights, I modified a spare back up light lens like this…..
……to use for my master disconnect switch like this. This obviously isn’t done yet. I still need to have a couple thin aluminum or stainless discs cut out to actually mound the switch it, but this gives you the basic idea.
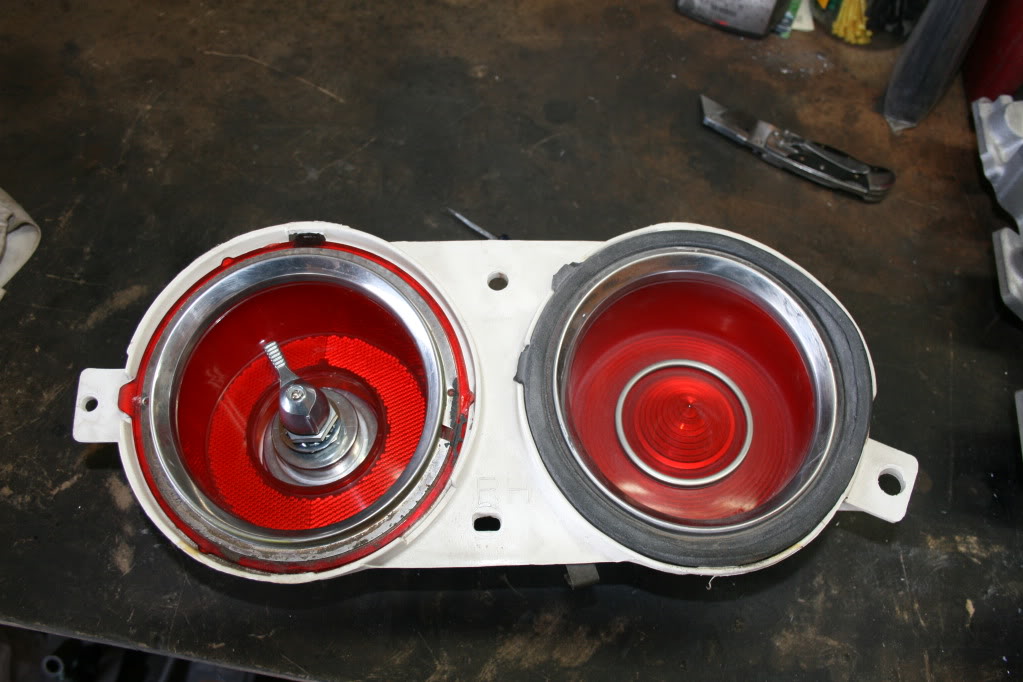
I had seen this done before and I really liked the idea. It saves me from putting yet another hole in the sheet metal of the car and I can still swap in the original lens for things like safety inspections. I also got a Taylor battery relocation kit from Summit this week, but I’ll take pics of that once it’s installed.
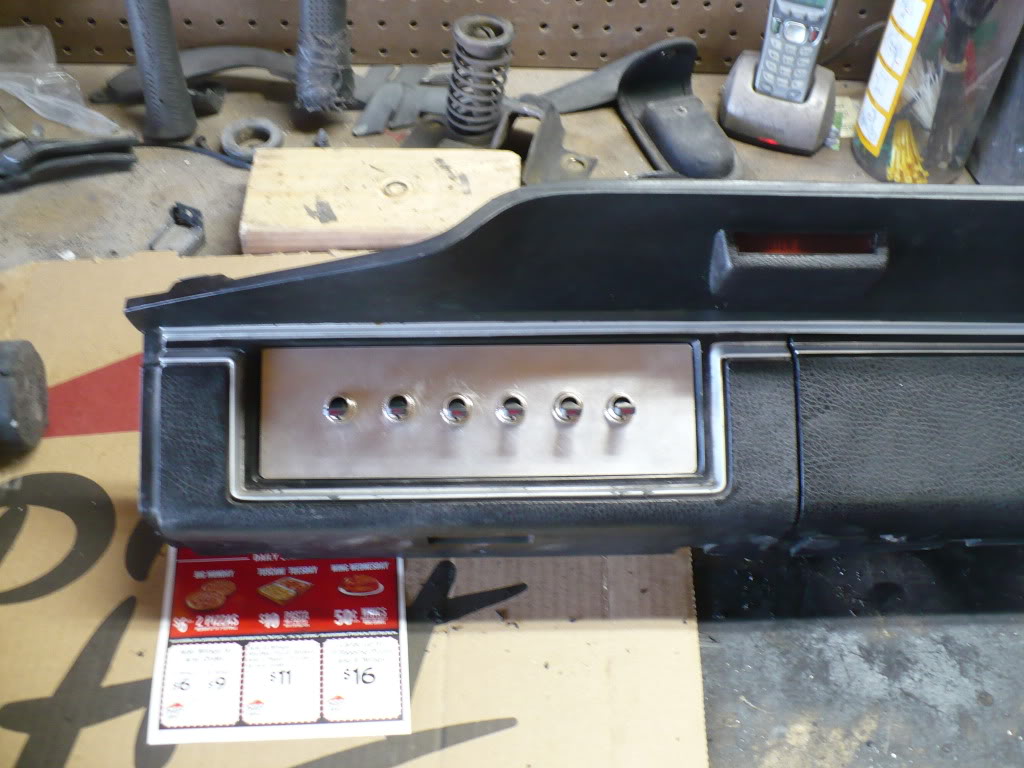
I also built a switch panel last weekend. Well, actually my good friend Dan cut the plate out for me a couple months ago, but last weekend I drilled the holes and installed the switches. This panel will be installed in the radio location.

Sheetmetal: As bad as the sheet metal work sucks, it isn’t gonna get done on it’s own. So, since I had some time left today, I got a few things done with it too. First was an easy job. One of my fenders was missing a weld nut where the inner fender attaches.
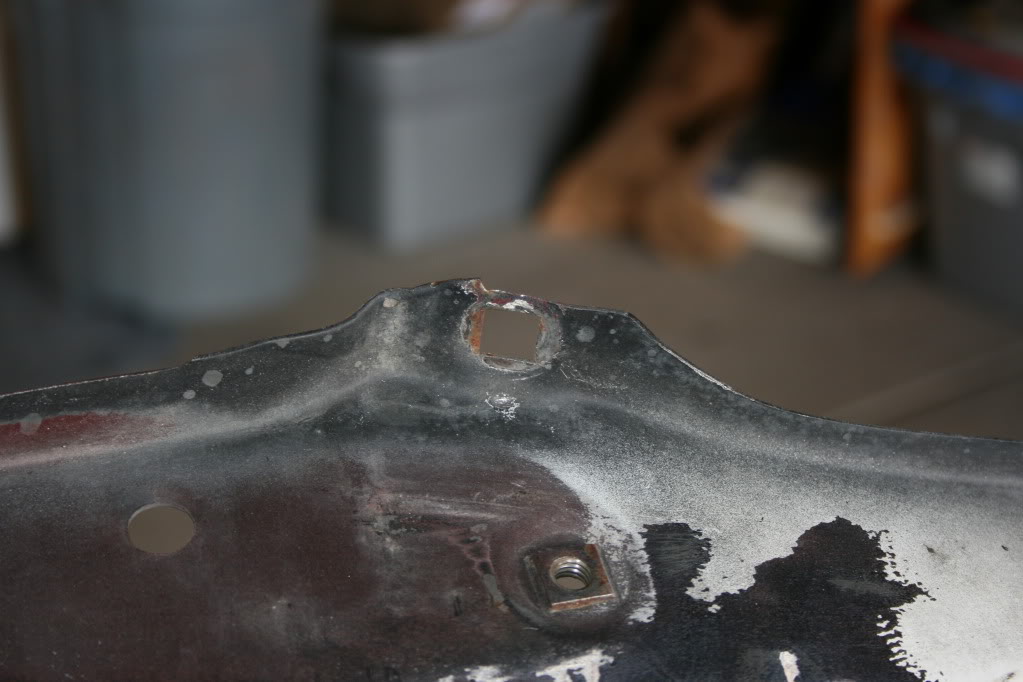
Another board member was nice enough to pop one out of a junk fender and send it to me. So today I cleaned it up with a wire wheel, popped it in place, and put a few tacks on the back of it to make sure it’s not going anywhere.
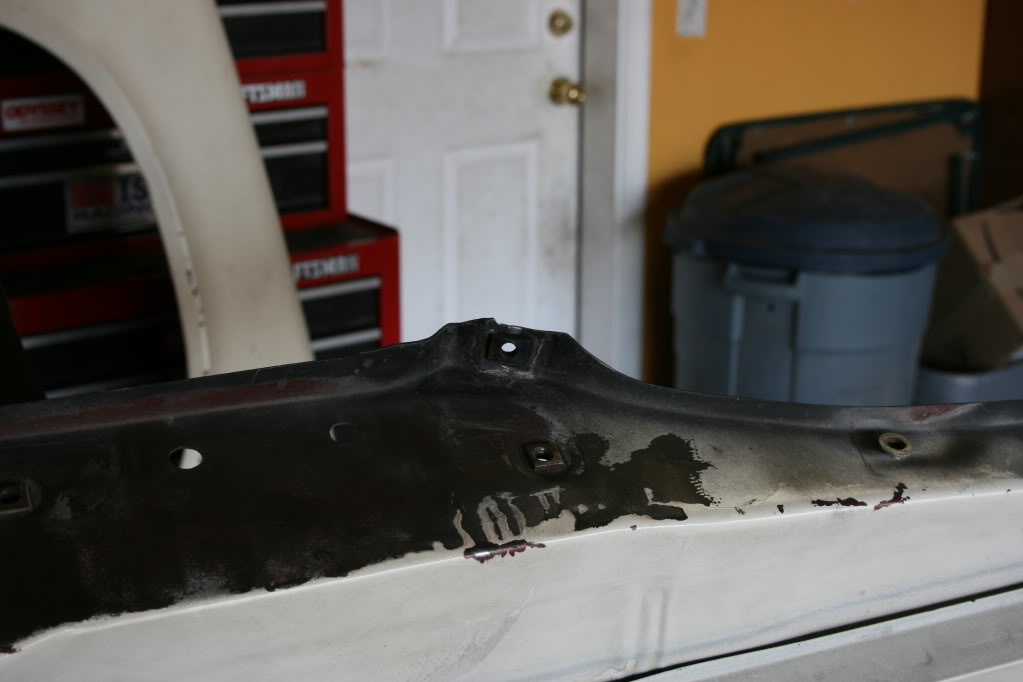
Finally, I broke out some POR-15 and coated the back side of my lower valance, as well as the surfaces where it mates together with the upper valance. I’ll probably scuff this stuff up and hit it again with epoxy when I do the front side of the panel, but I really like how the POR-15 seems to creep into every little crevice, so I wanted to POR it first. I plan to give the backsides of the upper valance and both fenders the same treatment when there time comes.

I think that brings me up to date for now, but the long weekend isn’t over yet. Hopefully I can get some more stuff done, even with the car not here. I think there’s still some panels out there that need work…….
Transmission: Again, couldn’t do any installing, but since all the braided lines and fittings for my transmission lines came in my Summit order, I figured I could get ahead of the game by at least installing the -6 fittings in my B&M Super Cooler.
I also couldn’t resist playing around with my new Pro Stick. Since my TH400 has a reverse pattern manual valve body, I went ahead and swapped out the forward pattern gate plate for a reverse pattern plate. I also installed the neutral safety switch, but I still need to pick up an additional micro switch for the back up lights. No pics of that stuff, but here’s the shifter.
Electrical: Oh, speaking of back up lights, I modified a spare back up light lens like this…..
……to use for my master disconnect switch like this. This obviously isn’t done yet. I still need to have a couple thin aluminum or stainless discs cut out to actually mound the switch it, but this gives you the basic idea.
I had seen this done before and I really liked the idea. It saves me from putting yet another hole in the sheet metal of the car and I can still swap in the original lens for things like safety inspections. I also got a Taylor battery relocation kit from Summit this week, but I’ll take pics of that once it’s installed.
I also built a switch panel last weekend. Well, actually my good friend Dan cut the plate out for me a couple months ago, but last weekend I drilled the holes and installed the switches. This panel will be installed in the radio location.
Sheetmetal: As bad as the sheet metal work sucks, it isn’t gonna get done on it’s own. So, since I had some time left today, I got a few things done with it too. First was an easy job. One of my fenders was missing a weld nut where the inner fender attaches.
Another board member was nice enough to pop one out of a junk fender and send it to me. So today I cleaned it up with a wire wheel, popped it in place, and put a few tacks on the back of it to make sure it’s not going anywhere.
Finally, I broke out some POR-15 and coated the back side of my lower valance, as well as the surfaces where it mates together with the upper valance. I’ll probably scuff this stuff up and hit it again with epoxy when I do the front side of the panel, but I really like how the POR-15 seems to creep into every little crevice, so I wanted to POR it first. I plan to give the backsides of the upper valance and both fenders the same treatment when there time comes.
I think that brings me up to date for now, but the long weekend isn’t over yet. Hopefully I can get some more stuff done, even with the car not here. I think there’s still some panels out there that need work…….
 02-22-2011, 11:26 AM
#299
Thanks! I didn't get too much more done this weekend. But, I did get the back side of my upper valance blasted and I started stripping the first couple coats of paint off of one fender...nothing to photo-worthy. Probably wont get much done next weekend because I've got some stuff to do around the house on Saturday and I'm going to the NASCAR race plus picking my car up from the chassis shop on Sunday.