

1973 RS Camaro LSX Swap
 05-13-2011, 02:18 PM
#381

A little advice from my experience restoring my 69, buy Metro trunk and door seals. The soffseal is way to thick and a harder compound. Metro is soft like the factory and will not distort any gaps or panel alignment. I learned the hard way. My trunk was perfectly fit to the quarters and after installing the Soffseal trunk gasket it sit up a good 1/8"-1/4" above the tops of the quarters. It took two months of me rolling this thing in and out of the sun so the heat would finally relax it somewhat. It is still not perfect but is not as noticable now, three years later!!!
 05-13-2011, 03:43 PM
#382

A little advice from my experience restoring my 69, buy Metro trunk and door seals. The soffseal is way to thick and a harder compound. Metro is soft like the factory and will not distort any gaps or panel alignment. I learned the hard way. My trunk was perfectly fit to the quarters and after installing the Soffseal trunk gasket it sit up a good 1/8"-1/4" above the tops of the quarters. It took two months of me rolling this thing in and out of the sun so the heat would finally relax it somewhat. It is still not perfect but is not as noticable now, three years later!!!
I've heard others complain about the trunk seal problem you describe having. 2nd gen guys have had the same issue with both Soff Seal and Metro. The only real solution I've heard so far for 2nd gens is to find a NOS GM trunk seal, which is harder than finding an virgin on prom night, and probably as expensive too
 .
.Maybe I'll trial fit mine (without glue) this weekend and see how bad it's gonna be. Luckily, the AZ sunshine may be on my side on this one....especially with a black car. Maybe I could roll it out into the sun with some weights on the deck lid?
05-13-2011, 07:20 PM
#383
I had the guy at Classic Muscle pull both the Metro and Soffseal "after the fact" to compare the density and the Metro was a ton softer. It wont matter either should be fine. The good thing about Soffseal is it should last longer. It also may be different on the second gens too. I know my doors and my trunk were hard as hell to shut once I had the Soffseal in.
05-13-2011, 07:55 PM
#384

My car has all softseal weatherstripping. Its good stuff. It been on my car for 14 years and no problems. Yeah, it was a tuff choice to trade my car, but I am bored with it and need some new scenery. I wanted a FI car and got the offer to trade for this t/a so I couldn't pass it up. I have had it for almost 15 years. I still enjoy 2nd gens and will always have a place in my heart for them. I will continue to follow your build and make an attempt to offer any advice that might be helpful to you.
05-13-2011, 09:28 PM
#385
I had the guy at Classic Muscle pull both the Metro and Soffseal "after the fact" to compare the density and the Metro was a ton softer. It wont matter either should be fine. The good thing about Soffseal is it should last longer. It also may be different on the second gens too. I know my doors and my trunk were hard as hell to shut once I had the Soffseal in.
Yeah, it was a tuff choice to trade my car, but I am bored with it and need some new scenery. I wanted a FI car and got the offer to trade for this t/a so I couldn't pass it up. I have had it for almost 15 years. I still enjoy 2nd gens and will always have a place in my heart for them. I will continue to follow your build and make an attempt to offer any advice that might be helpful to you.
05-14-2011, 07:23 AM
#386
I'm sure it was! But the FI car should be a lot of fun too and an interesting change of pace from your 72. It doesn't seem like it, but I guess I've had my 99 TA for 12 years now; since it was brand new. It's a nitrous car now but I've always had it in the back of my mind to go FI with it. Is your new one a manual or auto? I'll appreaciate any future input you have for me on my Camaro.[/QUOTE]
It will be a big change of pace for me, but I am looking forward to it. I have always had nitrous cars. My s10 had a fogger on it and now this car. The new car is an auto but orginally a 6 speed car so thinking about going back to it, we will see. FI is new to me and will do alot of learning, but look forward to it. I am considering doing E85 on it since there is a station close to my house. On 93 at 13 psi the motor should make 700+rwhp. The motor is new and hasn't been tuned yet so I will work on that in the next couple of weeks. I will continue to check in on your progress and make sure you do it right, lol. So far you are good. Keep up the good work.
It will be a big change of pace for me, but I am looking forward to it. I have always had nitrous cars. My s10 had a fogger on it and now this car. The new car is an auto but orginally a 6 speed car so thinking about going back to it, we will see. FI is new to me and will do alot of learning, but look forward to it. I am considering doing E85 on it since there is a station close to my house. On 93 at 13 psi the motor should make 700+rwhp. The motor is new and hasn't been tuned yet so I will work on that in the next couple of weeks. I will continue to check in on your progress and make sure you do it right, lol. So far you are good. Keep up the good work.
05-15-2011, 08:13 PM
#387
I got some decent stuff done in the garage today. First on the to-do list was welding my anti-submarine belt mounts to the floorboard. I started out by carefully positioning the driver’s side mount and tacking it in place. Then I installed the seat to be sure it would still fit over top of the mount and would still be adjustable forward and backward. Once everything checked out, I removed the seat and fully welded the mount. I used an angle finder to copy the position and angle for the passenger side mount and welded it in as well.
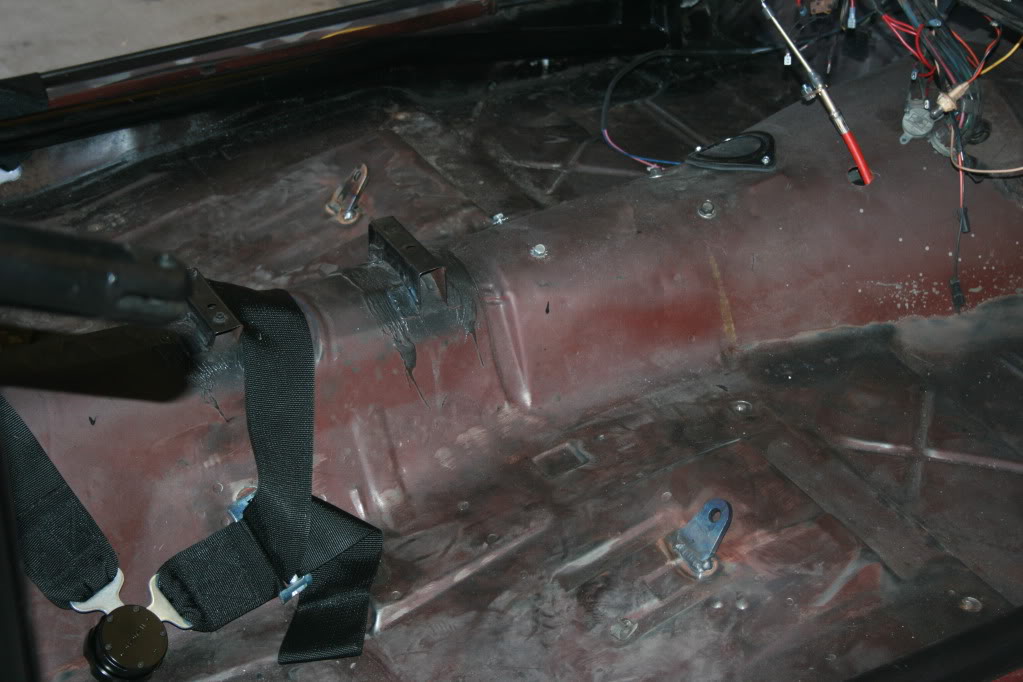

This should do just fine…..
Next I moved on to a job I had be putting off for a while, which was covering my starter wires with a thermal sleeve to keep them safe from the header tubes. I know…...sounds easy enough. But since there were already ends on all the wires, this required me to cut the wires, slide the sleeve over top, and then butt connect and solder them back together. Again….not hard, but not fun either. But, I got it done.

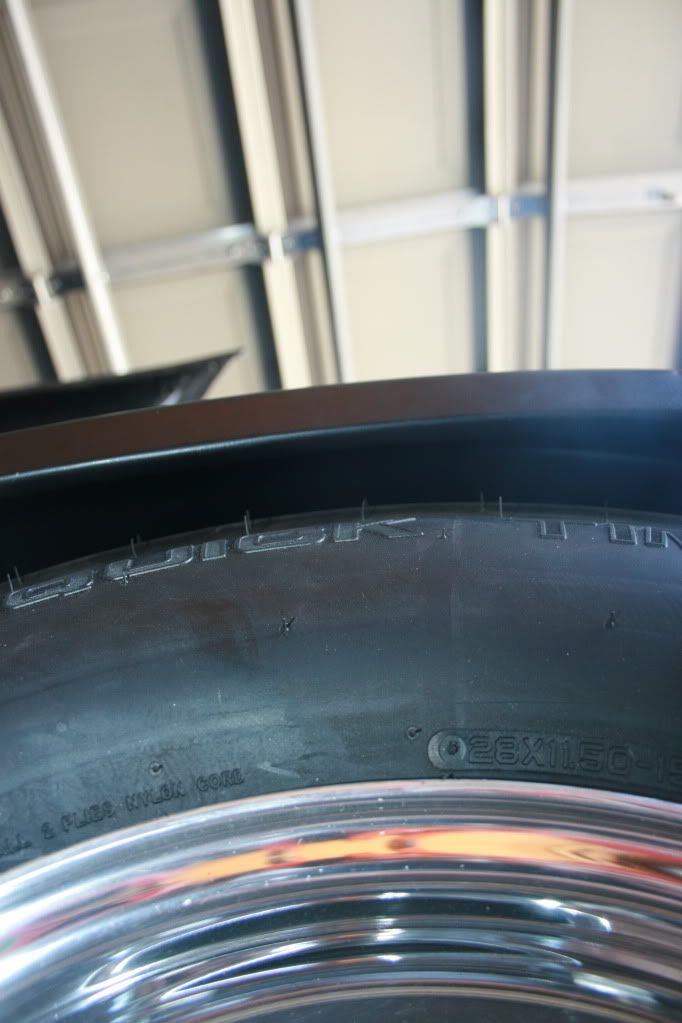
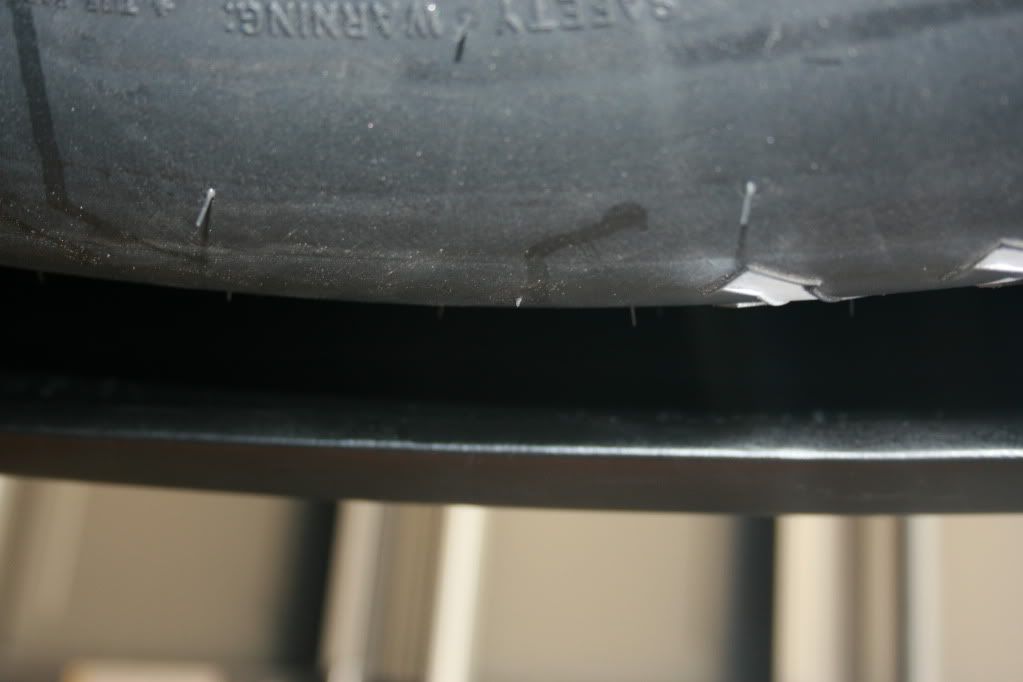
Then I moved on to addressing my tire clearance issues at the wheel lips. I started by covering the lips with masking tape so as to not scratch the primer too badly. Then I used to vice grips (as recommended by tsnow) to work my way along the lip and start the upward bend. I didn’t want to fold them completely flat so I kept the jaws of the vice grips from going all the way out to the quarter panel. This gave me more of a “U” bend than a “V”. Once the bend was started, I simply used a 3lb mini-sledge and worked my way along the lip and slowly pounded it up and away. Not the most delicate way to go about this, but it’s effective. The entire lip didn’t need rolled, so I only did the portion starting from just below the body line in front of the wheel well to just below the body line behind the wheel well. Once I was happy with the amount of bend I touched up the paint and repeated the process on the other side. I’m pretty happy with how this turned out, especially considering my method and tools used. This area is really difficult to photograph, but this should give an idea of all the clearance I have now.
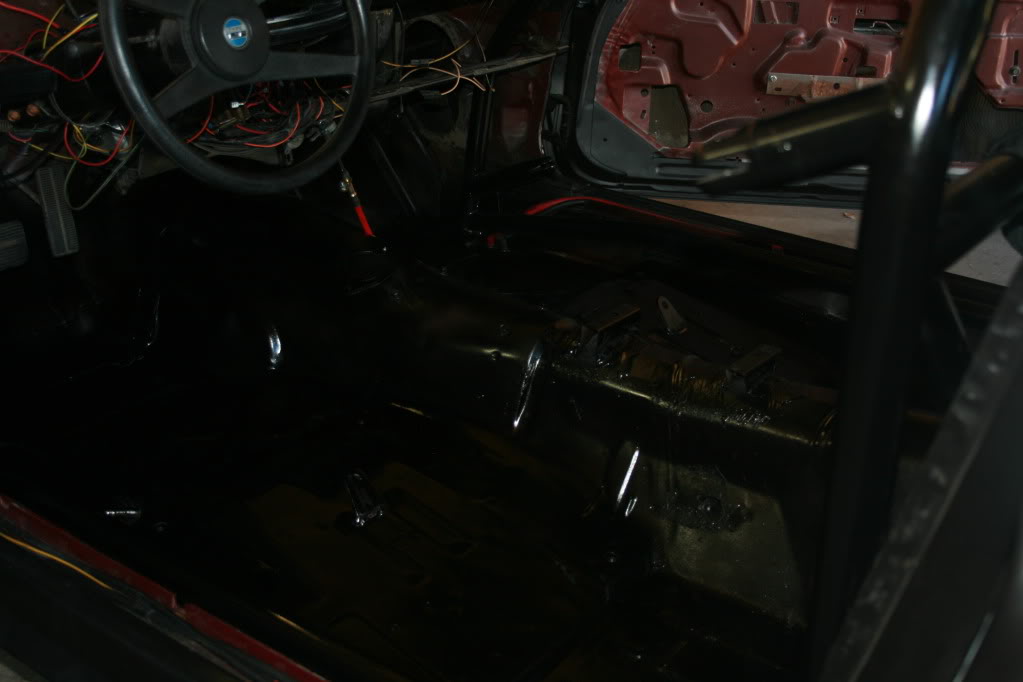
Next I wanted to address the areas of bare metal on my floorboards. The factory primer is still mostly intact so there was no way I was stripping the entire floor pan. Instead I wanted to add an extra layer of protection….especially in areas where the primer had been worn off. So, I decided to just use the same black appliance epoxy that I had used on my roll cage since it seems to be pretty durable. It’s not pretty but its functional and really….who cares how it looks since it will all be hidden by carpet.
Those were the main accomplishments for the day. Besides those things, I also did a few other small things like installing the lock cylinder, associated hardware, and weather strip in my trunk. And I also added a cheap transbrake button to my dash panel. Here’s a look at the trunk with the lock and weather strip in place.

Next weekend I think I’ll start by running my transbrake and trans temp gauge wires up through the floor so I can start to fit up the new carpet around the roll cage bars.
This should do just fine…..
Next I moved on to a job I had be putting off for a while, which was covering my starter wires with a thermal sleeve to keep them safe from the header tubes. I know…...sounds easy enough. But since there were already ends on all the wires, this required me to cut the wires, slide the sleeve over top, and then butt connect and solder them back together. Again….not hard, but not fun either. But, I got it done.
Then I moved on to addressing my tire clearance issues at the wheel lips. I started by covering the lips with masking tape so as to not scratch the primer too badly. Then I used to vice grips (as recommended by tsnow) to work my way along the lip and start the upward bend. I didn’t want to fold them completely flat so I kept the jaws of the vice grips from going all the way out to the quarter panel. This gave me more of a “U” bend than a “V”. Once the bend was started, I simply used a 3lb mini-sledge and worked my way along the lip and slowly pounded it up and away. Not the most delicate way to go about this, but it’s effective. The entire lip didn’t need rolled, so I only did the portion starting from just below the body line in front of the wheel well to just below the body line behind the wheel well. Once I was happy with the amount of bend I touched up the paint and repeated the process on the other side. I’m pretty happy with how this turned out, especially considering my method and tools used. This area is really difficult to photograph, but this should give an idea of all the clearance I have now.
Next I wanted to address the areas of bare metal on my floorboards. The factory primer is still mostly intact so there was no way I was stripping the entire floor pan. Instead I wanted to add an extra layer of protection….especially in areas where the primer had been worn off. So, I decided to just use the same black appliance epoxy that I had used on my roll cage since it seems to be pretty durable. It’s not pretty but its functional and really….who cares how it looks since it will all be hidden by carpet.
Those were the main accomplishments for the day. Besides those things, I also did a few other small things like installing the lock cylinder, associated hardware, and weather strip in my trunk. And I also added a cheap transbrake button to my dash panel. Here’s a look at the trunk with the lock and weather strip in place.
Next weekend I think I’ll start by running my transbrake and trans temp gauge wires up through the floor so I can start to fit up the new carpet around the roll cage bars.
05-15-2011, 08:24 PM
#388
Looks like you have plenty of clearance to the quarters now. Looks good. Your trunk seal, did it go into a channel or does it attach to a lip? Mine had to be glued into the channel. I noticed you didnt close the gap at the ends of the seal. Were you going to close it or leave it open. In case you are unfamiliar on how thats done, get some black super weather strip adhesive and glue them together to complete the seal. Glue each end and let them tack off and then stick them together. You prolly already knew that but just trying to help. Is there anyway for me to use the style of seat belts you used on my car without a roll cage? I am going to change out my seats and wanted to use the wider belts so as not to have my insides pulled out in case of a collision.
05-15-2011, 08:33 PM
#389
Looks like you have plenty of clearance to the quarters now. Looks good. Your trunk seal, did it go into a channel or does it attach to a lip? Mine had to be glued into the channel. I noticed you didnt close the gap at the ends of the seal. Were you going to close it or leave it open. In case you are unfamiliar on how thats done, get some black super weather strip adhesive and glue them together to complete the seal. Glue each end and let them tack off and then stick them together. You prolly already knew that but just trying to help. Is there anyway for me to use the style of seat belts you used on my car without a roll cage? I am going to change out my seats and wanted to use the wider belts so as not to have my insides pulled out in case of a collision.
The weather strip goes into a channel, and yeah it's supposed to be glued it like yours, but I just popped it in there for now so I can remove it again for paint. that's also why I didn't glue the two ends together. Since I'm running out of funds, the car will probably get driven for quite a while in primer. All the other weather stripping should remove easily cause this is the only piece that is supposed to be glued in.
I really don't know of any way you could use these type of belts without a bar to attach the shoulder harnesses to. They used to make a style where the shoulder harness "Y'd" into one strap and then it mounted to the floor behind the drivers/passenger seat. But I'm pretty sure most companies quit making them when the NHHR/IHRA disallowed their use. It may be worth checking into though. Maybe someone does still make them?
05-15-2011, 08:36 PM
#390
Thanks man. Yeah, plenty of clearance to the outside now. I even have room to space them out a little now if I find I need more room on the inside.
The weather strip goes into a channel, and yeah it's supposed to be glued it like yours, but I just popped it in there for now so I can remove it again for paint. that's also why I didn't glue the two ends together. Since I'm running out of funds, the car will probably get driven for quite a while in primer. All the other weather stripping should remove easily cause this is the only piece that is supposed to be glued in.
I really don't know of any way you could use these type of belts without a bar to attach the shoulder harnesses to. They used to make a style where the shoulder harness "Y'd" into one strap and then it mounted to the floor behind the drivers/passenger seat. But I'm pretty sure most companies quit making them when the NHHR/IHRA disallowed their use. It may be worth checking into though. Maybe someone does still make them?
Looking great as usual, cant wait till the first run!
 05-17-2011, 12:21 AM
#392
On The Tree

Join Date: Dec 2008
Location: San Anselmo, CA
Posts: 187
Likes: 0
Received 0 Likes
on
0 Posts
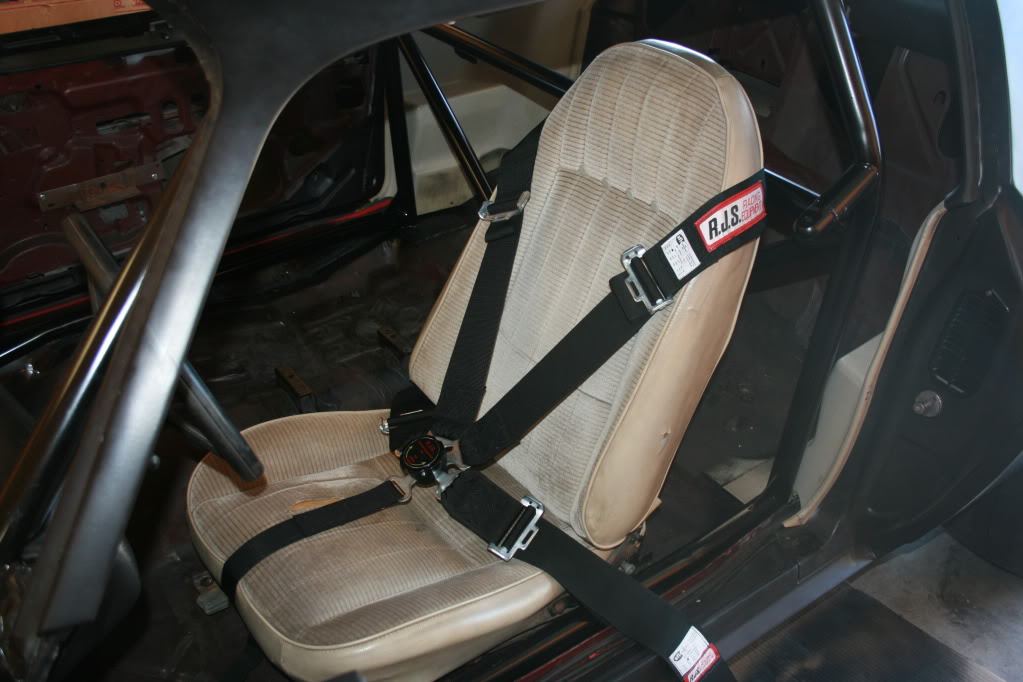
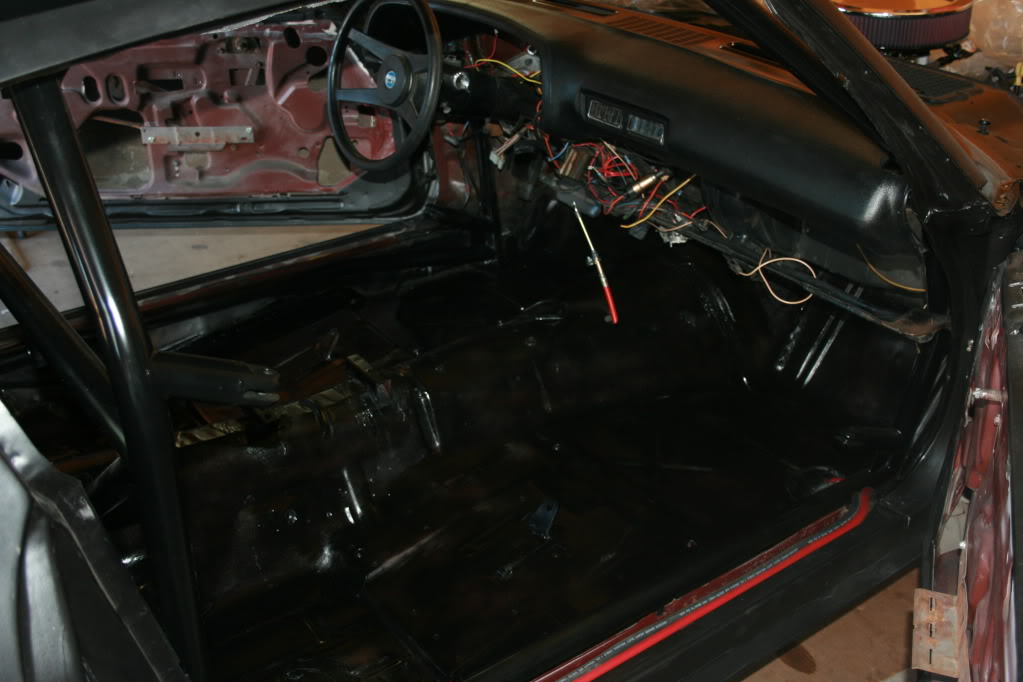
Please don't run those harnesses in this configuration. It's not safe. The shoulder straps have to run up your chest and directly over your shoulders and straight back to a solid mounting point. Someone mentioned before that you would need a bar for the harnesses. That's true, but even with that, a seat this wide at the shoulders will keep the shoulder belts too far apart. In a frontal impact, your torso will slide out through the harness as the belts slide off to the sides.
Also, the sub belt has to go directly down from the attachment point in the center of all the belts. The purpose of the sub belt is to keep the lap belts low - over your pelvis - to keep it from riding up into your abdomen where it would do internal damage to your organs. Think about what will happen as your body flies forward and stretches the lap belt (Yes, they will stretch!!) if the sub strap is mounted over the front of the seat. It will go SLACK. That's why racing seats have a hole in the middle of the seat.
Hate to be the bearer of bad news, but these belts as installed are probably considerably less safe than the stock 3 point belt that's designed to work with this seat.
Good luck,
Dean
05-17-2011, 12:14 PM
#393
Please don't run those harnesses in this configuration. It's not safe. The shoulder straps have to run up your chest and directly over your shoulders and straight back to a solid mounting point. Someone mentioned before that you would need a bar for the harnesses. That's true, but even with that, a seat this wide at the shoulders will keep the shoulder belts too far apart. In a frontal impact, your torso will slide out through the harness as the belts slide off to the sides.
Also, the sub belt has to go directly down from the attachment point in the center of all the belts. The purpose of the sub belt is to keep the lap belts low - over your pelvis - to keep it from riding up into your abdomen where it would do internal damage to your organs. Think about what will happen as your body flies forward and stretches the lap belt (Yes, they will stretch!!) if the sub strap is mounted over the front of the seat. It will go SLACK. That's why racing seats have a hole in the middle of the seat.
The way I have it now, the lap belts are in fact held down low across my pelvis with the cam-lock mechanism sitting right on my belt buckle, so the sub belt is accomplishing that secondary job. But as I understand it, the primary job of the sub belt (or anti-submarine strap) is to keep the driver from submarining or sliding out from underneath the harness in the event of a collision, which is probably why the NHRA authorizes it to be routed in front of an OEM seat. Granted, the further away that strap is from my crotch, the more inertia my body will gain before connecting with it
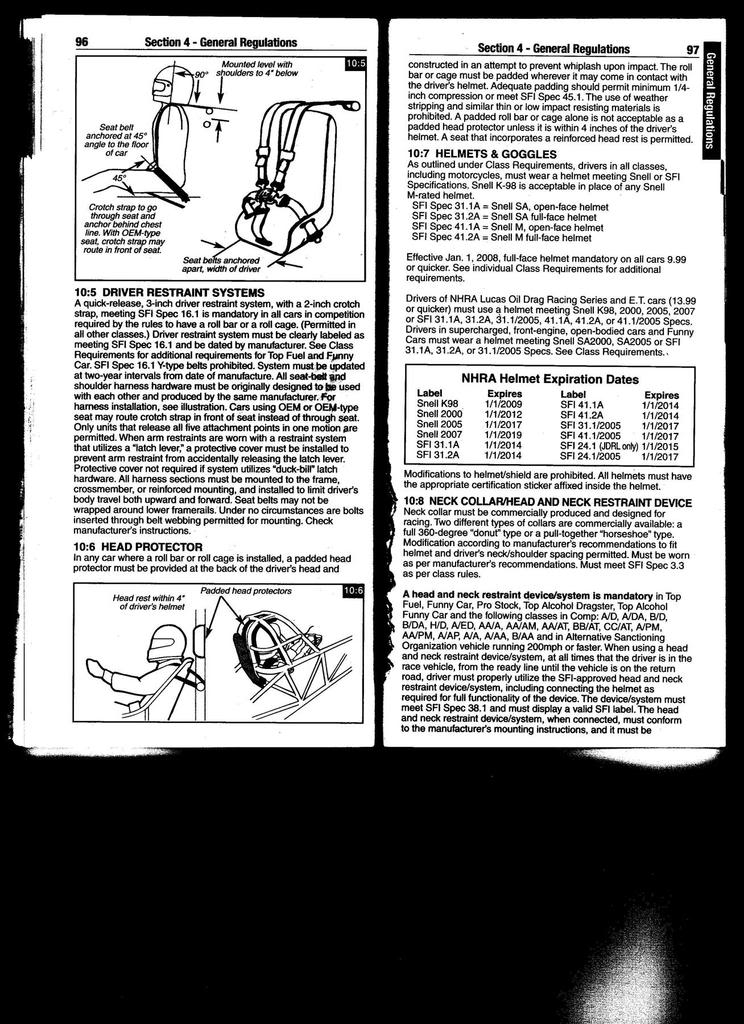
 , but it still should retain me in the seat nonetheless. This is another spot that I am considering for modification to my stock seat. I've seen it done before on stock 2nd gen seats and it's very nice.....but I need to dig deep into the NHRA rules and see if this type of modification is allowed before I drop the coin.
 EDIT:Something like this.....


Hey, thanks again for your input and consideration for my safety. I hope I don't come off as being argumentative because I think you raise some valid points. But as for being less safe than the stock belts that came in this car......you have seen them, right? LOL....J/K.
Last edited by GC99TA; 05-17-2011 at 01:05 PM.
05-17-2011, 12:27 PM
#394
On The Tree
Join Date: Dec 2008
Location: San Anselmo, CA
Posts: 187
Likes: 0
Received 0 Likes
on
0 Posts
 Haven't actually seen the stock belts, but point taken!
Awareness was the only thing I was shooting for, here, and it sounds like you've got that. The belts, seat, etc. all work together as a system with the driver, so your size is a factor, as you pointed out.
I think the anti-sub strap isn't actually intended to smash your ***** to keep you from sliding out under the belts, it is meant to keep the lap belts on your pelvis so that you CAN'T slide out from under the belts. This is another reason that the angle of the lap belts and their anchor points are important.
Sounds like you're complying with the NHRA rules. Here's another source of information to read and consider. I've found it really informative.
http://www.schrothracing.com/sdocs/2...structions.pdf
Pay particular attention to pages 8-18. No matter what type of harness you have, there's some great information in here.
And BTW, I didn't mention it the first time, but your car is BAD ***!
Cheers!
Dean
05-17-2011, 12:37 PM
#395
I think I am going to save my self the trouble and just buy 4 of the Simpson car seats for kids as my family members are short as hell. This way I can just strap them into my factory seats. They already have all the belt geometry figured in them. I wonder if NHRA would allow me to run it like that. LMFAO
I am glad you guys brought all of this up as I didn't know a damn thing about seat belts until now. I just figured you bolted them in and they were sort of set. I didnt know I was going to have actually use math to install seat belts, damn.
I am glad you guys brought all of this up as I didn't know a damn thing about seat belts until now. I just figured you bolted them in and they were sort of set. I didnt know I was going to have actually use math to install seat belts, damn.
05-17-2011, 12:49 PM
#396
On The Tree
Join Date: Dec 2008
Location: San Anselmo, CA
Posts: 187
Likes: 0
Received 0 Likes
on
0 Posts
Seriously - it's scary how easy it is to install belts incorrectly and have them ONLY provide peace of mind, but no real safety benefit. Since I've been racing for the last 7 years I've learned so much about how important installation is for safety equipment to function properly. I look back at some the crap I did when I was first doing track days - man, it scares the hell out of me. I'm glad I didn't have to learn "the hard way" (through an impact) that I only THOUGHT I was safe...
Cheers,
Dean
05-17-2011, 05:09 PM
#397
.Sounds like you're complying with the NHRA rules. Here's another source of information to read and consider. I've found it really informative.
http://www.schrothracing.com/sdocs/2...structions.pdf
Pay particular attention to pages 8-18. No matter what type of harness you have, there's some great information in here.
And BTW, I didn't mention it the first time, but your car is BAD ***!
Cheers!
Dean
http://www.schrothracing.com/sdocs/2...structions.pdf
Pay particular attention to pages 8-18. No matter what type of harness you have, there's some great information in here.
And BTW, I didn't mention it the first time, but your car is BAD ***!
Cheers!
Dean
05-17-2011, 05:22 PM
#398
I think I am going to save my self the trouble and just buy 4 of the Simpson car seats for kids as my family members are short as hell. This way I can just strap them into my factory seats. They already have all the belt geometry figured in them. I wonder if NHRA would allow me to run it like that. LMFAO
 05-19-2011, 11:23 AM
#400
Not much of an update, but here's a bunch of stuff I sent out for sand blasting/stripping yesterday. I COULD do it myself, but it's starting to get a little warm here for me to do all this out in the direct sunlight. I guess I'm just getting old and lazy.
Here are my license plate bracket, bumper brackets, steel interior trim pieces, and the carpet/wire protectors that go beneath the sill plates. From what I've seen on some other 2nd gens, I guess I'm lucky these are just surface rusted. Being bare steel, these are completely gone on a lot of cars.

And here are my driver's side seat tracks. Amazing how stuff inside the car can be much rustier then stuff on the exterior, but I guess it doesn't help that the factory left these unpainted as well.

The passenger side wasn't nearly as bad as the driver's side (not as many wet feet getting in and out of that side I suppose).

All of this stuff will get painted once I get it back.
Here are my license plate bracket, bumper brackets, steel interior trim pieces, and the carpet/wire protectors that go beneath the sill plates. From what I've seen on some other 2nd gens, I guess I'm lucky these are just surface rusted. Being bare steel, these are completely gone on a lot of cars.
And here are my driver's side seat tracks. Amazing how stuff inside the car can be much rustier then stuff on the exterior, but I guess it doesn't help that the factory left these unpainted as well.
The passenger side wasn't nearly as bad as the driver's side (not as many wet feet getting in and out of that side I suppose).
All of this stuff will get painted once I get it back.