
1973 RS Camaro LSX Swap
 06-30-2011, 05:44 PM
#441

I have to say I am pissed. I have been following this build and love it. I love 2nd gens and the flat black with new wheels and tires is kickkin. What I am pissed about is you show us pics of the new tail pipes and don't include a video of how the car sounds with the pipes. Come on man you killing me give me some sound and when you rev it leave the camera about 15 feet behind the car not 3 like most people so we can hear it without pegging the mic levels in the camera.
Thanks for your cooperation,
Doug
Thanks for your cooperation,
Doug
 You know, the one with the tailpipes on to show how good the car sounds. OK, so you got me on the rev part though. It was a cold start so I was being kind to her and only brought the R's up a little.
Seriously though......thanks for the compliments.
 I hadn't heard from you on here in a while and wondered where you had been. You're probably right though......I should get an updated vid soon. We'll see what the weekend brings.
  06-30-2011, 09:54 PM
#442
On The Tree
Join Date: Feb 2011
Location: Katy, Texas
Posts: 116
Likes: 0
Received 0 Likes
on
0 Posts
Hey Doug, talk about being pissed! Now I'm pissed. I'm not pissed at the compliments you gave....in fact I appreaciate them. I'm not pissed that you're following the thread so closely....no, I'm pissed that you followed so close you missed the video in post #333. You know, the one with the tailpipes on to show how good the car sounds. OK, so you got me on the rev part though. It was a cold start so I was being kind to her and only brought the R's up a little.
Seriously though......thanks for the compliments. I hadn't heard from you on here in a while and wondered where you had been. You're probably right though......I should get an updated vid soon. We'll see what the weekend brings.
You know, the one with the tailpipes on to show how good the car sounds. OK, so you got me on the rev part though. It was a cold start so I was being kind to her and only brought the R's up a little. Seriously though......thanks for the compliments.
I hadn't heard from you on here in a while and wondered where you had been. You're probably right though......I should get an updated vid soon. We'll see what the weekend brings.Ok so I feel like a dumb ***. I guess I scrolled through the pages with the exhaust video too quickly and missed the video thanks for posting the link. The car sounds great with tail pipes. The hoosiers look great also. Good work on the dash.
Sorry I haven't been around for a minute I have been working on painting interior panels just like you have. I started my own LSX conversion but have yet to start a build thread on here because I am taking care of the interior, paint and wheels before I start on the engine swap.
What is this mystery vehicle you ask? I got an '87 300 zx non turbo car that is in pretty good shape. I had to purchase some door panels and rear hatch panels to finish a color swap that was started. I had to find another hood cause the original had come loose and got beat to ****. I got a deal on some '09 mustang bullet wheels and Toyo p-zero road race street tires. The paint is not too bad but we are two toning the car with a bright silver roof, hood and deck from the "pinstripe" line up. The bottom color is a gunmetal blue.
The plan is to drive it around after cleaning it up till I get all the LSX parts and do a one weekend swap.
I found a 6.0L with about 150 miles on it and a 4l80e and a 70mm turbo. The plan is an e-85 blow through set up with '02 z06 cam and big single exhaust. The car will be called "The Silent Assassin" and will make over 650 I hope. Here is a pic.
 07-04-2011, 04:42 PM
#443
^^^^Looks like a really cool project! You'll definately have to start a thread once you get to the conversion part of your build. I did the same thing; I didn't start my thread here on LS1tech until I had gotten to the engine part of my build but had it going all along over on nastyz28. And of course the engine and swap related stuff only lasted for a short time and now I'm back to more "restoration" type work. I often wonder if I should still be updated that kind of stuff on here since it's not at all LS or swap related. But anyway........
I got a few more things done sporatically over the long weekend. It was another hot one, so my time in the garage was spent in short spurts and moving very slowly. So all of this stuff happened over a period of a few days.
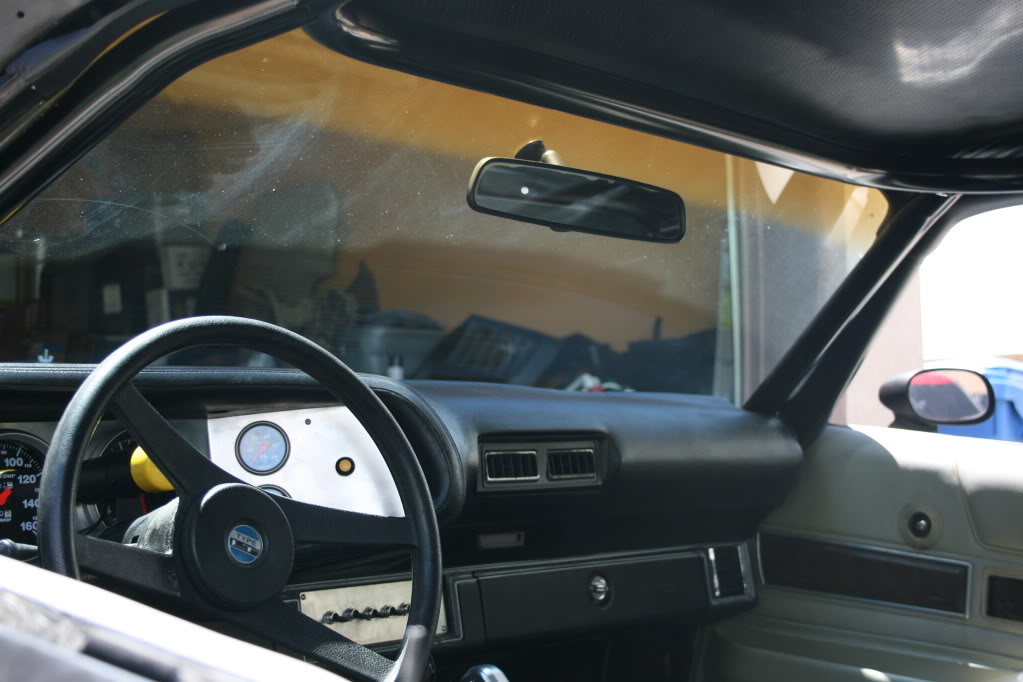
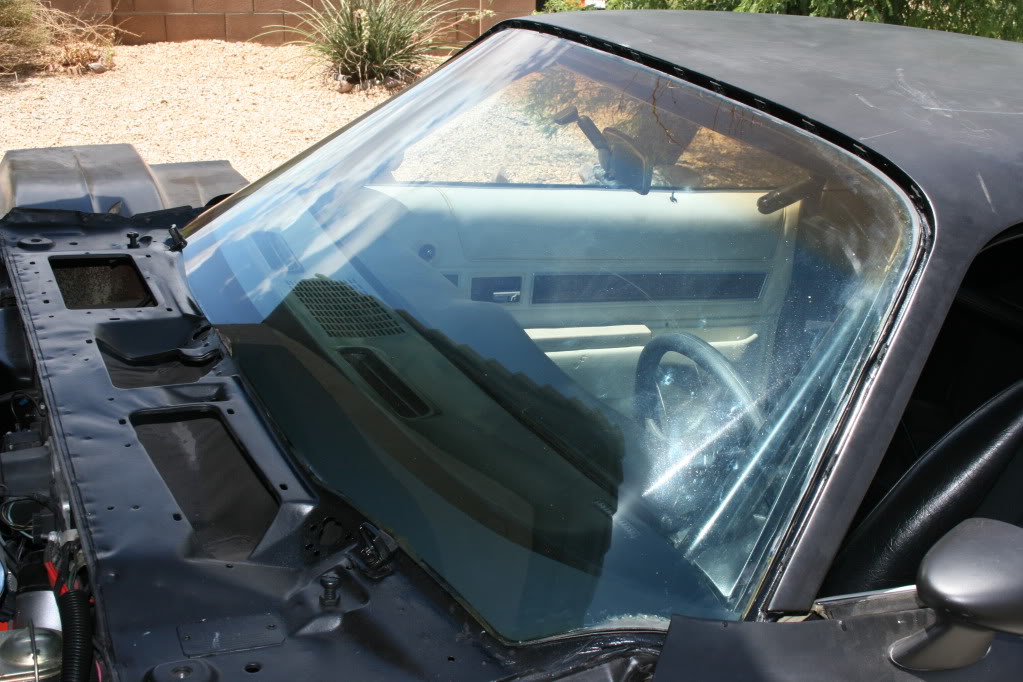
First of all the windshield went back in. It has a lot more small stone chips and scratches in it than I had remembered, but that could be because it's been stored outside alongside my garage wall since it was removed. Anyway, it went back in via the same process as I outlined for the rear glass. I first cleaned the edges really well, making sure there was no old butyl left to cause issues with the new seal. I also did my best to clean the entire glass surface front and back, but you'd never know that to look at it. Then Chris came over and we first dry fitted it, marking its final position with masking tape. We then removed the window, laid out the fresh butly on the glass and reinstalled it in place. Everything seemed to go as planned, but I haven't leak tested it yet.
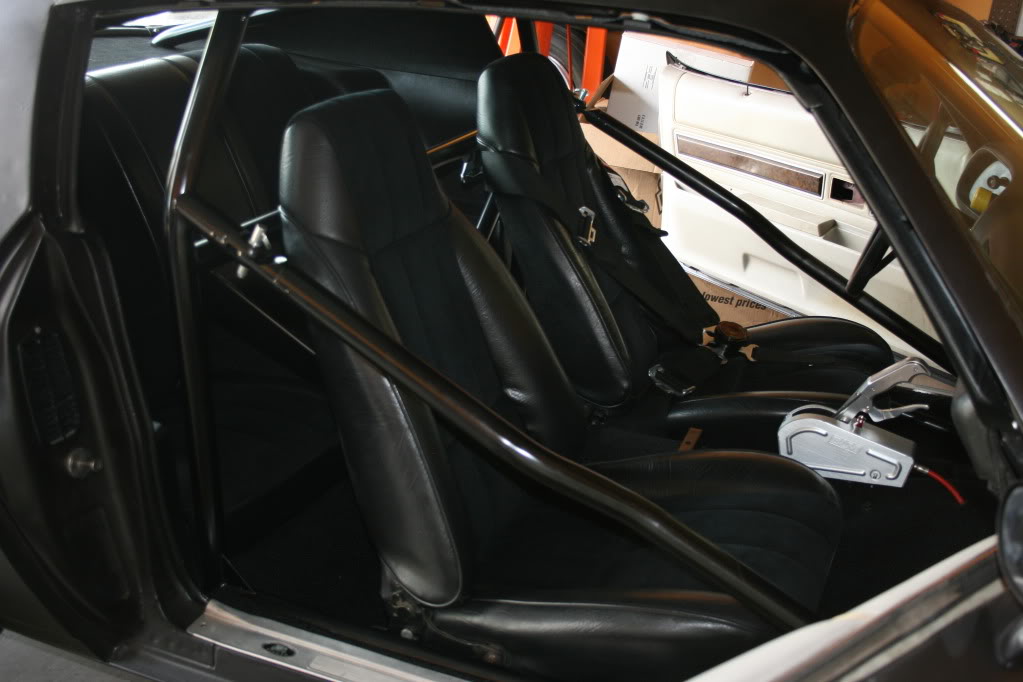
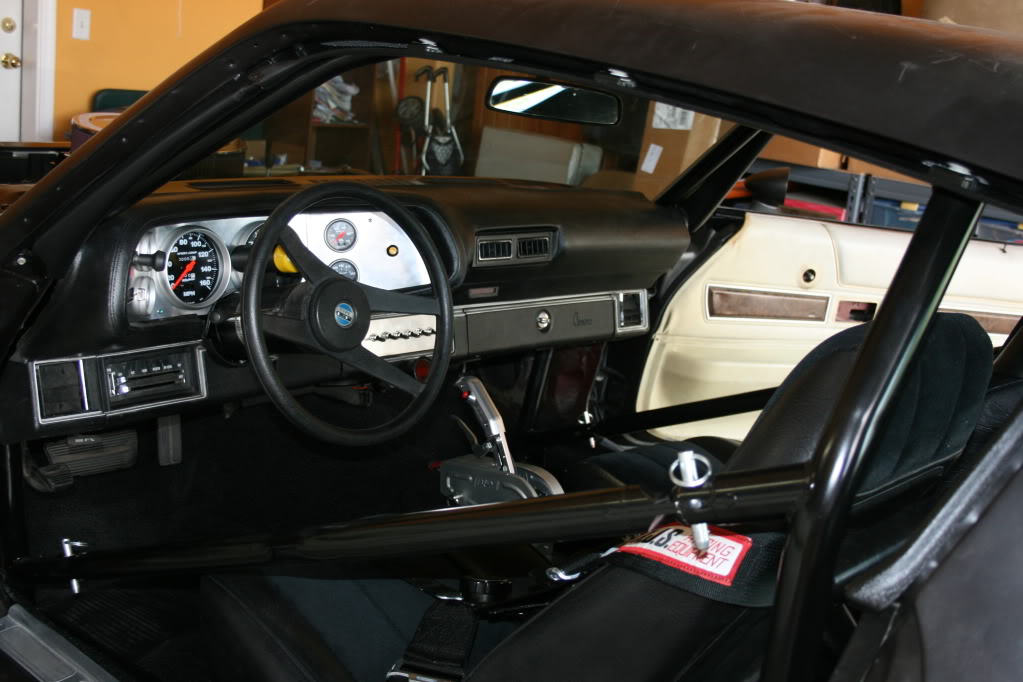
Then I finished recoating some more interior trim panels like the a-pillar panels and the pieces that run along the sides and front of the headliner. Once they had dried I got them all installed. I also removed the 75-81 seat tracks off of the black seats I bought last month and installed my freshly blasted and painted 73 seat tracks. But not before greasing them very well with white lithium grease to keep them operating smoothly. Then the front seats were finally bolted into place to I could try them out for comfort. Thats when I realized that the shoulder harness mounts on my roll cage are not centered on the seat backs. They are both offset to the inside by about a full mount's width. So, it looks like these are going to need to be cut back off and new ones welded in the proper position. Man....it never ends with this freakin cage! But, to test the sturdiness of the newly mounted seats I pulled the car out into the street and launched it a couple times at 4000RPMs off the transbrake. The test was sucessfull and the seats held up well . Sorry though.....no video. Even if I had one I probably wouldn't post it. Between the 7000ft+ DA here and the fuel fouled plugs, this thing comes out kinda lazy......but at least it hooks pretty well. I'm still not sure why I put TR6's in this 9.7:1 motor. I need to pick up some fresh TR5s.
I did a lot of other small stuff too, but nothing terribly photoworthy. One thing I got done yesterday afternoon was installing my door weatherstripping and outer window sweeps. I must say, I'm very pleased so far with the quality and fit of the Soff Seal stuff. The only complaint I have with the window sweeps was the screws they came with to attach them. They seem just a little small and don't tighten well in the holes in the door. So I think I'll buy a pop rivet gun and install them the way the factory did. Well, enough babbling. Here's some random interior and windshield pics.


I got a few more things done sporatically over the long weekend. It was another hot one, so my time in the garage was spent in short spurts and moving very slowly. So all of this stuff happened over a period of a few days.
First of all the windshield went back in. It has a lot more small stone chips and scratches in it than I had remembered, but that could be because it's been stored outside alongside my garage wall since it was removed. Anyway, it went back in via the same process as I outlined for the rear glass. I first cleaned the edges really well, making sure there was no old butyl left to cause issues with the new seal. I also did my best to clean the entire glass surface front and back, but you'd never know that to look at it. Then Chris came over and we first dry fitted it, marking its final position with masking tape. We then removed the window, laid out the fresh butly on the glass and reinstalled it in place. Everything seemed to go as planned, but I haven't leak tested it yet.
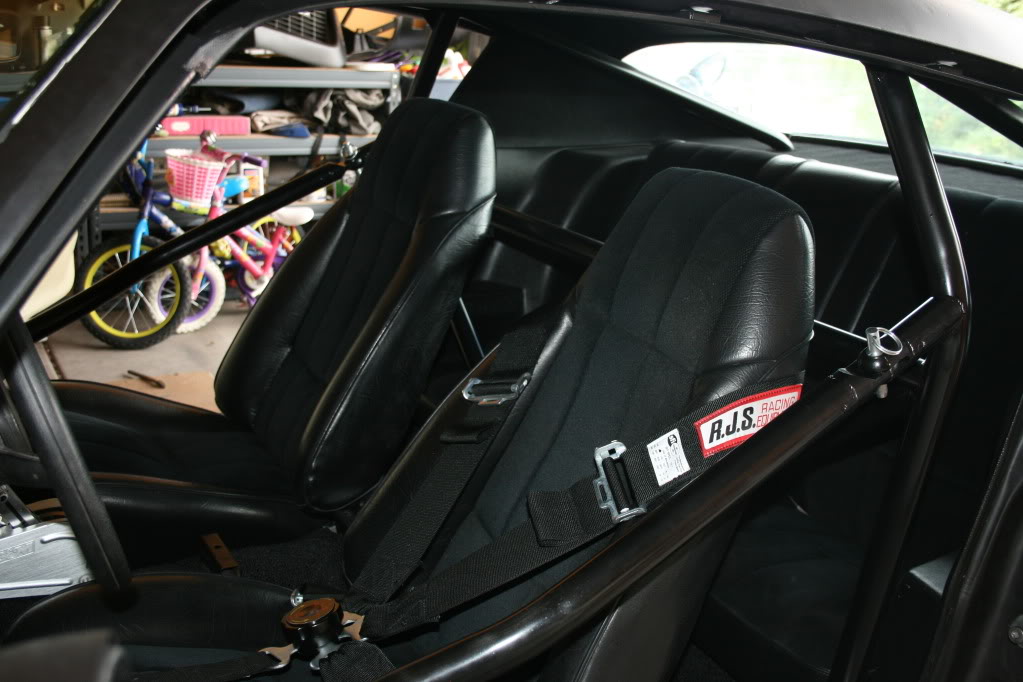
Then I finished recoating some more interior trim panels like the a-pillar panels and the pieces that run along the sides and front of the headliner. Once they had dried I got them all installed. I also removed the 75-81 seat tracks off of the black seats I bought last month and installed my freshly blasted and painted 73 seat tracks. But not before greasing them very well with white lithium grease to keep them operating smoothly. Then the front seats were finally bolted into place to I could try them out for comfort. Thats when I realized that the shoulder harness mounts on my roll cage are not centered on the seat backs. They are both offset to the inside by about a full mount's width. So, it looks like these are going to need to be cut back off and new ones welded in the proper position. Man....it never ends with this freakin cage! But, to test the sturdiness of the newly mounted seats
I pulled the car out into the street and launched it a couple times at 4000RPMs off the transbrake. The test was sucessfull and the seats held up well . Sorry though.....no video. Even if I had one I probably wouldn't post it. Between the 7000ft+ DA here and the fuel fouled plugs, this thing comes out kinda lazy......but at least it hooks pretty well. I'm still not sure why I put TR6's in this 9.7:1 motor. I need to pick up some fresh TR5s.I did a lot of other small stuff too, but nothing terribly photoworthy. One thing I got done yesterday afternoon was installing my door weatherstripping and outer window sweeps. I must say, I'm very pleased so far with the quality and fit of the Soff Seal stuff. The only complaint I have with the window sweeps was the screws they came with to attach them. They seem just a little small and don't tighten well in the holes in the door. So I think I'll buy a pop rivet gun and install them the way the factory did. Well, enough babbling. Here's some random interior and windshield pics.
Last edited by GC99TA; 07-04-2011 at 04:50 PM.
07-04-2011, 04:58 PM
#444

The car is looking great! Its almost a complete unit now. Hate to hear about the cage. I am sure it is an easy fix. I would have loved to see the launch on video! Your gonna have to take this car to the track before long, you gotta!!! No choice in the matter!!! I am glad you go over the details like you do, no matter how simple it may seem you just dont never know who might need the information.
07-04-2011, 05:33 PM
#445
The car is looking great! Its almost a complete unit now. Hate to hear about the cage. I am sure it is an easy fix. I would have loved to see the launch on video! Your gonna have to take this car to the track before long, you gotta!!! No choice in the matter!!! I am glad you go over the details like you do, no matter how simple it may seem you just dont never know who might need the information.
So, I keep moving forward but mostly on stuff that I can fart around with inside the garage. It's still hot, but it's shaded. But once it's all in one piece again, I'll get it to the track as soon as possible. The cage isn't a real tough fix, but it's just one more thing that needs to be done before I can drive/race it and that'll mean a good part of the interior has to come back out like the carpet and rear seats at a minimum. Plus I need to decide if I'm gonna trailer it all the way back up to Phoenix for the chassis shop to make it right or if I'll just bite the bullet and have someone local fix it. Man, I wish I could TIG weld right about now.
The launches were pretty funny and I'm sure my neighbors think I'm a real *******. Like I said, it comes out pretty soft and hooks really well (a little too well for the street, which makes me worry about power). Another factor though, aside from my DA and fouled plugs excuses is that my front end is still sitting really high (resting on the upper bump stops) so there is a ton of weight already transferred to the rear wheels.
I guess as long as folks keep checking out my progress on here, I'll keep posting it up. I know I pick up a lot of tips and information on these and other forums, so hopefully something here helps someone else.
 07-04-2011, 10:04 PM
#447

Wow Gary. Looking great. You've done a TON of work since you got it. It gives alot of us motivation.
07-05-2011, 10:26 AM
#448
Thanks to both of you guys! I'm pretty pleased with how things are progressing.....well, pleased with everything except the timeline it's happening on. But, all in due time I suppose. I'm quickly approaching the two-year mark on this project, so it's nice to see at least a little light at the end of the tunnel. The car has a lot more phases to go through before it's truly "done". Over the coming years it'll eventually see professional bodywork and paint when I someday get tired of the dents, holes and flat black. It'll also get an upgraded rear end and driveshaft, some sort of power adder, and eventually more cubes. But for now I'll be more than happy with it just being drivable so I can enjoy it while I "finish" it.
07-06-2011, 04:44 AM
#449
8 Second Club
iTrader: (1)
Join Date: Nov 2001
Location: the not so stock tribe
Posts: 3,697
Likes: 0
Received 0 Likes
on
0 Posts

great build!!!
just went through the whole thing , and thank you for all the effort you put in to document everything.
i'm in the process of getting a '70 camaro and this thread is like a gold mine of information ! keep up the good work !
just went through the whole thing , and thank you for all the effort you put in to document everything.
i'm in the process of getting a '70 camaro and this thread is like a gold mine of information ! keep up the good work !
07-06-2011, 07:35 AM
#450
I agree 100%. This has been my favorite build thread on here. I enjoy seeing someone who is into the fine detail of everything.
07-06-2011, 12:39 PM
#451
......How's yours coming by the way? Last I checked I think you were in the parts gathering phase, right? Anything new to report?
07-06-2011, 02:43 PM
#452
 and have it where I live. Oh well. Keep up the great work Gary.
JIm
07-10-2011, 06:22 PM
#453
It was a fairly overcast day today, so I decided to brave the great outdoors and get some work done on my fenders. These are the last two body panels that need to be stripped, prepped and primed before the front clip can finally be reassembled on the car. The passenger side fender is the worst of the two panels, so I started with it. I’ve actually been messing with this fender little by little for quite a while since it’s rust issues had been apparent since I first bought the car. Back in 09 when I was blasting the roof, I couldn’t resist also blasting the lower rear portion of this fender just to get an idea of how bad it was. Once I got done blowing several rust holes in it with the sand blaster, I cut out the swiss cheesed area of bad metal, knowing full well there was probably still more that needed to be cut out once I could get it off the car and see the back side of the panel.
So, fast forward about a year and a half later; The fenders had been off the car quite a while. I got bored one day and pulled the passenger fender out of the corner and drilled out the spot welds that connect the rear fender brace to the fender. This allowed me to pull the brace out away from the sheet metal and get a better look at how much rust was between the brace and outer sheet metal. Having the brace separated would also allow me to eventually address the rust with sand blasting and POR15.
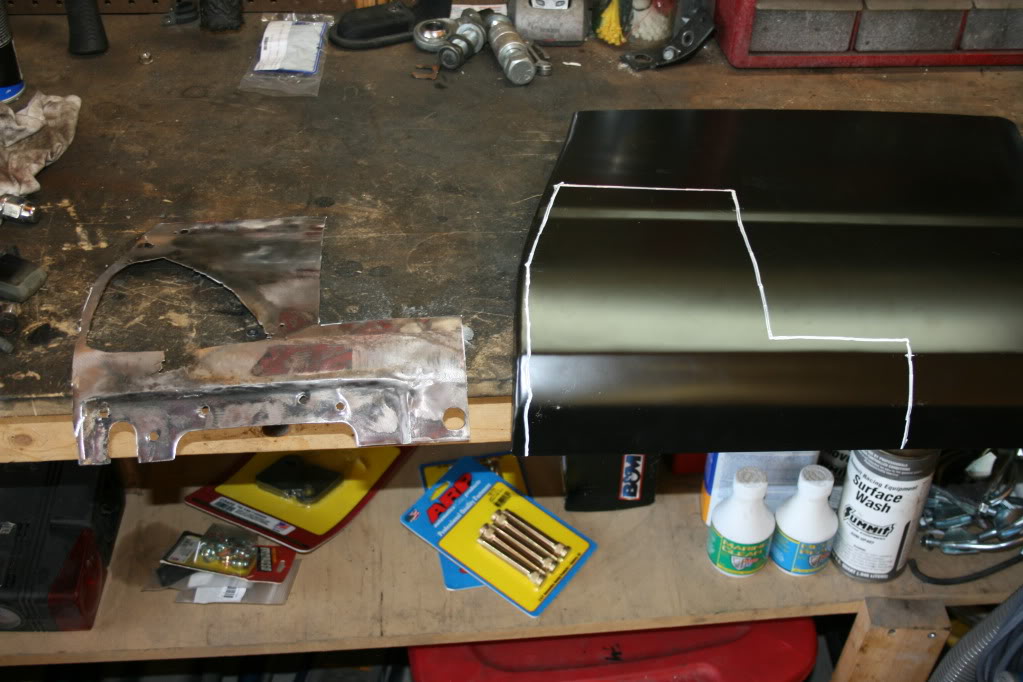
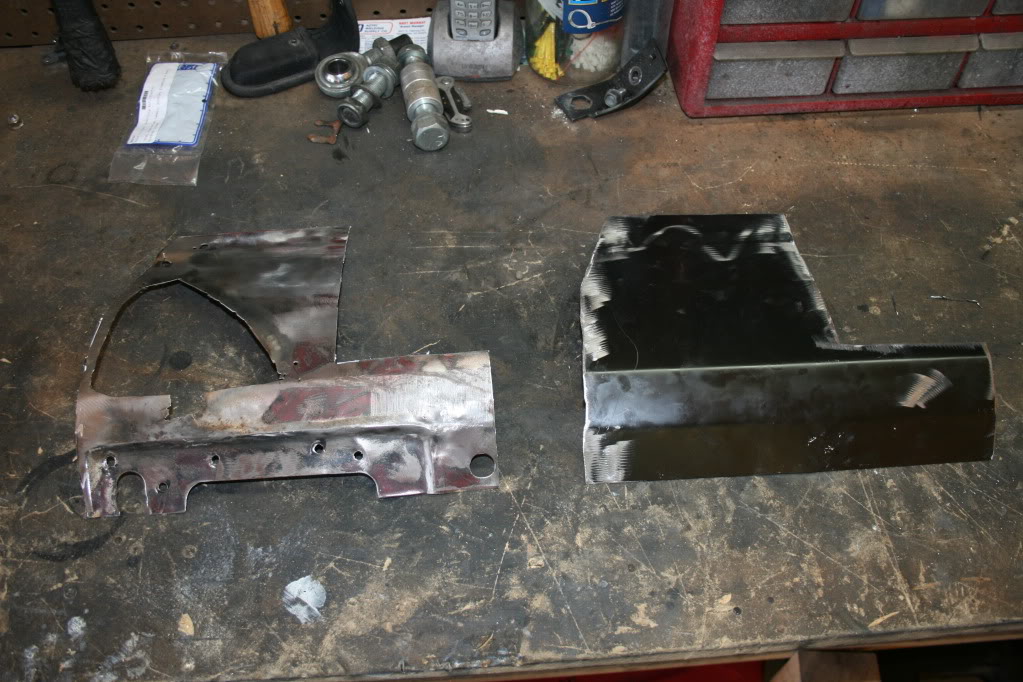
Now fast forward to today. Here’s the section of the lower fender I cut out back in 09 after blasting the outside of it.
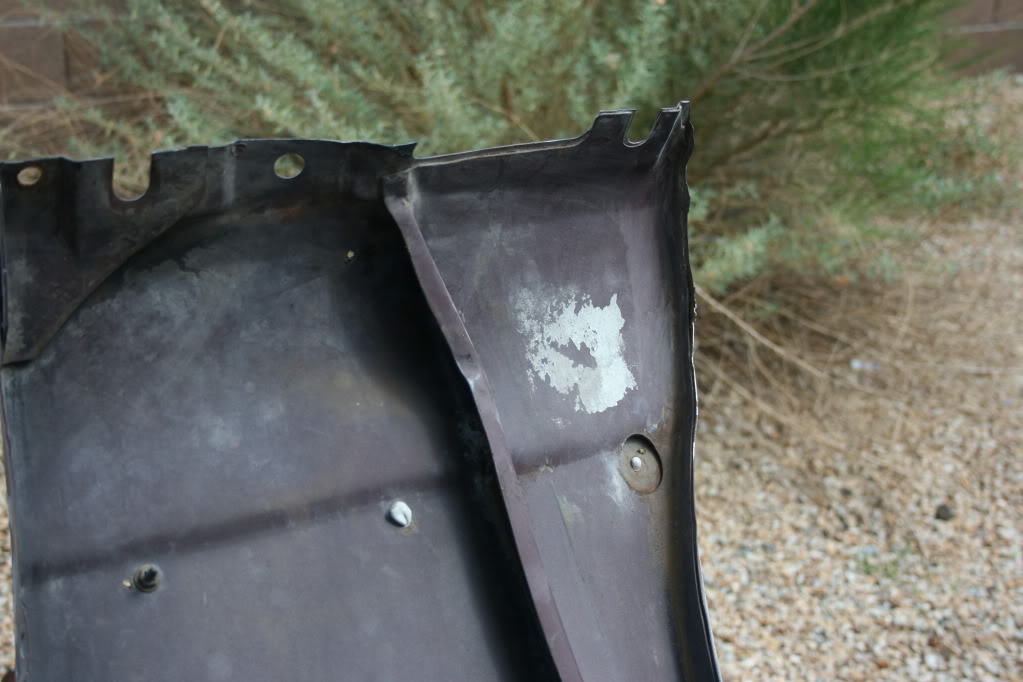
And here’s a look from behind with the rear fender brace pulled. Lots of rusty metal still left around the cut hole on the back side of the panel.
And here’s how much rust is on the brace itself. These braces run so close to the outer sheet metal that they create a trap for water and other debris. This will all get the wire wheel treatment, followed by some sand blasting and POR15.

So since I'm currently without sand, I next stripped the entire outer skin of the fender and then marked and cut out the bad area of the lower fender that I intend to replace with clean sheet metal. I also applied some mild chemical stripper (citrustrip) to some of the hard to reach areas like the inside (under hood) edges of the fender. I’ll let the stripper loosen it up and I'll finish stripping these parts with the sand blaster some other day.

I used the bad portion of fender I cut out as a template for my patch panel. I cut the patch on the outsides of the lines so I’d have some room for error. So additional trimming will need to be done when I do the final fit of the patch, but that won’t be done until much later. There’ still a lot of prep work that needs to be done before the patch goes in. Plus, I'd like to have the fender hung on the car when i fit the patch so I'm sure everything lines up OK.
So next I moved on to the driver’s side fender. The lower part of this one is in a lot better shape than the passenger side, but I still may drill and pull out the brace on this one too. I had some rust flake coming out from behind the brace when was stripping the outside with the grinder, and there’s also a few minor pin holes all the way through near the bottom. So now doubt this fender will eventually rot through if I don't address is now.
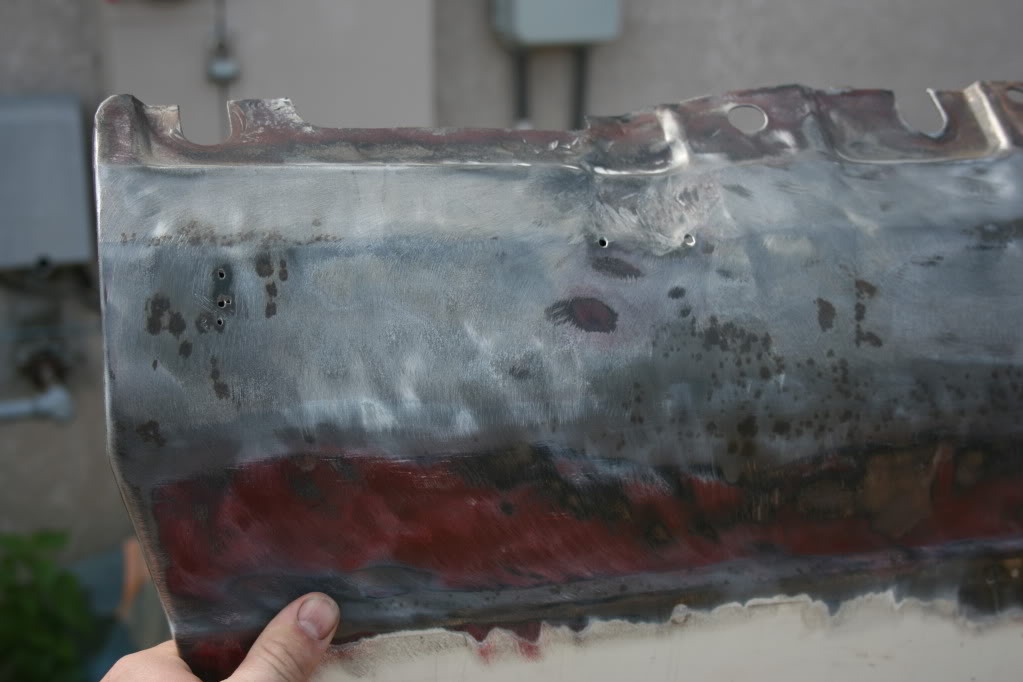
Here’s the outside of the driver's fender all stripped. Again, there is still a lot of stripping and blasting to do on the rear side.
This stuff took me most of the morning and by noon I had enough of the heat and sunlight. So I moved back into the garage and did a good clean up of my blast cabinet (what a dusty mess) and called it an early day. Whew, I'm getting old.
So, fast forward about a year and a half later; The fenders had been off the car quite a while. I got bored one day and pulled the passenger fender out of the corner and drilled out the spot welds that connect the rear fender brace to the fender. This allowed me to pull the brace out away from the sheet metal and get a better look at how much rust was between the brace and outer sheet metal. Having the brace separated would also allow me to eventually address the rust with sand blasting and POR15.
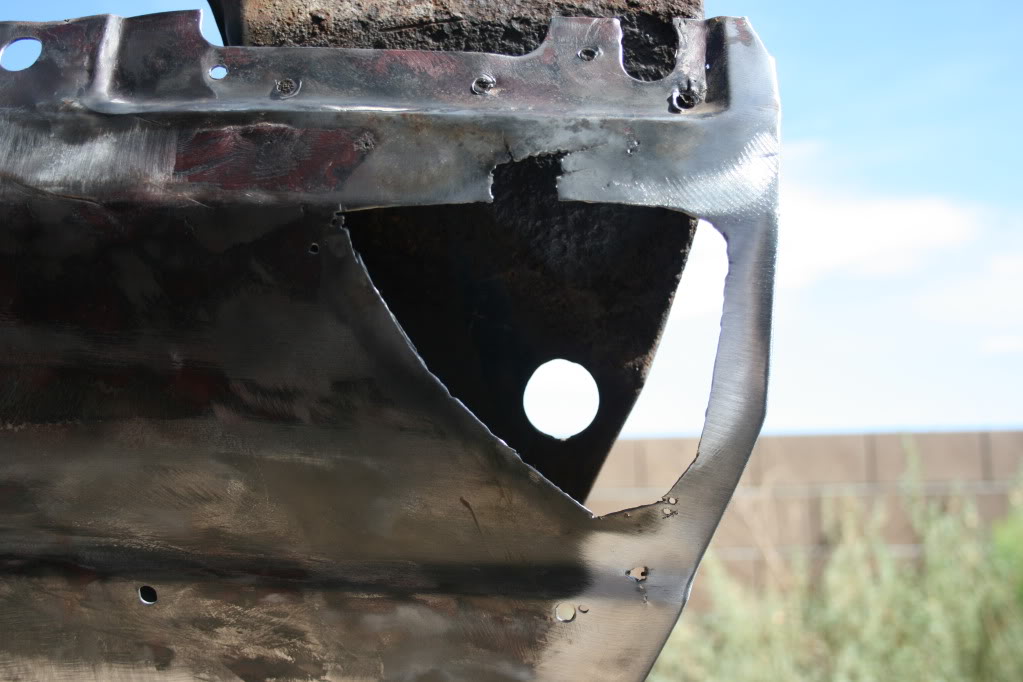
Now fast forward to today. Here’s the section of the lower fender I cut out back in 09 after blasting the outside of it.
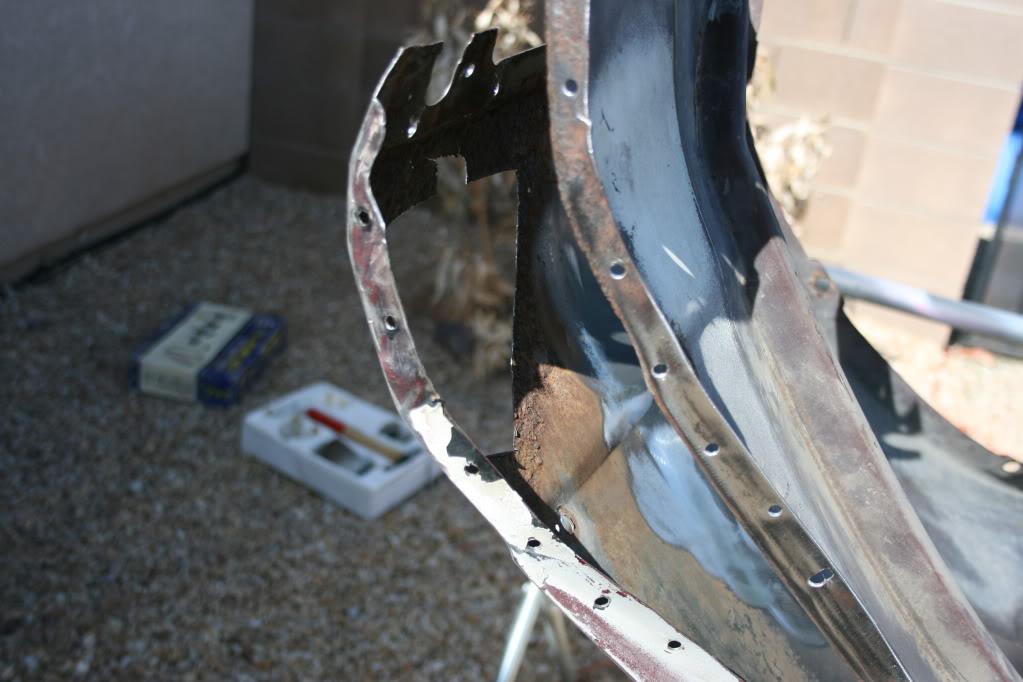
And here’s a look from behind with the rear fender brace pulled. Lots of rusty metal still left around the cut hole on the back side of the panel.
And here’s how much rust is on the brace itself. These braces run so close to the outer sheet metal that they create a trap for water and other debris. This will all get the wire wheel treatment, followed by some sand blasting and POR15.
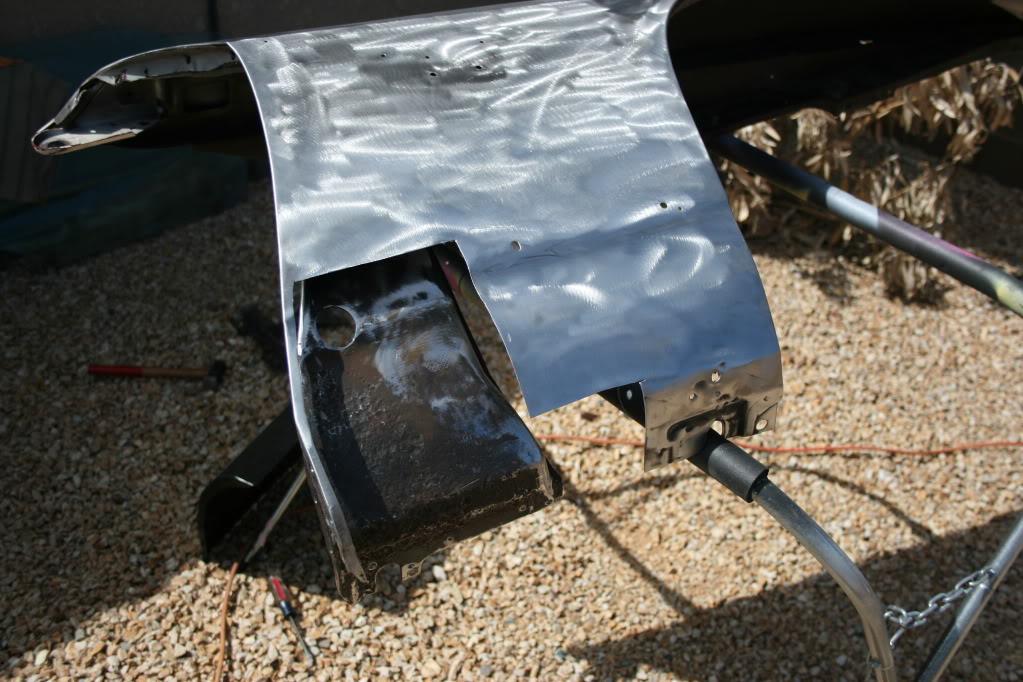
So since I'm currently without sand, I next stripped the entire outer skin of the fender and then marked and cut out the bad area of the lower fender that I intend to replace with clean sheet metal. I also applied some mild chemical stripper (citrustrip) to some of the hard to reach areas like the inside (under hood) edges of the fender. I’ll let the stripper loosen it up and I'll finish stripping these parts with the sand blaster some other day.
I used the bad portion of fender I cut out as a template for my patch panel. I cut the patch on the outsides of the lines so I’d have some room for error. So additional trimming will need to be done when I do the final fit of the patch, but that won’t be done until much later. There’ still a lot of prep work that needs to be done before the patch goes in. Plus, I'd like to have the fender hung on the car when i fit the patch so I'm sure everything lines up OK.
So next I moved on to the driver’s side fender. The lower part of this one is in a lot better shape than the passenger side, but I still may drill and pull out the brace on this one too. I had some rust flake coming out from behind the brace when was stripping the outside with the grinder, and there’s also a few minor pin holes all the way through near the bottom. So now doubt this fender will eventually rot through if I don't address is now.
Here’s the outside of the driver's fender all stripped. Again, there is still a lot of stripping and blasting to do on the rear side.
This stuff took me most of the morning and by noon I had enough of the heat and sunlight. So I moved back into the garage and did a good clean up of my blast cabinet (what a dusty mess) and called it an early day. Whew, I'm getting old.
07-17-2011, 08:29 PM
#454
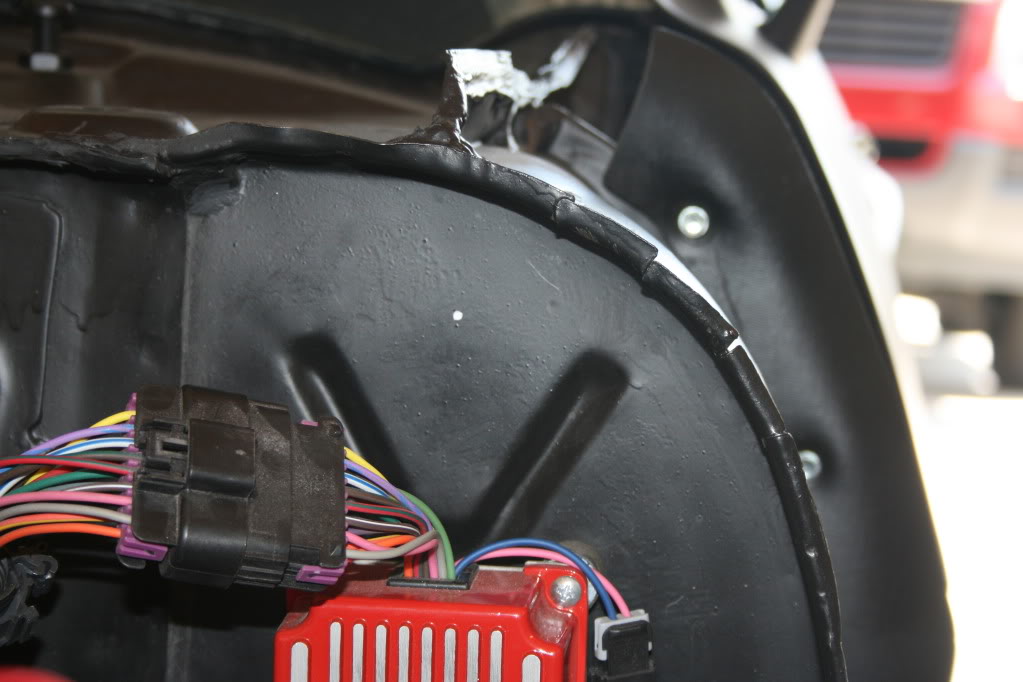
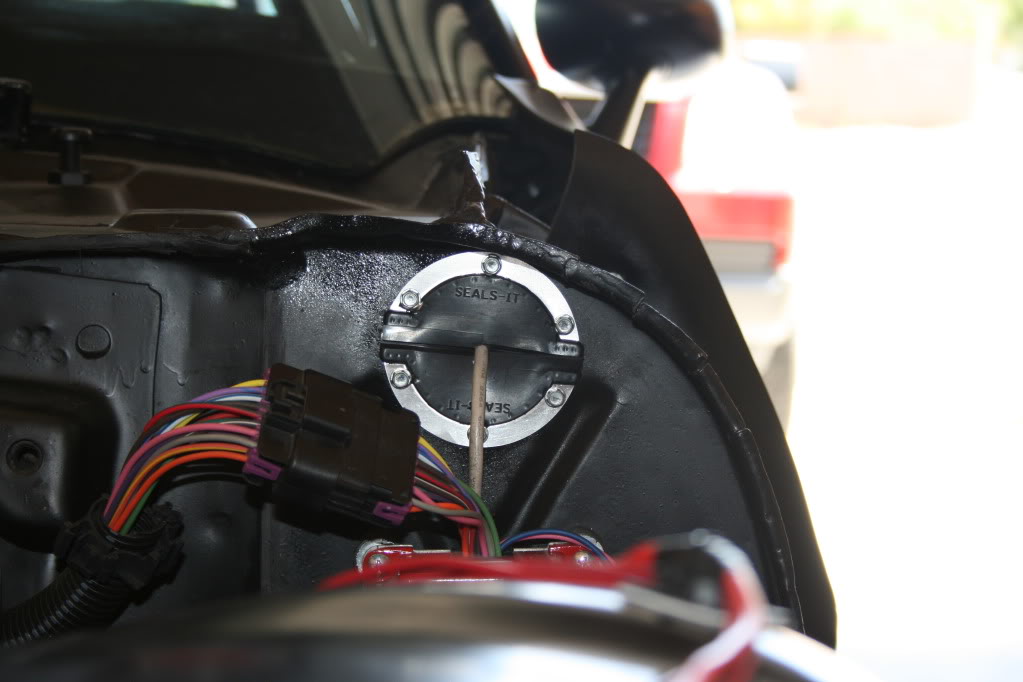
Just a small update for this weekend. I had a few family things going on Saturday, so I decided to just take on a few small jobs that need to be done before the front end sheet metal goes back on for good. First I needed to route the serial cable from my MSD 6LS box into the cabin of the car. This will allow me to connect to my laptop to make changes to my rev limits (upper and lower), timing table, and nitrous retard settings. The white dot marks the spot I want the cable to go through.
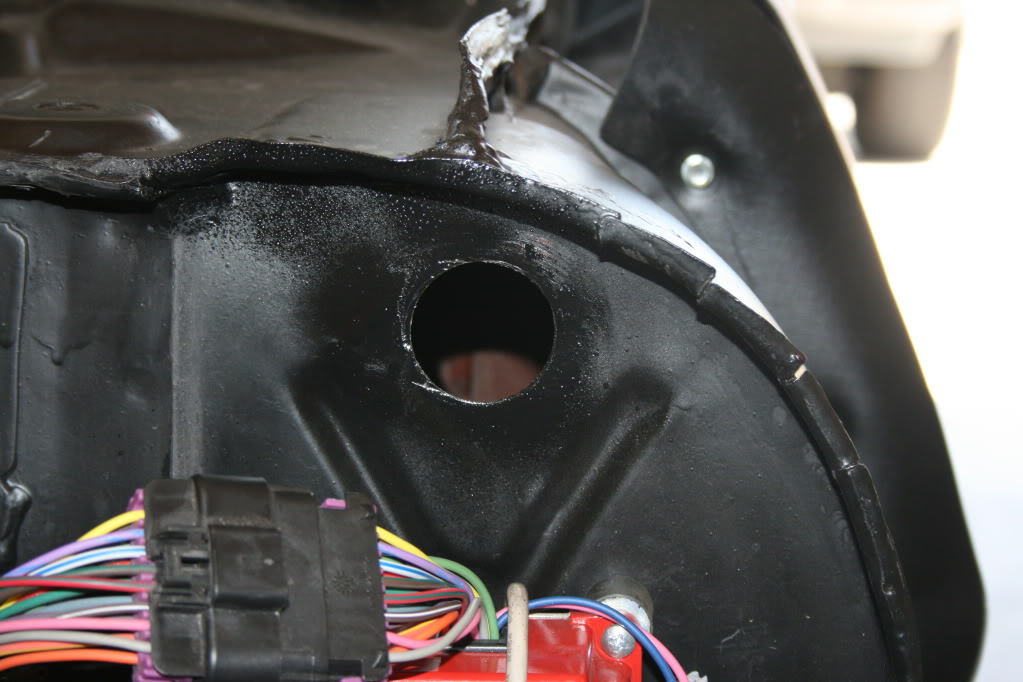
Since the serial cable plug end measures about 1 3/8in, I needed to cut a hole in the fire wall with a 1 ˝in hole saw. Then I dressed the cut real quick and sloppily splattered it with some paint. Luckily this will be hidden under the fender.
I obviously didn’t want to leave a hole this large uncovered, so I bought a Seals It brand split grommet with a 1/4inch hole that fit the cable size perfectly.
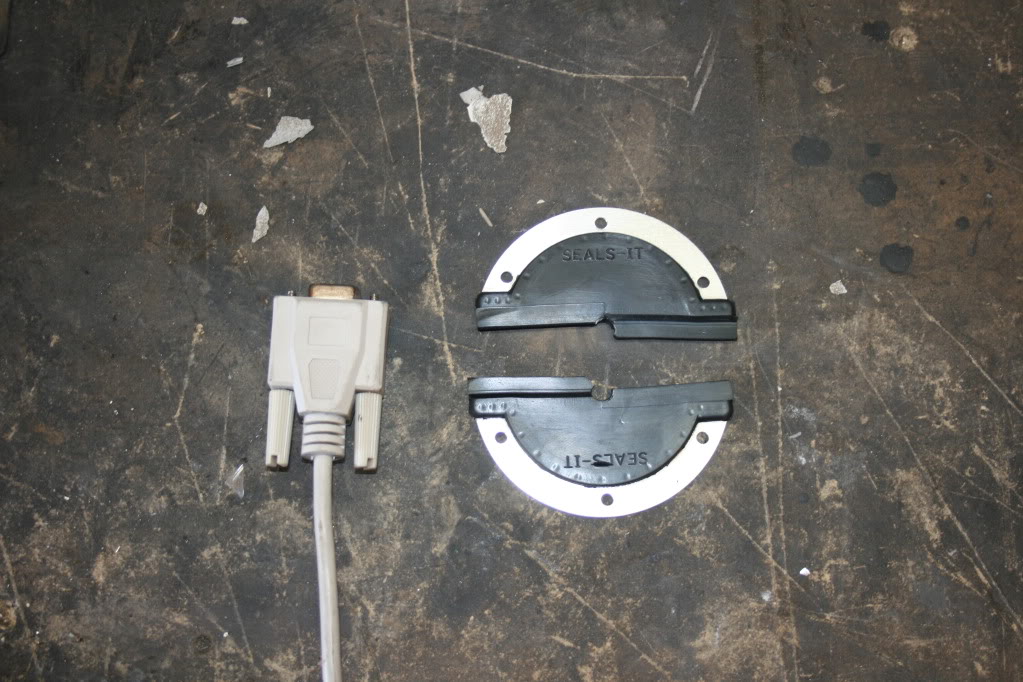
Once the cable was routed through the hole, I covered it with the grommet and secured it with some sheet metal screws. Problem solved.
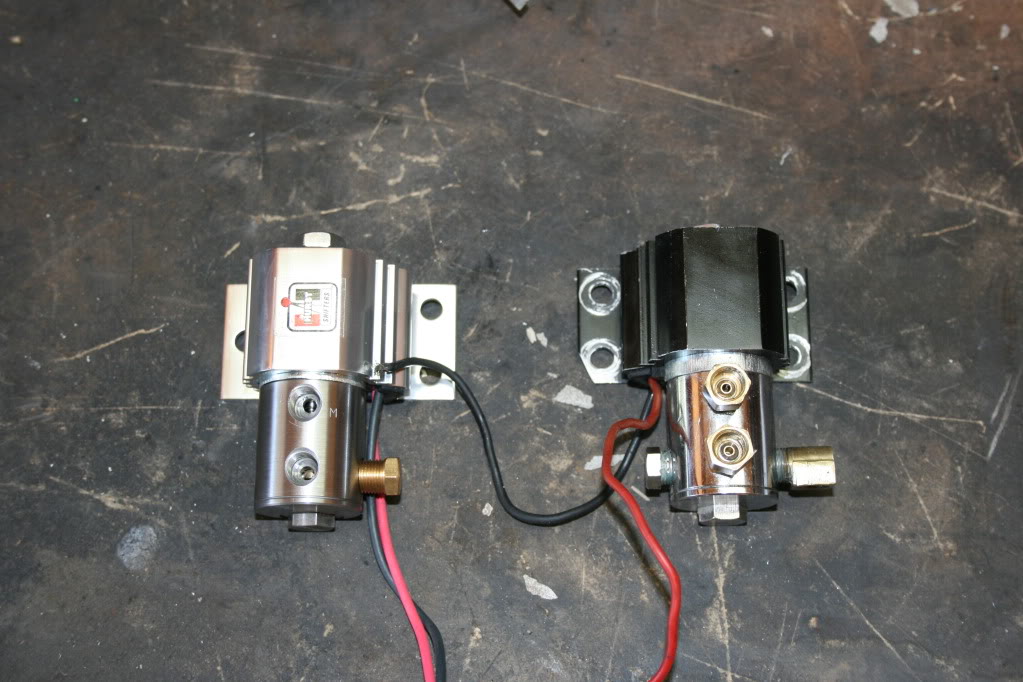
Next up was my line lock. When I first bought it, I made the wrong assumption that the Summit brand line lock was just a re-branded Hurst at a much lower price. Well, as it turns out, it’s a much cheaper (inferior parts) copy of the Hurst because the quality is night and day. Long story short, I bought the Summit unit first and it failed shortly after installing it while simply testing it in the garage. So, I pulled it off, messed with it a little and got it working. So, I put it back on and it did the same thing….just quit during testing. So, I gave up on it and order the Hurst. Here they are side by side.
There’s not much of a story to the install since the Summit and Hurst units both have the same port layout. It was really a matter of pulling one off and replacing it with the other. But, here’s a shot of the Hurst in place.

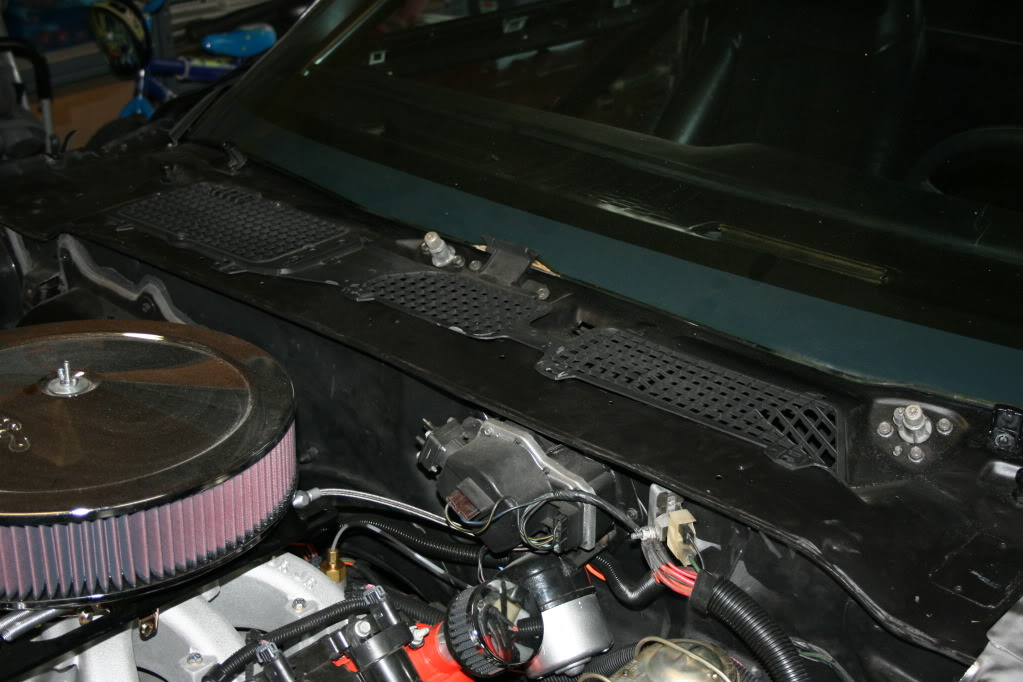
The last small job I did was to put the “guts” back into my cowl. That was basically the windshield wiper mechanisms, the vacuum operated vent door, the cowl divider, and cowl screen.
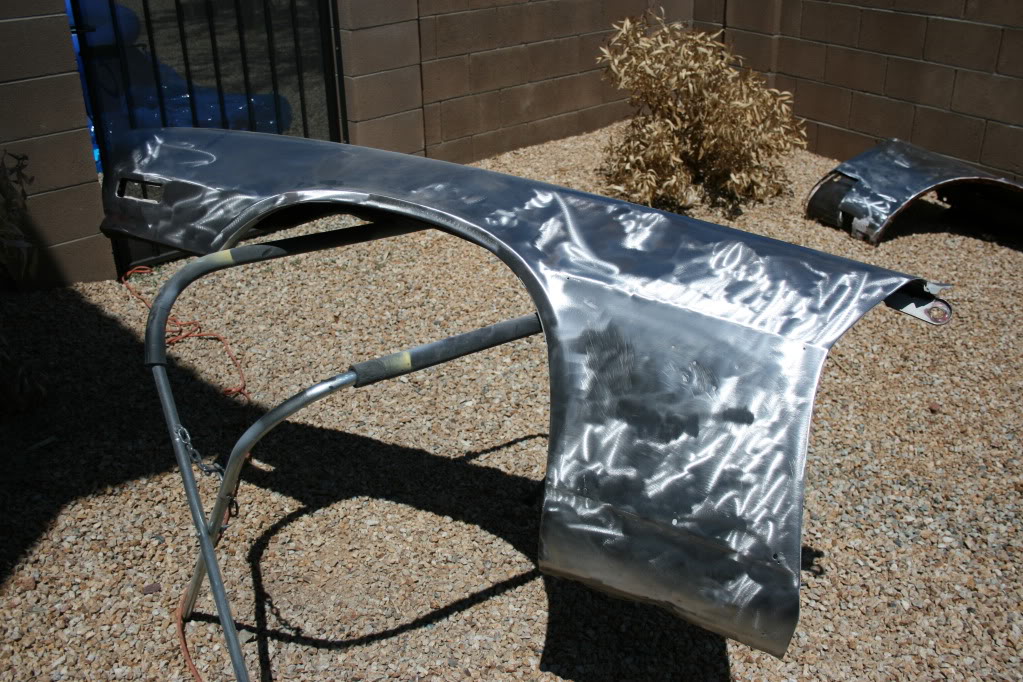
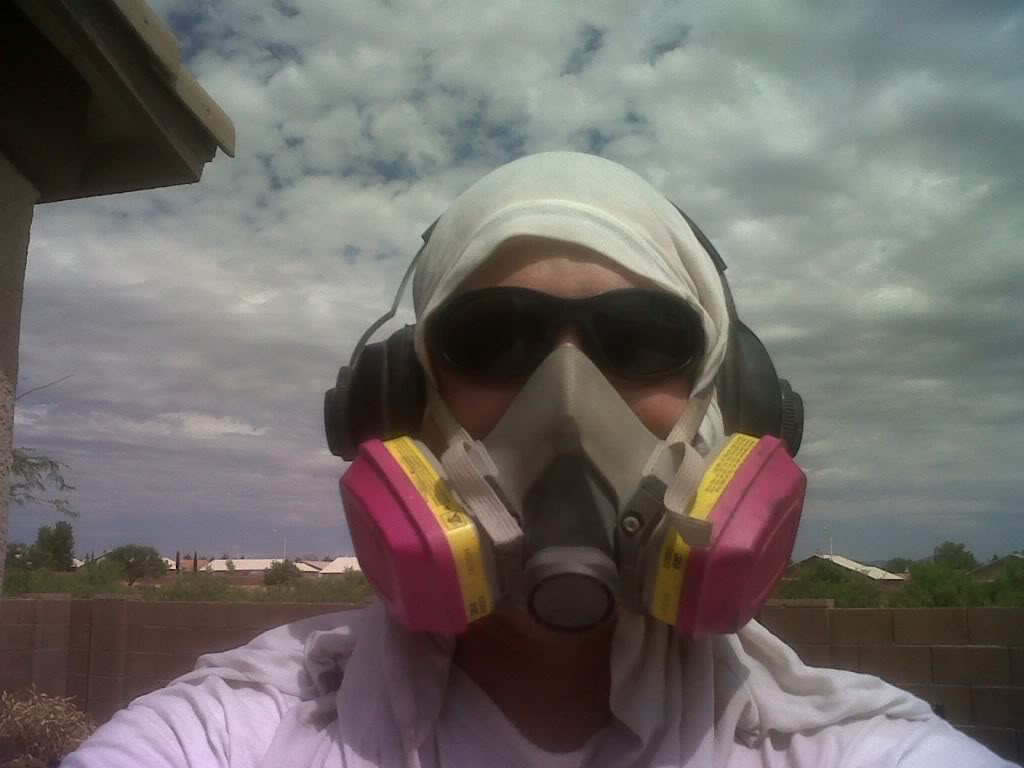
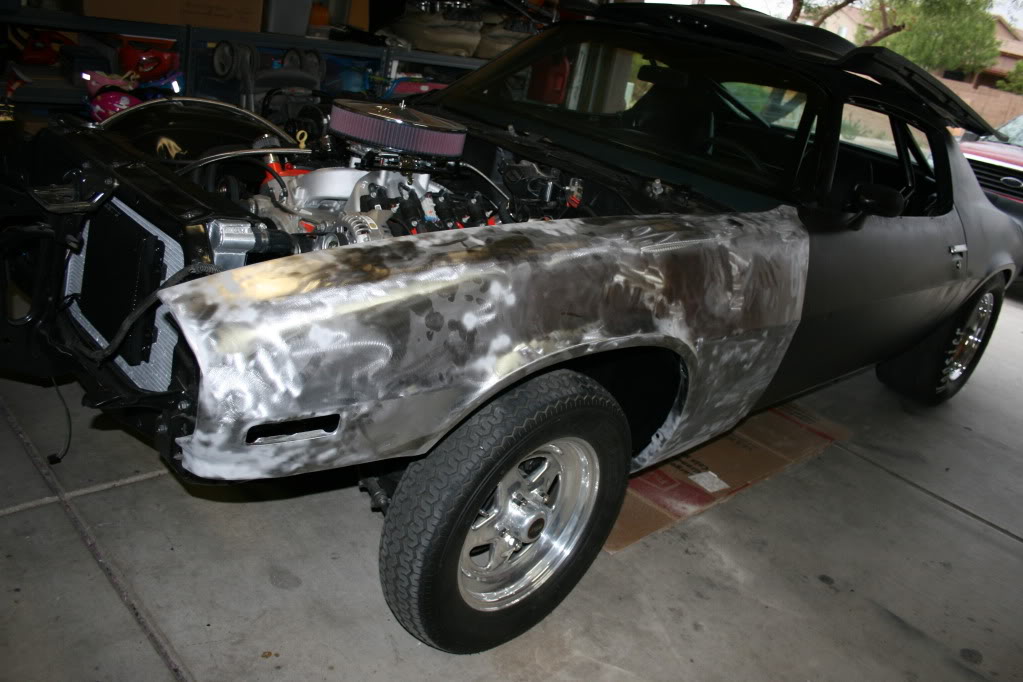
Today was a fairly overcast day, so I decided to brave the heat again to work on one of my fenders. So, I donned my gear (to include a wet T-shirt on my head) and got to it.
Last week I had stripped the outside of the fenders, but now starts the tedious task of stripping the back sides of paint and any rust. So, I spent about three hours just on the passenger fender and got it about 60% of where I want it to be, but I had to help a buddy this afternoon, which gave me an great reason to get in out of the heat. I still need to drill the spot welds and pry back the inner brace to take care of the rust issues between the brace and panel and do some other clean up. Then this one will be ready for some POR 15 on the back and some epoxy on the outside. From this picture it doesn’t look much different than it did last week, but trust me…..it is. I just rested it here on the car instead of stetting it back in the corner.
Since the serial cable plug end measures about 1 3/8in, I needed to cut a hole in the fire wall with a 1 ˝in hole saw. Then I dressed the cut real quick and sloppily splattered it with some paint. Luckily this will be hidden under the fender.
I obviously didn’t want to leave a hole this large uncovered, so I bought a Seals It brand split grommet with a 1/4inch hole that fit the cable size perfectly.
Once the cable was routed through the hole, I covered it with the grommet and secured it with some sheet metal screws. Problem solved.
Next up was my line lock. When I first bought it, I made the wrong assumption that the Summit brand line lock was just a re-branded Hurst at a much lower price. Well, as it turns out, it’s a much cheaper (inferior parts) copy of the Hurst because the quality is night and day. Long story short, I bought the Summit unit first and it failed shortly after installing it while simply testing it in the garage. So, I pulled it off, messed with it a little and got it working. So, I put it back on and it did the same thing….just quit during testing. So, I gave up on it and order the Hurst. Here they are side by side.
There’s not much of a story to the install since the Summit and Hurst units both have the same port layout. It was really a matter of pulling one off and replacing it with the other. But, here’s a shot of the Hurst in place.
The last small job I did was to put the “guts” back into my cowl. That was basically the windshield wiper mechanisms, the vacuum operated vent door, the cowl divider, and cowl screen.
Today was a fairly overcast day, so I decided to brave the heat again to work on one of my fenders. So, I donned my gear (to include a wet T-shirt on my head) and got to it.
Last week I had stripped the outside of the fenders, but now starts the tedious task of stripping the back sides of paint and any rust. So, I spent about three hours just on the passenger fender and got it about 60% of where I want it to be, but I had to help a buddy this afternoon, which gave me an great reason to get in out of the heat. I still need to drill the spot welds and pry back the inner brace to take care of the rust issues between the brace and panel and do some other clean up. Then this one will be ready for some POR 15 on the back and some epoxy on the outside. From this picture it doesn’t look much different than it did last week, but trust me…..it is. I just rested it here on the car instead of stetting it back in the corner.
07-18-2011, 03:35 PM
#455
You look like I do when I sandblast something in the pic with the wet shirt over your head. My wife just laughs at me. Your car is looking great! I really hate to hear about the Summit line lock as I have the exact same one and for the same reason you bought yours, price! I am hoping you got the bad one out of the bunch and all of the other chinese spin-offs are perfect, yeah right! Your a week away from having a complete car again!!! Did you read the article in Hot Rod about the twin turbo 5.3? They tried to blow it up and could not. The based it in at 451hp N/A and then started adding boost. They got to 26.8 lbs of boost and yielded 1,203hp out of the 5.3. the pulled on it 60 times on the dyno and didnt break a thing. After it was all said and done the realized it was a 4.8 not 5.3!!! Imagine 1,203hp out of a 4.8!!! Imagine the same test on a 6.0 or larger.
Last edited by tsnow678; 07-18-2011 at 04:05 PM.
07-18-2011, 07:58 PM
#456
You look like I do when I sandblast something in the pic with the wet shirt over your head. My wife just laughs at me. Your car is looking great! I really hate to hear about the Summit line lock as I have the exact same one and for the same reason you bought yours, price! I am hoping you got the bad one out of the bunch and all of the other chinese spin-offs are perfect, yeah right! Your a week away from having a complete car again!!! Did you read the article in Hot Rod about the twin turbo 5.3? They tried to blow it up and could not. The based it in at 451hp N/A and then started adding boost. They got to 26.8 lbs of boost and yielded 1,203hp out of the 5.3. the pulled on it 60 times on the dyno and didnt break a thing. After it was all said and done the realized it was a 4.8 not 5.3!!! Imagine 1,203hp out of a 4.8!!! Imagine the same test on a 6.0 or larger.
. If you want this old one for parts, you can have it for the cost of shipping. I'm not sure but they may be rebuildable with the rebuild kit for the Hurst? No, I haven't seen the article in Hot Rod yet.....I'll have to definatly have to check it out. That sounds awesome!
But in the meantime.......here's an article for you guys to check out. Believe it or not, the guys at lsxtv.com did a short feature article on my car! Here's the link to check it out:
http://www.lsxtv.com/features/car-re...er-to-hot-rod/
I've got to admit that when Cliff Klaverweiden (author) contacted me about writing it, I was afraid he had acidentally contacted the wrong guy....like maybe he had mistaken me for the owner of one of the other awesome swaps on this board. But as it turns out......I guess it was my lucky day.
07-18-2011, 08:10 PM
#457
Thats great to have that kind of publicity even before its complete! I bet you are proud. Your famous now! Can we still call you Gary or have you already changed your name. And I thought I was famous when I was asked if they could put my car on the shirts for a local cruise in reunion, damn!!! You deserve some credit for all of your hard work.
07-18-2011, 08:25 PM
#458
Thats great to have that kind of publicity even before its complete! I bet you are proud. Your famous now! Can we still call you Gary or have you already changed your name. And I thought I was famous when I was asked if they could put my car on the shirts for a local cruise in reunion, damn!!! You deserve some credit for all of your hard work.
. Actually, to be perfectly honest with you man....your car was the first one to come to mind when I was first contacted about this article. The scenario played out in my head like this: I've posted a few times in tsnow's thread. The lsxtv author was probably reading through it and accidentally clicked on my username instead of tsnows. Man, this is gonna be really awkward when I get the next message back from him that says, "sorry.....we accidentally got the wrong car. Give us a call when it's painted or something" Dude, you're car is gonna be so gorgeous when you get done with it, its gonna be ridiculous. But yeah, this type of thing never happens for me, so I am proud. But more so...I'm motivated more than ever to get it done now!
07-18-2011, 10:27 PM
#459
He probably seen the work you did to the T/A and also the work that has been done to the 2nd gen and seen the talent you have. Your car is a work in progress and that hits home with so many builders on the fence on which way to go with theirs, it was a no brainer to put a car like yours out front. When I started my Camaro 17 years ago I would have rather seen a car that has all this grunt and a blank canvas to go from than I would a painted car with the normal outfit. If they never show another 69 Camaro in the magazines it would not hurt my feelings. Of course it is my favorite but damn every magizine out their has at least one in it somewhere. I didnt know there was so many that still existed. Pat yourself on the back and look around you. You have done one hell of a job!!! Hats off for sure!!
07-18-2011, 10:50 PM
#460
He probably seen the work you did to the T/A and also the work that has been done to the 2nd gen and seen the talent you have. Your car is a work in progress and that hits home with so many builders on the fence on which way to go with theirs, it was a no brainer to put a car like yours out front. When I started my Camaro 17 years ago I would have rather seen a car that has all this grunt and a blank canvas to go from than I would a painted car with the normal outfit. If they never show another 69 Camaro in the magazines it would not hurt my feelings. Of course it is my favorite but damn every magizine out their has at least one in it somewhere. I didnt know there was so many that still existed. Pat yourself on the back and look around you. You have done one hell of a job!!! Hats off for sure!!
