1933 Ford Coupe/Roadster Stroker Build
 05-24-2011, 07:35 AM
#41
TECH Enthusiast
Thread Starter
iTrader: (10)

Join Date: Jun 2010
Location: Boston
Posts: 728
Likes: 0
Received 0 Likes
on
0 Posts

Yup the only ppl that know other than my family are a neighbor from down the street who has a 31 model a converter-ed to pickup, and his cruising buddy. They happen to be driving by when i was pulling the 5.3l out. Otherwise almost know-one knows. All someone would have to do is google my name and car and this thread would most likely show up, but i don't think anyone will or has.

 05-24-2011, 09:24 PM
#43
TECH Enthusiast
Thread Starter
iTrader: (10)
Join Date: Jun 2010
Location: Boston
Posts: 728
Likes: 0
Received 0 Likes
on
0 Posts
Need advice on painting it. Should i paint just the block? Or front cover and oil pan was well? Maybe even the water pump? Im painting it a solid blue if i didnt mention it earlier.
05-27-2011, 07:51 AM
#44
TECH Enthusiast
Thread Starter
iTrader: (10)
Join Date: Jun 2010
Location: Boston
Posts: 728
Likes: 0
Received 0 Likes
on
0 Posts
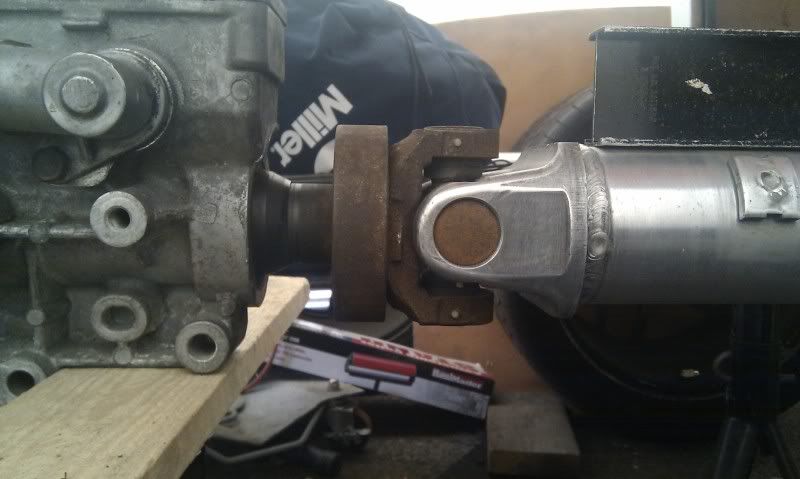
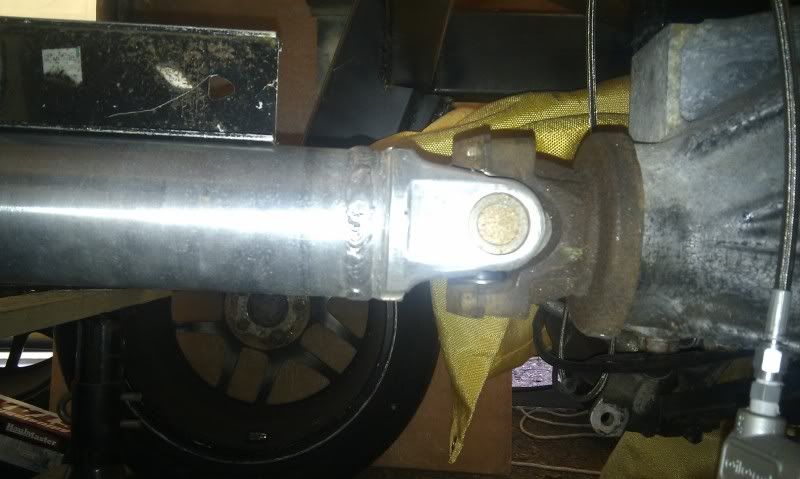
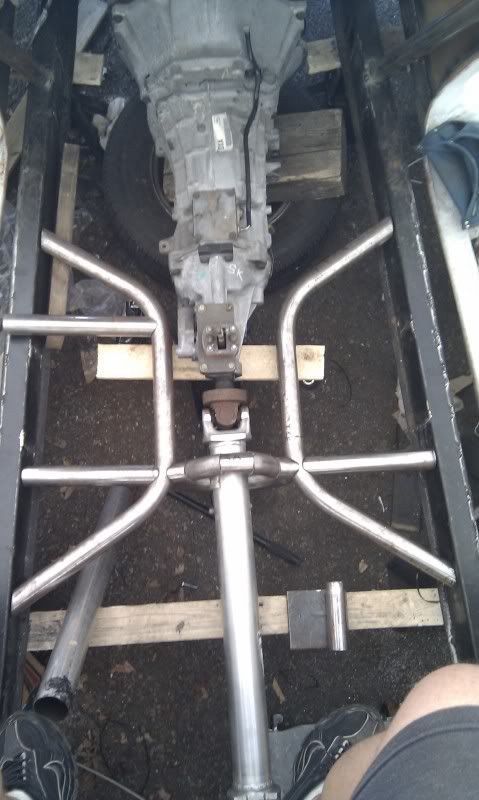
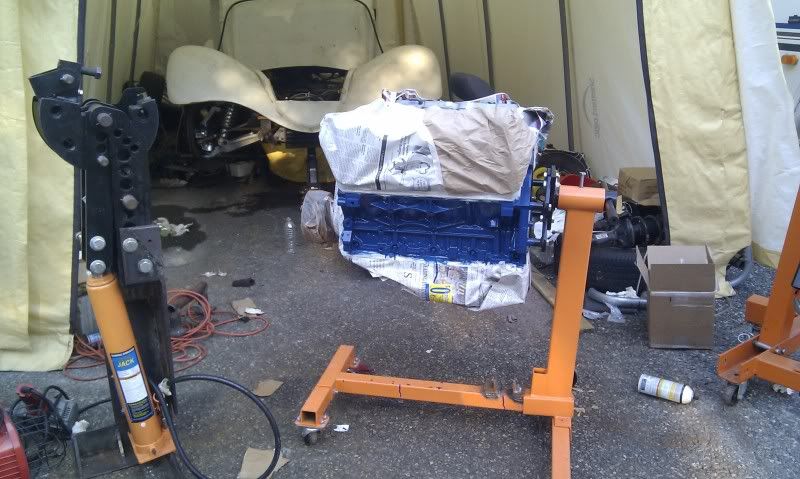
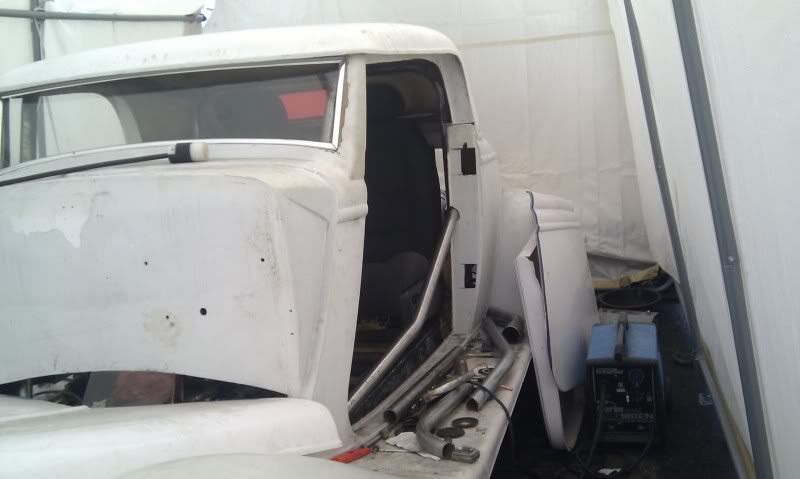
I got a bit more done yesterday. dropped the motor back in to align and fab my tranny mount. i didn't have a drive-shaft while designing the frame, i guess with some good math i got damn lucky with alignment.
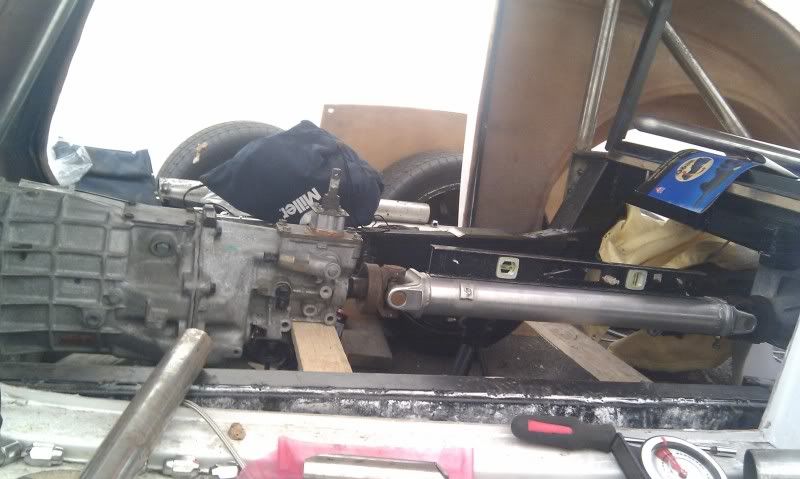
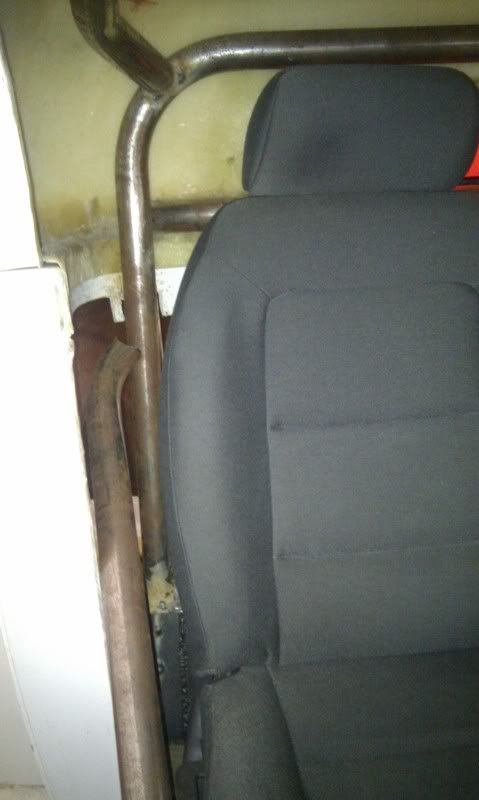
Should have the mount and K member done with weekend. Then i can finish the floor, mount the seats, then fab my door bars for the cage. Then the motor will come back out to be painted, and while its out i may rework my wire harness some more.
Once the motor is painted, on goes the flywheel, clutch, and pp and the motor will get put back on the frame for the last time. Connect everything back up and make my break-in/tuning appointment at slowhawk. While waiting for the appointment i'll work on getting the shitty fiberglass doors to fit.
 05-30-2011, 08:42 PM
#48
TECH Enthusiast
Thread Starter
iTrader: (10)
Join Date: Jun 2010
Location: Boston
Posts: 728
Likes: 0
Received 0 Likes
on
0 Posts
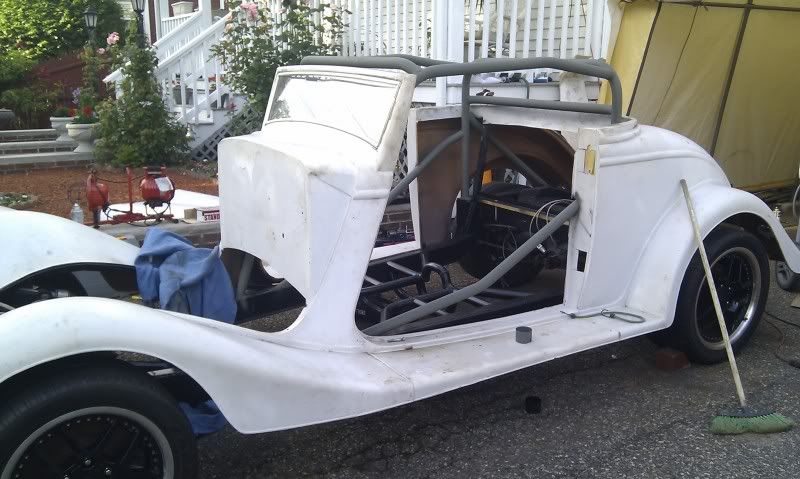
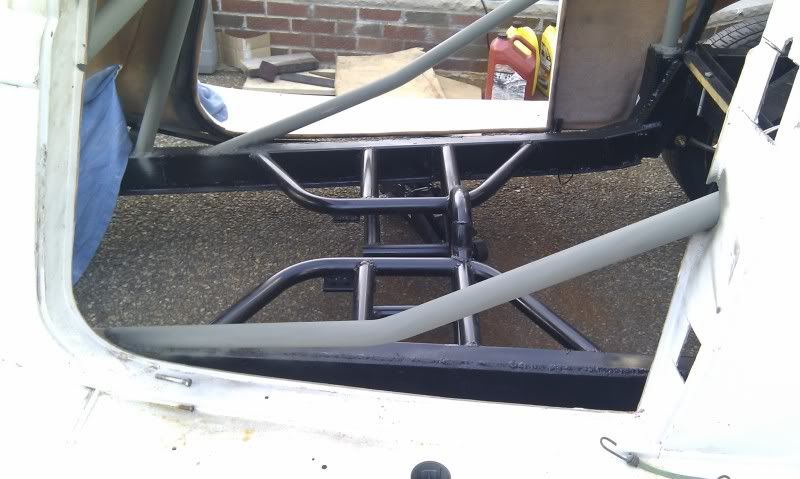
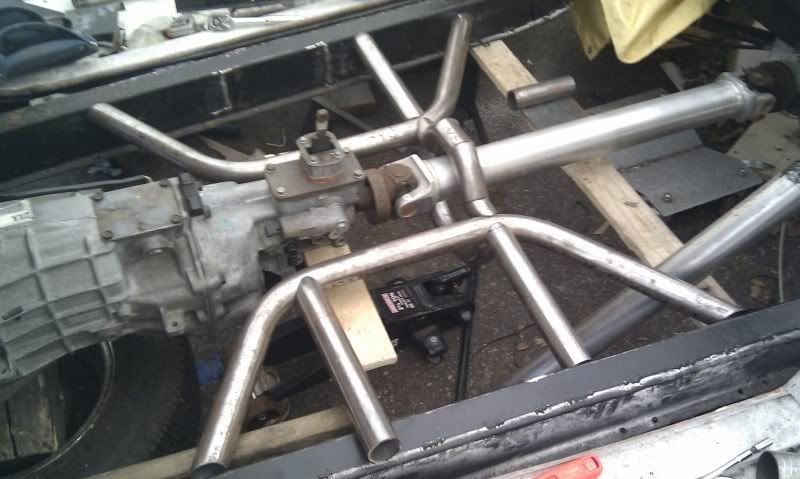
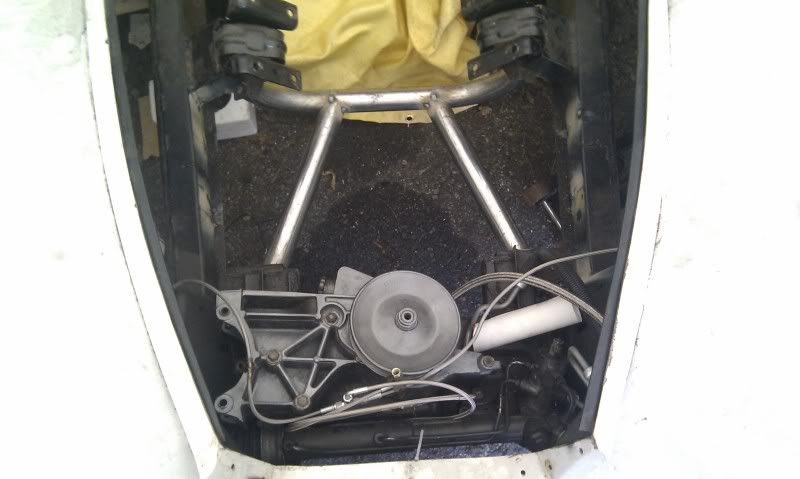
All i have left for the k member is to make the tranny mount. And finalize the welding. I need to pull the motor back out to do so since its a little tight. I had one idea, but think i will rework it. It needs to be removable, so it complicates things a bit. I also need to finalize the welding. I need to pull the motor back out to do so since its a little tight. Here is where im at right now:

 05-31-2011, 07:05 AM
#50
TECH Enthusiast
Thread Starter
iTrader: (10)
Join Date: Jun 2010
Location: Boston
Posts: 728
Likes: 0
Received 0 Likes
on
0 Posts
Thanks for the consideration, its not my eyesite or anything. Its trying to get good penetration with a flux core welder. I don't have any sort of sheilding gas, so the burning off of the flux usually blocks my vision. i have the heat up a little higher than i should and run shorter beads, so it gives time for the smoke to dissipated a bit.
I took the spare money i had for a tank of gas for my mig and put it toward a tig. I'll post some pics when i finally get around to welding up the cage. They will definitely be much better, i just need to practice steel tiging since all i did over the winter was aluminum.
I took the spare money i had for a tank of gas for my mig and put it toward a tig. I'll post some pics when i finally get around to welding up the cage. They will definitely be much better, i just need to practice steel tiging since all i did over the winter was aluminum.
06-07-2011, 07:15 AM
#51
TECH Enthusiast
Thread Starter
iTrader: (10)
Join Date: Jun 2010
Location: Boston
Posts: 728
Likes: 0
Received 0 Likes
on
0 Posts
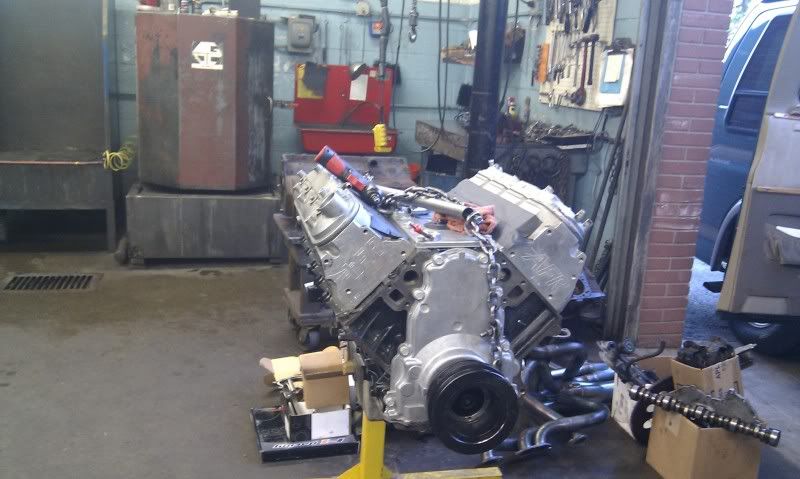
Over the weekend i got some more stuff done, almost finalized the tranny mount, pulled the motor back out for paint, built a K member for under the engine, and started planning the door bars. Door bar thread here: https://ls1tech.com/forums/drag-raci...bars-look.html
06-08-2011, 12:11 PM
#52
TECH Enthusiast
Thread Starter
iTrader: (10)
Join Date: Jun 2010
Location: Boston
Posts: 728
Likes: 0
Received 0 Likes
on
0 Posts
Just picked up some long mig gloves so i don't toaste myself while welding under the car. Hate to admit it but with most things i'll weld with shorts and no shirt, but under the car im a baby.
06-09-2011, 06:45 AM
#53
TECH Enthusiast
Thread Starter
iTrader: (10)
Join Date: Jun 2010
Location: Boston
Posts: 728
Likes: 0
Received 0 Likes
on
0 Posts
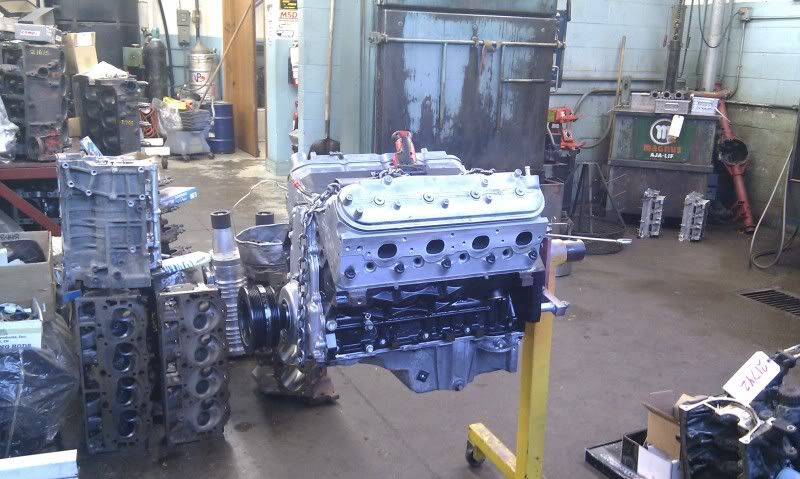
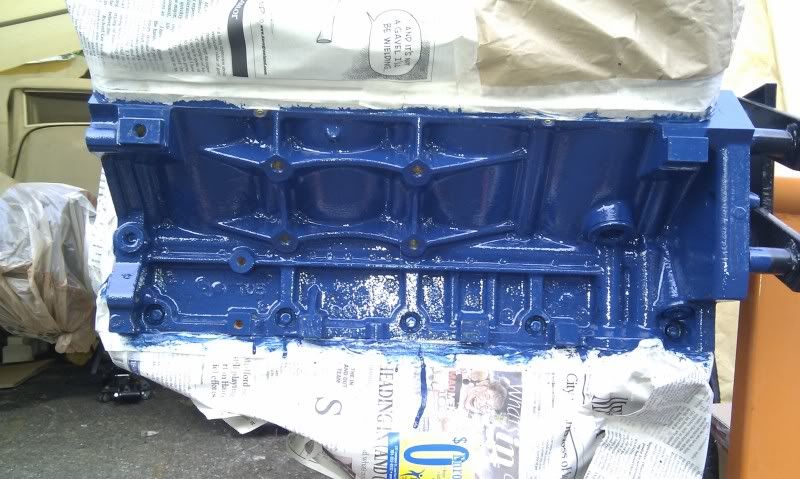
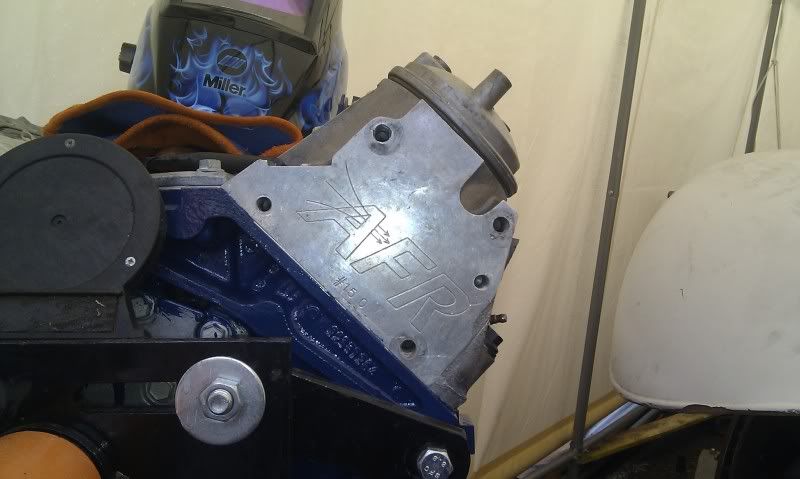
Review of por15 engine enamel kit Ford Corporate Blue:
First glance at the full kit and i thought wow they skimped on the por15. Since my block was already painted, i didn't need to the por15 itself so its getting saved for later. I did use the marine clean and metal ready. Metal ready didn't rinse off as nicely as i would have liked. Could have spent more time rinsing but i wanted to get to painting. Regardless i waited till the next day since things came up. Upon first opening the can of the engine enamel itself i realized its very very thick. If spraying it comes with a thinner/reducer, and you can thin it even if your painting with a brush, i chose not to. Since i was painting over black i wanted a nice thick coat. Because its so thick you don't realize how much paint your actual putting on, so i leaned to take it slow. I had some streaks from going too thick then spreading once it started to somewhat gel over. also some runs. From anything more than a couple of feet non of it is noticeable. Today i will be putting on a second coat, it should lighten it up a tiny bit more since the black base kept it on the darker side. Im sure in pictures you won't really be able to notice though.
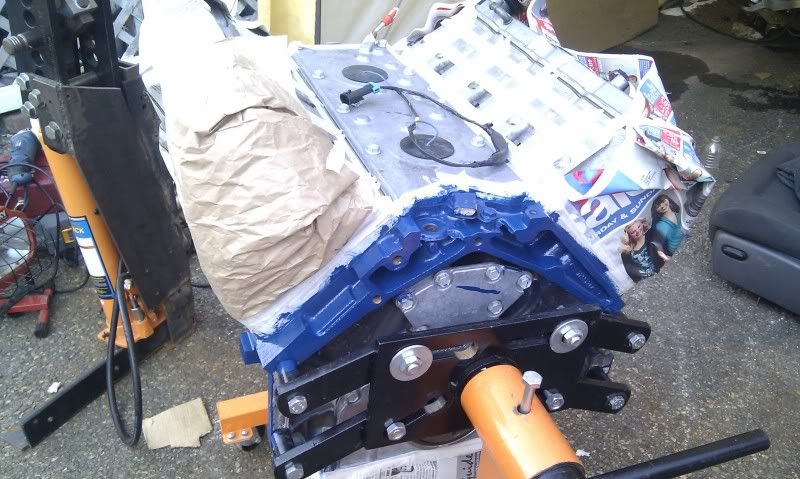

First glance at the full kit and i thought wow they skimped on the por15. Since my block was already painted, i didn't need to the por15 itself so its getting saved for later. I did use the marine clean and metal ready. Metal ready didn't rinse off as nicely as i would have liked. Could have spent more time rinsing but i wanted to get to painting. Regardless i waited till the next day since things came up. Upon first opening the can of the engine enamel itself i realized its very very thick. If spraying it comes with a thinner/reducer, and you can thin it even if your painting with a brush, i chose not to. Since i was painting over black i wanted a nice thick coat. Because its so thick you don't realize how much paint your actual putting on, so i leaned to take it slow. I had some streaks from going too thick then spreading once it started to somewhat gel over. also some runs. From anything more than a couple of feet non of it is noticeable. Today i will be putting on a second coat, it should lighten it up a tiny bit more since the black base kept it on the darker side. Im sure in pictures you won't really be able to notice though.
06-09-2011, 06:50 AM
#54
TECH Enthusiast
Thread Starter
iTrader: (10)
Join Date: Jun 2010
Location: Boston
Posts: 728
Likes: 0
Received 0 Likes
on
0 Posts
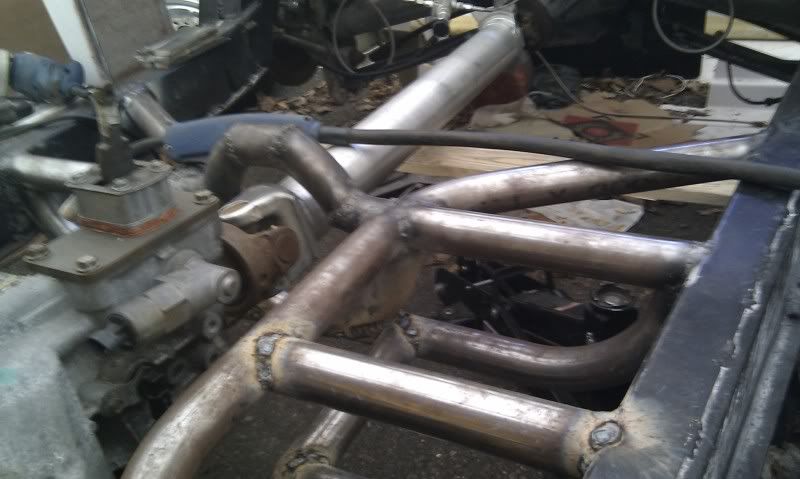
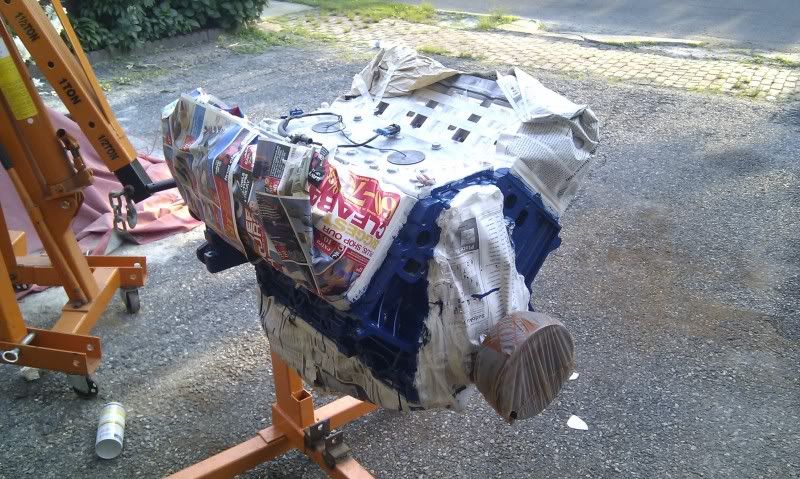
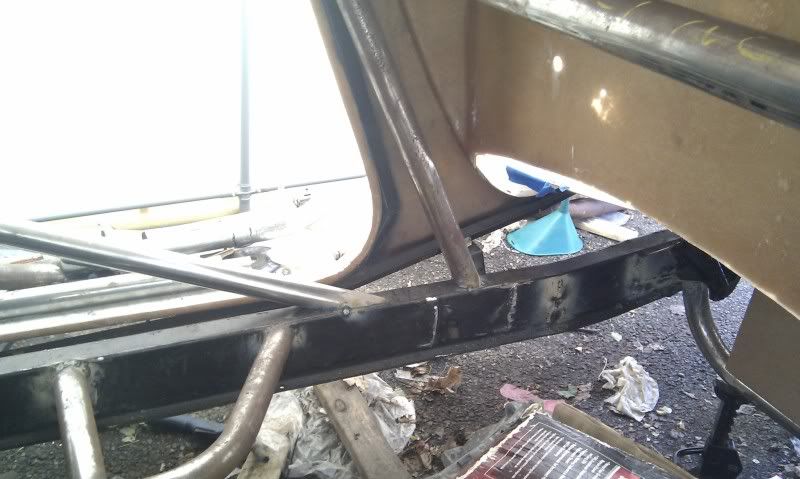
Other than the painting, i did some more welding to the frame. Tons of stuff is still only tack'ed in place.
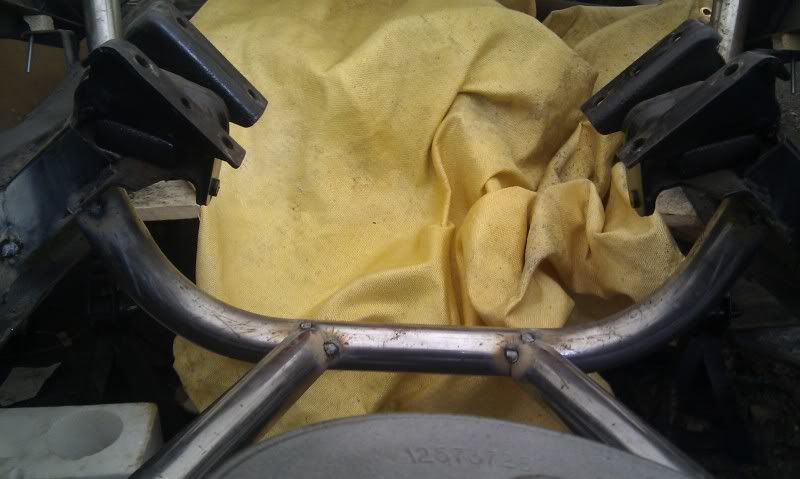
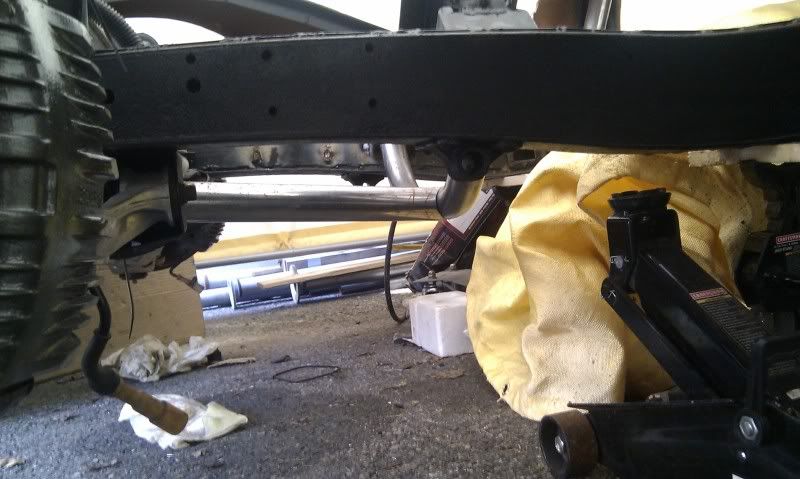
Then took some more random pictures:
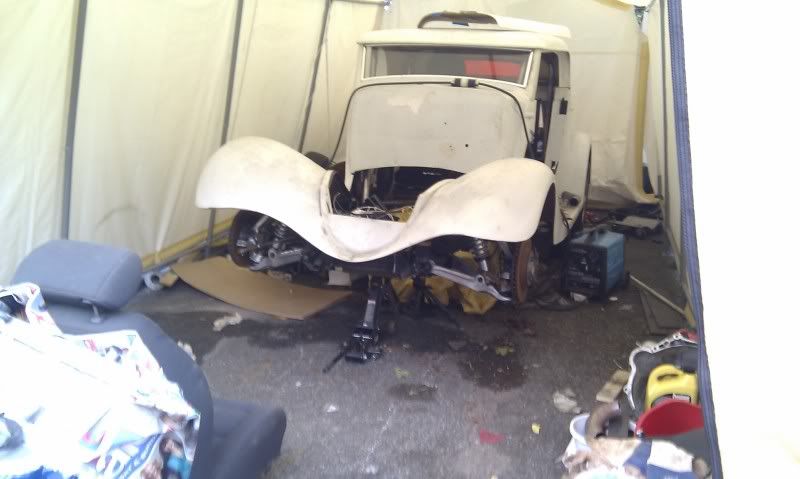
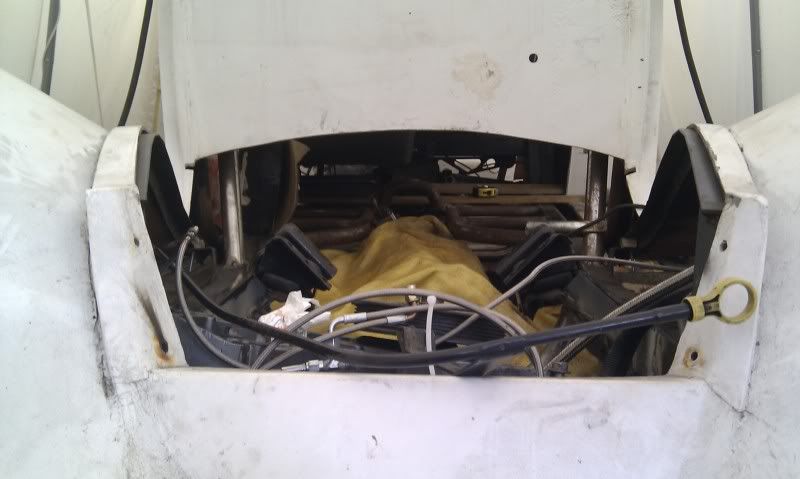
Then took some more random pictures:
06-13-2011, 07:23 AM
#55
TECH Enthusiast
Thread Starter
iTrader: (10)
Join Date: Jun 2010
Location: Boston
Posts: 728
Likes: 0
Received 0 Likes
on
0 Posts
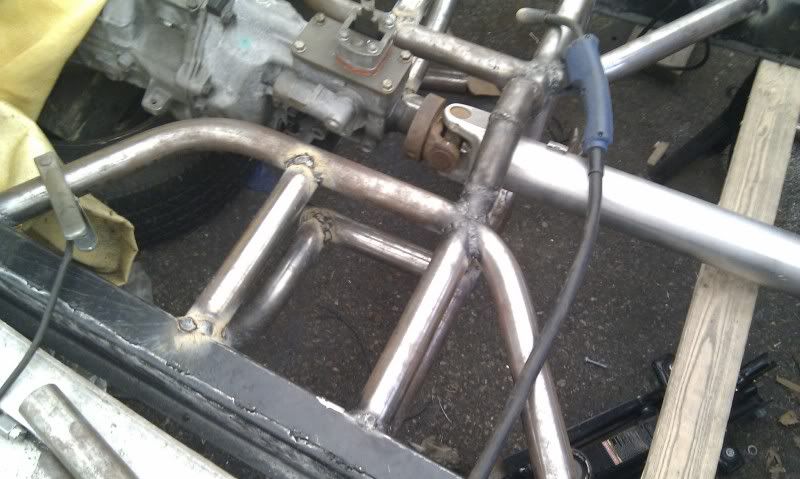
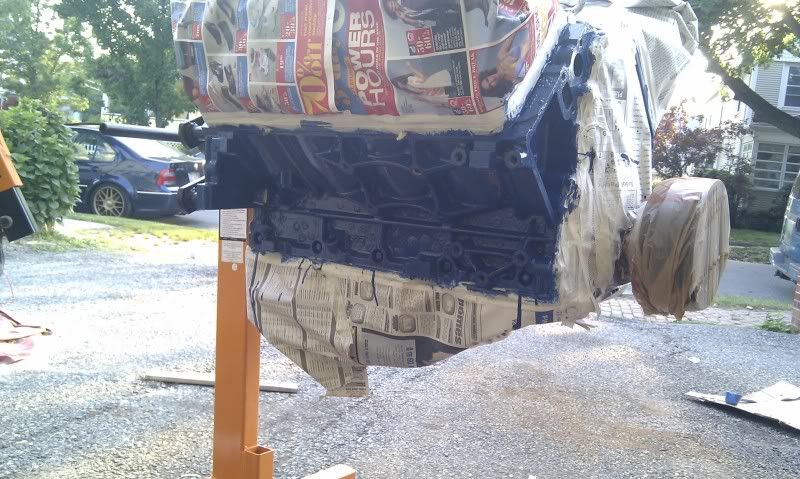
Although the weather sucked this weekend i made some more progress. Got engine unmasked, which was a PITA! Where-ever the paint overlaped the masking tape it had to be cut with a blade. Paint says to wait about 4 days before starting the engine, so im guessing its still in the hardening phase.
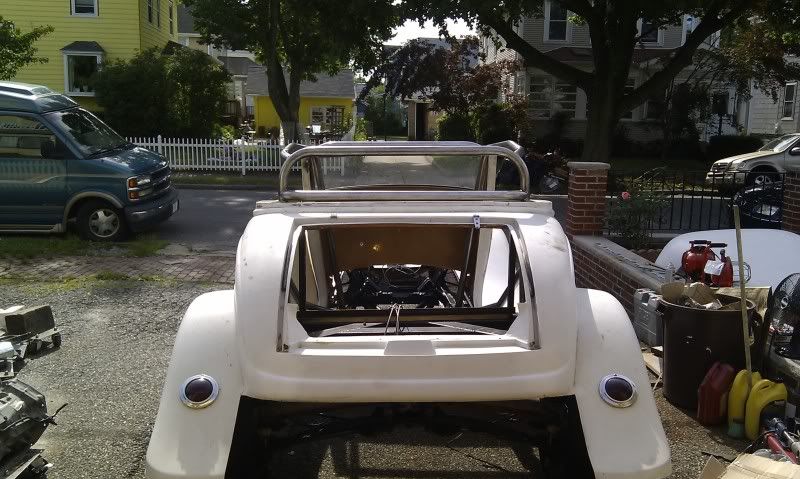
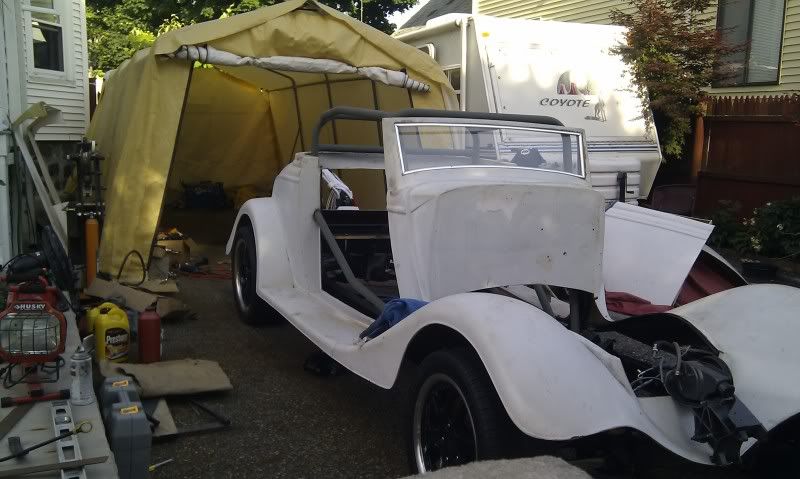
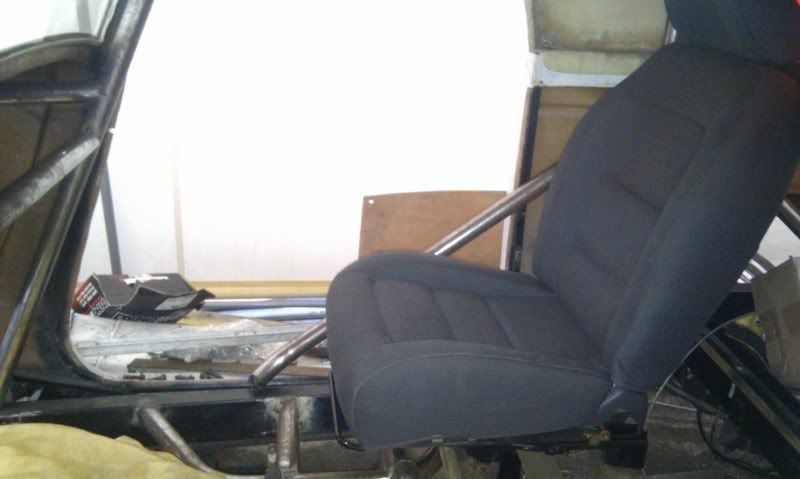
Then i got back to finishing the cage. I was down to my last full 12' piece of DOM plus another 6' as well. I was able to get both my door bars and my front halo. I don't have enough for my extra more decorative bars i wanted to add, so im going to finish up what i have and worry about those after this summer. Nothing is TIG'ed in yet tho, still need to practice a little first.
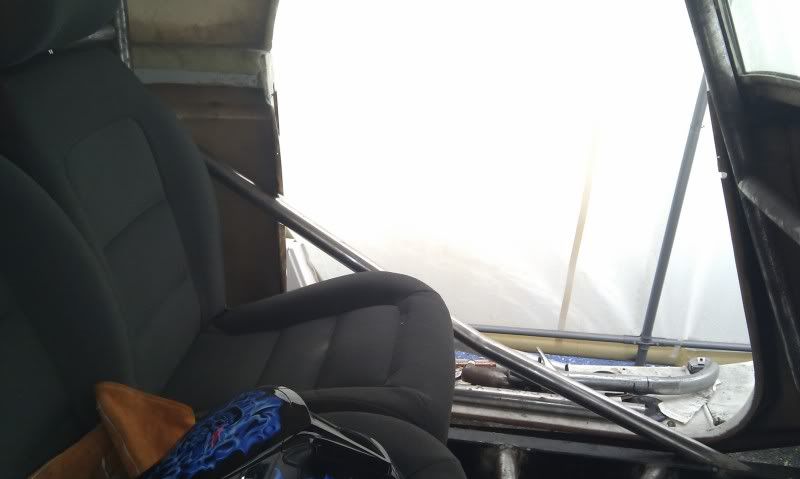
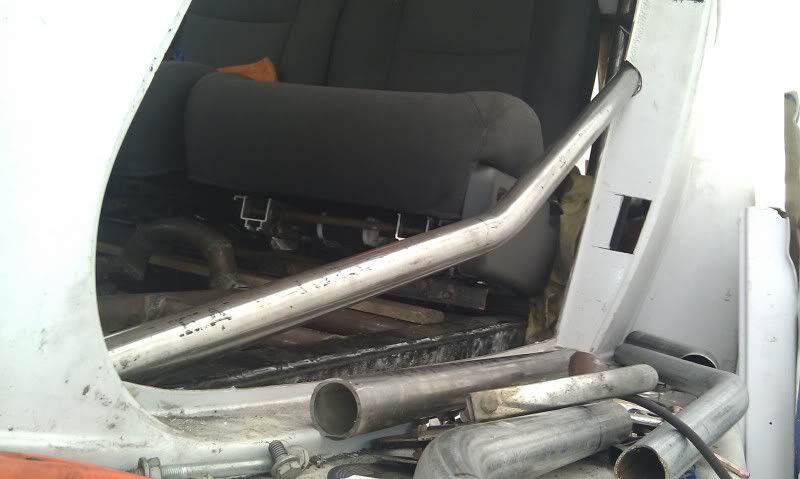
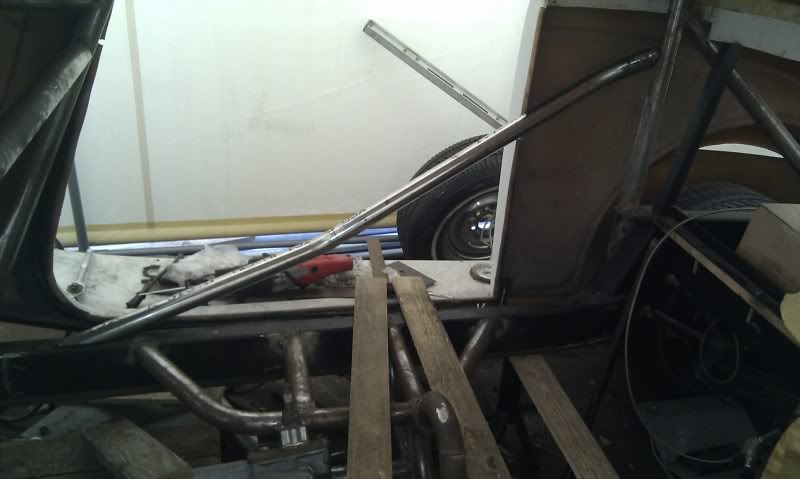
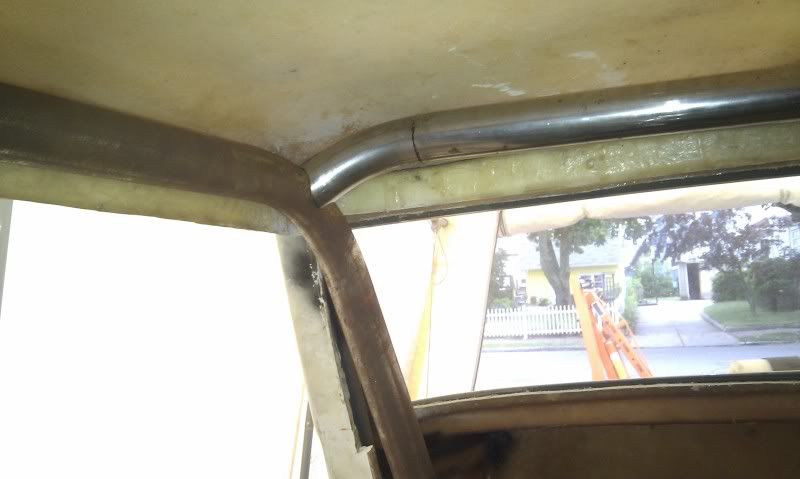
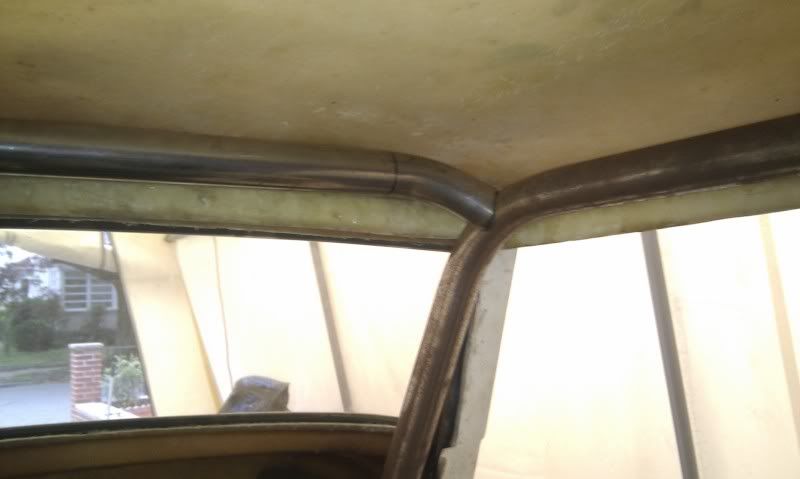
Then i got back to finishing the cage. I was down to my last full 12' piece of DOM plus another 6' as well. I was able to get both my door bars and my front halo. I don't have enough for my extra more decorative bars i wanted to add, so im going to finish up what i have and worry about those after this summer. Nothing is TIG'ed in yet tho, still need to practice a little first.
06-14-2011, 07:09 AM
#56
TECH Enthusiast
Thread Starter
iTrader: (10)
Join Date: Jun 2010
Location: Boston
Posts: 728
Likes: 0
Received 0 Likes
on
0 Posts
Practiced some tig welding so i can tackle the cage today. WOW is it a hell of alot easier than aluminum. I bought the tig mainly for some aluminum stuff i wanted to try, so i never attempted steel with it. Hopefully going to get a good chunk of the cage welded today.
After some practice i went out to eat with my family, just happened to be in the same place a bunch of the hot rodders meet on monday nights. Some nice cars there, fastest one was a model a roadster with a 396 bbc, man did it sound mean. It was some serious motivation to get my A$$ moving faster. Alot of the guys there already knew who i was before ever meeting me, i guess word is out that theres a "young kid" building a hot rod in town.
After some practice i went out to eat with my family, just happened to be in the same place a bunch of the hot rodders meet on monday nights. Some nice cars there, fastest one was a model a roadster with a 396 bbc, man did it sound mean. It was some serious motivation to get my A$$ moving faster. Alot of the guys there already knew who i was before ever meeting me, i guess word is out that theres a "young kid" building a hot rod in town.
06-15-2011, 07:31 AM
#57
TECH Enthusiast
Thread Starter
iTrader: (10)
Join Date: Jun 2010
Location: Boston
Posts: 728
Likes: 0
Received 0 Likes
on
0 Posts
So yea tigging steel is alot easier than aluminum, but.............getting into the awkward angle and places to actually do the welding is a PITA. Makes things a hell of alot harder.
For only 2-3 hours of tigging practice this is my outcome.
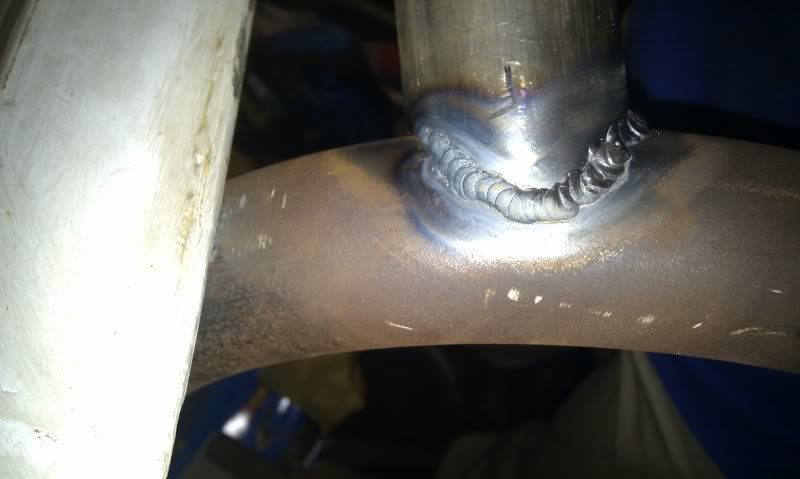
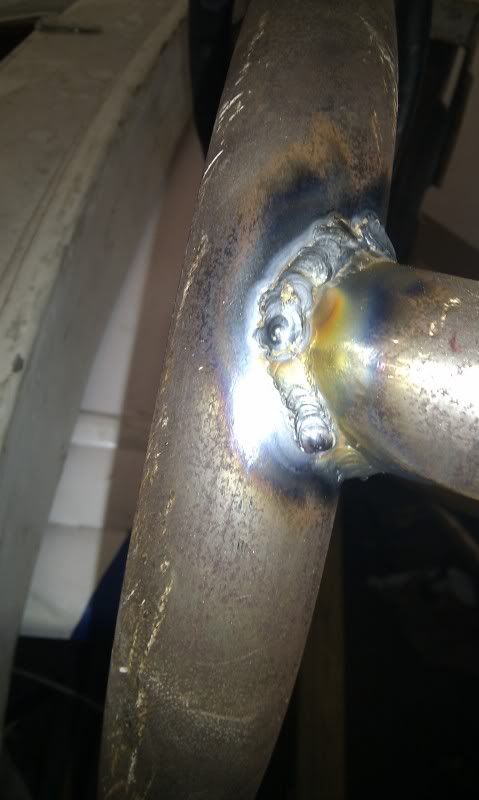
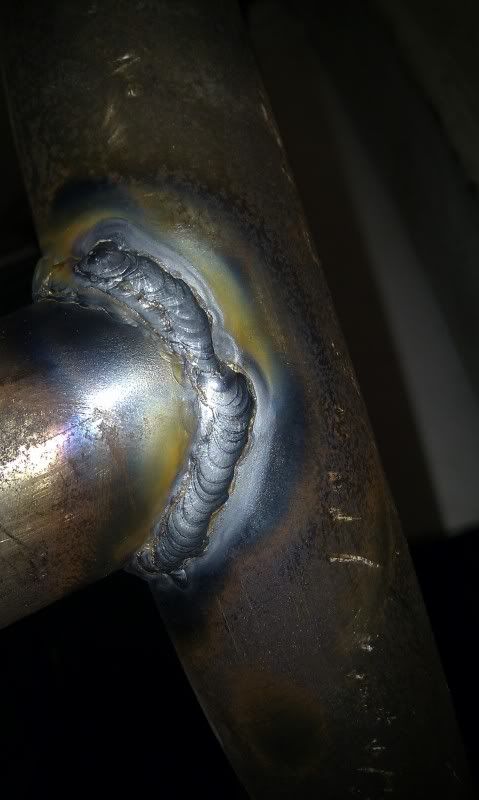
For only 2-3 hours of tigging practice this is my outcome.
06-15-2011, 07:35 AM
#58
TECH Enthusiast
Thread Starter
iTrader: (10)
Join Date: Jun 2010
Location: Boston
Posts: 728
Likes: 0
Received 0 Likes
on
0 Posts
I then realized that if i cut all the tac's connecting the cage to the frame i can shift it around just enough to get to some of the hard to reach places a little better. Hold the torch upside down and stuff gets difficult since my amp control is a scroll wheel. Im using the diversion 165 if anyone wanted to know.
06-16-2011, 08:25 AM
#59
TECH Enthusiast
Thread Starter
iTrader: (10)
Join Date: Jun 2010
Location: Boston
Posts: 728
Likes: 0
Received 0 Likes
on
0 Posts
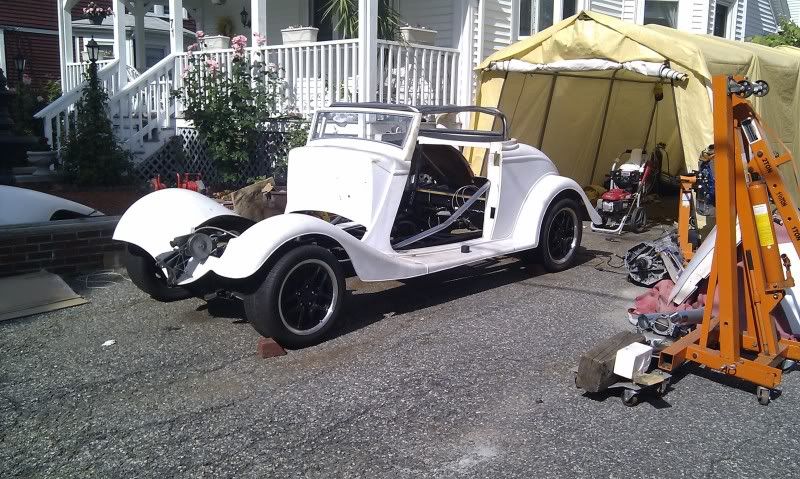
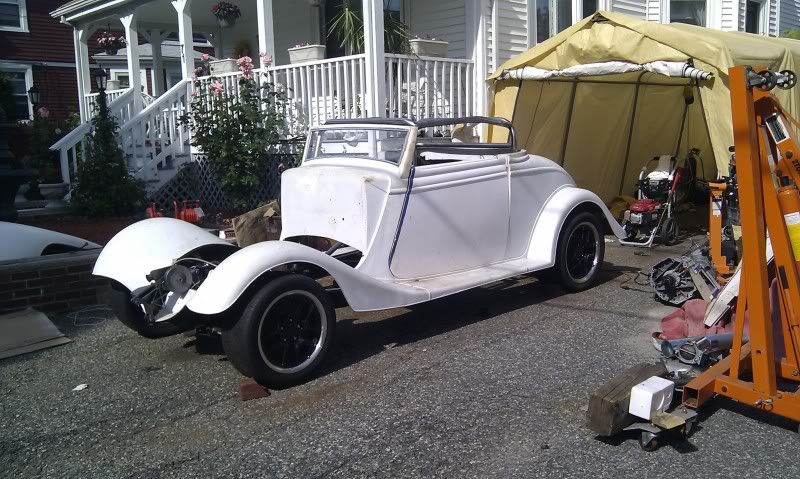
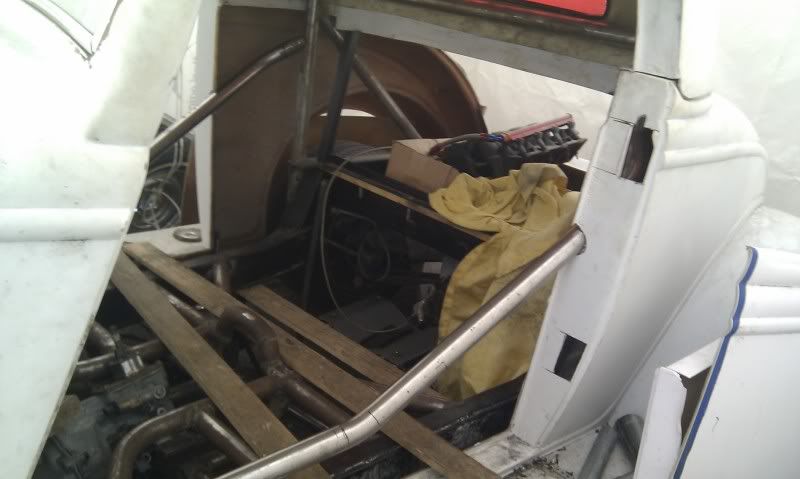
Cage minus door bars is fully welded together. door bars will go in today, and i will start sanding down the cage's flash rust to coat everything with some self etching primer. Hopefully the motor will be back in and i can get started on the headers.
06-20-2011, 08:24 AM
#60
TECH Enthusiast
Thread Starter
iTrader: (10)
Join Date: Jun 2010
Location: Boston
Posts: 728
Likes: 0
Received 0 Likes
on
0 Posts
Got all the welding done, minus 2 more tabs i want to add to my tranny mount. Needed to use the machine shop here at work to drill them before welding them. Finally got the car back to a roller, its been on stands for 4-5 months now, so i was able to roll it out of the carport. Got the frame all power washed to removed the flux from my mig then painted everything. Then sanded all the flash rust off of my cage and primed it with etching primer.