

'70 Nova LY6/TH400 6.0VVT


Fantastic to see the black Cherry Nova running, and what a great looking family! Lock those keys up, that boy is going to be stealing that car first chance he gets. Now that you have good knowledge of the Th 400 when it's time to upgrade, I vote for the T56. I like my 4L80e and it's very good, fast, and the right tool for my car, but it is very boring. Don't do a TKO600 with it's crappy slow shift. Great work, and btw, you might be doing your own tuning soon.
Thread Starter

Joined: Apr 2010
Posts: 2,816
Likes: 86
From: Instagram @chevyhotrodder
Fantastic to see the black Cherry Nova running, and what a great looking family! Lock those keys up, that boy is going to be stealing that car first chance he gets. Now that you have good knowledge of the Th 400 when it's time to upgrade, I vote for the T56. I like my 4L80e and it's very good, fast, and the right tool for my car, but it is very boring. Don't do a TKO600 with it's crappy slow shift. Great work, and btw, you might be doing your own tuning soon.
I will continue to research and look for a deal on a T56, but it's not high on my list if I can live with this for a while. I want to stick with weekend jobs for the foreseeable future and DRIVE the car. It's my happy place.
Thread Starter
Joined: Apr 2010
Posts: 2,816
Likes: 86
From: Instagram @chevyhotrodder
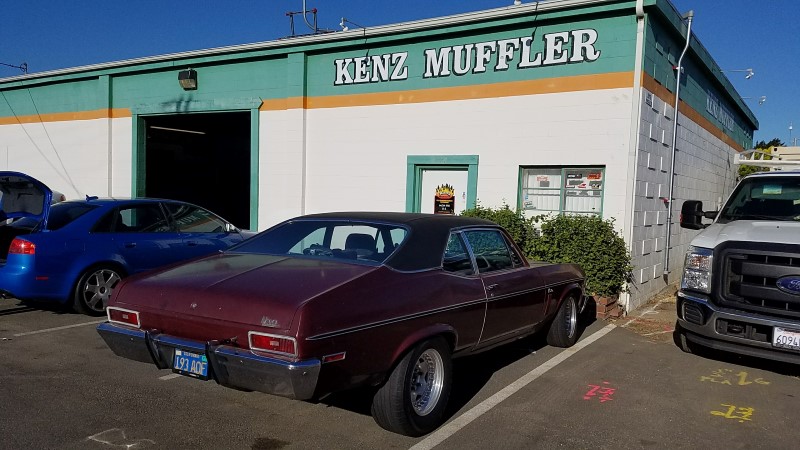
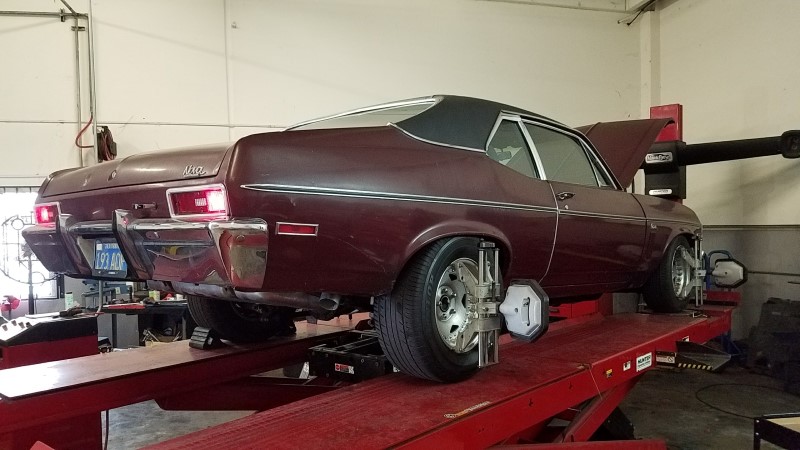
Last week I took the car to Ken's Muffler in Oxnard. These guys were awesome - super friendly, fair pricing, and they really took their time fitting everything.
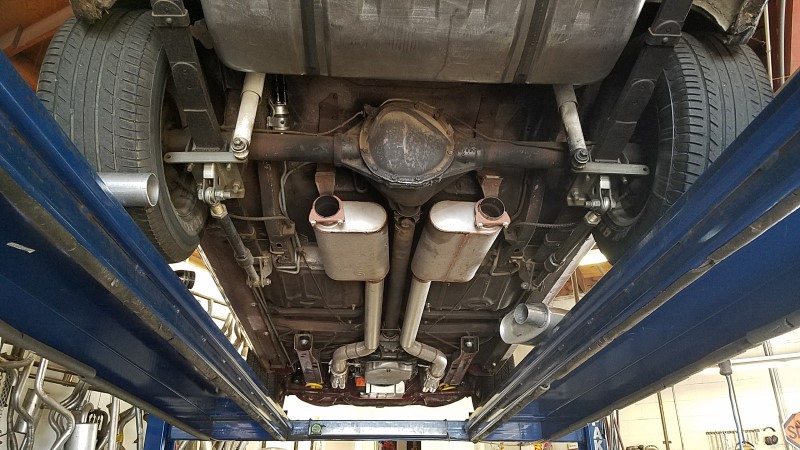
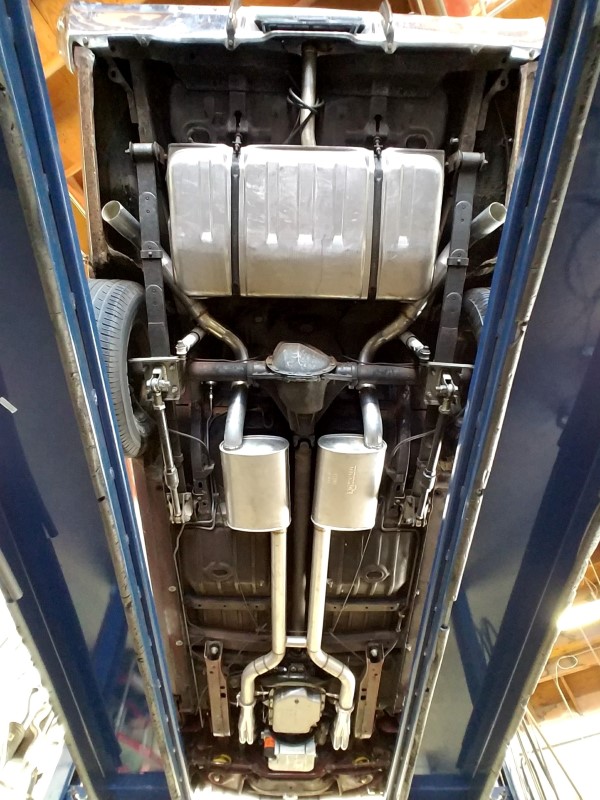
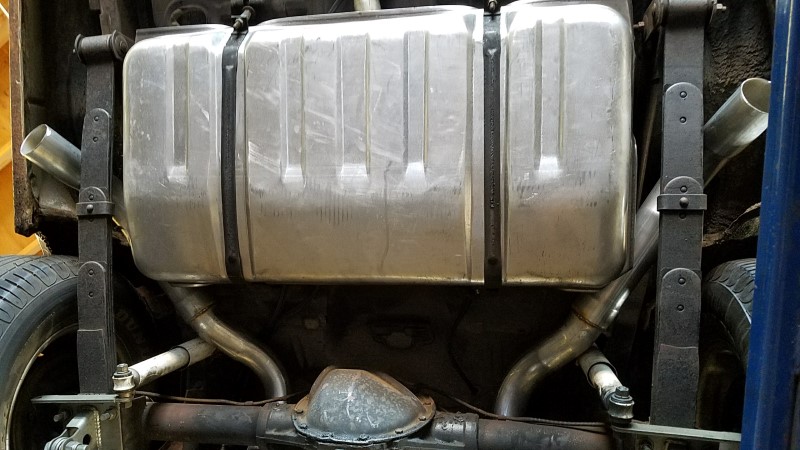
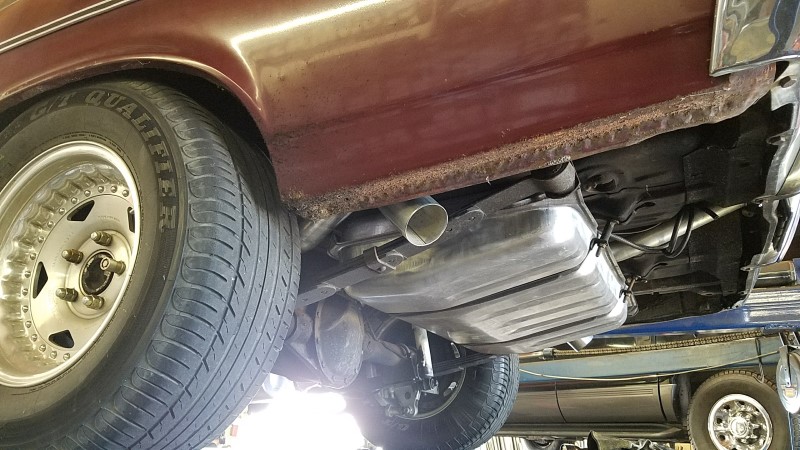
Here is what the exhaust looked like when I rolled in. I weldered it myself a few years ago using 3" mandrel bends that I cut up and spliced together. I had the Ultraflo VTs exiting directly in front of the axle. I planned to put some turndowns on there, but never got around to it.
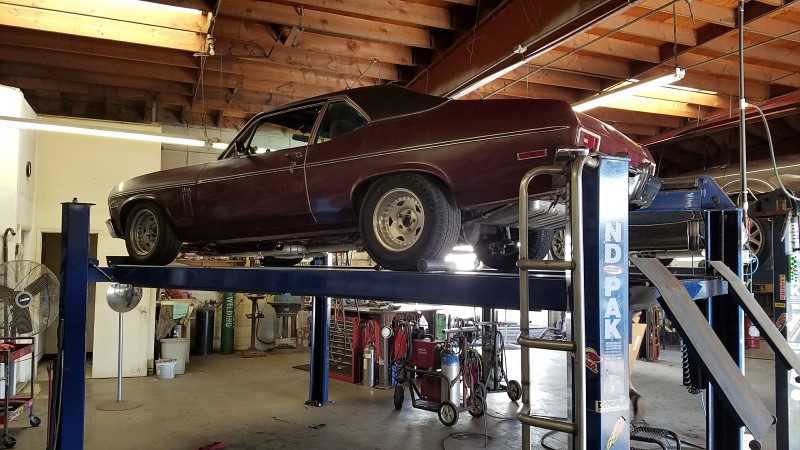
It was great having the car up on a lift where I could walk around underneath and see everything. I swore when I finished the exhaust originally I would never lay under a car and tack exhaust together again. My back still hurts thinking about it!
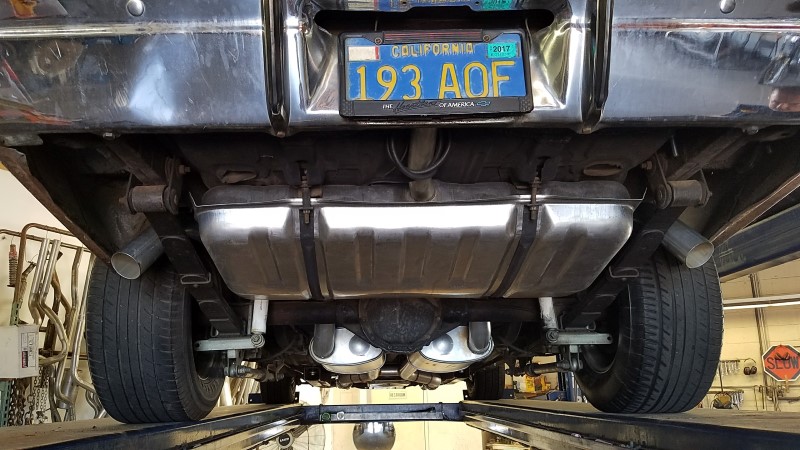
The plan was to swap the mufflers for 17769 3" super turbos, add 3" tailpipes, and add a crossover H-pipe (another thing I never got around to). Here is what they came up with:
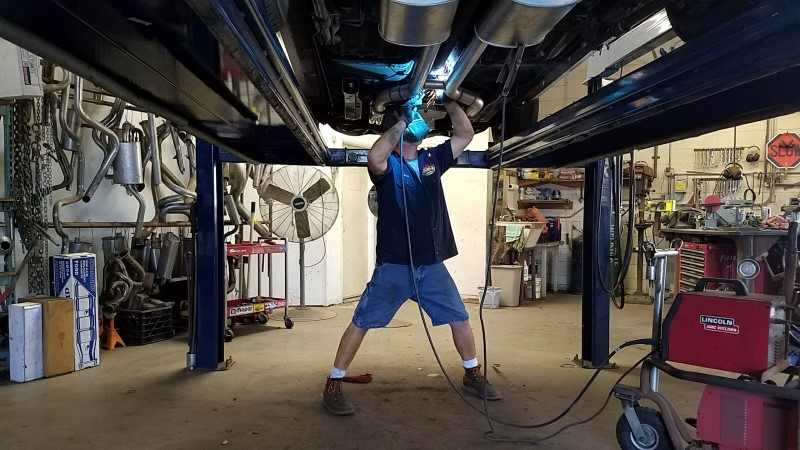
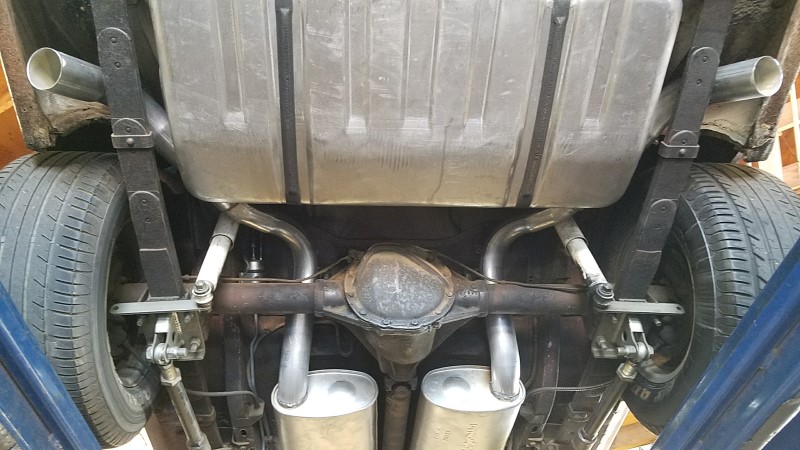
Snaking 3" pipe through here is not easy. My shocks are relocated inboard of the frame and that made it especially hard to get the pipes through.
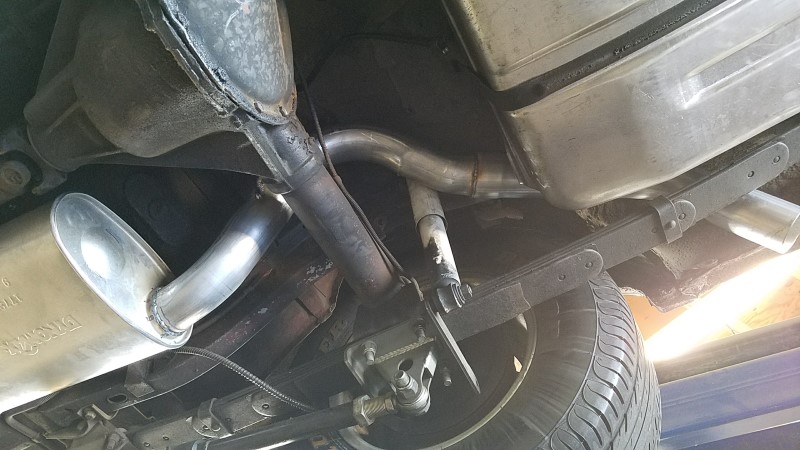
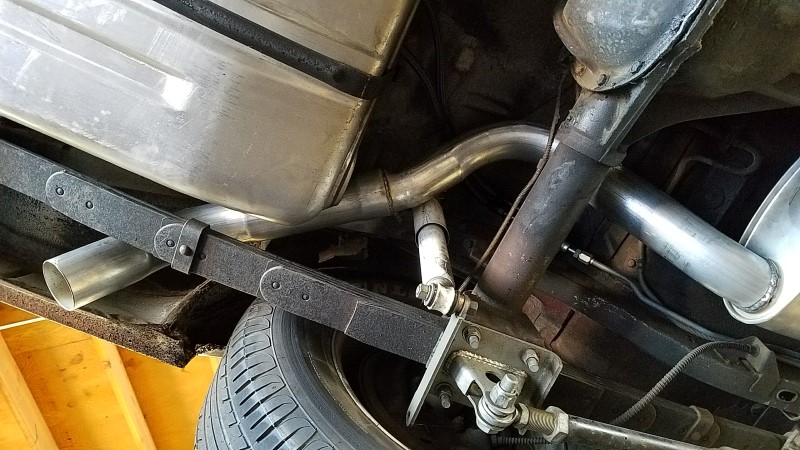
I decided to have the tailpipes exit unobtrusively below the quarter panels just behind the tires. This is about where they exited from the factory. I much prefer the sound of turndowns because you can hear the exhaust note from all around the car and not just the back, but getting the exhaust away from the cabin is better for my health and quiets things further.
My first driving impressions were "this is weird". It's much much quieter. It doesn't sound like my car anymore. I hear all these weird sounds I never heard before like wind noise, the fuel pump, the tires rolling, squeaks, and other people talking. The exhaust still has a good note, but it's subdued. It's going to take some getting used to!
Here is what the exhaust looked like when I rolled in. I weldered it myself a few years ago using 3" mandrel bends that I cut up and spliced together. I had the Ultraflo VTs exiting directly in front of the axle. I planned to put some turndowns on there, but never got around to it.
It was great having the car up on a lift where I could walk around underneath and see everything. I swore when I finished the exhaust originally I would never lay under a car and tack exhaust together again. My back still hurts thinking about it!
The plan was to swap the mufflers for 17769 3" super turbos, add 3" tailpipes, and add a crossover H-pipe (another thing I never got around to). Here is what they came up with:
Snaking 3" pipe through here is not easy. My shocks are relocated inboard of the frame and that made it especially hard to get the pipes through.
I decided to have the tailpipes exit unobtrusively below the quarter panels just behind the tires. This is about where they exited from the factory. I much prefer the sound of turndowns because you can hear the exhaust note from all around the car and not just the back, but getting the exhaust away from the cabin is better for my health and quiets things further.
My first driving impressions were "this is weird". It's much much quieter. It doesn't sound like my car anymore. I hear all these weird sounds I never heard before like wind noise, the fuel pump, the tires rolling, squeaks, and other people talking. The exhaust still has a good note, but it's subdued. It's going to take some getting used to!
Last edited by -TheBandit-; Mar 2, 2022 at 02:04 PM.
Thread Starter
Joined: Apr 2010
Posts: 2,816
Likes: 86
From: Instagram @chevyhotrodder
The next job lingering on my "to do" list for months was bleeding the brakes. This was something I meant to do before driving the car at all because it sat for so long, but I got distracted by my "get the engine running" strategy and the subsequent excitement of having it on the road. I decided I could live with a mushy pedal for a while. Well when I finally got around to it, here's what I found the master cylinder:
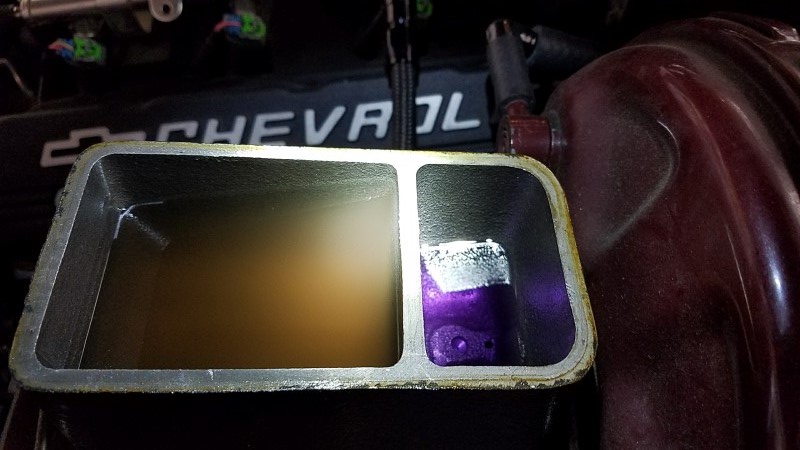
This is DOT5 silicon brake fluid. I started using DOT5 years ago because it doesn't damage paint. The front fluid appears to have been contaminated. The rear was perfectly clear/clean. Full disclosure: the picture above was taken after I finished bleeding the rear brakes, so the level is low in the photo. I used a small cup to remove as much of the old fluid out of the front as I could, then I used a paper towel to soak up whatever remained in the reservoir before adding new fluid for bleeding the front.
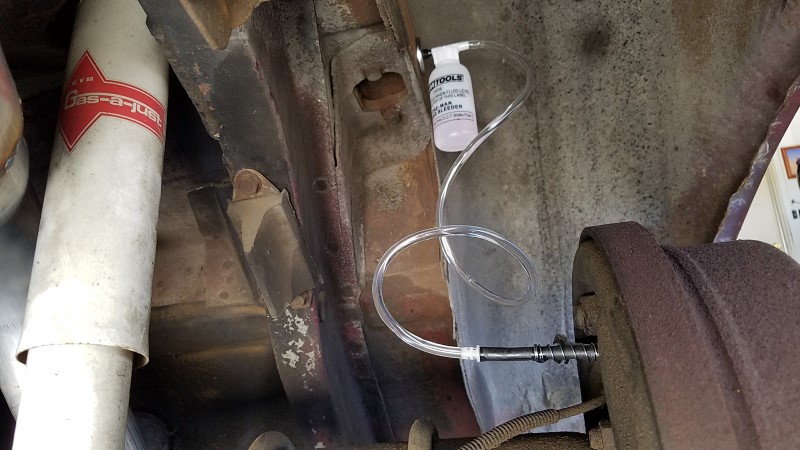
Below is the setup I used for bleeding. I bought a checkvalve hose assembly from NAPA. It has a spring that acts as a hose clamp to keep it on the bleeder. I ran that to a cheap little one man bleeder bottle with a magnetic holder. This was my first time using a one man bleeder setup; in the past I have always just stuck a hose down into a jar and had a friend pump/hold the brakes while I open and close the bleeder valve. This one man setup worked well.
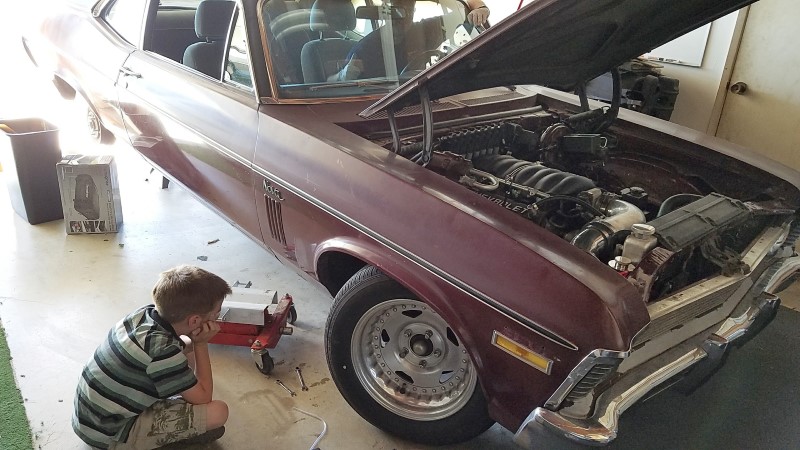
While I could technically go back and forth and check for bubbles in the hose, I made good use of my 6 year old to spot bubbles while I pumped the brakes and kept the reservoir topped off. He's always happy to help me on the car.
I pumped quite a bit of fluid through the front passenger side to flush out the nastiness, but when I started on the driver's side the hex rounded off on the bleeder screw (even though I used a six-point socket attempting to break it loose). I need to pick up a new screw today so I can finish the job. I can't wait to see how the brakes feel after this.
This is DOT5 silicon brake fluid. I started using DOT5 years ago because it doesn't damage paint. The front fluid appears to have been contaminated. The rear was perfectly clear/clean. Full disclosure: the picture above was taken after I finished bleeding the rear brakes, so the level is low in the photo. I used a small cup to remove as much of the old fluid out of the front as I could, then I used a paper towel to soak up whatever remained in the reservoir before adding new fluid for bleeding the front.
Below is the setup I used for bleeding. I bought a checkvalve hose assembly from NAPA. It has a spring that acts as a hose clamp to keep it on the bleeder. I ran that to a cheap little one man bleeder bottle with a magnetic holder. This was my first time using a one man bleeder setup; in the past I have always just stuck a hose down into a jar and had a friend pump/hold the brakes while I open and close the bleeder valve. This one man setup worked well.
While I could technically go back and forth and check for bubbles in the hose, I made good use of my 6 year old to spot bubbles while I pumped the brakes and kept the reservoir topped off. He's always happy to help me on the car.
I pumped quite a bit of fluid through the front passenger side to flush out the nastiness, but when I started on the driver's side the hex rounded off on the bleeder screw (even though I used a six-point socket attempting to break it loose). I need to pick up a new screw today so I can finish the job. I can't wait to see how the brakes feel after this.

Thread Starter
Joined: Apr 2010
Posts: 2,816
Likes: 86
From: Instagram @chevyhotrodder
Here are a couple videos of the new quiet exhaust
I've noticed when reving it does not want to snap back down to idle. It sort of floats back slowly. I don't know if that's something in the tune that can be adjusted. It doesn't matter so much when driving with the auto.
Noise from the fuel pump is much more noticeable now and it gets louder as the fuel level goes down. I'm not too happy with it; it makes me want to do a PWM setup.

TECH Senior Member


Joined: Jul 2009
Posts: 8,028
Likes: 660
Thanks for sharing the videos. That sounds real nice !!! That pump is kinda loud. What tank and fuelpump setup do you have? (no. I don't remember. LOL) Didn't you have a TSP VVT cam? Mind refreshing US (me) which one? I was expecting a lot more chop. So I'm guessing VVT2 It sounds pretty mild. What mufflers?
thanks,
jim
thanks,
jim
Thread Starter
Joined: Apr 2010
Posts: 2,816
Likes: 86
From: Instagram @chevyhotrodder
Thanks for sharing the videos. That sounds real nice !!! That pump is kinda loud. What tank and fuelpump setup do you have? (no. I don't remember. LOL) Didn't you have a TSP VVT cam? Mind refreshing US (me) which one? I was expecting a lot more chop. So I'm guessing VVT2 It sounds pretty mild. What mufflers?
thanks,
jim
thanks,
jim
The fuel pump is a Tanks Inc PA-4 tray installed into the factory tank with a Walbro 255. The loudness depends a lot on the fuel level - you can barely hear it when the tank is full. In the night time video posted previously with the Super Turbo mufflers, the fuel gauge was reading 3/4 tank. In the daytime video in this post with Ultraflo VT mufflers the tank was nearly full.

Thread Starter
Joined: Apr 2010
Posts: 2,816
Likes: 86
From: Instagram @chevyhotrodder
Thanks Edy! That is every bit my intention 
This morning I took the car in for an alignment. I debated a while on what numbers to shoot for. I decided on targeting +5deg LF +5.5deg RF caster, -1deg camber and 1/8" toe in. Kevin's Precision Alignment in Camarillo was a great place to deal with and they got me within 0.1deg of those specs.
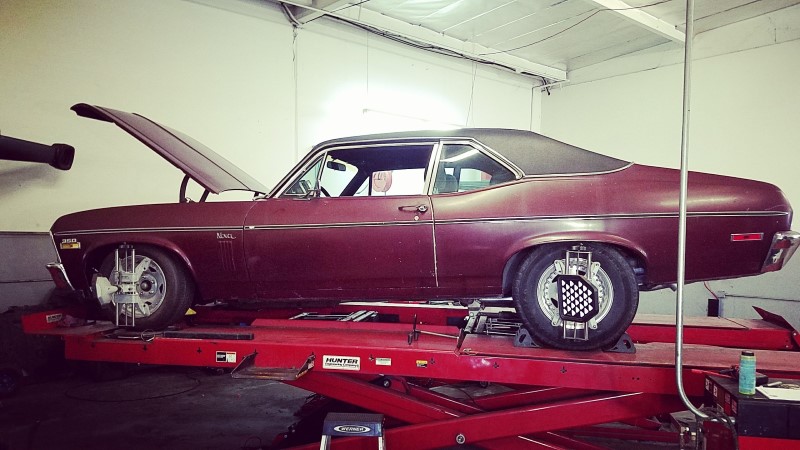
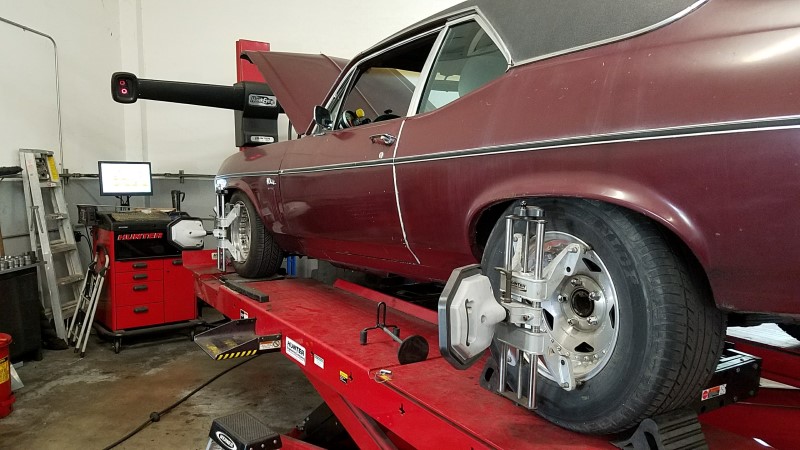
Afterwards I drove the car to work. It tracks well, but the steering box has a dead spot in the center. Eventually I want to replace or rebuild it to a tighter fast ratio. I'll admit the quiet exhaust is kinda nice for commuting
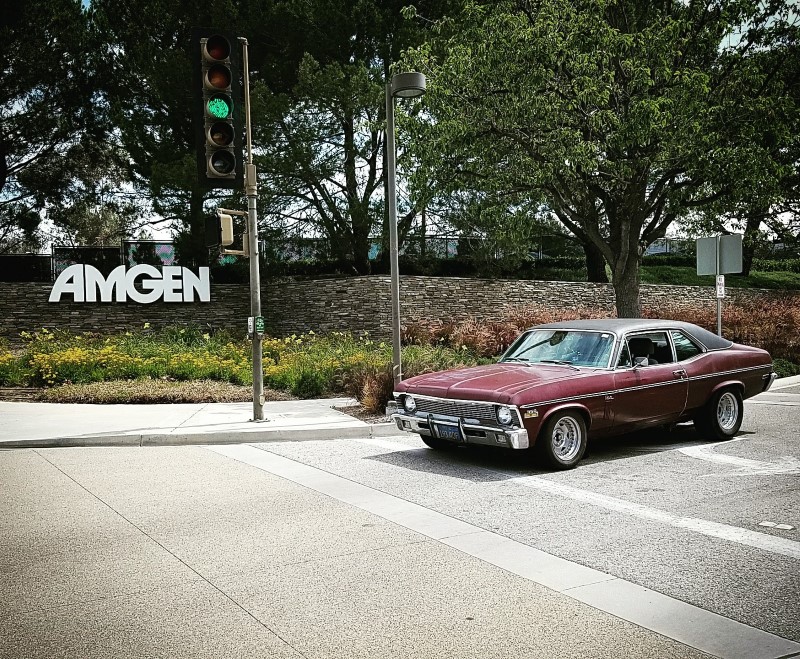
I'm registered to take the car autocrossing this weekend at Camarillo Airport. Hopefully I'll get a full day of racing in without any breaks or bugs. It'll be a learning experience! I can't wait.
This morning I took the car in for an alignment. I debated a while on what numbers to shoot for. I decided on targeting +5deg LF +5.5deg RF caster, -1deg camber and 1/8" toe in. Kevin's Precision Alignment in Camarillo was a great place to deal with and they got me within 0.1deg of those specs.
Afterwards I drove the car to work. It tracks well, but the steering box has a dead spot in the center. Eventually I want to replace or rebuild it to a tighter fast ratio. I'll admit the quiet exhaust is kinda nice for commuting
I'm registered to take the car autocrossing this weekend at Camarillo Airport.
Hopefully I'll get a full day of racing in without any breaks or bugs. It'll be a learning experience! I can't wait. TECH Senior Member
Joined: Jul 2009
Posts: 8,028
Likes: 660

Thread Starter
Joined: Apr 2010
Posts: 2,816
Likes: 86
From: Instagram @chevyhotrodder
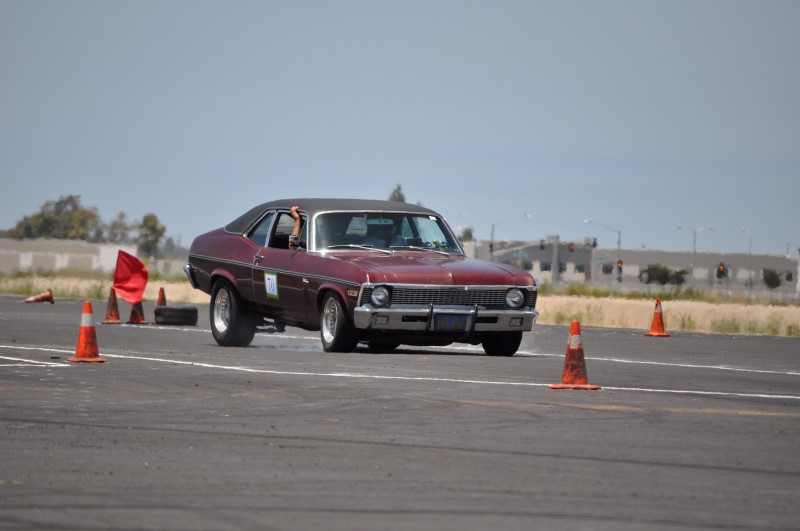
This Saturday I took the Nova autocross for the first time since the swap and only my second time doing this at all. What a riot! Since my last time doing this in 2009, I have the new engine, stiffer front springs and sway bar, more static caster and camber, a modified camber curve via the Guldstrand mod, and better shocks up front. Unfortunately I haven't done anything to the rear yet, so the car is horribly unbalanced. And my tires (10+years aged hard compound big & skinnies) were not helping either. That did not stop me from having SO MUCH FUN piloting this thing around the course! The bug has bit hard...
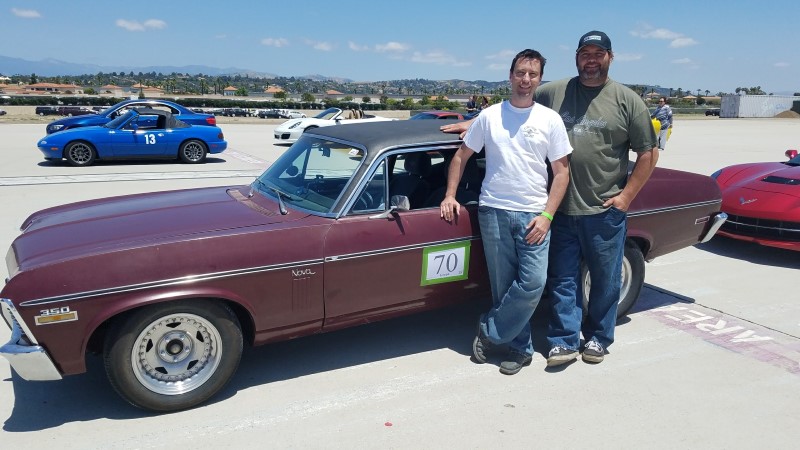
So here she is sticking out like a sore thumb on the grid full of Corvettes, Porches, Miatas and other comparably modern cars.
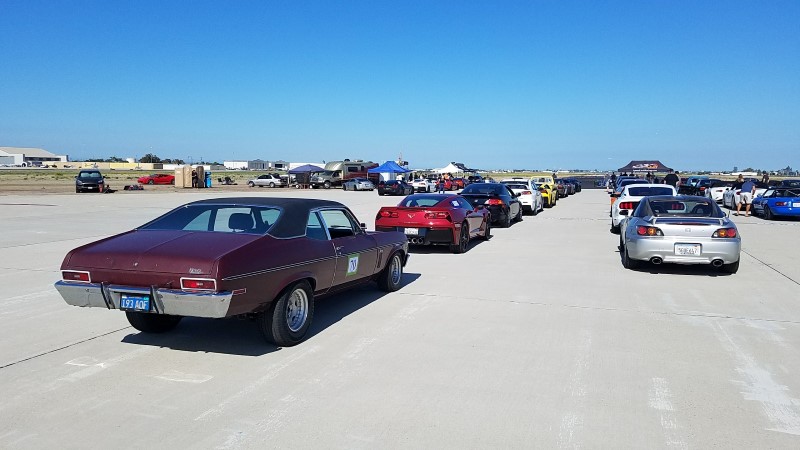
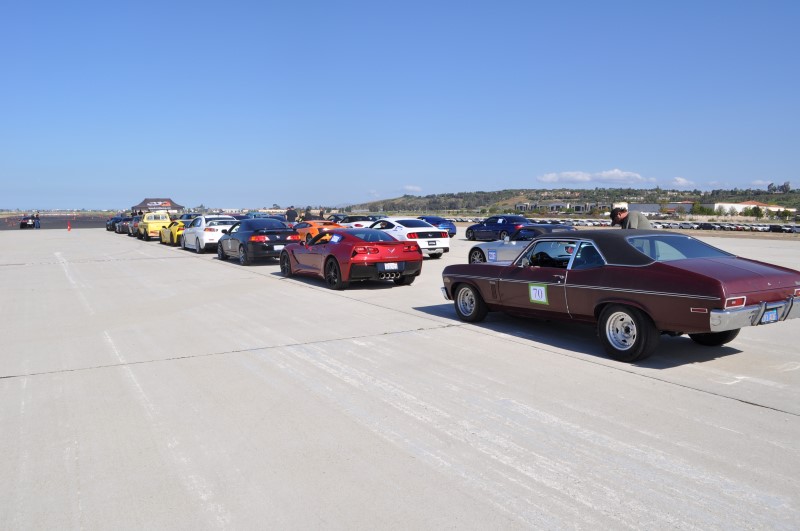

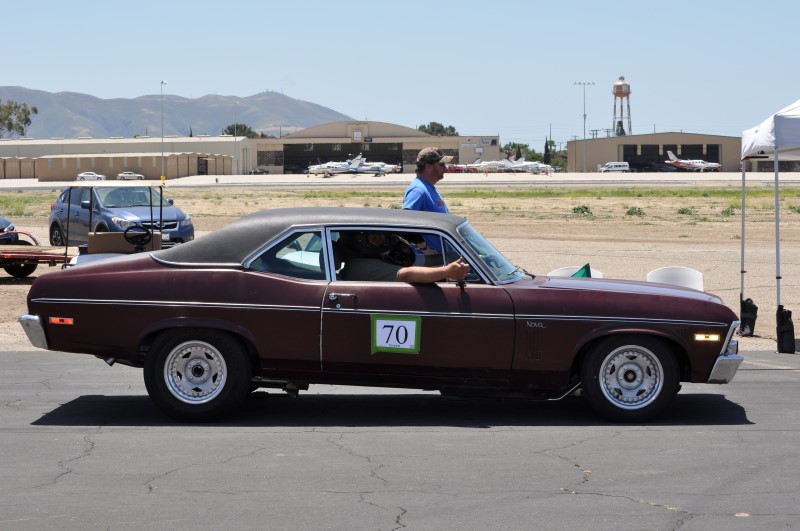
I love the stance of my car right now - classic muscle car with a little rake and a big/skinny combo showing plenty of sidewall on 15" wheels. This is 100% wrong for autocross!
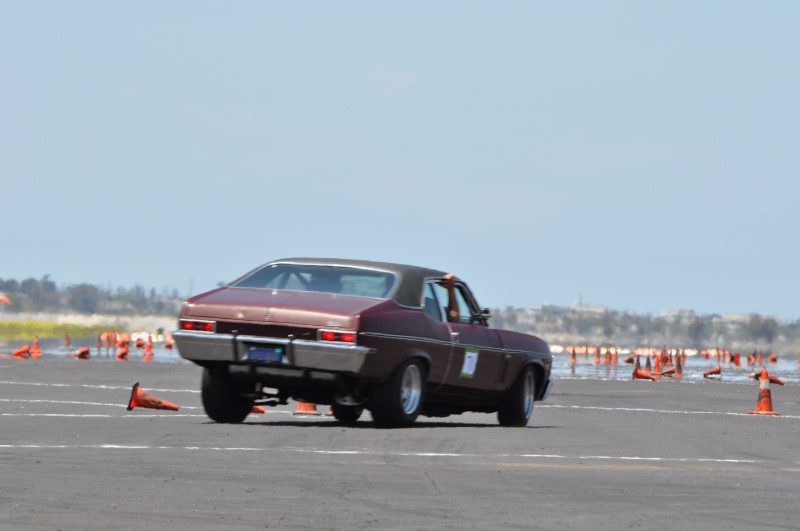
Here are a few photos from on the course. In the photo immediately below notice how much the rear lifts under braking. You can really see the driver's rear tire unload in a sharp left. The car is putting it's weight on the front outside tire. Look at it fold under the rim! This causes the car to push really bad.
Over the course of the day I learned to throttle-steer the car. In the photo below the car has leveled out a bit front-to-rear as I began to throttle out of the corner.
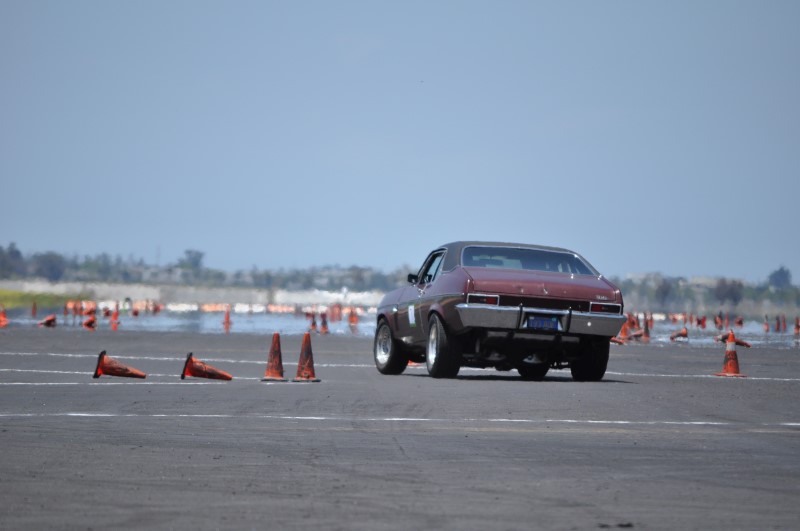
Photo below shows the rear unloading thing from further way. You can see I'm asking way too much of those skinny 215s up front. I think stiffening up the back will help a ton so those back tires can do more work. It probably wouldn't hurt to lower the back of the car too.
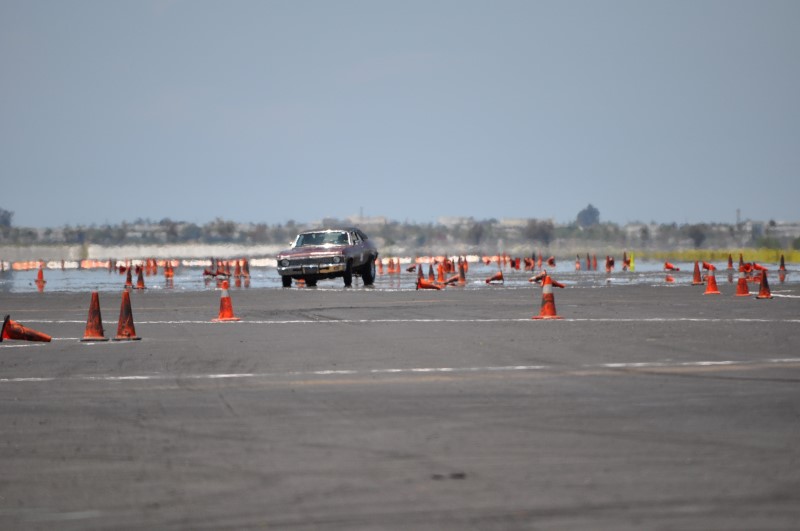
In the next photo below I am braking hard to slow the car after the finish.
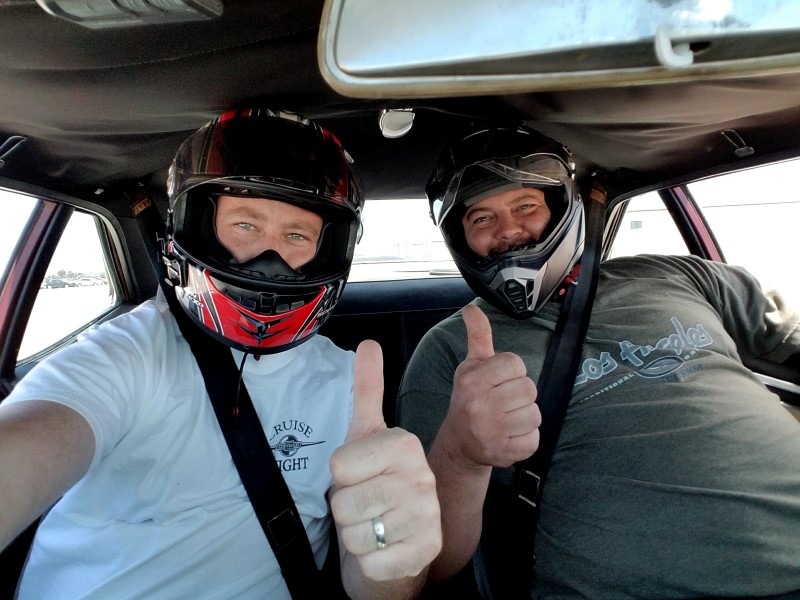
The day was a family affair. I invited my brother down and let him drive 3 of my 12 laps. I think he got the bug just as bad as I did. He's talking about bringing his Manx buggy next time.
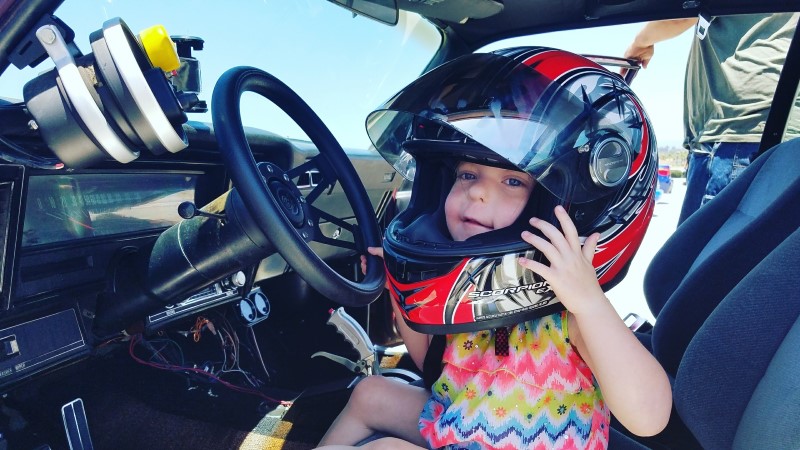
My kids stopped by for a visit too. Here's my daughter gearing up for her turn in the car. Sorry kiddo - rules are you have to be able to see over the steering wheel before you can drive!
Unfortunately in all the prep for this event I forgot to clear the memory card for my GoPro! I was only able to capture a little footage from the very first run on it when I was getting a feel for the course and car. Here it is:
My times were not great, but I did progressively improve from around 57.5sec on my first run down to a best of 50.0sec. Out of the 9 runs I ran, I spun on only one, but similar to the above video I lost it a few other times and had to recover.
The car did well mechanically. It didn't overheat and nothing broke. On one of the runs the transmission seemed to come out of gear momentarily and I found the transmission fluid was low on fluid again - just barely registering on the dipstick. I added a quart and it did fine after that. I am not sure where the fluid is going - it's not leaking anywhere so my only guess is the system is still burping air. The steering gear didn't make any noise and it felt like it was working right, but it does have a dead zone in the middle and it's horribly numb - I am getting just about no feedback through the wheel.
The experience shook up my priority list for what to do with the car next. I think number one is getting the rear suspension in order. I have a set of Hotchkis leafs for the back to help balance it out, but I also need to get shocks and a rear swaybar. Next the car needs better tires and probably larger wheels too, because there's almost no tire selection out there for 15s that would be sized right for the car. Finally I want a heavier and faster steering box. Then brake upgrades.
So here she is sticking out like a sore thumb on the grid full of Corvettes, Porches, Miatas and other comparably modern cars.
I love the stance of my car right now - classic muscle car with a little rake and a big/skinny combo showing plenty of sidewall on 15" wheels. This is 100% wrong for autocross!
Here are a few photos from on the course. In the photo immediately below notice how much the rear lifts under braking. You can really see the driver's rear tire unload in a sharp left. The car is putting it's weight on the front outside tire. Look at it fold under the rim! This causes the car to push really bad.
Over the course of the day I learned to throttle-steer the car. In the photo below the car has leveled out a bit front-to-rear as I began to throttle out of the corner.
Photo below shows the rear unloading thing from further way. You can see I'm asking way too much of those skinny 215s up front. I think stiffening up the back will help a ton so those back tires can do more work. It probably wouldn't hurt to lower the back of the car too.
In the next photo below I am braking hard to slow the car after the finish.
The day was a family affair. I invited my brother down and let him drive 3 of my 12 laps. I think he got the bug just as bad as I did. He's talking about bringing his Manx buggy next time.
My kids stopped by for a visit too. Here's my daughter gearing up for her turn in the car. Sorry kiddo - rules are you have to be able to see over the steering wheel before you can drive!
Unfortunately in all the prep for this event I forgot to clear the memory card for my GoPro! I was only able to capture a little footage from the very first run on it when I was getting a feel for the course and car. Here it is:
My times were not great, but I did progressively improve from around 57.5sec on my first run down to a best of 50.0sec. Out of the 9 runs I ran, I spun on only one, but similar to the above video I lost it a few other times and had to recover.
The car did well mechanically. It didn't overheat and nothing broke. On one of the runs the transmission seemed to come out of gear momentarily and I found the transmission fluid was low on fluid again - just barely registering on the dipstick. I added a quart and it did fine after that. I am not sure where the fluid is going - it's not leaking anywhere so my only guess is the system is still burping air. The steering gear didn't make any noise and it felt like it was working right, but it does have a dead zone in the middle and it's horribly numb - I am getting just about no feedback through the wheel.
The experience shook up my priority list for what to do with the car next. I think number one is getting the rear suspension in order. I have a set of Hotchkis leafs for the back to help balance it out, but I also need to get shocks and a rear swaybar. Next the car needs better tires and probably larger wheels too, because there's almost no tire selection out there for 15s that would be sized right for the car. Finally I want a heavier and faster steering box. Then brake upgrades.
Thread Starter
Joined: Apr 2010
Posts: 2,816
Likes: 86
From: Instagram @chevyhotrodder
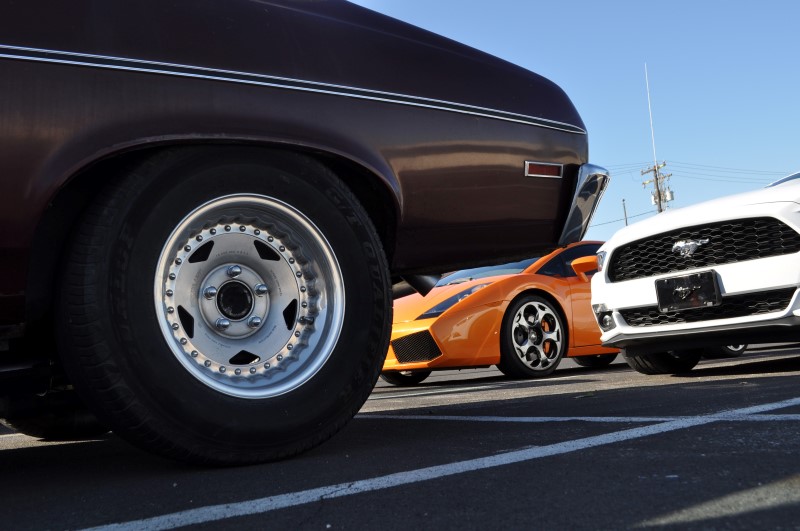
I also want to share a major fail from the day. Just after I pulled in, a bright orange '07 Lamborghini Gallardo pulled up behind me. I've always been a major fan of Lamborghinis. I even toured the factory in Italy a number of years ago. So before we moved to the grid, I snapped a few photos, including this one of my rear wheel with the front of the Lamborghini in the background. At the time I took the photo I thought it was just a cool juxtaposition of muscle vs. exotic, but it sort of foreshadowed what was to come.
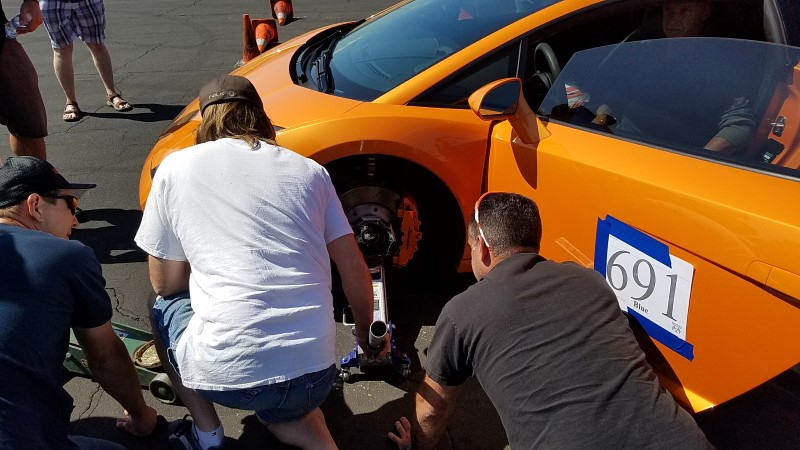
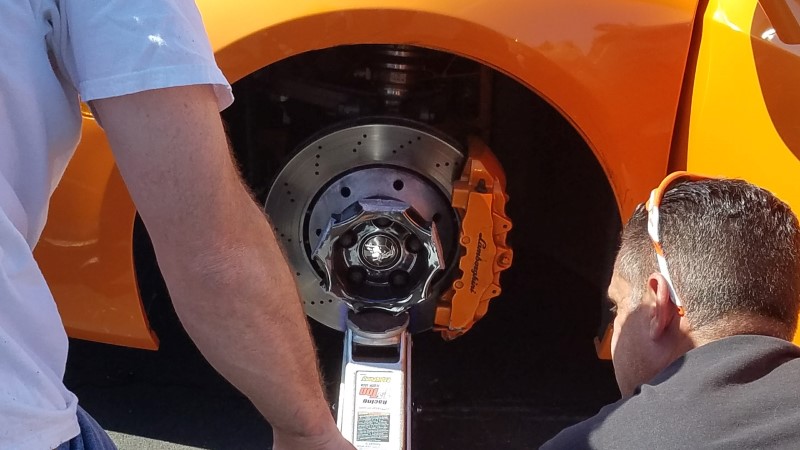
As the Lamborghini was about half way through it's second or third run, heading toward the grid of cars waiting for their next run, the front driver wheel suffered catastrophic failure. The 5 spokes broke off at the center and the car slammed to the ground on it's rotor. As it skidded to a stop, the wheel and tire rolled off at speed, flying toward the grid of waiting cars. By stroke of luck, it veered around, rolling full speed past the crowd of onlookers and eventually slamming into an aircraft hanger a few hundred yards from where it launched.
Thankfully no one was hurt. It could have been so much worse if this happened on a canyon road or highway or if that tire had decided to follow just a slightly different path into people or other cars.
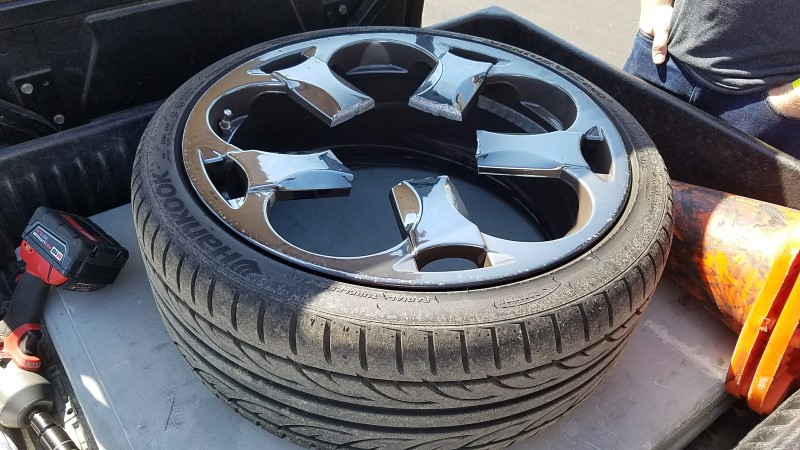
I took a look at the failed wheel and while "Lamborghini" was cast into the back side, I can only guess this was a China knock off. You can buy these black chrome wheels on eBay for around $1k each. Buyer beware!!!
As the Lamborghini was about half way through it's second or third run, heading toward the grid of cars waiting for their next run, the front driver wheel suffered catastrophic failure. The 5 spokes broke off at the center and the car slammed to the ground on it's rotor. As it skidded to a stop, the wheel and tire rolled off at speed, flying toward the grid of waiting cars. By stroke of luck, it veered around, rolling full speed past the crowd of onlookers and eventually slamming into an aircraft hanger a few hundred yards from where it launched.
Thankfully no one was hurt. It could have been so much worse if this happened on a canyon road or highway or if that tire had decided to follow just a slightly different path into people or other cars.
I took a look at the failed wheel and while "Lamborghini" was cast into the back side, I can only guess this was a China knock off. You can buy these black chrome wheels on eBay for around $1k each. Buyer beware!!!
Last edited by -TheBandit-; May 30, 2017 at 12:57 PM.
curious, what organization did you autocross with, and what are their rules regarding passenger age? also I have yet to complete 9 runs in an entire 3-day weekend at good guys, let alone a single day.
ETA: Jimbo, it does include a rear end, but sadly not one in a g-string.
ETA: Jimbo, it does include a rear end, but sadly not one in a g-string.
Thread Starter
Joined: Apr 2010
Posts: 2,816
Likes: 86
From: Instagram @chevyhotrodder
This was with a local group, Speed Limit Racing www.camarilloautocross.com. I had a total of 12 runs (let my brother drive 3 of them, I drove 9). They don't allow child seats. I don't know if there is a minimum age. They run once a month for Saturday and Sunday. I am thinking about going back in July for my birthday. Join me?