

'70 Nova LY6/TH400 6.0VVT


Thread Starter


Joined: Apr 2010
Posts: 2,816
Likes: 86
From: Instagram @chevyhotrodder
So after looking over over my housing end welds closely I decided there were just too many start-stops and inconsistency, so I decided to rework them. Here is a video to get a closer 360 view of each. I noticed the first inch or so of each weld is cold and then starts to wet out more. The cold parts of the welds and questionable overlaps at the ends are what motivated me to rework.
Youtube Video - Old Welds

https://youtu.be/y7PC6gEBxSo
In retrospect I think I would have had better results if I preheated the housing, but even so I think the starts and stops and time to re-position the housing between welds were the main contributing factors to the result. So I decided to enlist my kids to help me make a rotisserie. Here's what we came up with:
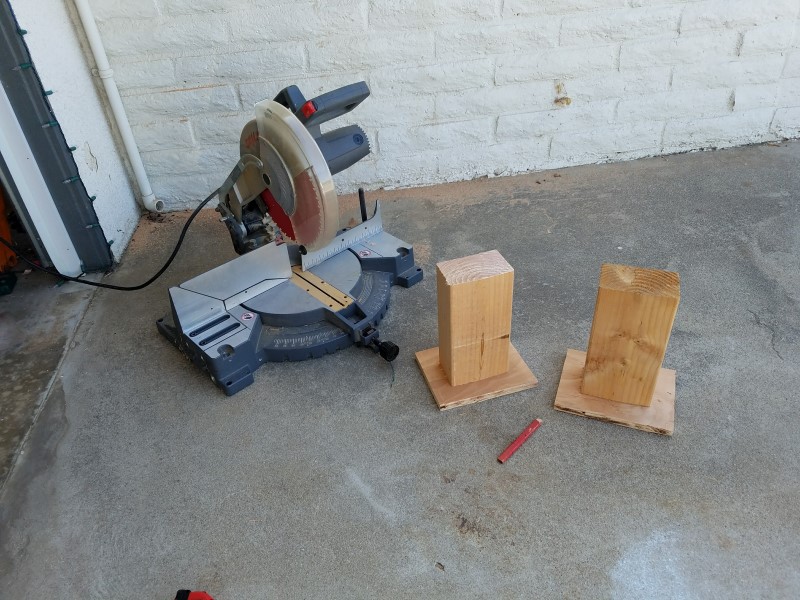
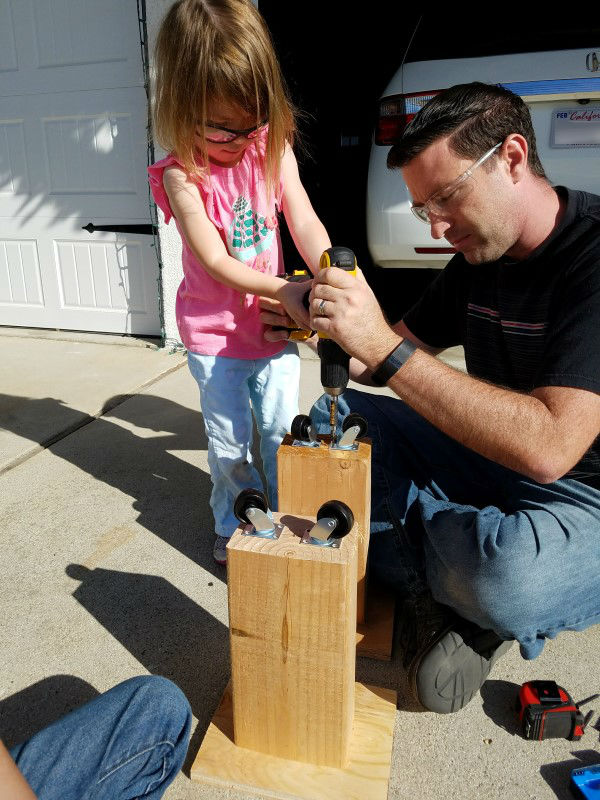
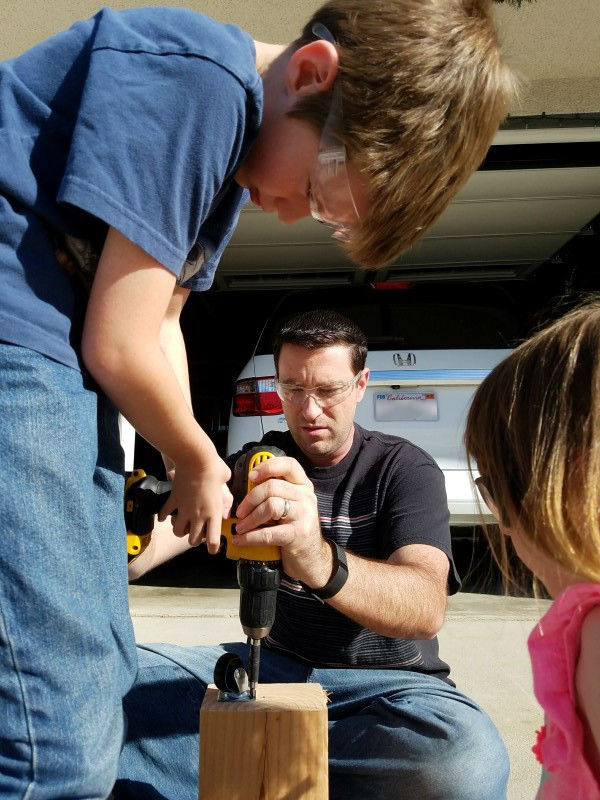
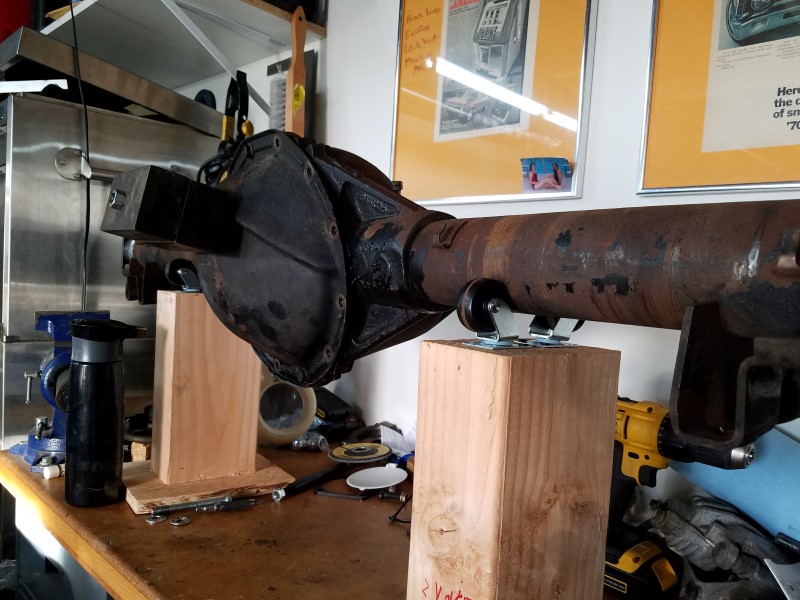
The rotisserie we came up with is a simple set of stands made from 4x6 and 3/4 plywood remnants with opposing chair casters on top. Fixed wheels might work better, but I had these on hand. I'm hopeful they are far enough from welding heat that they won't melt. I bolted a pair of heavy steel lift/lowering blocks to the diff cover to balance it and formed a crank handle from a piece of scrap aluminum. Here's a video of it in action.
Youtube Video - Rear Axle Housing Rotisserie

https://youtu.be/h0cS8J92NiQ
I'm happy with how it works; it rotates smoothly and feels balanced enough that I can stop at any position and the axle housing doesn't try to swing around on me.
I ground out the old welds with a 4-1/2 grinder. Here is what they look like. There is a bit of a radius inside the corner due to how the grinding wheel wore on edge.
Youtube Video - Ground down housing end welds

https://youtu.be/skACc_e_Dag
Youtube Video - Old Welds
https://youtu.be/y7PC6gEBxSo
In retrospect I think I would have had better results if I preheated the housing, but even so I think the starts and stops and time to re-position the housing between welds were the main contributing factors to the result. So I decided to enlist my kids to help me make a rotisserie. Here's what we came up with:
The rotisserie we came up with is a simple set of stands made from 4x6 and 3/4 plywood remnants with opposing chair casters on top. Fixed wheels might work better, but I had these on hand. I'm hopeful they are far enough from welding heat that they won't melt. I bolted a pair of heavy steel lift/lowering blocks to the diff cover to balance it and formed a crank handle from a piece of scrap aluminum. Here's a video of it in action.
Youtube Video - Rear Axle Housing Rotisserie
https://youtu.be/h0cS8J92NiQ
I'm happy with how it works; it rotates smoothly and feels balanced enough that I can stop at any position and the axle housing doesn't try to swing around on me.
I ground out the old welds with a 4-1/2 grinder. Here is what they look like. There is a bit of a radius inside the corner due to how the grinding wheel wore on edge.
Youtube Video - Ground down housing end welds
https://youtu.be/skACc_e_Dag
Thread Starter
Joined: Apr 2010
Posts: 2,816
Likes: 86
From: Instagram @chevyhotrodder
This has been quite a refresher on welding (and grinding lol) for me. After getting the rotisserie figured out, I got everything setup on my welding table and proceeded on a second pass at welding this. Here is a video:

https://youtu.be/3Jf7DU67A7E
Unfortunately that attempt was ill-fated. The resulting weld was a narrow, piled-up glob-ring around the housing that I dared not photograph (the grinder came out faster than John Force). I walked away from the project for a few days while I pondered what went wrong. I talked to my brother who is more of a doer/fabricator than an over-thinker/engineer like me, and together we came up with a few conclusions:
First, the overall height of my welding table and the rotisserie stands put the housing too high - roughly armpit level - and instead of positioning the gun over the housing for a flat position weld, I had the gun on the side of the housing doing a vertical position weld. Second, the hand crank was large so I ended up positioning my head behind the nozzle where my view of the weld was obstructed (this also contributed to doing a vertical position weld). Third, I was pushing the weld and given I was looking at the front side of the weld and had obstructed view of the back, I didn't even notice the weld pilling up behind the gun. Fourth, I wasn't weaving nearly enough.
Those factors all contributed to a bad result so I set out on a plan to right my wrongs. First I put the rear end all the way down on the floor instead of up too high on the welding table. As a result I had to kneel on the floor to make the weld, but I was able to more easily do a flat position weld which would help the weld lay flat and wide instead of narrow and built-up. Second, I shortened my hand crank to essentially just stick out from where the bolt of the housing end would normally go. This made it harder to crank, but freed space so I could put my body in front of the housing end and get my head closer to see what I was doing. Third, I switched from a "pushing" technique to a "pulling" technique by rotating the housing in the opposite direction, angling the gun slightly from vertical toward the direction of welding, and viewing the weld from the back of the puddle. I placed a jack stand as close to the housing as I could to use as a hand rest and did a dry run. Here is a video (ignore my muttering):

https://youtu.be/oFxGp53rx4Y
The dry run went well. I had to adjust my position a little to get angle on the gun and visibility while the spring perch swung around, but for the most part this worked. Time to weld. This time I made a wider weave and I paused momentarily at each end of the weave.

https://youtu.be/7P_RI_gJ_Gg
That worked out quite well. The first side went smoothly and I got a flatter, continuous bead all the way around the housing. While welding the second side I had to stop and restart twice, first because my hand crank got caught in my welding apron (Murphy's law) and second because I accidentally dipped the tip into the weld. But I corrected those issues pretty quickly and the start-stops are not too noticeable. Here are a couple photos showing the finished welds:
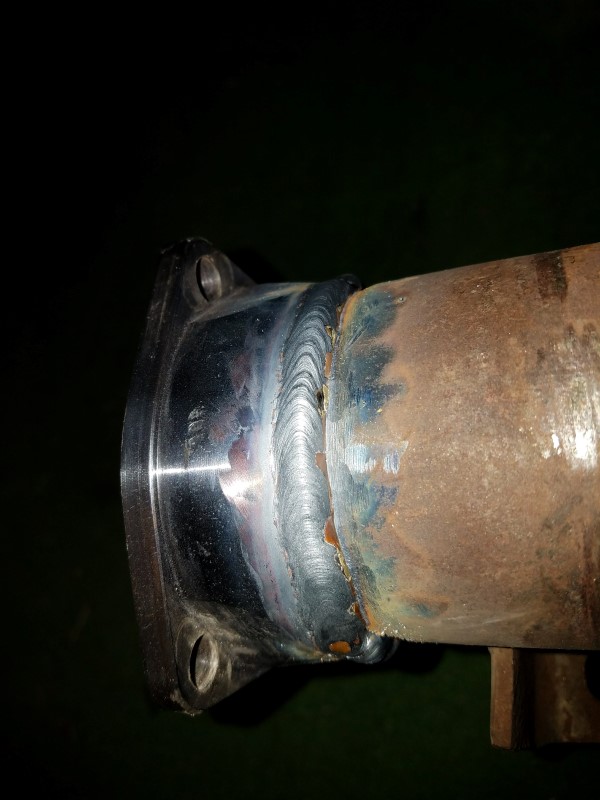
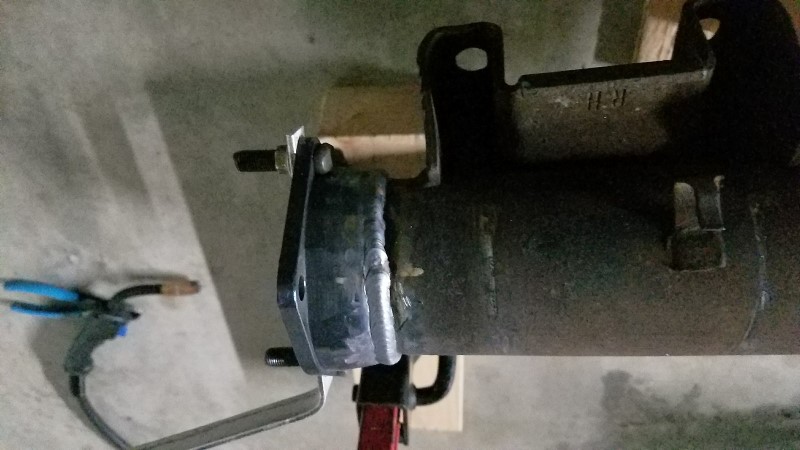
I am happy with those results. They are a little built-up and could probably have wetted out more at the housing tube side, but I think they'll be just fine.
I think next I'll mock up the brake lines and add any necessary mounting tabs before getting the housing blasted.
https://youtu.be/3Jf7DU67A7E
Unfortunately that attempt was ill-fated. The resulting weld was a narrow, piled-up glob-ring around the housing that I dared not photograph (the grinder came out faster than John Force). I walked away from the project for a few days while I pondered what went wrong. I talked to my brother who is more of a doer/fabricator than an over-thinker/engineer like me, and together we came up with a few conclusions:
First, the overall height of my welding table and the rotisserie stands put the housing too high - roughly armpit level - and instead of positioning the gun over the housing for a flat position weld, I had the gun on the side of the housing doing a vertical position weld. Second, the hand crank was large so I ended up positioning my head behind the nozzle where my view of the weld was obstructed (this also contributed to doing a vertical position weld). Third, I was pushing the weld and given I was looking at the front side of the weld and had obstructed view of the back, I didn't even notice the weld pilling up behind the gun. Fourth, I wasn't weaving nearly enough.
Those factors all contributed to a bad result so I set out on a plan to right my wrongs. First I put the rear end all the way down on the floor instead of up too high on the welding table. As a result I had to kneel on the floor to make the weld, but I was able to more easily do a flat position weld which would help the weld lay flat and wide instead of narrow and built-up. Second, I shortened my hand crank to essentially just stick out from where the bolt of the housing end would normally go. This made it harder to crank, but freed space so I could put my body in front of the housing end and get my head closer to see what I was doing. Third, I switched from a "pushing" technique to a "pulling" technique by rotating the housing in the opposite direction, angling the gun slightly from vertical toward the direction of welding, and viewing the weld from the back of the puddle. I placed a jack stand as close to the housing as I could to use as a hand rest and did a dry run. Here is a video (ignore my muttering):
https://youtu.be/oFxGp53rx4Y
The dry run went well. I had to adjust my position a little to get angle on the gun and visibility while the spring perch swung around, but for the most part this worked. Time to weld. This time I made a wider weave and I paused momentarily at each end of the weave.
https://youtu.be/7P_RI_gJ_Gg
That worked out quite well. The first side went smoothly and I got a flatter, continuous bead all the way around the housing. While welding the second side I had to stop and restart twice, first because my hand crank got caught in my welding apron (Murphy's law) and second because I accidentally dipped the tip into the weld. But I corrected those issues pretty quickly and the start-stops are not too noticeable. Here are a couple photos showing the finished welds:
I am happy with those results. They are a little built-up and could probably have wetted out more at the housing tube side, but I think they'll be just fine.
I think next I'll mock up the brake lines and add any necessary mounting tabs before getting the housing blasted.
Thread Starter
Joined: Apr 2010
Posts: 2,816
Likes: 86
From: Instagram @chevyhotrodder
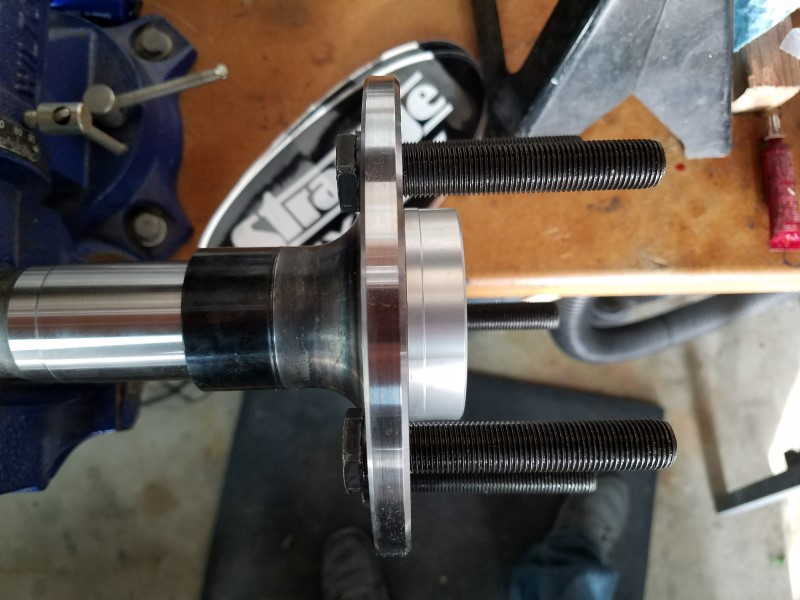
I also managed to assemble the new Strange axles. First step was installing the new 1/2" screw-in wheel studs with red Loctite and the appropriate torque. Along with the vise, I used a piece of square tubing across two studs to help resist the tightening torque. The vise alone just wasn't enough.

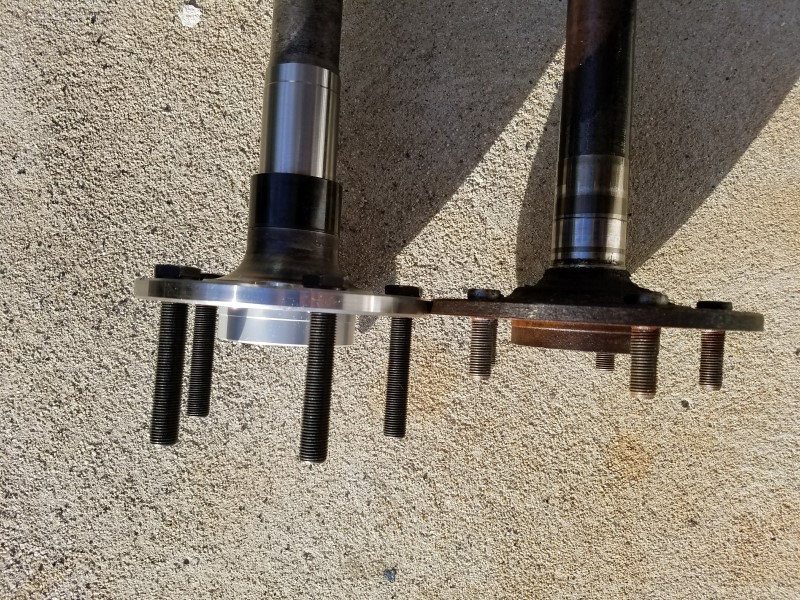
The photo below compares the stock 12bolt axle end to the Strange setup. The 1/2" studs are a little more substantial than the stock press in 7/16" studs. Also you can see the flanges are thicker than OEM and with the way the axle necks down slightly, it's likely if the axle ever does break, it will break inside of the bearing and the wheel will stay on.
With the studs in I could move on to assembling the bearings and retaining/wedding rings. I am using the F-body brake bracket to retain the axles, so I had to put the backing plates on first, then the tapered bearing with seal, and finally the wedding ring.
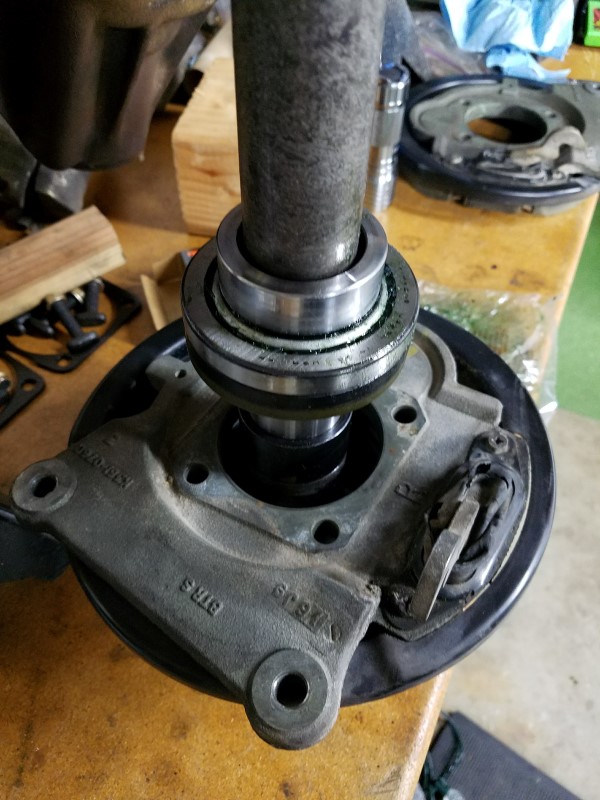
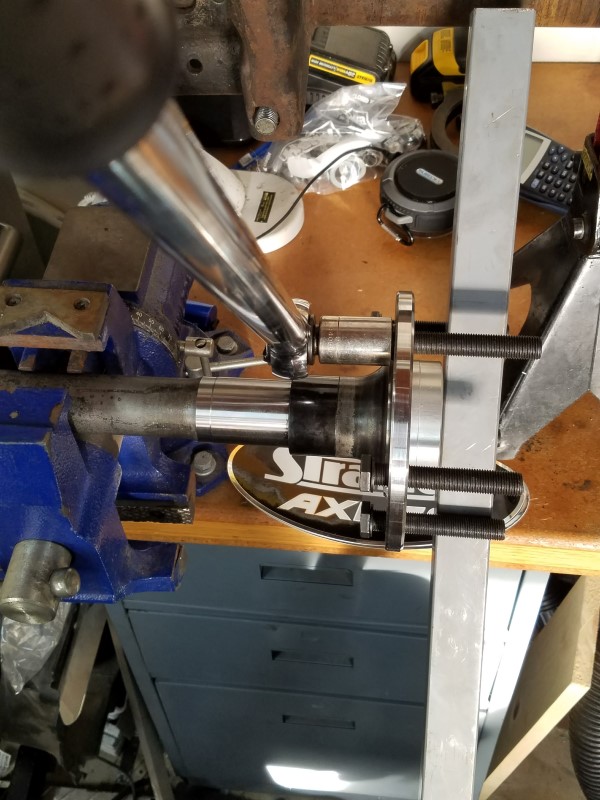
I brought the assembly to my 12ton shop press fitted with a 20ton bottle jack. I supported the wedding ring with the press plates and pressed both the bearing and the wedding ring on at the same time. Some prefer to do the bearing first then ring since it takes less press force, but this worked out fine for me - even though it took some doing I could tell when they bottomed. I took a "hyperlapse" video of the process with my cellphone

https://youtu.be/CYBUorkx9yM
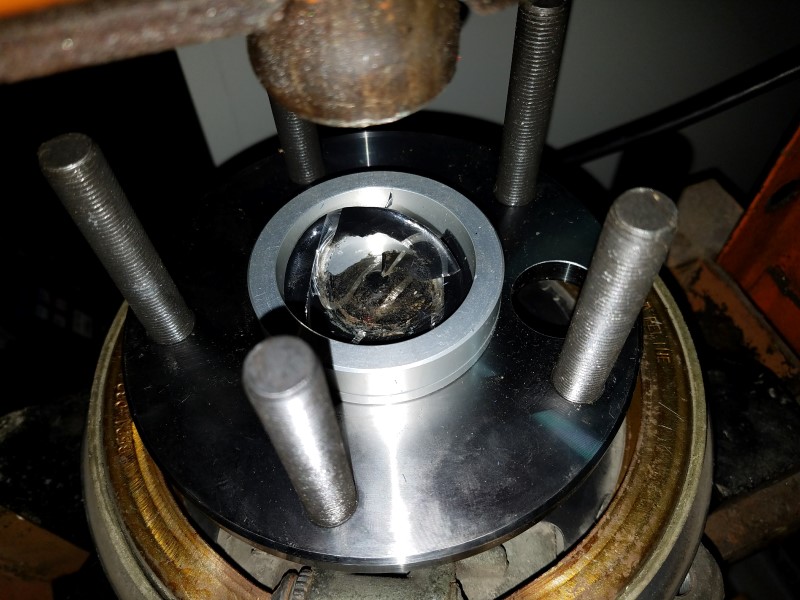
My only problem here was pressing against and destroying the fancy gel-like logo sticker Strange puts inside the end. I didn't have a suitable size puck to place over the end of the axle otherwise I could have avoided this! Maybe they will send me a replacement.
The photo below compares the stock 12bolt axle end to the Strange setup. The 1/2" studs are a little more substantial than the stock press in 7/16" studs. Also you can see the flanges are thicker than OEM and with the way the axle necks down slightly, it's likely if the axle ever does break, it will break inside of the bearing and the wheel will stay on.
With the studs in I could move on to assembling the bearings and retaining/wedding rings. I am using the F-body brake bracket to retain the axles, so I had to put the backing plates on first, then the tapered bearing with seal, and finally the wedding ring.
I brought the assembly to my 12ton shop press fitted with a 20ton bottle jack. I supported the wedding ring with the press plates and pressed both the bearing and the wedding ring on at the same time. Some prefer to do the bearing first then ring since it takes less press force, but this worked out fine for me - even though it took some doing I could tell when they bottomed. I took a "hyperlapse" video of the process with my cellphone
https://youtu.be/CYBUorkx9yM
My only problem here was pressing against and destroying the fancy gel-like logo sticker Strange puts inside the end. I didn't have a suitable size puck to place over the end of the axle otherwise I could have avoided this! Maybe they will send me a replacement.

Thread Starter
Joined: Apr 2010
Posts: 2,816
Likes: 86
From: Instagram @chevyhotrodder
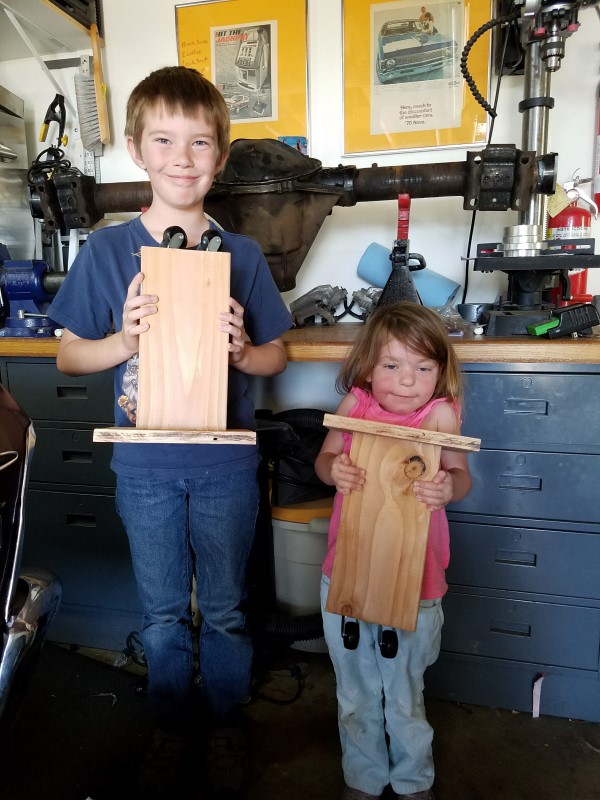
Yeah she's quite petite and that was probably right at her lifting capacity, but she was talking about this for days and she still points them out in the garage after several weeks. The kids are really proud of their work and I am too. I love being a dad.

TECH Senior Member


Joined: Jun 2016
Posts: 22,288
Likes: 3,615
From: Central Cal.
It puts joy in my heart to see your kids involved. They LOVE to be part of WHATEVER Dad is doing! Keep it up!
No kids for me, but you've inspired me to make a similar rolling jig and try to get my girlfriend to slowly spin my stainless turbo piping and exhaust so I can get nice long welds!
Thread Starter
Joined: Apr 2010
Posts: 2,816
Likes: 86
From: Instagram @chevyhotrodder
Yes I am doing the "LS1" rear discs, but I haven't decided yet on the front. I am leaning toward C6 standard (12.8" diameter rotors) up front, but I might go for C6 Z51 (13.4" diameter rotors). I don't want to spend a fortune on a master and all the plumbing, so I'll have to research that too. I'm keeping my eyes peeled for used or NIB kore3 or similar aftermarket hubs.
Staging Lane

Joined: Jun 2013
Posts: 83
Likes: 1
Yes I am doing the "LS1" rear discs, but I haven't decided yet on the front. I am leaning toward C6 standard (12.8" diameter rotors) up front, but I might go for C6 Z51 (13.4" diameter rotors). I don't want to spend a fortune on a master and all the plumbing, so I'll have to research that too. I'm keeping my eyes peeled for used or NIB kore3 or similar aftermarket hubs.
It will help a lot more on the track if you are going to be doing that a lot. Don't forget about tall spindles, raised upper ball joint mount tall spindle to yield a better camber change during suspension movement. Plumbing should be the same and the master is going to depend on the combo you go with.

Clint, not sure if it's been mentioned yet but are you planning on running power (either vacuum or hydro assist) or manual brakes? I have a fair amount of research on manual setup master cylinder piston diameter vs caliper piston total area vs pedal ratio yanked from Pro-Touring and Lateral-G over the years. Some of which is from Toby at Kore3.
Last edited by frojoe; Jan 3, 2018 at 05:39 PM.
Thread Starter
Joined: Apr 2010
Posts: 2,816
Likes: 86
From: Instagram @chevyhotrodder
The advantage of the larger Z51 rotor is obvious, I just haven't looked into it much yet and I want to make sure I'm not overly biasing the front when I am only running the 12" LS1 rotors out back. Joe if you have some good links that could be helpful. I haven't done any research or made any decisions on master or booster yet. Unfortunately I don't have access to drive other people's cars to get a sense for pedal feel with these setups. My stock power disc/drum system felt OK, but I haven't paid my braking performance much attention until recently so I'm going to be feeling my way around in the dark and likely trying to replicate someone else's or an OEM-like setup initially to get a baseline. One reason I was thinking standard front C6 rotors is the the "LS1" rears are about the same dimensions as the standard C6 rears and I could possibly replicate relevant master and booster specifications to get a C6-like system. Of course my car isn't a C6 so it was just an idea to get a starting point.
Can you tell I haven't researched this subject much at all? I just wanted an OEM-based, drum-in-hat p-brake disc setup for the rear that would easily bolt on and the "LS1" setup seemed to fit the bill. That is of course going to snowball when I start thinking about the front end but I'll worry about that after I get the rear end under the car.
Can you tell I haven't researched this subject much at all? I just wanted an OEM-based, drum-in-hat p-brake disc setup for the rear that would easily bolt on and the "LS1" setup seemed to fit the bill. That is of course going to snowball when I start thinking about the front end but I'll worry about that after I get the rear end under the car.
At this point with that info, the only thing I can really add is that you definitely don't have to worry about "over braking" the front at this point. With my initial setup of 12.9" front rotors, 6piston Wilwoods with 7/8" master cylinder, 5.5:1 brake pedal leverage, and 12.2" 4piston rear brakes, I had to dial in the proportioning valve some in order to not lock up the rear tires first. This was with 235 tires on the front and 275 tires on the back, both a "performance" but hard 320 treadwear.
When I stepped up to 14.25" rotors in the front and the 275 tires moved from the back to the front (no other changes) I was able to overpower the front tires more easily, but not consistently or annoyingly so. I never ended up adjusting the proportioning valve, that's how close the braking threshold change was to the old setup, it mainly added modulation and better brake feel.
Now with the sticky 100 treadwear 275 tires up front, I can't even lock up the fronts so far.. it's all hard stopping power. Once my car is back on the road I'll be testing proportioning valve adjustment to try and find the new balance point for the wider stickier 275 front tires.
That all being said, I probably have 200lbs of extra weight on the front of mine from the iron block and the turbo+intercooler+piping, so that's a consideration for your car potentially locking up the front tires easier. However for the added brake feel I would still 100% agree that the bigger 13.4" rotors would be extra money very well spent since you're at a point of buying a new setup from scratch anyways.
More braking leverage on the wheel is never a bad thing, it lowers pedal input and line pressure, and also allows you to use harder pads that produce less brake dust if you happen to find the brake setup to be too strong. That's another thing, using a factory setup (whether it be smaller LS1 or larger Z51) is going to open up a world of possible brake pad compounds that could let you tune the initial bite, grip/power, and threshold of your overall brake balance.
Thread Starter
Joined: Apr 2010
Posts: 2,816
Likes: 86
From: Instagram @chevyhotrodder
Thanks for all the great input Joe. I really do appreciate and respect your and Edys (and Trevors outside of this thread) input on this. The next question is if I keep the stock pedal ratio is there an inexpensive master option and would it make any sense to couple that with my larger single diaphragm booster or go to something totally different? I street drive this 90% of the time and I need something my wife can drive too.
Last edited by -TheBandit-; Jan 3, 2018 at 09:08 PM.
I can't really provide any boosted-brake input because I knew almost from the get-go that I was going to use a manual setup due to space constraints and simplicity.
I'm not sure exactly how economical you're wanting to get, but I imagine that Matt's Classic Bowtie or CPP or somewhere similar should have a multitude of affordable repop cast iron master cylinders designed for boost (1", 1.125", 1.25" M/C pistons) that are intended for Nova, or other muscle car that might fit with no or minimal rework. If you find another one that will work but has a different bolt pattern (don't even have to limit yourself to GM masters) then a simple 1/4" thick adapter plate sandwiched between the M/C and the firewall would work, with just a longer pushrod or an extended threaded pushrod.
My opinion my be a bit skewed as I'm 6'2" and 210lbs with cyclist's legs, but I have to say that the power behind my brakes comes in at a very respectable leg power.. I wouldn't be too concerned about my girlfriend needing to make an emergency stop and she's 5'2" and 105lbs. That being said, with a manual setup I don't think you'll ever quite get that "panic brake initial bite" as soon as you tap the pedal like most boosted brake systems seem to have. On top of that, on older cars like ours with narrower tires and no ABS, I wouldn't necessarily want crazy initial bite from an over-boosted brake setup due to the likelihood of easily blowing past that braking point with the power assist in a panic scenario and repeatedly lock up the brakes up.
Also, what cam do you have? I seem to remember it being mildly to moderately lopey in a video. What vacuum do you normally pull under idle, and how are your current brakes? What is your current brake setup (brand/model/specs of M/C and front calipers and rotors)? What is your qualitative evaluation of your current braking setup? How is the pedal feel?
Now is just as good as any time to start a more detailed discussion of this braking topic!
My Z51/LS1 setup feels incredible, with the 1" bore* C6 master/booster.
Buy Z51 rotors and standard C6 calipers**. Find OEM drum hubs and have them whittled down. Get stainless hoses from Tobin@Kore3, and their brackets if you don't want to fab your own (I have a design). I assume you have a valve to modulate rear brake line pressure, and advise you to get one if not.
*Note that both the C6 and 4th gen use 1" m/c, so I'd advise going that route with power brakes. I prefer the look of modern masters, but that's a matter of personal preference. The C6 booster is also smaller in diameter, which was important to me as the OEM booster created space issues with my valve cover.
**Z51 are identical to standard calipers, only the bracket differs.
Note also that Edy's post shows C7 brake rotors; C6 are one-piece.
Last edited by hookemdevils22; Jan 4, 2018 at 03:45 PM.

Ken

Teching In
Joined: Nov 2017
Posts: 4
Likes: 0
Turned ought I bought a 4.8 instead of a 5.3 and now I need to know what ignition box I am needing to get it started I�m going for the Edelbrock rpm performer intake and I�m still looking at carbs but a key part is the ignition and spark controller and I can�t seem to find the right one to use . Any help would be great