

'70 Nova LY6/TH400 6.0VVT

Thread Starter


Joined: Apr 2010
Posts: 2,816
Likes: 86
From: Instagram @chevyhotrodder
Another option for lighter weight stuff is to get an electric rotisserie designed for a BBQ. They make some of them with adjustable speeds.
Also, what cam do you have? I seem to remember it being mildly to moderately lopey in a video. What vacuum do you normally pull under idle, and how are your current brakes? What is your current brake setup (brand/model/specs of M/C and front calipers and rotors)? What is your qualitative evaluation of your current braking setup? How is the pedal feel?
Currently setup is completely stock OEM/replacement disc/drums with the exception of running Hawk HPS pads up front. If my research is correct it probably has a 1" master with an 11" single diaphragm booster, 11" diameter front rotors with single piston calipers (not sure about the piston diameter). In terms of feel, it felt a little mushy - not as much feel/feedback as I'd like to have and very little foot effort required. The tires were very limiting so I could never really drive it deep into corners at autocross or hard braking would lock them, so I'm sure updating the tires will change the calculus considerably.
I like the idea of adapting an OEM setup like a C6 unit. For wear items, I tend to favor using OEM over aftermarket parts because replacements are more likely to be available down the road. I just need to drive Trevor's Nova (hard) and see how his brakes feel before I make a decision.
Thread Starter
Joined: Apr 2010
Posts: 2,816
Likes: 86
From: Instagram @chevyhotrodder
I've always wanted to roadtrip the car down the coastal Route 101, ending up in California. But I have a feeling that by the time that happens, your need for comparative brake testing will have long-since passed!
Thread Starter
Joined: Apr 2010
Posts: 2,816
Likes: 86
From: Instagram @chevyhotrodder
My wife and I are thinking about doing an Alaskan cruise later this year which could bring us to your area. It would be cool to have that awkward first date after chatting online with babes all day. Besides, we both know I'm training to become a cage fighter.
Well I met Mark and another guy Derek on here, and we've become good friends. So I think 3 for 3 is totally possible! You be flying into or out of Vancouver, presuming it's a 1-way cruise?
Thread Starter
Joined: Apr 2010
Posts: 2,816
Likes: 86
From: Instagram @chevyhotrodder
*Note that both the C6 and 4th gen use 1" m/c, so I'd advise going that route with power brakes. I prefer the look of modern masters, but that's a matter of personal preference. The C6 booster is also smaller in diameter, which was important to me as the OEM booster created space issues with my valve cover.
Thread Starter
Joined: Apr 2010
Posts: 2,816
Likes: 86
From: Instagram @chevyhotrodder

I like to attempt new things and learn skills, so this year's resolution is to learn how to draw/render cars in pencil. I wasn't really looking for new hobby but my wife has been going on a crafting binge lately and I wanted a way to spend time with her in her craft room while feeding my own interests. I got started by watching a few YouTube videos and I picked up some pencil sets for Christmas. I made my first honest attempt at a decent shaded sketch...nothing real fancy, just the basics of dark and light and trying to get a feel for how to use colored pencils.

I learned there are all kinds of tools and skills for doing this kind of thing, but they are considerably less expensive than the tools I usually buy plus they are available at the craft stores my wife always drags me to. So after that first sketch I picked up a few little things and got to work on my second sketch. I decided to tackle FroJoe's Nova because if I screwed it up at least it wasn't mine!

I learned a bunch doing that drawing. I glossed over a few things, but I'm happy with how most of it turned out so I decided I'm ready to try screwing up my own car. Here's where I'm at with it so far. I need to correct a few things (headlight mismatch needs some help lol) before I add interior, wheels, tires, etc but it's getting there.

My aspiration is to do photo-real pencil art. I also want to learn markers and do rendering and cartoon drawings, but for now I'm learning how to work the pencils and having a great time.


C5 booster install. C6 is essentially the same.
And my goal is to make it to Good Guys Del Mar in 2019. You can skip down to take it out on the autocross. Hopefully it'll be 4-linked by then. Granted, that likely won't help you any time soon.
And my goal is to make it to Good Guys Del Mar in 2019. You can skip down to take it out on the autocross. Hopefully it'll be 4-linked by then. Granted, that likely won't help you any time soon.
Thread Starter
Joined: Apr 2010
Posts: 2,816
Likes: 86
From: Instagram @chevyhotrodder
Thanks guys and thanks Trevor - that's exactly the link I was looking for! Really kind of you to offer the wheel - maybe I will be able to make it down there and we could swap seats/cars, but I'd hate to take valuable track time from you. Hopefully by that time my brakes will be sorted out.
Thread Starter
Joined: Apr 2010
Posts: 2,816
Likes: 86
From: Instagram @chevyhotrodder
So I started adding up the costs on front brakes and decided I'm going to hold off until next year and temporarily run the stock 11" discs up front with the "LS1" 12" discs out back. I think I am going to keep the 11" booster and swap the stock disc/drum 1-1/8" master for a '69 Vette 1-1/8" master. They are cheap, disc/disc ready (larger rear reservoir, no residual valves), and I *think* will bolt right up. I will eliminate the front hold off valve (info on that here) and replumb the rear leg of the system with an adjustable pressure regulator. I want to keep the stock distribution block which has the brake idiot light switch in case the front and rear pressure get mismatched or their is air in the system (that has saved my butt in the past when I developed an undetected leak).'
In the meantime I'll keep my eyes peeled for C5/C6 calipers and save up for the various parts needed for the Z51 rotor setup.
I am currently waiting on brake hoses for the rear so I can weld tabs on the housing and get it painted/assembled. I have most of the other parts to get it back together and I am itching to pull the trigger on wheels.
Clint if those drawings are just learning to draw, I can't wait to see the next one. Very impressive. As always nice work.
Last edited by Motown 454; Jan 25, 2018 at 03:39 PM.
Thread Starter
Joined: Apr 2010
Posts: 2,816
Likes: 86
From: Instagram @chevyhotrodder
Thank you Wayne! I have doodled before but never anything like this. Here is how that previous drawing turned out.

And here is a small / quick one I did after that - '66 Chevelle and Cragers.

I enjoy drawing and shading, but I have a really hard time getting the initial sketch right. Practice practice practice.
And here is a small / quick one I did after that - '66 Chevelle and Cragers.
I enjoy drawing and shading, but I have a really hard time getting the initial sketch right. Practice practice practice.

Thread Starter
Joined: Apr 2010
Posts: 2,816
Likes: 86
From: Instagram @chevyhotrodder
Thanks to you both. It can be very frustrating. The one I did of my Nova (with the "70" on the side) has a lot of things wrong with it. I erased and redrew all the outlines up front several times and it's still goofy. The front fender opening is too low. The wheels are "lumpy" instead of oval and missing a lot of detail. The interior isn't drawn dark enough. The headlights are mismatched. I look at it and see mistake after mistake, but they are all learnings I can take with me to the next drawing.
A lot of building my car has been to learn how to do new things. Shortening the axle, for example, was a challenge and learning experience I wanted to have under my belt. Similar for the wiring and a bunch of the other projects. I just like to try things and learn things even if I don't get them 100% perfect. That's what makes life interesting for me. Sometimes you win, sometimes you learn!
A lot of building my car has been to learn how to do new things. Shortening the axle, for example, was a challenge and learning experience I wanted to have under my belt. Similar for the wiring and a bunch of the other projects. I just like to try things and learn things even if I don't get them 100% perfect. That's what makes life interesting for me. Sometimes you win, sometimes you learn!
Thread Starter
Joined: Apr 2010
Posts: 2,816
Likes: 86
From: Instagram @chevyhotrodder
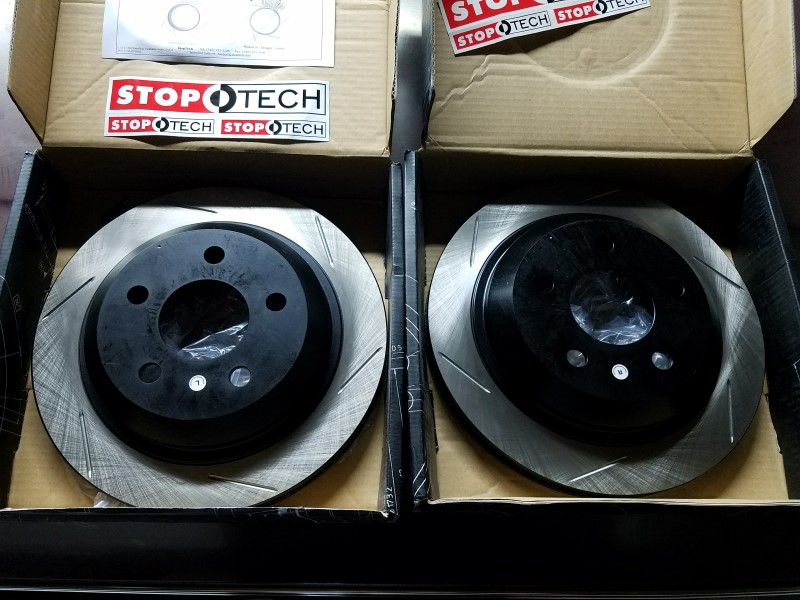
More progress on the rear end. I picked up a pair of Powerslot (now Stoptech) slotted rotors for the "LS1" brake swap. They are directional vane, P/N 126.62065SL (left) and 126.62065SR (right).
As you may know I like to get my son into the garage as often as I can, so I he helped me mock up the axles and brakes. Here's a little hyperlapse video of us.
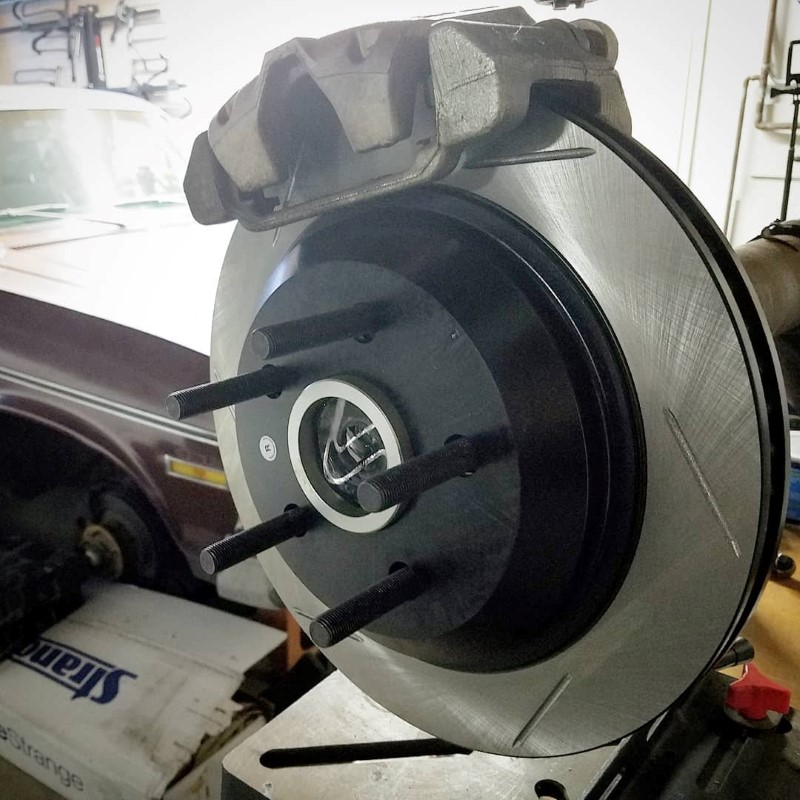
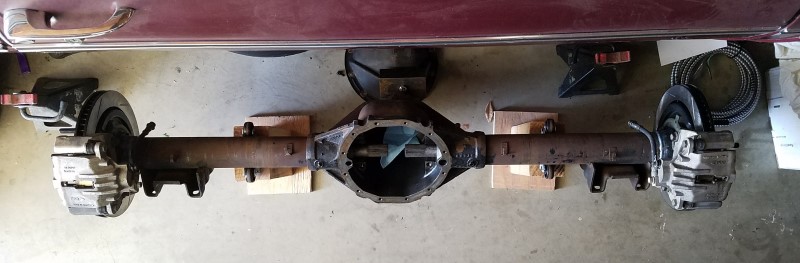
I'm happy to see everything fit as it should and I hit my target overall width WMS-to-WMS within 1/16th inch. To summarize, I narrowed the housing using Strange H1143 GM pattern housing ends and used strange B1105D spacers for tapered Ford bearings. The brakes are "LS1" calipers and backing plates from a '02 Camaro and the axles are custom length Strange axles. The overall WMS-to-WMS has been narrowed by 2in from 60-1/4" to 58-1/4" (1in per side). The goal is to fit more common 0 offset wheels (for example 18x9 w/ 5"BS) instead of getting 1" offset wheels (for example 18x9 w/ 6"bs) which are virtually unavailable without going to 2 or 3pc wheels.
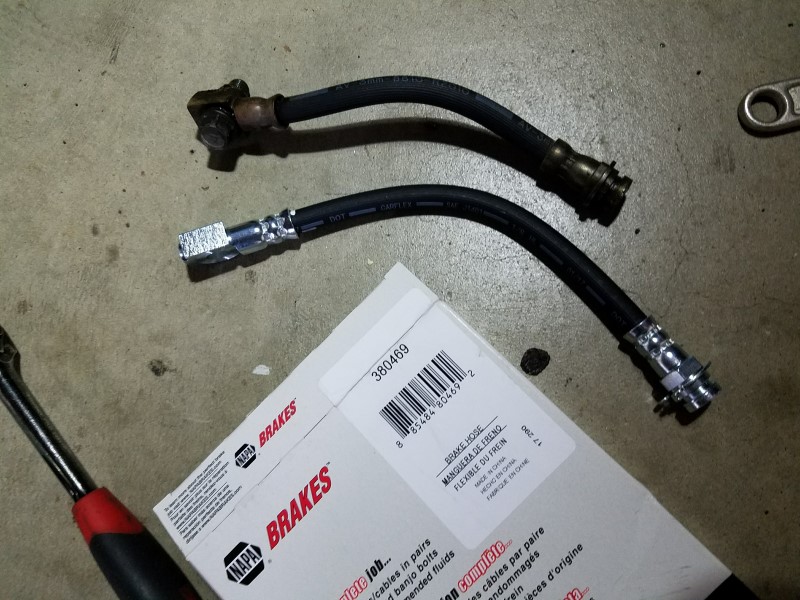
Happy with the brake mockup, I picked up some new brake hoses. The original "LS1" hoses have a 10mm banjo at the caliper and a 10mm bubble/DIN connection at the other end. I decided to swap them for '05 Blazer hoses which are a couple inches longer and have a 3/8-24 inverted flare for 3/16" tubing. They are Dorman H380469 / Napa P/N 380469 and cost about $10 each. By comparison, braided stainless lines of the same size are around $25ea.
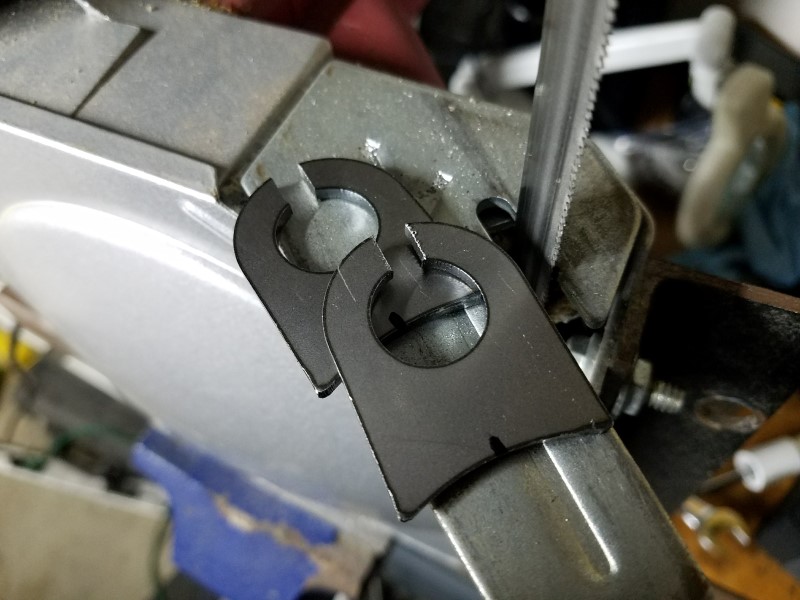
For mounting the hoses, I picked up some precut tabs for Currie CE-6013-TAB. They didn't have a slot for removing the brakeline, so cut a slot with my bandsaw. This will allow me to remove the brake lines from the axle without opening up the brake system, so i can just hang the calipers and lines from the car if I want to remove the rear end - no bleeding needed.
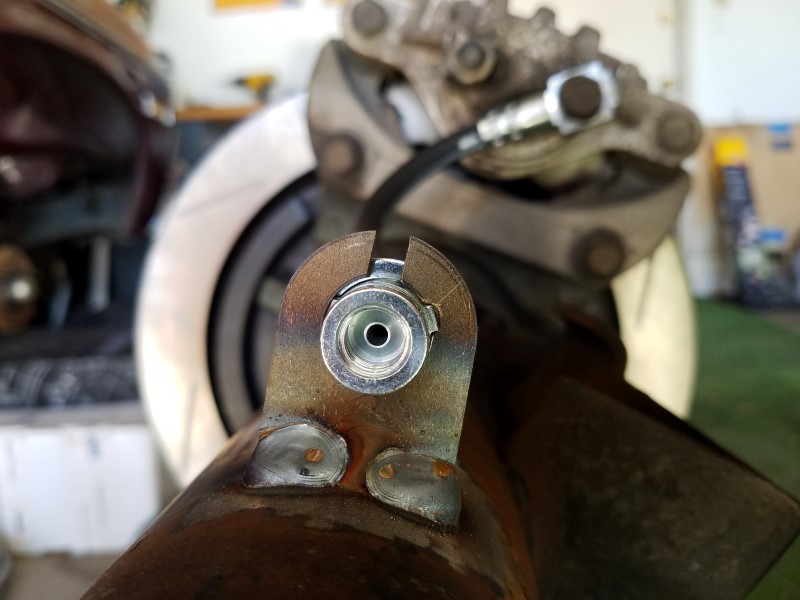
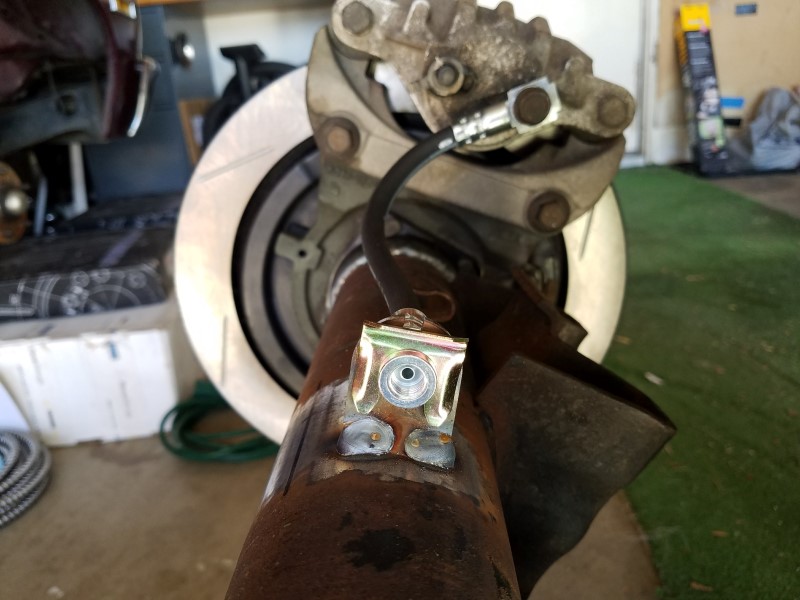
Once I figured out where I wanted them, I used a Dremel and a carbide cutter to make a notch for the anti-rotation tab. Then I tacked and finally welded them on. I used Allstar brake line clips ALL50150 to retain the hoses lines.

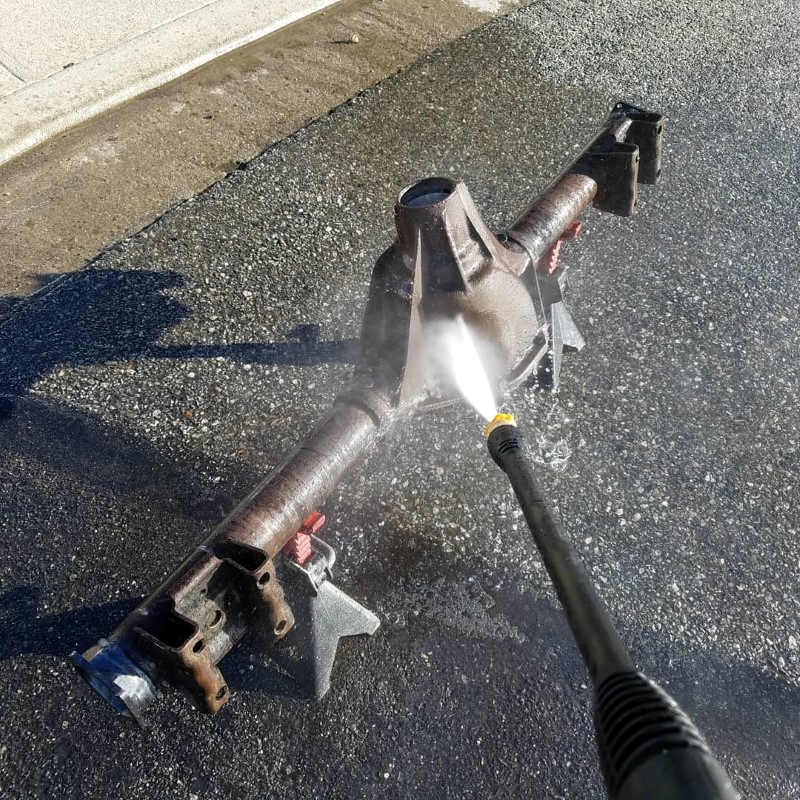
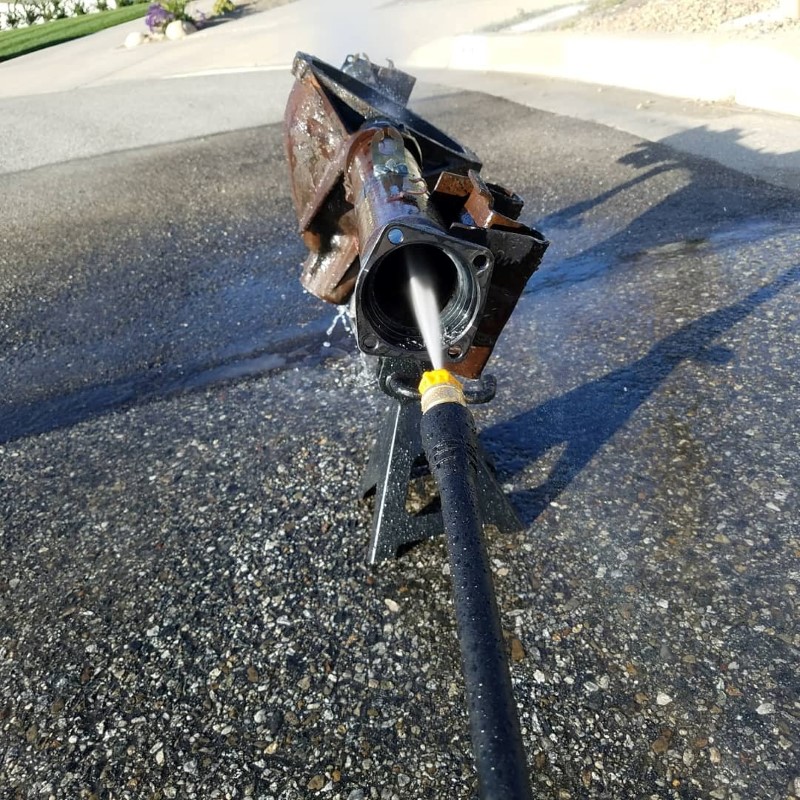
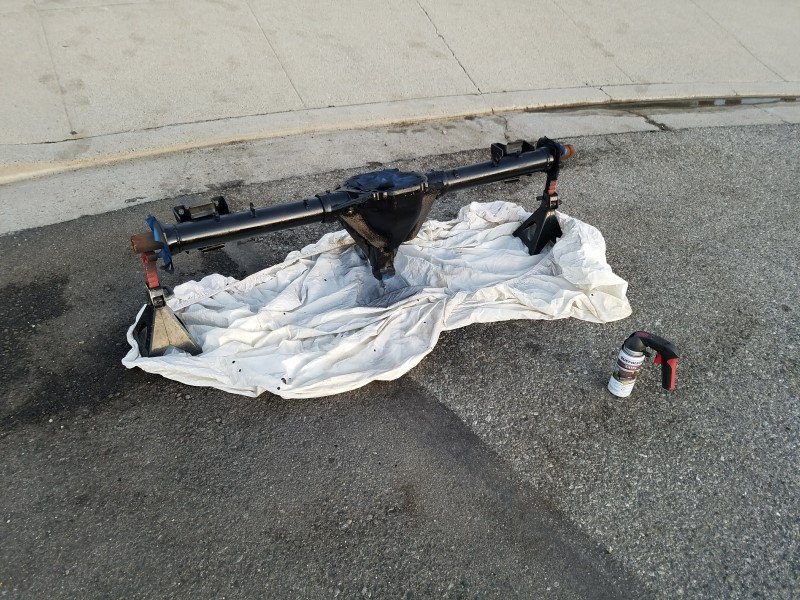
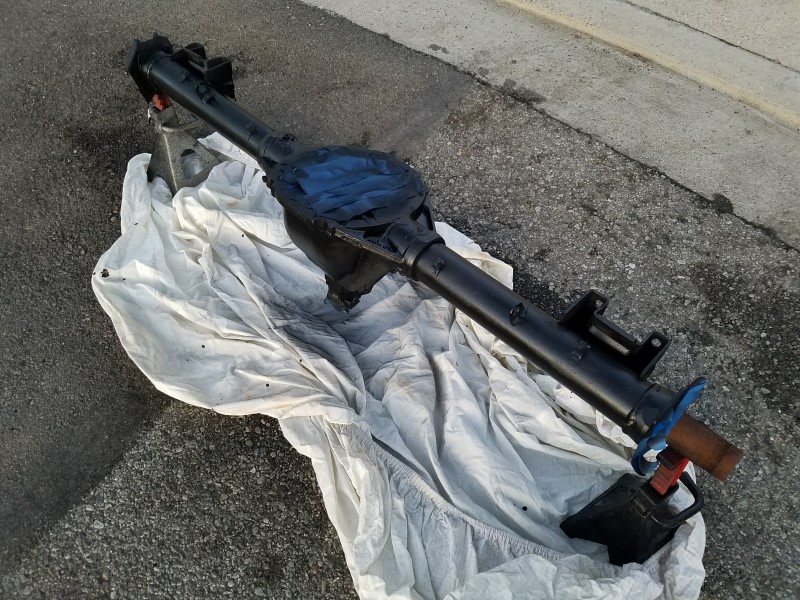
That was it for fabrication, so it was finally time to strip it back down for clean and paint. I got an electric pressure washer a couple months go. After a series of soaking in degreaser and spraying inside and out with the pressure washer, it was ready for paint.
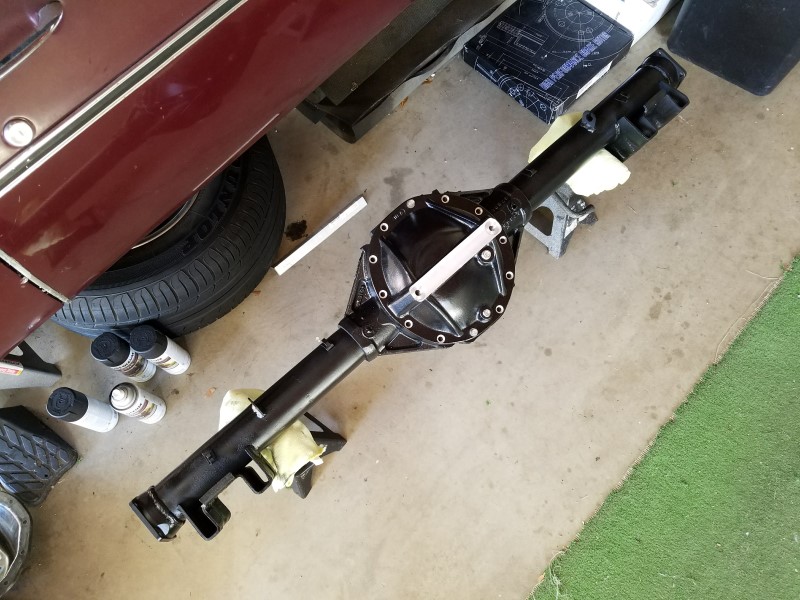
I decided to get an LPW racing diff cover, not so much for the cap support girdle but because I'm more confident the cast cover will seal well and it has drain and fill ports. One of my goals for the car is no leaks!
As you may know I like to get my son into the garage as often as I can, so I he helped me mock up the axles and brakes. Here's a little hyperlapse video of us.
I'm happy to see everything fit as it should and I hit my target overall width WMS-to-WMS within 1/16th inch. To summarize, I narrowed the housing using Strange H1143 GM pattern housing ends and used strange B1105D spacers for tapered Ford bearings. The brakes are "LS1" calipers and backing plates from a '02 Camaro and the axles are custom length Strange axles. The overall WMS-to-WMS has been narrowed by 2in from 60-1/4" to 58-1/4" (1in per side). The goal is to fit more common 0 offset wheels (for example 18x9 w/ 5"BS) instead of getting 1" offset wheels (for example 18x9 w/ 6"bs) which are virtually unavailable without going to 2 or 3pc wheels.
Happy with the brake mockup, I picked up some new brake hoses. The original "LS1" hoses have a 10mm banjo at the caliper and a 10mm bubble/DIN connection at the other end. I decided to swap them for '05 Blazer hoses which are a couple inches longer and have a 3/8-24 inverted flare for 3/16" tubing. They are Dorman H380469 / Napa P/N 380469 and cost about $10 each. By comparison, braided stainless lines of the same size are around $25ea.
For mounting the hoses, I picked up some precut tabs for Currie CE-6013-TAB. They didn't have a slot for removing the brakeline, so cut a slot with my bandsaw. This will allow me to remove the brake lines from the axle without opening up the brake system, so i can just hang the calipers and lines from the car if I want to remove the rear end - no bleeding needed.
Once I figured out where I wanted them, I used a Dremel and a carbide cutter to make a notch for the anti-rotation tab. Then I tacked and finally welded them on. I used Allstar brake line clips ALL50150 to retain the hoses lines.
That was it for fabrication, so it was finally time to strip it back down for clean and paint. I got an electric pressure washer a couple months go. After a series of soaking in degreaser and spraying inside and out with the pressure washer, it was ready for paint.
I decided to get an LPW racing diff cover, not so much for the cap support girdle but because I'm more confident the cast cover will seal well and it has drain and fill ports. One of my goals for the car is no leaks!