

'70 Nova LY6/TH400 6.0VVT

Thread Starter


Joined: Apr 2010
Posts: 2,816
Likes: 86
From: Instagram @chevyhotrodder
Looks good! I think your welds are fine. MM180 is that a Millermatic 180? I have the cousin a Hobart 175. Good welders and heavy enough to get the job done but light enough for thin metal as well. Enough with the suspension lets see this thing roll on its own power. When your done come on over and get mine going for me as I am dragging tail to get it done.
If getting your project done is the goal, I am not the best person to help! I take FOREVER getting even the simplest things done, assuming I can even find the time. You have been doing circles around me!

Thanks wade! I'm not the first to do it, so check around the net for other ideas too. It is very simple - just takes time and care.


Thread Starter
Joined: Apr 2010
Posts: 2,816
Likes: 86
From: Instagram @chevyhotrodder
Wow, I can't believe it's been two months with so little progress. I'm not really sure why I'm even posting this except to say I am still excited about this project and it will continue. Last weekend I finished up the Guldstrand mod on the driver's side to match what I've shown already for the passenger side, but I haven't had a moment to upload photos, so they'll have to wait.
Today I ordered Dougs D3337 ceramic coated swap headers. I did a lot of reading and scouring over pictures to determine what headers I wanted to use and I called several manufacturers to ask questions. A few months ago my preference was the Edelbrock headers because I felt they had the best chance of fitting around the AC box and they seem to have made the most effort toward equal length primaries. Unfortunately they shuttered that portion of their business and as far as I know they are no longer available. Dougs were a close second choice and I always liked the look of their ceramic better anyway, so that's the route I'm going. I got them through www.performancepeddler.com. They seem to have the best price with free shipping and if you enter the discount code "clubgp" the price for these comes out to just $549.85. That's about $30 cheaper than Summit or Jegs when you also factor in their "handling" charge and a UPS oversized surcharge. I haven't bought from them before, so hopefully I have a good experience. I'll be sure to report back how it works out.
I've also since purchased and received a set of AFCO racing 600lb/in springs (5x9.5) and adjustable "hidden" coil spacers which will allow me to fine tune the ride height in the future. Initially I will try to match the Hotchkis TVS system by adjusting these to a free length of 12.5", which would theoretically give a 2" drop according to their literature. To be sure Hotchkis got a piece of the pie, I ordered their Bilstien shocks which have been well-reviewed. Finally I have a Hellwig hollow sway bar to wrap up (for now) the suspension package.
My plan over the next few weeks is:
- Machine the driver's side motor mount adapter to match the passenger version I've already finished
- Modify the frame stands (or mounts, not sure yet) so the mounts can be flipped without interfering; my frame stands have a hump that prevents this, although I'm not sure they would fit without the hump.
- Measure 100x or more to get the frame notching figured out; complete the notches to an appropriate level for mockup (partially welded filler panels)
- Mockup the engine with headers and see how things fit!
I have been thinking around the clock about this build, really hoping to get back on it as soon as possible. Thanks for the encouragement so far!


Thread Starter
Joined: Apr 2010
Posts: 2,816
Likes: 86
From: Instagram @chevyhotrodder
Thanks for the words of encouragement. Here's some evidence that I've been doing more than just changing diapers.
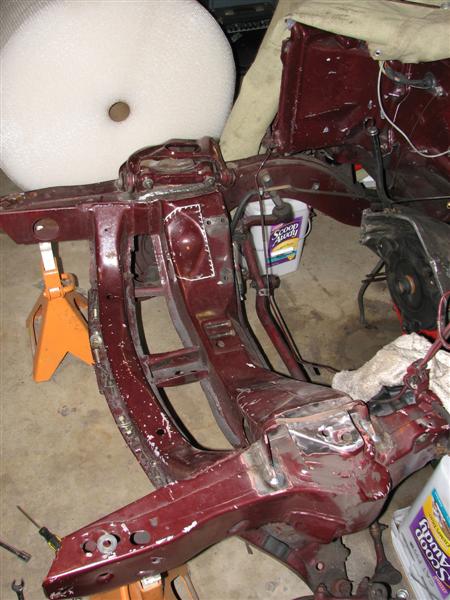
Driver's side Guldstrand mod cutting & fitting:

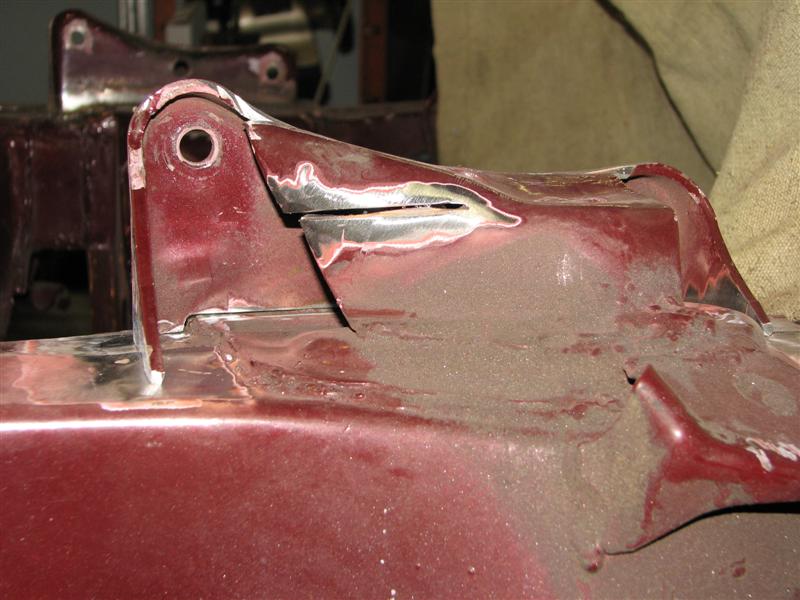
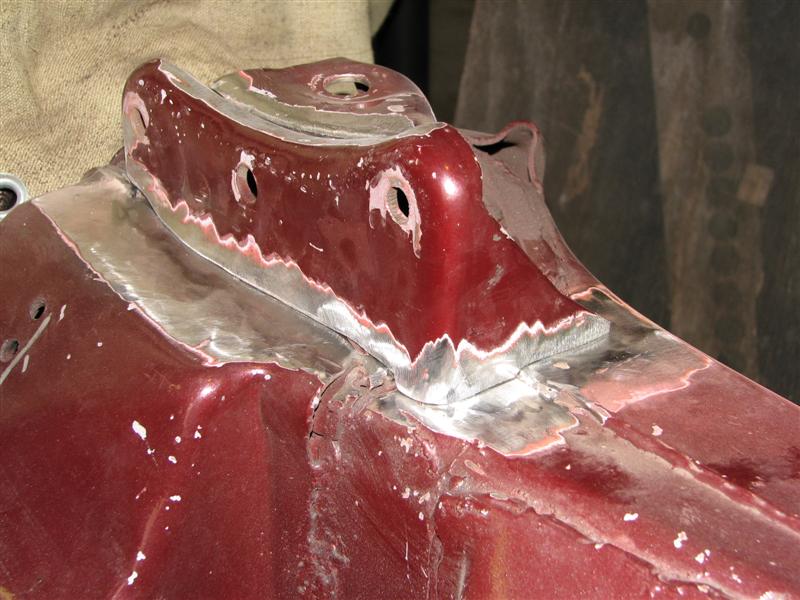
I was very happy with the fit on everything on this side and it went much faster than the passenger side. Much less head scratching and more just working to get it done. Here it is welded up.

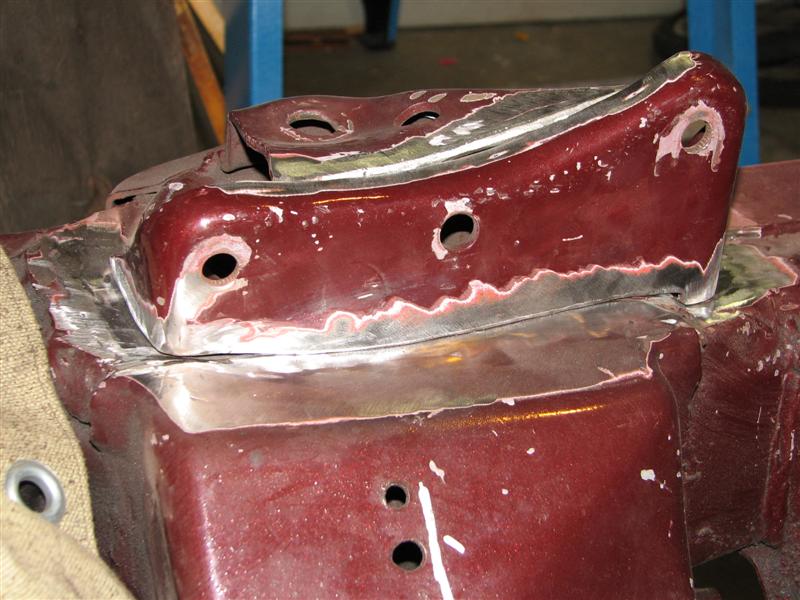
Both sides complete. Feels good to have that out of the way!
I also made some progress on my driver's side adapter. First I roughed out the shape:
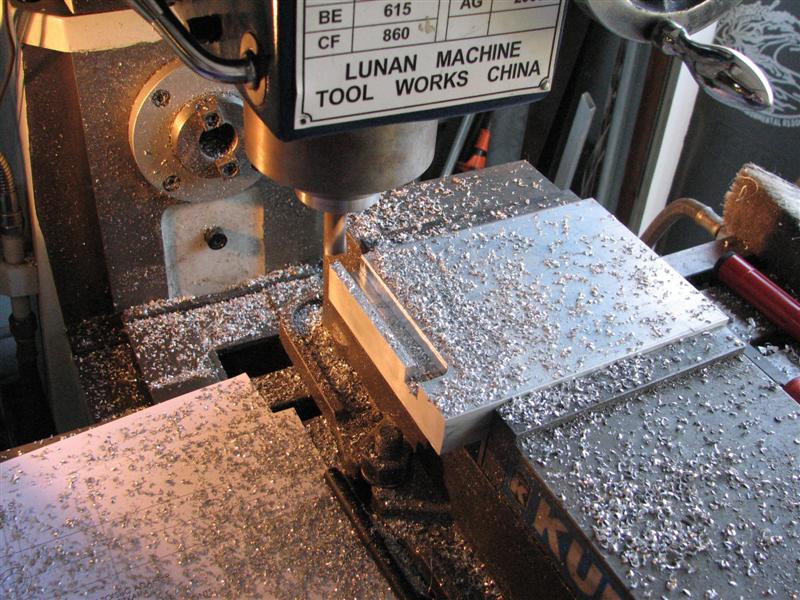
Then I added the pocket to clear the indent on the motor mount
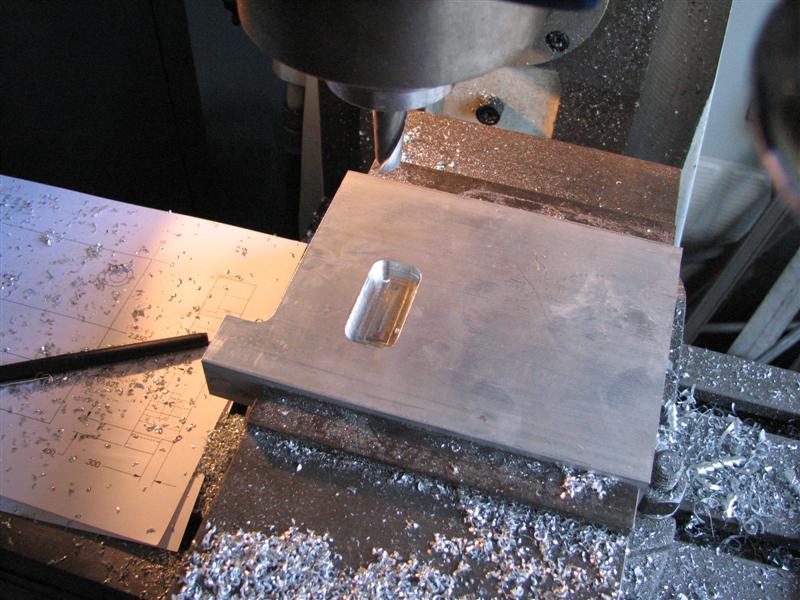
Then counterbored the four mounting holes.

Hopefully I'll have more time this weekend to finish it up.
Driver's side Guldstrand mod cutting & fitting:
I was very happy with the fit on everything on this side and it went much faster than the passenger side. Much less head scratching and more just working to get it done. Here it is welded up.
Both sides complete. Feels good to have that out of the way!
I also made some progress on my driver's side adapter. First I roughed out the shape:
Then I added the pocket to clear the indent on the motor mount
Then counterbored the four mounting holes.
Hopefully I'll have more time this weekend to finish it up.
Do you have any DRO on your mill? I am desperate to get some for my J-head Bridgeport. I see you have a Kurt vice, expensive!!! I have a chinese version that has never been on the table yet. All I need to do is fit the locating blocks and its ready to go. I will get to work on my machine shop as soon as my car is done. I have a milling machine, 13" lathe, and a surface grinder with hydraulic feed. I am going to sell the surface grinder as soon as I can get my hood off of it. Glad to see you have the capability to properly machine something. I run 5 CNC swiss lathes each and every day but rarely have time to mess with my own equipment. Gulstrand looks great! I am not into the handling aspect of my build at this moment but will be shortly and will refer to your build when I am ready to do so. Great job, keep up the good work!!! Almost been 5 years since you were diagnosed thats good to hear. Once the 5 year period hits you are pretty much cancer free, correct???
Thread Starter
Joined: Apr 2010
Posts: 2,816
Likes: 86
From: Instagram @chevyhotrodder
Sounds like you have more than enough toys to keep you body! I don't have a DRO on my mill. Not only is it without a DRO but it also has metric leads market with inches on the dials so any more than a turn and you start getting pretty far off dimension. I printed out a lookup table to convert between distances and dial turns + indications that get me to the proper dimensions. There are plenty of opportunities to make mistakes, but having done it for a long time now I rarely do. I actually find it very therapeutic now because the combination of careful counting and concentration tends to clear my mind of all other thoughts. I find "zen" if you will.
Yes I am very excited to hit the five year mark. There are a lot of statistics based on surviving five years and in the case of my cancer (Hodgkins lymphoma) its very very unlikely to return. Not a day goes by that I don't think about how fortunate I am. It really helps me to appreciate the important things in life.
Yes I am very excited to hit the five year mark. There are a lot of statistics based on surviving five years and in the case of my cancer (Hodgkins lymphoma) its very very unlikely to return. Not a day goes by that I don't think about how fortunate I am. It really helps me to appreciate the important things in life.
Last edited by -TheBandit-; Jul 15, 2011 at 12:19 AM.

Sounds like you have more than enough toys to keep you body! I don't have a DRO on my mill. Not only is it without a DRO but it also has metric leads market with inches on the dials so any more than a turn and you start getting pretty far off dimension. I printed out a lookup table to convert between distances and dial turns + indications that get me to the proper dimensions. There are plenty of opportunities to make mistakes, but having done it for a long time now I rarely do. I actually find it very therapeutic now because the combination of careful counting and concentration tends to clear my mind of all other thoughts. I find "zen" if you will.
Yes I am very excited to hit the five year mark. There are a lot of statistics based on surviving five years and in the case of my cancer (Hopkins lymphoma) its very very unlikely to return. Not a day goes by that I don't think about how fortunate I am. It really helps me to appreciate the important things in life.
Yes I am very excited to hit the five year mark. There are a lot of statistics based on surviving five years and in the case of my cancer (Hopkins lymphoma) its very very unlikely to return. Not a day goes by that I don't think about how fortunate I am. It really helps me to appreciate the important things in life.
Thread Starter
Joined: Apr 2010
Posts: 2,816
Likes: 86
From: Instagram @chevyhotrodder
Turning the dials certainly complicates things. I got a great deal on this machine at a local auction a couple years ago (also where I picked up the awesome Kurt vise for $60). It's great to have right in my garage. It's a 220v single phase machine and has an autofeed on one axis. I am spoiled having it in the garage, although it was no easy task getting it there!
Today I made a little more progress on the swap. First I finished off the driver's side adapter. That took drilling a few more holes, tapping the 3/8-16s for the old style SBC mounts, and clearancing the lower back side around the oil gallies and bosses that protrude from the side of the block.

Here is the matching passenger side that I did a few months ago. I stll need to pick up the rest of the socket head cap screws; hardware store was out last time I went.

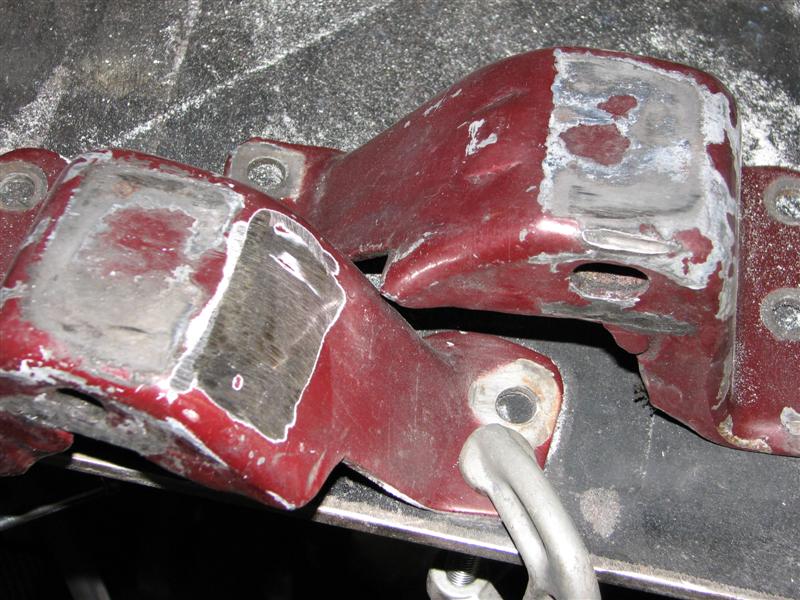
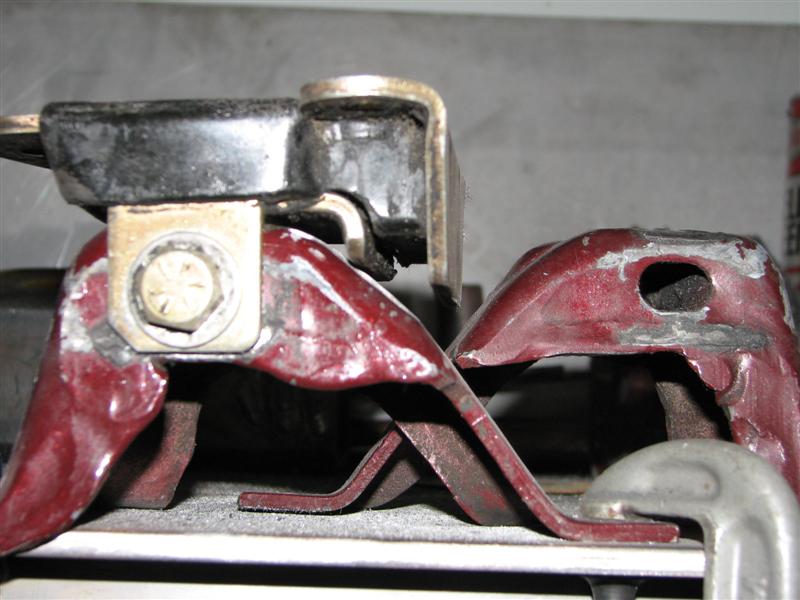
Next I ground down the "humps" that are formed into the engine frame stands. These cause interferance with the mounts when flipped upside down. I am not yet sure if I'll reinforce under these. I took away a good deal of material, but I don't suspect it will be an issue. You can see one mount with the hump ground away against an unmodified mount on the right.
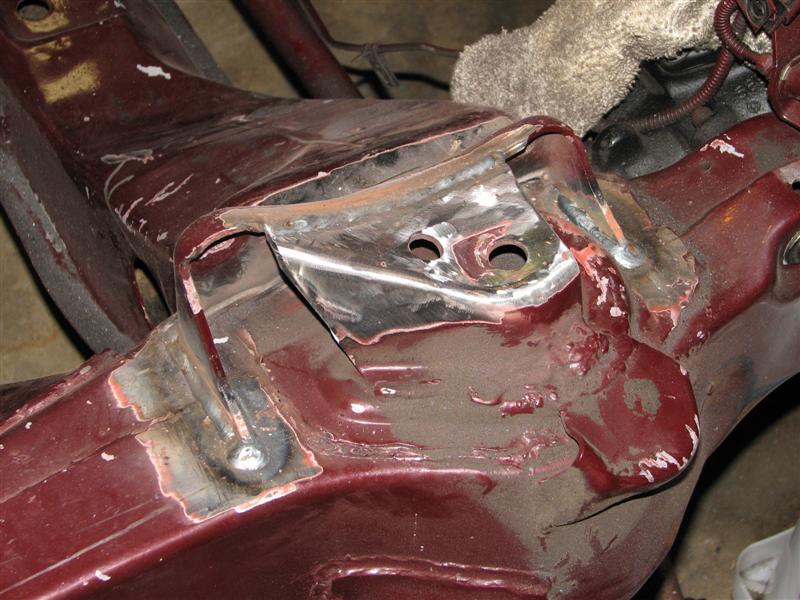
Finally I attached the two engine frame stands to the frame, along with the upper control arms. Kinda neat to see things coming back together, but they need to be torn back apart for paint later.

At this point I could do a trial fit of the engine, but I'm thinking I will do the accessory notches first per my plan above. Careful measurement required! (the lines on there now need to move around quite a bit) Hmm... or maybe I should test fit the engine first, then do the notches, then test fit the engine again, then pull apart for paint. I'm not sure.
Today I made a little more progress on the swap. First I finished off the driver's side adapter. That took drilling a few more holes, tapping the 3/8-16s for the old style SBC mounts, and clearancing the lower back side around the oil gallies and bosses that protrude from the side of the block.
Here is the matching passenger side that I did a few months ago. I stll need to pick up the rest of the socket head cap screws; hardware store was out last time I went.
Next I ground down the "humps" that are formed into the engine frame stands. These cause interferance with the mounts when flipped upside down. I am not yet sure if I'll reinforce under these. I took away a good deal of material, but I don't suspect it will be an issue. You can see one mount with the hump ground away against an unmodified mount on the right.
Finally I attached the two engine frame stands to the frame, along with the upper control arms. Kinda neat to see things coming back together, but they need to be torn back apart for paint later.
At this point I could do a trial fit of the engine, but I'm thinking I will do the accessory notches first per my plan above. Careful measurement required! (the lines on there now need to move around quite a bit) Hmm... or maybe I should test fit the engine first, then do the notches, then test fit the engine again, then pull apart for paint. I'm not sure.

Thread Starter
Joined: Apr 2010
Posts: 2,816
Likes: 86
From: Instagram @chevyhotrodder
The thicker adapter plates move the engine up about 1" and forward 1/4" from where Autokraft & ATS adapters would place it. This is to provide clearance under and behind the ac compressor which by my measurements would interfere with the sway bar and engine frame stand. Frame notching will still be required. These adapters are my own design.
Those Tidy Scoop stands come in handy. I have matching Tidy Scoop trash cans, storage containers, rag pales, and oil drain tanks throughout my garage. Can't beat the price and they come with free cat litter!
Last edited by -TheBandit-; Jul 11, 2011 at 03:28 PM.
Staging Lane
Joined: Jun 2011
Posts: 80
Likes: 0
From: Lena, WI
Just wondering if you ever got your swap finished? I'm curious to see how it worked out with the VVT and the TH400. I was under the impression that you had to use an electronically controlled trans with the DBW throttle body. I am just starting to round up parts for my project so any insight would be extremely helpful. I am putting an LY6 in my chevelle and I plan on keeping the VVT, so again, any info would be greatly appreciated.
Thread Starter
Joined: Apr 2010
Posts: 2,816
Likes: 86
From: Instagram @chevyhotrodder
Sorry RJ, unfortunately I haven't been putting a lot of time into the car, so progress has been very slow. Hope to speed things up in the near future.
These engines can be used with older, non-electronic transmissions behind them when the ECM is programmed appropriately. Here is an example of an LY6 with a TH350 behind it and if you read through the thread he is nice enough to explain how he used HPTuners to get it to run: https://ls1tech.com/forums/conversio...y6-76-gmc.html I am not very thrilled about using the TH400, but I wanted to limit my scope. As you can see it takes me long enough just to swap the engine!
These engines can be used with older, non-electronic transmissions behind them when the ECM is programmed appropriately. Here is an example of an LY6 with a TH350 behind it and if you read through the thread he is nice enough to explain how he used HPTuners to get it to run: https://ls1tech.com/forums/conversio...y6-76-gmc.html I am not very thrilled about using the TH400, but I wanted to limit my scope. As you can see it takes me long enough just to swap the engine!
Limit your scope, hahahaha... you've completely hacked up your subframe and are making your own parts. you really think adding a modern trans would push you over the edge in terms of complexity?!
Thread Starter
Joined: Apr 2010
Posts: 2,816
Likes: 86
From: Instagram @chevyhotrodder
Imagine all the custom parts and hacking I could do for a tranny swap! I know it seems simple, but I am pretty good at complicating things. Gotta draw the line somewhere!
I will try not to take offense to the word "hacking".
I will try not to take offense to the word "hacking".
Last edited by -TheBandit-; Jul 13, 2011 at 05:01 PM.
Thread Starter
Joined: Apr 2010
Posts: 2,816
Likes: 86
From: Instagram @chevyhotrodder
The Dougs headers came in last night. The build and finish on them looks great. I bolted them onto the engine; so far no problems or interference with my custom mount adapters. Eyeballing things, I think there's a chance I can get them to work around the AC box, but I wont know until the engine gets in. The #6 primary is going to be really close to the front edge of the evaporator.
I'm planning on a test fit this weekend. Getting giddy just thinking about it!
I'm planning on a test fit this weekend. Getting giddy just thinking about it!