

'70 Nova LY6/TH400 6.0VVT


 02-18-2019, 01:12 PM
#1663
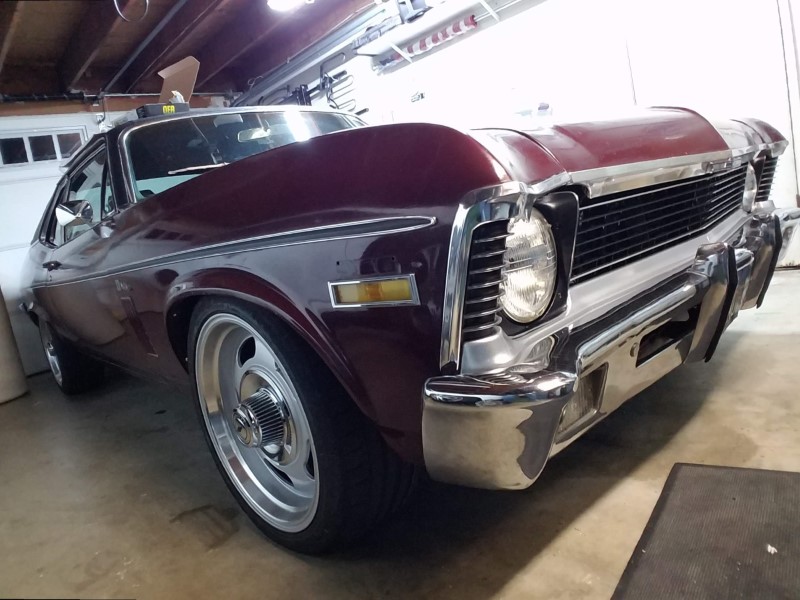
Looking at the photos of my car above you may have noticed the filler panel between the grill and bumper has some areas body color and some areas gray. That's because the body-color paint has chipped and peeled off the plastic over the years since I painted it around 1999. It's been bothering me a lot more since I cleaned up the paint last year and I finally had enough of it.
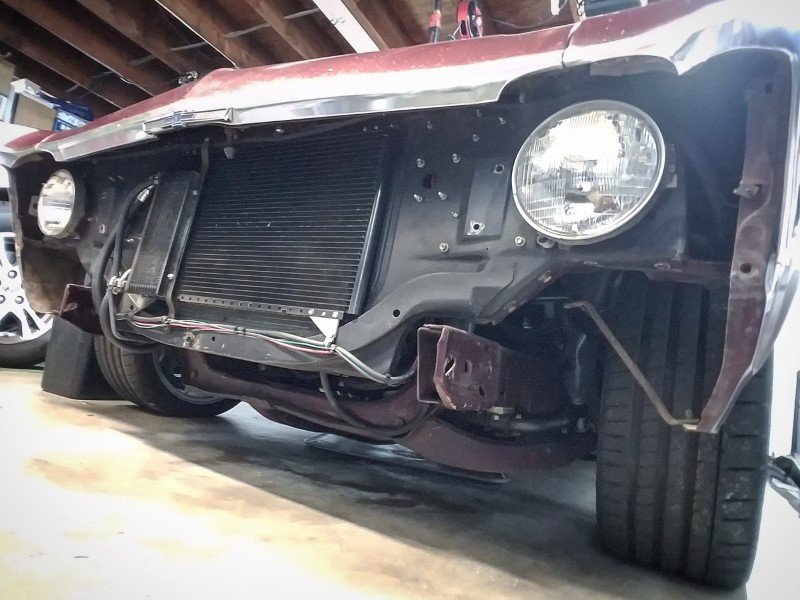
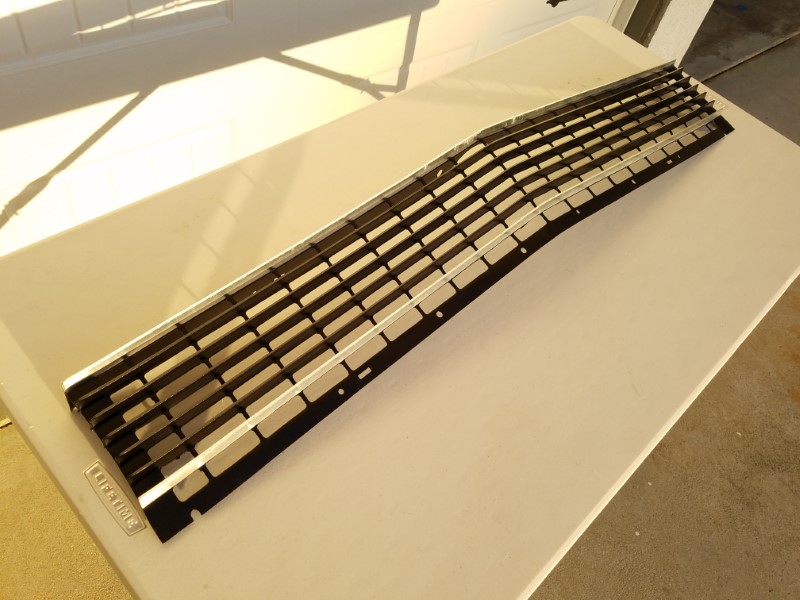
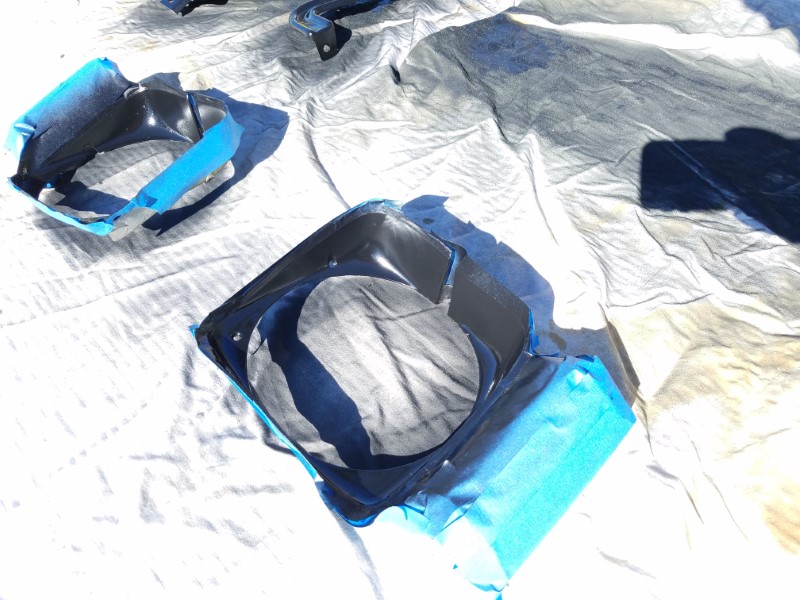
I decided to take the whole grill assembly off the car and make some changes. First I decided to give the grill an "SS" style blacked-out finish where just the top and bottom fins of the grill are exposed. After thoroughly cleaning the grill, I masked the top and bottom fins.
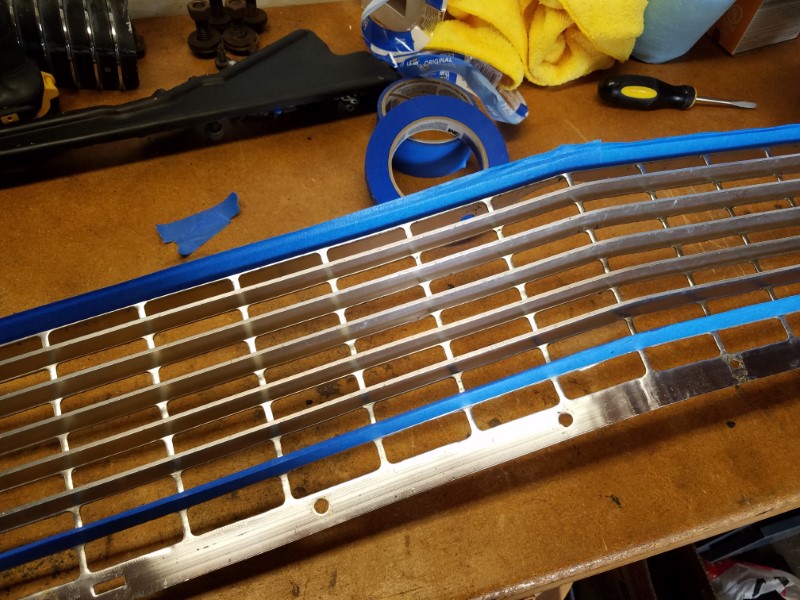

Then I used a self-etching primer.

And finally I shot it with Krylon Satin Black.


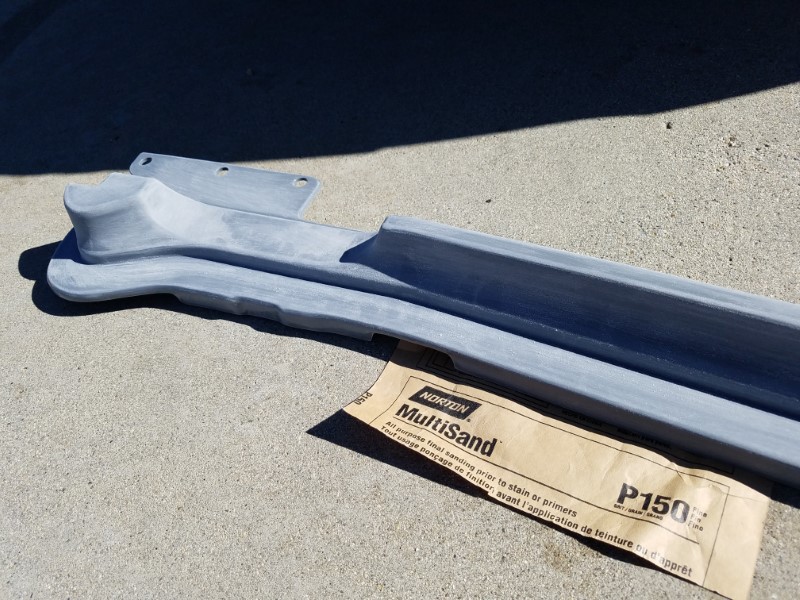
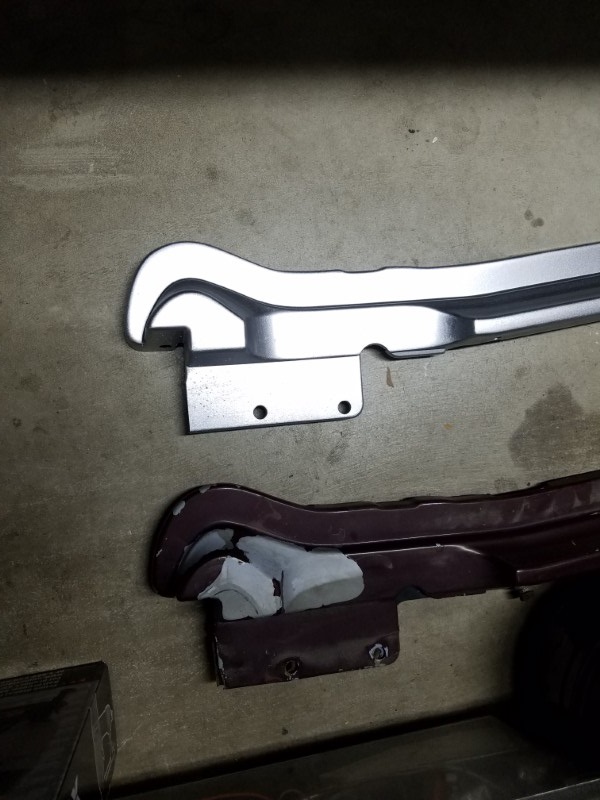
Next, rather than strip down the old filer panel, I decided to start fresh with a new one from AMD. I gave the whole panel a scuff-down with 150 grit and painted it Rustoleum Metallic Titanium Silver

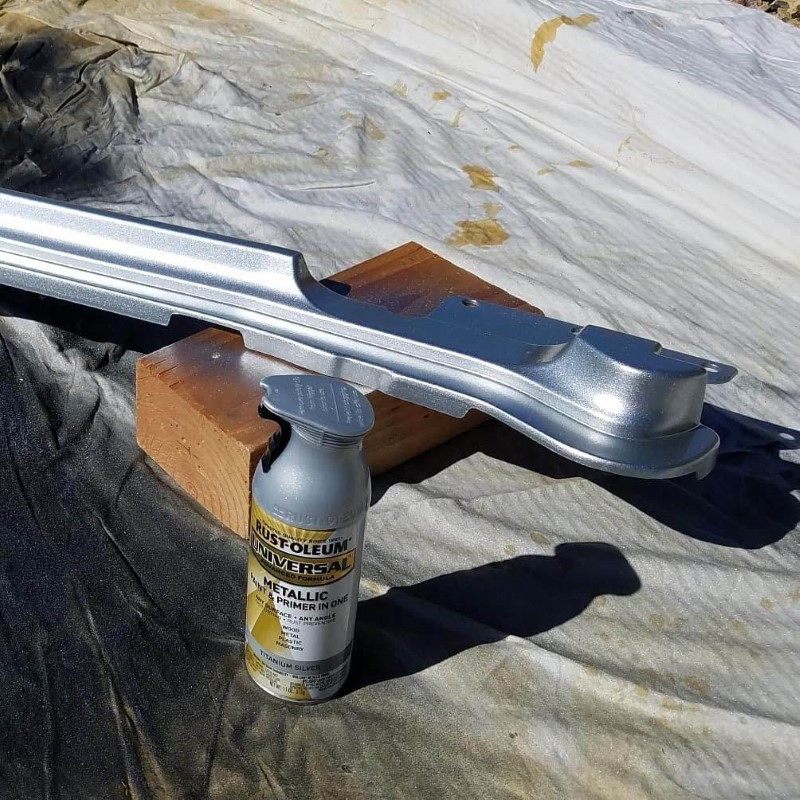
Years ago cut off one end of the old filler panel and underlying metal support so it could be removed and installed easily without removing a fender. I did the same with this one. No one will ever see this, but it makes taking the grill and filler panel assembly in and out a breeze.

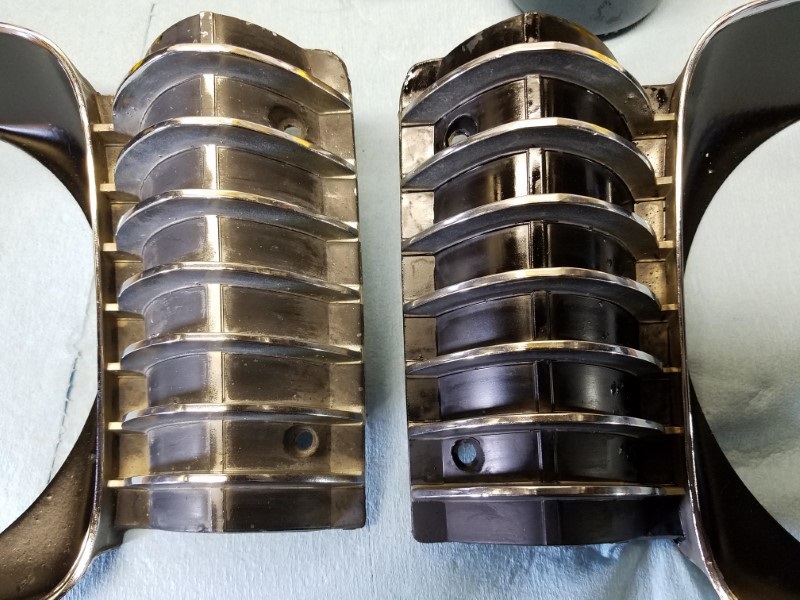
Next I decided to tackle the headlight bezels. Looking closely at the originals, a lot of the edges that were supposed to be exposed chrome had overspray on them.
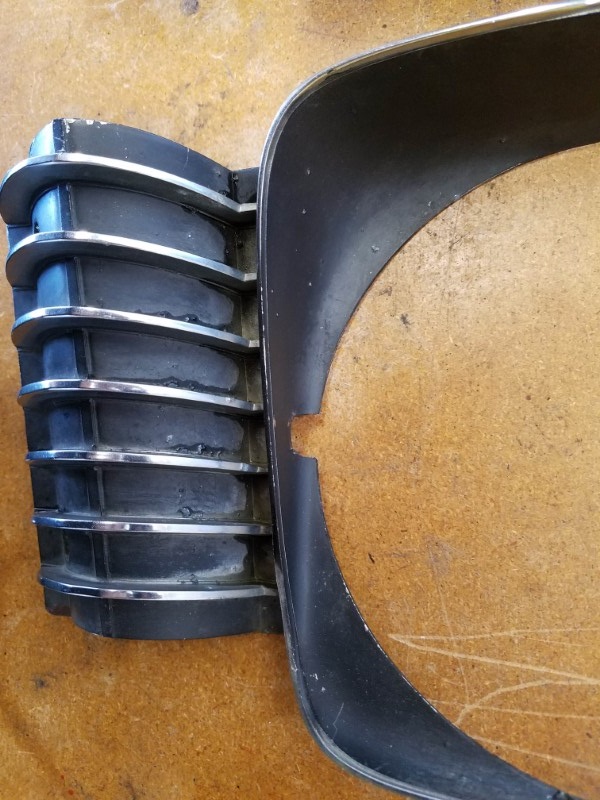
So before doing anything, I carefully removed the overspray with steel wool.
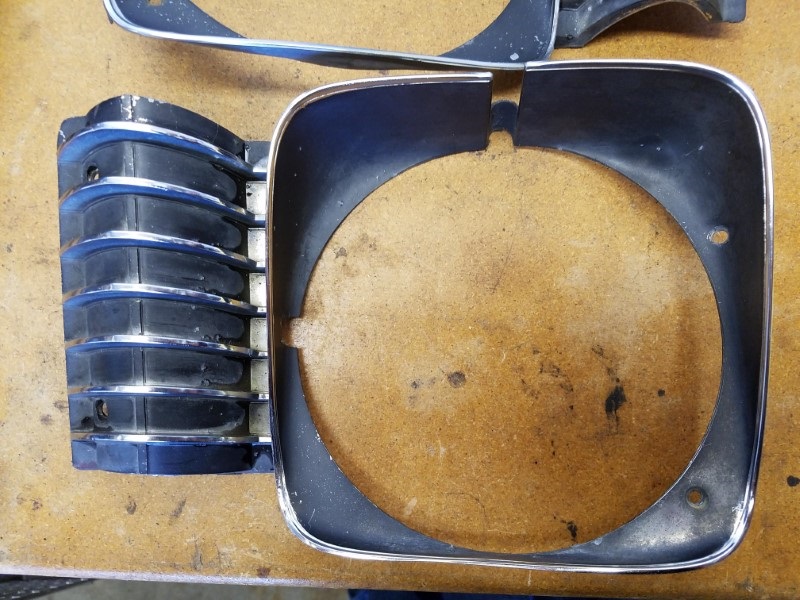
The ribs on either side of the headlights are exposed chrome on the top, front, and bottom faces. I tried masking one off and decided it was just way to intricate and time consuming for masking. So I decided just to mask and spray the centers and save the areas between the ribs for later.


I spayed the bezels the same color as the grill (Krylon Satin Black), then I used a little trick to decant the paint for brushing.

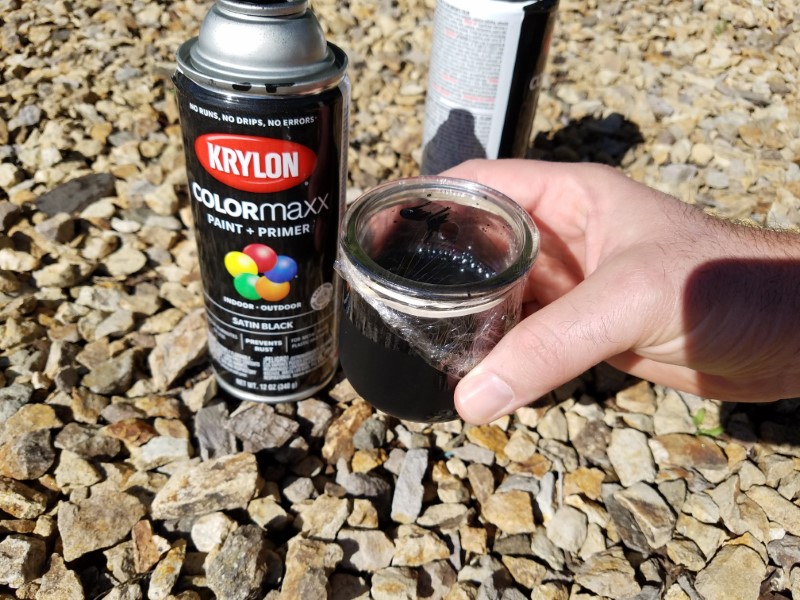
What I did above is attached a bendy straw to the nozzle of the paint can, then I poked it through some plastic wrap on the top of a glass jar. After spraying enough paint into the jar, I let it it out for about 6 hours so all the propellant could make it's way out of the paint - otherwise it would become a volcano when shaken or blow it's cap off.
Next I took the freshly decanted paint and hand brushed the areas between the ribs.
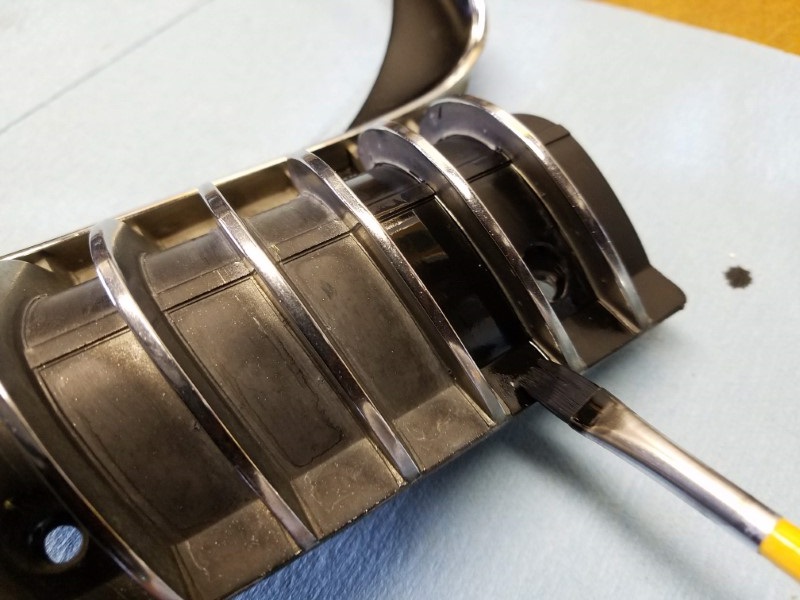
Unpainted on the left vs. fresh first coat on the right. I did two coats to cover this area. The decanted paint was a bit thin for brushing but it did the job.
Some reassembly required...

Hopefully tonight I can finish up and see how she looks from more than 2ft away!
I decided to take the whole grill assembly off the car and make some changes. First I decided to give the grill an "SS" style blacked-out finish where just the top and bottom fins of the grill are exposed. After thoroughly cleaning the grill, I masked the top and bottom fins.
Then I used a self-etching primer.
And finally I shot it with Krylon Satin Black.
Next, rather than strip down the old filer panel, I decided to start fresh with a new one from AMD. I gave the whole panel a scuff-down with 150 grit and painted it Rustoleum Metallic Titanium Silver
Years ago cut off one end of the old filler panel and underlying metal support so it could be removed and installed easily without removing a fender. I did the same with this one. No one will ever see this, but it makes taking the grill and filler panel assembly in and out a breeze.
Next I decided to tackle the headlight bezels. Looking closely at the originals, a lot of the edges that were supposed to be exposed chrome had overspray on them.
So before doing anything, I carefully removed the overspray with steel wool.
The ribs on either side of the headlights are exposed chrome on the top, front, and bottom faces. I tried masking one off and decided it was just way to intricate and time consuming for masking. So I decided just to mask and spray the centers and save the areas between the ribs for later.
I spayed the bezels the same color as the grill (Krylon Satin Black), then I used a little trick to decant the paint for brushing.
What I did above is attached a bendy straw to the nozzle of the paint can, then I poked it through some plastic wrap on the top of a glass jar. After spraying enough paint into the jar, I let it it out for about 6 hours so all the propellant could make it's way out of the paint - otherwise it would become a volcano when shaken or blow it's cap off.
Next I took the freshly decanted paint and hand brushed the areas between the ribs.
Unpainted on the left vs. fresh first coat on the right. I did two coats to cover this area. The decanted paint was a bit thin for brushing but it did the job.
Some reassembly required...
Hopefully tonight I can finish up and see how she looks from more than 2ft away!
02-18-2019, 01:32 PM
#1665
That would be awesome! You can caravan with Joe and others. I think there is a big Nova meetup in the bay area someplace. Maybe we could all make our way there some year. Or perhaps LSFest West?
02-18-2019, 01:34 PM
#1666
TECH Senior Member

Hey, if it looks good 2' away, 10-20 will be no problem! I too like tastefully blacking out various details on some cars. The paint I always use is SEM Trim Black, also a semi gloss black. I've done window frames on some cars. Looks almost like a pillarless coupe when done.
02-18-2019, 02:48 PM
#1668
TECH Senior Member
It goes on nice and dries well, but the surface if shiny or chrome should be scuffed. Ask me how I know... I used it on my '13 Ford F150 grille, and it does chip off once in a while as I did not scuff it.
02-19-2019, 10:25 AM
#1670
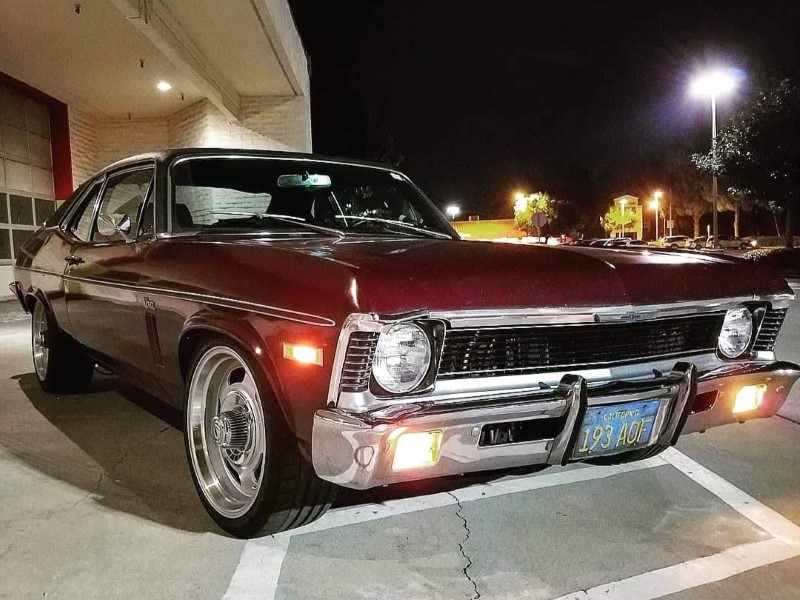
Finished up the face-lift last night. I'll be doing a double take for a while at this impostor car.


Potential next projects:
- Polish and wax (needed after more than 6 months since the last time)
- Install C6 brakes up front, new master, some new lines, flush brakes, etc
- Revisit tuning: I have a couple of DTC codes that don't make sense like rear O2 error
- Cup holders (seriously)
What I'll probably do instead:
- Drive
- Take pictures
- Autocross
- Drive some more
02-19-2019, 11:06 AM
#1671
TECH Senior Member
That's a clean look Clint! I've blacked out all or parts of nearly every grill on every vehicle I've ever owned. Never a negative comment, with many thinking it was factory! LOL
Last edited by G Atsma; 02-20-2019 at 12:18 PM.
02-19-2019, 11:45 AM
#1672
TECH Addict
iTrader: (27)

I'd install those C6 brakes before you autox.  Seriously though, if you didn't want to go through everything right now to swap out the booster and all you can pick up a C3 Vette Master Cylinder with a 1" bore and it will work great and bolt right in place of your stock MS. In an afternoon you could swap out your front brakes for the C6. It was night and day different when I did that exact same thing on my old 1976 T/A.
Seriously though, if you didn't want to go through everything right now to swap out the booster and all you can pick up a C3 Vette Master Cylinder with a 1" bore and it will work great and bolt right in place of your stock MS. In an afternoon you could swap out your front brakes for the C6. It was night and day different when I did that exact same thing on my old 1976 T/A.
02-19-2019, 12:50 PM
#1673
I fully intend to do the brake swap before autocross. Currently the bias is heavily to the front which limits the overall braking performance and leads to easily locking the front. I also have a strong pull to the driver's side on heavy braking. It was a big problem for me last autocross. The other thing I'd really like to do is swap the steering box for one with more feedback. Driving my brother's buggy w/ manual steering was night and day better on the course.
02-19-2019, 06:12 PM
#1675

Looks great Clint. Great job !!!
02-20-2019, 10:49 AM
#1676
I'm thinking about doing the box at the same time as the front brakes. I need to replace the brake line to the passenger wheel and I think it'd be easier with the box out. So I may be ordering a new box sooner rather than later. I am thinking that may do it for pricey upgrades this year so I can start saving and scraping together parts for a six speed.
Where is your box leaking? Maybe it's an easy reseal job.
02-20-2019, 12:00 PM
#1678
TECH Addict
iTrader: (27)
You can also look at the 96ish-98 Jeep Grand Cherokee steering boxes. They have the quick ratio and internal bump stops that match our cars perfectly. That is what I'm running in my car, and they are a direct swap. Added bonus is they use a metric fitting so you can use the stock LS stuff.

 02-20-2019, 03:07 PM
#1680
Where is your box leaking? Maybe it's an easy reseal job.
Also, it's a good excuse for a Lee box.....