
78 Datsun 280z-------------> 5.3 Build
 01-23-2011, 09:53 PM
#61

[quote name='240zphilly' timestamp='1295754727' post='917947']
That dash repair is so cool, beats the hell out of a cover, cheaper, too!
[/quote]
Thanks!
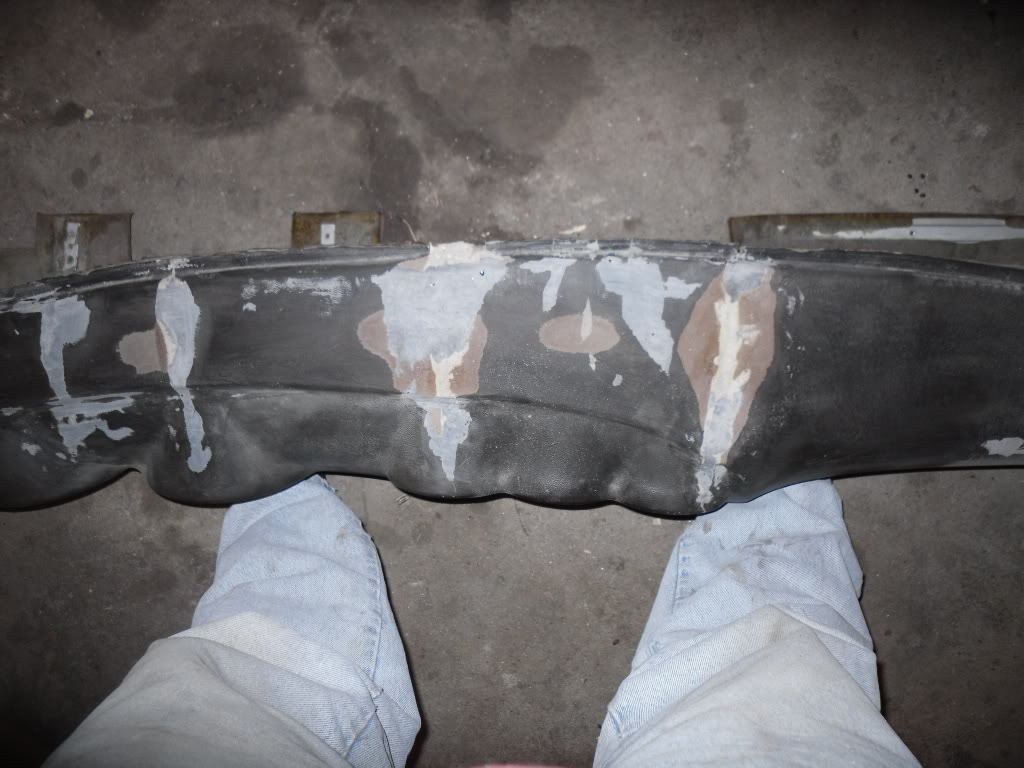
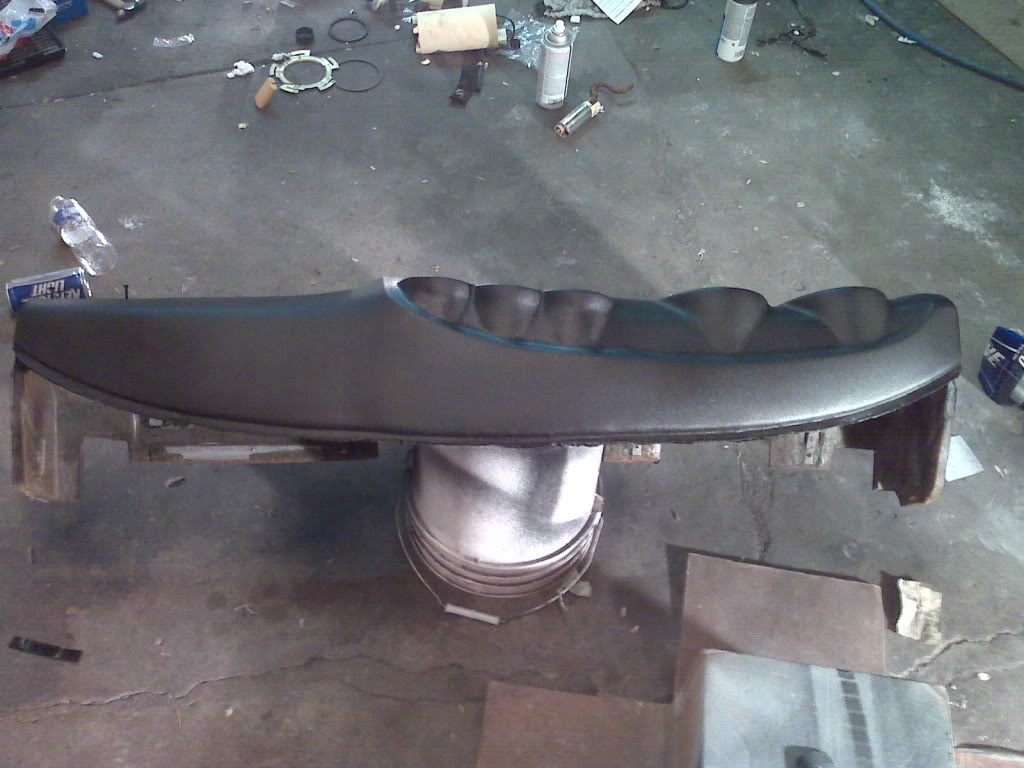
Spending a bit more time on the dash today. Here is the progress.
1st coat sanded
After the 2nd coat of epoxy
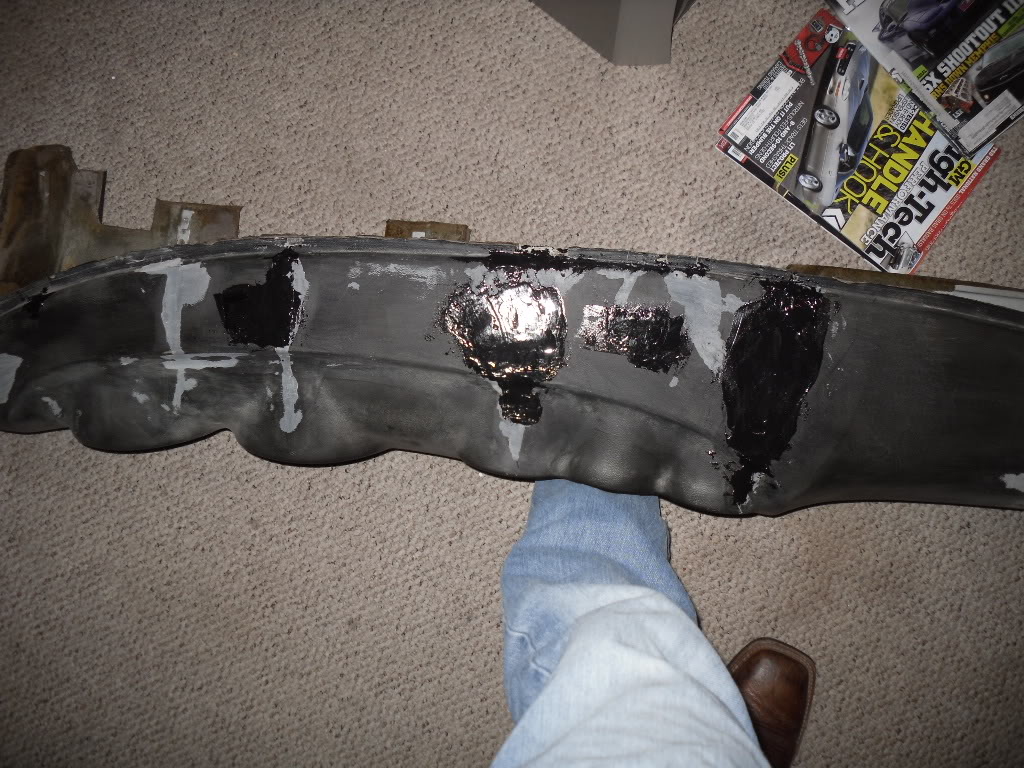
Second coat sanded
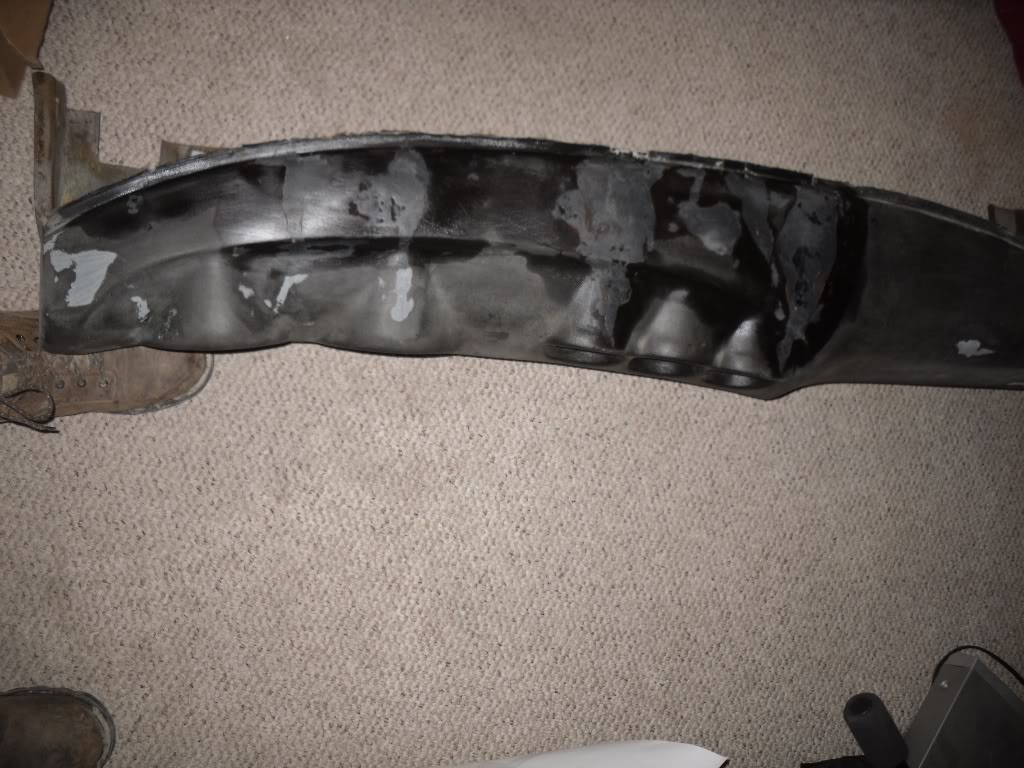
Third coat
Backside
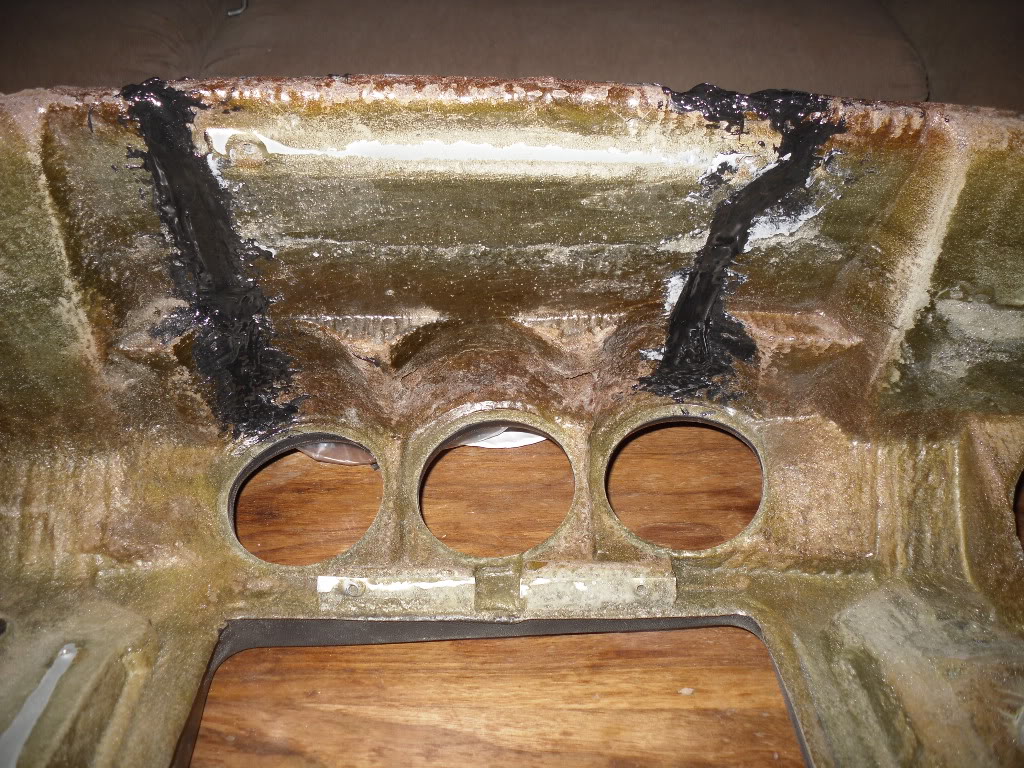
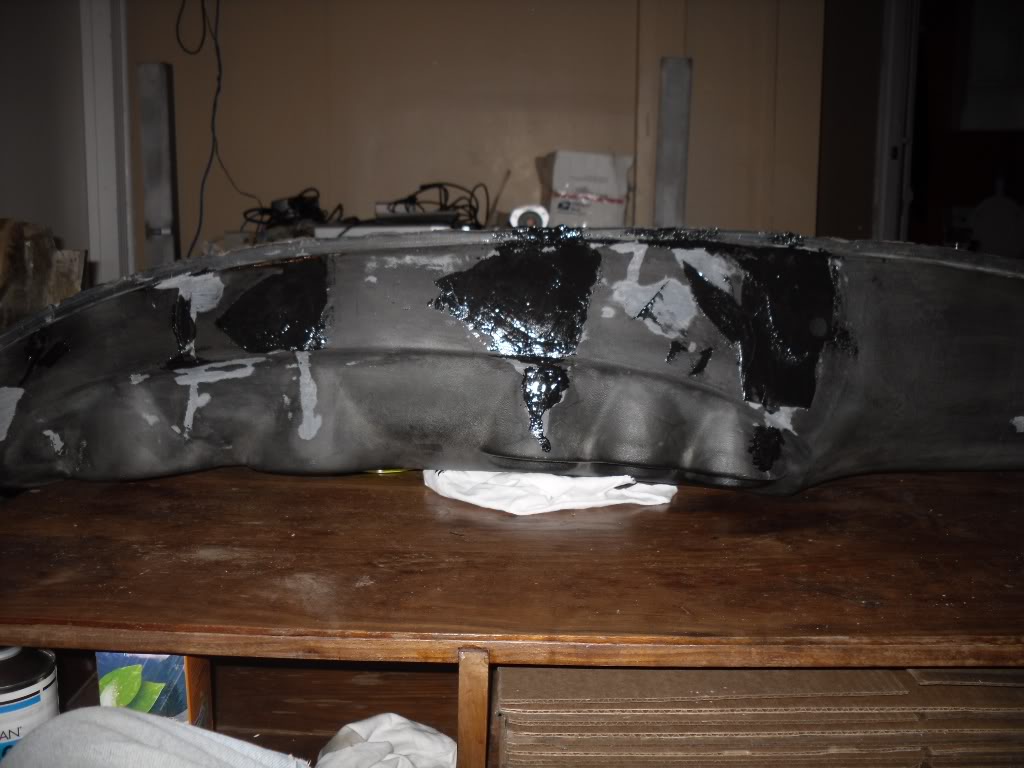
Finished the 3rd and final coat. It's sanded and ready for the plasti-dip. Stores were closed by the time I thought to go get some, so its gonna have to wait till tomorrow!
That dash repair is so cool, beats the hell out of a cover, cheaper, too!
[/quote]
Thanks!
Spending a bit more time on the dash today. Here is the progress.
1st coat sanded
After the 2nd coat of epoxy
Second coat sanded
Third coat
Backside
Finished the 3rd and final coat. It's sanded and ready for the plasti-dip. Stores were closed by the time I thought to go get some, so its gonna have to wait till tomorrow!
 01-23-2011, 10:00 PM
#62
On The Tree
iTrader: (5)

Join Date: Mar 2010
Location: Maine
Posts: 126
Likes: 0
Received 0 Likes
on
0 Posts
definatly digging the GMHTP and Hot Rod magazines in the background!!
seeing you do this makes me want to try and save my dash on my project, still leaning towards making a new aluminum dash
cool project all the same!
seeing you do this makes me want to try and save my dash on my project, still leaning towards making a new aluminum dash
cool project all the same!
01-23-2011, 10:57 PM
#63
I will be modding the tranny crossmember here shortly though, I'm going to add a driveshaft safety loop to it to simplify things under the car, and get it one step closer to being safe/ ready for the track.
 01-23-2011, 11:02 PM
#64
Its a time consuming process, no doubt. If you go this route, be sure to buy some form of powered sander, NO WAY would I have tackled this with only a sanding block.
Also, if you have cracks like mine, I'd suggest skipping the foam step, if you can (if they're small). The great stuff doesn't really act like the factory stuff in my dash, so it's a PITA. Also, make sure that the cracks are lower than the rest, so you have something to "fill" in.
01-24-2011, 06:53 AM
#66
Staging Lane
iTrader: (1)

Join Date: Oct 2008
Location: kuwait
Posts: 96
Likes: 0
Received 0 Likes
on
0 Posts
nice work man i just finsh buliding my z i`m very sure you will love it when you drive it for more info about my project you can viste my website
http://lsz.weebly.com/
all the best man
http://lsz.weebly.com/
all the best man
01-24-2011, 12:30 PM
#67
Launching!

Join Date: Oct 2009
Posts: 235
Likes: 0
Received 0 Likes
on
0 Posts
I just redid my dash. After the filling and sanding I put down a 2/16ths layer of polyethelene foam and sanded the edges to match the contours, then covered in a good quality vinyl. The foam makes it soft to the touch and gives it more of a modern feel. I did this on a 944 not a Z. YMMV
02-03-2011, 10:13 AM
#70
Well I'm extremely torn on what to do for my exhaust setup. I've been mocking up some ebay SS shorty headers, ...https://ls1tech.com/forums/conversio...rs-crap-2.html
but I'm still not sure if they're what I want.
Other option is to buy the bends in mild and MIG weld them together, front discharge, for future turbo plans, and have them coated.
any thoughts / opinions?
but I'm still not sure if they're what I want.
Other option is to buy the bends in mild and MIG weld them together, front discharge, for future turbo plans, and have them coated.
any thoughts / opinions?
02-03-2011, 12:06 PM
#71
I think you would be miles ahead if you just use standard headers while NA then switch to your front dump headers once you do the turbo. If you are like most guys your plan to switch from NA to turbo will come a few years farther down the road than you think. If that happens then you will be cursing the front dump exhaust everytime you work on the car or lose a race. That will involve a lot of bends to make work. If you do go turbo in a year or so, then I say just build it that way now. i would be amazed if the switch didn't require some sort of rework anyway.
02-10-2011, 11:31 PM
#72
I think you would be miles ahead if you just use standard headers while NA then switch to your front dump headers once you do the turbo. If you are like most guys your plan to switch from NA to turbo will come a few years farther down the road than you think. If that happens then you will be cursing the front dump exhaust everytime you work on the car or lose a race. That will involve a lot of bends to make work. If you do go turbo in a year or so, then I say just build it that way now. i would be amazed if the switch didn't require some sort of rework anyway.
I haz no monies! The college drains my bank account.

 02-13-2011, 11:28 PM
#75
check out www.nekm.org
thats our local "street scene" website. mostly just trash talking and posting pics but it'll keep you in the loop.
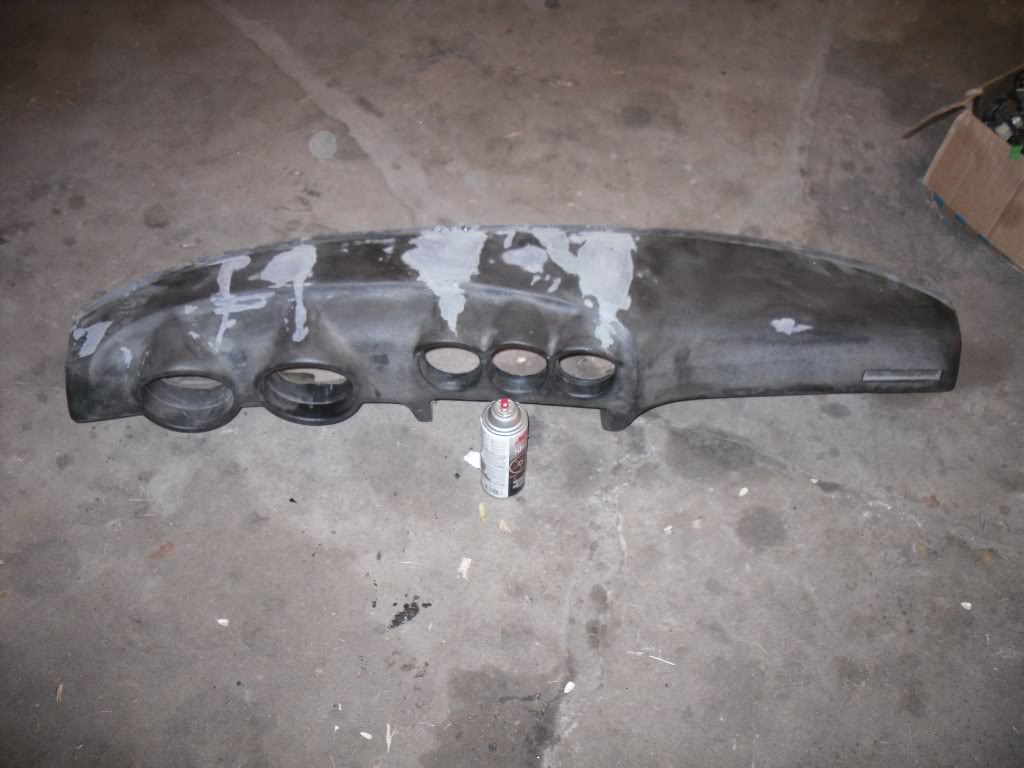
I just finished the dash tonight. (almost) one coat of paint, and then all thats left is to wire the gauges up. It's looking VERY sexy. I'll post pictures when I find my camera..........
 02-14-2011, 01:00 PM
#76
Well i still have yet to find my camera. So I used the ol blackberry. The camera was kinda dirty in the first couple pics, so please excuse that.
Here's the dash after I topcoated the problem areas with some good ol bondo.
and again
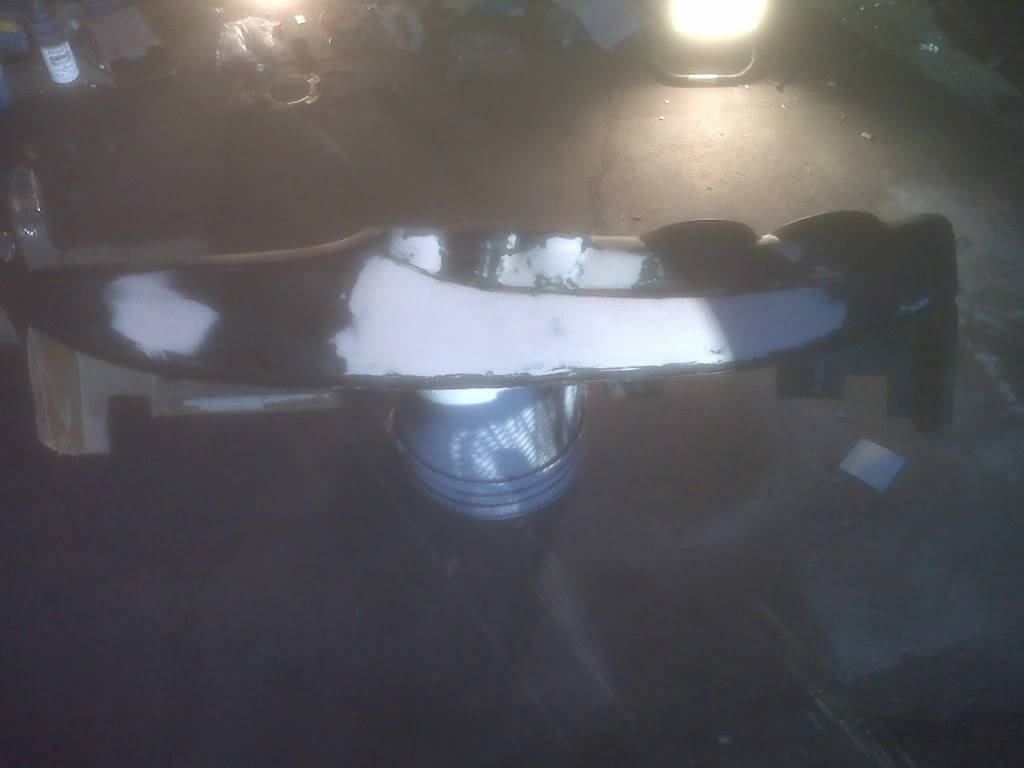
Then after two coats of Duplicolor Bedliner (400 scuff between coats)
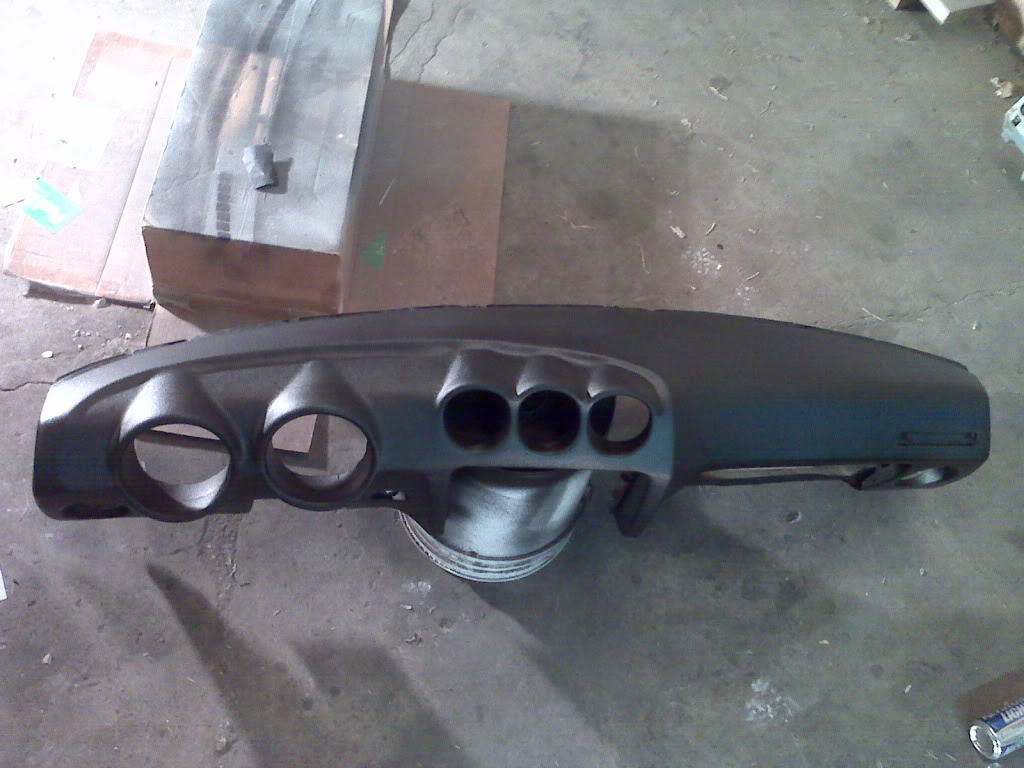

As you can imagine, I was VERY happy with the results. Labor intensive as it was, it was definitely worth it. note: not for those who don't like sanding, and don't have patience
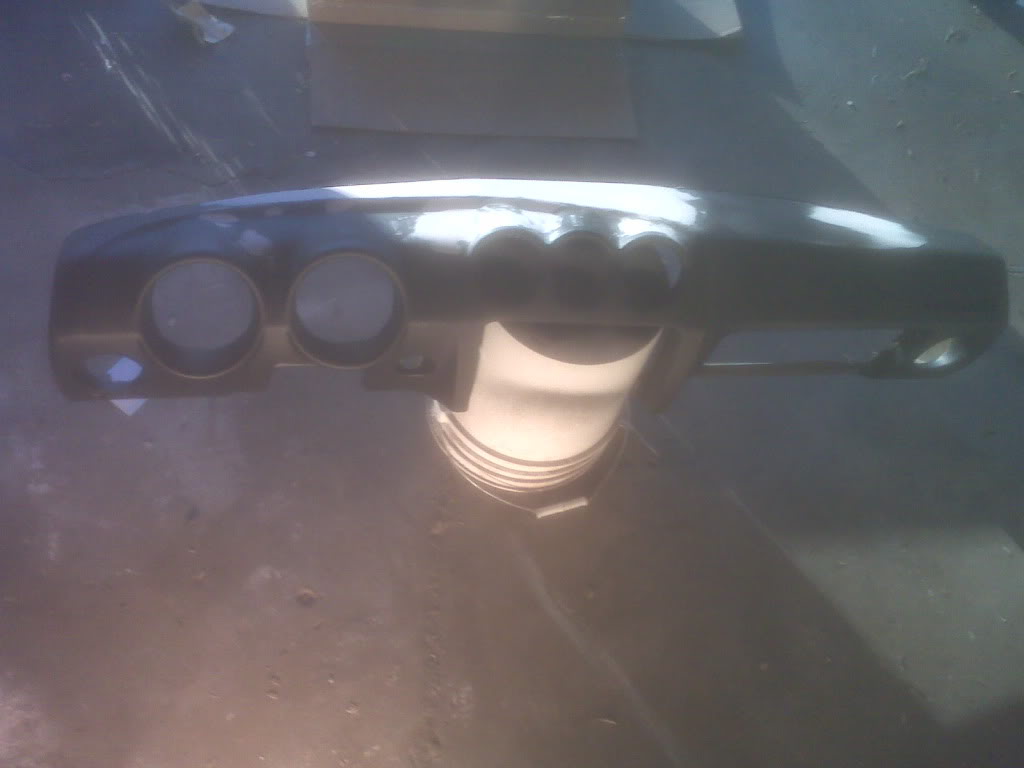
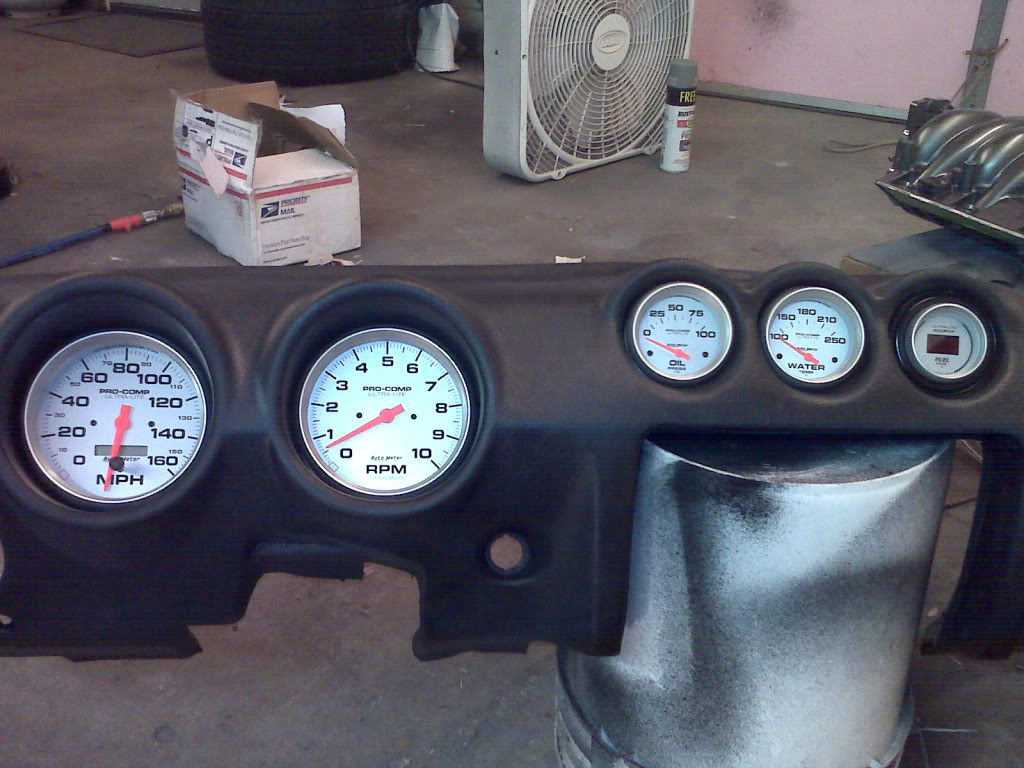
I then took it upon myself to mock up the Autometer Pro Comp Ultra Lites
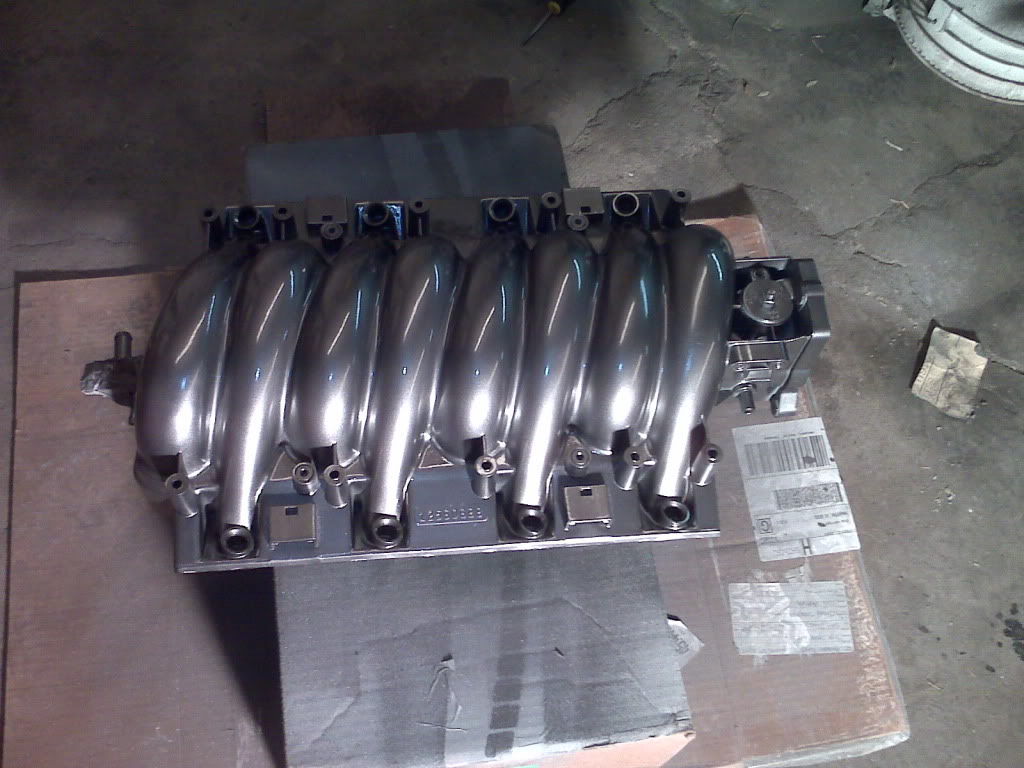
I also got bored with my LS1 intake. It was kinda dingy, and I wanted it to look fresh.
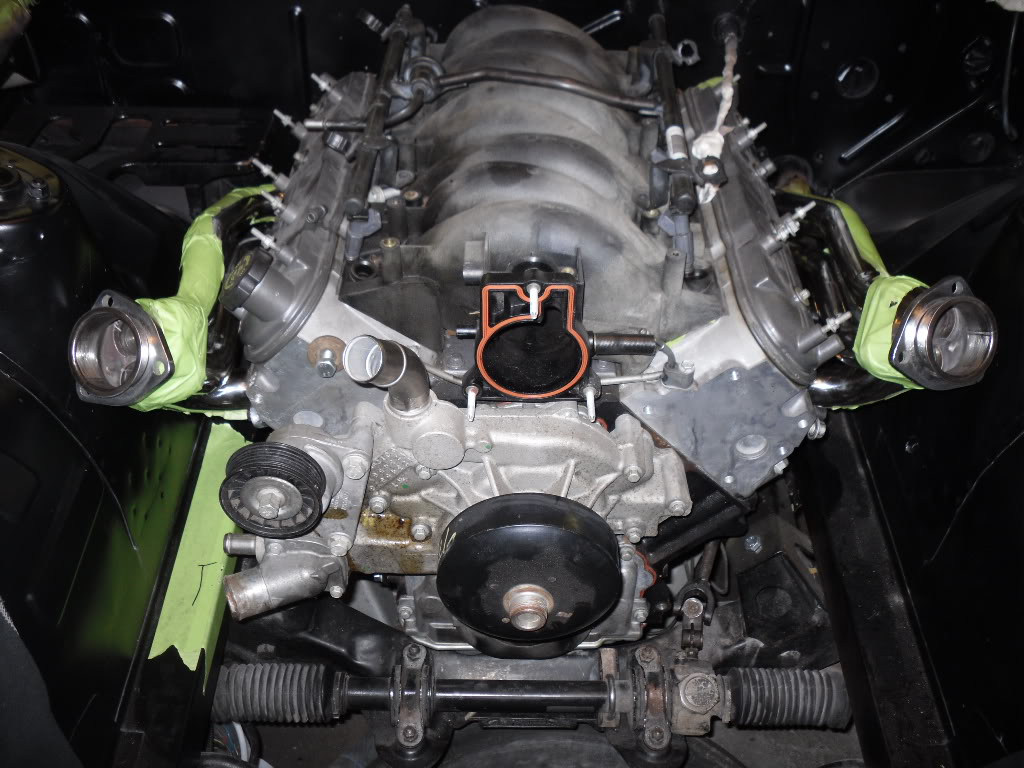
SO, I sanded off the casting marks with 80 grit, then 220.
3 coats primer, wet sanded with 400 in between,
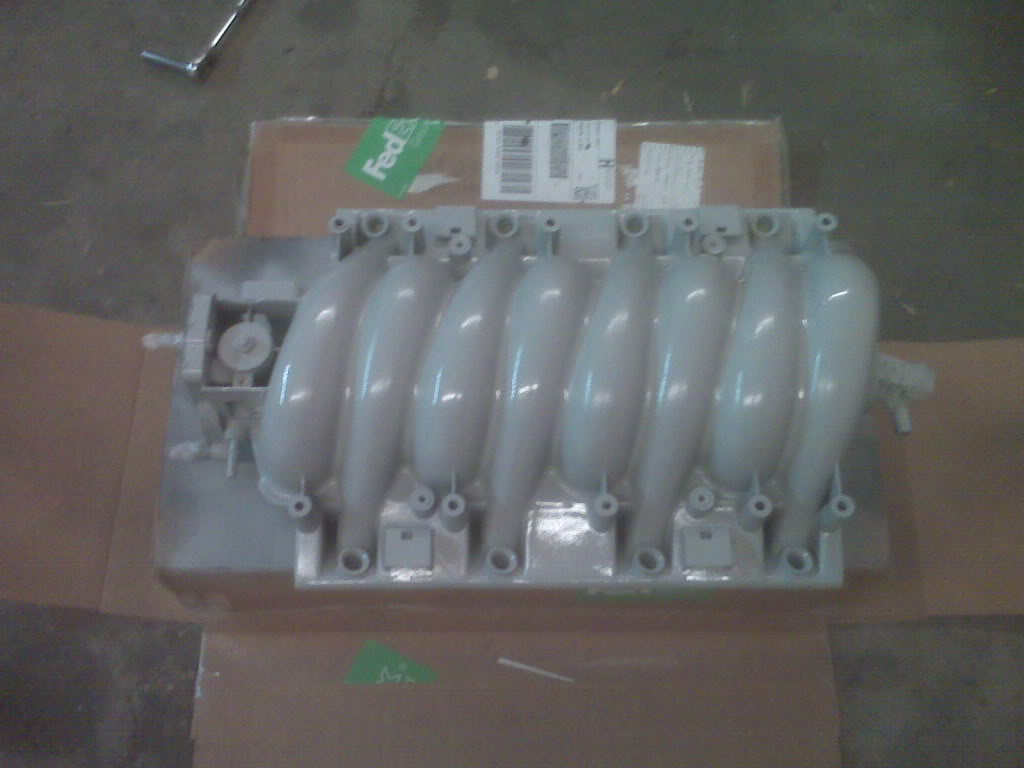
2 coats base (gunmetal metallic), wet sanded 400 in between, and here it is after 1 coat of clear. (gonna do at least 2 more)
Here's the dash after I topcoated the problem areas with some good ol bondo.
and again
Then after two coats of Duplicolor Bedliner (400 scuff between coats)
As you can imagine, I was VERY happy with the results. Labor intensive as it was, it was definitely worth it. note: not for those who don't like sanding, and don't have patience
I then took it upon myself to mock up the Autometer Pro Comp Ultra Lites
I also got bored with my LS1 intake. It was kinda dingy, and I wanted it to look fresh.
SO, I sanded off the casting marks with 80 grit, then 220.
3 coats primer, wet sanded with 400 in between,
2 coats base (gunmetal metallic), wet sanded 400 in between, and here it is after 1 coat of clear. (gonna do at least 2 more)
