

1971 Nova Swap - 02 LS1/A4


 04-22-2013, 10:25 PM
#223
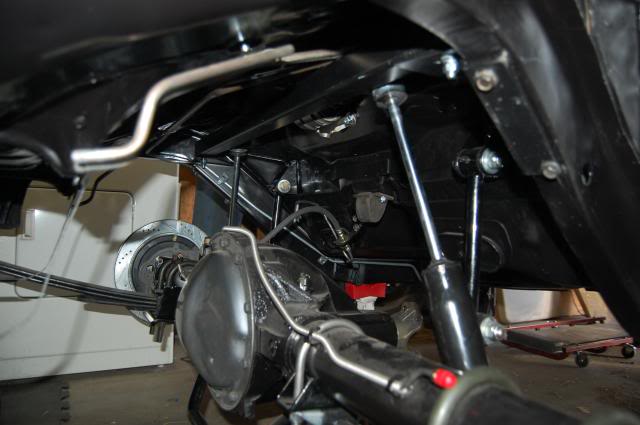
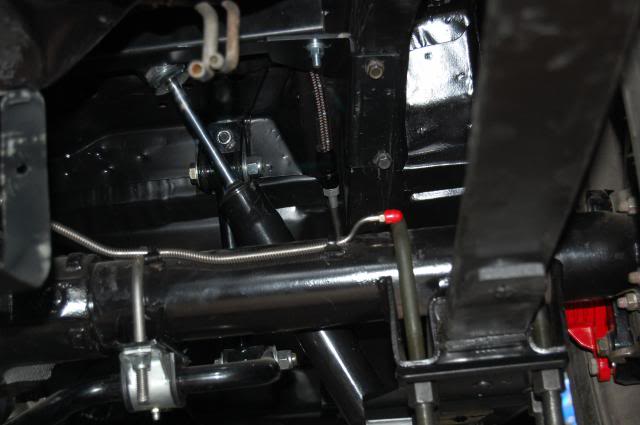
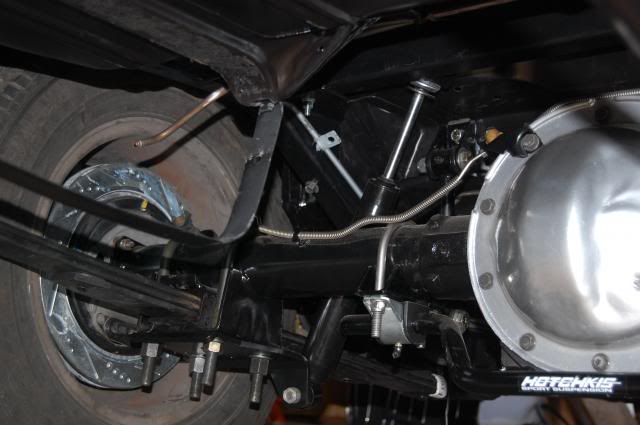
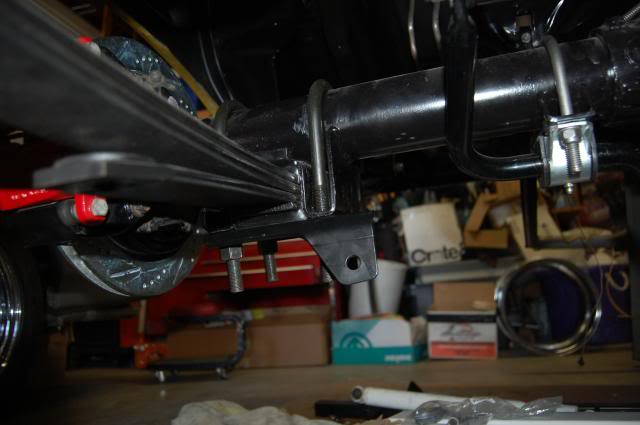
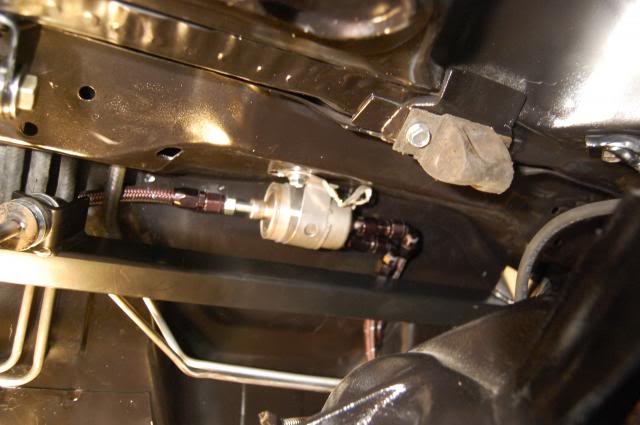
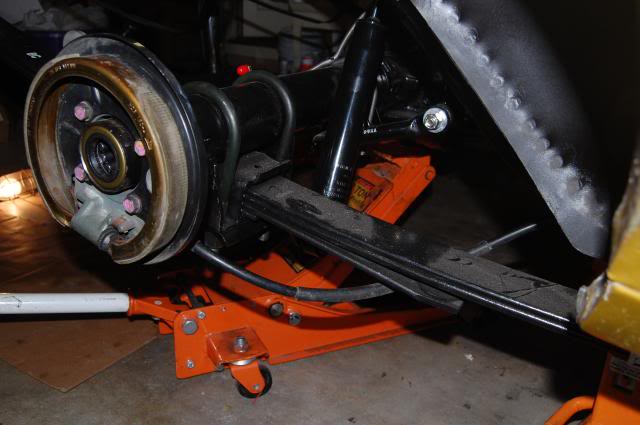
Got POL Shock Relocation kit in.. had to oblong the mounting plates and drill out the shock/leaf plate holes larger to fit my Hotchkis U-Bolt.. With the top shock mount in a very tight location, I found it better to mount the shock to the crossmember and leave the side brackets loose and then put the shock/crossmember up together.
Here are a few pictures of the install.. As I hoped, it cleared the Hotchkis sway bar and all of the fuel and vapor lines and hoses. The bolts that came with the kit were to large to work with the OEM threads on the Rail. I will replace them with some grade 8 bolt tomorrow. I also have to pick up some shock mounting bolts.
I am thinking of maybe drilling the bracket and the rear rails and put a bolt or two through to add more support.


I have to move the car some, as I didn't have room to remove the axle to flip the Brake backing plate/caliper.. the car is back on the ground and I can move it so I can complete the brake flip (left to right and right to left, that way the E-Brake will be pulling from the front like Stock.
Next after I finish the little items is the E-Brake setup and the Gas tank. I will clean and seal it before I replace it, using the Eastwood Gas tank sealer. Not taking any chances of it leaking, I used it on my 48 Ford F1.. it worked well.
Hopefully there is enough room for the Exhaust. .but I'll leave that to the Muffler shop..
BC
05-15-2013, 12:27 PM
#225
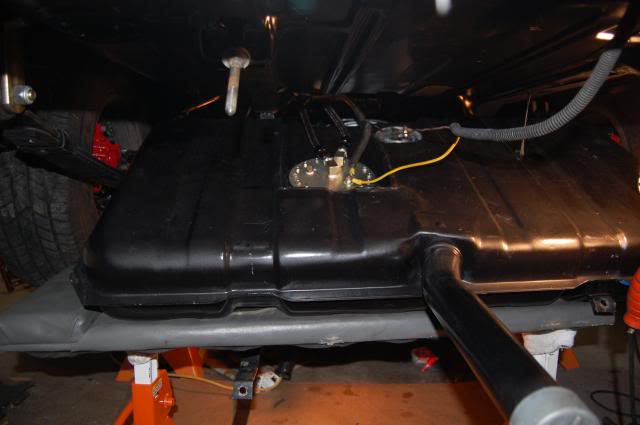
Got a little work done. Gas tanks is welded up, cleaned, sealed and painted. Mounting and checking the PA4 and Fuel Sender setup today and maybe the last of the fuel line from the PA4 to FPR.
Got the Rear shock relocated, brakes mounted, need some brake lines now(line to calipers).. well get some pictures posted soon.
Thanks for checking in.. I like your wheel setup you got going on you Nova !
BC
Got the Rear shock relocated, brakes mounted, need some brake lines now(line to calipers).. well get some pictures posted soon.
Thanks for checking in.. I like your wheel setup you got going on you Nova !
BC
05-15-2013, 11:25 PM
#226
Thanks man. Next up is to paint the rear drums, and start saving for the LS brake swap. Good to hear you're making progress. Definitely let us know the PN/application on those caliper lines. And you're keeping the stock parking brake pedal, correct? I've got a Neon console and e-brake handle, which I believe moves opposite (somehow?) of the OEM setup.
Last edited by hookemdevils22; 06-28-2013 at 11:05 AM. Reason: no longer looking for backing plates
05-22-2013, 11:53 PM
#227
I finished cleaning, sealing and painting the Gas tank. Installed the PA4 and a new Fuel Level Sender along with completing the Fuel lines from the sender/pump to the Vette FPR.

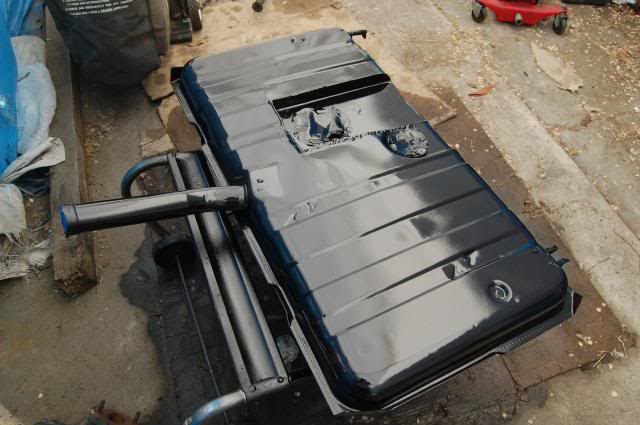
Here is the tank mounted and you can see the small sump that was added so that the PA4 tray would set in to be the lowest part in the tank and with the high wall of the sump should keep the fuel in place...
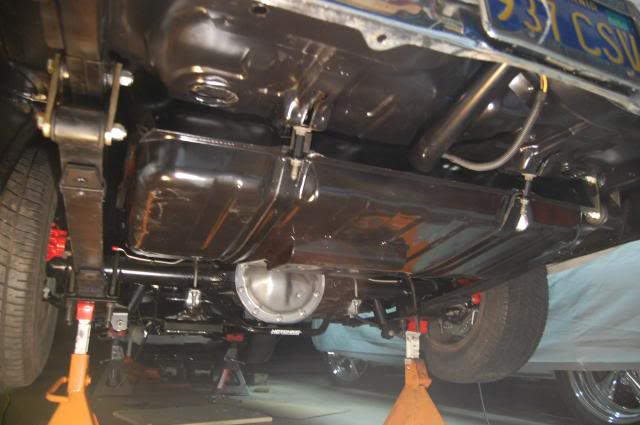
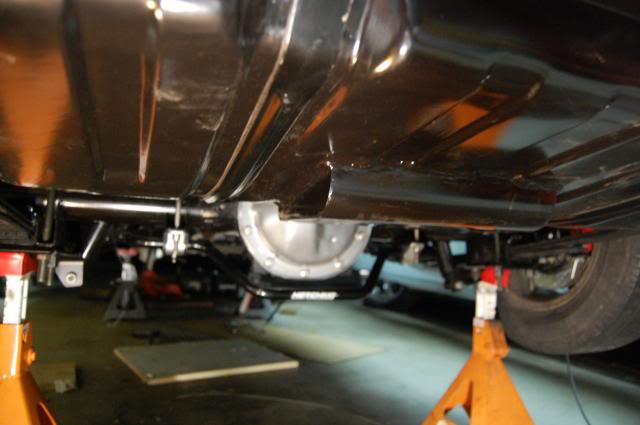
Here is the tank mounted and you can see the small sump that was added so that the PA4 tray would set in to be the lowest part in the tank and with the high wall of the sump should keep the fuel in place...
Last edited by bczee; 05-23-2013 at 12:07 AM.
05-23-2013, 12:05 AM
#228
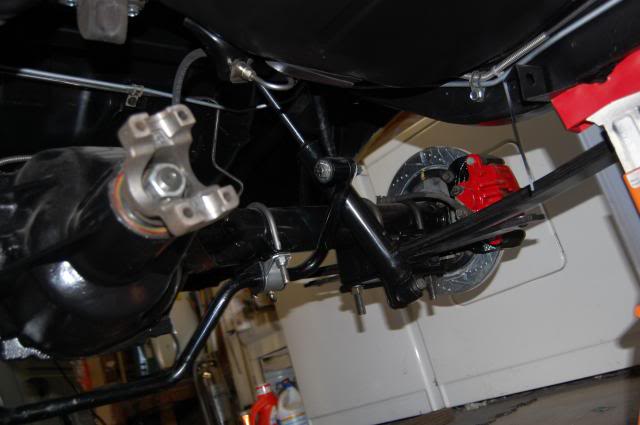
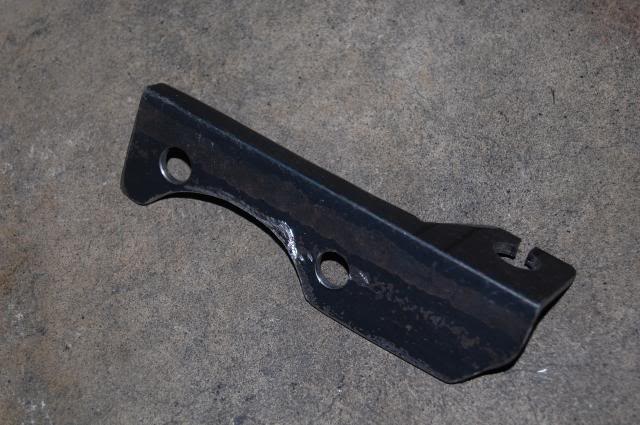
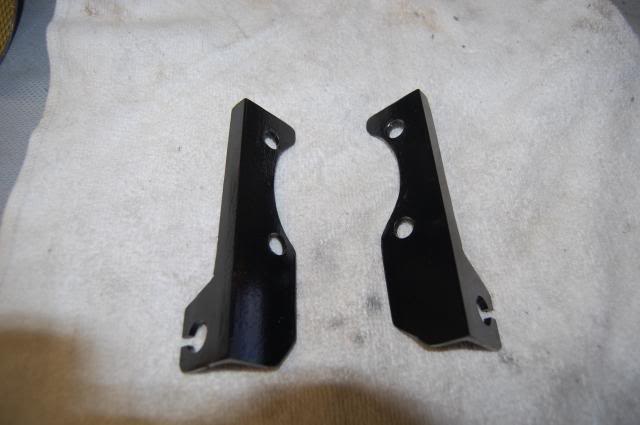
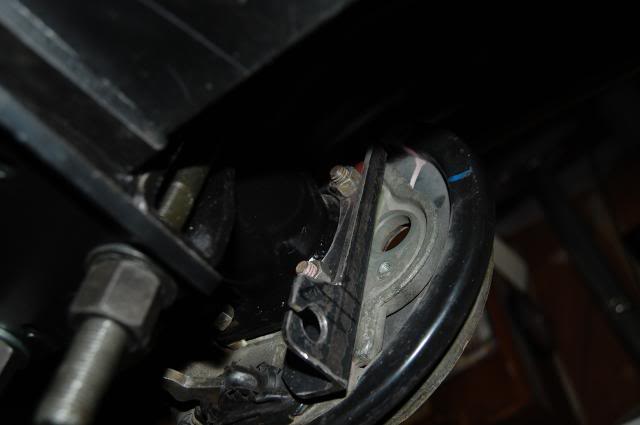
I researched and read a few post on some other forums and found one that converted the LS1 brakes using these simple brackets and shorten the cables.
Here are the brakes that was made from some 1-1/2"x1-1/2" angle iron, cut the circle for the axle tube and drilled the mounting bolt holes. Then drilled and slotted a hole for the E-Brake Cable to fit in.
I have not shorten the cables yet, but should be simple enough.. but looking for some cable ends to use once I shorten the cable.
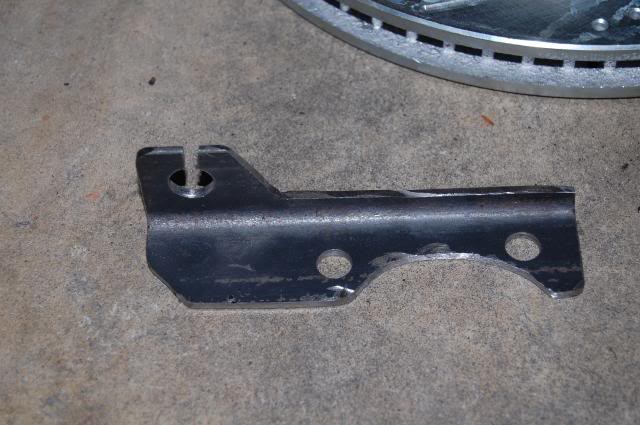
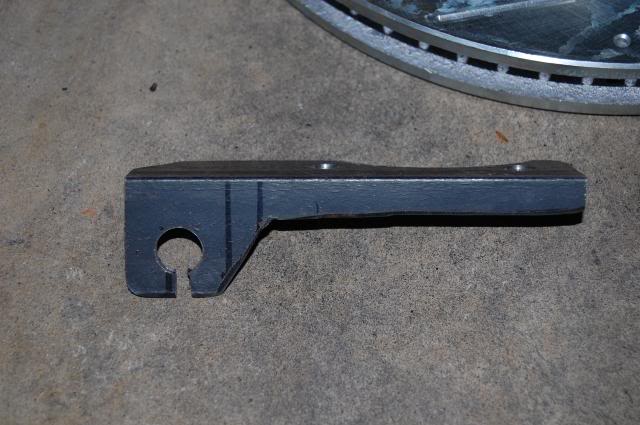
I then powder coated them.
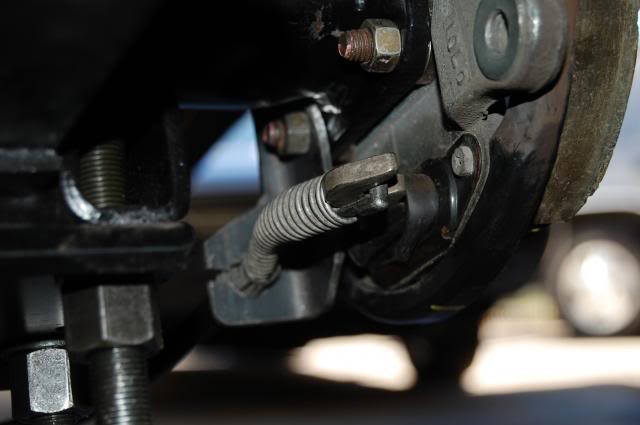
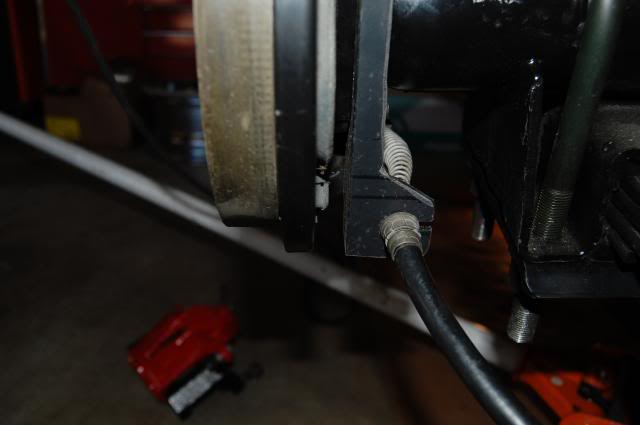
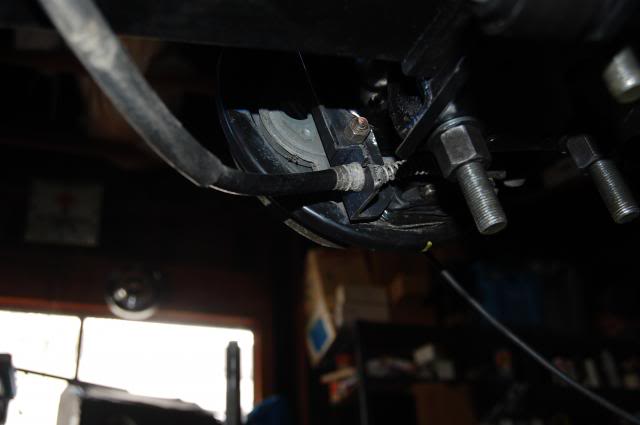
By relocating the Shock in board, I was able to use a Left/Right Set without the Caliper hitting the shock.. Since I wanted to have them pull forward like the Nova setup. I flipped them right to left and left to right, that way the cable would pull from the front.

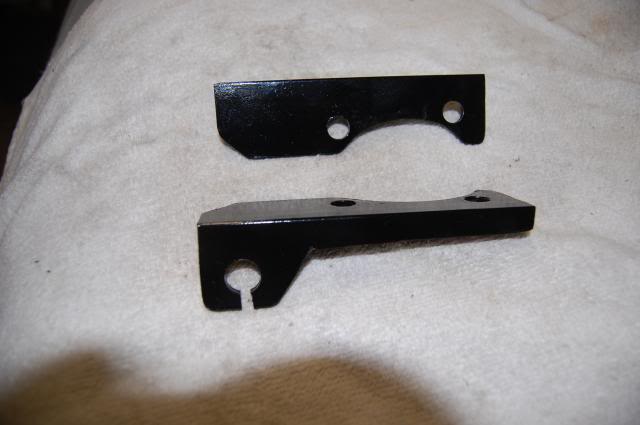
Mounted and with the cable mounted.

I'll post up some more picture of the shorten cable.. but that will be later. Next I am finishing up the B&M Trans plate cooler and the remaining lines I need to finish.
I ordered a Drive Shaft from the local Driveline shop.. Picking that up tomorrow.
BC
Here are the brakes that was made from some 1-1/2"x1-1/2" angle iron, cut the circle for the axle tube and drilled the mounting bolt holes. Then drilled and slotted a hole for the E-Brake Cable to fit in.
I have not shorten the cables yet, but should be simple enough.. but looking for some cable ends to use once I shorten the cable.
I then powder coated them.
By relocating the Shock in board, I was able to use a Left/Right Set without the Caliper hitting the shock.. Since I wanted to have them pull forward like the Nova setup. I flipped them right to left and left to right, that way the cable would pull from the front.
Mounted and with the cable mounted.
I'll post up some more picture of the shorten cable.. but that will be later. Next I am finishing up the B&M Trans plate cooler and the remaining lines I need to finish.
I ordered a Drive Shaft from the local Driveline shop.. Picking that up tomorrow.
BC
Last edited by bczee; 05-23-2013 at 12:11 AM.
05-27-2013, 02:32 PM
#230
TECH Apprentice
That came out nice! I am going to do the same thing to my car this summer. Great write up and pics. Looking forward to details on cutting the cable to work. Is it the e-brake cable from the donor car or the original from the Nova that you are cutting? Those brackets came out nice.
05-30-2013, 12:07 AM
#231
Well, did some late night working this past few weeks... MisterD, I'll post up the cable once I get to them. For now, trying to bottom of some of the other items.
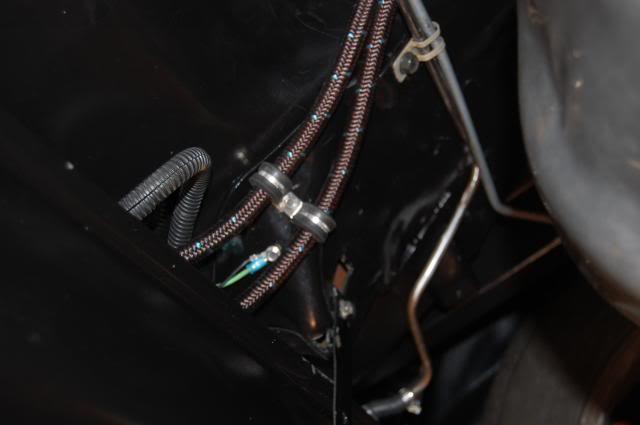
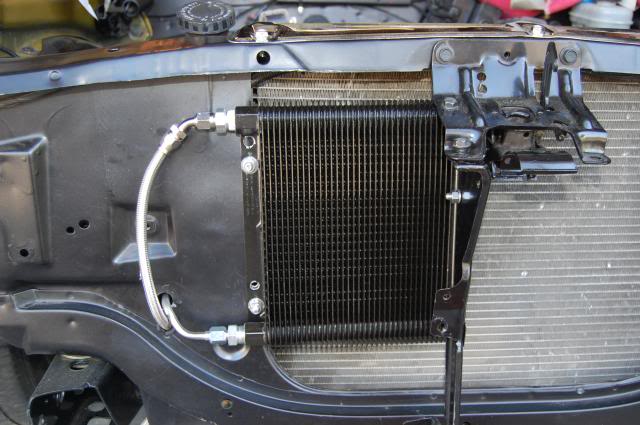
So far for the past few weeks, I have complete the Fuel system (Tank and lines), Transmission lines and Power Steering lines. Had a local shop build me a Drive shaft with 1350 Joints and 3" tube.
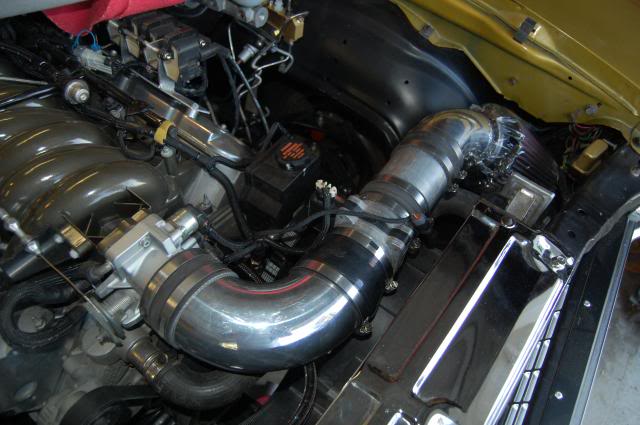
Here is the CAI that is in progress, got to build a box to isolate the filter.
 [/URL]
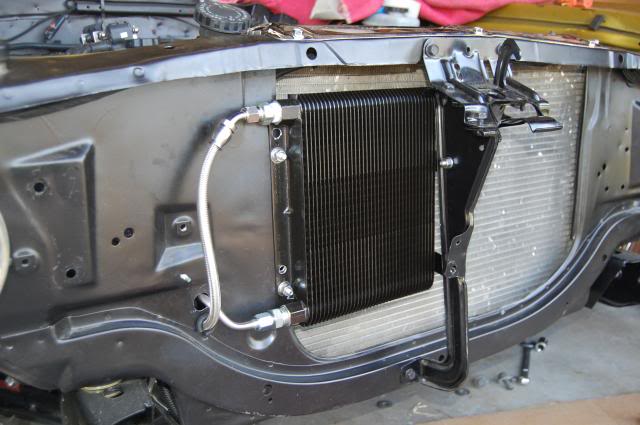
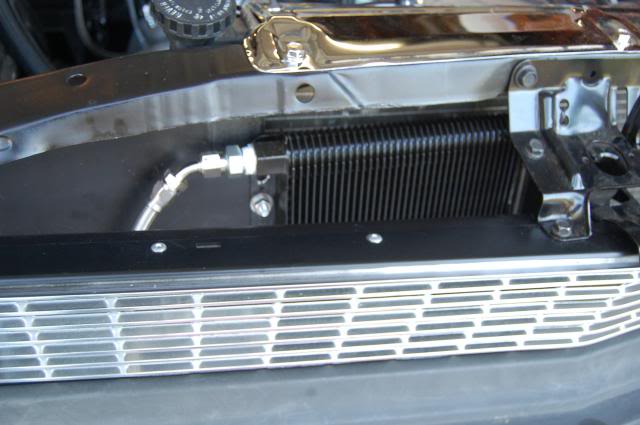
Got the B&M Cooler mounted and the lines made. Did a little bad planning on the line routing, but it should be ok.
Started to add the Trans, Engine, Power Steering Fluids and trying to get ahold of my tuner to get the PCM Flash for start up.
That's if for now.. !
BC
05-30-2013, 02:12 PM
#232
Looking good! Can't wait to see the first start-up video. I got a line on an LS rear brake setup, so I'll be doing the swap soon. Thanks for the inspiration.
One piece of advice though - your intake setup doesn't look like it'll work too well. Plastic bags don't help the engine breath too well.
One piece of advice though - your intake setup doesn't look like it'll work too well. Plastic bags don't help the engine breath too well.
05-30-2013, 02:39 PM
#234
 . that guy on the corner down the street from the speed shop told me that was the latest in Micro Filteration and all of the Pro now use them !!..
  LOL
LOLI'll get to the Cables as soon as I find some correctly sized cable ends to use once they are shorten. but it is a simple task
You just cut the old end off. twist the end of Counter-Clockwise, pull the cable out, shorten the spring about 1".
Then cut the cable housing and reassemble in reverse order !
But I'll post pictures for you guys cause I know

I am hoping to hook up with my Tuner this weekend, so the PCM will be ready for at lease a start up...(I still need to complete the Brake lines and master along wth needing some 17" or larger wheel/tires to fit around the larger front brakes)
BC
06-12-2013, 10:30 AM
#235
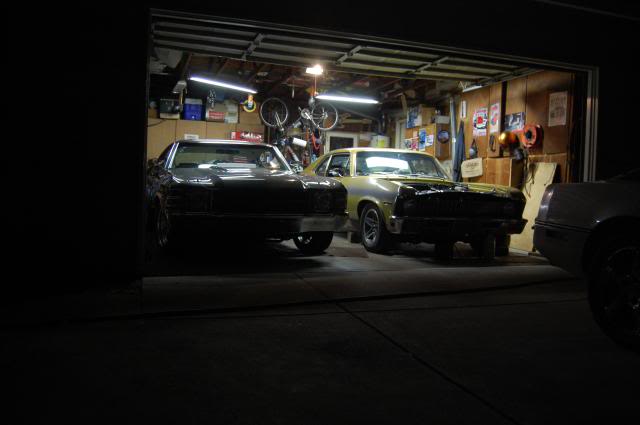
Well, time for an update... !
Had my Tuner Flash my PCM with some basic tuning and deletes. PCM should be ready to go now.
I have been just working on finishing up the wiring and needed to do something with the PNP/NSS switch to provide a Ground while in Park/Neutral to the PCM. This was a problem since I am still keeping the Column shifter and it doesn't have any terminal to provide Ground while in Park or Neutral.
With the Help of LS1Nova71, I was able to understand and use what he had done. I figured I would share this info again in a way that I would understand it. I have put together a simple drawing and steps to outline what I am doing.
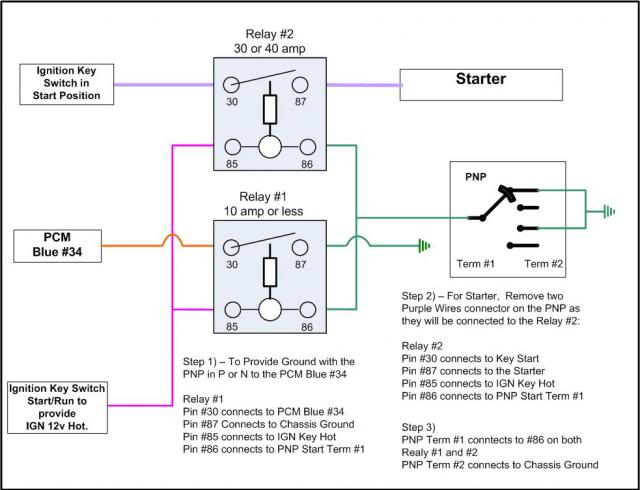
Being cheap again.... I was able to use one of the old Camaro Fuse Box by cutting it up to provide a two fuse Relay holder and re-wired the holder (will wire it up once I get some time to get under the dash again, but it bench tested ok)
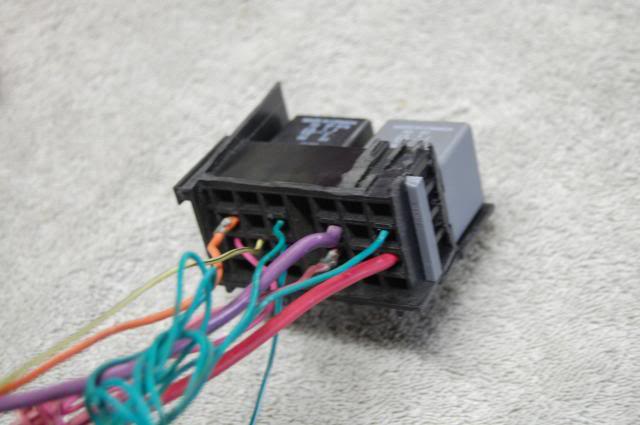
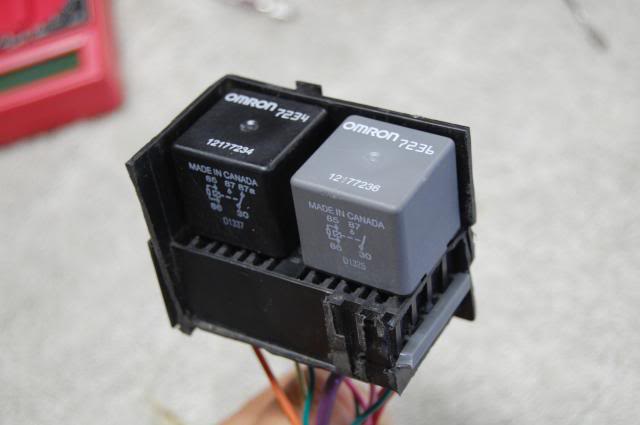
(I will have to clean up the cuts and sand down smooth the Relay case/holder for a better look.)
So for now, just trying to finish up a lot of small items and topping off the Fluids and checking everything as it is getting close to a starting up the engine. But it will not be on the road until I finish the brakes and can afford some Wheels and Tires.
I'd like to thank LS1Nova71 for his help on the PNP/NSS setup.
That the update for now.
BC
Had my Tuner Flash my PCM with some basic tuning and deletes. PCM should be ready to go now.
I have been just working on finishing up the wiring and needed to do something with the PNP/NSS switch to provide a Ground while in Park/Neutral to the PCM. This was a problem since I am still keeping the Column shifter and it doesn't have any terminal to provide Ground while in Park or Neutral.
With the Help of LS1Nova71, I was able to understand and use what he had done. I figured I would share this info again in a way that I would understand it. I have put together a simple drawing and steps to outline what I am doing.
Being cheap again.... I was able to use one of the old Camaro Fuse Box by cutting it up to provide a two fuse Relay holder and re-wired the holder (will wire it up once I get some time to get under the dash again, but it bench tested ok)
(I will have to clean up the cuts and sand down smooth the Relay case/holder for a better look.)
So for now, just trying to finish up a lot of small items and topping off the Fluids and checking everything as it is getting close to a starting up the engine. But it will not be on the road until I finish the brakes and can afford some Wheels and Tires.
I'd like to thank LS1Nova71 for his help on the PNP/NSS setup.
That the update for now.
BC
06-13-2013, 03:17 PM
#236
Is PCM blue 34 PRNDL P input for the LS1 like it is for trucks? Surprisingly, I bypassed the PRNDL inputs to my PCM (blue 32!, blue 34, blue 72, red 62) and she appears to run like a champ. My tuner did ask why I did that though, and mentioned it does have some effect on the engine idle.
edit: of course, I used a B&M shifter with its own NSS and reverse light hookup.
edit: of course, I used a B&M shifter with its own NSS and reverse light hookup.
06-13-2013, 03:39 PM
#237
From my understanding of a 4L60e and On my LS1 (411 pcm), it would be the input to know that the transmission is in Park or Neutral (or in a gear) and change or control the idle as needed for being in park/neutral or in Gear.
As far as the Truck one. I would assume it did the same. I know some have just grounded the wire and have no problem. I assume that without it.. it would be acting like a manual trans car and use the VSS signal to assist idle as needed. (?)
BC
As far as the Truck one. I would assume it did the same. I know some have just grounded the wire and have no problem. I assume that without it.. it would be acting like a manual trans car and use the VSS signal to assist idle as needed. (?)
BC
06-14-2013, 12:24 AM
#238
Got the Nova to the point that I could fire up the engine and check for leaks, codes and other issue..
I fired it up but flipped the key to the off position on the 1st Burst of the engine.. My BAD LOL. turned it over again and it fired right up and kept on running !...
I thought I had zero oil pressure at first cause the gauge was reading Zero.. I found that I forgot to secure the ground for the gauges ..LOL
Turn up the Volume.!. (it does sound much better standing around it LOL).
Only one code (P0102) and one small leak to fix so far.. .still might need to chase down some isolated things that might be a problem.. but will check all of the grounds again.
but without Brakes, didn't get the 1st drive.. that will have to wait.. But it felt good knowing that I wired everything up ok and it fired right up.. Mark Romans did the Bench programming, he did a good job for the 1st start up.. dyno in a few months if the funds are there.. Also.. no Exhaust system yet.. Open Headers !
BC
Last edited by bczee; 06-14-2013 at 11:03 PM.
 06-14-2013, 10:28 AM
#240
Taylor.. thanks. problem is.. I already have one Swap done !.. so... everyday.. its like work on Nova or Drive the Chevelle !?.. its a tough choice.. but someones got to make it and live with the choice ... ! LOL..
Great to hear your Nova is on the road and that you also got some track time in.. good going on that too ! You just need a rear end and tires ! to cut another second off the ET
Great to hear your Nova is on the road and that you also got some track time in.. good going on that too ! You just need a rear end and tires ! to cut another second off the ET
Last edited by bczee; 06-14-2013 at 11:04 PM.