

1971 Nova Swap - 02 LS1/A4
 05-17-2012, 03:59 PM
#121
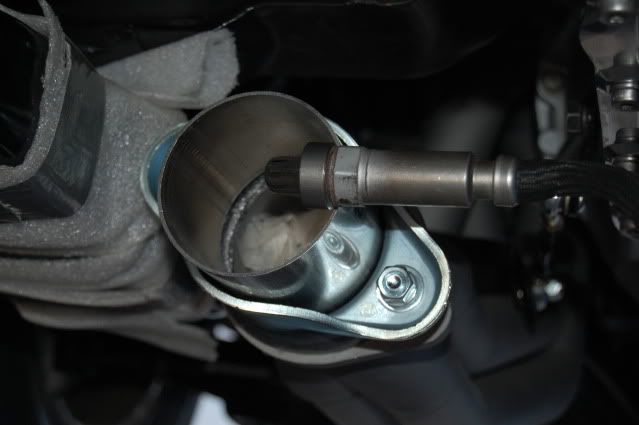
Yup, those are the one's.... as you can see from the Shiftworks catalog (Lokar is simular) for the column shifter kit.. it is just a long rod and a modified / adjustable arm. I have cloned it.. but as I said, my trans is located back due a bit due to the plates and frame stands. So it contacts the Firewall.
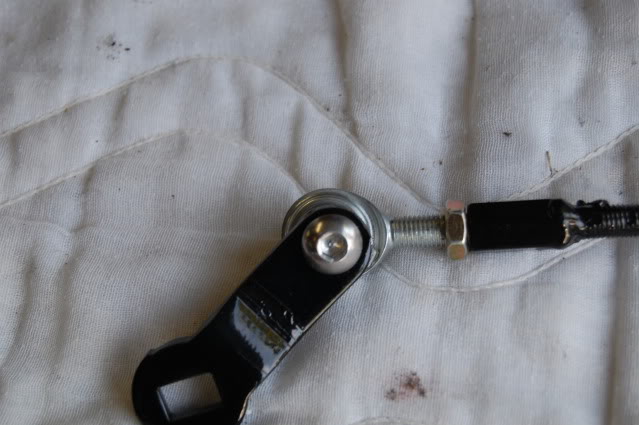
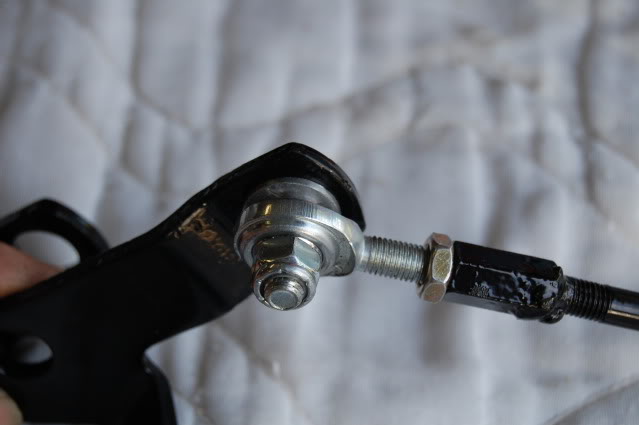
I have also created new rods with Sperical ends..

If my re-engineering doesn't work out, might have to looking into that cable conversion kit or go to a floor shifter (with my Bench seat !!??)
!!??)
I have also created new rods with Sperical ends..
If my re-engineering doesn't work out, might have to looking into that cable conversion kit or go to a floor shifter (with my Bench seat
 05-17-2012, 04:09 PM
#122
http://www.summitracing.com/parts/WVI-66-7812042
and
http://www.davidsrallywheels.com/id106.html
to name a few
I also recall a one piece aluminum or billit wheel in a Rally style like these. But they out of my Budget !!
http://www.yearonewheels.com/category.aspx?zcid=688
BC
Last edited by bczee; 05-17-2012 at 04:16 PM.
 05-30-2012, 11:31 AM
#125
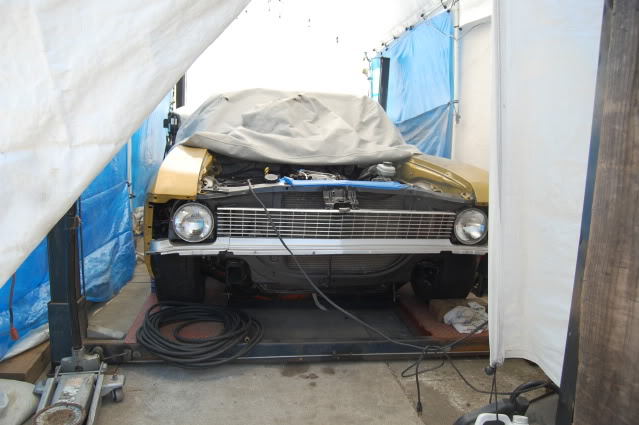
Well my friend two house away as let me use is 4 post lift, So we wheeled it down the street into my work area. So Life is a bit better right now and not flat on my back !LOL

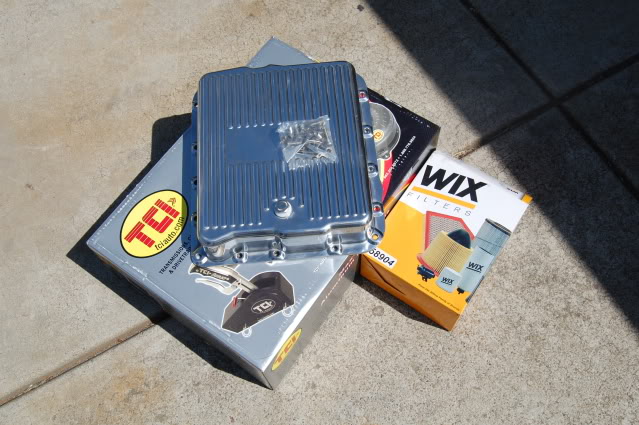
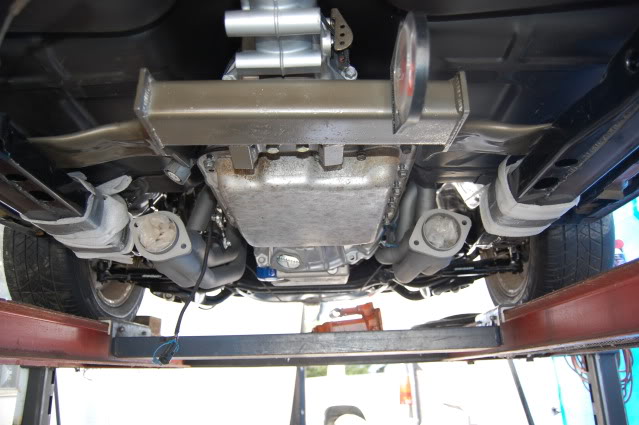
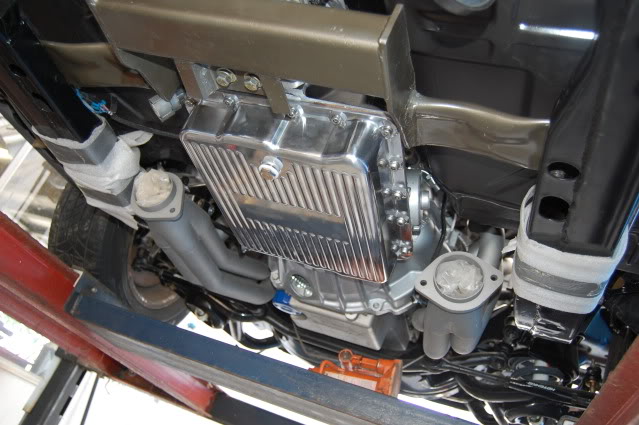
Was in Reno a few weeks back, stopped by Summitracing and picked up alum Trans pan. I was going to go with a Deep pan, but after getting the car back on the ground, I figure it was not going to be a good idea. Ground clearance was not that good, Headers are only a few inch. So I when with a Standard TCI Alum pan with a Wix Filter.
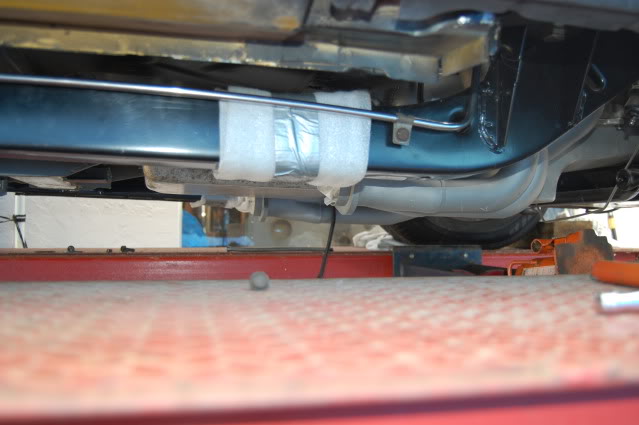
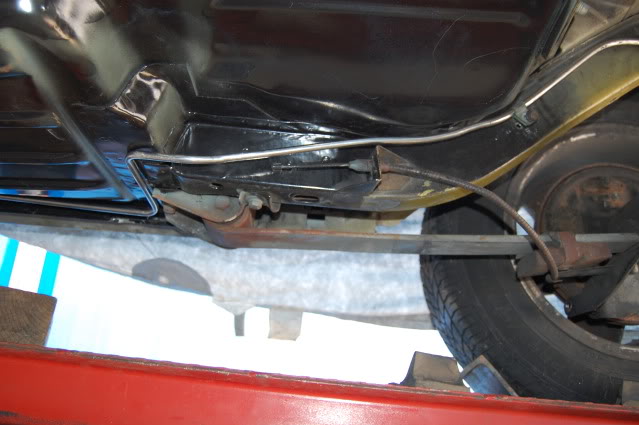
I also got a 20 foot stick of 3/8" Stainless tubing and start to bend up the main fuel line.
Well need braze some AN Fitting on the end, then need to order a Vette FPR, some more AN hose ends and hose, was thinking of going black hose and fittings. Then on to the Trans lines and Fuel tank/pump.
BC
Was in Reno a few weeks back, stopped by Summitracing and picked up alum Trans pan. I was going to go with a Deep pan, but after getting the car back on the ground, I figure it was not going to be a good idea. Ground clearance was not that good, Headers are only a few inch. So I when with a Standard TCI Alum pan with a Wix Filter.
I also got a 20 foot stick of 3/8" Stainless tubing and start to bend up the main fuel line.
Well need braze some AN Fitting on the end, then need to order a Vette FPR, some more AN hose ends and hose, was thinking of going black hose and fittings. Then on to the Trans lines and Fuel tank/pump.
BC
05-30-2012, 11:42 AM
#126
Guys, Got a bit of a problem. Trying to put the O2 on the Collector reducer and not have to drill/weld and recoat the headers. But the location is a problem in that I can not get them to be level with the ground on the Right side header, The collector area is too close to the Trans/pan.
I know the general rule is to have them level with the ground, but do you think that 45 Degree would be ok..
If I locate the right side 45 degree off center.

Just enough room on the Left/Drivers side.
or make that 45 too ?

What do you guys think ?
BC
I know the general rule is to have them level with the ground, but do you think that 45 Degree would be ok..
If I locate the right side 45 degree off center.
Just enough room on the Left/Drivers side.
or make that 45 too ?
What do you guys think ?
BC
05-30-2012, 12:44 PM
#127
TECH Enthusiast

Never heard of the level rule only you don't want it on the bottom for mositure if it collects in the tube. My Kooks TBSS haders have a built in O2 sensor and it is vertical and angled about 45 degrees back. Go for it
 05-30-2012, 01:07 PM
#129
Yeah.. that also was my understanding, to not position in a location where water/Mositure will collect on the O2.
I have chevelle one level with the ground, I recall someone telling me that before..
thanks guys... (old brain needs checking once in a while).
BC
I have chevelle one level with the ground, I recall someone telling me that before..
thanks guys... (old brain needs checking once in a while).
BC
05-30-2012, 01:25 PM
#130
TECH Regular
iTrader: (12)
Join Date: May 2010
Location: Waxahachie, Tx
Posts: 451
Likes: 0
Received 0 Likes
on
0 Posts

correct
They are temperature and pressure sensitive but don't care which way they face. But water and RTV are bad for them.
-69 Ghost- How's it going Eric? Scott L
Last edited by TurboS10; 05-30-2012 at 01:31 PM.
05-30-2012, 01:29 PM
#131
Looks like it is coming along really nice! Your fuel line routing look very close to what I did as well! Guess great minds think alike  I bet it was nice to use that lift while working under the car. I know attempting to bend lines and test fit while rolling around on a creeper got old in a hurry!
I plan to install the subframe w/powertrain back into the chassis in the next few days so I can work on exhaust fittment and take a look at what options may work for the column shift situation. Keep up the good work!
I bet it was nice to use that lift while working under the car. I know attempting to bend lines and test fit while rolling around on a creeper got old in a hurry!I plan to install the subframe w/powertrain back into the chassis in the next few days so I can work on exhaust fittment and take a look at what options may work for the column shift situation. Keep up the good work!
06-07-2012, 04:03 PM
#132
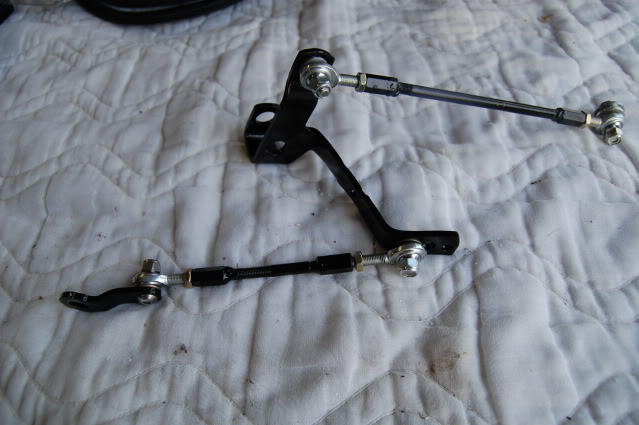
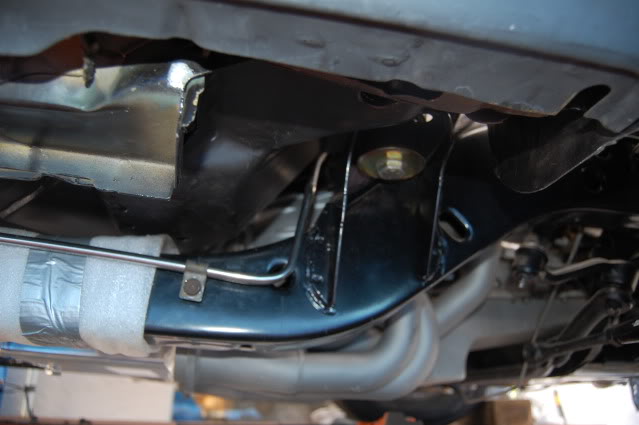
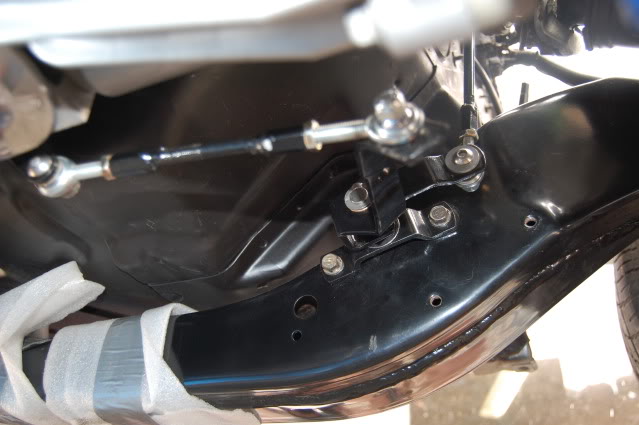
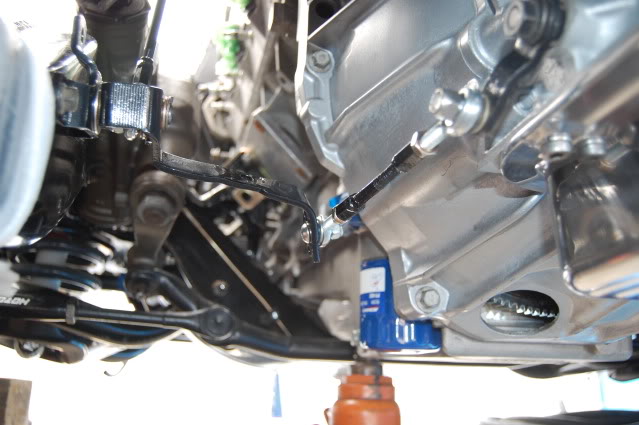
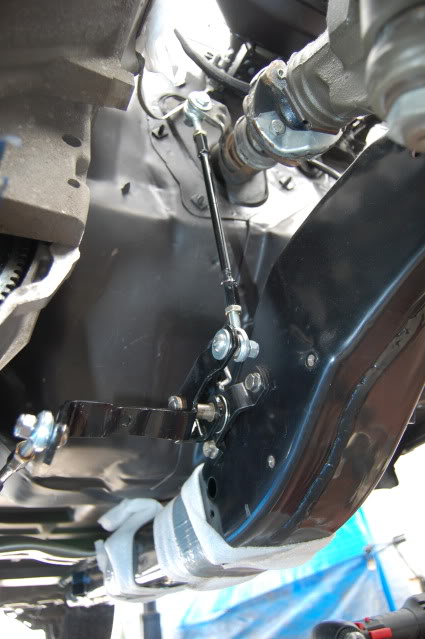
Crusini73 - Got a little work done on the Column Shifter mod's, Had to remove the header to get acces. Still might export the direct line from column to trans are.. but might placement of the trans has the line of site very close to scraping, will try it later.
I reshimmed the pivot, extended the arm, created new Rods with adjustable ends, Got all gear pretty much. .still a little slop in it. I think the spring in the detent is a bit stiff and causing everything else to flex some.
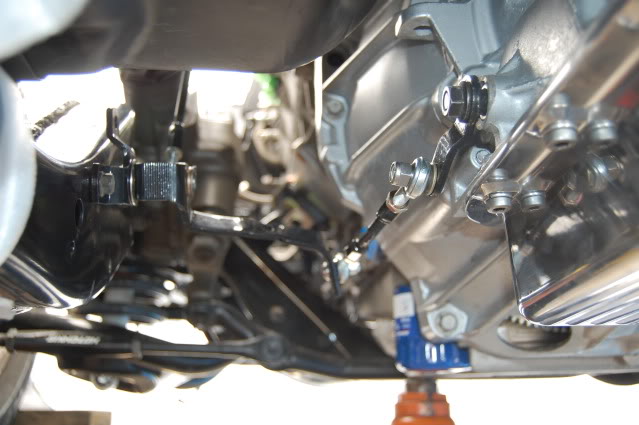
You can see the original mounting holes. I used the top one only. I drilled an new one for the rear bolt and will have to make a brace for the top one to add more support. (see top picture)

I reshimmed the pivot, extended the arm, created new Rods with adjustable ends, Got all gear pretty much. .still a little slop in it. I think the spring in the detent is a bit stiff and causing everything else to flex some.
You can see the original mounting holes. I used the top one only. I drilled an new one for the rear bolt and will have to make a brace for the top one to add more support. (see top picture)
 06-07-2012, 11:23 PM
#134
Got a little more work done as my SS Brake lines came in. Also still working on the Fuel lines. But well post more on those later when I get closer to finishing them.
I was over at my buddy shop and we came up with some Coil brackes to relocation them higher off of the Valve Covers and closer together.. They are just mocked up for now. Have to complete threading the rod ends and adjust the spacers, then re-assemble before mounting them on the valve covers.. but might have to refinish the Valve Covers first.(?)


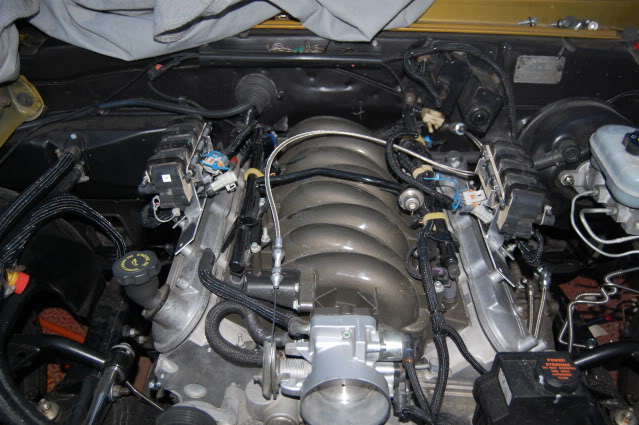


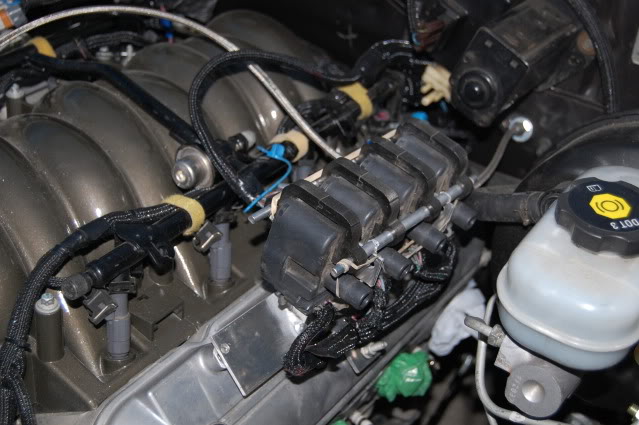
Since I moved the engine back, I couldn't fit them behind the heads. I really didn't like my other options on were to relocate them. I tried a few spots, but it just seems that it would work on one side, but not enough room on the other.
I tried the engine adapter plate / motor mount area. Didn't like the Side of the Sub-frames, in front of the engine or crossmember, Fender wells.. etc.. Didn't want to put them through the firewall.
So, What do you guys think ?
BC
I was over at my buddy shop and we came up with some Coil brackes to relocation them higher off of the Valve Covers and closer together.. They are just mocked up for now. Have to complete threading the rod ends and adjust the spacers, then re-assemble before mounting them on the valve covers.. but might have to refinish the Valve Covers first.(?)
Since I moved the engine back, I couldn't fit them behind the heads. I really didn't like my other options on were to relocate them. I tried a few spots, but it just seems that it would work on one side, but not enough room on the other.
I tried the engine adapter plate / motor mount area. Didn't like the Side of the Sub-frames, in front of the engine or crossmember, Fender wells.. etc.. Didn't want to put them through the firewall.
So, What do you guys think ?
BC
06-08-2012, 07:37 AM
#135
Nice looking job on he linkage! I am sure you checked the function with the headers in place already and no problem? the frame mount for my linkage looks totally different! Mine is a �1" hole with large radius leading into it like it was made with a dimple die. No chance I could re-locate it up like you. I am still leaning towards the direct linkage action. I am going to pick up the 3/8" rod ends this weekend and see what I can come up with. The Lokar system is really nice, and I will go that direction if I can not make my own system.
I also like your coil mounting system. Do you need to do that for clearance or just want to be different? At first I was thinking cooling might be an issue with the coils that close together, but then you see guys mount them under the headers, or sandwiched between the firewall and engine so I can not forsee it being an issue for you! Keep up the good work!
I also like your coil mounting system. Do you need to do that for clearance or just want to be different? At first I was thinking cooling might be an issue with the coils that close together, but then you see guys mount them under the headers, or sandwiched between the firewall and engine so I can not forsee it being an issue for you! Keep up the good work!
 06-29-2012, 08:40 AM
#137
Taylor.. yes on clearing the Headers, some of my pictures have the header inplace and other taken out so that it was easier to work with.
But that was the main reason I had to modify the Linkage, the Header was causing problems, the linkage had to be extended over the collector and then turn down.
It is a little bet loose/slop, but works on stopping in all gears as I shift through all of the range of the shifter.. Not going to be a great setup if I have do a lot of quick shifting if I was racing or something, might be just be better to put it in one gear and step on the Go pedal. Basically let the the Automatic do its job of shifting.
Nothing really new.. been working on my son' Harley, putting a new hardtail frame on it and turning it into a old school bobber. Also finally fitted some Vette Fuel Rail Covers on my Chevelle (picture to follow).
Did a little work on the Fuel and brake lines, but got to finish up painting the rear area of the under body (leaf springs back). Waiting for some more funds to order more AN Fittings and hose lines for the Fuel and Trans lines. That is next on the ToDo list.
BC
But that was the main reason I had to modify the Linkage, the Header was causing problems, the linkage had to be extended over the collector and then turn down.
It is a little bet loose/slop, but works on stopping in all gears as I shift through all of the range of the shifter.. Not going to be a great setup if I have do a lot of quick shifting if I was racing or something, might be just be better to put it in one gear and step on the Go pedal. Basically let the the Automatic do its job of shifting.
Nothing really new.. been working on my son' Harley, putting a new hardtail frame on it and turning it into a old school bobber. Also finally fitted some Vette Fuel Rail Covers on my Chevelle (picture to follow
).Did a little work on the Fuel and brake lines, but got to finish up painting the rear area of the under body (leaf springs back). Waiting for some more funds to order more AN Fittings and hose lines for the Fuel and Trans lines. That is next on the ToDo list.
BC
07-13-2012, 02:36 PM
#138
Nice job with the linkage BC. I think you may want to reinforce it a bit though. There are some long extensions there and not the best incidence angle between the lever on the tranny and the attached linkage rod. I could see those parts bending over time. Of course I could be wrong as I often am. What is the thickness of the flatstock?
Your coil mounts remind me a litte of this C5.R front engine mounted setup.
Your coil mounts remind me a litte of this C5.R front engine mounted setup.
07-13-2012, 03:37 PM
#139
Bandit... the rod seem to be ok.. no flexing on them (5/16"). The extensions that was weld on to the original linkage was the same 1/8". that also seem to be ok, I don't see any flexing. What is the area that is causing the slop is the piviot linkage to the mount. The pivot linkage has the original brass bushing and the shaft that the mount is on it could use some better bushing for a tighter clearance.
But if I find any thing later down the roll, i will re-enforce it with larger rods or adding more metal to stiffen up the pivot lever. But I think the area of improvement would be the bushing to shaft.
right now I have been busy with the house, new roof and gutters.. then a Solar system soon. Well be getting the Chevelle ready for Hot August Nights In Reno next month.. then back to work on the Nova.. Still working on trying to get time to finish up the under body paint and then finsh up the Fuel, Brakes and Trans lines..
Well most coil relocation are pretty generic in the basic assembly.. but yeah.. I really have not found a location to put them that I really liked.. but for now.. i will use then on top of the Valve covers and make some custom wires.
BC
Last edited by bczee; 07-13-2012 at 04:05 PM.