

Mike's 65 GTO Ls1 T56 Build

 07-13-2011, 05:29 PM
#62
Staging Lane
Thread Starter


Yeah, we're getting closer. I'm starting to get excited. We trial fitted the computer harness today, all looks good.
Rocky, what O2 sensors did you use on your car?
Rocky, what O2 sensors did you use on your car?
07-13-2011, 08:35 PM
#63
TECH Resident
Join Date: Nov 2007
Location: Texas
Posts: 816
Likes: 0
Received 0 Likes
on
0 Posts
Whatever the oem is I purchased from Orileys. Why you ask you having fit issues on the drivers side manifold? If that is what you are referring to I plugged the O2 sensor in the manifold and located them in the exhaust pipes just past the manifolds both sides.
07-13-2011, 08:45 PM
#64
Staging Lane
Thread Starter
No, actually the bung is in my exhaust pipe, so no clearance issues. I was asking because i'm going to buy the sensors soon. Thanks.
07-31-2011, 08:52 PM
#65
Staging Lane
Thread Starter
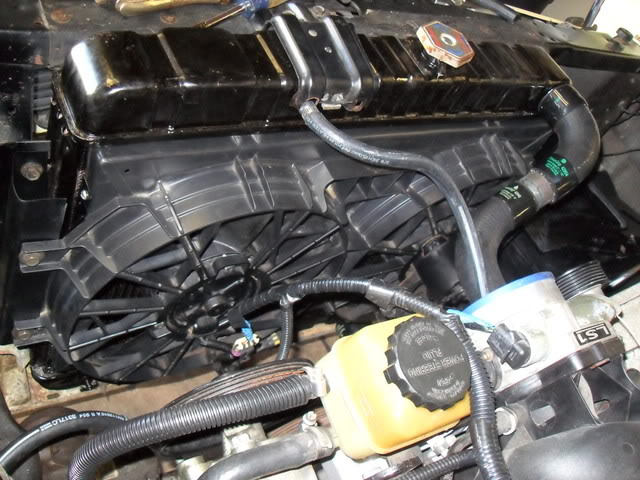
Just a quick update as I get closer to starting the beast. The computer harness is in, along with the fans, O2 sensors, radiator hoses, steam vent line, heater hoses, and battery box (which I moved to the passenger side). We mounted the ECM behind the glove box, and a fuse box in the glove box. Here are some pics:
Fans and hoses installed. I had to make brackets for the fans to bolt to my original shroud mounts. I decided to try the Gates Power Grip clamps which are installed with a heat gun. Also pictured is the steam hose which goes to a fitting I had installed in the top tank of the radiator.
Glove box.
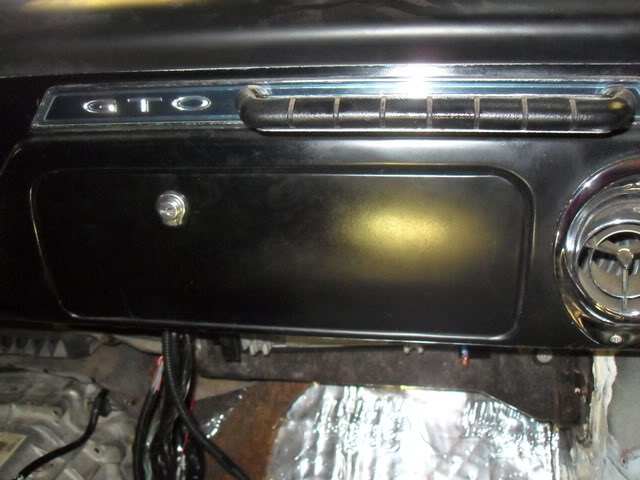
Fuse block in the glove box. I'm going to modify my glove box liner to make use of the space to the left of the fuses.
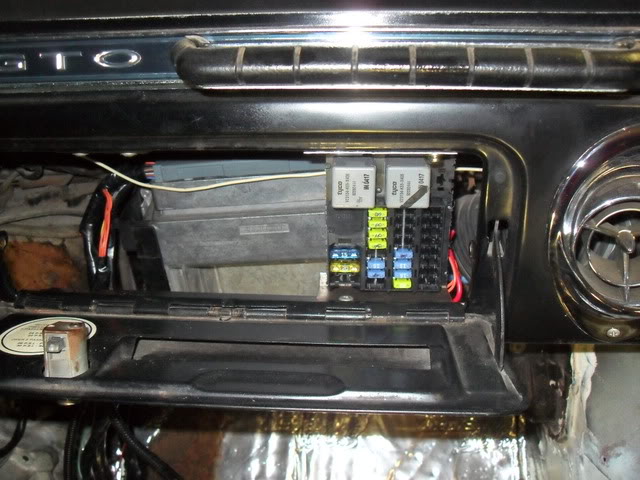
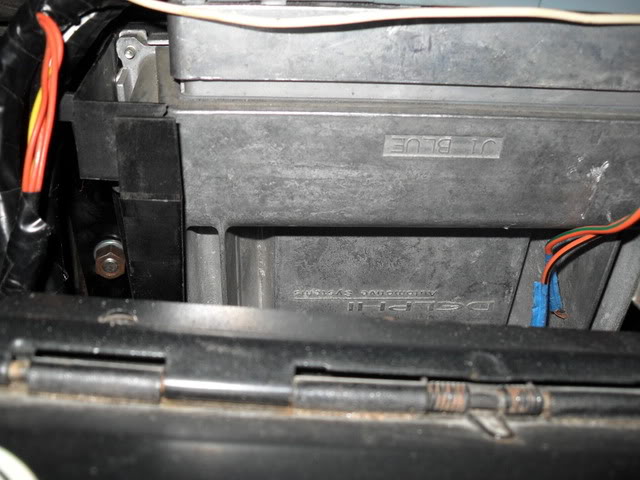
The next two pics show the ECM mounted. We used the original GTO box and made a couple of brackets to mount it to the heater plenum. Fits pretty good.

More to come...
Fans and hoses installed. I had to make brackets for the fans to bolt to my original shroud mounts. I decided to try the Gates Power Grip clamps which are installed with a heat gun. Also pictured is the steam hose which goes to a fitting I had installed in the top tank of the radiator.
Glove box.
Fuse block in the glove box. I'm going to modify my glove box liner to make use of the space to the left of the fuses.
The next two pics show the ECM mounted. We used the original GTO box and made a couple of brackets to mount it to the heater plenum. Fits pretty good.
More to come...
 09-06-2011, 01:25 PM
#70
Staging Lane
Thread Starter
It runs!! The start up went pretty well with just a couple of hiccups. We had a minor leak at the fuel rail, and I forgot to plug the O2 sensor hole in the exhaust manifold.
I've been driving it and it is a riot. The T56 is a dream and the car has lots of power. The engine is smooth and quiet, maybe too quiet. We still have some loose ends to tie up with the interior and gauges; the speedo and gas gauge don't work yet, and I have to build a console and put in the '04 GTO seats. We had to cut the front carpet in half since the tunnel we made is taller than the original. The console will cover the carpet.
Here are a few pics and a video.
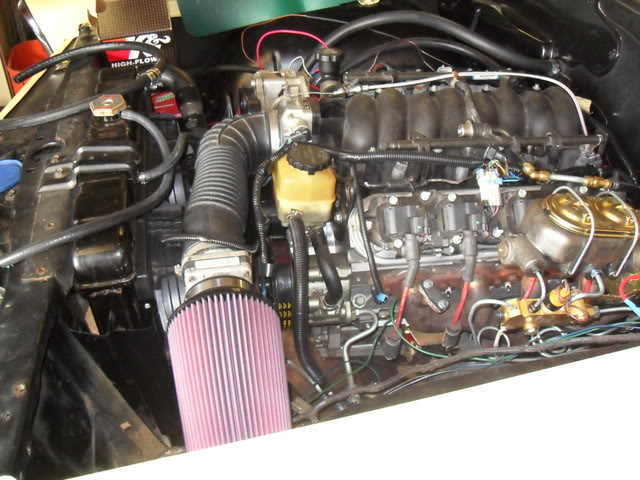
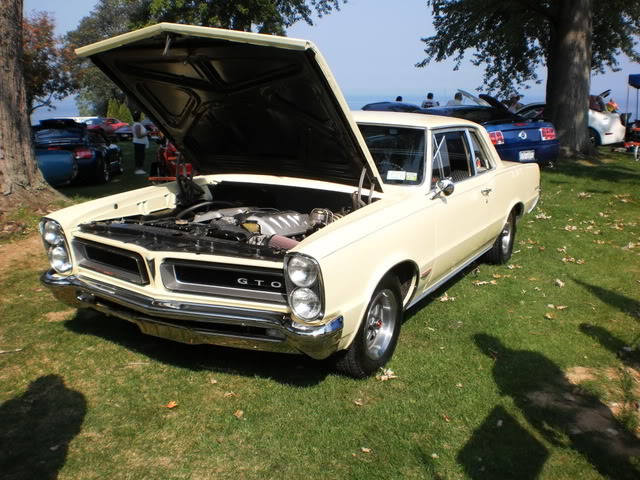
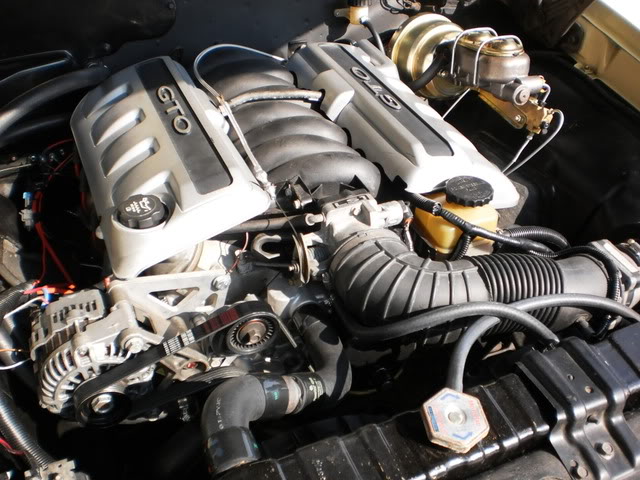
Engine ready to go.
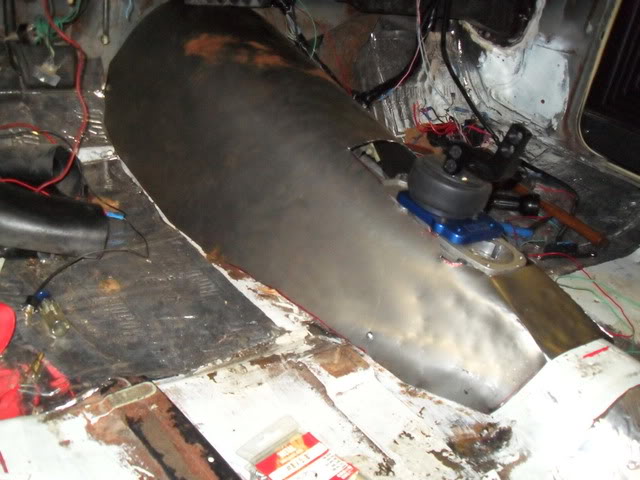
Tranny tunnel we made
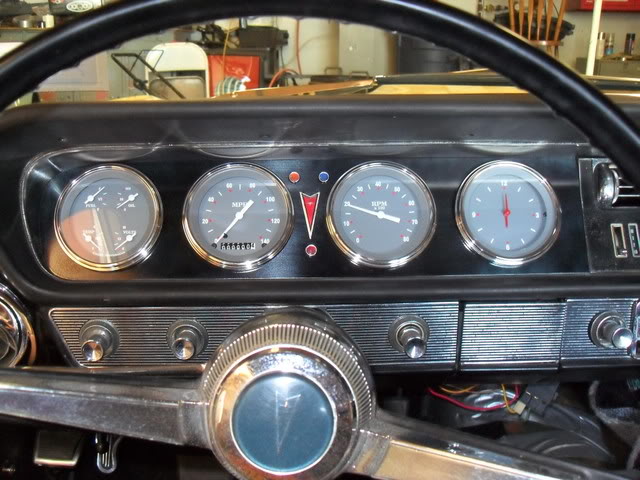
Classic gauges put into an aluminum plate in the dash. Also indicators for the turn signals, bright lights, and check engine light. The Pontiac Arrowhead is from a Rally II center cap.
http://youtu.be/Fb2Uaa1bO0o
I've been driving it and it is a riot. The T56 is a dream and the car has lots of power. The engine is smooth and quiet, maybe too quiet. We still have some loose ends to tie up with the interior and gauges; the speedo and gas gauge don't work yet, and I have to build a console and put in the '04 GTO seats. We had to cut the front carpet in half since the tunnel we made is taller than the original. The console will cover the carpet.
Here are a few pics and a video.
Engine ready to go.
Tranny tunnel we made
Classic gauges put into an aluminum plate in the dash. Also indicators for the turn signals, bright lights, and check engine light. The Pontiac Arrowhead is from a Rally II center cap.
http://youtu.be/Fb2Uaa1bO0o
Last edited by darksider; 09-06-2011 at 01:32 PM.
09-09-2011, 08:21 AM
#71

It looks great, you've done a very nice job. Bob
__________________
ATI ProCharger and Moser Sales 260 672-2076
PM's disabled, please e-mail me
E-mail: brutespeed@gmail.comob@brutespeed.com
https://brutespeed.com/ Link to website

ATI ProCharger and Moser Sales 260 672-2076
PM's disabled, please e-mail me
E-mail: brutespeed@gmail.comob@brutespeed.com
https://brutespeed.com/ Link to website

 10-10-2011, 06:52 AM
#75
How's the GTO running? Bob
__________________
ATI ProCharger and Moser Sales 260 672-2076
PM's disabled, please e-mail me
E-mail: brutespeed@gmail.comob@brutespeed.com
https://brutespeed.com/ Link to website
ATI ProCharger and Moser Sales 260 672-2076
PM's disabled, please e-mail me
E-mail: brutespeed@gmail.comob@brutespeed.com
https://brutespeed.com/ Link to website
10-10-2011, 09:55 AM
#76
Staging Lane
Thread Starter
How's the GTO running? Bob
04-19-2013, 10:47 AM
#77
Staging Lane
Thread Starter
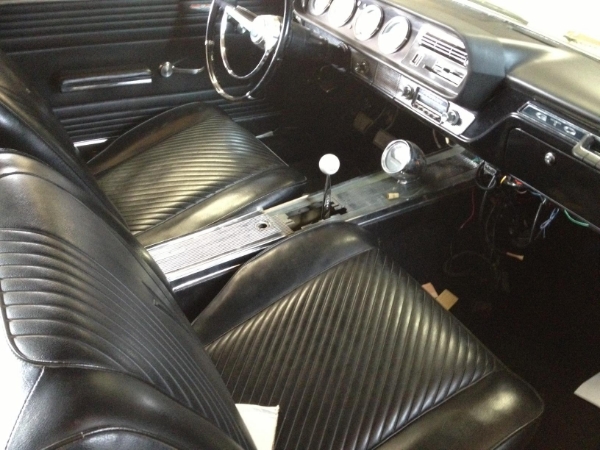
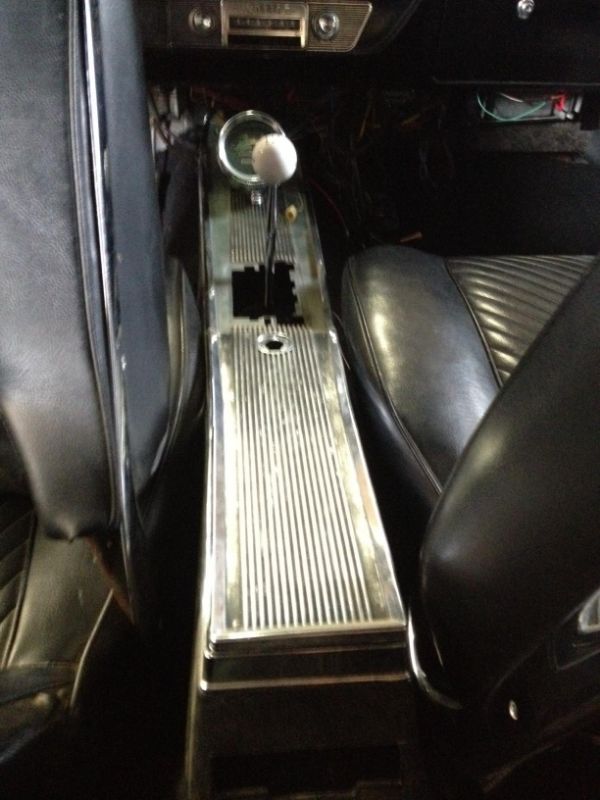
I've come up with a rather unique console idea for my Goat. A friend had an automatic console and since the automatic shifter is mounted on top of the tranny tunnel, I thought maybe it would work for my T56 since it is in the middle of the tunnel also.
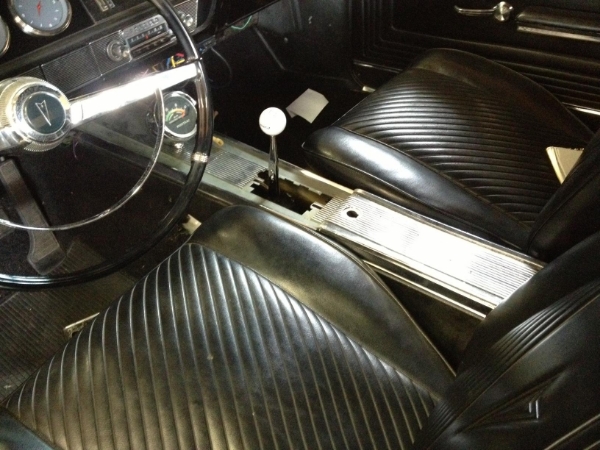
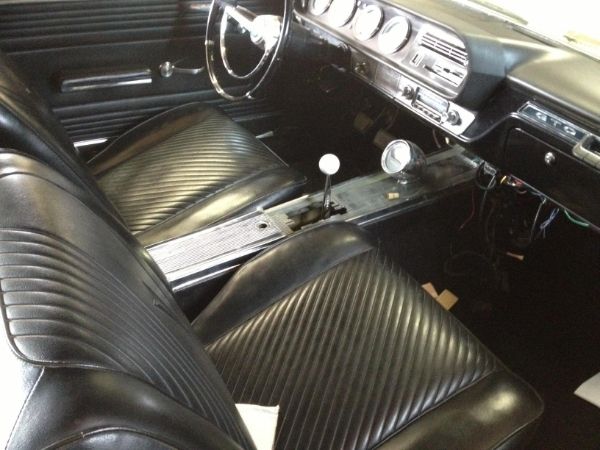
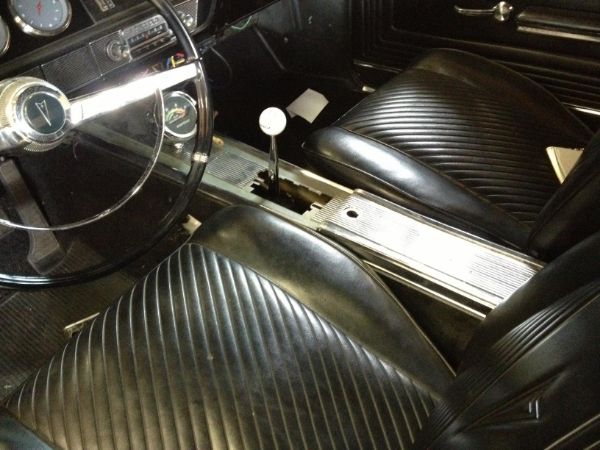
Take a look at the pics, I think it looks fantastic! I had the vacuum gauge and lid for the console, it fit in there about perfectly. Gives it a stock feel. I have some 2004 GTO seats, but I'm going to stick with the originals because they look great with the console.
I'm going to have to trim a little in the opening and also open up the bezel that goes over the shifter. I can get all 6 gears now, but a couple of them are close to the edges. Check out the pics.


 04-19-2013, 10:55 AM
#78
That looks cool! I had that same console on one of my '65 GTO's back in the late '70's. Bob
__________________
ATI ProCharger and Moser Sales 260 672-2076
PM's disabled, please e-mail me
E-mail: brutespeed@gmail.comob@brutespeed.com
https://brutespeed.com/ Link to website
ATI ProCharger and Moser Sales 260 672-2076
PM's disabled, please e-mail me
E-mail: brutespeed@gmail.comob@brutespeed.com
https://brutespeed.com/ Link to website
04-19-2013, 11:11 AM
#79
TECH Senior Member
iTrader: (7)
That looks great. I would make a leather shift boot that is attached to a tip piece. That will cover everything and make it look finished. Heck, maybe even upholster the whole console?
Andrew
Andrew
04-19-2013, 11:43 AM
#80
TECH Enthusiast

I've come up with a rather unique console idea for my Goat. A friend had an automatic console and since the automatic shifter is mounted on top of the tranny tunnel, I thought maybe it would work for my T56 since it is in the middle of the tunnel also.
Take a look at the pics, I think it looks fantastic! I had the vacuum gauge and lid for the console, it fit in there about perfectly. Gives it a stock feel. I have some 2004 GTO seats, but I'm going to stick with the originals because they look great with the console.
I'm going to have to trim a little in the opening and also open up the bezel that goes over the shifter. I can get all 6 gears now, but a couple of them are close to the edges. Check out the pics.