When you click on links to various merchants on this site and make a purchase, this can result in this site earning a commission. Affiliate programs and affiliations include, but are not limited to, the eBay Partner Network.
the Goat looks great! love the way the motor sits right in the engine bay like it's factory.
good to see a local guy. I'm over in North Buffalo. hope to see the car out on the road this summer. i'm putting an LQ4/T56 into my '01 5-Series right now. GTO engine covers as well.
the Goat looks great! love the way the motor sits right in the engine bay like it's factory.
good to see a local guy. I'm over in North Buffalo. hope to see the car out on the road this summer. i'm putting an LQ4/T56 into my '01 5-Series right now. GTO engine covers as well.
Thanks man!
Your car's going to be bad ***! I hope to run into you this summer. I'm in Wheatfield.
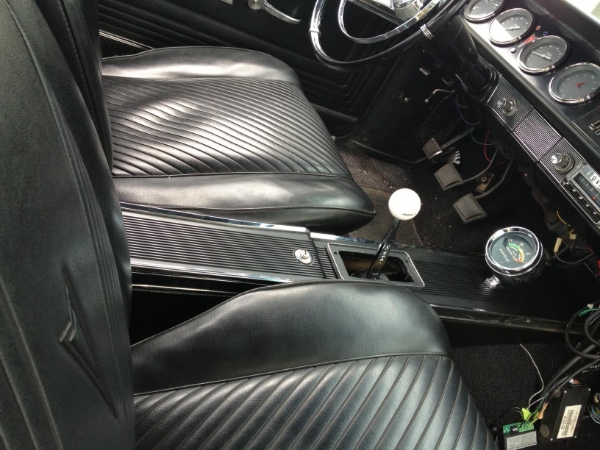
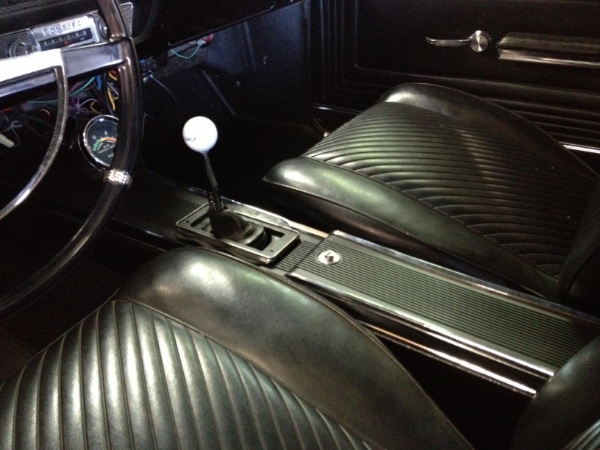
I modified and painted the console and put it in the Goat the other day. I'm really stoked about it. It looks great in there. The second picture has the boot in it also.
I was going to take the paint off of the ribs, but I like the way it looks black.
My name is Andy, and I'm darksider Mike's son. I stumbled upon this thread while browsing the internet for information about putting VintageAir into this GTO. What a walk down memory lane reviewing all the work we did so many years ago.
Now for the unfortunate news, Mike passed away from esophageal cancer in November of 2015. I always knew he had a thread going detailing the build and utilizing the many knowledgeable people the internet is so kind to provide, but stumbling upon the thread literally by chance, I couldn't let it go un-updated.
My brother Mike and I have been carrying on continuing to work on the classic cars we own, and I hope to update this thread with all our future endeavors with the '65 GTO. Hence, my frequent internet searches about VintageAir!
Not much has changed with the GTO, besides for being our primary trip car. We take a trip every summer with other local classic car enthusiasts. Lately, it has been short, week long trips around NY State, but the GTO did make a Power Tour back in 2014. This summer, the trip we're planning ends up in Colorado, and we've decided it's time to finally make the car truly comfortable for long trips and bite the bullet for AC!
Before I jump into the AC install, which will be occurring over the next couple of months as time allows, I do have a question/recurring issue while on our long trips. While cruising at a constant speed, or while in the same gear for a long stretch (more than 10 mins), the clutch is extremely hard to push. But just for one full press. Any presses after that return to normal stiffness. Regardless of the gear (4th thru 6th), this happens every time.
Thank you guys for all your help throughout the years, and I hope we remember to take enough pictures during the upcoming install!!
Andy, first off my sincerest condolences on your father!
Welcome to LS1Tech! Both you and your brother! It will be good to see continued reports on this cool car.
I haven't read thru the thread, so if you could refresh us on the clutch setup it would be really nice.
Linkage, cable, or hydraulic?
Andy, first off my sincerest condolences on your father!
Welcome to LS1Tech! Both you and your brother! It will be good to see continued reports on this cool car.
I haven't read thru the thread, so if you could refresh us on the clutch setup it would be really nice.
Linkage, cable, or hydraulic?
Here's a quick snap of what clutch components we have. It is the hydraulic set-up from the '04 GTO.
Used an F-Body clutch slave, couldn't find a GTO part and the Camaro one was $30 cheaper!! Just had to change the GTO's hydraulic fitting to the Camaro slave.
Camaro clutch master cylinder, I had to change the fitting on the clutch slave back to the Camaro fitting so I could use the Camaro hydraulic hose. (taken from the build thread)
Welp, the time finally came. After acquiring the proper kit from VintageAir (super helpful guys, were able to customize a kit to work with the body of the '65 GTO and the LS1 engine seamlessly), we decided to take a Saturday and tackle the majority of the installation!
Before the major disassembly
We decided to tackle it systematically, starting with removing the air intake, cooling fans, and draining the coolant from the radiator. Next, we installed the condenser under the top core support, as shown below (you can just see it peaking out under the core support)
After much deliberation and consideration between removing the hood/fender etc, or just attempting to remove the inner fender, we decided to try and remove the inner fender only. Boy, what a challenge that became. After locating and removing all the bolts holding it in place, we also had to loosen the lower fender mounts, remove the chrome side trim, and massage/finesse it out of place. All of three hours work to finally achieve this: In progress Finally free
Thankfully, we were able to maneuver it enough to get access to the bolts holding the heater core and blower motor in place. You can see how much clearance we obtained All the old stuff removed!
Next, we systematically started installing the various block off plates provided by the kit. First plate in place
Then, it was time to tackle some bench assembly of the unit itself. Hoses all attached and ready to go
Continued removal of the old ducts, including the defrost vents, and control system (which will be re-utilized)
Now for an even more aggravating part than the inner fender removal. With all the hoses attached, the unit has to be mounted while simultaneously feeding the hoses through two different panels. One inside the car where the fresh air intake used to be (passenger side footwell), and another under the hood, through a plate that fills the hole where the blower motor was. Hoses fed through passenger kick panel Where the blower motor used to be under the fender All tucked away under the dash!
Our final goal for the work day was to be able to tuck the inner fender into its home! Along with that, we finished installing the block off plates, and buttoned the fender back into place. Upper block off plate in place Inner fender re-attached
That was enough for our work day! 10 hours in the garage, and feeling super accomplished, we put the rest off for another weekend.
Left to do: Install compressor and belt, connect all hoses, all wiring, under dash ducts, re-configure fuse box/computer mounting locations, drive in total comfort!


 04-19-2013, 07:17 PM