
89 Trans Am GTA LS1 t56 swap


 03-29-2011, 11:35 AM
#42
I don't know what you mean by a body swap, they are both unibody cars and it's easy enough to bolt everything together with the swap mounts and a transmission crossmember. Other than that the wiring takes a little time to work out but it's not hard if you are familiar with wiring.
03-29-2011, 08:28 PM
#43
As for FedEx, you can give them a call and let them know that it wasnt received by you. Although you didnt take out any extra insurance, they still cover packages up to a certain value, just give them a call, all they can do is tell you to take a hike.
The body swap I was referring to wouldve been to swap the 89's body onto the later models frame.
The body swap I was referring to wouldve been to swap the 89's body onto the later models frame.
05-13-2011, 05:52 PM
#44
Been pretty busy with other stuff lately but did some work to the GTA finally.
Put my clutch and flywheel on
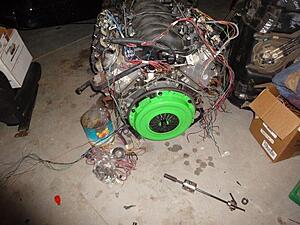
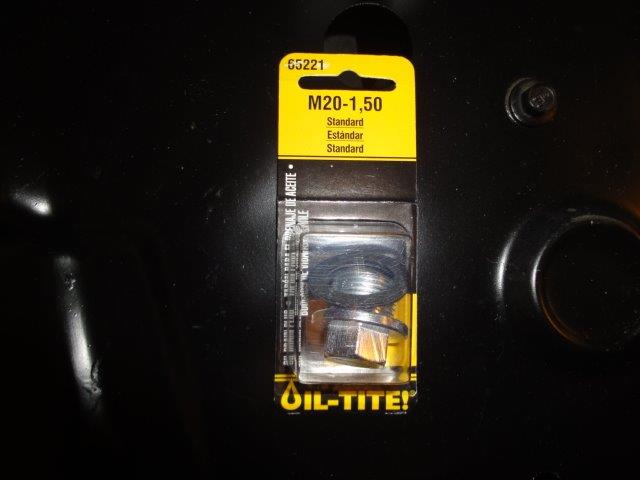
Replacing my skip shift solenoid with a plug. A Subaru oil plug is the same thread but a bit short, not enough length for the crush washer so I'm just going to silicone it
Got the clutch master in
Notched the k-member to clear the compressor
Decided to try solid motor mounts so I ordered a set of those
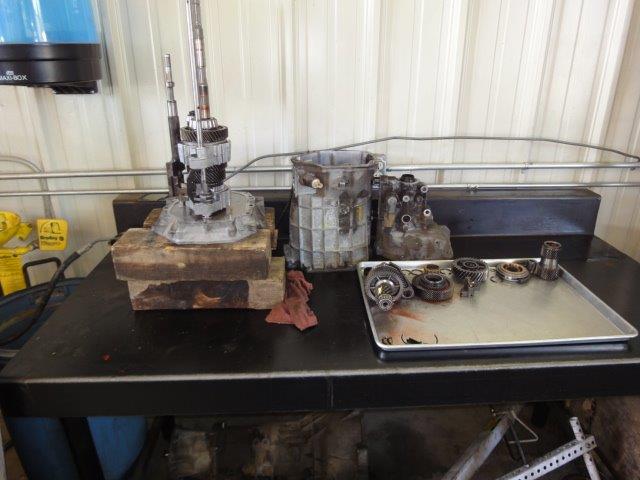
The t56 in my 01 TA was shifting hard so I decided to put the one that was originally going into the 89 into the 01 and was going to rebuild that one to go in the 89. Well when I got it out of the 01 the pilot bearing had made nice grooves in the input shaft. Luckily I had a core laying around that was going to go in my 67. The guy I got it from said it needed 2nd gear. Tore it down yesterday, the blocker rings and keys in the 3-4 syncro are done but the rest looks pretty good. I ordered a level 2 rebuild kit from tickshift.com.

Put my clutch and flywheel on

Replacing my skip shift solenoid with a plug. A Subaru oil plug is the same thread but a bit short, not enough length for the crush washer so I'm just going to silicone it
Got the clutch master in
Notched the k-member to clear the compressor
Decided to try solid motor mounts so I ordered a set of those

The t56 in my 01 TA was shifting hard so I decided to put the one that was originally going into the 89 into the 01 and was going to rebuild that one to go in the 89. Well when I got it out of the 01 the pilot bearing had made nice grooves in the input shaft. Luckily I had a core laying around that was going to go in my 67. The guy I got it from said it needed 2nd gear. Tore it down yesterday, the blocker rings and keys in the 3-4 syncro are done but the rest looks pretty good. I ordered a level 2 rebuild kit from tickshift.com.
Last edited by t_raven; 07-31-2017 at 08:58 AM.
05-19-2011, 03:18 PM
#45
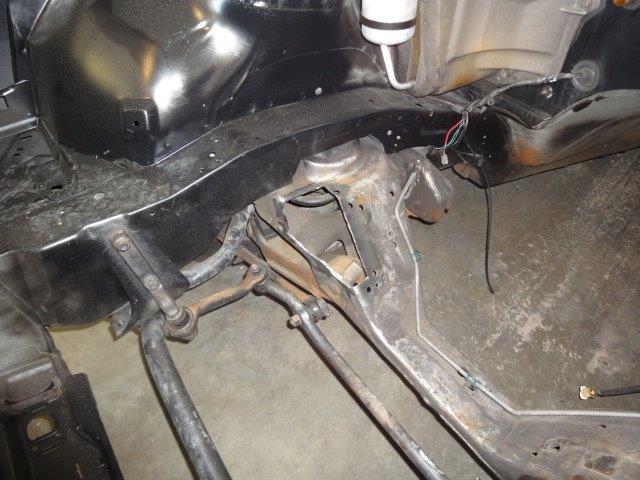
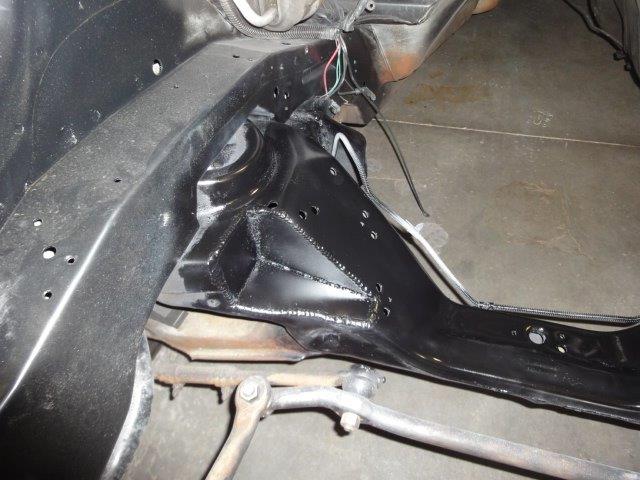
Got my hole boxed in and painted the K member
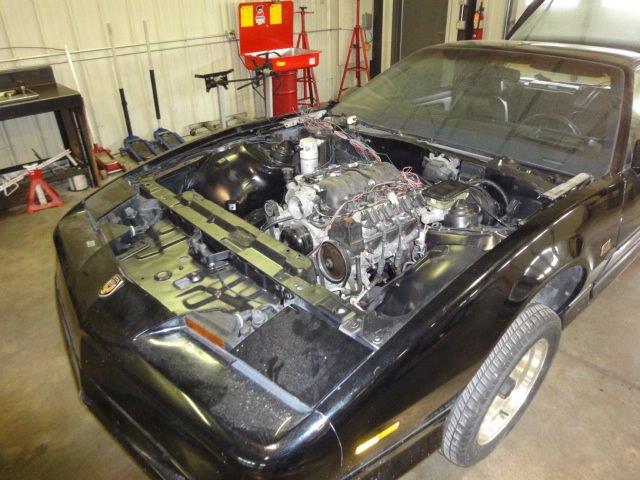
Set the engine in. Left all the mount bolts loose so I could get it in place

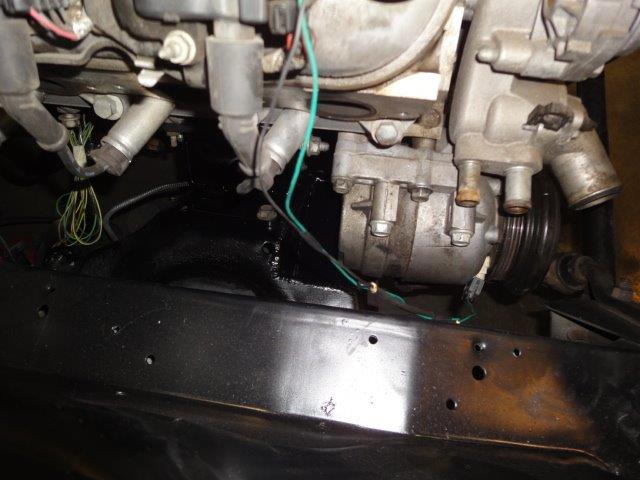
Plenty of clearance on the back and side of the compressor, gottal get the block I need to screw some hoses onto

The bottom of the compressor is pretty close to the K member, I should've got a little lower there but should be fine with the solid mounts
The rear coil on the passenger side won't clear the evap case so I'll see if I can make it fit, if not I'll relocate the coil somewhere.
Set the engine in. Left all the mount bolts loose so I could get it in place
Plenty of clearance on the back and side of the compressor, gottal get the block I need to screw some hoses onto
The bottom of the compressor is pretty close to the K member, I should've got a little lower there but should be fine with the solid mounts
The rear coil on the passenger side won't clear the evap case so I'll see if I can make it fit, if not I'll relocate the coil somewhere.

Last edited by t_raven; 07-31-2017 at 08:59 AM.
 05-20-2011, 08:40 PM
#48

Hoses match the rad used. 4th gen for 4th gen rads, mix and match for 3rd gen rad. Remember the 3rd gen V8 (90-92 V6 too) rads are the biggest. LT1 and LS1 rads are smaller but have a few small features like mount tabs for fans and steam ports that 3rd gens wont have
06-10-2011, 07:51 PM
#49
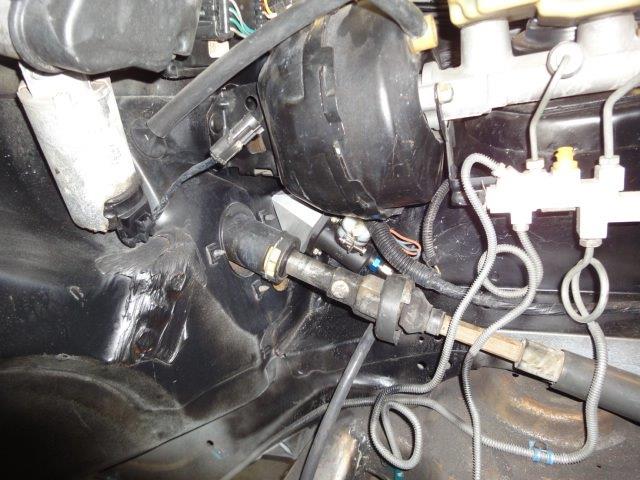
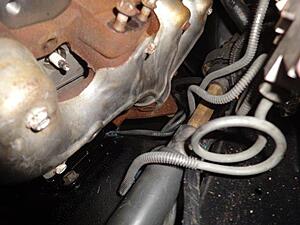
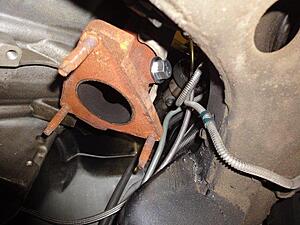
Ran into another little issue. The driver's O2 sensor doesn't clear so I'll have to plug the hole in the manifold and move the sensor to the pipe.
Mostly been working on the harness lately. Finally got it all wired up. I used the relay block from the doner that has the fan relays. this way I can have 2 speed fans like the 00 had. I used the other 2 relays for the fuel pump and a/c compressor. There were enough fuses in the block to have all that I needed and a couple spare. I'm going to use the cruise module from the 00 so that connector is wired into the harness. Everything under the hood is done as far as the harness goes. I have a couple pig tails that will have to be wired inside the cab to go to the pedals, ac control, MIL and diagnostic port.
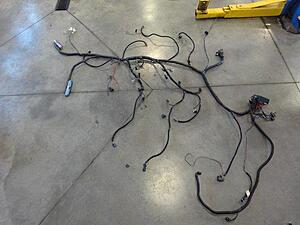
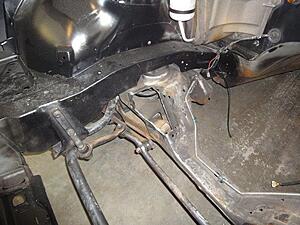
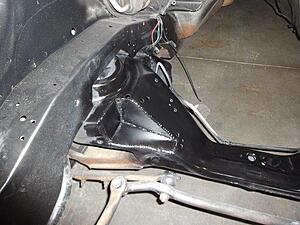
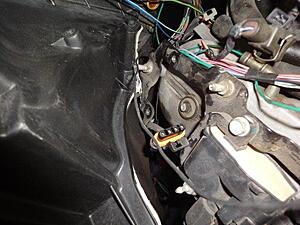
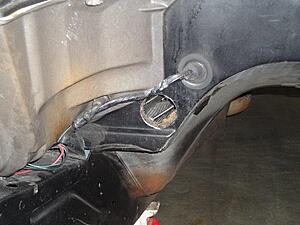
Decided to put the PCM where the original one was so I cut this hole in the firewall and made the harness long enough to reach the PCM.

Mostly been working on the harness lately. Finally got it all wired up. I used the relay block from the doner that has the fan relays. this way I can have 2 speed fans like the 00 had. I used the other 2 relays for the fuel pump and a/c compressor. There were enough fuses in the block to have all that I needed and a couple spare. I'm going to use the cruise module from the 00 so that connector is wired into the harness. Everything under the hood is done as far as the harness goes. I have a couple pig tails that will have to be wired inside the cab to go to the pedals, ac control, MIL and diagnostic port.

Decided to put the PCM where the original one was so I cut this hole in the firewall and made the harness long enough to reach the PCM.

Last edited by t_raven; 07-31-2017 at 09:00 AM.
06-10-2011, 08:03 PM
#50
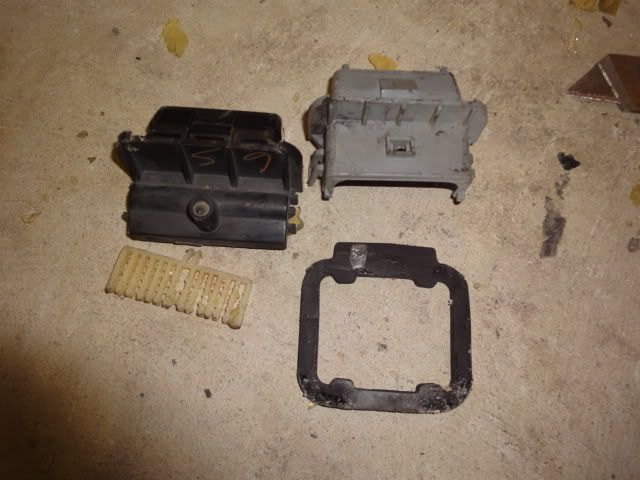
This is the gromet for where the harness passes into the passenger foot well. I've seen guys cut the wires on both sides but I decided to take it apart and remove all the wires before I started cutting anything. It's full of like a hard glue but it all broke apart pretty easy. I'm hoping I can mount my PCM where the orignal ECU was and reuse this gromet on the new harness.
here is mine
06-11-2011, 07:18 AM
#51
Mine is similar what did you brake it up with? and what do you plan on filling it back up with so it doesn't leak?
When using the 2" hole like he is, dont bother splitting the grommet open, just use it as a plug for the bundle of wires

 06-12-2011, 03:56 PM
#55
I haven't yet and there have been mixed reviews online so I figured I'd try them out. Most people switch to poly mounts where available but they don't give much so solid can't be too much worse. Plus in a manual transmission car there is no load on the engine sitting at a stop so I'd expect solid mounts to transfer more vibration in an automatic car. If I hate them I'll put a rubber one back on the passenger side. If I like that I'll use the left over solid mount on the driver's side of my 01 TA. Guys have been doing the one solid/one rubber thing with older Pontiacs since no one makes poly mounts for Pontiac engines.
 06-14-2011, 08:28 PM
#59
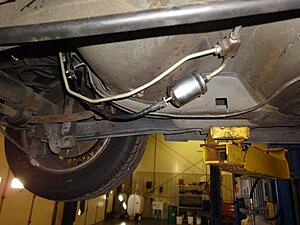
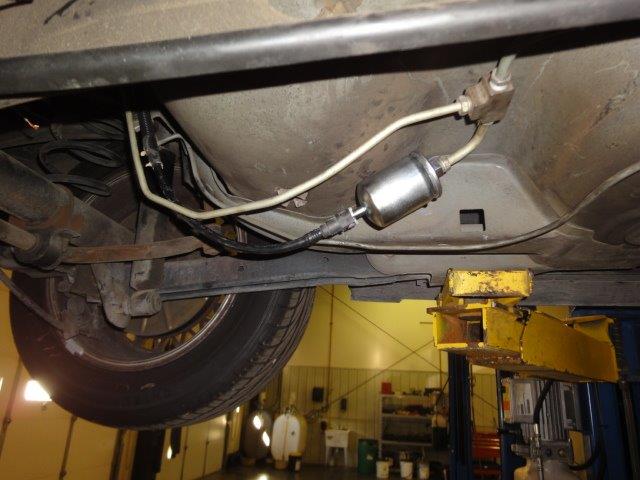
put the 4th gen tank in yesterday. I didn't modify anything, didn't even take off the EVAP canister. From what I've read it should vent fine through the canister where I won't be using the EVAP, the vent valve just stays open. We'll see how it works out. I used the lines from the 4th that go to the filter and a 4th gen filter. The 3rd gen line screwed right into the T from the 4th gen. I'll need an adaptor to hook the fuel line to the fuel rail. The filter needs to be secured still, not sure where I put the bracket.
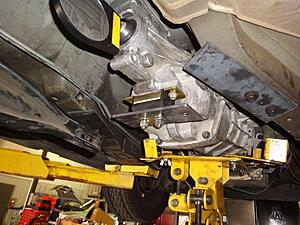
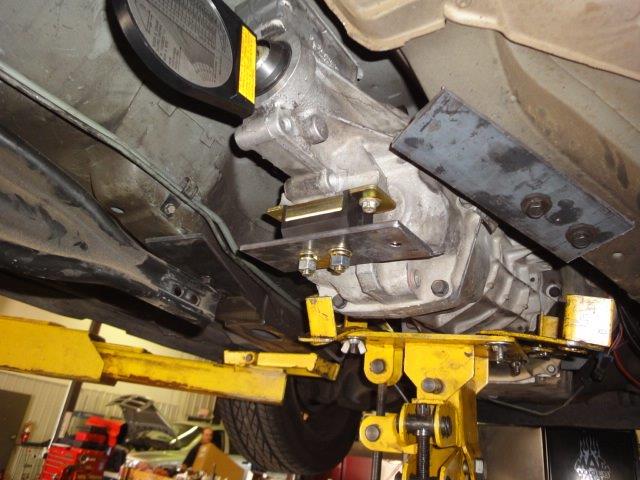
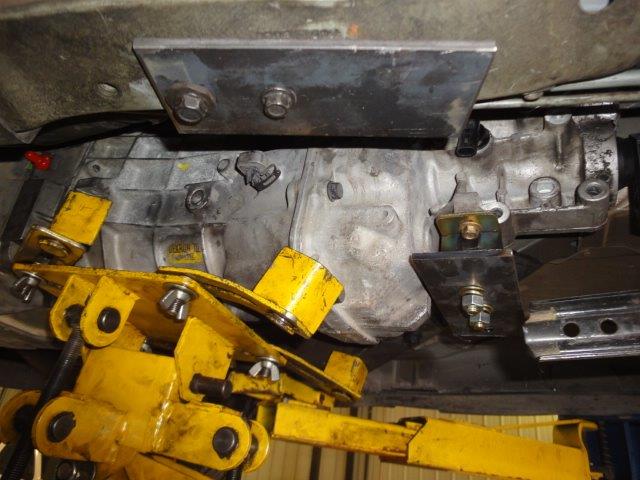
Bolted my transmission up and started fabbing a crossmember

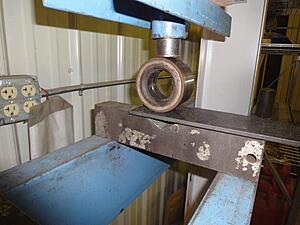
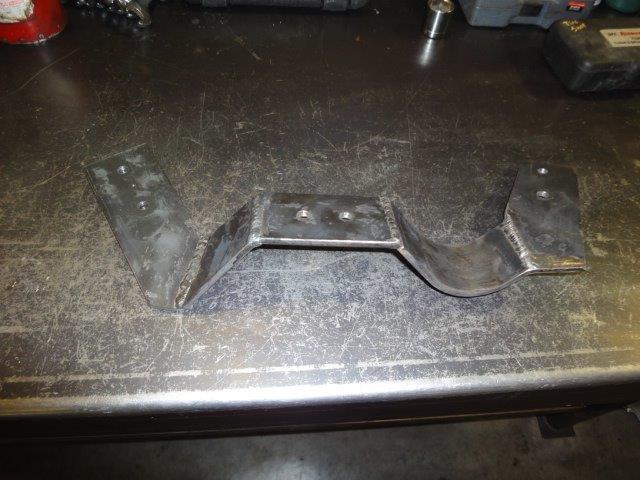
Used an old bearing in the press to curve a pieces
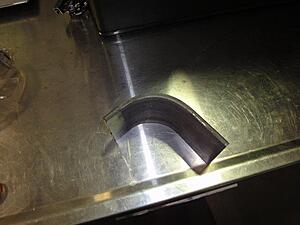
Here it is all welded up
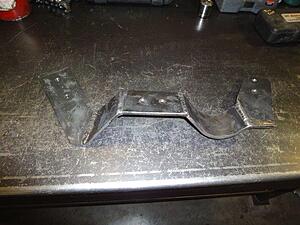
Right side up, the curved piece is for exhaust clearance
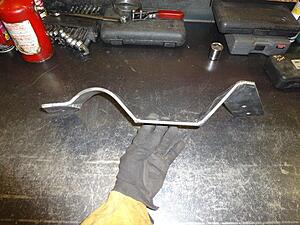
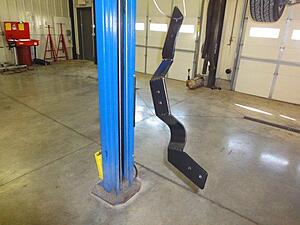
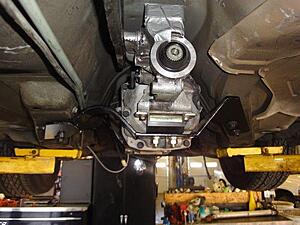
And here it is danglin with some paint on it. Cost me $15 and about 2 hrs of time. Alot better than $150 for the ones out there that everyone says don't give any exhaust clearance anyway.
Bolted my transmission up and started fabbing a crossmember
Used an old bearing in the press to curve a pieces


Here it is all welded up
Right side up, the curved piece is for exhaust clearance

And here it is danglin with some paint on it. Cost me $15 and about 2 hrs of time. Alot better than $150 for the ones out there that everyone says don't give any exhaust clearance anyway.

Last edited by t_raven; 07-31-2017 at 09:00 AM.
06-18-2011, 01:39 AM
#60
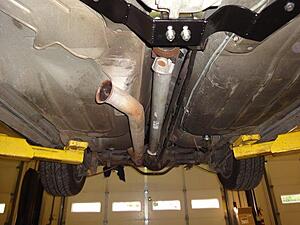
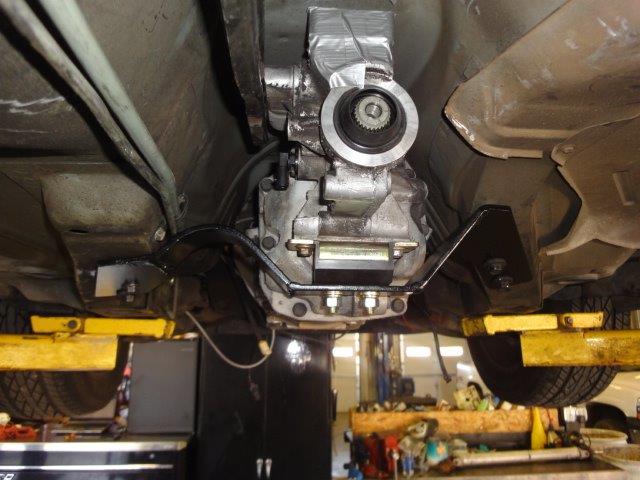
Trans crossmember bolted up. When I built it I put an extra piece of the 1/4 inch strap under the trans mount to leave the xmember a little low so I have some room for adjustment if I need it. Better too low and shim it than too high and needing to modify it.
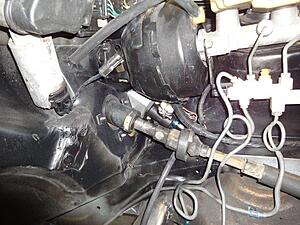
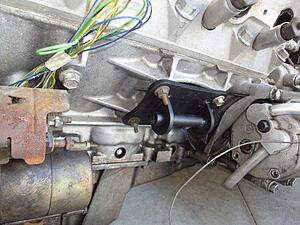
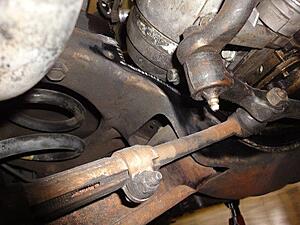
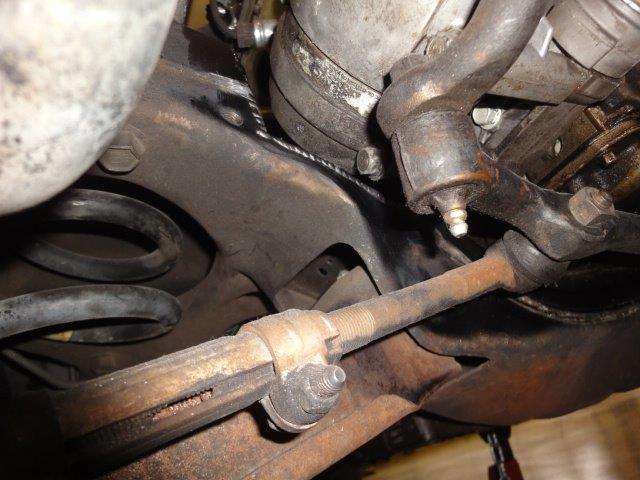
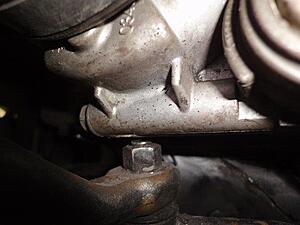
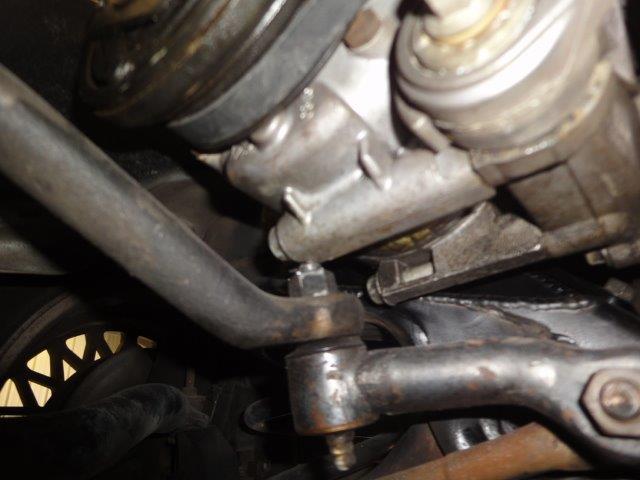
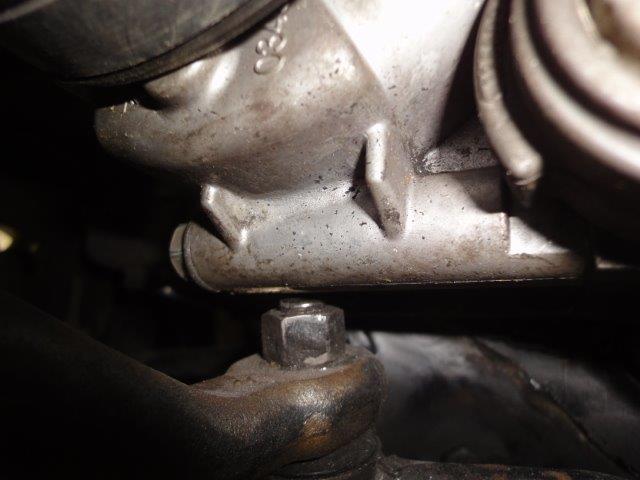
The center link joint on the idler was hitting my compressor

I loosened the idler bolts and slid it down as far as it would go and trimmed the stud a little. It clears now but if I need to raise the trans at all it may tip the engine down enough to be hitting the joint again, we'll see.
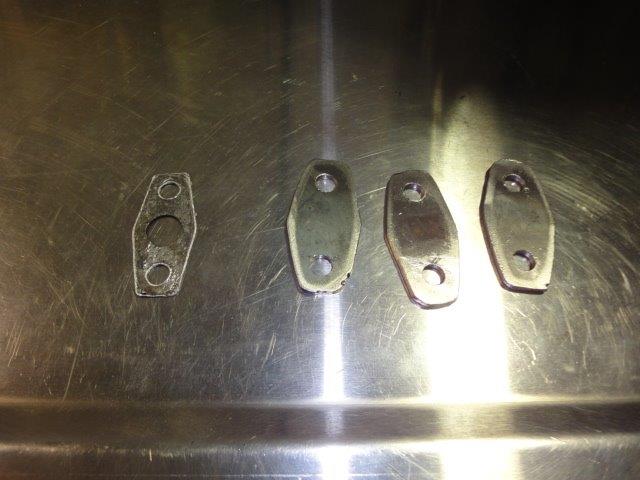
I made some block off plates for the AIR and EGR ports on the manifold. I made the mistake of assuming they were all the same. I used one of the AIR gaskets for a template and made three the same size. The EGR port is bigger. Rather than make a new one I oblonged the holes and it worked but it's a hair narrow.

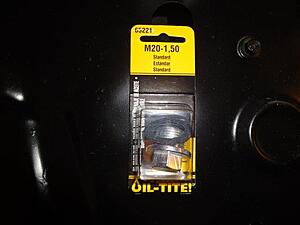
I plugged the O2 hole in the driver's manifold because there isn't room for the sensor. I used an 18 mm oil plug. I also used 20 mm oil plugs to replace the skip shift solenoid and the oil level sensor in the pan.
Put the 4th gen drive shaft in
I'm putting the battery on the passenger side so I put the 4th gen battery cables in. Then I started cutting a hole for the shifter but I'll finish that tomorrow.
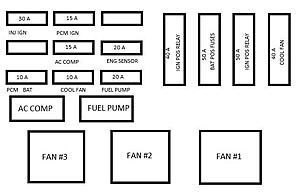
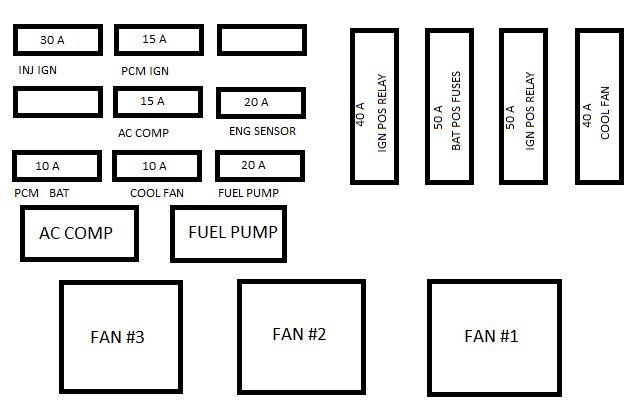
I made this legend for my fuse box. I'm gonna see if the sticker joint in the mall can make a sticker like the original labeled how I have my little drawing
It's getting pretty close. Things left to do:
radiator and heater hoses
AC lines
y pipe
intake pipe
mount PCM
a little wiring in the cab, pedals, ALDL, MIL etc.
Throttle and cruise cables (donor had TCS so the cables are too long)
Plug EGR hole in manifold. My coworker has a lathe so he wants to machine me a nice plug for it
That's about it then I have to figure out how to tune out the VATS so it'll start but I do have HPtuners
I got a call this morning about a job in Kuwait. It's short notice, I'd have to go to Mississippi for training on the 27th. I'm gonna go so I'm hoping to pretty much wrap the car up by then, but I have to put all my stuff in storage so it's going to be a busy week.
The center link joint on the idler was hitting my compressor
I loosened the idler bolts and slid it down as far as it would go and trimmed the stud a little. It clears now but if I need to raise the trans at all it may tip the engine down enough to be hitting the joint again, we'll see.
I made some block off plates for the AIR and EGR ports on the manifold. I made the mistake of assuming they were all the same. I used one of the AIR gaskets for a template and made three the same size. The EGR port is bigger. Rather than make a new one I oblonged the holes and it worked but it's a hair narrow.
I plugged the O2 hole in the driver's manifold because there isn't room for the sensor. I used an 18 mm oil plug. I also used 20 mm oil plugs to replace the skip shift solenoid and the oil level sensor in the pan.

Put the 4th gen drive shaft in

I'm putting the battery on the passenger side so I put the 4th gen battery cables in. Then I started cutting a hole for the shifter but I'll finish that tomorrow.
I made this legend for my fuse box. I'm gonna see if the sticker joint in the mall can make a sticker like the original labeled how I have my little drawing
It's getting pretty close. Things left to do:
radiator and heater hoses
AC lines
y pipe
intake pipe
mount PCM
a little wiring in the cab, pedals, ALDL, MIL etc.
Throttle and cruise cables (donor had TCS so the cables are too long)
Plug EGR hole in manifold. My coworker has a lathe so he wants to machine me a nice plug for it
That's about it then I have to figure out how to tune out the VATS so it'll start but I do have HPtuners
I got a call this morning about a job in Kuwait. It's short notice, I'd have to go to Mississippi for training on the 27th. I'm gonna go so I'm hoping to pretty much wrap the car up by then, but I have to put all my stuff in storage so it's going to be a busy week.
Last edited by t_raven; 07-31-2017 at 09:02 AM.