
89 Trans Am GTA LS1 t56 swap
 06-18-2011, 08:14 PM
#61
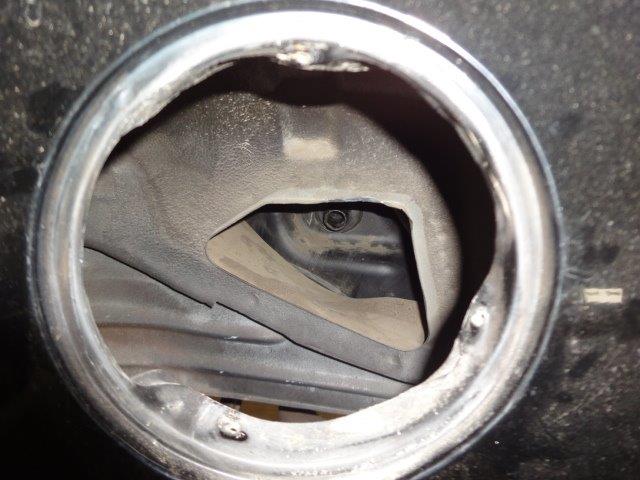
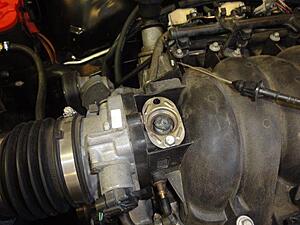
Installed my filler neck

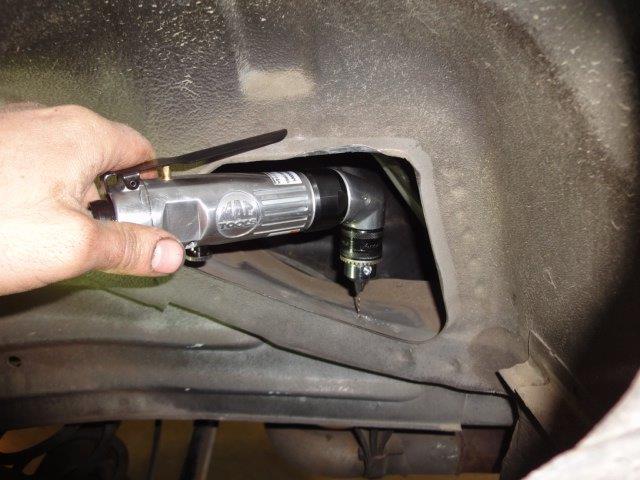
Stuck the 4th gen neck in and marked the hole. My right angle drill made drilling a pilot hole pretty easy. Then I drilled it to the right size from the bottom.
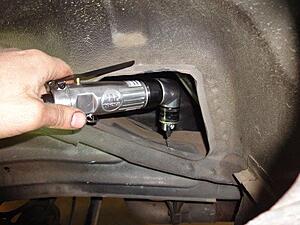
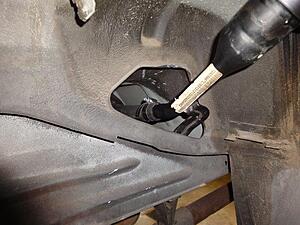
And here it is installed. Used 1" hose
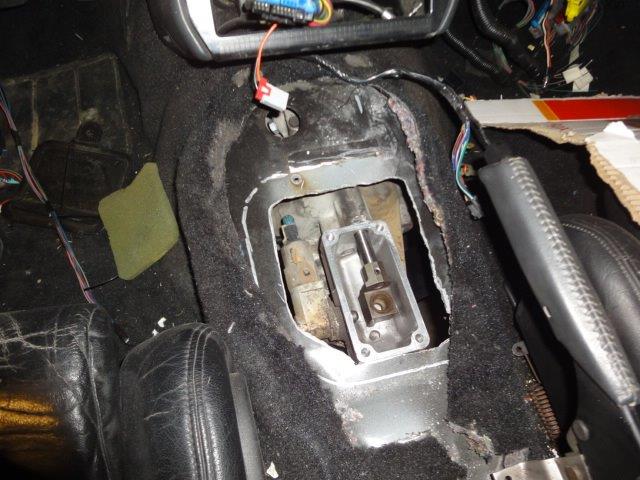
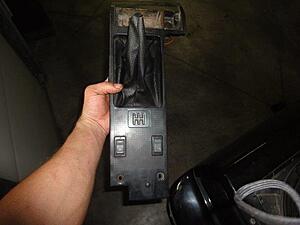
Cut a hole for the shifter. I started with a cut off wheel but the sparks kept starting the carpet insulation on fire lol. So I busted out the plasma cutter. Quicker and blew most of the sparkes down instead of all over the interior

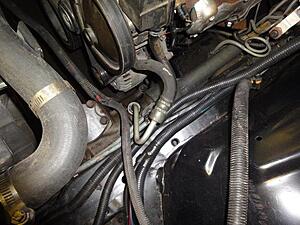
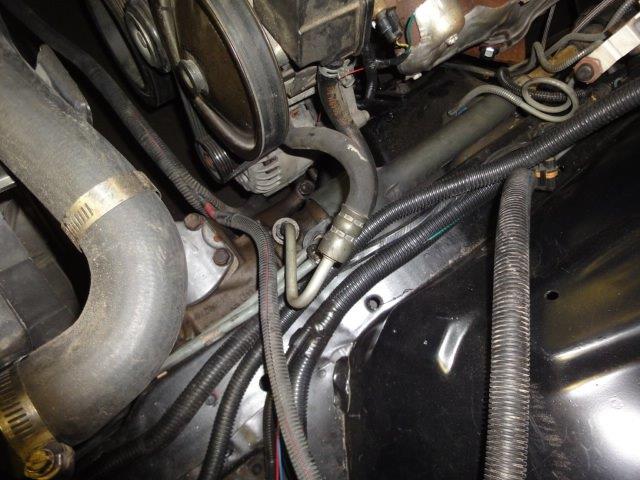
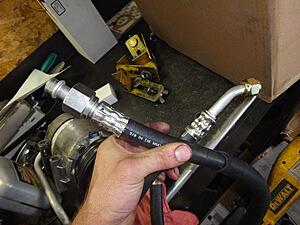
PS lines, I used the 3rd gen return line and the 4th gen supply line. I didn't think the supply line was going to work but with a little bending I made it work
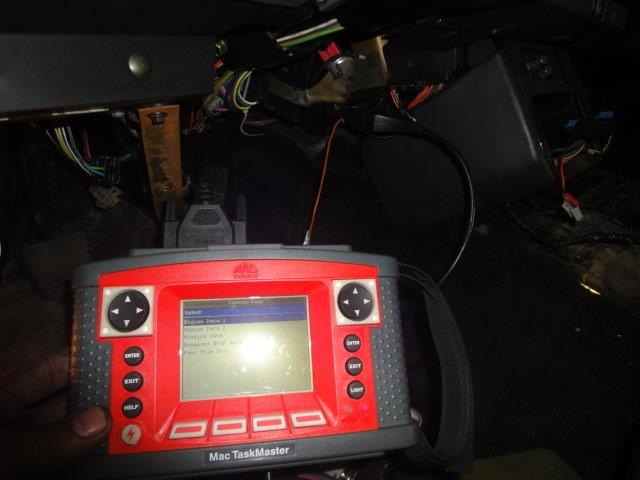
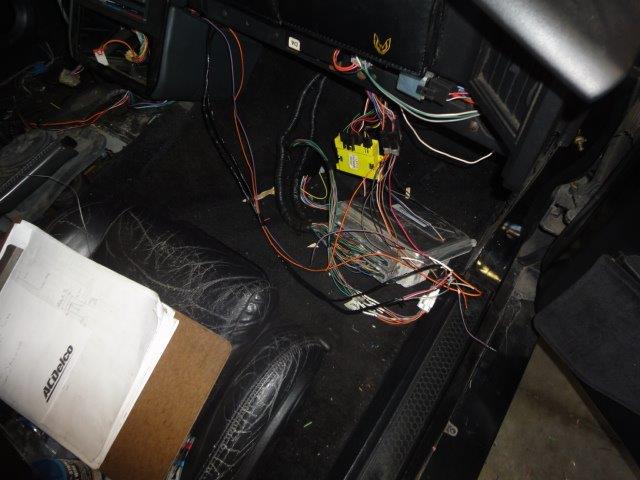
I ran out of shrink tube so I didn't get to finish the interior wiring yet but I temporarily wired up the ALDL and connected the battery. Nothing went up in smoke lol, and I have scan tool communication.

I'm going to bypass the pass key system entirely. I cut the green wire going from the start enable relay to the pass key module. I will use the clutch switch to ground the relay rather than the module. The original shifter switch completes the circuit from the relay to the starter solenoid. Personally I think it was dumb to run such big wires from the ignition switch to a relay, to the shifter, then to the starter rather than using those switches to control a relay. I'll solder the two wires together at the shifter and my neutral safety function will be handled by the clutch switch grounding the start enable relay.

I plan to make a better fuel line later on but for now I'm going to use a barbed fitting to connect the two so I can at least start it before heading off to Kuwait.
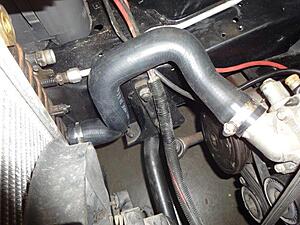
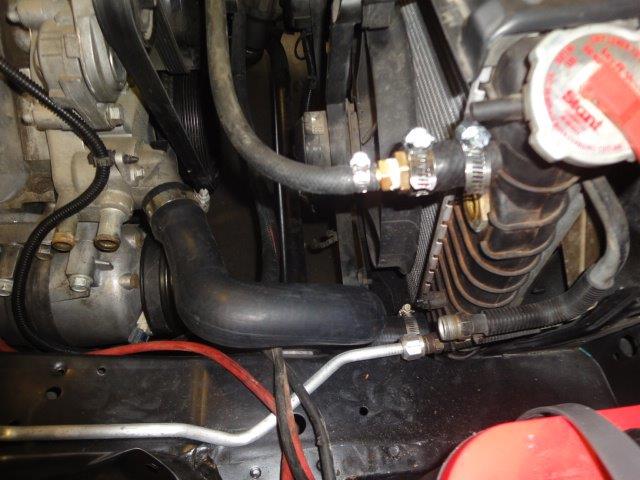
I installed the 4th gen upper radiator hose but I couldn't make the lower fit with the 3rd gen radiator, though some guys say they have. I picked up a Gates 21505 which other guys have said works so I'll try that on monday.
Don't need much to start it now. I need to connect the hoses, add fluids and tune out the VATS. I'll build a y pipe but we have a bender at the shop so that won't be too tough. I wanted to buy some mandrel bends to fab one out of but don't have the time to wait for shipping
Stuck the 4th gen neck in and marked the hole. My right angle drill made drilling a pilot hole pretty easy. Then I drilled it to the right size from the bottom.
And here it is installed. Used 1" hose

Cut a hole for the shifter. I started with a cut off wheel but the sparks kept starting the carpet insulation on fire lol. So I busted out the plasma cutter. Quicker and blew most of the sparkes down instead of all over the interior
PS lines, I used the 3rd gen return line and the 4th gen supply line. I didn't think the supply line was going to work but with a little bending I made it work
I ran out of shrink tube so I didn't get to finish the interior wiring yet but I temporarily wired up the ALDL and connected the battery. Nothing went up in smoke lol, and I have scan tool communication.
I'm going to bypass the pass key system entirely. I cut the green wire going from the start enable relay to the pass key module. I will use the clutch switch to ground the relay rather than the module. The original shifter switch completes the circuit from the relay to the starter solenoid. Personally I think it was dumb to run such big wires from the ignition switch to a relay, to the shifter, then to the starter rather than using those switches to control a relay. I'll solder the two wires together at the shifter and my neutral safety function will be handled by the clutch switch grounding the start enable relay.
I plan to make a better fuel line later on but for now I'm going to use a barbed fitting to connect the two so I can at least start it before heading off to Kuwait.

I installed the 4th gen upper radiator hose but I couldn't make the lower fit with the 3rd gen radiator, though some guys say they have. I picked up a Gates 21505 which other guys have said works so I'll try that on monday.
Don't need much to start it now. I need to connect the hoses, add fluids and tune out the VATS. I'll build a y pipe but we have a bender at the shop so that won't be too tough. I wanted to buy some mandrel bends to fab one out of but don't have the time to wait for shipping
Last edited by t_raven; 07-31-2017 at 09:02 AM.
 06-22-2011, 02:09 PM
#62
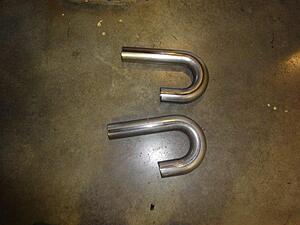
Quite a few guys on thirdgen.org are using a Gates 21505 for a lower radiator hose so I picked one up. It's for some early 90s F250. Got it back to the shop and it was too big so I got back on tgo and most guys were saying they just clamped the crap out of it. Well that just won't do for T Raven so I spent about 10 mins in the back of Oreilly and found this MasterPro 21736. It's the right diameter and the way it's shaped it clears the idler arm nicely.
(Edit: this hose is listed for a 94 Explorer with 4.0 and manual trans)
Here it is from the other side. I also used a barbed fitting and a small piece of heater hose to connect the steam vent line to the heater hose line on the radiator. I don't love how it looks but it got the job done for now any way.

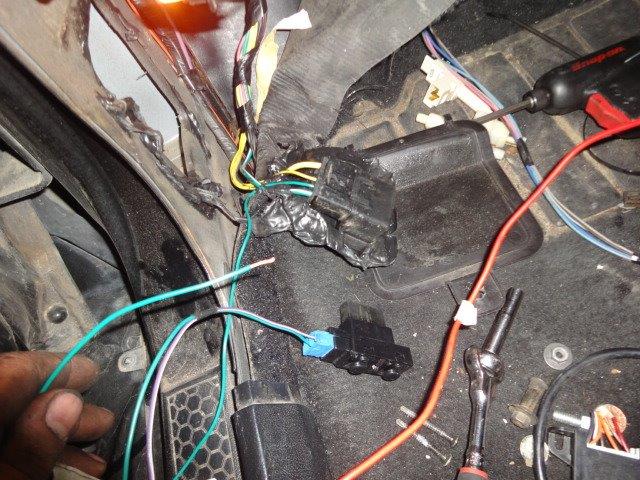
Finished up the rest of my PCM wiring. The check engine light and diagnostic port are now wired up and working properly.
Pedal switches in and most of the way wired up. I haven't yet wired the cruise control to the switches

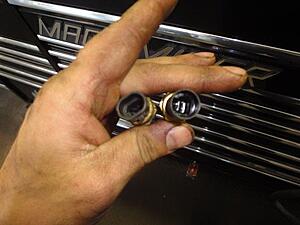
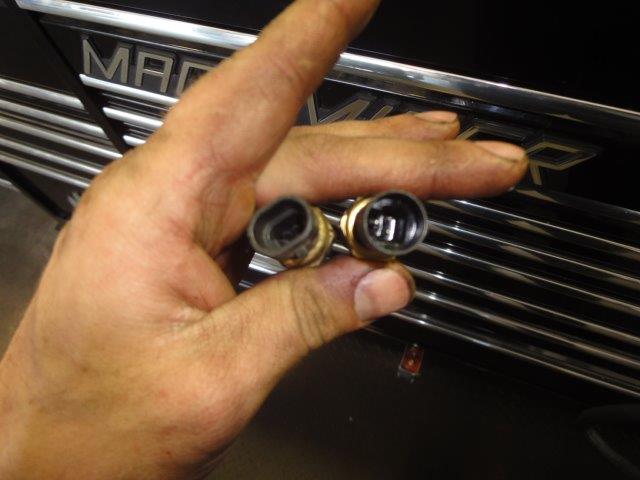
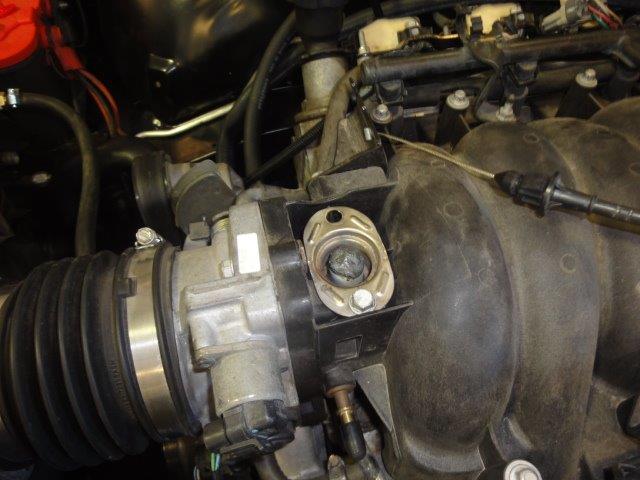
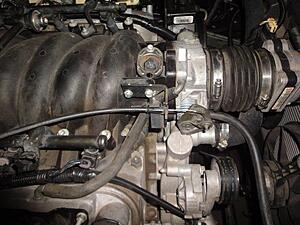
The 99-02 F Bodies have a 2 wire coolant senseor for the PCM and the PCM controls the gauges. I needed a way to control the 89 temp gauge and after some reading figured out the 98 Firebirds use a three wire sensor, 2 for the PCM and 1 for the gauge. It was hard to track down and I had to wait a week to get one. According to the guy my service manager ordered it from the 98 Camaro had the 2 wire sensor, I don't know if that's true or not though. But if you're ever looking for one look it up as a 98 Firebird with a 5.7, part number is 12551708. The V6 had a 3 wire sensor but it is too big for the hole in the LS1 head.
(Edit: this hose is listed for a 94 Explorer with 4.0 and manual trans)

Here it is from the other side. I also used a barbed fitting and a small piece of heater hose to connect the steam vent line to the heater hose line on the radiator. I don't love how it looks but it got the job done for now any way.
Finished up the rest of my PCM wiring. The check engine light and diagnostic port are now wired up and working properly.
Pedal switches in and most of the way wired up. I haven't yet wired the cruise control to the switches

The 99-02 F Bodies have a 2 wire coolant senseor for the PCM and the PCM controls the gauges. I needed a way to control the 89 temp gauge and after some reading figured out the 98 Firebirds use a three wire sensor, 2 for the PCM and 1 for the gauge. It was hard to track down and I had to wait a week to get one. According to the guy my service manager ordered it from the 98 Camaro had the 2 wire sensor, I don't know if that's true or not though. But if you're ever looking for one look it up as a 98 Firebird with a 5.7, part number is 12551708. The V6 had a 3 wire sensor but it is too big for the hole in the LS1 head.
Last edited by t_raven; 07-31-2017 at 09:04 AM.
06-22-2011, 04:34 PM
#63
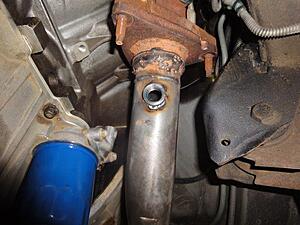
Cut the end off my EGR tube and welded it shut. It'll do until my coworker mills me a nice plug or I get an LS6 intake
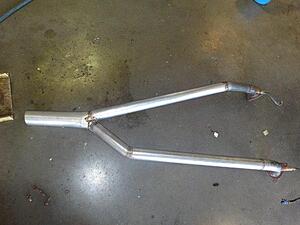
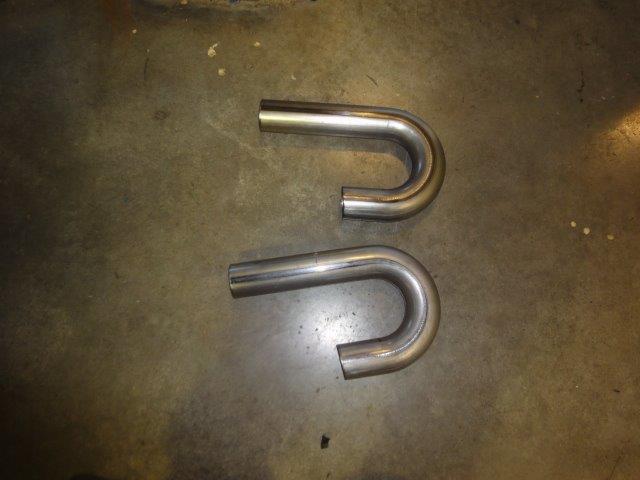
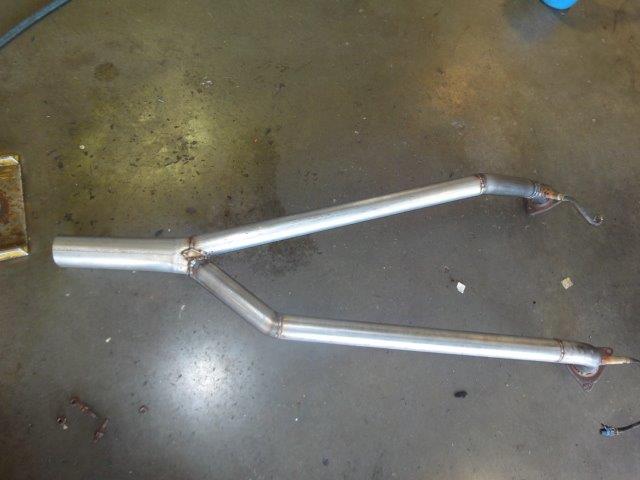
Thought about making a y pipe out of 2 1/2 inch pipe but the flanges from the manafolds are only 2 1/4" and I was able to get a couple 2 1/4" bends here in town for $10 each so I decided to just go with that for now. I'd like to turbo this at some point anyway so if I ever do, or get headers this y pipe won't be permanent.
Welded an O2 bung in the driver's side pipe
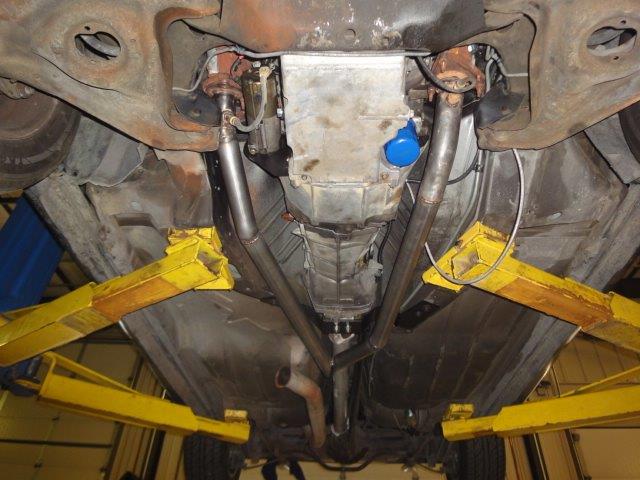
Here it is mostly done
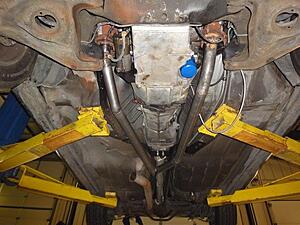
And all done and fully welded
Turned off the vats and started it this morning. Just figured out how to turn off all the codes for the emissions equipment I removed so I did that. Now that I've got it figured out. It only took a minute to turn off the skip shift in my 01, so no more of that annoying nonsense.
Thought about making a y pipe out of 2 1/2 inch pipe but the flanges from the manafolds are only 2 1/4" and I was able to get a couple 2 1/4" bends here in town for $10 each so I decided to just go with that for now. I'd like to turbo this at some point anyway so if I ever do, or get headers this y pipe won't be permanent.
Welded an O2 bung in the driver's side pipe

Here it is mostly done
And all done and fully welded
Turned off the vats and started it this morning. Just figured out how to turn off all the codes for the emissions equipment I removed so I did that. Now that I've got it figured out. It only took a minute to turn off the skip shift in my 01, so no more of that annoying nonsense.
Last edited by t_raven; 07-31-2017 at 09:05 AM.
06-25-2011, 12:33 AM
#64
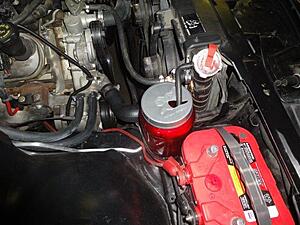
I've been pretty busy at work this week, but I did get a couple little things handled so I could actually drive it. Made a custom over flow bottle. It's temporary of course lol. I want to fab up a nice little aluminum tank, the original plastic one is a huge eye sore.
Because of the throttle cable set up on the donor do to the TCS none of the cables would work. The cables from the pedal and the cruise servo both went to a throttle control motor and then a cable from there went to the throttle body, but I managed to make the one from the pedal work by making a new bracket for it. I'll probably buy a braided lokar one or something later on. The cruise cable however not only has the wrong end but is way long. I'll see if I can swap cables, if not I'll be looking for a non TCS cruise control unit. But here's the little bracket I made for the time being
Still gotta make some AC lines but I made the dang pig tail for the pressure switch too short. But hey, after all that wiring I did pretty good if that's the only thing I have to change.
Gonna wrap things up inside and get it all put back together. I've got a 5 speed shifter plate I'll put in for now, but I'll probably switch to the 4th gen console later.
I drove it around the block yesterday. It runs fine, and the vibration with the solid mounts is pretty minimal. It does vibrate quite a bit when engaging the clutch from a stop but I'm thinking it's more because the clutch is chattering, which is a bit annoying with a brand new clutch and flywheel. Maybe it'll quit after a bit of a break in. If not I guess I'll be calling Monster to see what's wrong.

Because of the throttle cable set up on the donor do to the TCS none of the cables would work. The cables from the pedal and the cruise servo both went to a throttle control motor and then a cable from there went to the throttle body, but I managed to make the one from the pedal work by making a new bracket for it. I'll probably buy a braided lokar one or something later on. The cruise cable however not only has the wrong end but is way long. I'll see if I can swap cables, if not I'll be looking for a non TCS cruise control unit. But here's the little bracket I made for the time being
Still gotta make some AC lines but I made the dang pig tail for the pressure switch too short. But hey, after all that wiring I did pretty good if that's the only thing I have to change.

Gonna wrap things up inside and get it all put back together. I've got a 5 speed shifter plate I'll put in for now, but I'll probably switch to the 4th gen console later.

I drove it around the block yesterday. It runs fine, and the vibration with the solid mounts is pretty minimal. It does vibrate quite a bit when engaging the clutch from a stop but I'm thinking it's more because the clutch is chattering, which is a bit annoying with a brand new clutch and flywheel. Maybe it'll quit after a bit of a break in. If not I guess I'll be calling Monster to see what's wrong.
Last edited by t_raven; 07-31-2017 at 09:06 AM.
07-04-2011, 03:24 PM
#66
TECH Fanatic
iTrader: (2)

Join Date: Nov 2007
Location: Newport, RI
Posts: 1,406
Likes: 0
Received 0 Likes
on
0 Posts

Great project! I love GTA's, IMO a LS1 GTA is the best of both worlds.
This makes me miss mine...I had a '88 L98 GTA from '97-00. It was gunmetal grey with the grey interior...gorgeous car! I never saw too many of them in gunmetal, it was usally either white or cranberry that seemed to be the most common.
I got the GTA because I couldn't afford a LT1 car at the time, but I still really loved it. Then I got a LS1 car in '00, but honestly I think the GTA was a better car except for the drivetrain.
07-04-2011, 03:44 PM
#67
Great project! I love GTA's, IMO a LS1 GTA is the best of both worlds.
This makes me miss mine...I had a '88 L98 GTA from '97-00. It was gunmetal grey with the grey interior...gorgeous car! I never saw too many of them in gunmetal, it was usally either white or cranberry that seemed to be the most common.
I got the GTA because I couldn't afford a LT1 car at the time, but I still really loved it. Then I got a LS1 car in '00, but honestly I think the GTA was a better car except for the drivetrain.
This makes me miss mine...I had a '88 L98 GTA from '97-00. It was gunmetal grey with the grey interior...gorgeous car! I never saw too many of them in gunmetal, it was usally either white or cranberry that seemed to be the most common.
I got the GTA because I couldn't afford a LT1 car at the time, but I still really loved it. Then I got a LS1 car in '00, but honestly I think the GTA was a better car except for the drivetrain.
 . my fave 3rd gen. i also have one under construction. with custom accesory drive and sc.
07-15-2011, 11:19 AM
. my fave 3rd gen. i also have one under construction. with custom accesory drive and sc.
07-15-2011, 11:19 AM
#69
Finished up the wiring inside and mounted the PCM where the original ECU was. Made a little bracket that bolts to the bottom of the dash frame and hold it up in there. Decided to use the 4th gen console, I like drink holders lol.
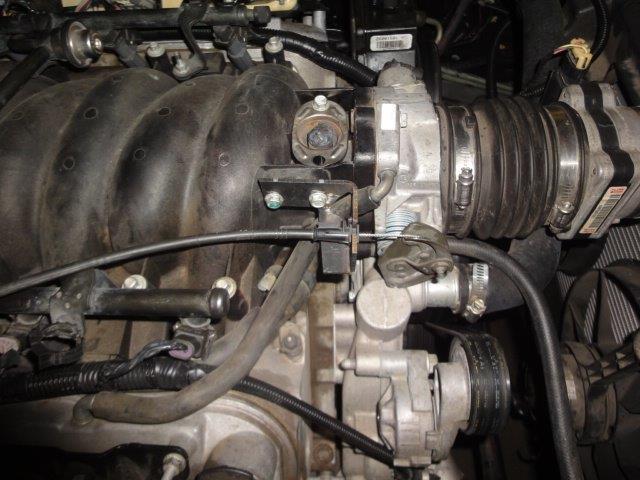
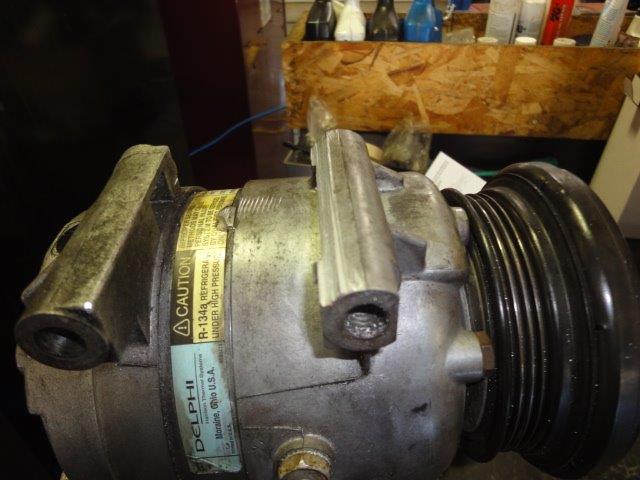
Took my compressor back off to get the lines figured out. Trimmed the housing where I needed more clearance for the idler arm.

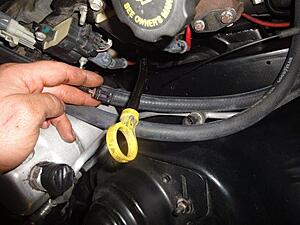
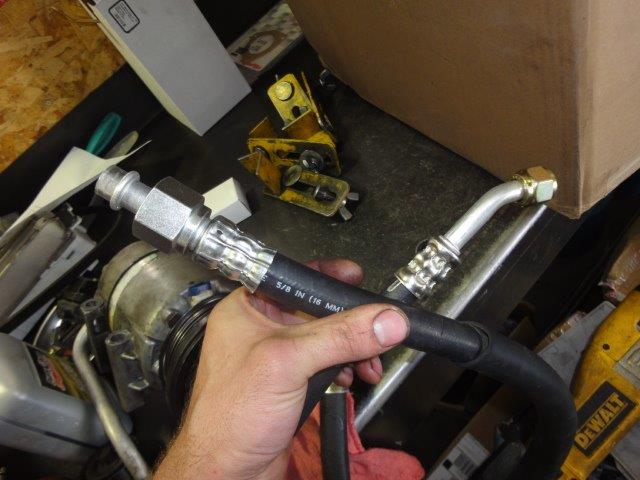
I went to Evco House of Hose and they had the right fittings to make the 4th gen hose assembly work. $10 per fitting and they didn't even charge me to crimp them on. I wanted a 45* on the bigger fitting but they only had a straight one.
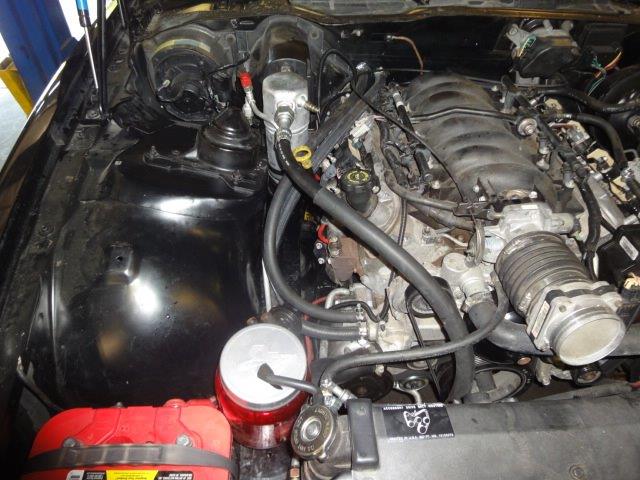
I don't love the routing but at least it works and I have cold air. If I ever do build a turbo set up I'll probably have to re-route the line

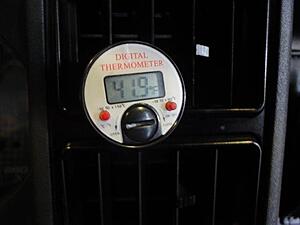
Nice and cold
Just waiting on my pipes and silicone couplers for the intake and it'll be ready to start driving it for now. It sits a little high in the front but not as much as I expected. I'd love to get the lowering spindles I want but I want to change the brakes too so I'd have to get the spindles for newer style calipers, which means I'd have to do brakes at the same time, which means I'd have to put the C6 wheels on, which means I'd have to buy tires etc etc lol. I'll just drive it like this for now


Took my compressor back off to get the lines figured out. Trimmed the housing where I needed more clearance for the idler arm.
I went to Evco House of Hose and they had the right fittings to make the 4th gen hose assembly work. $10 per fitting and they didn't even charge me to crimp them on. I wanted a 45* on the bigger fitting but they only had a straight one.
I don't love the routing but at least it works and I have cold air. If I ever do build a turbo set up I'll probably have to re-route the line
Nice and cold

Just waiting on my pipes and silicone couplers for the intake and it'll be ready to start driving it for now. It sits a little high in the front but not as much as I expected. I'd love to get the lowering spindles I want but I want to change the brakes too so I'd have to get the spindles for newer style calipers, which means I'd have to do brakes at the same time, which means I'd have to put the C6 wheels on, which means I'd have to buy tires etc etc lol. I'll just drive it like this for now
Last edited by t_raven; 07-31-2017 at 09:06 AM.
 07-30-2011, 08:15 PM
#71
And on top of that my dang AC compressor is leaking so I need to replace that. Once I fix those I can start driving this baby while I save for suspension mods.
07-31-2011, 12:34 AM
#73
TECH Addict
iTrader: (3)
Join Date: Feb 2006
Location: limbo
Posts: 2,124
Likes: 0
Received 0 Likes
on
0 Posts
sickness! awesome work man! have you considered swapping the '01 dash into it as well?
are you planning on putting SFC's on it? that LSx will twist it up pretty quick! and don't forget about a wonder bar.
now wash and wax that beauty! some tint and black out spray on those yellows would be sexy as hell!!
are you planning on putting SFC's on it? that LSx will twist it up pretty quick! and don't forget about a wonder bar.
now wash and wax that beauty!
some tint and black out spray on those yellows would be sexy as hell!!
07-31-2011, 10:01 AM
#74
sickness! awesome work man! have you considered swapping the '01 dash into it as well?
are you planning on putting SFC's on it? that LSx will twist it up pretty quick! and don't forget about a wonder bar.
now wash and wax that beauty! some tint and black out spray on those yellows would be sexy as hell!!
are you planning on putting SFC's on it? that LSx will twist it up pretty quick! and don't forget about a wonder bar.
now wash and wax that beauty!
some tint and black out spray on those yellows would be sexy as hell!!I'll definitely be adding SFCs and a wonder bar. At some point I'll paint it but it aughta polish up pretty good for now. I use to not like the stock wheels but they've grown on me, though I have some C6 wheels I want to put on it later

 07-31-2011, 02:33 PM
#77
Well once I get the leaks fixed and get some SFCs welded in I'll work on getting drop spindles. I'm also keeping an eye out for a Ford 8.8 axle to put in it with some 4.11s. With the 3.27s in it, it doesn't get off the line like I would like, so those are gonna have to go
10-15-2013, 01:45 AM
#78
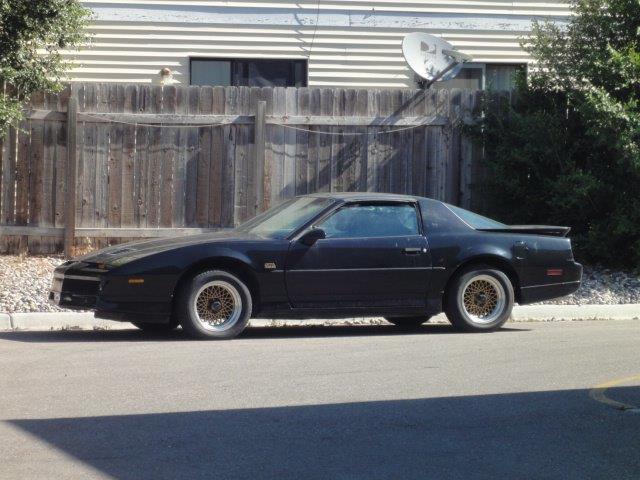
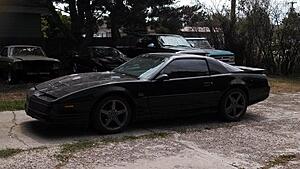
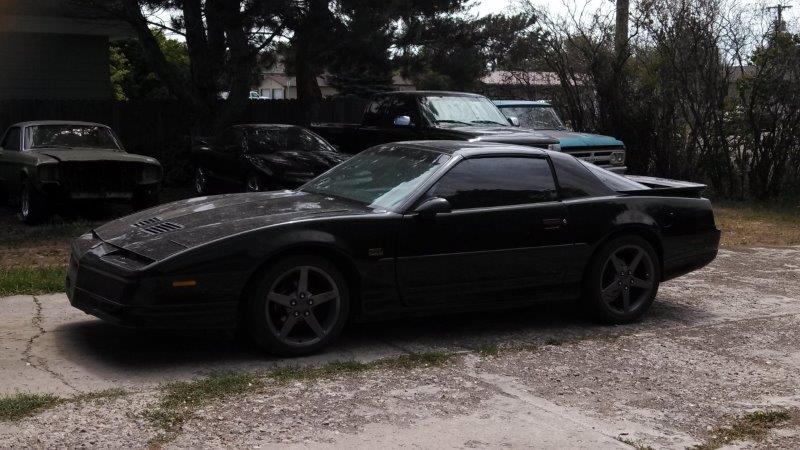
Well I've been driving this thing quite a bit for the last 6 months. I bought a used set of Konis and Eibach springs so I installed those, put my C6 wheels on after spraying them with some charcoal wheel paint, and tinted the windows.
Next I'm going to start playing with the tune and see how good I can get it to run until I can add some bolt ons and a cam later on.
Next I'm going to start playing with the tune and see how good I can get it to run until I can add some bolt ons and a cam later on.
Last edited by t_raven; 07-31-2017 at 09:09 AM.
10-15-2013, 04:26 PM
#80
Thanks pal. It still needs some new paint, though it's not too bad, the front seats are a bit tore up so I'll re-upholster them some day. I want to upgrade the brakes, maybe a few more suspension mods, and then a few bolt ons and a cam.