


project high school: 5.3 in 72 nova

Thread Starter
Launching!
Joined: Jan 2011
Posts: 200
Likes: 0
From: Arizona
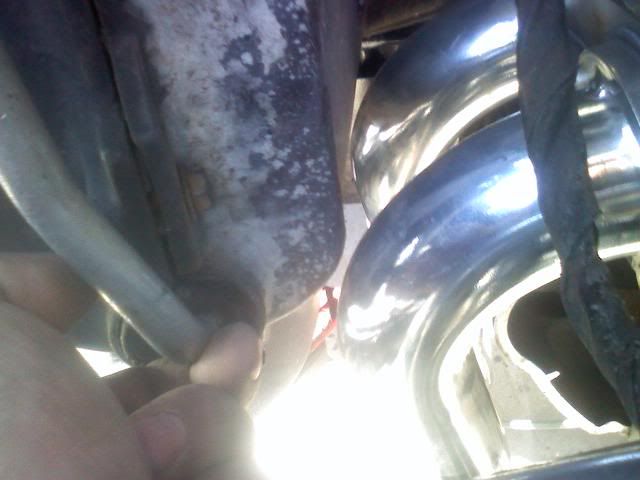
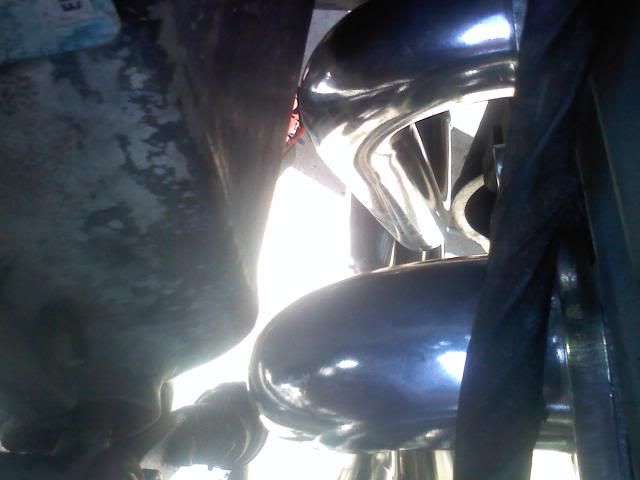
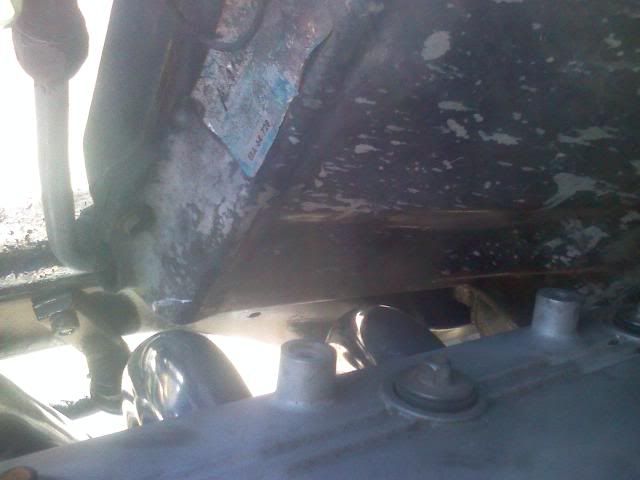
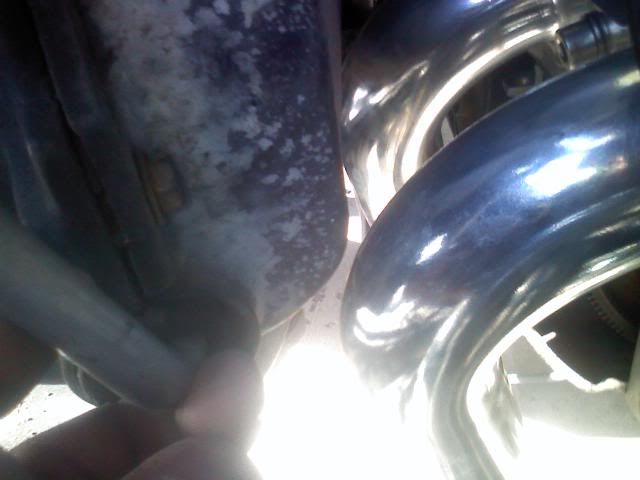
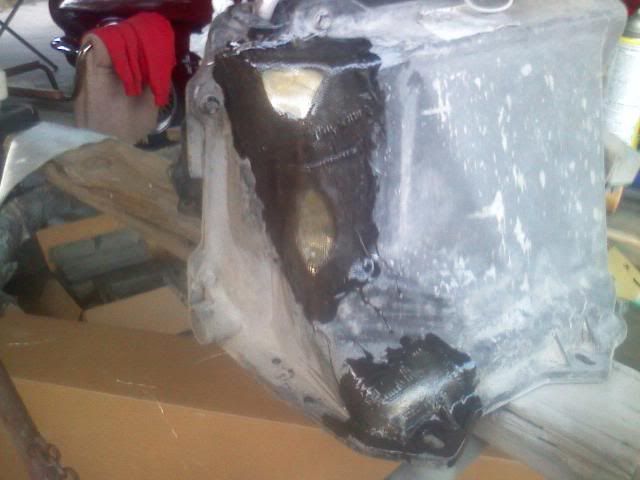
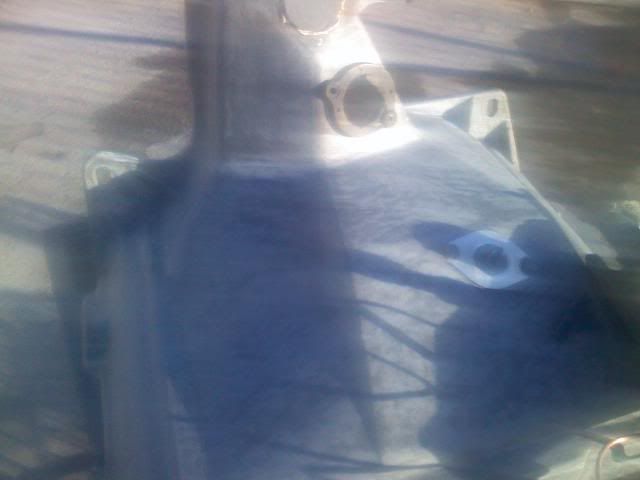
i finally got to check the clearance on the suitcase to header. much to my dismay, the complete suitcase would not go in as a unit. i finally had to split it and put the bigger half in and then put the cover in and bolt it together. to my surprise the suitcase cleared with about a 1/4" on the third tube and 3/8-1/2" on the rear tube. i went ahead and marked where i would like a little more room, and will buy the fiberglass kit tomorrow and get as much room as possible before applying the heat reflective tape. i am really glad i split the case, it was full of leaves, mesquite beans, and pine needles. I couldn't believe how dirty it was.
the pics do not do justice to the clearance, i think i could have run it like it was if i had too.
if anyone knows of a good reflective tape, let me know. gonna be in phoenix tomorrow and go by home depot if i need to. Maybe a good a/c shop might have it too?
hope to have it complete, painted and installed by Saturday eve.
also had a 74 nova suitcase there, it was shaped in a way at the bottom that would have given a more room, possibley without cutting, but the valve that attaches to the evaporator wrapped around to the driver side (opposite of mine) and i didn't want that. but that may be an option for some.
I am thinking about nothing the two right most mounting holes so I can slide the whole case assembly onto the studs from the side. Glad to see it clears. I had about that much room from my smallblock headers. I ended up with a little bit of melt through near the #6 tube.
I had this same issue with my Chevelle. What I did was remove the AC case, You should be able to removed the one side. Take a look how much room you have between the Evap and the case wall (or whatever is there). Then cut a notch out of the case, flip it over, and use a Filberglass Repair kit to glass it back together. Paint it and then use some of the Thermo-Tec Heat tape or shield. It gave me another 1/2"-3/4" extra clearance.
Consider it like a Notch on your frame for a AC compressor..(cut, flip and weld), that is about as close as I can compare something for what I did.
http://www.summitracing.com/search/?keyword=heat&dds=1
Hope this helps.. Sorry, I didn't take any pictures of this.
BC
Consider it like a Notch on your frame for a AC compressor..(cut, flip and weld), that is about as close as I can compare something for what I did.
http://www.summitracing.com/search/?keyword=heat&dds=1
Hope this helps.. Sorry, I didn't take any pictures of this.
BC
Last edited by bczee; Mar 8, 2012 at 11:28 PM.
Thread Starter
Launching!
Joined: Jan 2011
Posts: 200
Likes: 0
From: Arizona
so today i went to phoenix-what a zoo, and got some parts. Went to "no salesman around" depot and got some fiberglass resin, cloth, and hardner. Got some black paint and gloss clear. Couldn't wait to get home and do some work when i realized i needed some heat reflective tape. went to all of the parts store and nobody had it. Drove halfway across town to a little speed shop and they had a self adhesive mat. Has anybody used this before. I hope it is good.
Well when i got home, i notched the cover. Sanded around 2-3" around the notches with 80 grit and washed with acetone. The corner by the #6 cylinder is real close to the evaporator so i took some wax paper and put it in the hole on top of the evaporator before i started spreading resin. I put two layers of cloth and resin and when i open it up to remove the wax paper i will put a layer in there. took some pics and i will update tomorrow after sanding and paint. I put the fiberglass on the outside due to how close the evaporator was to the corner and it will be covered with the heat shield anyways. just read that bczee said to use the thermo tec so i should be good.

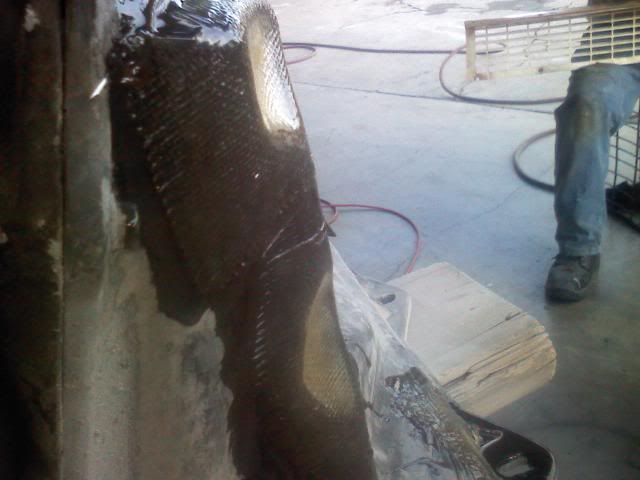
Well when i got home, i notched the cover. Sanded around 2-3" around the notches with 80 grit and washed with acetone. The corner by the #6 cylinder is real close to the evaporator so i took some wax paper and put it in the hole on top of the evaporator before i started spreading resin. I put two layers of cloth and resin and when i open it up to remove the wax paper i will put a layer in there. took some pics and i will update tomorrow after sanding and paint. I put the fiberglass on the outside due to how close the evaporator was to the corner and it will be covered with the heat shield anyways. just read that bczee said to use the thermo tec so i should be good.
Thread Starter
Launching!
Joined: Jan 2011
Posts: 200
Likes: 0
From: Arizona
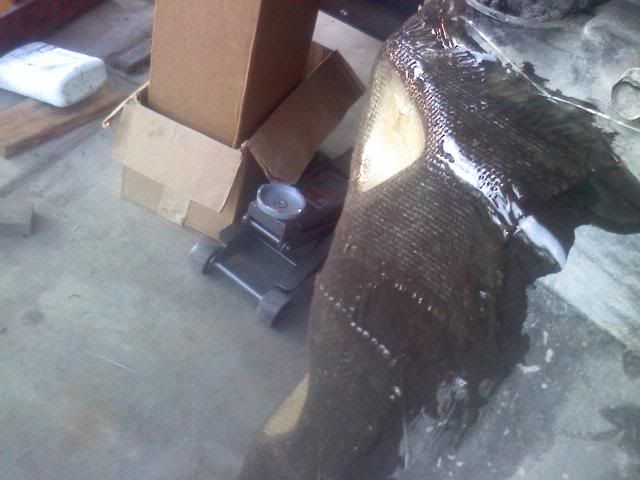
Took me 3 !@#$ days to clean the suitcase. What a royal pain. I originally planned on painting it black, but with so much black already under the hood, i decided to clear coat it. Herein lies the problem, my original plan had me scratching the entire fiberglass structure with 60 grit for paint adhesion. i cut and installed the heat shield, then bit the bullet and shot the clear on it. much to my surprise, it looks fantastic. looks a little darker than original but looks damn good. now i need to install it (read... royal pain in the ****!) as it has to go in as two parts then put together and bolted in. I didn't get a picture of it clearcoated because it was getting dark when i finished the second side. i will get pics when it's all installed. I'm really excited about the clearance and being able to keep the original box.
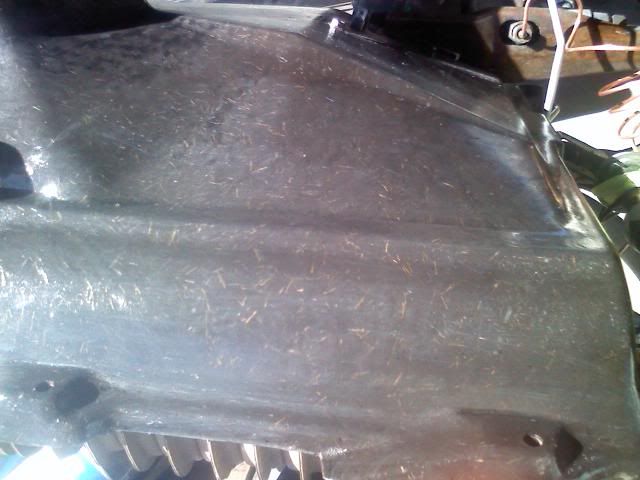
here it is with the heat shield
and this is the second side all scuffed up before clear
here it is with the heat shield
and this is the second side all scuffed up before clear
Thread Starter
Launching!
Joined: Jan 2011
Posts: 200
Likes: 0
From: Arizona
I ended up clear coating all of the fiberglass. The last picture shows the fiberglass scuffed up ready for clear. I should have pics today when i go over there after work. The clear hid all of the scuff marks and made the fiberglass look a couple of shades darker than original- but much better.
LS1 Tech Stories
The Best V8 Stories One Small Block at Time

Gas Monkey Built a 6-Wheel Ferrari Testarossa With a Corvette LT4 Engine
Verdad Gallardo
7 Most Reliable High-Performance Engines GM Has Ever Built
Verdad Gallardo
Amazing '71 Camaro Restomod Is Modern Muscle Car Under the Skin
Verdad Gallardo
6 Common C5 Corvette Failures and What's Involved In Repairing Them
Pouria Savadkouei
Retro Modern Bandit Pontiac Trans AM Comes With Burt Reynolds' Autograph
Verdad Gallardo
Top 10 Greatest Cadillac V Series Performance Models Ever, Ranked
Pouria Savadkouei
Top 10 Most Powerful Chevy Trucks Ever Made!

Hennessey's New Supercharged Silverado ZR2 Has 700 HP
Verdad Gallardo
Coachbuilt N2A Anteros Is an LS2-Powered C6 Corvette In Italian Clothes
Verdad Gallardo Ls68firebird. .Yes. you are doing pretty much what I did (step wise). but I didn't take off of the extra steps to make it look so good ! LOL.
I was able to get away with just doing the outer most corner (a 4" x 4" patch). Yes. that is the same tape I used. I had a friend with a 40' Willey that has a custom Frame and roll bar.. that are intergraded together. The roll bar extends into the engine Bay and the Fender well header get very close, Heat was being transferred into the Cab.. It made the Cab very hot.. I suggested he use the tape and to his surprise, it pretty much stopped most of the Heat and Cab Temp was way down !.. so It does work !
Hope it all works out well in the end for you !
Maybe you should try and stretch a sheet of Carbon around the whole thing.. that would look cool !
BC
Thread Starter
Launching!
Joined: Jan 2011
Posts: 200
Likes: 0
From: Arizona
i wouldn't have done so much to make it look good either, except...my daughter saw it and said " it will look so much better when we clean that up" , and Ruben Lopez (a.k.a. the painter guy) won't let me short cut anything.
Bczee- i need to read your whole thread, i rarely seem to have time to post. I get on post and look around a little and then i have to run to some softball game or else it's 9:00p.m. and time to hit the pillow. Thank you for the answers and help, it is all appreciated.
next is the inner fenderwells and wiring. (YUCK!!!!) man i hate wiring. no matter how hard i try it looks like s@#$%!
Thread Starter
Launching!
Joined: Jan 2011
Posts: 200
Likes: 0
From: Arizona
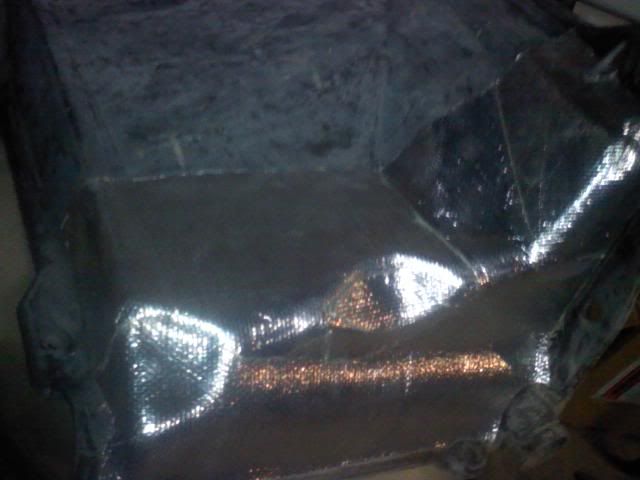
i got the suitcase into the car with minimal carnage and swearing, but it was dark when i got done. i managed to take a picture of the fiberglass after clearcoating it. One thing though- at some time or another a battery must have blown up in there staining some of the fiberglass, looks like bleaching. The clear coat did not hide that and actually made it show up a little more. I can live with it, but be aware. The pic below doesn't show the bleaching but shows a little streaking where i wiped the dust off. dirt lot across the street.
this is after scuffing with 60 grit and clear coating.
this is after scuffing with 60 grit and clear coating.
Thread Starter
Launching!
Joined: Jan 2011
Posts: 200
Likes: 0
From: Arizona
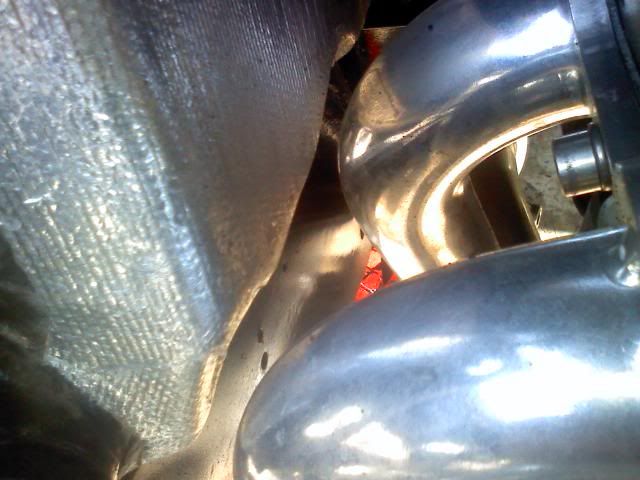
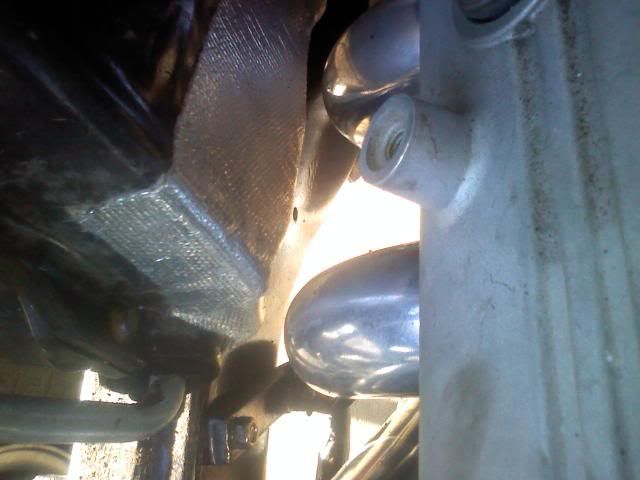
got out to the car today and took a couple pics of the clearance and the suitcase installed. i really like the clearance. Has to be 3/4" or better everywhere. Then i started to steam clean under the body. Got a lot of cleaning to do under there.
Thread Starter
Launching!
Joined: Jan 2011
Posts: 200
Likes: 0
From: Arizona
update: got the inner fenderwells in, the radiator and mounts in, the lower radiator hose on (stock 05 chevy truck w/6.0 - cut the length but it fit good), upper hose there but not on (also chevy truck). Got the factory fuse block wiring harness attached. Does anyone have a 72 nova wiring diagram i can get to eliminate some of the wires i will not be using? I also need to find some tranny fittings and lines. What are some that people have been using? Need to mount the fuel tank and lines (most of which i already have). Then install the psi harness and ecm. Hopefully get most of that done this week. And oh yeah, i changed the fitting on back of the truck power steering pump with the one that came out of the nova. It screwed right in and allowed me to use the stock power steering lines. Called the junkyard and they would sell me a used pump for $10 bucks. Seems that way would be cheaper to go than all of the adapter fittings. Made some spark plug wires by taking off the straight ends of the stock ones and using the 90 degree ends off of some oddball wires in the shop. But just my luck, the 90's need to be a little longer to clear the header flange, tried to get away cheap, but it didn't work. I know there are several posts on here with the correct ends, and i will look them up and order some tomorrow.
Thread Starter
Launching!
Joined: Jan 2011
Posts: 200
Likes: 0
From: Arizona
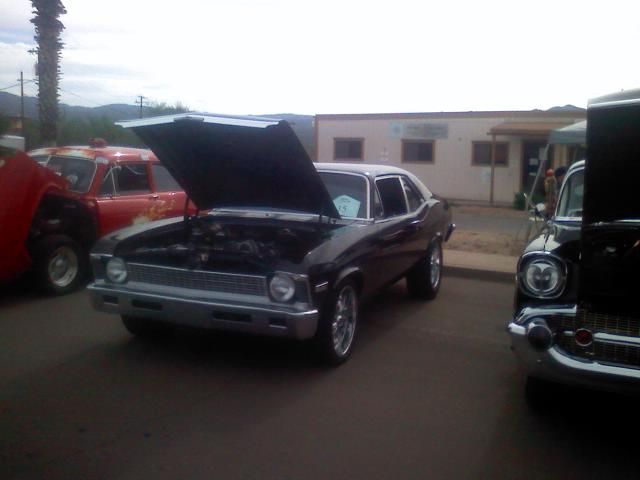
it has been a while since i updated ( 6 months unfortunately). so here it goes. We worked hard and took it to a car show in May and entered in the under construction class as it wasn't running yet. My daughter got 1st in the under 18 class instead as she was the only one there under 18. That made her day and she really got to bugging me to finish it. We worked pretty hard on finishing it up. We used the stock radiator with 5.3 van upper and lower hoses. we trimmed the top hose to fit better and installed a coupler in the middle that we drilled and tapped to accept a barb fitting for the steam hoses. I had to twist the outlet of the water pump a little and dent it just a bit to clear the cable throttle body. We drilled the oil cooler bypass cap for 1/8 pipe and installed the oil pressure line. I didn't realize or didn't read the fact that i should have drilled the passenger side head BEFORE the engine went in for the autometer mechanical temp gauge. So..... i took another water plug (on the driver side of the block) and drilled and tapped it to accept the 1/2" temp probe adapter that came with the gauge. I had to go to autozone and buy a set of ford plug wires (don't know what they originally went to, just kept opening boxes till i found what i wanted) to get a set of angled plug wire ends. Installed those ends on two of the wires to clear the headers. I got it running and the ford fuel pump mod worked great and the car fired up first try. seems to run good and still needs a tune. I wanted to put it in the car show this past weekend here in the small town, so i made a quick gauge panel and attached it to the bezel, (made the gauges tilt down so that will need reworked), attached all the carpet and took off the 8" rear spring hangers, cut them shorter and drilled them to stock dimensions and put them back on. Lowered the car and the fenders sat on the tires. On the hunt i go. Found a guy here in town that had a set of Boss 304 18" with 255's on them fronts were 30 series, rears were 50 series. I hate the front ones but the rear ones had the correct offset to clear the fenderwells. I like the look of the 18"s but now i think some boss 338's with black centers. When i put the front ones on i drove it around the block and there was a knocking noise, thinking i left the lugnuts loose, i checked them and found the rim was bent and hitting the tie rod end when it came around. Further inspection found it was cracked and someone put jb weld in it. IDIOTS!!! kid was driving that s-10 around like it was a slot car at highway speeds and no clue there was a time bomb on the front wheel. Anyways, enough rambling and a few quick pics took at the car show with my phone. scheduling a full blown shoot a couple weeks from now. And a pic of where it started.
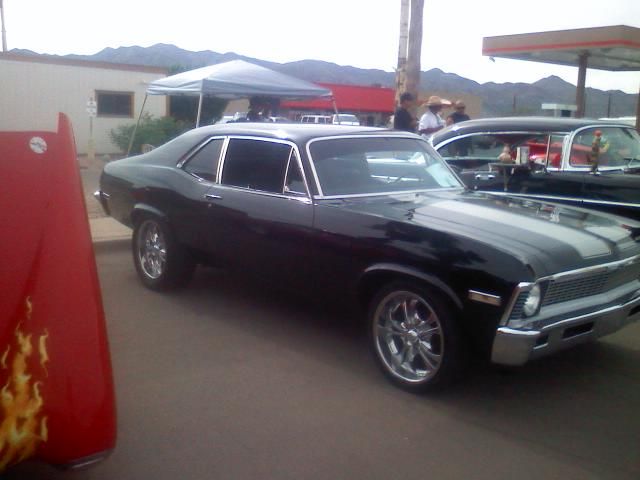
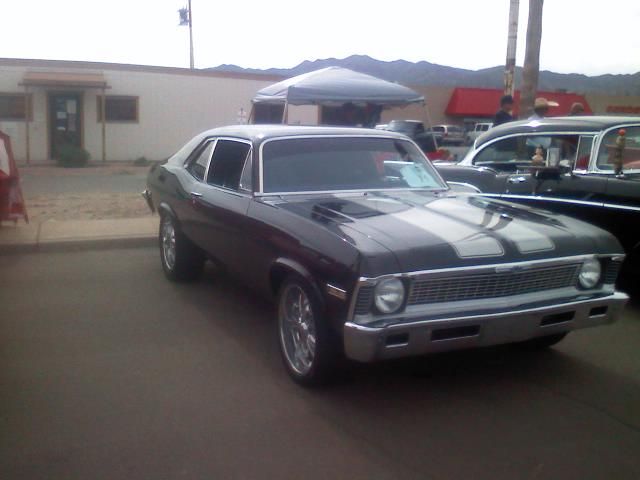
This is the second day of ownership and 10 minutes after putting the rims and tires on.
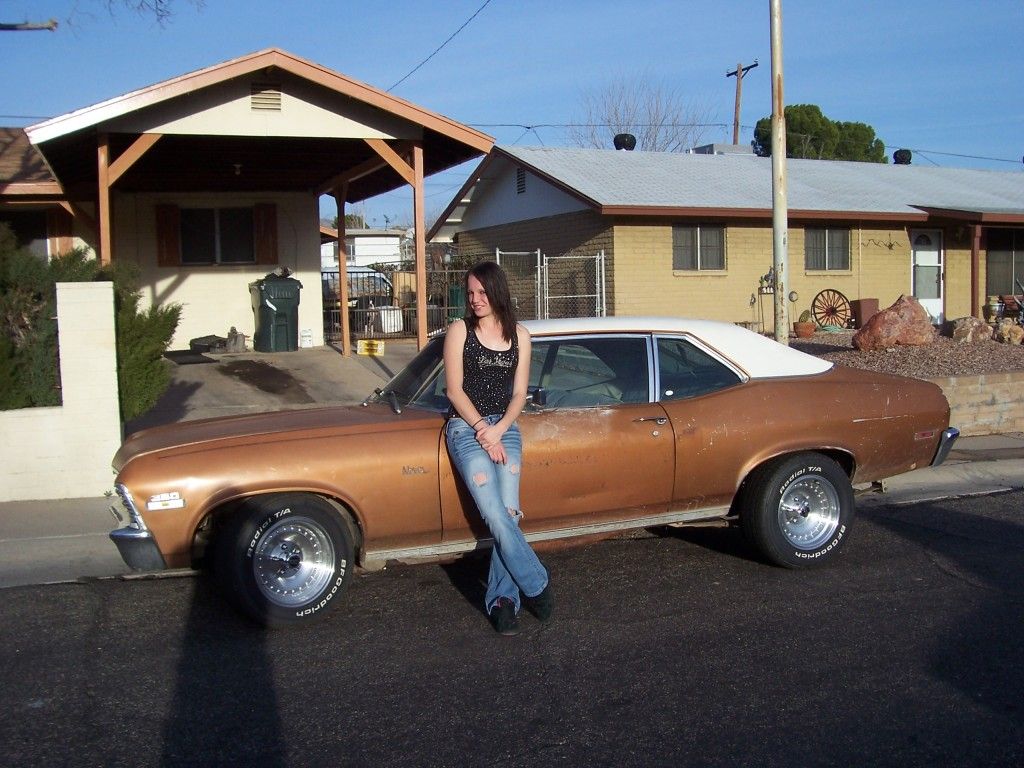
This is the second day of ownership and 10 minutes after putting the rims and tires on.
Thread Starter
Launching!
Joined: Jan 2011
Posts: 200
Likes: 0
From: Arizona
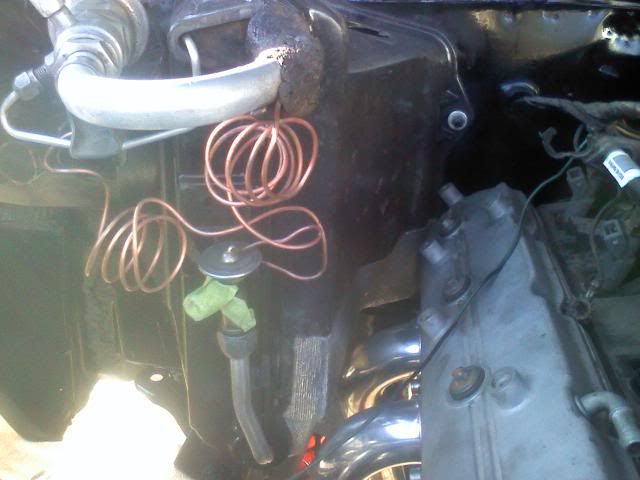
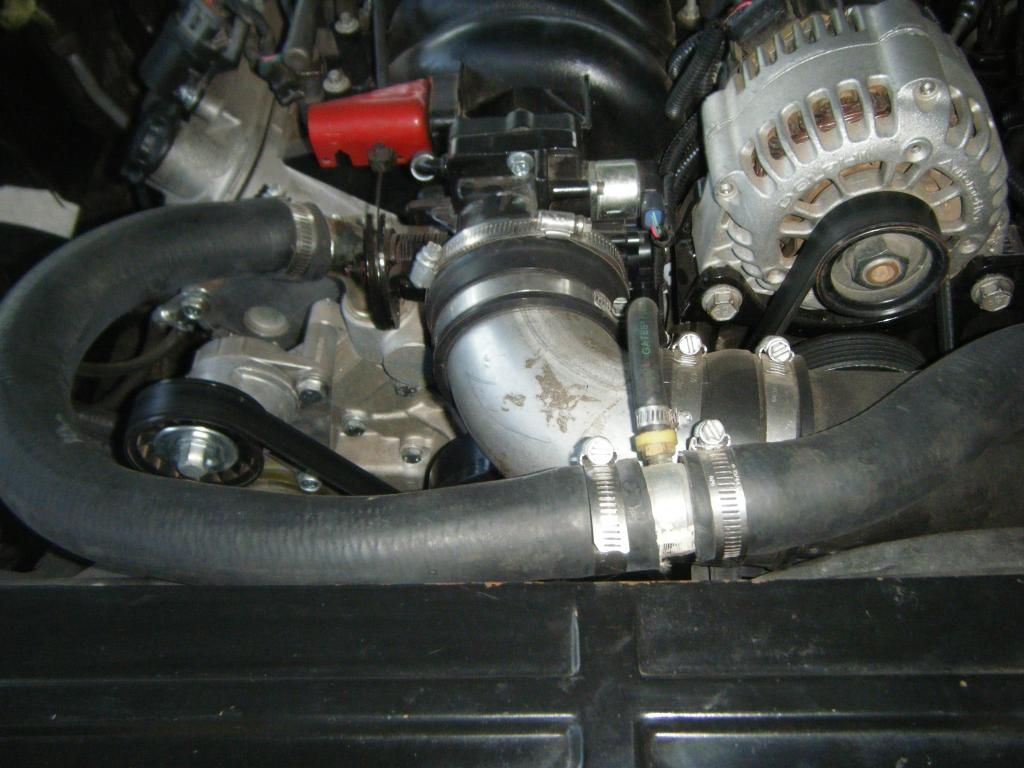
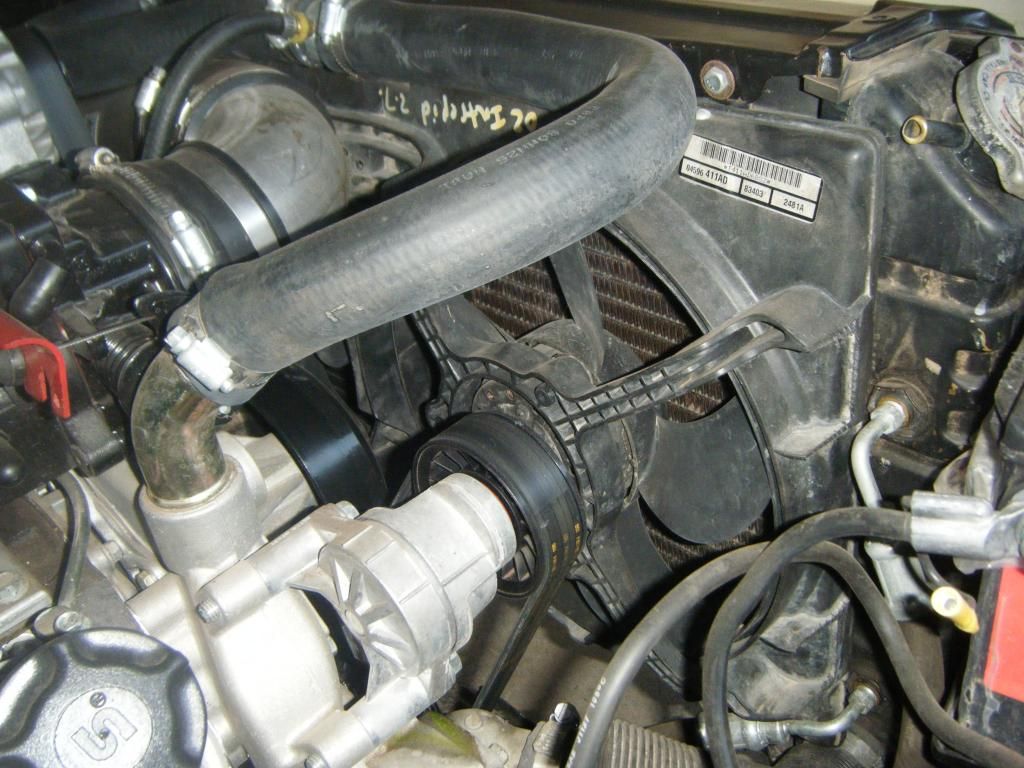
this shows the ace hardware hose coupler and how i drilled it to accept the steam vent. if you look close you can see the dent in the water pump and how it is turned slightly to the left
How close the cold air intake and fan shroud are. about 1/8" clearance.
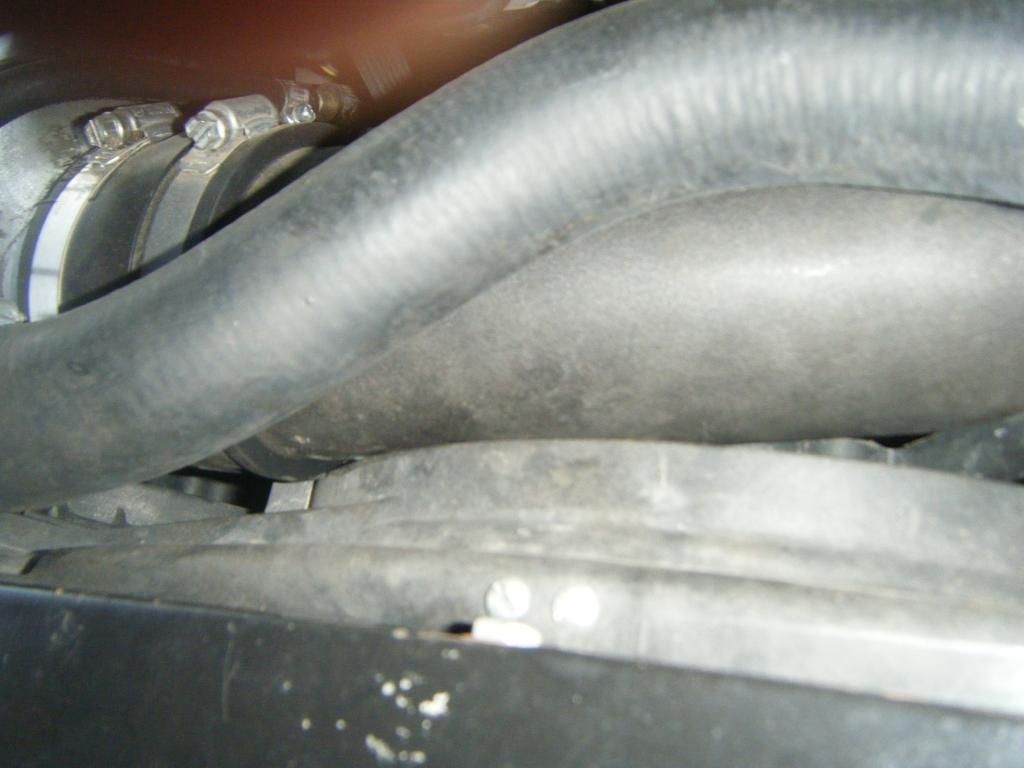
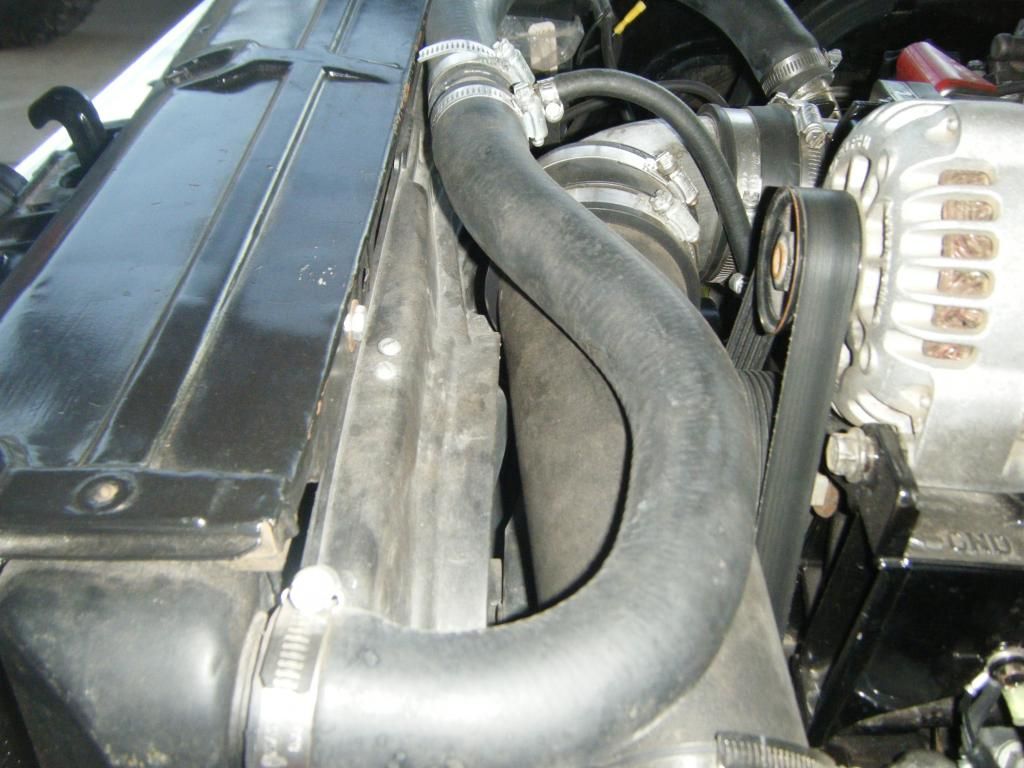
here is how the fan shroud fits to the radiator core. a little trimming on the bottom by the lower trans cooler line, and the opposite corner by the upper radiator hose inlet. brackets were pretty straight forward coming down off of the front of the radiator hold down then 90 degree bend to go under the shroud and hold it in place. not real fancy but seems to work good. And for the eagle eyes, yep a coolant leak. damnit!
just another pic of the cold air intake to the shroud.
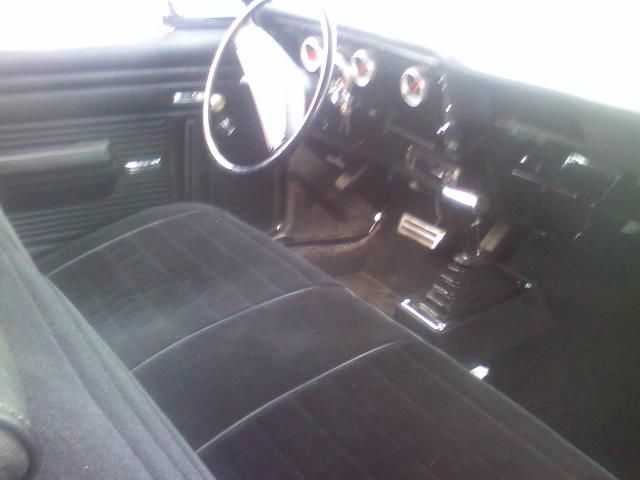
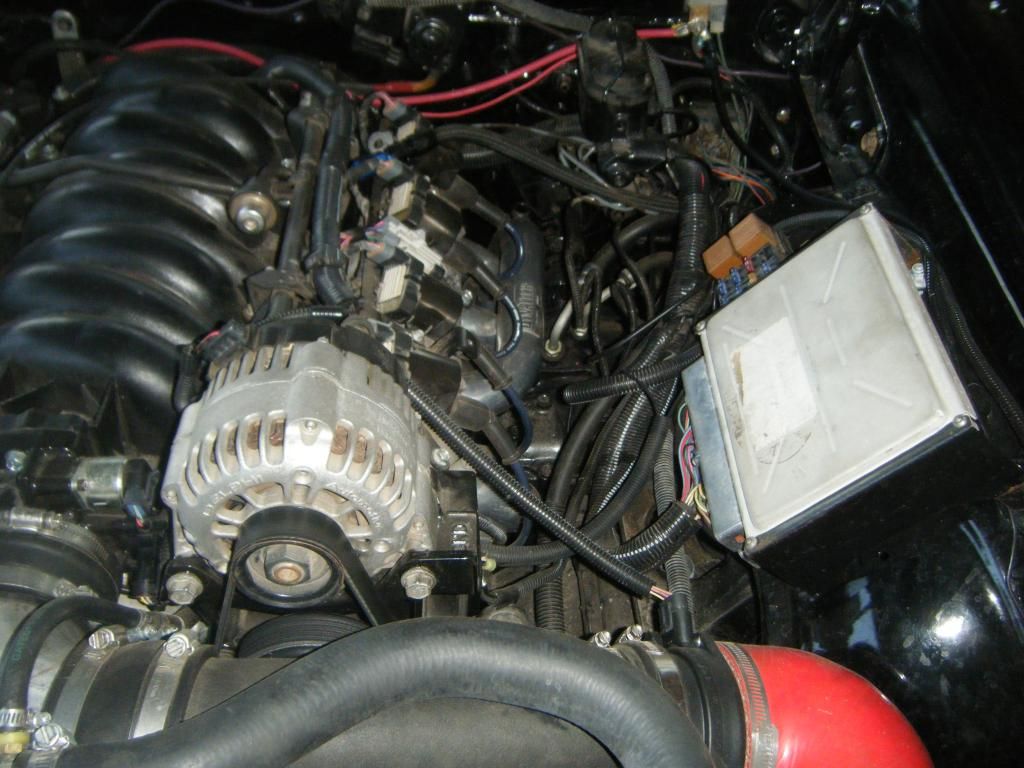
this is how i mounted the computer. this was going to be temporary but seems to work here for now. drove it in the rain for a short time and didn't seem to bother it. the wiring does need to be cleaned up a little. I couldn't mount the computer under the dash due to the factory a/c ducting. Might see if there is a way after the a/c is finished and ducting done.
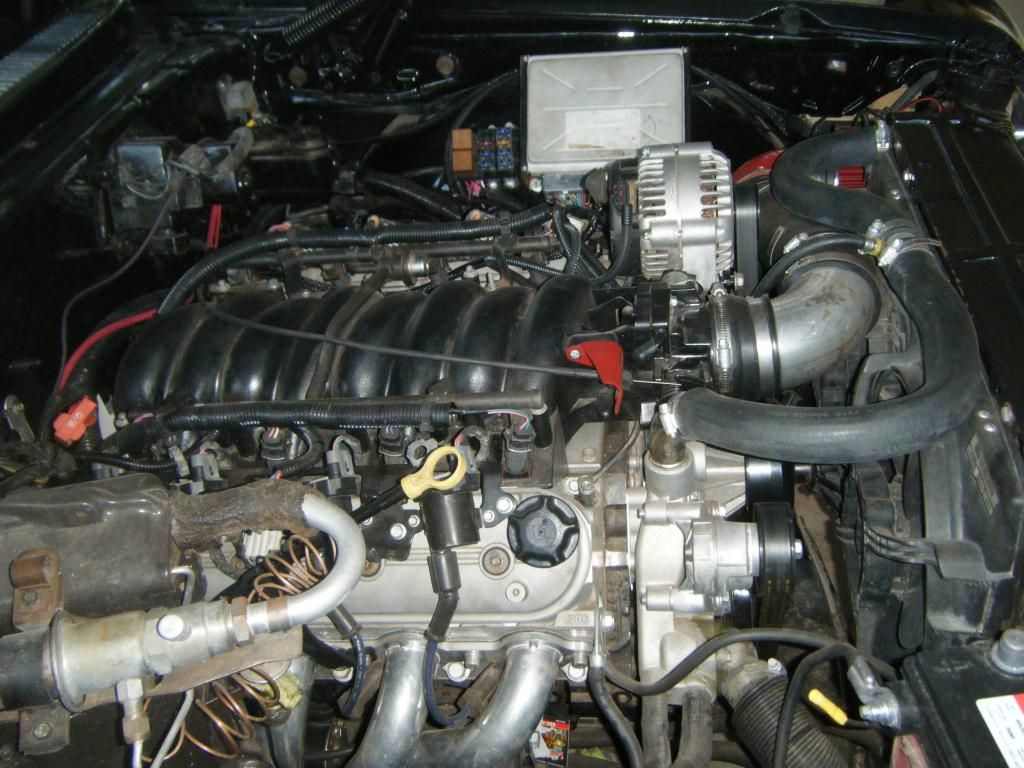
just an overview of the engine. Hawkeyes will notice the painters business card that fell down by the motor mount. didn't even notice it there till just now.
How close the cold air intake and fan shroud are. about 1/8" clearance.
here is how the fan shroud fits to the radiator core. a little trimming on the bottom by the lower trans cooler line, and the opposite corner by the upper radiator hose inlet. brackets were pretty straight forward coming down off of the front of the radiator hold down then 90 degree bend to go under the shroud and hold it in place. not real fancy but seems to work good. And for the eagle eyes, yep a coolant leak. damnit!
just another pic of the cold air intake to the shroud.
this is how i mounted the computer. this was going to be temporary but seems to work here for now. drove it in the rain for a short time and didn't seem to bother it. the wiring does need to be cleaned up a little. I couldn't mount the computer under the dash due to the factory a/c ducting. Might see if there is a way after the a/c is finished and ducting done.
just an overview of the engine. Hawkeyes will notice the painters business card that fell down by the motor mount. didn't even notice it there till just now.