1983 Z28 get LS1/T56 and Cyber Grey paint
 07-18-2011, 05:28 PM
#1
Car is still a work in progress but I'm transferring my build from another website that was too conservative for my liking lol 
Started off with an 83 Z28 w/a T5 and the 305 L69, swapped for 350 L98 stock heads, then some GM fastburn heads, LT4 hot cam kit and Richmond 6 speed. My goal was to hang with full bolt on�s LS1's. Accomplished that, then went after pullied 03 Cobras with the addition of a nitrous kit. Fuel economy sucked, engine had leaks, smelled like an old sbc, starter would get heat soak due to headers (trouble starting) and ran really hot in summer. So I only drove the car to car meets and street races. Finally decided to go with a LS1 swap for power, fuel economy and better street manners.
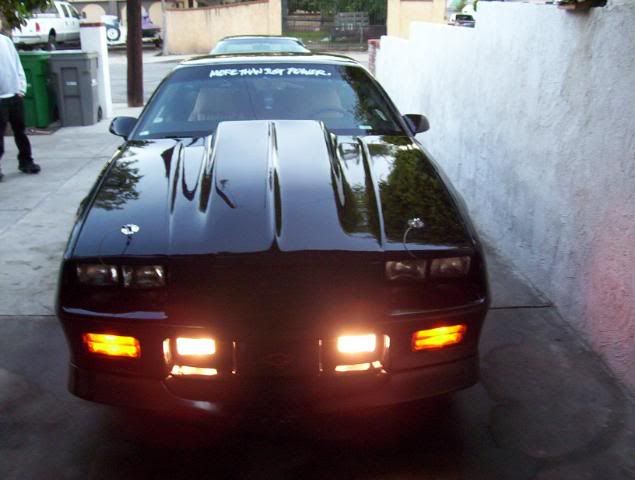
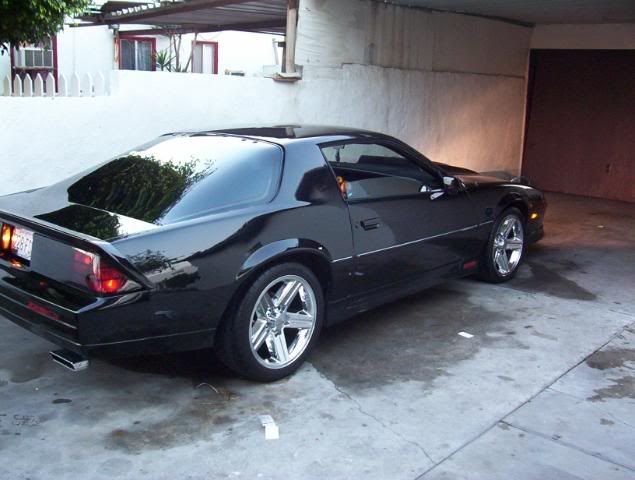
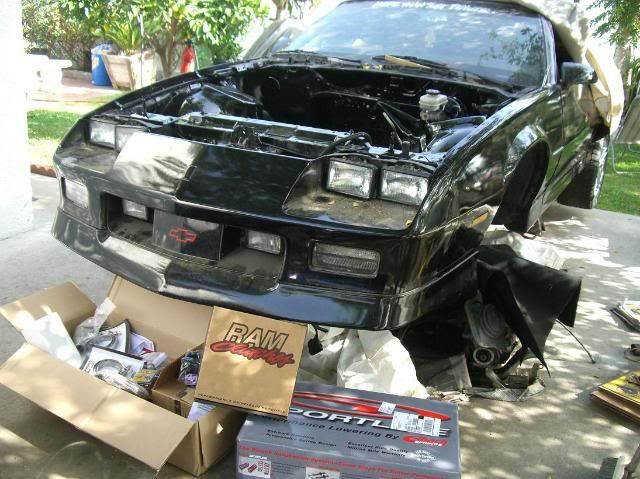
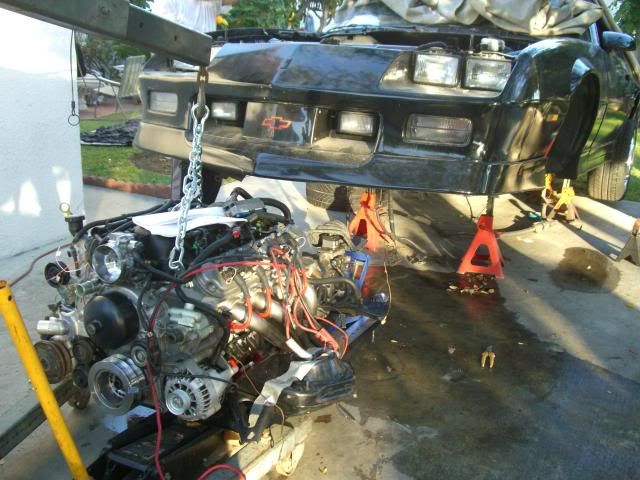
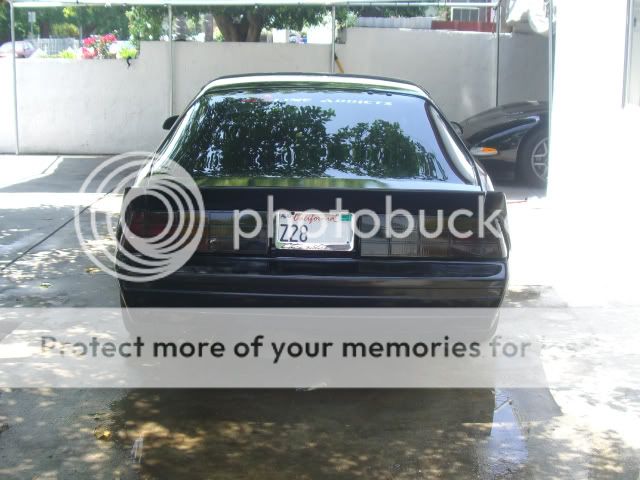
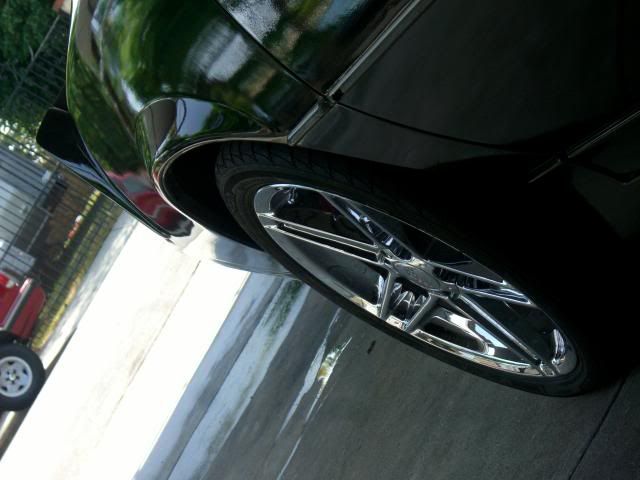
Here are some pictures before the tear down, there was nothing really wrong with the car except I was shooting for 10's in a daily driver.
Started off with an 83 Z28 w/a T5 and the 305 L69, swapped for 350 L98 stock heads, then some GM fastburn heads, LT4 hot cam kit and Richmond 6 speed. My goal was to hang with full bolt on�s LS1's. Accomplished that, then went after pullied 03 Cobras with the addition of a nitrous kit. Fuel economy sucked, engine had leaks, smelled like an old sbc, starter would get heat soak due to headers (trouble starting) and ran really hot in summer. So I only drove the car to car meets and street races. Finally decided to go with a LS1 swap for power, fuel economy and better street manners.
Here are some pictures before the tear down, there was nothing really wrong with the car except I was shooting for 10's in a daily driver.
 07-18-2011, 05:33 PM
#2
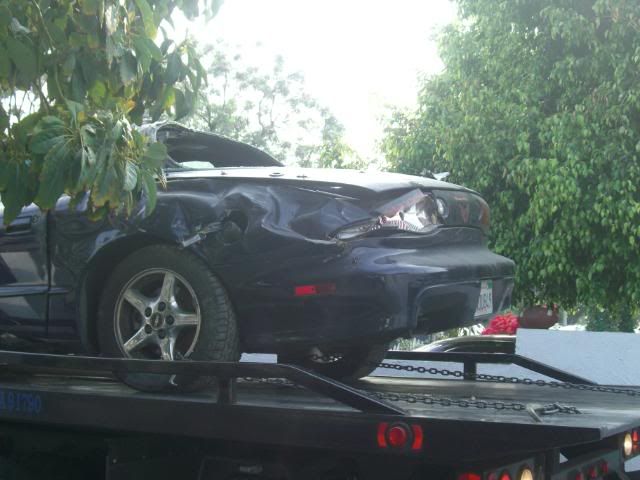
I purchased a wrecked 2000 TA LS1/T56 for parts and to become familiar with the LS1 mechanics ($3,000 back in 2008).
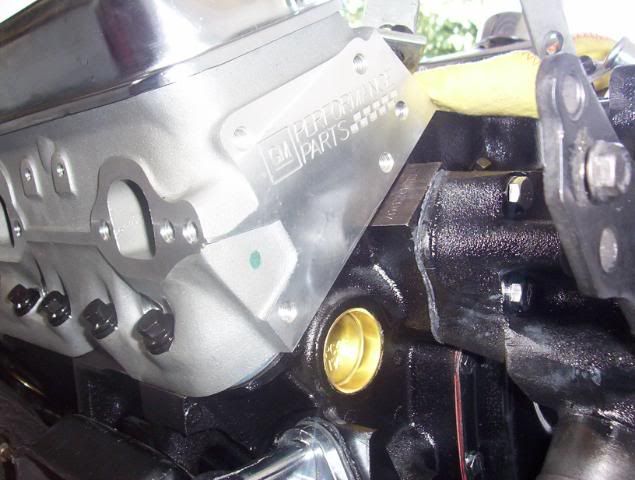
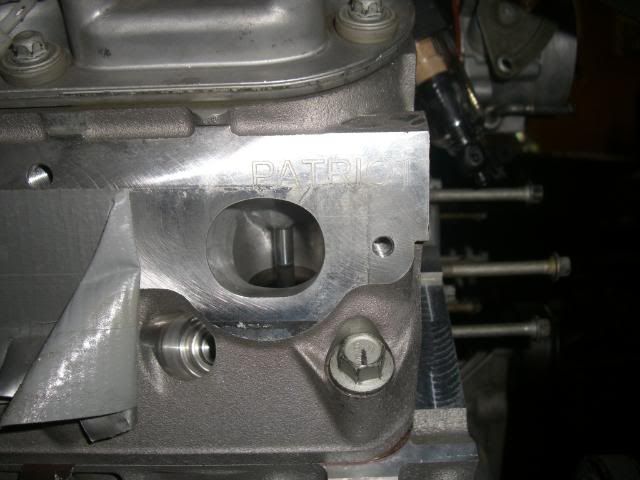
I was thinking of purchasing a heads and cam package for the high mileage LS1 but then I found a deal I couldn�t pass up. Freshly built 2000 LS1 long block w:
Patriot Stage II Heads 59cc
Thunder Racing 224/224 .566/.566 114 LSA Cam
Rev 1116 Dual Springs with Titanium Retainers
Chrome Moly Pushrods
Stock Coated Pistons
Stock Connecting Rods with ARP rod bolts
Stock Lifters
LS6 Oil Pump
JWIS Timing Chain
(Picked it up from the shop where it was finished, ZERO miles)
Ended up selling almost the whole donor car. I used the following from the donor TA:
- LS1 accessories ( starter, pwr. Steering pump, TB, misc.)
-T56 (w/new flywheel and slave cylinder), center console, pedals
-Wiring harness and ECU
-Dash w/wiring and fuse/relay box
-Gauge cluster and wiring
-Center console
-Fuel Tank and Fuel Lines
-LS1 Power booster and master
-AC components
- Tons of other small parts that would have nickel and dimed me to death
(Estimate I made back $2,000 in parts sold.)
07-18-2011, 05:36 PM
#3
Parts purchased new:
-LS6 intake ($300 ls1tech)
-Water Pump ($100 local vendor)
-SLP pulley and ARP bolt ($229 + 30, Summit)
- Ram Adjustable Master Cylinder ($165 Summit)
-Belt tensioner ($30 ls1tech)
-Alternator ($60 local vendor)
-Walbro 255 Fuel Pump w Ford 42 lbs. Injectors ($250 ls1tech)
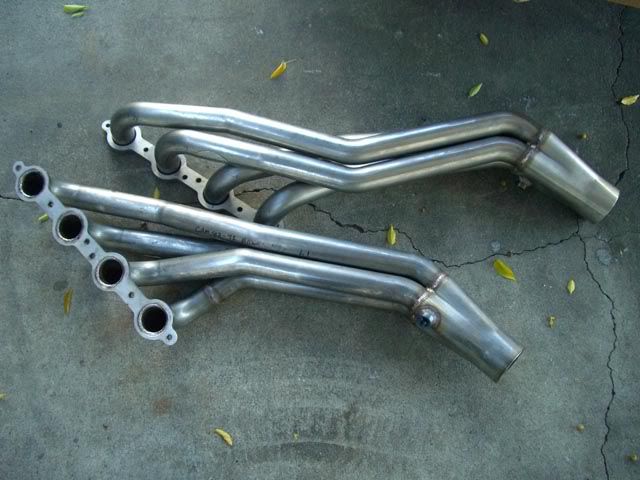
-Hawks headers (3 inch collector) ($850!!)
-2 V clamp kit 3 inch (87.90 summit)
-Flowmaster y-pipe 3 inch (47.00, summit)
-LS1 Radiator and hoses ($140 local vendor)
-Gatorback belt $20 (local vendor)
-Spec 3+ clutch kit ($350, ls1tech)
-Poly-urethane Engine mounts ($50, Summit)
-Taylor Wires 10.4 ($63.00, summit)
-SLP 160 degree thermostat ($60, Summit)
-2 RUS- Adapter Fittings PN 640850 ($30, Summit)
-Steel braided fuel line and fittings ($35, Summit)
-Stage 8 locking header bolts ($60, Summit)
-Accelerator Cable Non-TCS ($23, sdpc.com)
Misc.
-Eibach Springs, sportlines ($250, Summit)
-Tokico 5-way adjustable Shocks ($200, TGO)
-Strut mounts ($80 local vendor)
-New rotors and brake hardware ($80 local vendor)
-Hawks 5 inch wing ($300)
-Spohn Adj. Panhard ($115, Byunspeed)
-ACC Carpet ($267, summit)
Parts purchased used:
-Corsa exhaust w/bullet muffler ($325, sold tips for $250, ls1tech)
-B&B dual oval exhaust tips ($160, ls1tech)
-Pwr steering reservoir ($20, ls1tech)
-Hawks motor mounts ($50, TGO)
-Drews T56 cross member ($75?, TGO)
-Remote clutch bleeder ($50, ls1tech)
-Z06 valve covers ($80, ebay)
Services
-Wiring harness conversion to stand alone, base tune, and extension ($350, lt1wiring)
-Port, polish and epoxy TB ($65, ls1tech)
-LS6 intake ($300 ls1tech)
-Water Pump ($100 local vendor)
-SLP pulley and ARP bolt ($229 + 30, Summit)
- Ram Adjustable Master Cylinder ($165 Summit)
-Belt tensioner ($30 ls1tech)
-Alternator ($60 local vendor)
-Walbro 255 Fuel Pump w Ford 42 lbs. Injectors ($250 ls1tech)
-Hawks headers (3 inch collector) ($850!!)
-2 V clamp kit 3 inch (87.90 summit)
-Flowmaster y-pipe 3 inch (47.00, summit)
-LS1 Radiator and hoses ($140 local vendor)
-Gatorback belt $20 (local vendor)
-Spec 3+ clutch kit ($350, ls1tech)
-Poly-urethane Engine mounts ($50, Summit)
-Taylor Wires 10.4 ($63.00, summit)
-SLP 160 degree thermostat ($60, Summit)
-2 RUS- Adapter Fittings PN 640850 ($30, Summit)
-Steel braided fuel line and fittings ($35, Summit)
-Stage 8 locking header bolts ($60, Summit)
-Accelerator Cable Non-TCS ($23, sdpc.com)
Misc.
-Eibach Springs, sportlines ($250, Summit)
-Tokico 5-way adjustable Shocks ($200, TGO)
-Strut mounts ($80 local vendor)
-New rotors and brake hardware ($80 local vendor)
-Hawks 5 inch wing ($300)
-Spohn Adj. Panhard ($115, Byunspeed)
-ACC Carpet ($267, summit)
Parts purchased used:
-Corsa exhaust w/bullet muffler ($325, sold tips for $250, ls1tech)
-B&B dual oval exhaust tips ($160, ls1tech)
-Pwr steering reservoir ($20, ls1tech)
-Hawks motor mounts ($50, TGO)
-Drews T56 cross member ($75?, TGO)
-Remote clutch bleeder ($50, ls1tech)
-Z06 valve covers ($80, ebay)
Services
-Wiring harness conversion to stand alone, base tune, and extension ($350, lt1wiring)
-Port, polish and epoxy TB ($65, ls1tech)
07-18-2011, 05:38 PM
#4
Started by stripping the car down. Also sold the L98 motor, heads cam, nitrous plate to recoup some funds.
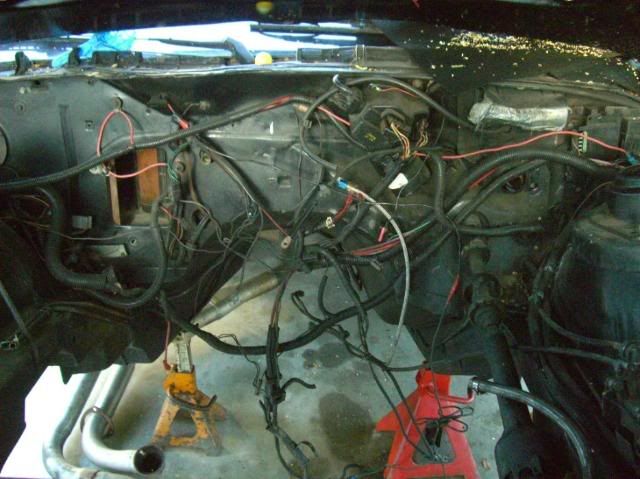
I removed most of the wiring which ran to the original ECM as well as the relays that are found on the driver's side firewall.
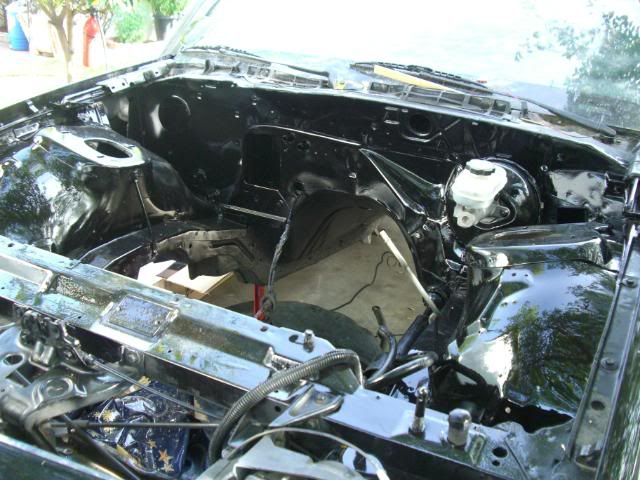
I also sanded down the engine bay and painted the bay with left over paint.
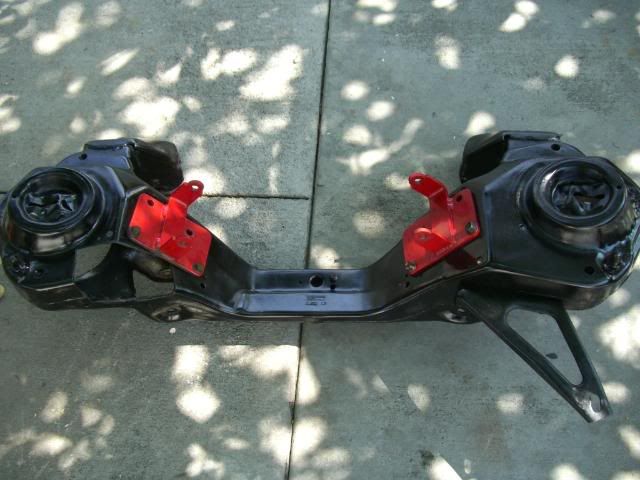
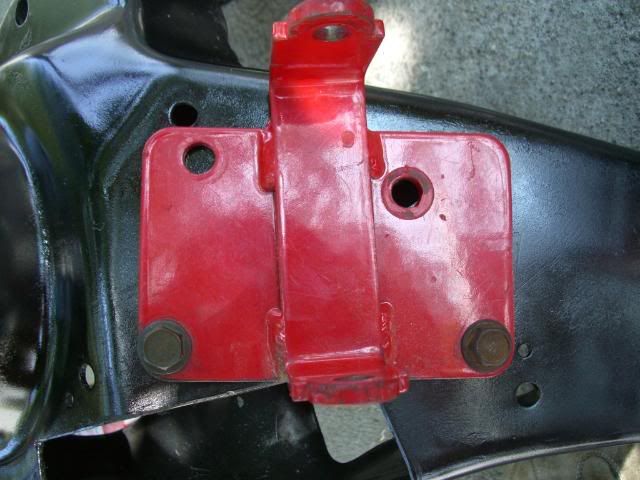
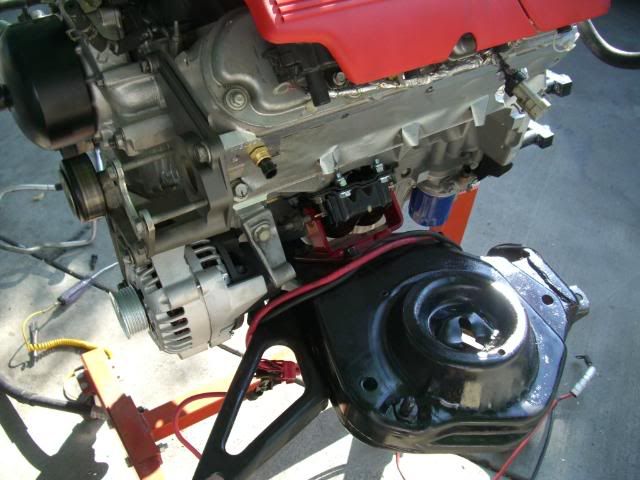
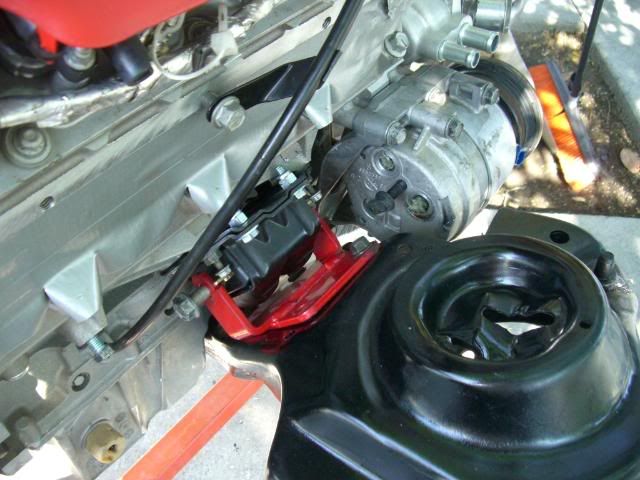
Took down the K-member and prep�d it for the notch just in case I decide to run AC in the future. Bolted on the motor mounts but left them a little loose so I had about � inch to play with oil plan clearance. I was surprised how well everything fit. While bolting the LS1 to the K-member clearance was pretty good compared to other swaps I�ve seen.

I removed most of the wiring which ran to the original ECM as well as the relays that are found on the driver's side firewall.
I also sanded down the engine bay and painted the bay with left over paint.
Took down the K-member and prep�d it for the notch just in case I decide to run AC in the future. Bolted on the motor mounts but left them a little loose so I had about � inch to play with oil plan clearance. I was surprised how well everything fit. While bolting the LS1 to the K-member clearance was pretty good compared to other swaps I�ve seen.
07-18-2011, 05:54 PM
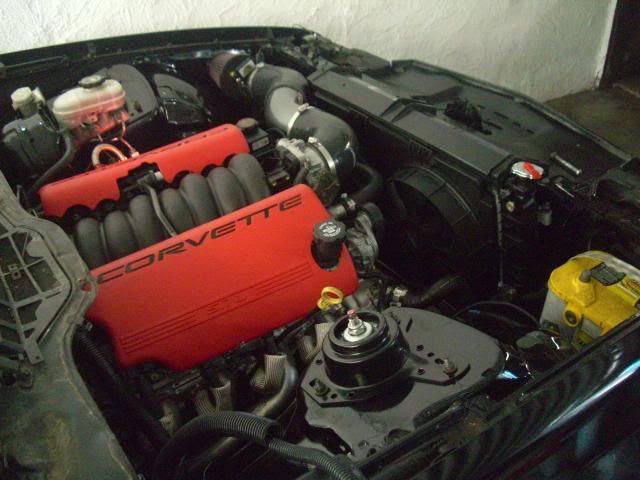
#5
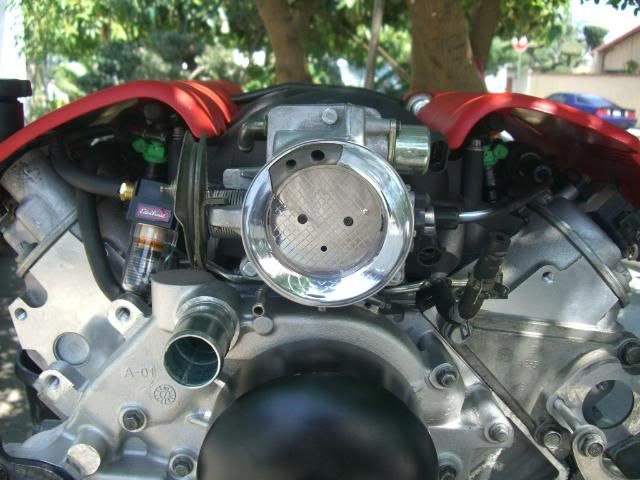
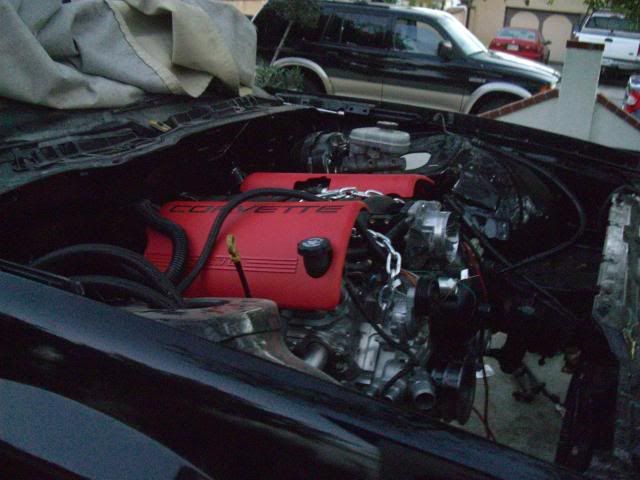
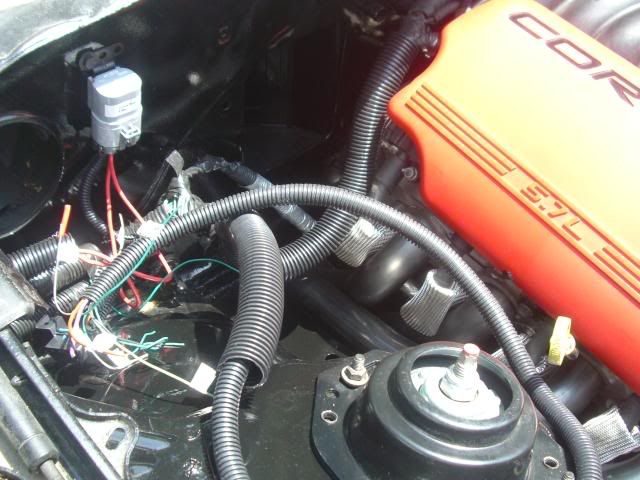
Nice pic of the port and polished TB and home depot catch can.
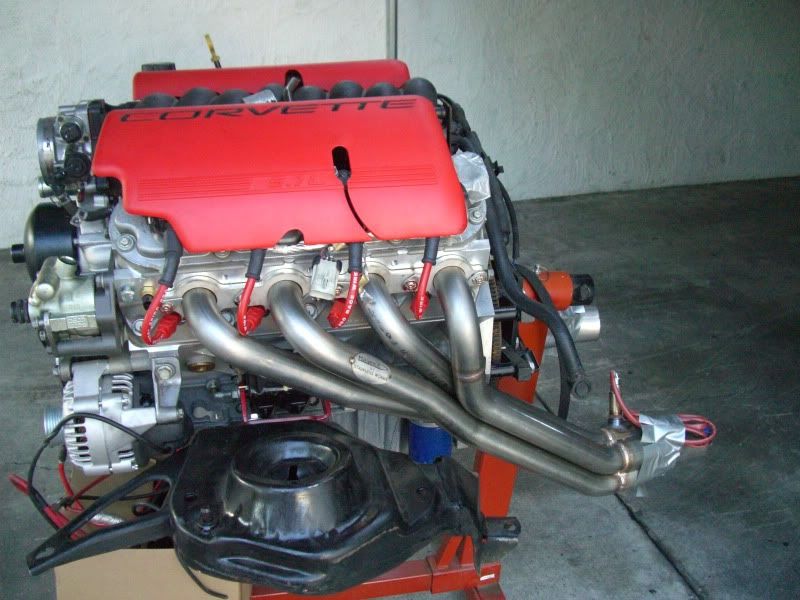
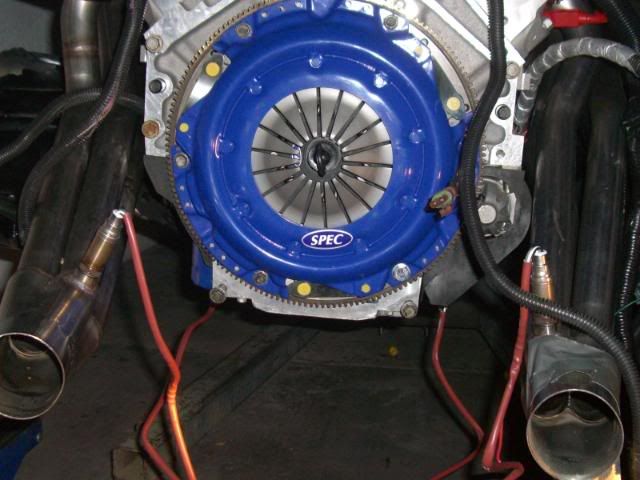
Bolted up the headers, clutch (with T/O bearing spacer), and T56.
Hooked up the LS1 wiring harness to engine

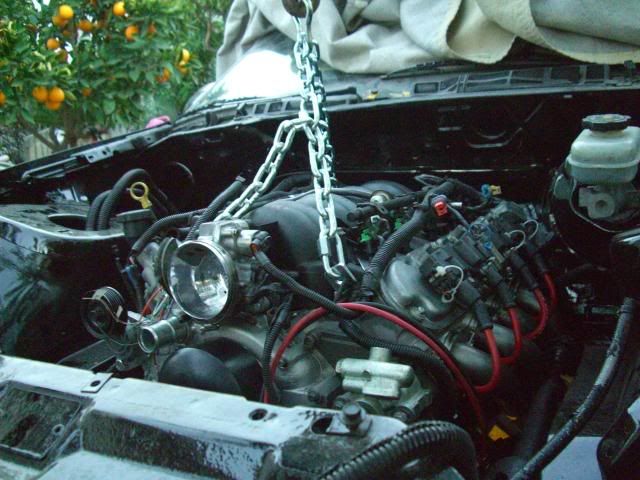
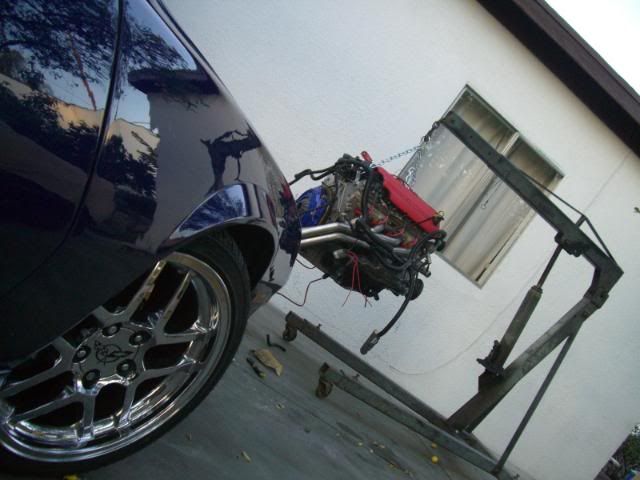
Rolled the entire K-member w/engine and trans under the engine. Lifted motor and bolted the K-member right up.
Bolted up the headers, clutch (with T/O bearing spacer), and T56.
Hooked up the LS1 wiring harness to engine
Rolled the entire K-member w/engine and trans under the engine. Lifted motor and bolted the K-member right up.
Trending Topics
07-18-2011, 10:44 PM
#9
Thanks guys!!! Wait til you guys see the finished project...
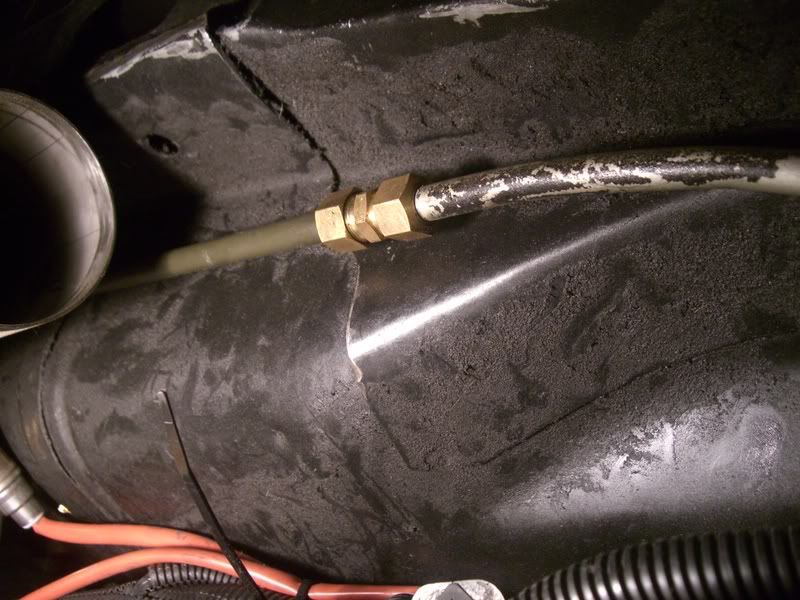
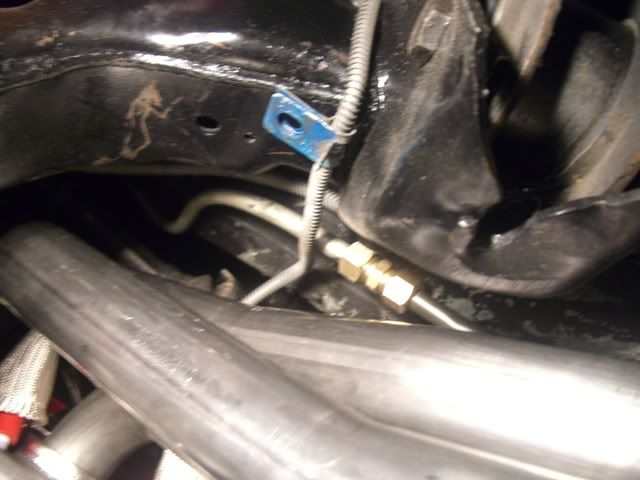
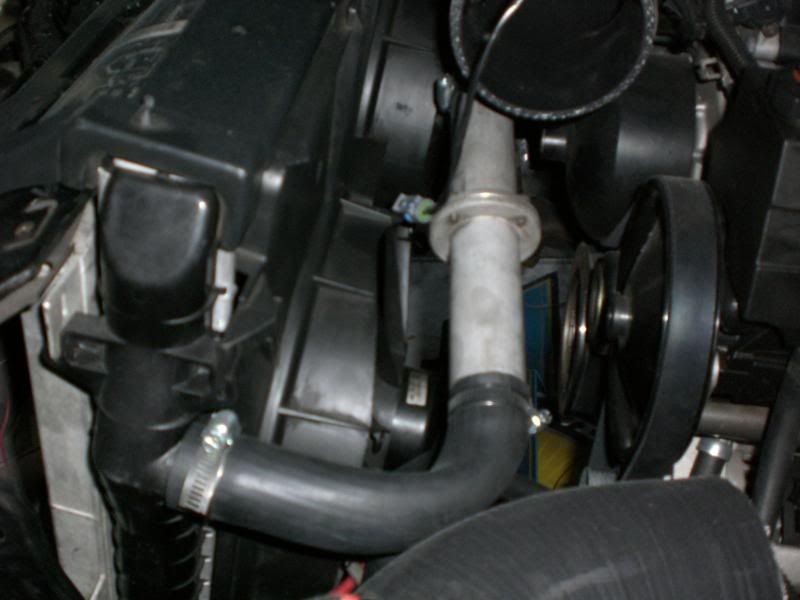
Used the stock 4th gen tank and fuel lines w/o return line. Fuel lines fit from the tank up until a foot or so before the back of the engine then I cut and used union fittings as other on this board have done.


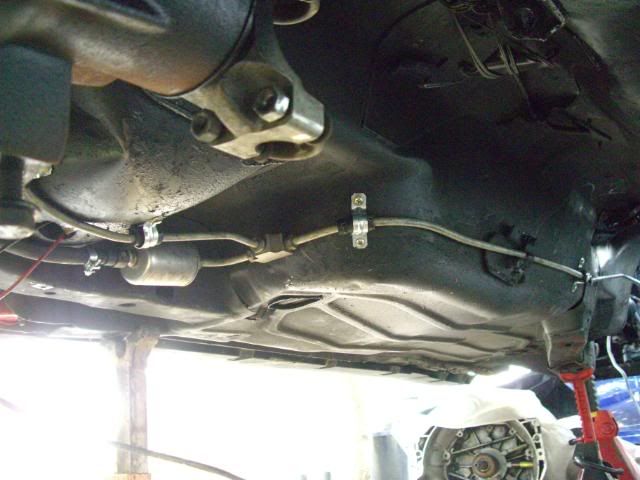
Fuel lines wrapped in heat resistant tape.
I first cut the 4th gen fuel line right before the header collector and bent my own line which was about 1.5 ft., then connected it again to the original 4th gen fuel line. Also, don’t mind the brake line, haven’t got to that.
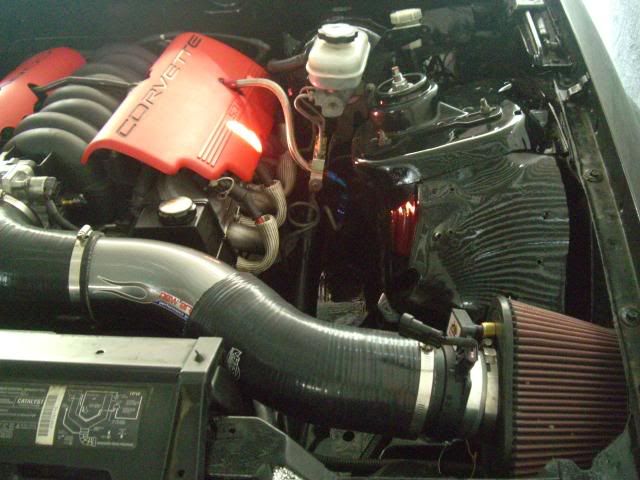
I installed the New Era CAI from an 04 GTO (4 inch diameter). 85mm It cleared pretty well since the LS1 radiator’s upper hose is lowered by about 3 inches, I had to use adapters to run an
(***pics don't show the adapter i used to run the 85 mm MAF)
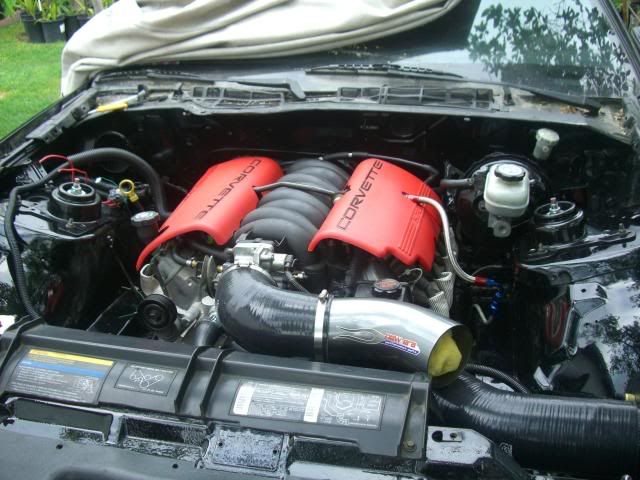
I also bolted up the suspension.
Used the stock 4th gen tank and fuel lines w/o return line. Fuel lines fit from the tank up until a foot or so before the back of the engine then I cut and used union fittings as other on this board have done.
Fuel lines wrapped in heat resistant tape.
I first cut the 4th gen fuel line right before the header collector and bent my own line which was about 1.5 ft., then connected it again to the original 4th gen fuel line. Also, don’t mind the brake line, haven’t got to that.
I installed the New Era CAI from an 04 GTO (4 inch diameter). 85mm It cleared pretty well since the LS1 radiator’s upper hose is lowered by about 3 inches, I had to use adapters to run an
(***pics don't show the adapter i used to run the 85 mm MAF)
I also bolted up the suspension.
Last edited by CyberGrey Z28; 07-18-2011 at 10:44 PM. Reason: ...
07-18-2011, 11:01 PM
#10
Teching In
Join Date: Jun 2011
Location: West Bloomfiled, MI
Posts: 11
Likes: 0
Received 0 Likes
on
0 Posts
Awsome build thread, I would like to do this with my third gen. I have an 84 z, but it looks like yours with the 85-90 gfx. also the thread gave me some ideas on my 95 z ls1 swap. Great job!
 07-19-2011, 02:41 PM
#12
4th gen radiator, hoses, and power steering cooler.
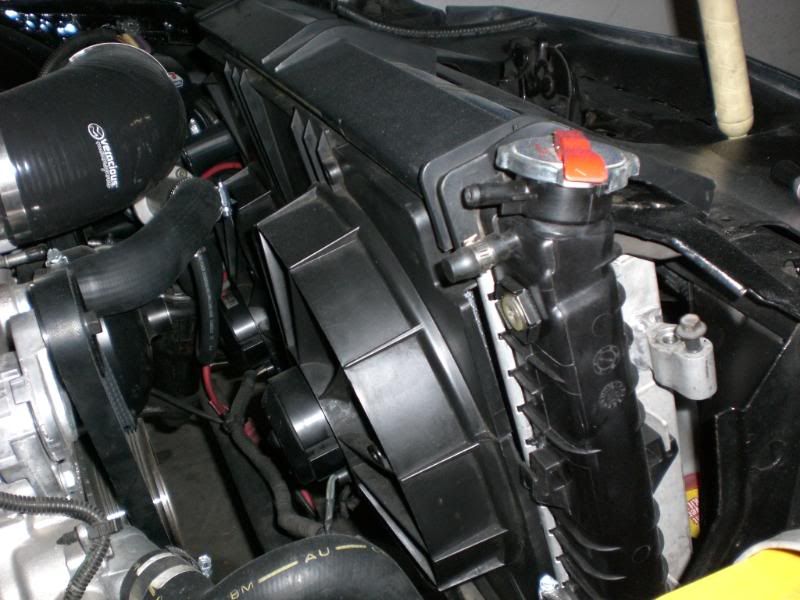
You can also see the AC condensor in the back. I used an LT1 radiator support and chopped it to fit. The 4th gen radiators are at an angle.
At this point I�m pretty much done with mechanical and drivetrain part of the swap, now on to the wiring.
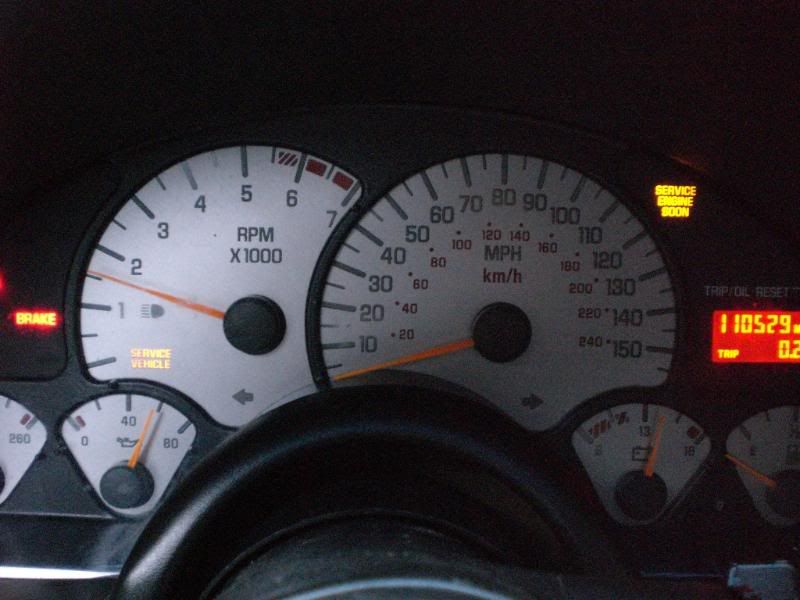
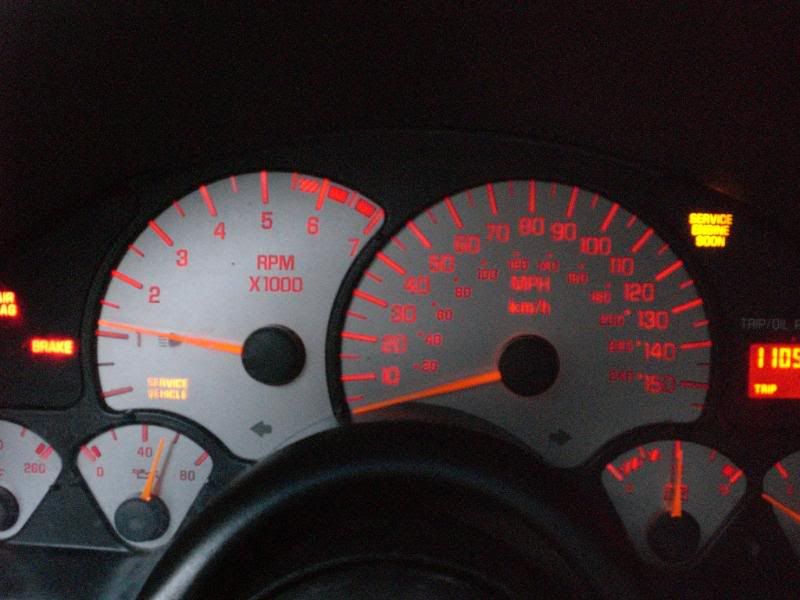
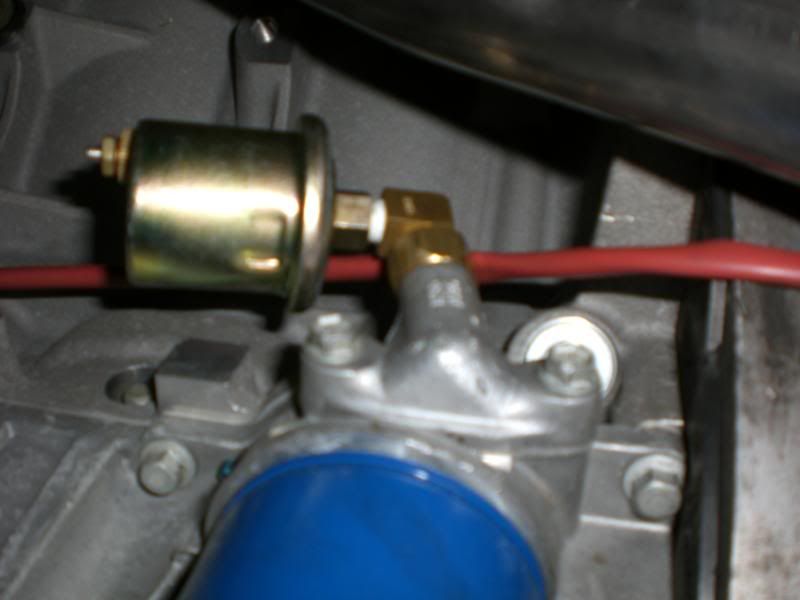
My plans are to run the 4th gen TA dash with working cluster. But just to be on the safe side and just in case the cluster doesn't work, i'm also going to be running autometer gauges for the water temperature and oil pressure.
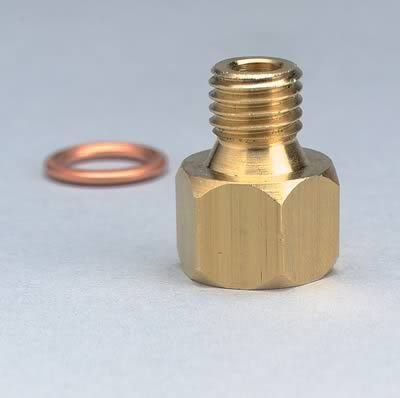
I used the piece on top of the oil filter to read the oil pressure.
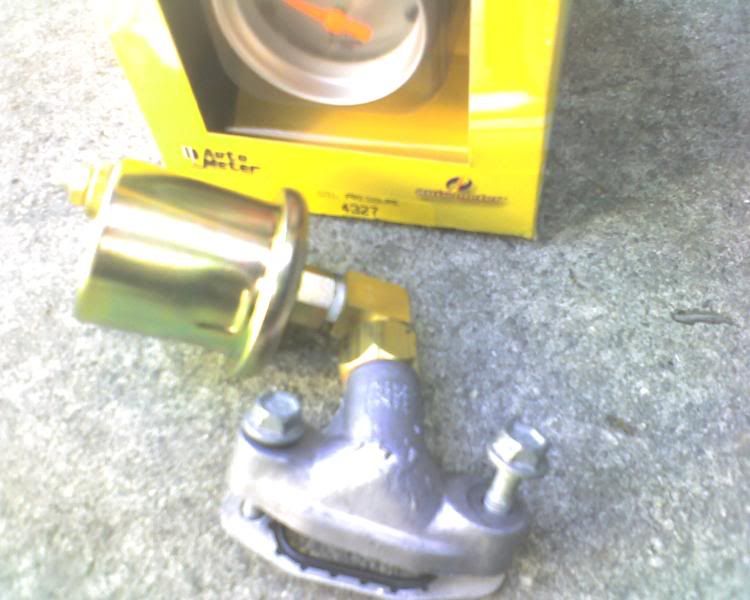
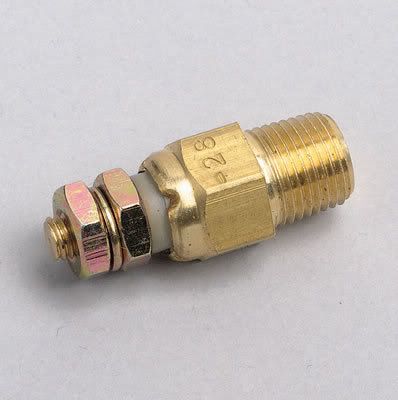
Then I used the passenger side head to run the water temperature gauge.
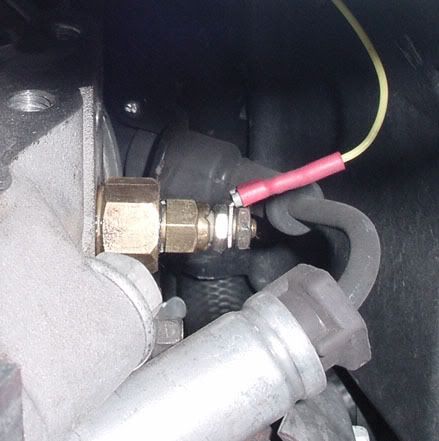
Didn't have to tap for either sensor thanks to autometer's metric 12mm x 1.5 to a 1/8th adapter from (P/N 2277) and a 1/8th temperature sending unit (P/N) 2259.
You can also see the AC condensor in the back. I used an LT1 radiator support and chopped it to fit. The 4th gen radiators are at an angle.
At this point I�m pretty much done with mechanical and drivetrain part of the swap, now on to the wiring.
My plans are to run the 4th gen TA dash with working cluster. But just to be on the safe side and just in case the cluster doesn't work, i'm also going to be running autometer gauges for the water temperature and oil pressure.
I used the piece on top of the oil filter to read the oil pressure.
Then I used the passenger side head to run the water temperature gauge.
Didn't have to tap for either sensor thanks to autometer's metric 12mm x 1.5 to a 1/8th adapter from (P/N 2277) and a 1/8th temperature sending unit (P/N) 2259.
07-20-2011, 08:52 PM
#13
I sent my harness to be reworked into stand alone, extended and programmed to delete ABS, TCS, EVAP, EGR and everything I wasn't going to be using. I could not argue with the price since it was about half of what Speartech charges w/the tune included (injectors, gearing, rev limit, speed governor, etc.). The only thing I can complaint about so far is that they didn't strip all the unused connectors and wires from the harness.
This is what I got making it standalone.
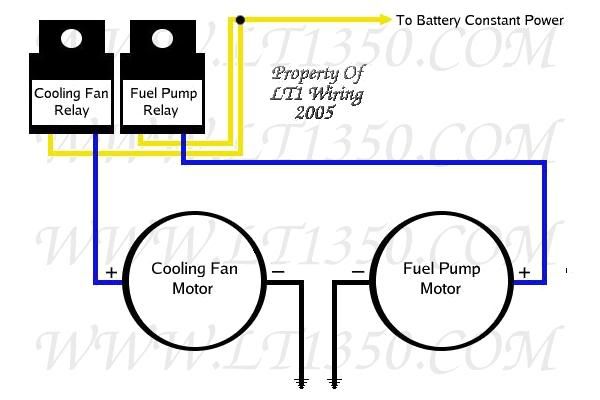
It came with 2 relays for fuel and for the fans which are pretty much plug and play. I ran an extra relay for manual operation which will be activated by a toggle switch.
I ran these wires to the interior via the hole on the passenger side firewall where the AC wires once ran.
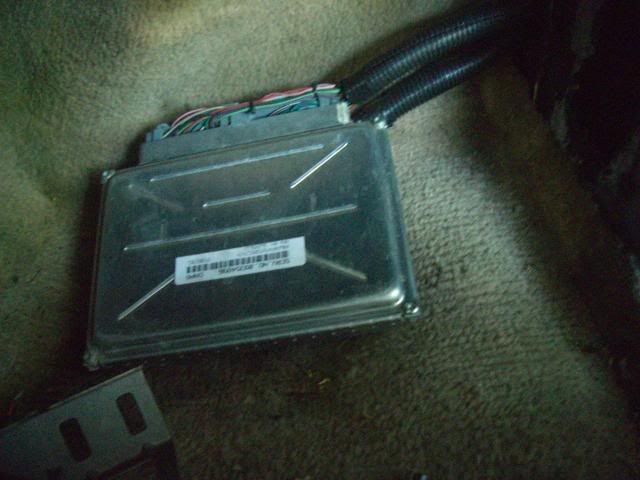
I'm going to mount the ECM in the original 3rd gen ECM location. Pretty straight forward.
From Aaron91RS
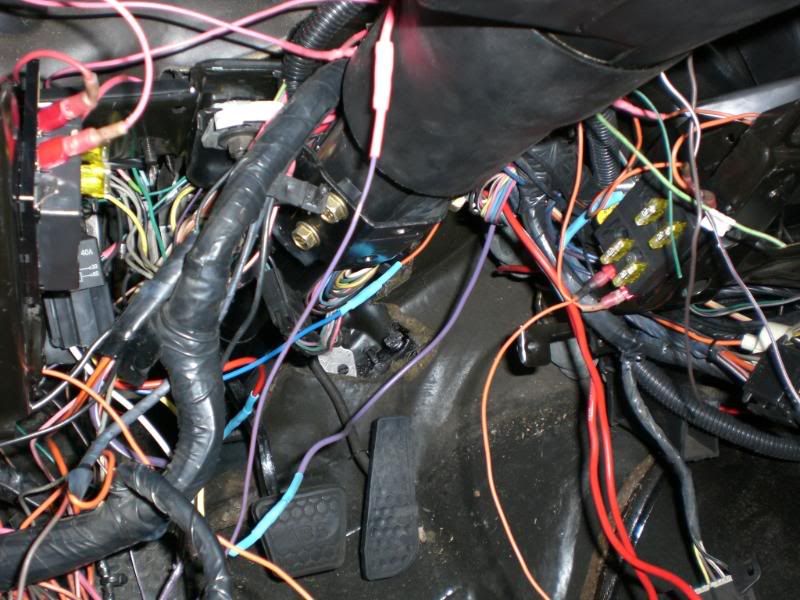
"On the driver side near the brake master cylinder is where all the wires go through the firewall that control the lights, interior switches and some gauges. It's here you will will be making the connections from the LS1 harness to your 3rdgen wiring to get some of the gauges working. This connector is called c100(not to be confused with c100 on the LS1 harness) To keep them clear I will refer to this as the bulkhead connector. The specific wire locations changed slightly over the years...."
"...Since you're really only trying to connect a few wires out of this it's pretty easy to trace them from the bulkhead in to the engine bay and make sure they go to what you logically think they should.
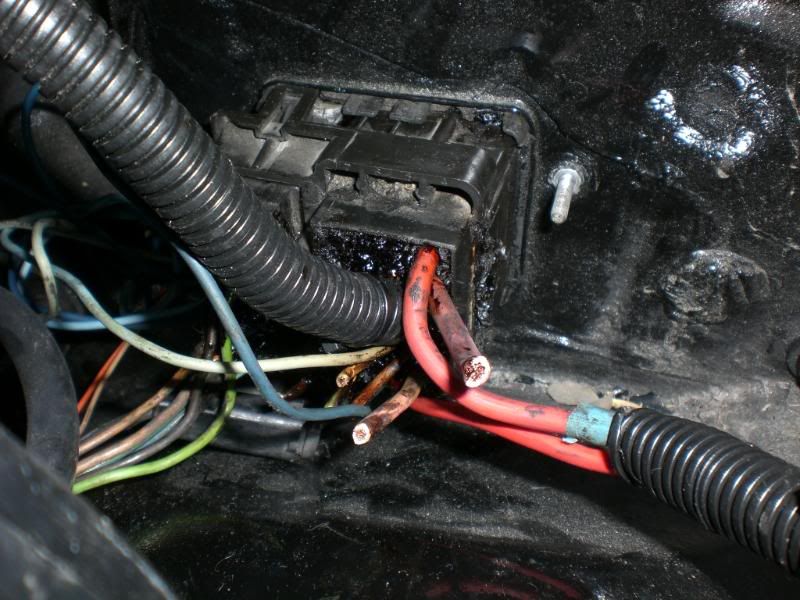
Now here is the cool part. On the back of your 3rdgen starter is a ring terminal with some fusible links and 3 heavy red wires going off of it. 2 of these wires go to this bulkhead connector to give it power and the 3rd goes to the a/c box area for power there. Simply take that ring terminal off with those 3 wires and connect them to the battery and you already have power for all your interior switches like the windows, headlights brakes, etc. "

Here's what it looks like.
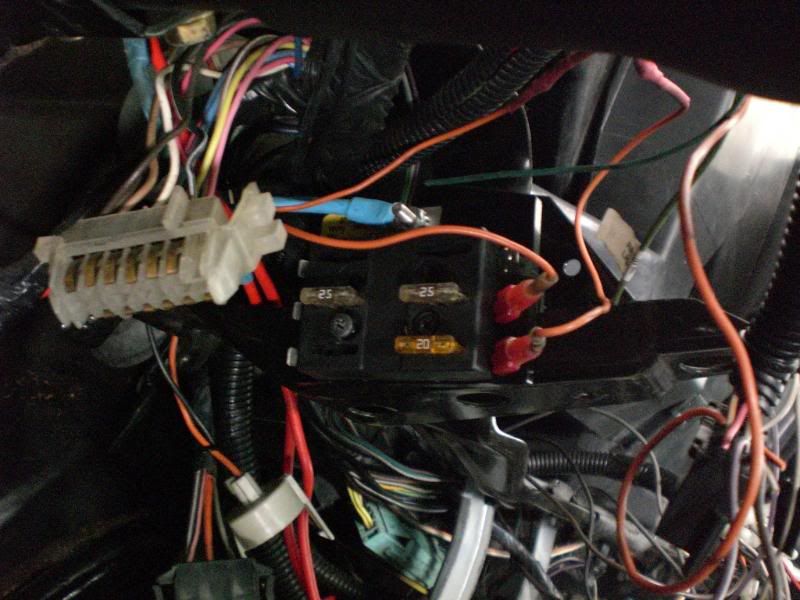
Ran them to the 4th gen power cable that use to go to the 4th gen under hood fuse fox. Ran a kill switch/breaker 150 Amp.
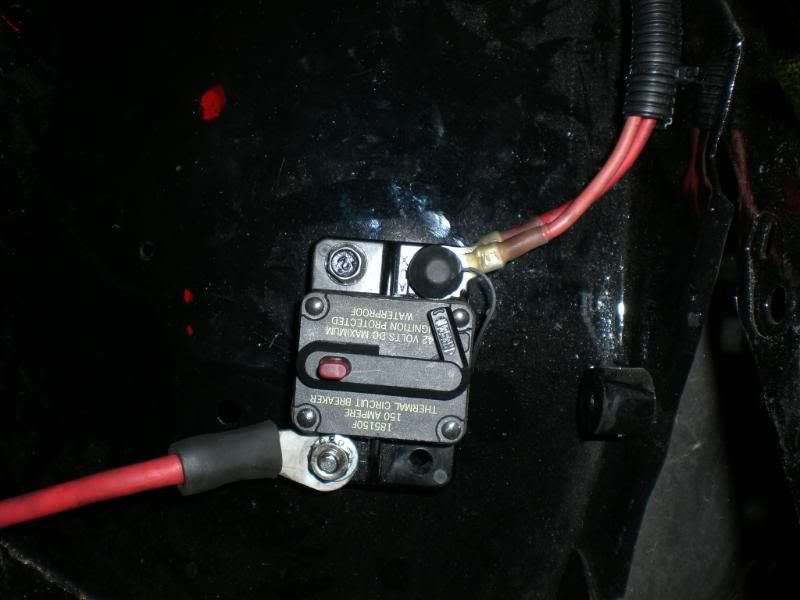
These fuse boxes ran 12v constant (used to supply PCM, fuel pump relay, starter relay ) and another for hot in start (used to supply power to Autometer pillar gauges and to 4th gen cluster ).
Here's a quick vid of the initial start up.
This is what I got making it standalone.
It came with 2 relays for fuel and for the fans which are pretty much plug and play. I ran an extra relay for manual operation which will be activated by a toggle switch.
I ran these wires to the interior via the hole on the passenger side firewall where the AC wires once ran.
I'm going to mount the ECM in the original 3rd gen ECM location. Pretty straight forward.
From Aaron91RS
"On the driver side near the brake master cylinder is where all the wires go through the firewall that control the lights, interior switches and some gauges. It's here you will will be making the connections from the LS1 harness to your 3rdgen wiring to get some of the gauges working. This connector is called c100(not to be confused with c100 on the LS1 harness) To keep them clear I will refer to this as the bulkhead connector. The specific wire locations changed slightly over the years...."
"...Since you're really only trying to connect a few wires out of this it's pretty easy to trace them from the bulkhead in to the engine bay and make sure they go to what you logically think they should.
Now here is the cool part. On the back of your 3rdgen starter is a ring terminal with some fusible links and 3 heavy red wires going off of it. 2 of these wires go to this bulkhead connector to give it power and the 3rd goes to the a/c box area for power there. Simply take that ring terminal off with those 3 wires and connect them to the battery and you already have power for all your interior switches like the windows, headlights brakes, etc. "
Here's what it looks like.
Ran them to the 4th gen power cable that use to go to the 4th gen under hood fuse fox. Ran a kill switch/breaker 150 Amp.
These fuse boxes ran 12v constant (used to supply PCM, fuel pump relay, starter relay ) and another for hot in start (used to supply power to Autometer pillar gauges and to 4th gen cluster ).
Here's a quick vid of the initial start up.
Last edited by CyberGrey Z28; 07-20-2011 at 08:55 PM. Reason: ...
07-23-2011, 02:09 PM
#14
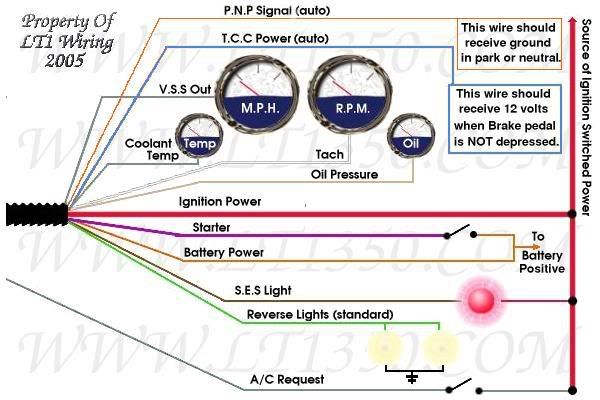
Was able to get my instrument cluster to operate via the serial data wire. All the gauges are working except the fuel level which I'm still working on (need to add a pin to PCM which grounds the fuel sender). I took my 3rd gen cluster diagrams and hooked them up to the cluster along with the serial data wire from the LS1 PCM as follows.
3rd gen connectors that go to cluster

Incorporated to 4th gen cluster pin outs as follows:
A3 PNK 39 Ignition Power...to 3rd gen Clear Connenctor #2 or #6 Pnk w/Black
A5 TAN/WHT...to 3rd gen Clear Connenctor #7 Brake Reservoir Sensor
A8 BRN/WHT 419 SES light to
A10 ORN 640 Constant Battery 12v
A12LT BLU 14 Left Turn Signal Lamps...to 3rd Gen Black Connector #8
A13 PPL/WHT 237 Instrument Panel Lamp Control ??????
A17 LT GRN 11 Headlamp High Beam... to 3rd Gen Black Connector #10
B1 BRN 9 Park Lamp Supply Voltage...Power w/parking lights
B3 GRY 728 Security Indicator Control (Not used)
B5 PPL/WHT 1035 Starter Coil Supply Voltage...Hot in start, yellow wire from Ign, Switch
B6 GRY 1036 IPC Class 2 Serial Data...from LS1 PCM
B7 ORN/BLK737 Trunk Lamp Control (Not used)
B8 DK GRN/WHT 817 VSS Signal..from LS1 PCM
B9 GRY 8 Instrument Panel Lamp Supply Voltage ??? Lamps form Dimmer
B10 DK BLU 15 Right Turn Signal Lamps...to 3rd gen Clear Connenctor #12
B11 BLK 650 Ground....to 3rd gen Clear Connenctor #9 or or Black Connector #10
B14 TAN 31 Oil Pressure Indicator Control...from LS1 oil sending unit
B15 BLK 650 Ground... to 3rd gen Clear Connenctor #9 or Black Connector #10
now for the pics.
4th gen cluster connector
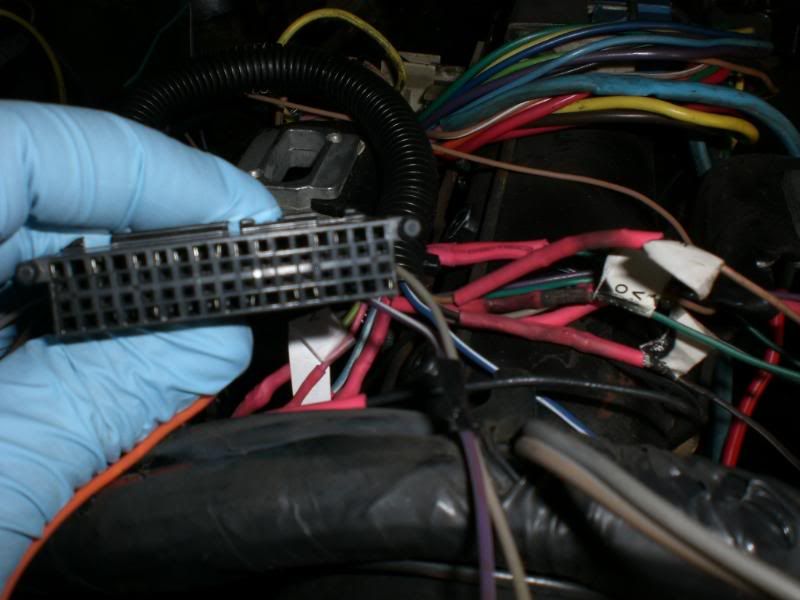
In start position
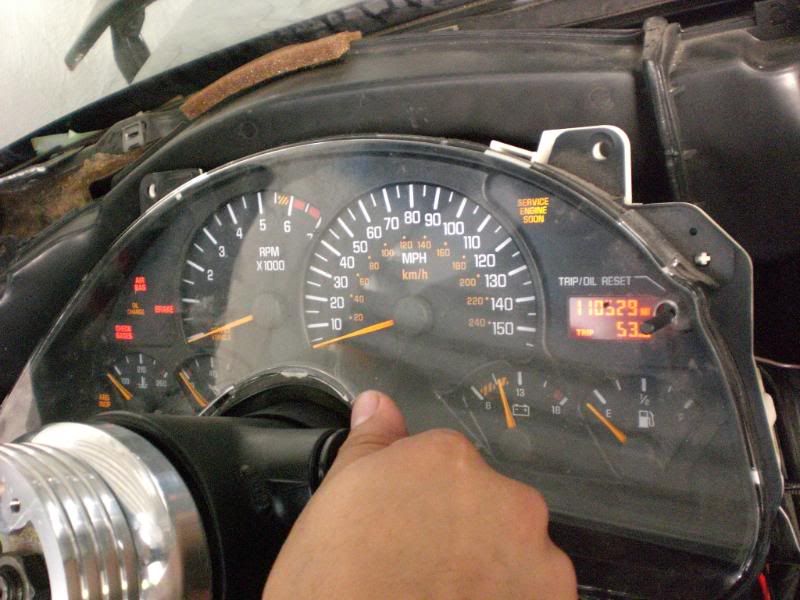
Before
Still in the process...
3rd gen connectors that go to cluster
Incorporated to 4th gen cluster pin outs as follows:
A3 PNK 39 Ignition Power...to 3rd gen Clear Connenctor #2 or #6 Pnk w/Black
A5 TAN/WHT...to 3rd gen Clear Connenctor #7 Brake Reservoir Sensor
A8 BRN/WHT 419 SES light to
A10 ORN 640 Constant Battery 12v
A12LT BLU 14 Left Turn Signal Lamps...to 3rd Gen Black Connector #8
A13 PPL/WHT 237 Instrument Panel Lamp Control ??????
A17 LT GRN 11 Headlamp High Beam... to 3rd Gen Black Connector #10
B1 BRN 9 Park Lamp Supply Voltage...Power w/parking lights
B3 GRY 728 Security Indicator Control (Not used)
B5 PPL/WHT 1035 Starter Coil Supply Voltage...Hot in start, yellow wire from Ign, Switch
B6 GRY 1036 IPC Class 2 Serial Data...from LS1 PCM
B7 ORN/BLK737 Trunk Lamp Control (Not used)
B8 DK GRN/WHT 817 VSS Signal..from LS1 PCM
B9 GRY 8 Instrument Panel Lamp Supply Voltage ??? Lamps form Dimmer
B10 DK BLU 15 Right Turn Signal Lamps...to 3rd gen Clear Connenctor #12
B11 BLK 650 Ground....to 3rd gen Clear Connenctor #9 or or Black Connector #10
B14 TAN 31 Oil Pressure Indicator Control...from LS1 oil sending unit
B15 BLK 650 Ground... to 3rd gen Clear Connenctor #9 or Black Connector #10
now for the pics.
4th gen cluster connector
In start position
Before
Still in the process...

 07-23-2011, 04:37 PM
#17
TECH Enthusiast
iTrader: (1)

Join Date: Jan 2006
Location: Charlotte, NC
Posts: 581
Likes: 0
Received 0 Likes
on
0 Posts

Im assuming your copying and pasting these from somewhere...
Did you paint the car after the swap? It looks black in the fab/swap pics... I know I'm probably jumping ahead...
Did you paint the car after the swap? It looks black in the fab/swap pics... I know I'm probably jumping ahead...
07-23-2011, 06:20 PM
#18

 07-25-2011, 03:05 AM
#20
Thanks, will do!


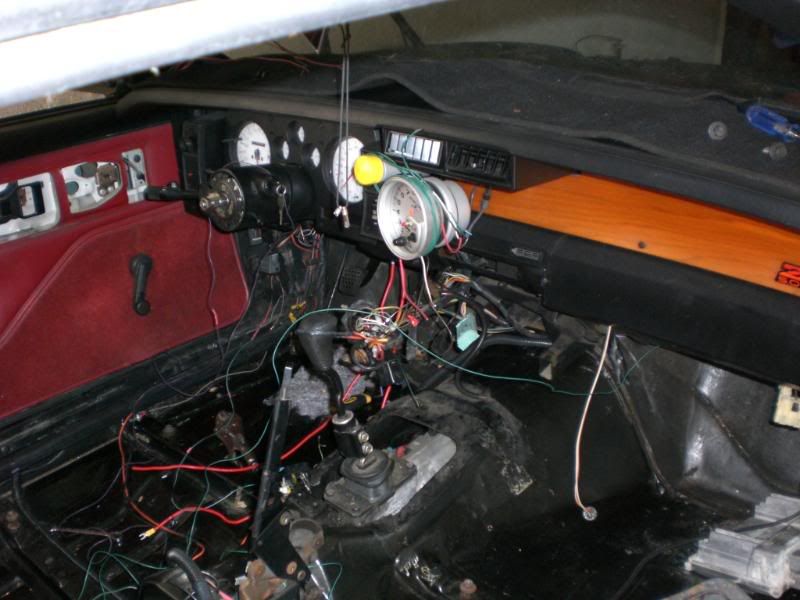
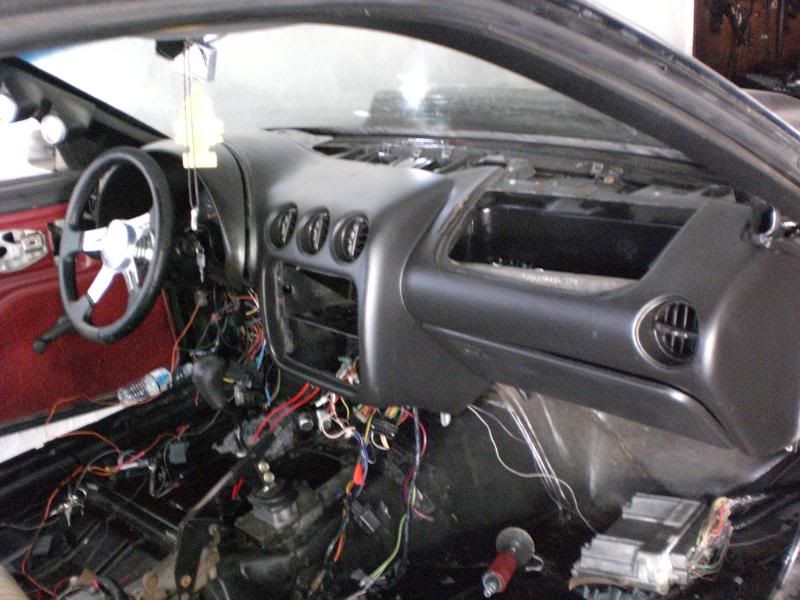
About the 4th gen dash, it's relatively easy to mount the dash. The wiring on the other hand is not fun at all, good thing my bro TPI TERROR is meticulous with those details. He did the interior wiring and set up my functional 4th gen A/C (will post info later.)
 You don't know how many PM's I got about getting the LS1 gauge cluster to work!!
More Updates:
Ran into some issues, one of the coils packs was hooked up inccorectly so it was causing backfirng. Took a while for us to figure it out.
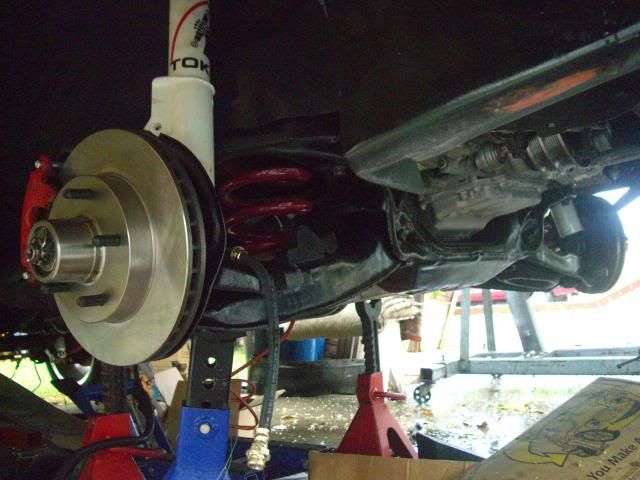
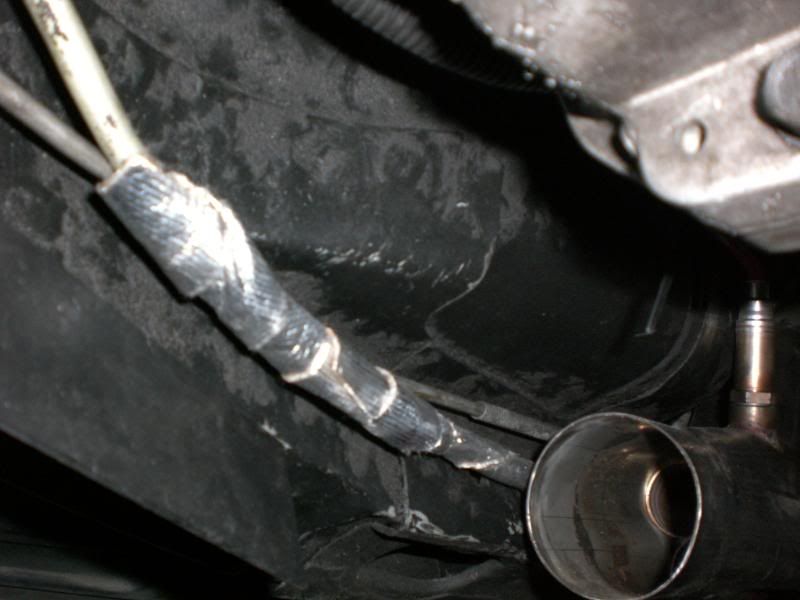
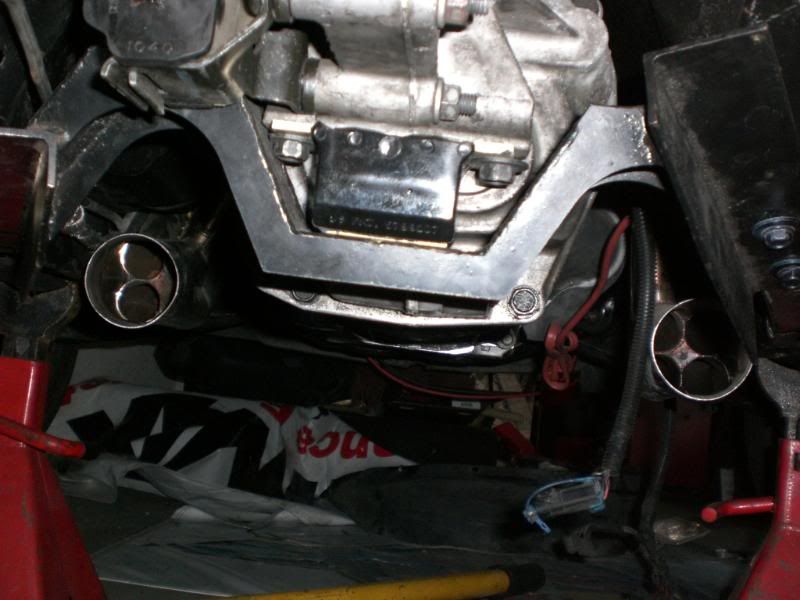
I did get the exhaust welded, Hawks Headers w/3inch collectors, v-bands, 3 inch flowmaster y-pipe, to spiral muffler, to Corsa catback w/B&B exhasut tips. Here are the pics:
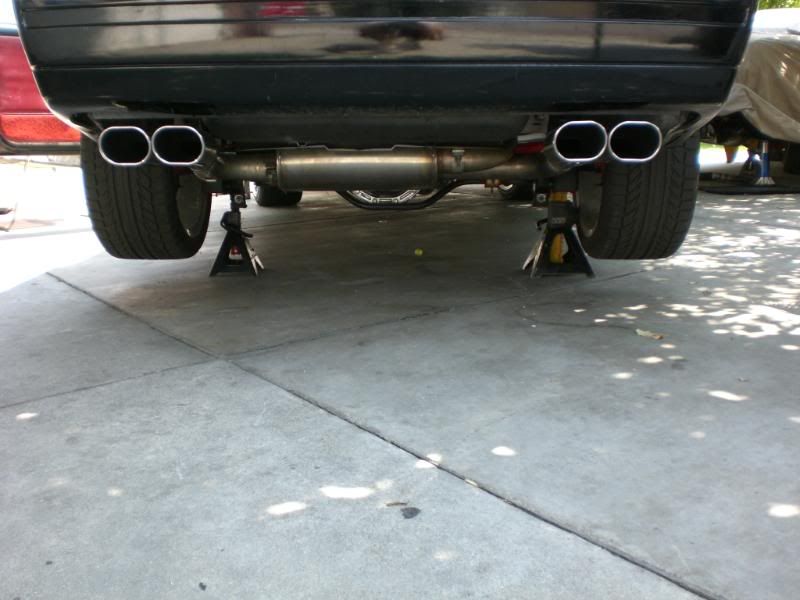
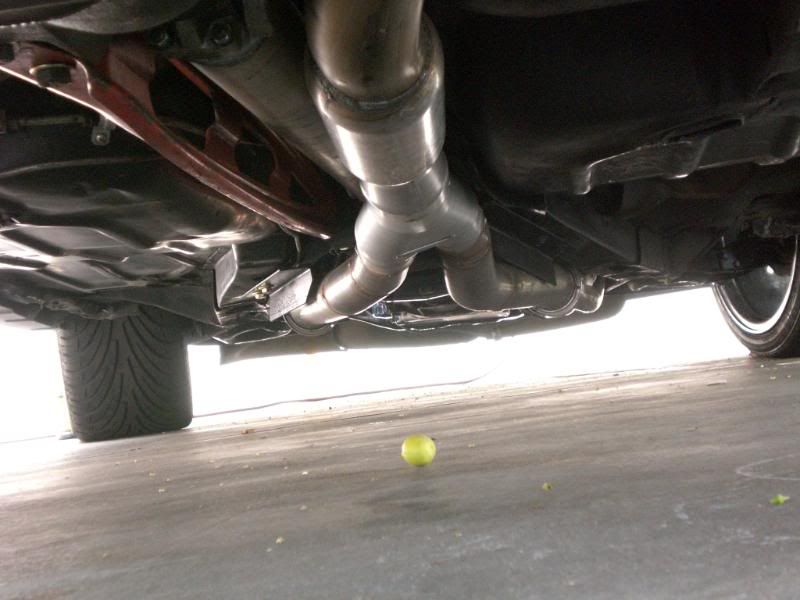

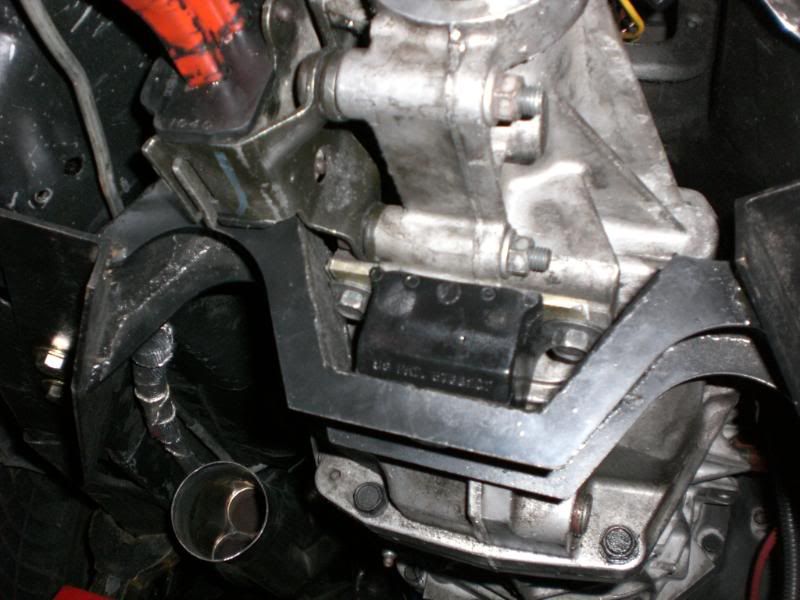
Double hump cross member was used. Here are a few different shots (excuse the hanging rear O2 sensor and remote clutch bleeder):
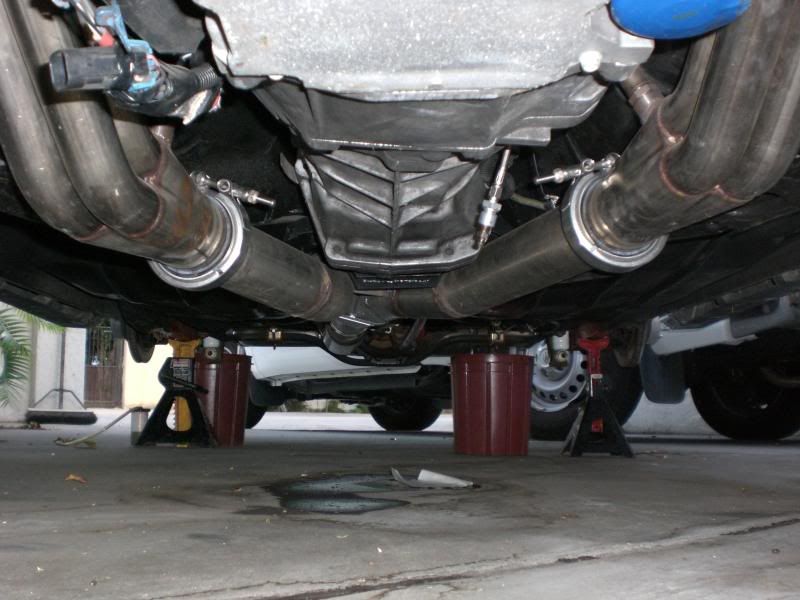
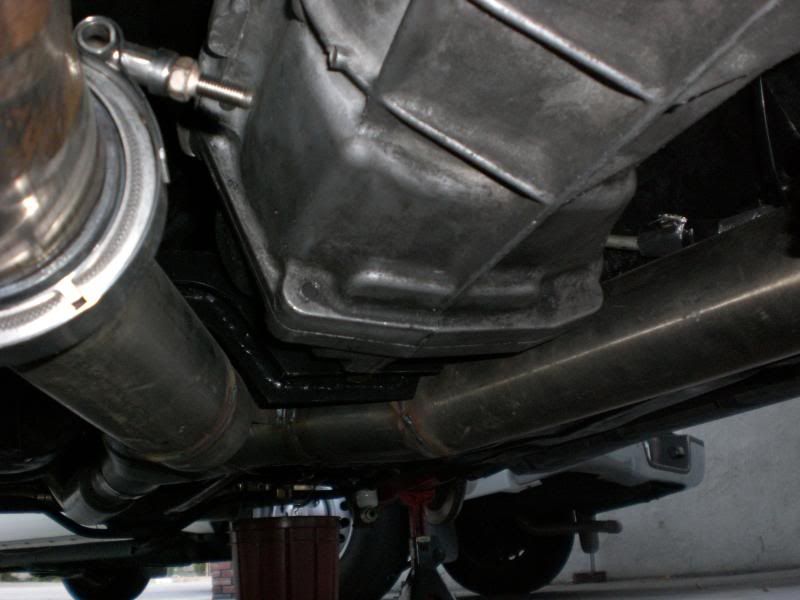
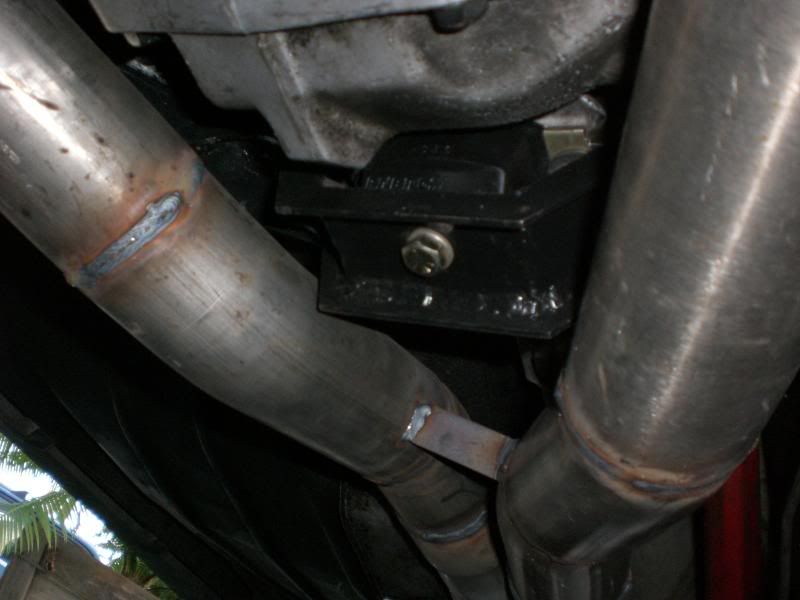
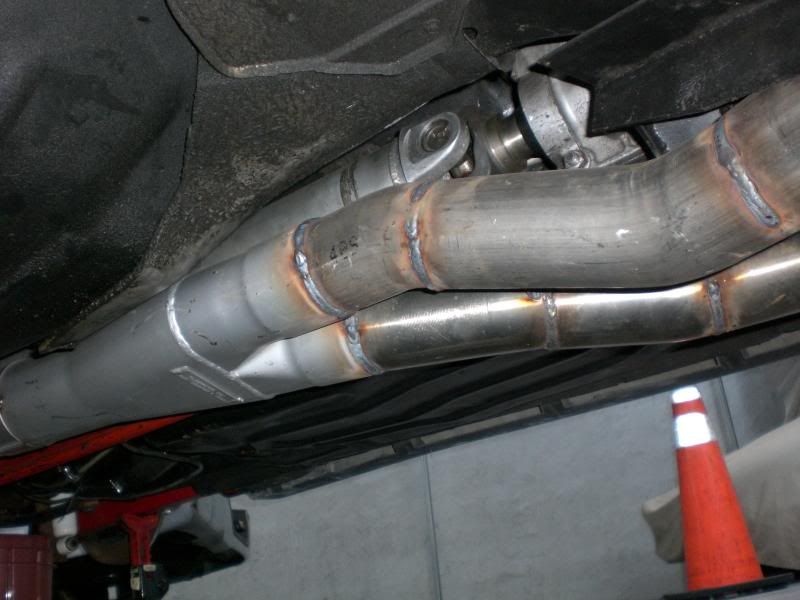
Very tight clearances, the welder spent a few hours on it because I didn't want any dents or crimps in the piping which would restrict air flow. I'm hoping the body doesn't rattle against the exhaust while driving, I'll keep you guys posted.
Also installed the overlay gauges w/working headlight and dimmer switch.