

66 Impala Convert LS2 Conversion
 02-14-2012, 06:33 PM
#101
TECH Fanatic
Thread Starter


All the parts used came out of a GTO fuel tank assy.....except for the sheet metal modifications and fuel line fitting which were made at our shop......
Ken
Ken
 02-14-2012, 08:39 PM
#102
TECH Enthusiast

 02-16-2012, 07:46 AM
#103
TECH Fanatic
Thread Starter
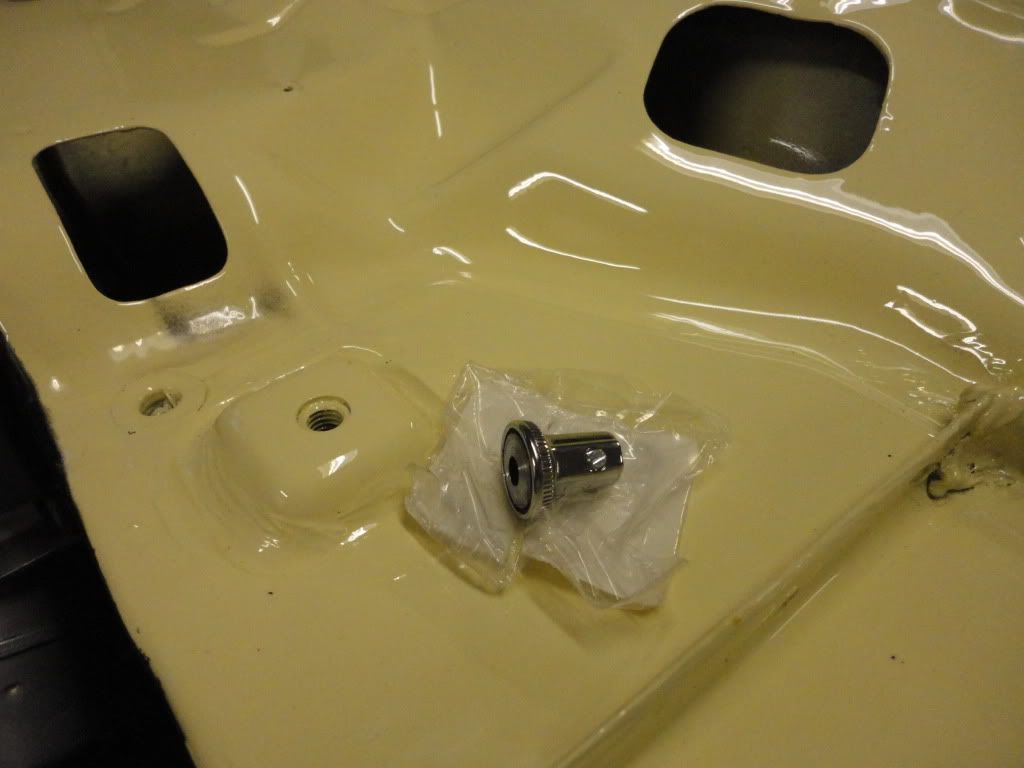
Still waiting for the wheels and tires to come in so I can move the car around and get the engine in.....So....In the mean time I started putting the dash together......Here we go.....I ordered a bunch of repro stuff......Lets see how this goes.....
First off I opened the new dash trip bezels.......Holes lined up....Off to a good start.......install the headlight switch.....good so far........Install the wiper switch.....go to put on the new wiper switch ****.......Humm!!......When I tighten the set screw, the **** shifts to one side and the washer stem is locked in place.........HUmm!!....Put the old one back on and everything works fine........Put the new one back on and it binds up again.......Get a Caliper out and start measuring things.....theres a hex shape that keys on to the hex on the switch that turns for operation of the wipers.....Check the GM and then check the repro.......The Repro hex doesn't go thru the part deep enough to allow the **** to go on far enough for the set screw to tighten on the hex....it instead tightens on the washer push spindle and locks it in position......Great Start!!.......So, I put the old one back on and it works perfectly.......I can see right now there will probably be a bunch of stuff going back for credit (Wiper **** $12 Ignition Bezel $20)......this time I was smart and saved all the paperwork so I had a record of everything....
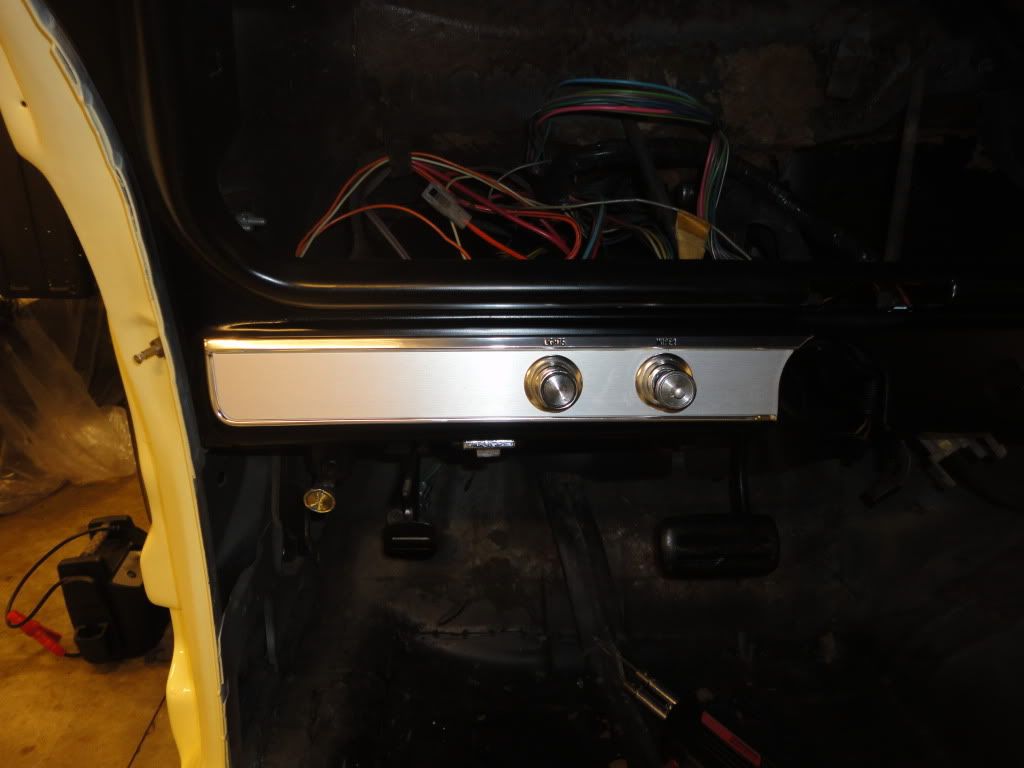
I bought a complete Interior Trim Kit so all this stuff was included.........Move on to the next piece.......install the trim plate....holes line up.....so far so good....install the cigarette lighter.....screws right in....install the ignition switch.....so far so good.....grab the new ignition trim bezel....oops!!.........Doesn't fit....Imagine that.....wrong part.....


Installed the old one.....another part to be returned......the last piece of trim to be installed ahd the studs bent during assy and wouldn't fit into the holes in the dash......So...should I bend them straight to fit and take a chance of deforming the front side that you see (my fault) or send it back??......Darn!!....I'm just getting started and already I hate all this Repro "Junk".....I don't want to be a chronic complainer here....I just want this to be a real world assembly experience and will call things as they happen just to save others from a like experience.....Anyhow!1....I straightened the studs and got lucky as the front didn't distort.....
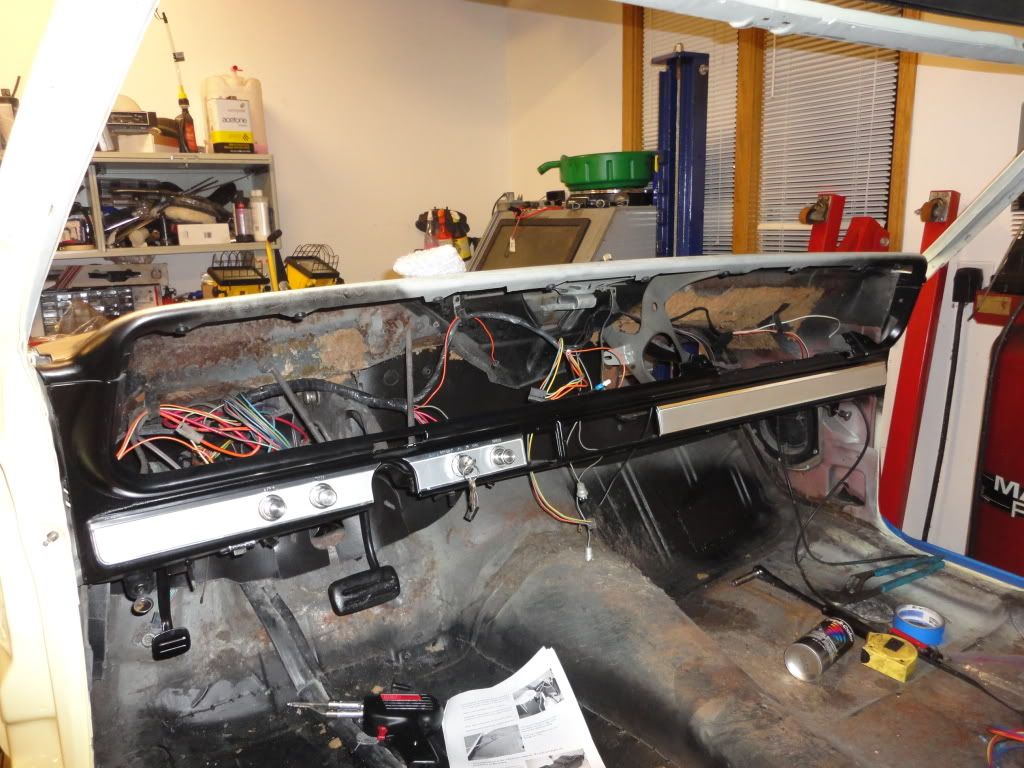
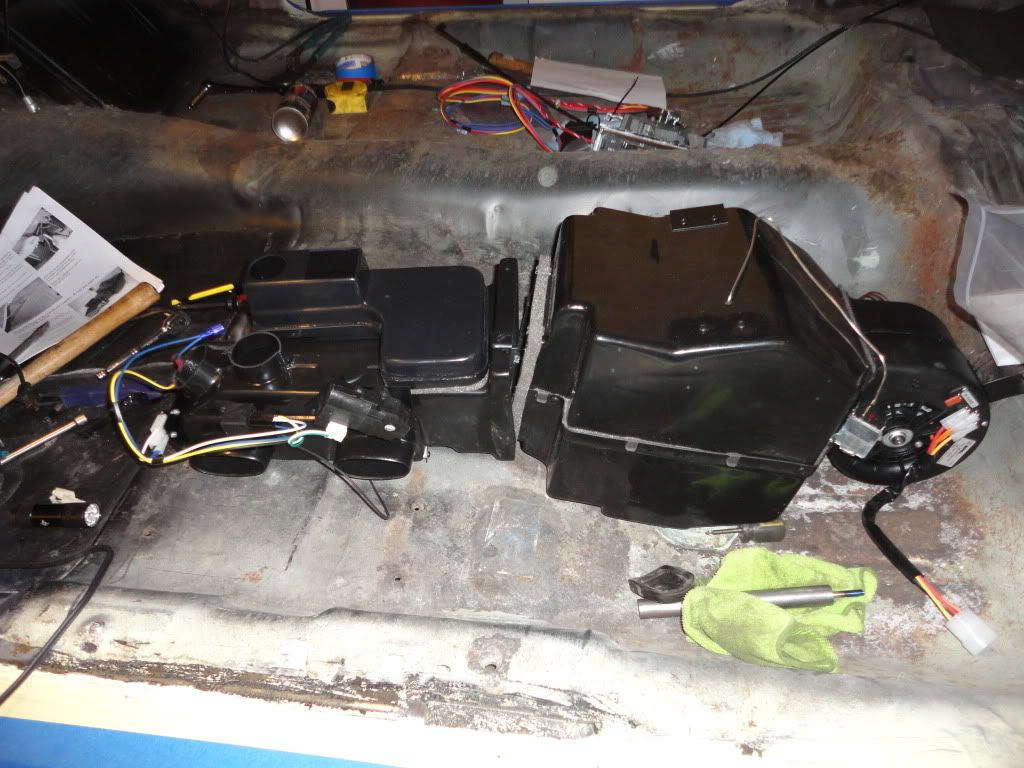
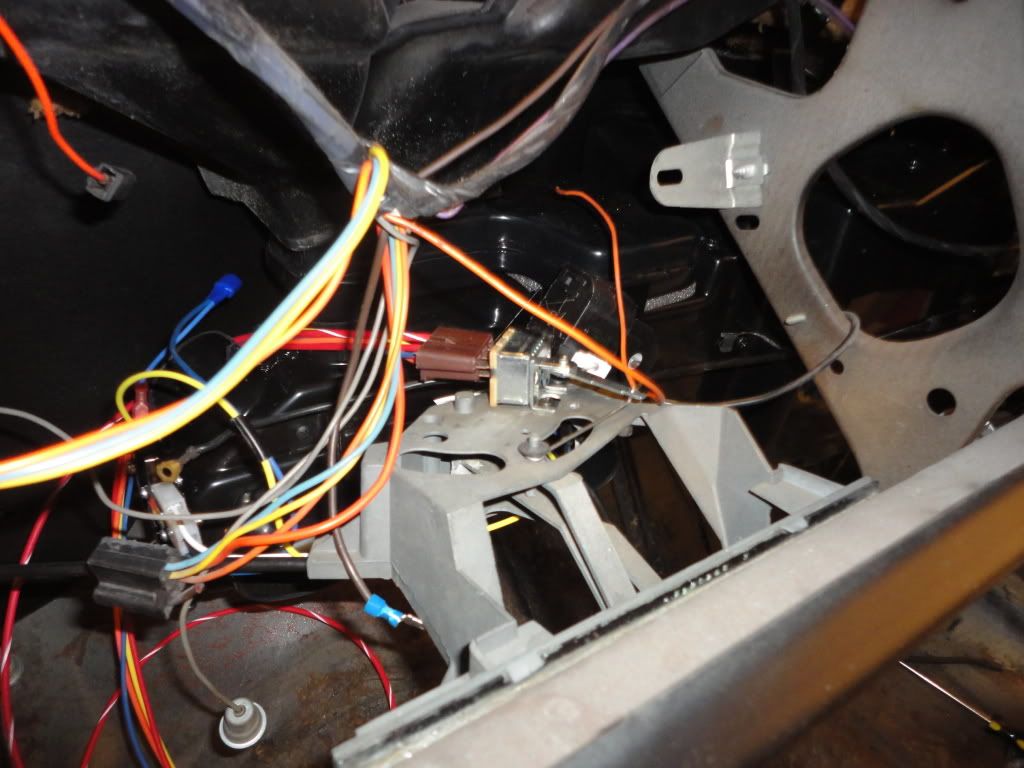
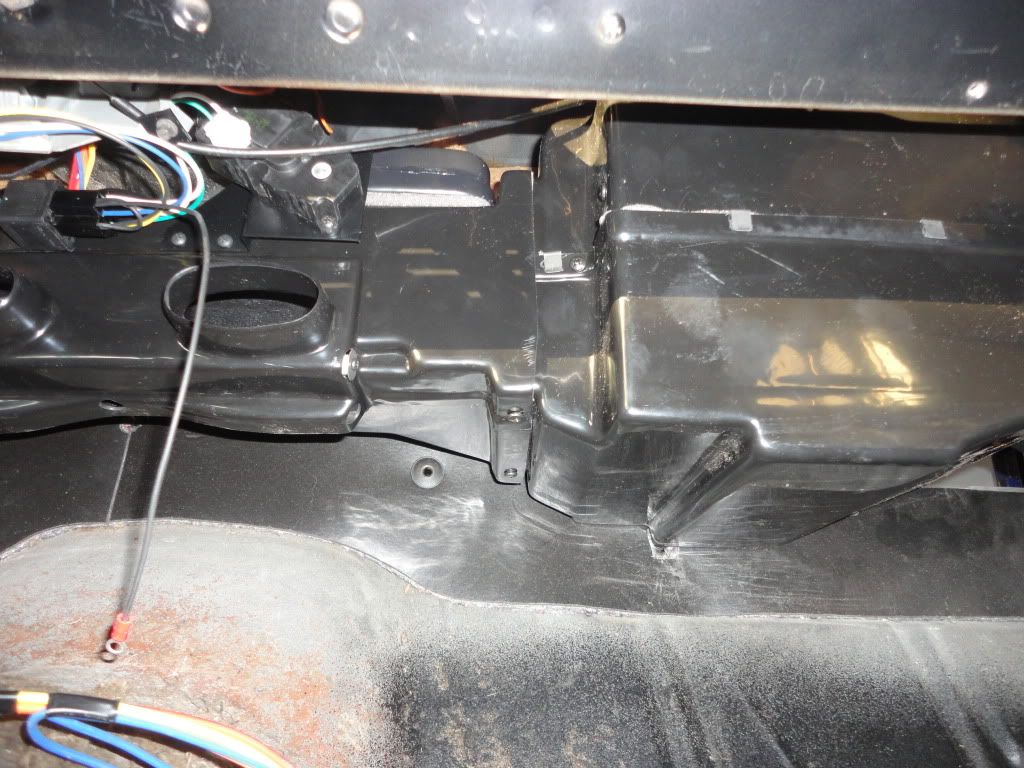
Got all the A/C stuff out.....I'll get everything mounted tonight......
First off I opened the new dash trip bezels.......Holes lined up....Off to a good start.......install the headlight switch.....good so far........Install the wiper switch.....go to put on the new wiper switch ****.......Humm!!......When I tighten the set screw, the **** shifts to one side and the washer stem is locked in place.........HUmm!!....Put the old one back on and everything works fine........Put the new one back on and it binds up again.......Get a Caliper out and start measuring things.....theres a hex shape that keys on to the hex on the switch that turns for operation of the wipers.....Check the GM and then check the repro.......The Repro hex doesn't go thru the part deep enough to allow the **** to go on far enough for the set screw to tighten on the hex....it instead tightens on the washer push spindle and locks it in position......Great Start!!.......So, I put the old one back on and it works perfectly.......I can see right now there will probably be a bunch of stuff going back for credit (Wiper **** $12 Ignition Bezel $20)......this time I was smart and saved all the paperwork so I had a record of everything....
I bought a complete Interior Trim Kit so all this stuff was included.........Move on to the next piece.......install the trim plate....holes line up.....so far so good....install the cigarette lighter.....screws right in....install the ignition switch.....so far so good.....grab the new ignition trim bezel....oops!!.........Doesn't fit....Imagine that.....wrong part.....
Installed the old one.....another part to be returned......the last piece of trim to be installed ahd the studs bent during assy and wouldn't fit into the holes in the dash......So...should I bend them straight to fit and take a chance of deforming the front side that you see (my fault) or send it back??......Darn!!....I'm just getting started and already I hate all this Repro "Junk".....I don't want to be a chronic complainer here....I just want this to be a real world assembly experience and will call things as they happen just to save others from a like experience.....Anyhow!1....I straightened the studs and got lucky as the front didn't distort.....
Got all the A/C stuff out.....I'll get everything mounted tonight......
02-16-2012, 08:43 PM
#104
TECH Fanatic
Thread Starter
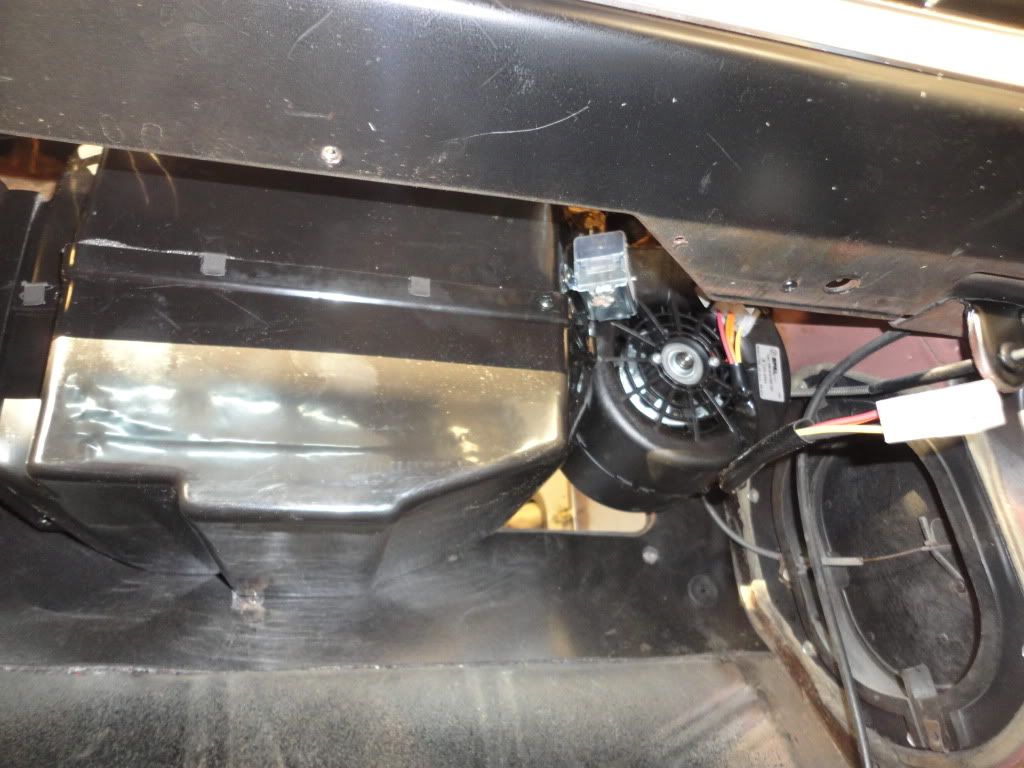
Had a good day today.....Didn't have to deal with any repro stuff....Got the new A/C set-up from Classic Auto Air installed on the inside of the car.....wired and mounted.....Easy day....LOL
02-18-2012, 02:35 PM
#105
TECH Fanatic
Thread Starter
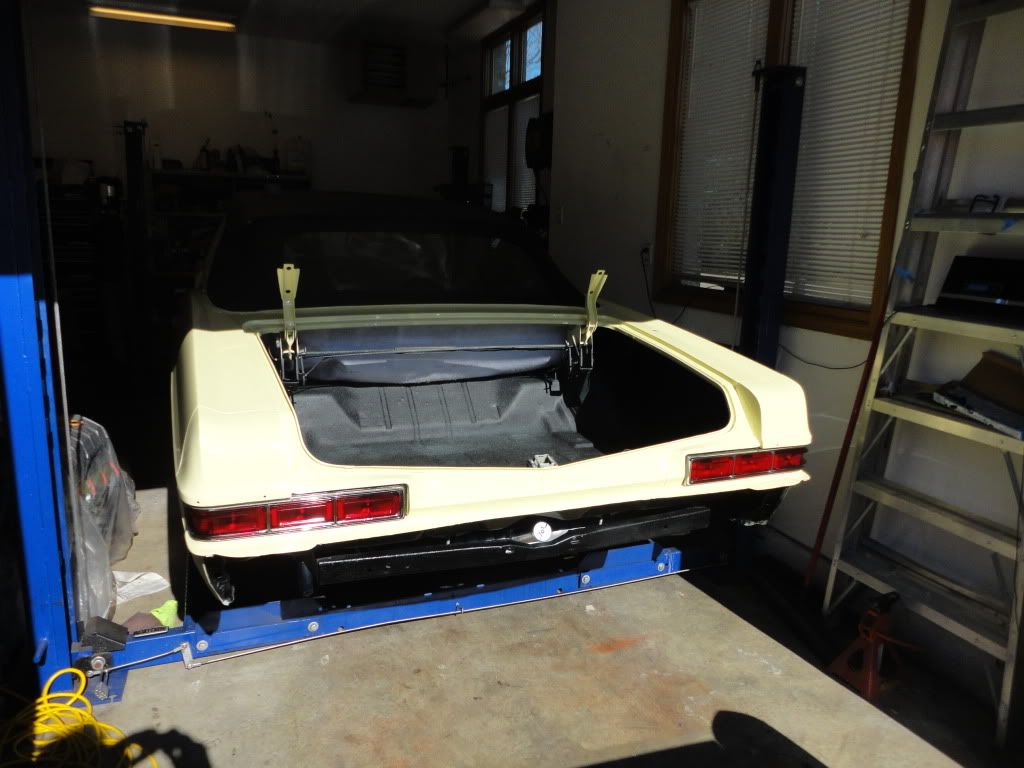
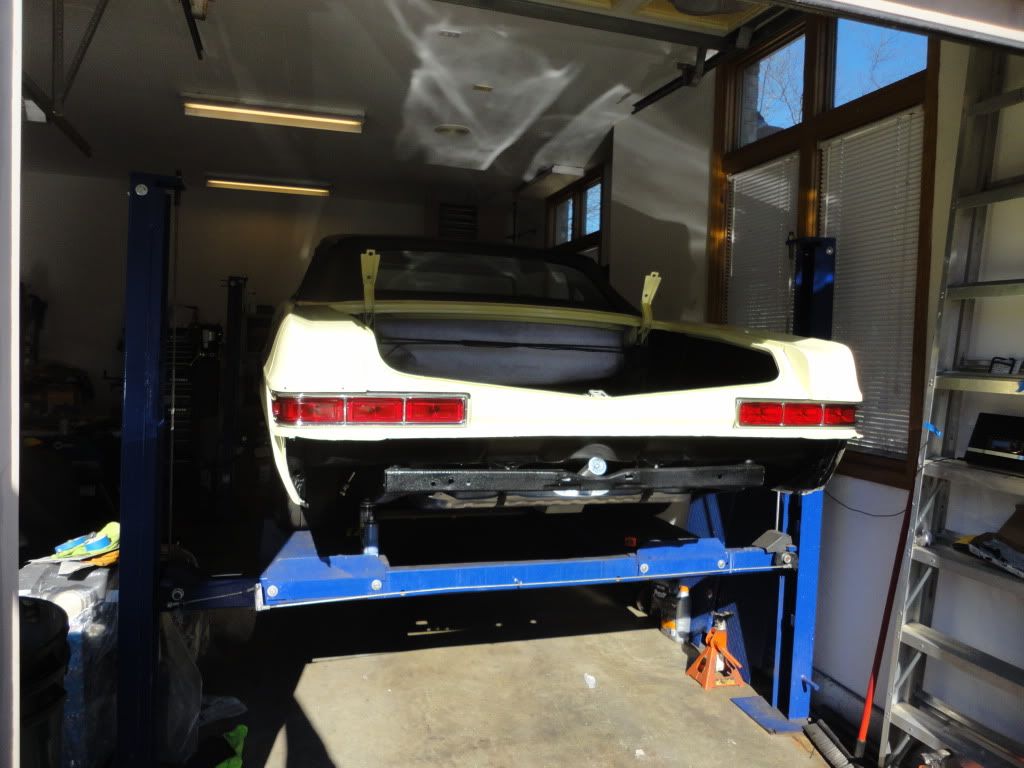
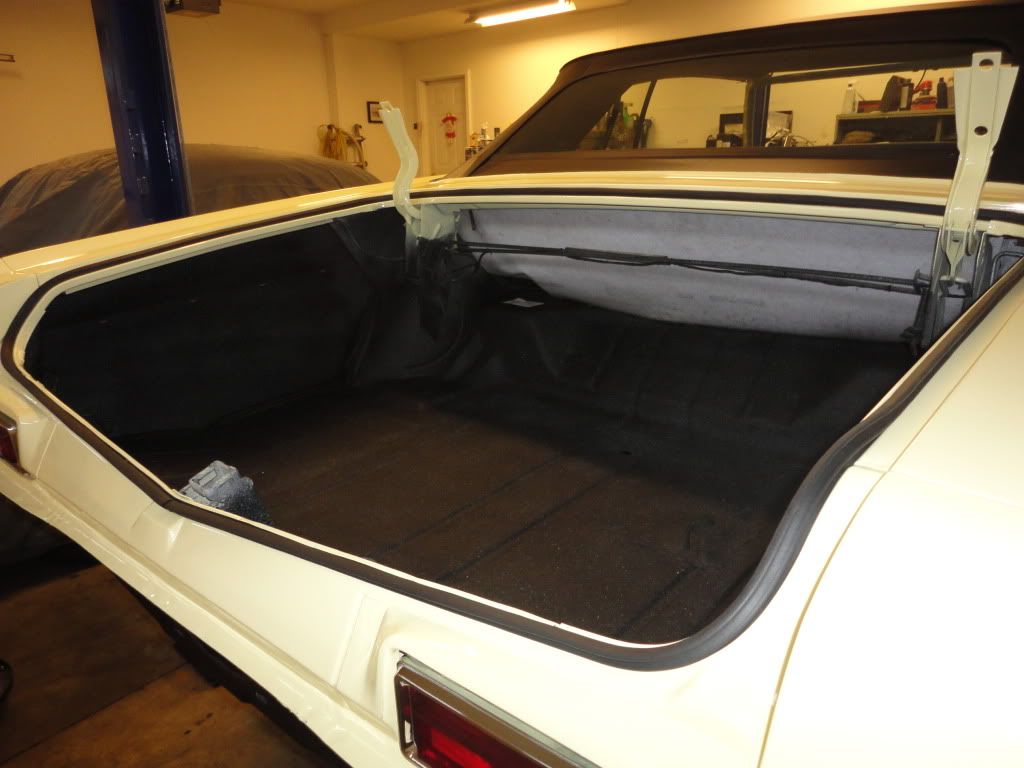
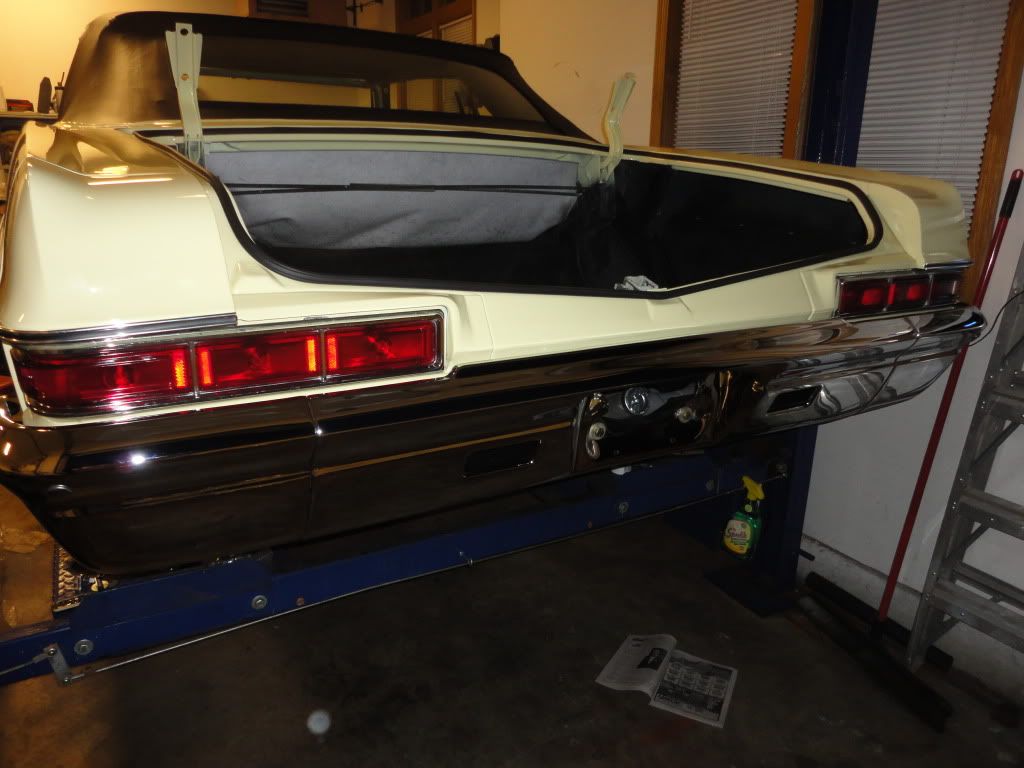
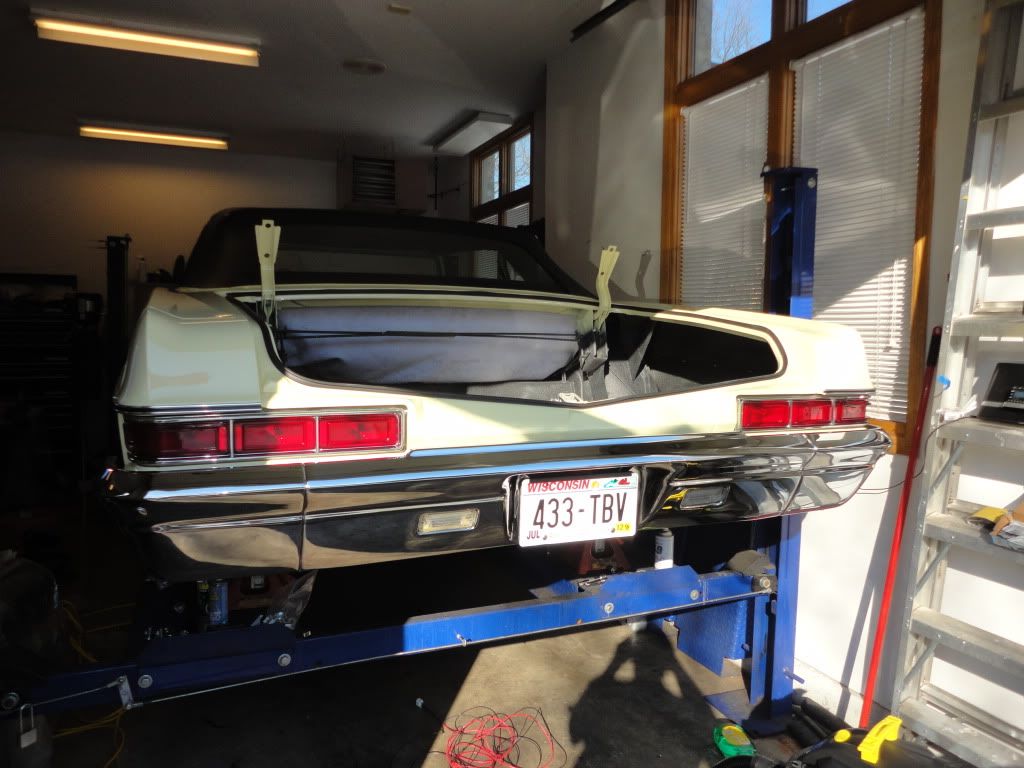
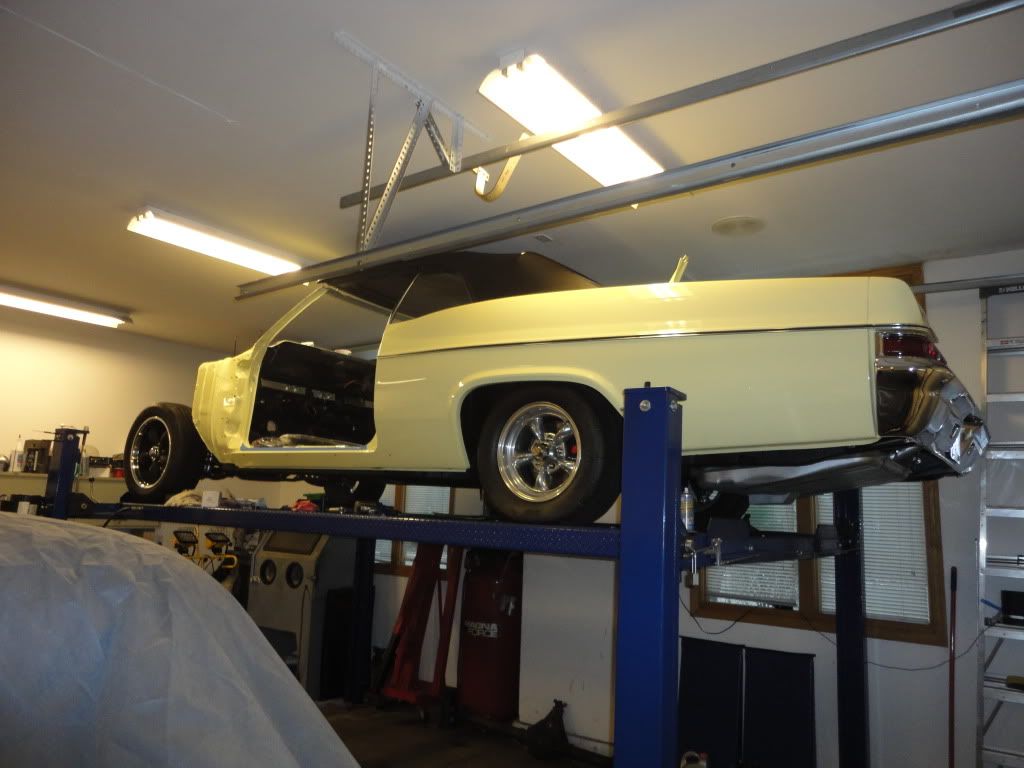
Cleaned, wire brushed and sanded the trunk, then Rattle canned it..... Got the quarter extensions on.....got the tail lights installed.....Just have to wait for the new wire harnesses to show up....the front rims are MIA......Darn!!.....they should have been here two weeks ago......called last Monday and they said they were to be shipped that day...still not here...
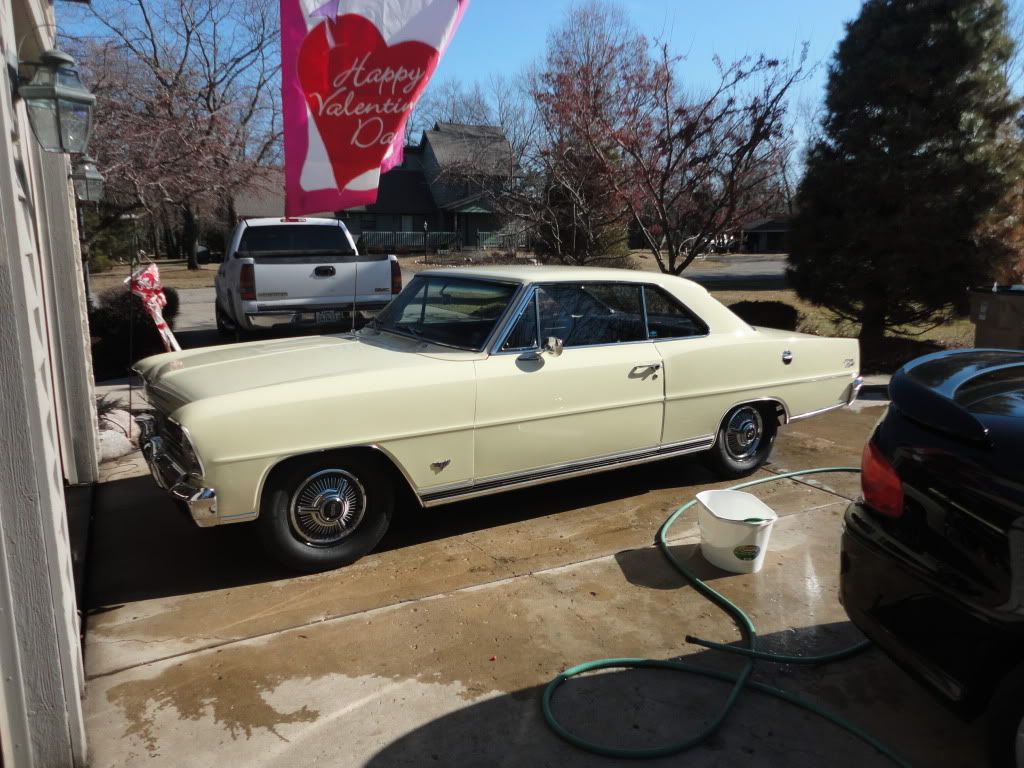
40 Degrees here today....Washed the Nova.....(Out West Guy's.....40 degrees ain't that bad!!....LOL)
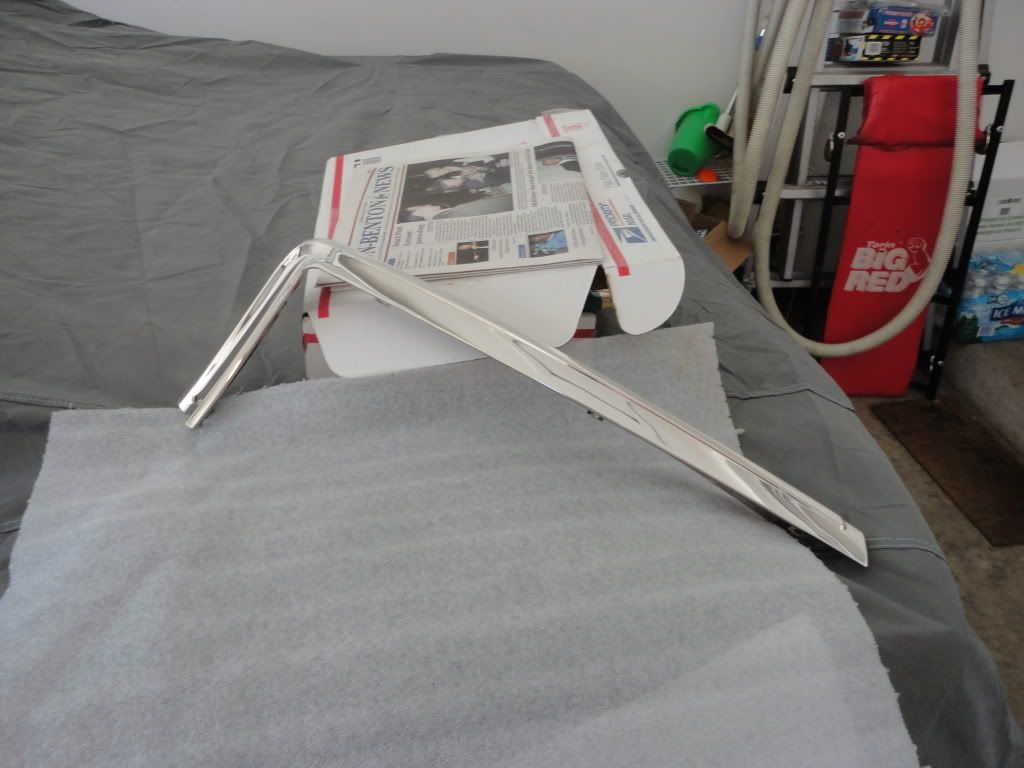
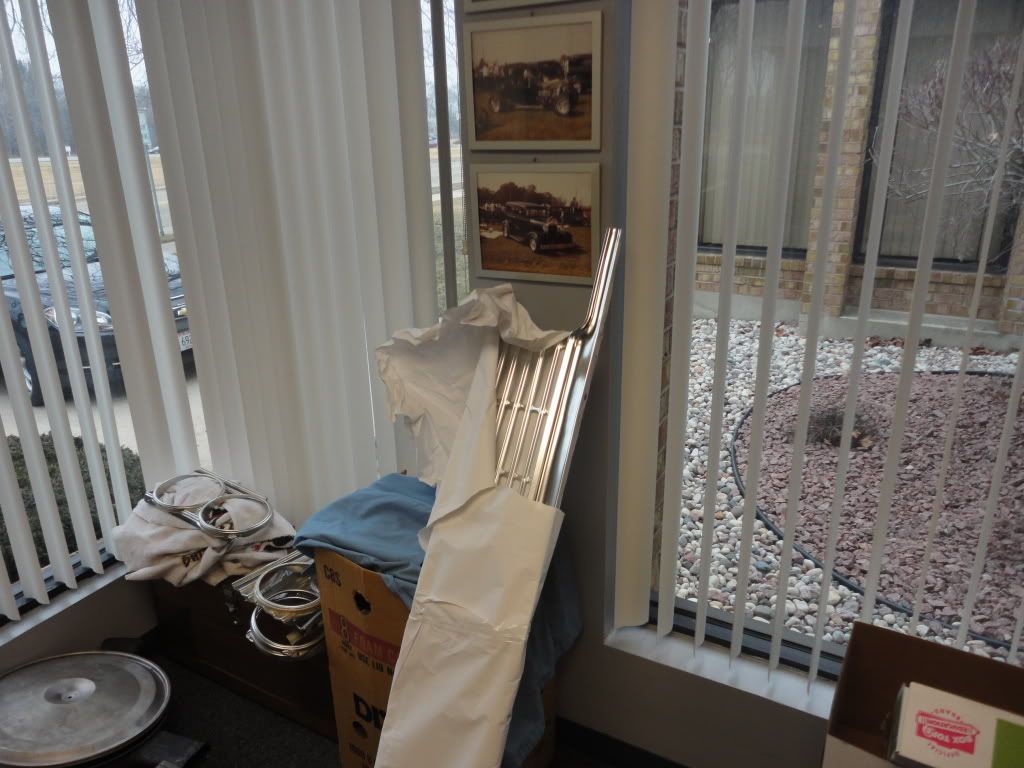
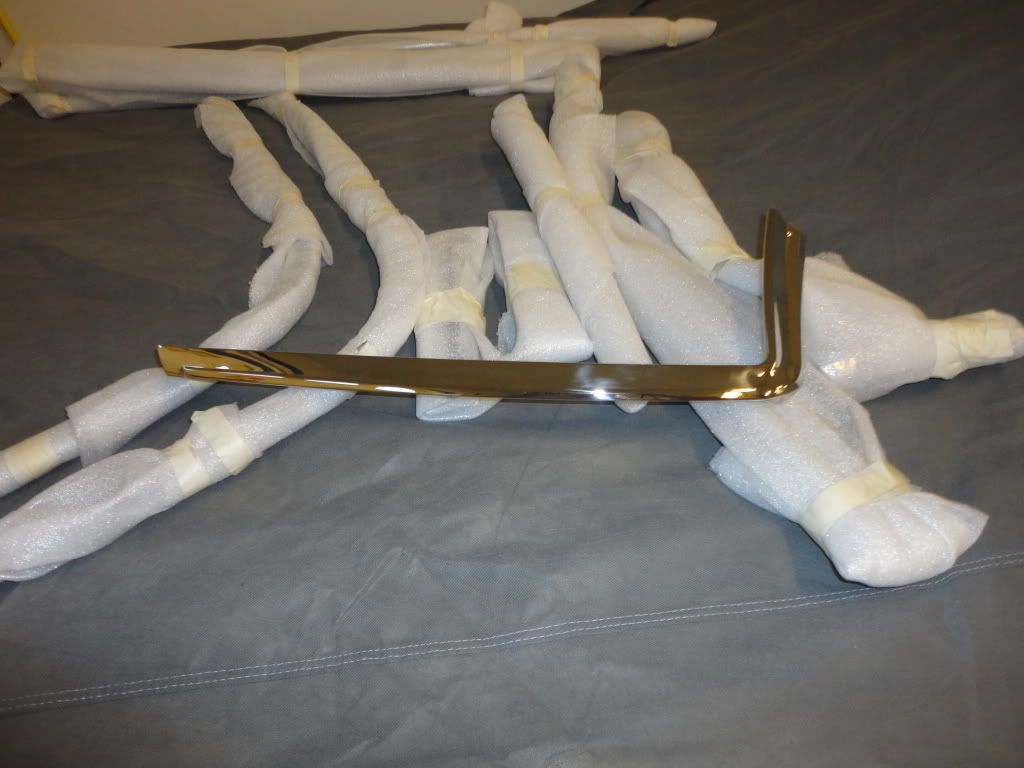
I also picked up the first piece of the Nu Yawk Perfect Survivor Cars stainless trim from the polisher....the rest will be finished on Monday.......Just gotta love thoise Nu Yawk Cars...
40 Degrees here today....Washed the Nova.....(Out West Guy's.....40 degrees ain't that bad!!....LOL)
I also picked up the first piece of the Nu Yawk Perfect Survivor Cars stainless trim from the polisher....the rest will be finished on Monday.......Just gotta love thoise Nu Yawk Cars...
02-21-2012, 06:11 AM
#106
TECH Fanatic
Thread Starter
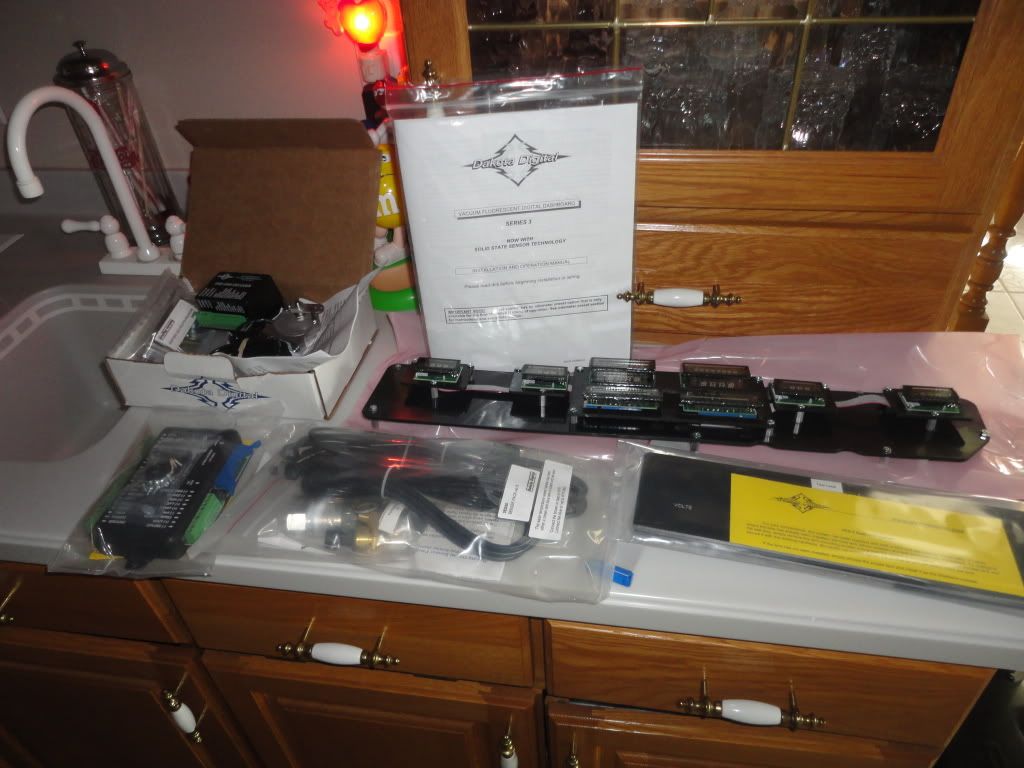
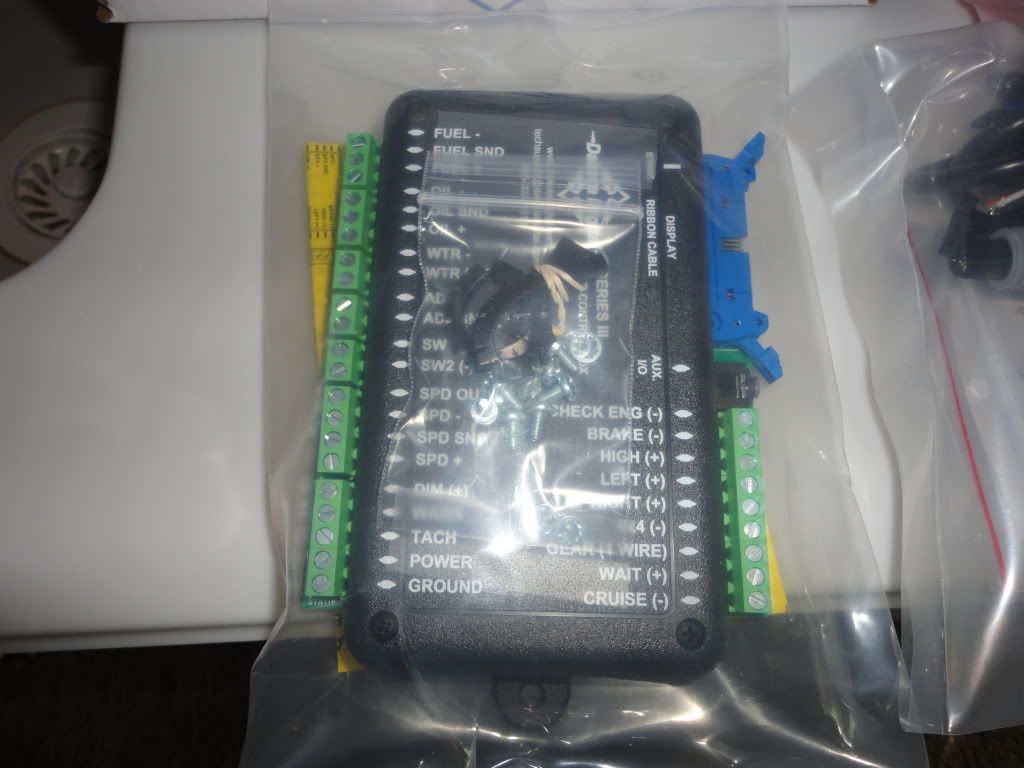
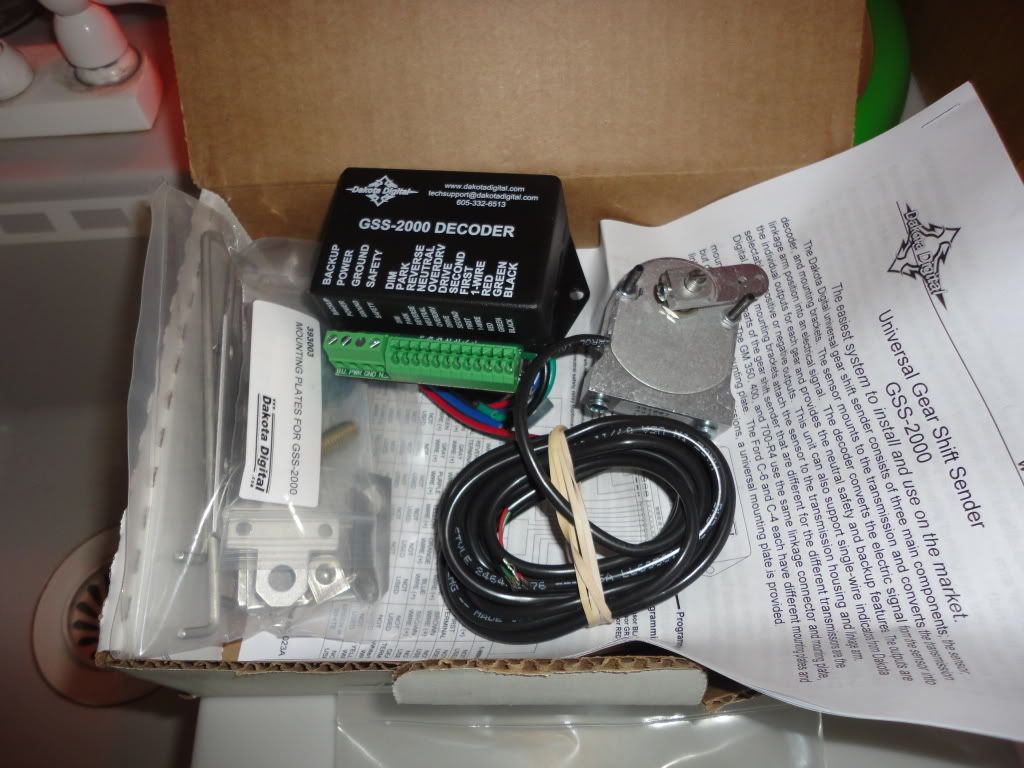
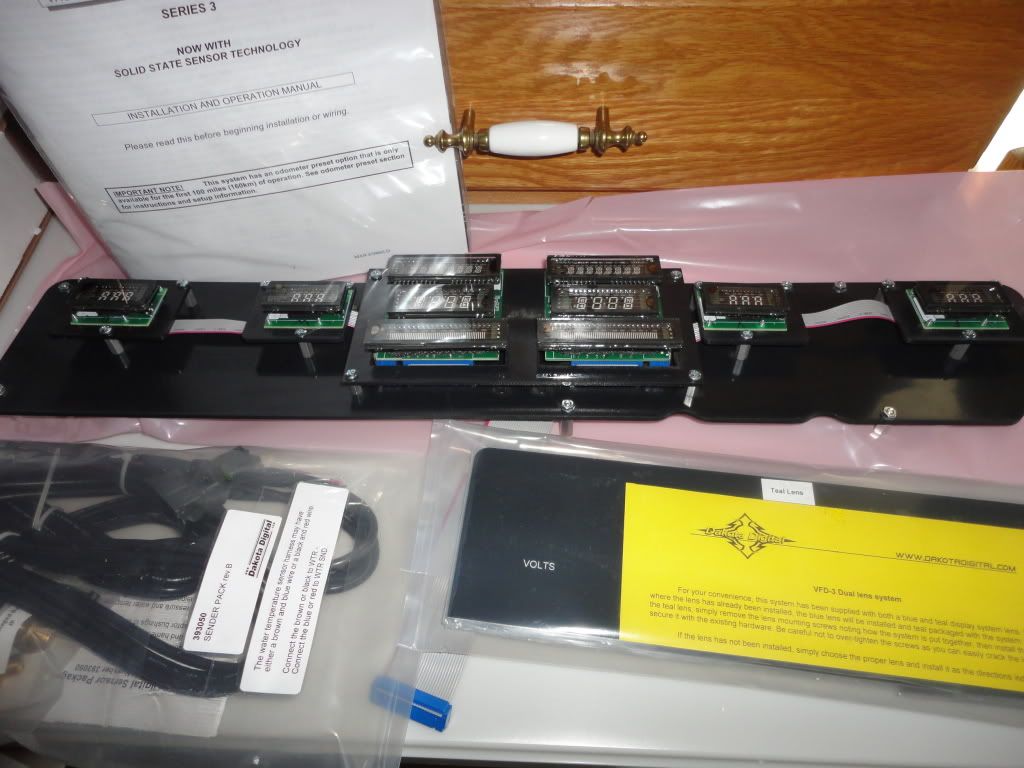
Dakota Digital gauge unit showed up today......

 02-23-2012, 07:34 AM
#108
TECH Fanatic
Thread Starter
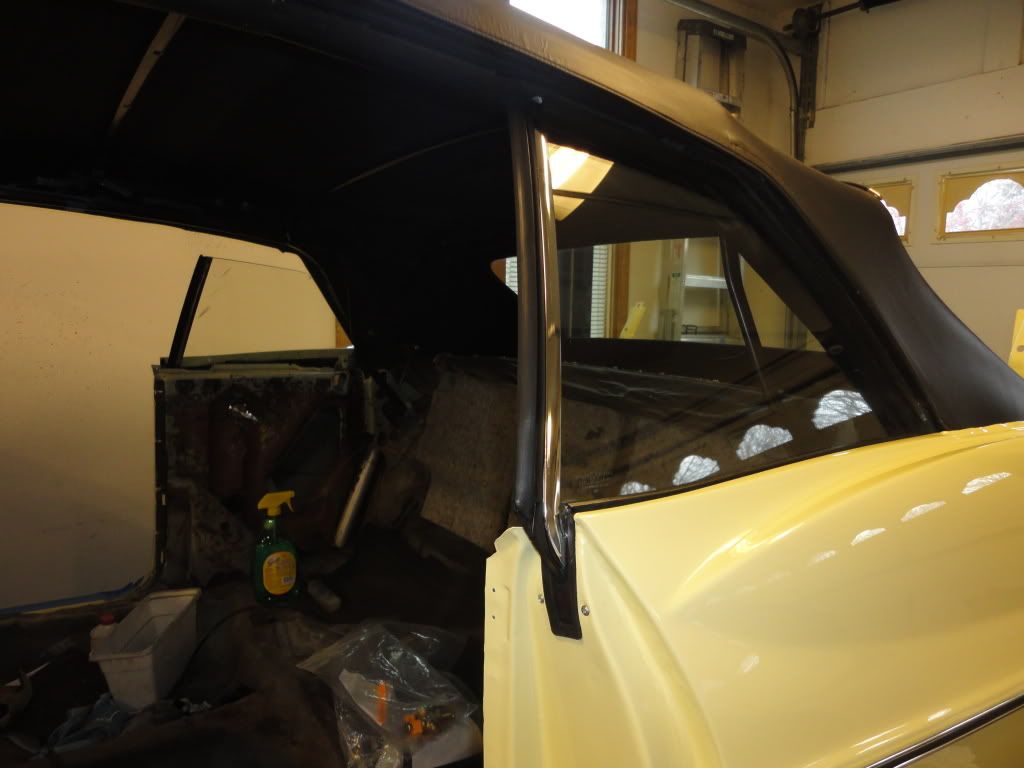
I actually found some parts that fit.....I put in the quarter window jamb seals and the rear window seals....they actually fit......
But.....I ran into some other issues that should have taken 5 minutes and ended up taking a day to fix.....just for what it's worth....the GM speed nuts (the sheet metal ones) that hold the rear quarter extensions on, are made with two slits that form the self cutting thread into the stud and tightens the unit to the quarter......I bought some repro ones that had only one slit....no big deal.....So...I had a heck of a time getting these things to screew all the way down the stud......they would just spin in place and after pushing on them I finally got them tightened up..........then I realized that I got ahead of myself and installed the quarter extensions without the trim piece installed.......Darn!!.....Took a couple of hours inside the trunk to get them off again,.....(The two GM nuts I had came right off).......after getting them off I took a threading die and cut a 1/4-20 thread on the studs and just used regular nuts....Simple thing ....8 Nuts......should have been ten minutes total time and ended up taking two days and a lot of frustration...........Be careful with those stupid little nuts...
Now.....I get out the repro trim kit that I bought from an company that specilaizes in Impala stuff....Get out the Quarter extension trim and open a bag the had "Quarter trim fasteners" on it.......I take the little trim clips and slide them into the trim and install them on the extension........Humm....on the inside of the extension, there wasn't any room for the nut as it was right next to the lip on the QE........Darn!!........I find some smaller nuts and just get them to fit....I couldn't get a socket on the nut cause there wasn't any room....so I spend an hour with a open end wrench snugging them up.....Double darn!!!......I keep thinking to myself.......I know GM was smarter than this as this was the Stupidest thing I have ever seen.......As I start installing the QE again....at least I can now put them on iun a minute with the studs threaded.....as I install the first one.....the trim pops off at the bend and the trim clip is now out of the trim.....I put a little pressure on the other one and it pops off also......WTF!!......I take everything apart again.........I just happen to look thru the other bag for the side trim and I see some plastic push clips made for a round hole.....I install them and push the trim on....Bingo!!.......I knew GM wouldn't do something so stupid ....so...stupid me ......but.....If the repro place would have included the right clips and some instructions it would have made things a lot easier.....Anyhow....the trim is on...

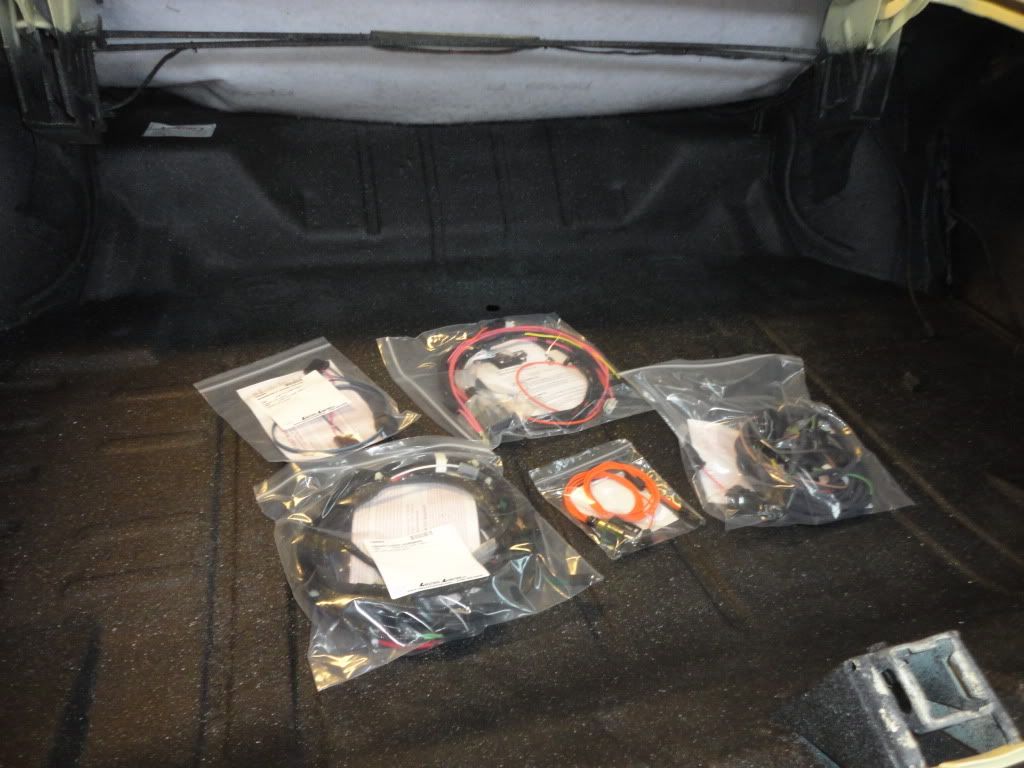
Got the trunk seal installed and also received the new harnesses from Lecric-Limited and changed out the rear lamp harness...I also found out the back ordered rims are in and I should have all the wheels and tires installed next week...
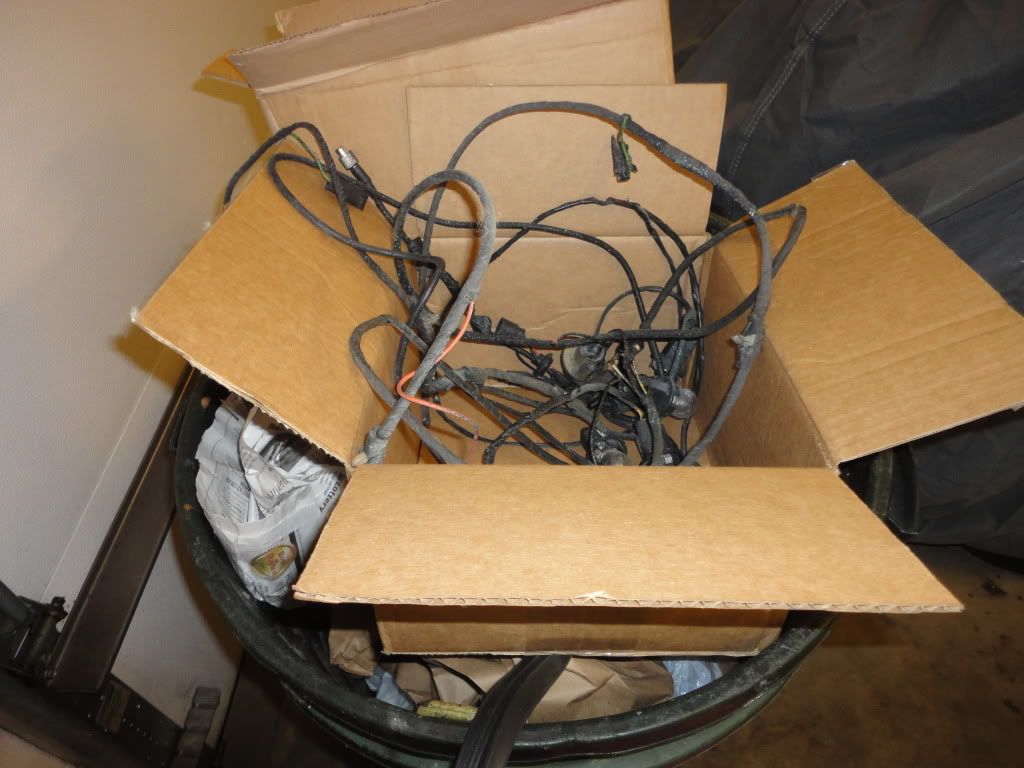
My original Perfect Nu Yawk Survivor Car harness in the garbage....
But.....I ran into some other issues that should have taken 5 minutes and ended up taking a day to fix.....just for what it's worth....the GM speed nuts (the sheet metal ones) that hold the rear quarter extensions on, are made with two slits that form the self cutting thread into the stud and tightens the unit to the quarter......I bought some repro ones that had only one slit....no big deal.....So...I had a heck of a time getting these things to screew all the way down the stud......they would just spin in place and after pushing on them I finally got them tightened up..........then I realized that I got ahead of myself and installed the quarter extensions without the trim piece installed.......Darn!!.....Took a couple of hours inside the trunk to get them off again,.....(The two GM nuts I had came right off).......after getting them off I took a threading die and cut a 1/4-20 thread on the studs and just used regular nuts....Simple thing ....8 Nuts......should have been ten minutes total time and ended up taking two days and a lot of frustration...........Be careful with those stupid little nuts...
Now.....I get out the repro trim kit that I bought from an company that specilaizes in Impala stuff....Get out the Quarter extension trim and open a bag the had "Quarter trim fasteners" on it.......I take the little trim clips and slide them into the trim and install them on the extension........Humm....on the inside of the extension, there wasn't any room for the nut as it was right next to the lip on the QE........Darn!!........I find some smaller nuts and just get them to fit....I couldn't get a socket on the nut cause there wasn't any room....so I spend an hour with a open end wrench snugging them up.....Double darn!!!......I keep thinking to myself.......I know GM was smarter than this as this was the Stupidest thing I have ever seen.......As I start installing the QE again....at least I can now put them on iun a minute with the studs threaded.....as I install the first one.....the trim pops off at the bend and the trim clip is now out of the trim.....I put a little pressure on the other one and it pops off also......WTF!!......I take everything apart again.........I just happen to look thru the other bag for the side trim and I see some plastic push clips made for a round hole.....I install them and push the trim on....Bingo!!.......I knew GM wouldn't do something so stupid ....so...stupid me ......but.....If the repro place would have included the right clips and some instructions it would have made things a lot easier.....Anyhow....the trim is on...
Got the trunk seal installed and also received the new harnesses from Lecric-Limited and changed out the rear lamp harness...I also found out the back ordered rims are in and I should have all the wheels and tires installed next week...
My original Perfect Nu Yawk Survivor Car harness in the garbage....
02-24-2012, 07:41 PM
#109
TECH Fanatic
Thread Starter
Today was one of those nights when everything went together without "Any" problems.......(all original GM parts)...Too Easy...I got the Nu Yawk Survivor rear bumper re-installed.....looks pretty good....(Thanks to straightening, rechroming, and $$$$)....LOL....... Gotta love those Nu Yawk cars....
02-25-2012, 05:17 PM
#110
TECH Fanatic
Thread Starter
Got a lot of little stuff done today.....got the new harness modified for the Dakota Digital Tail lights.....everything works per plan....got the backup lights and the Liscense plate light installed also.........everything even works.....LOL...I also got the Fuel Pump wires run up to the firewall for hook-up.....I also read the Instructions for the Dakota Digital dash and ran the fuel gauge wires at the same time.....So....If I figured everything out correctly.....I should be completely finished with the wiring in the back of the car.....Almost ready for the Power Tour.......
02-26-2012, 10:27 AM
#111
TECH Fanatic
Thread Starter
Well......Looks like I'm gonna get an education $$$$$$$ in Power Top repairs....The Nu Yawk guy I bought the car from told me (LOL) that the hydraulic power top system in the car was brand new as it was just replaced......So.....I wasn't concerned about that part....So..the top wouldn't operate and by looking at the plastic lines that go to the cylinders I could see there was air in the lines so I figured it was probably just low on fluid........LOL....
So.....I get out my Fisher Body manual and check out how to add fluid and bleed the system...I go out to the car and start to check it out and I find a different type of top motor than the book shows.....Hummm!.....So....I start to remove (what I thought was the fill plug) and find out that it's the bolt that holds the reservoir on the pump body....as it loosened up and the reservor came loose, no fluid came out....I took it off to look inside and found a 1/2" of muck inside it......Darn!!...So....I clean it out and add some automatic trans fluid (Supposed to be brake fluid, but they had trans fluid in it).....Power the pump and it runs and starts to build pressure, but not enough to move anything.......I can see where this is going $$$$$$.......Putting a Wax job on this "Perfect" Nu Yawk Survivor car is starting to get $$$........Those Krazee Nu Yawk guyz will do anything for a laugh....
So.....I get out my Fisher Body manual and check out how to add fluid and bleed the system...I go out to the car and start to check it out and I find a different type of top motor than the book shows.....Hummm!.....So....I start to remove (what I thought was the fill plug) and find out that it's the bolt that holds the reservoir on the pump body....as it loosened up and the reservor came loose, no fluid came out....I took it off to look inside and found a 1/2" of muck inside it......Darn!!...So....I clean it out and add some automatic trans fluid (Supposed to be brake fluid, but they had trans fluid in it).....Power the pump and it runs and starts to build pressure, but not enough to move anything.......I can see where this is going $$$$$$.......Putting a Wax job on this "Perfect" Nu Yawk Survivor car is starting to get $$$........Those Krazee Nu Yawk guyz will do anything for a laugh....
02-29-2012, 08:34 PM
#112
TECH Fanatic
Thread Starter
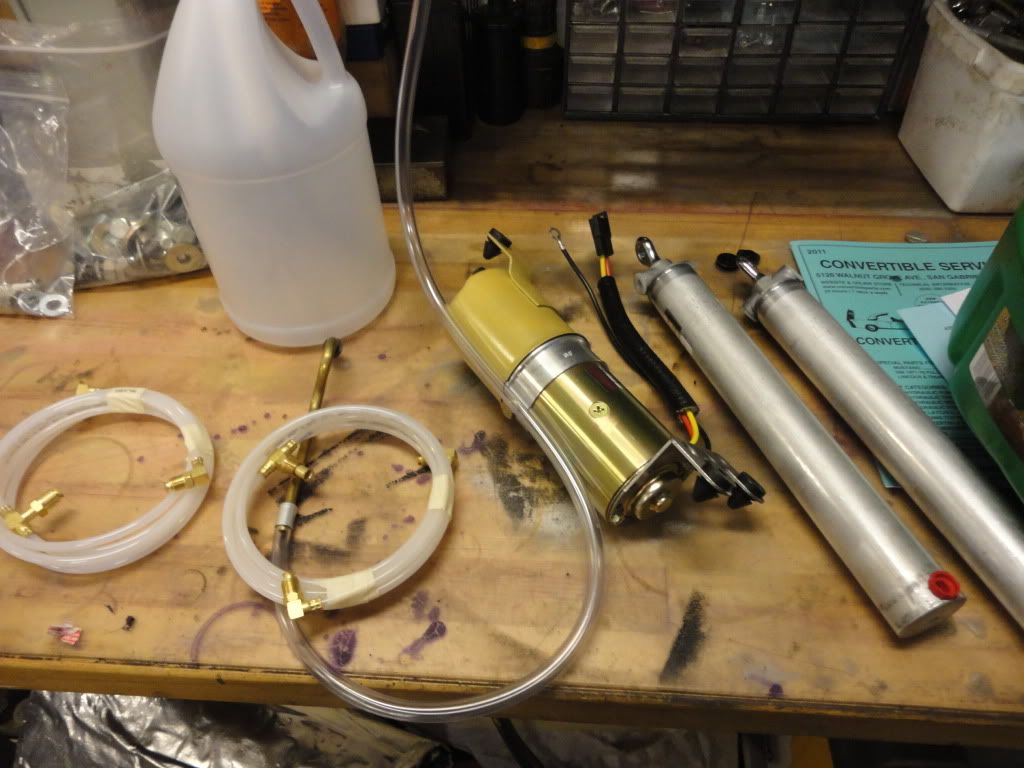
Got home today and the box with all the new Power Top stuff from Convertible Service was waitng for me....
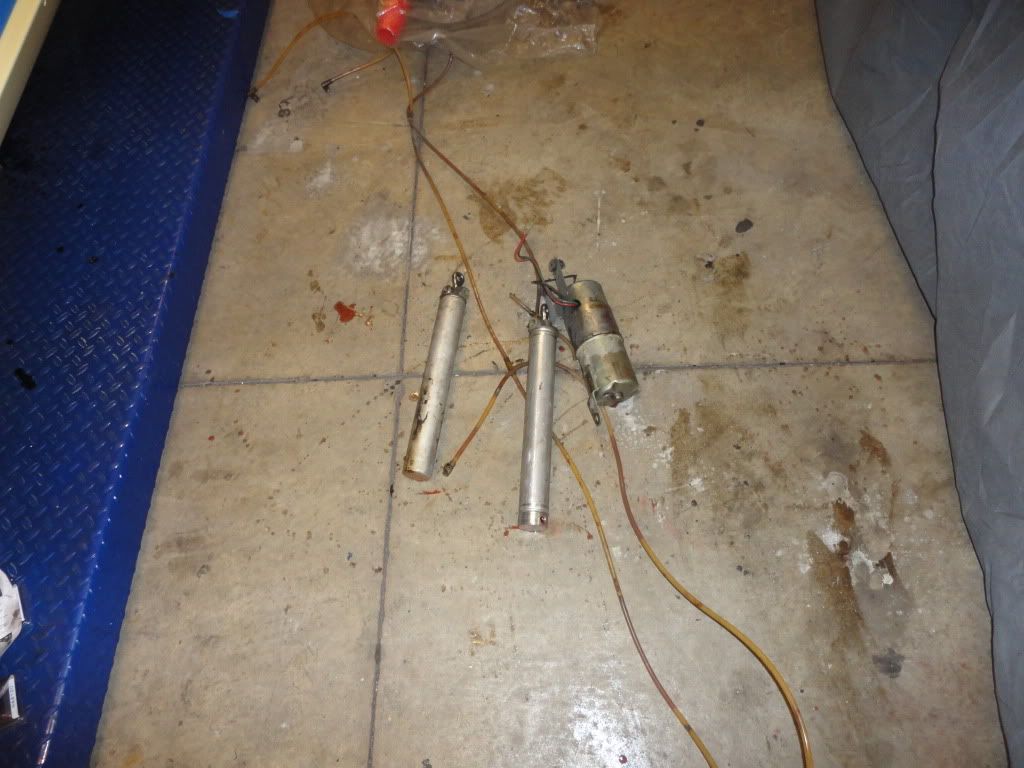
Seems like kind of a waste to take out all that New Nu Yawk Survivor car stuff and throw it in the garbage, But....LOL
Anyhow......an hour later I had the new system in and working perfectly.........Pretty cool and Kudo's to Convertible Service for a great kit...

Seems like kind of a waste to take out all that New Nu Yawk Survivor car stuff and throw it in the garbage, But....LOL
Anyhow......an hour later I had the new system in and working perfectly.........Pretty cool and Kudo's to Convertible Service for a great kit...

 ...just sayin'
03-02-2012, 05:45 PM
...just sayin'
03-02-2012, 05:45 PM
#114
TECH Fanatic
Thread Starter
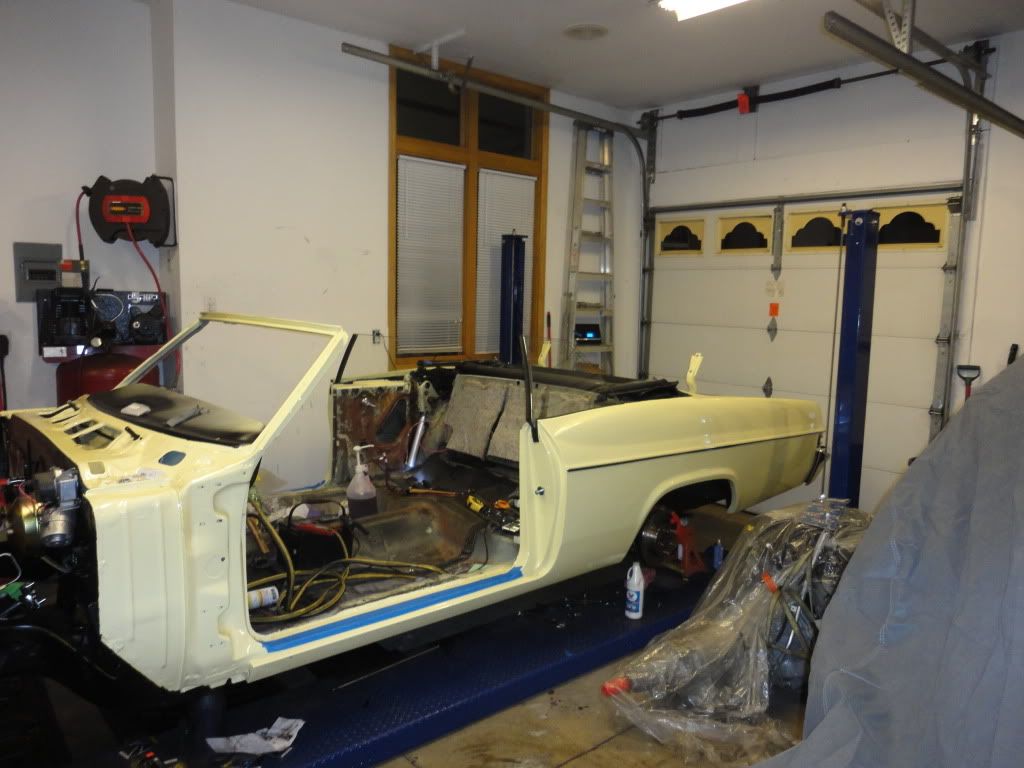
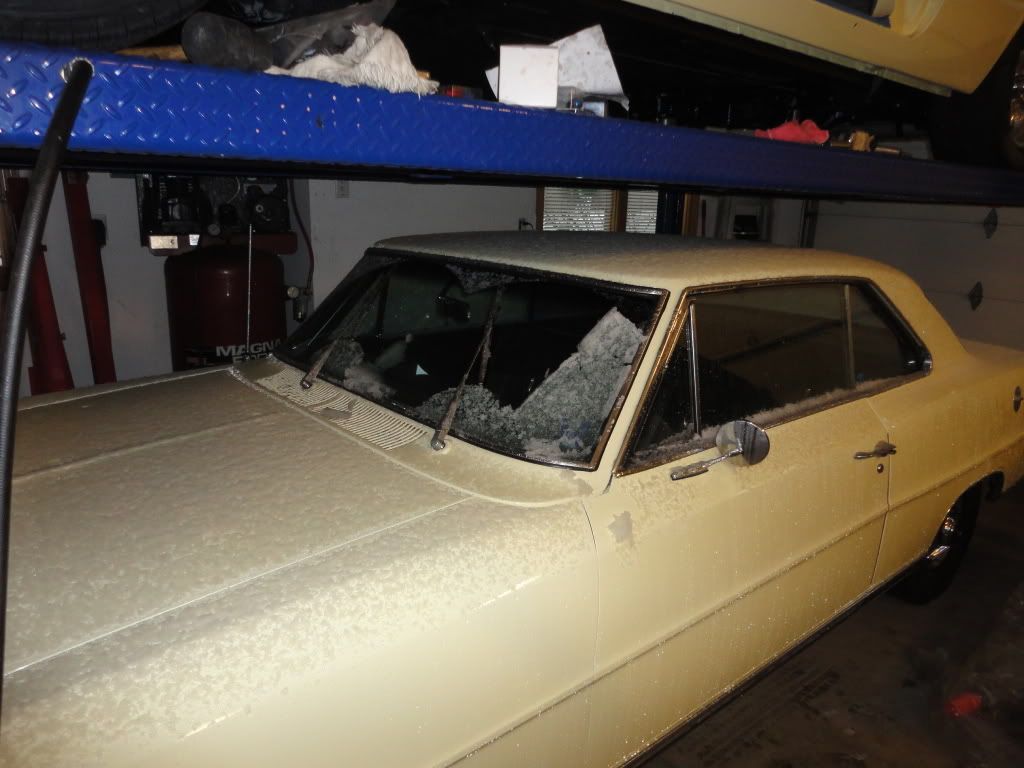
Can you say "Snow".........LOL.....Today was a pretty good day........Got my Grill (bought off Ebay to replace that NU Yawk Survivor Beauty) back from getting the Anodizing stripped, Bright Dipped, and re-Anodized......
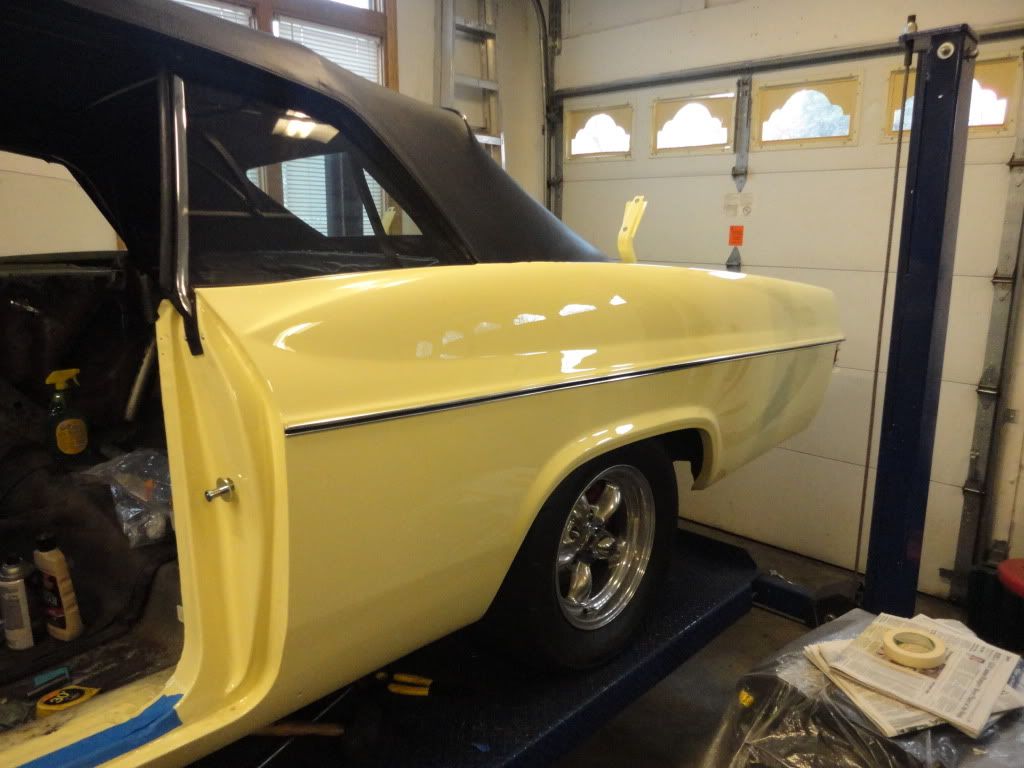
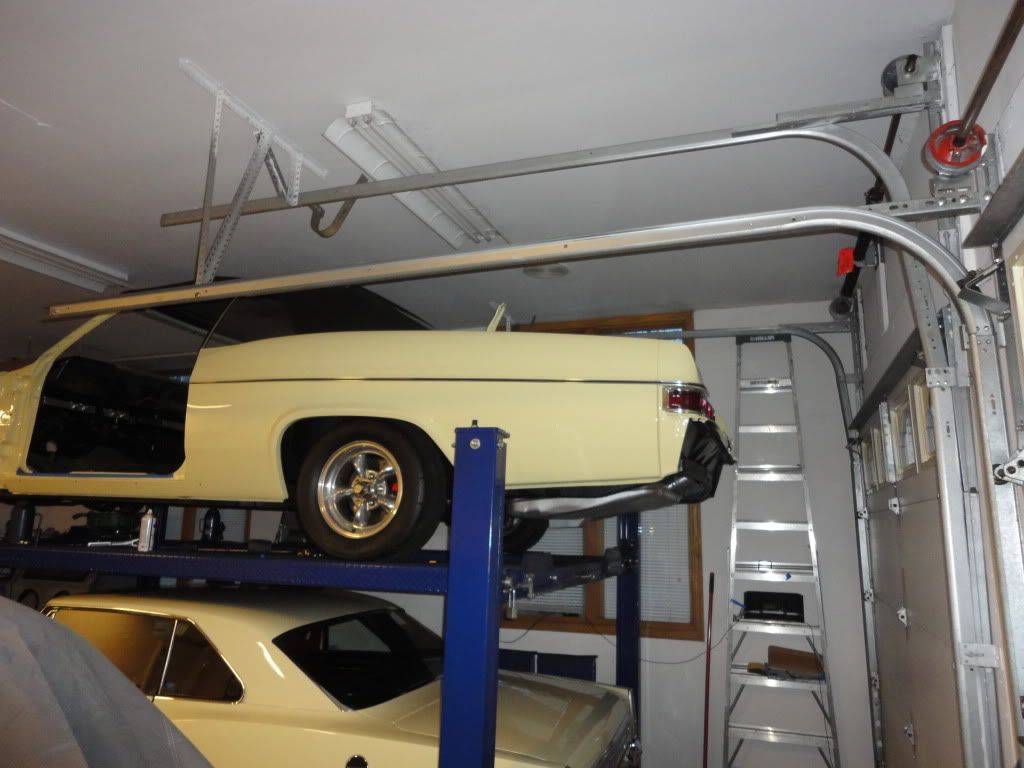
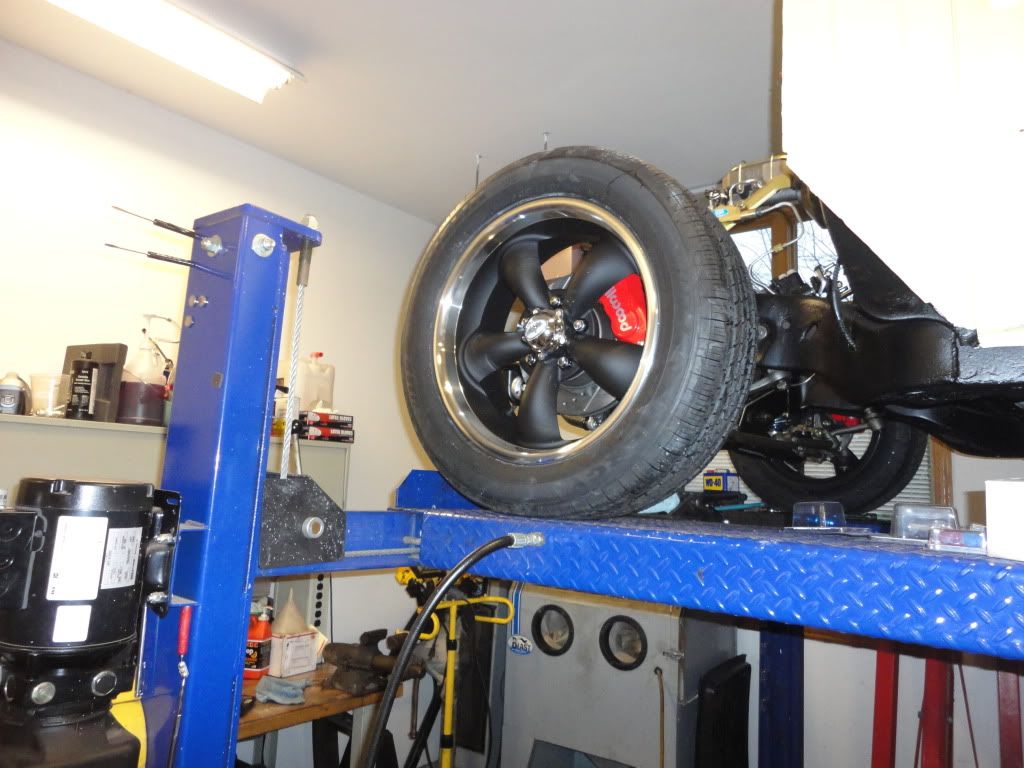
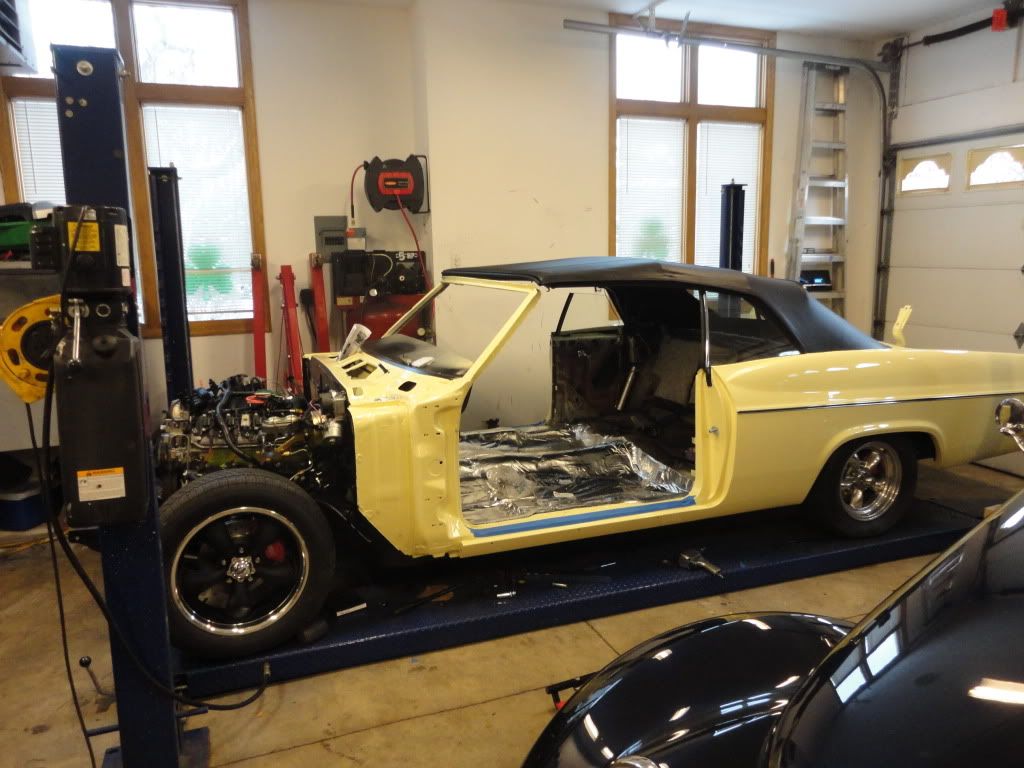
The front rims finally arrived and I got the tires installed, the rears should be in next week......

I also stopped at the Upholstry shop and the Seats will be ready to be picked up next week......Got the Dyna mat installed inside the car also........Got all the polished stainless trim out and ready for installation.......
Got the Nova in just in time......It's a Blizzard out there right now......
The front rims finally arrived and I got the tires installed, the rears should be in next week......
I also stopped at the Upholstry shop and the Seats will be ready to be picked up next week......Got the Dyna mat installed inside the car also........Got all the polished stainless trim out and ready for installation.......
Got the Nova in just in time......It's a Blizzard out there right now......
 03-04-2012, 05:08 PM
#116
TECH Fanatic
Thread Starter
Time to start getting Serious!!......Got the Speartech modified harness assy out of the basement.....
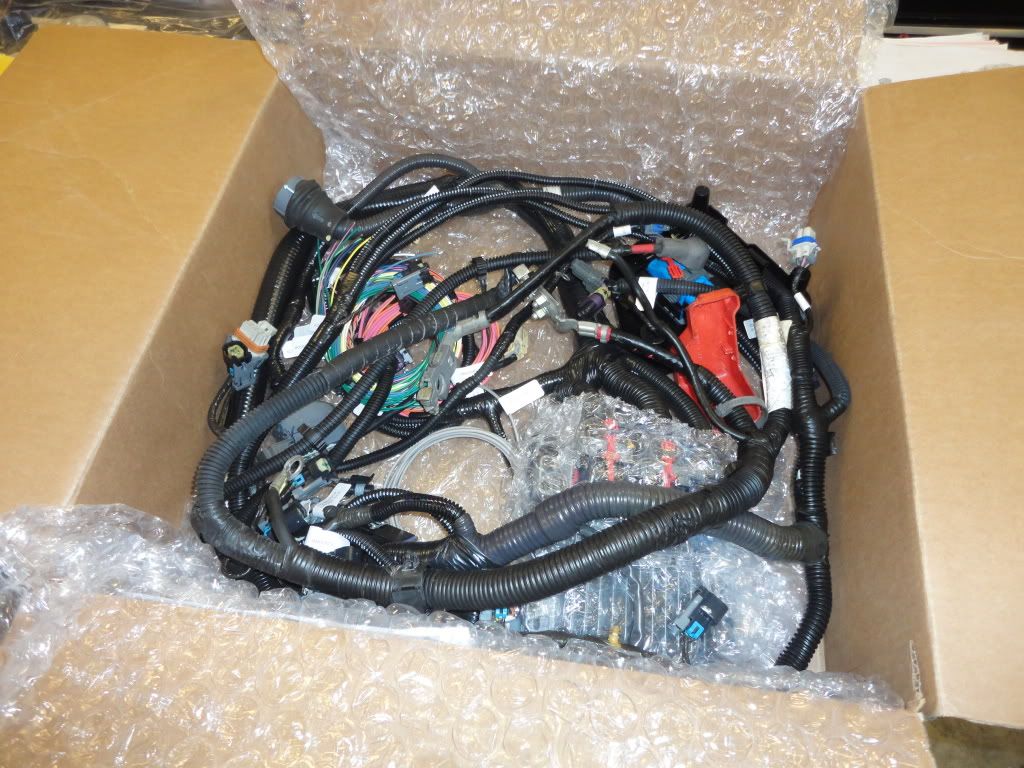
Mr. Harness.....meet your new best friend.....
Getting soft in my old age and actually got info from the GTO assy manual
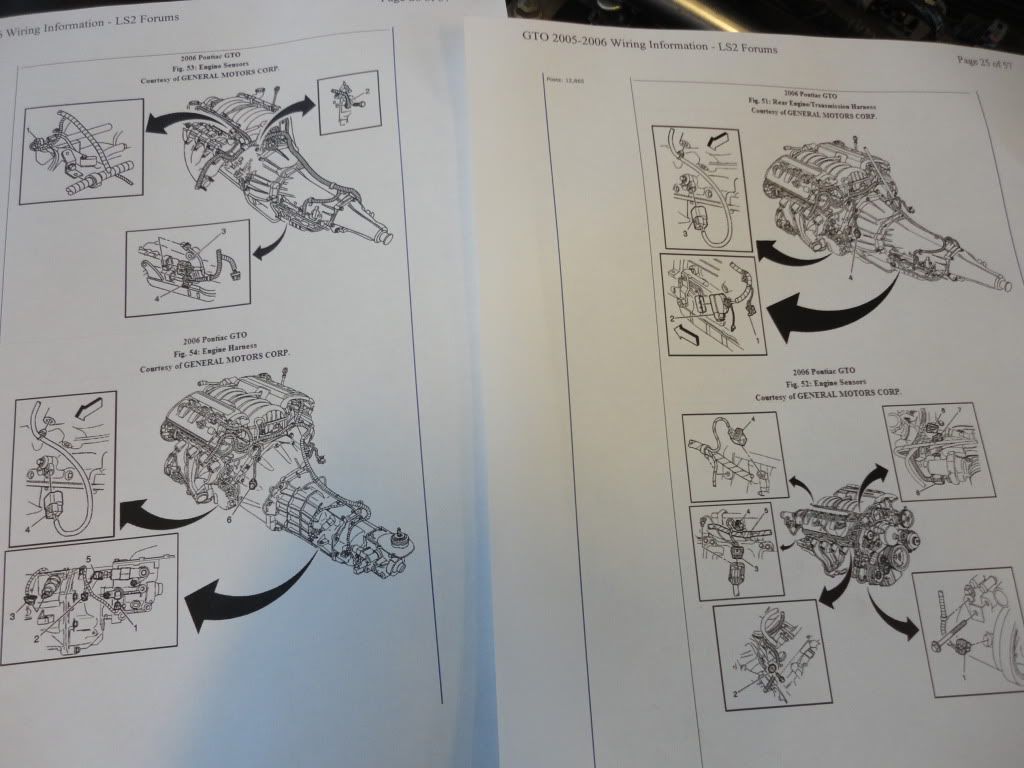
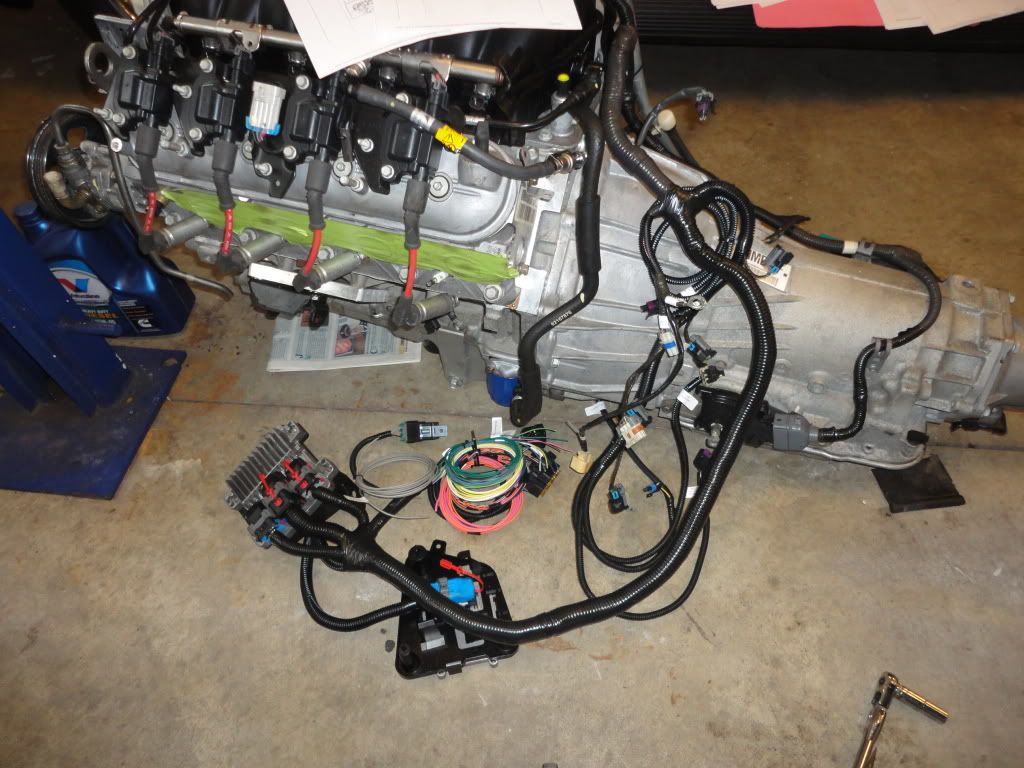
20 minutes later......Everything was marked and labeled.....Kudo's to Speartech.....
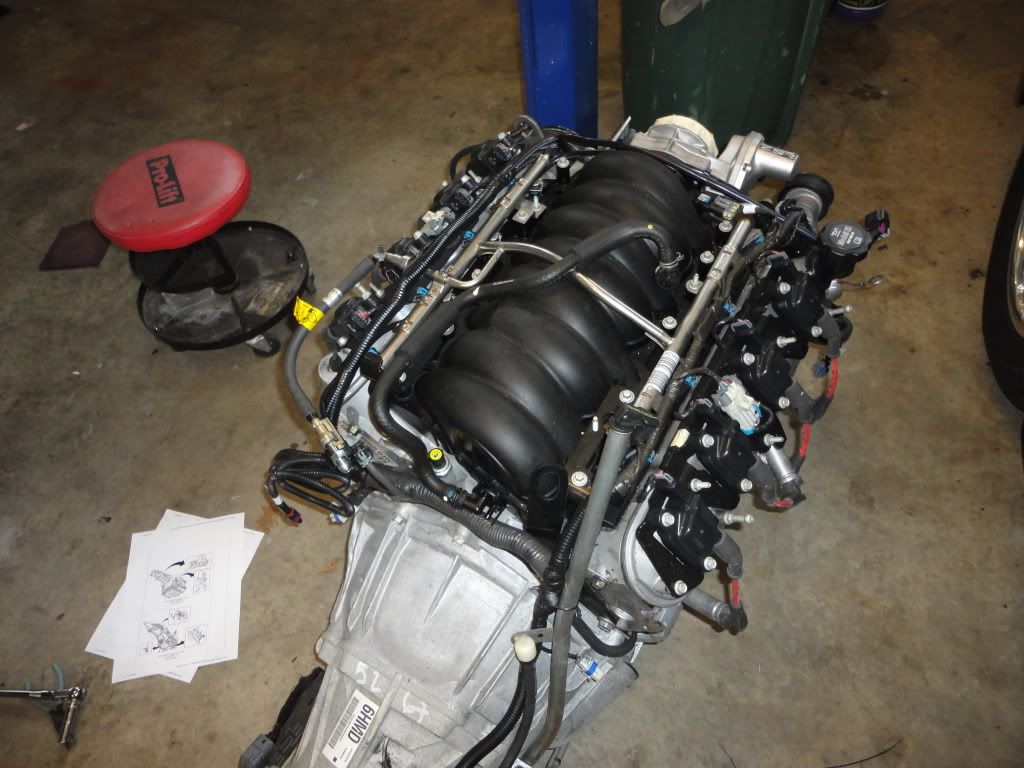
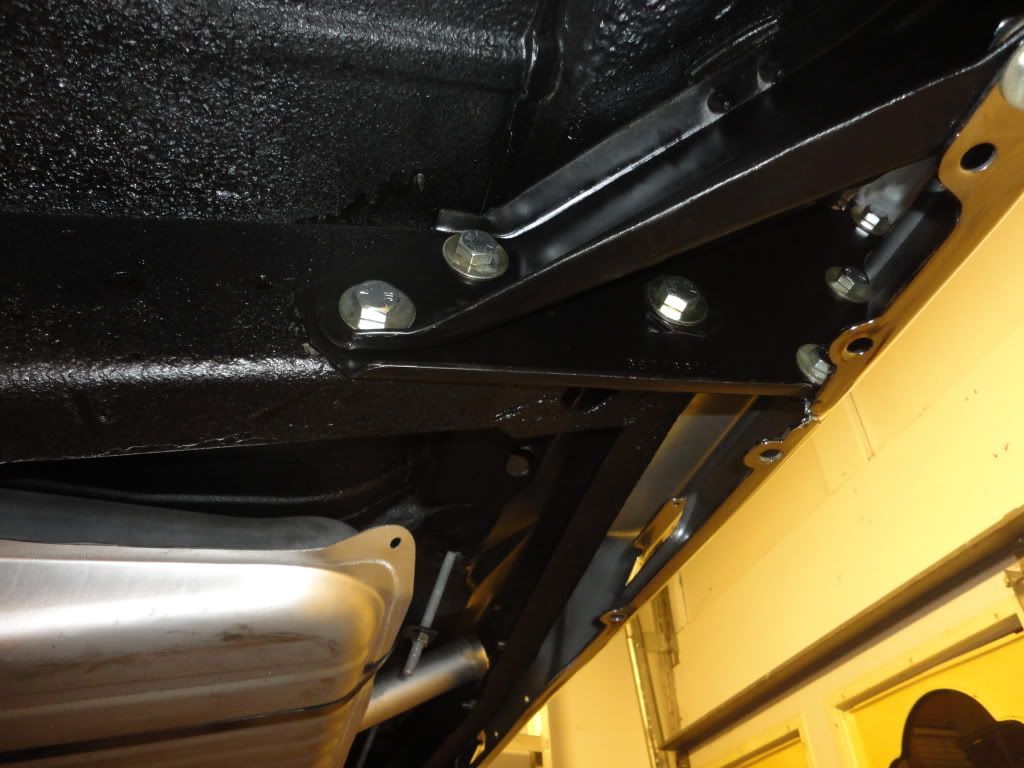
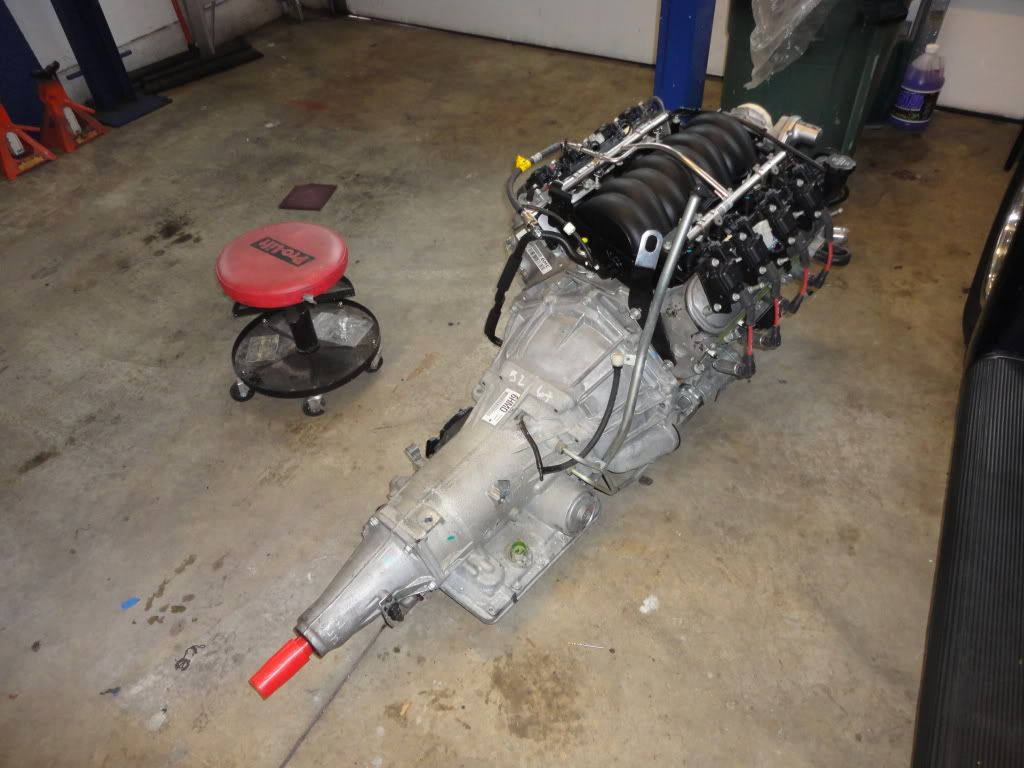
What the heck....might as well put it in.......
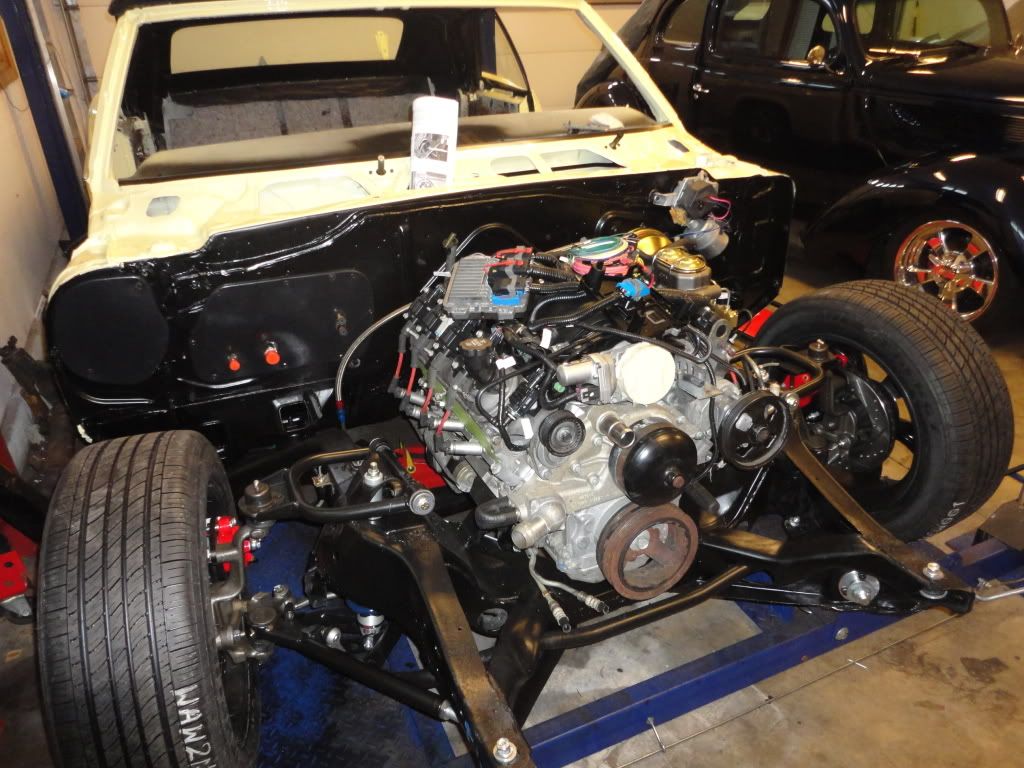
Had to pull it out 1 time to add some clearance for the trans computer plug...... other than that it looks like it came from the factory as far as the fit go's......Power tour is like 89 days away.....
Mr. Harness.....meet your new best friend.....
Getting soft in my old age and actually got info from the GTO assy manual
20 minutes later......Everything was marked and labeled.....Kudo's to Speartech.....
What the heck....might as well put it in.......
Had to pull it out 1 time to add some clearance for the trans computer plug...... other than that it looks like it came from the factory as far as the fit go's......Power tour is like 89 days away.....
03-05-2012, 06:48 PM
#118
TECH Fanatic
Thread Starter
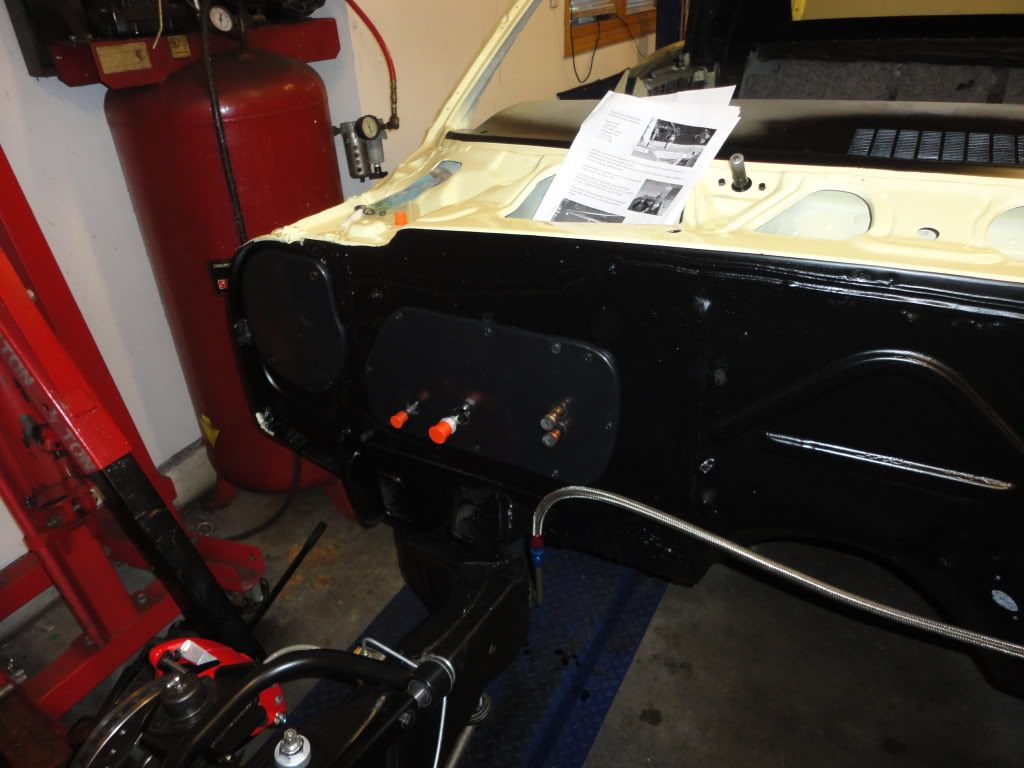
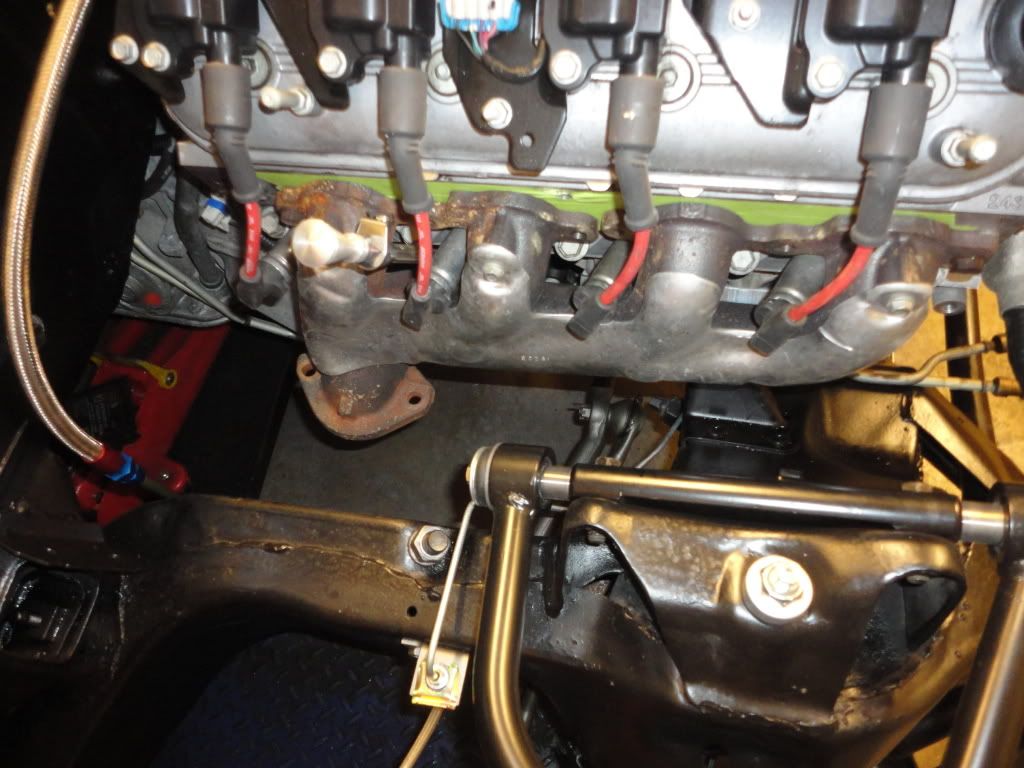
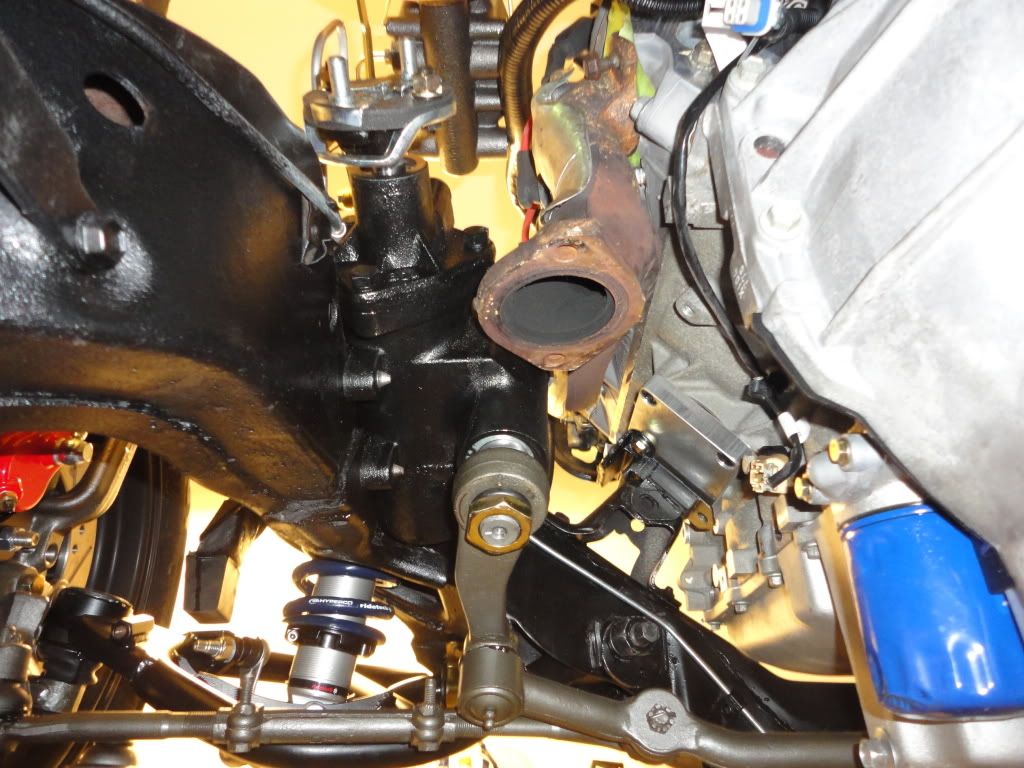
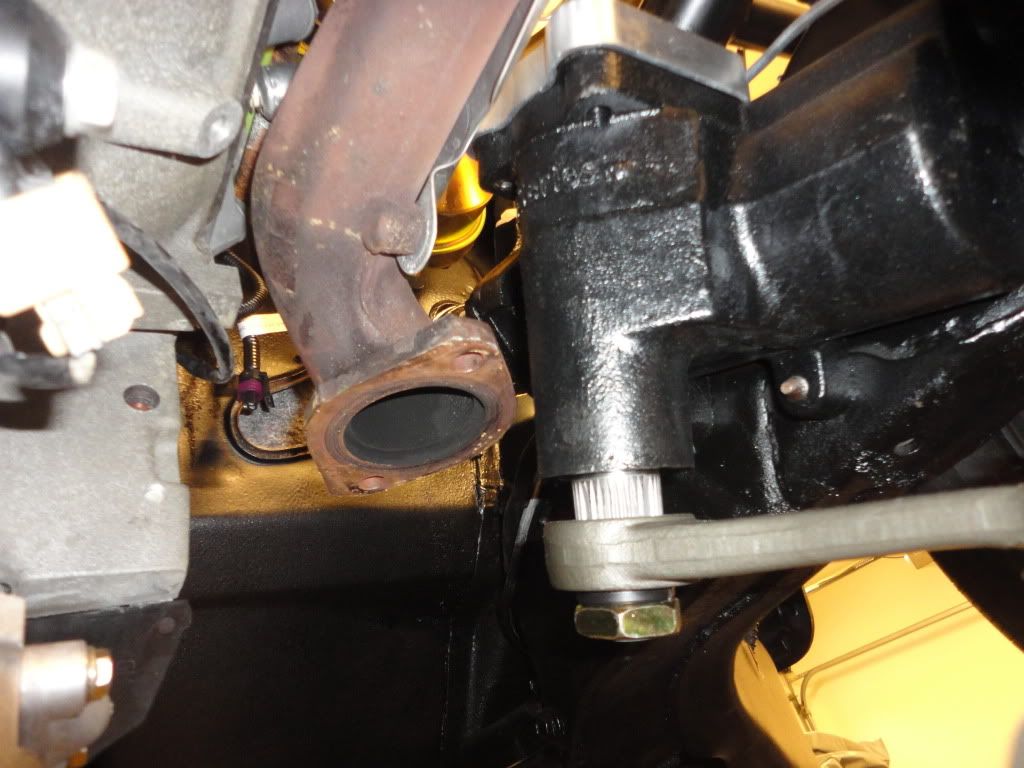
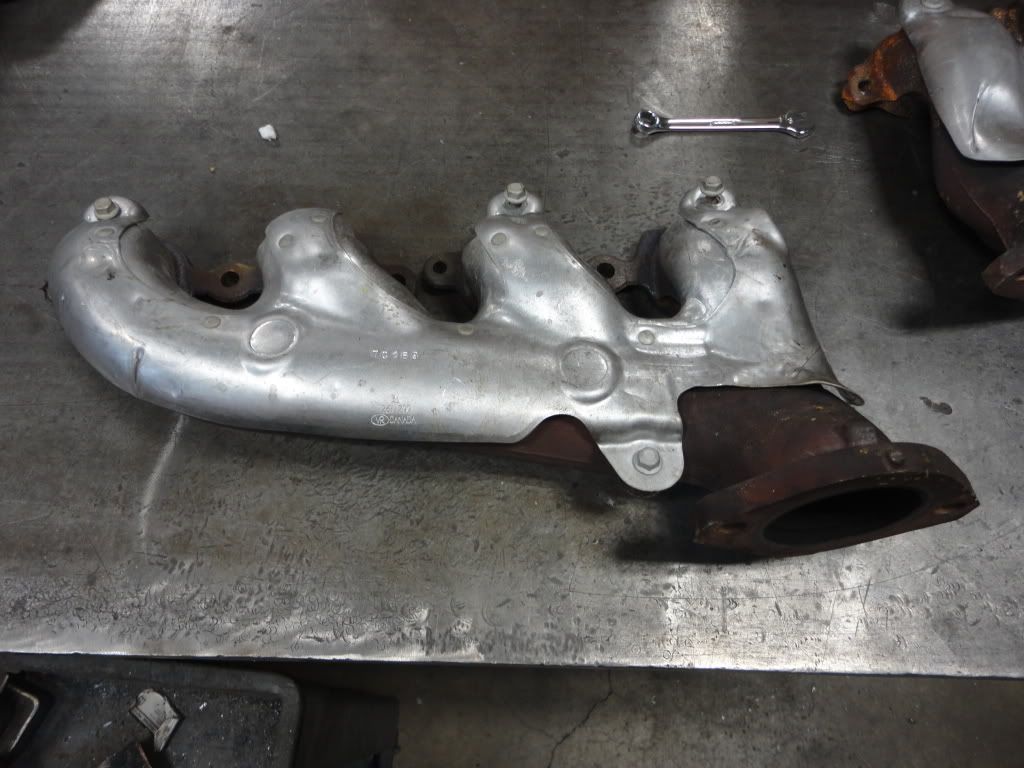
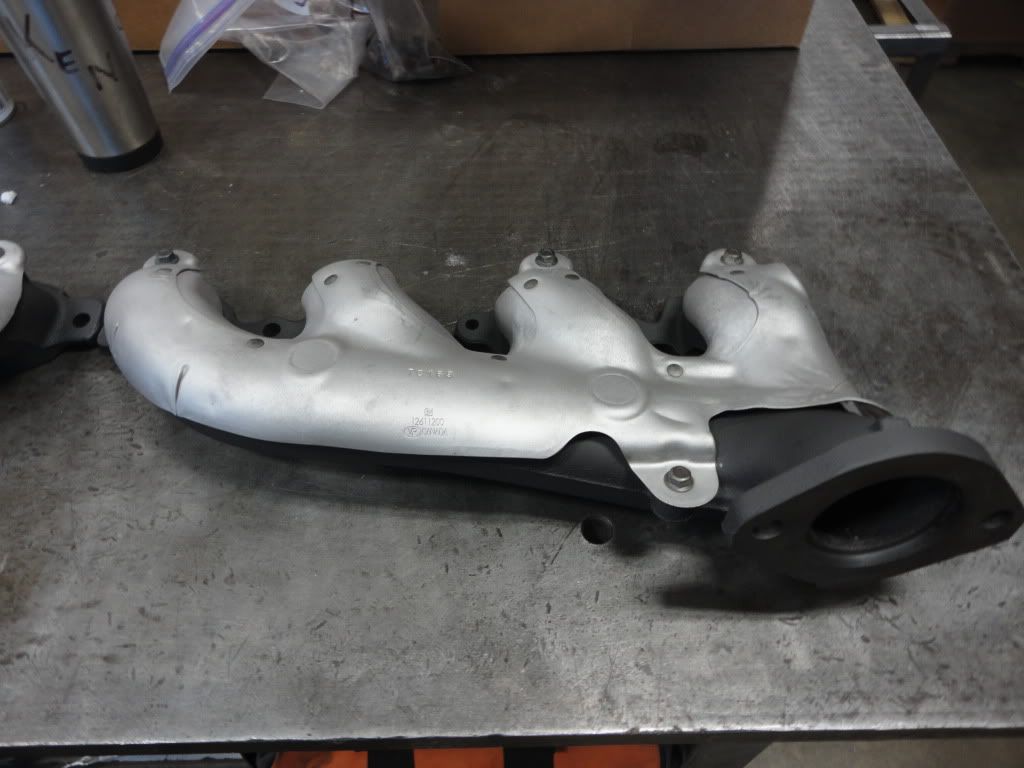
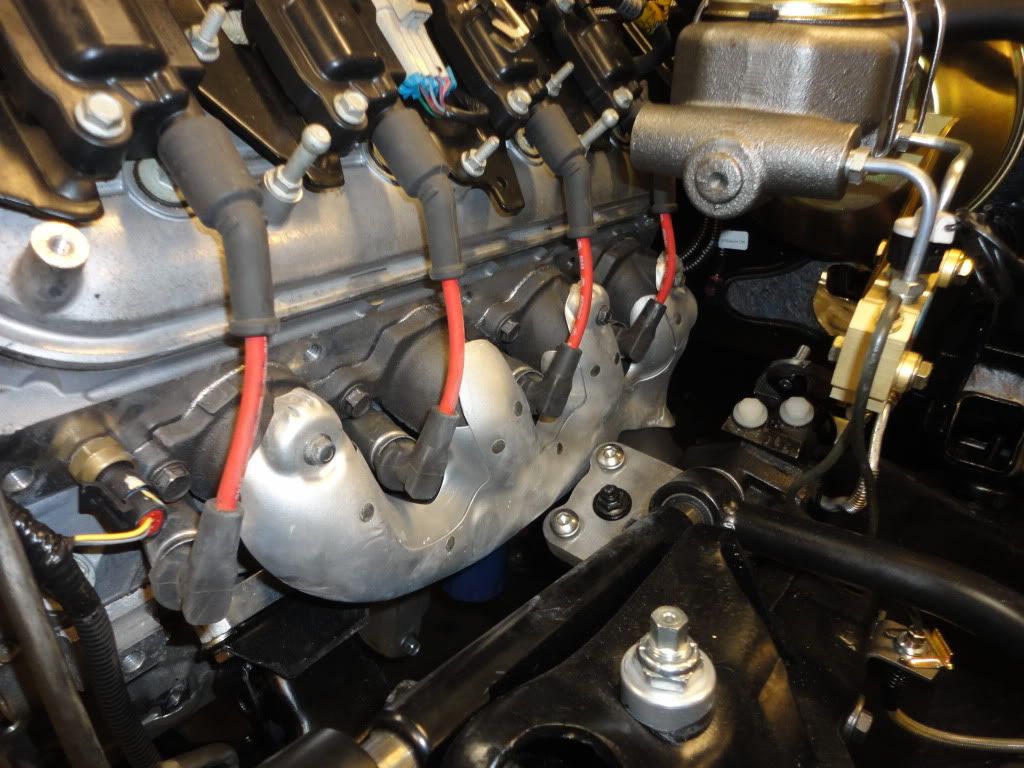
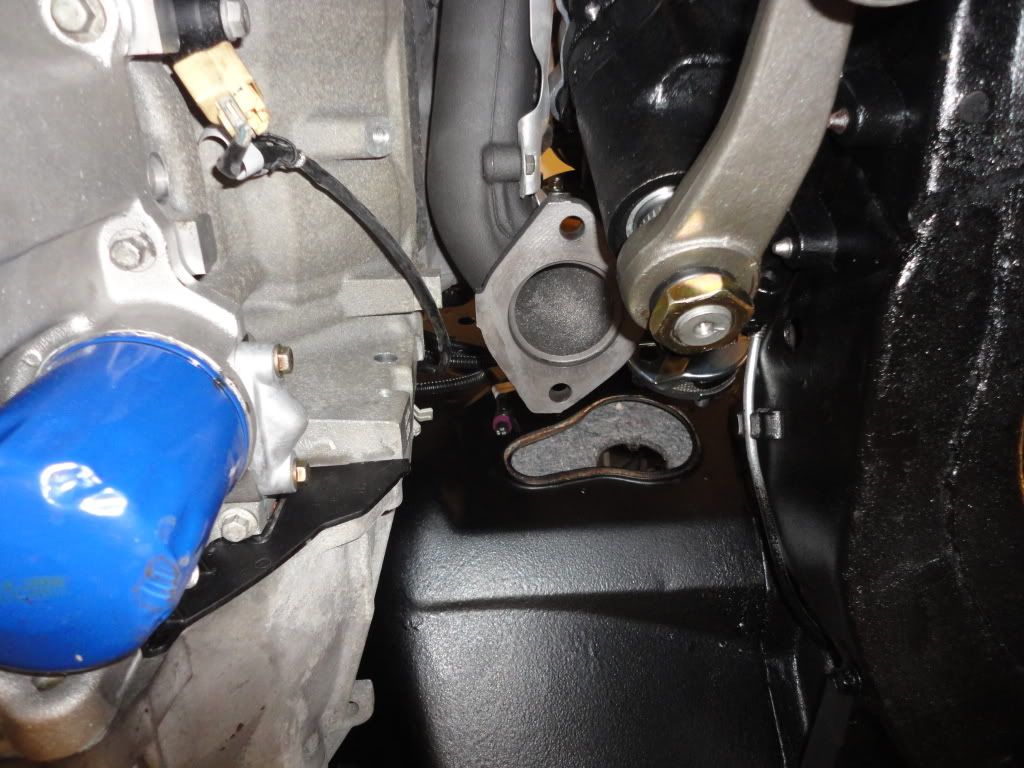
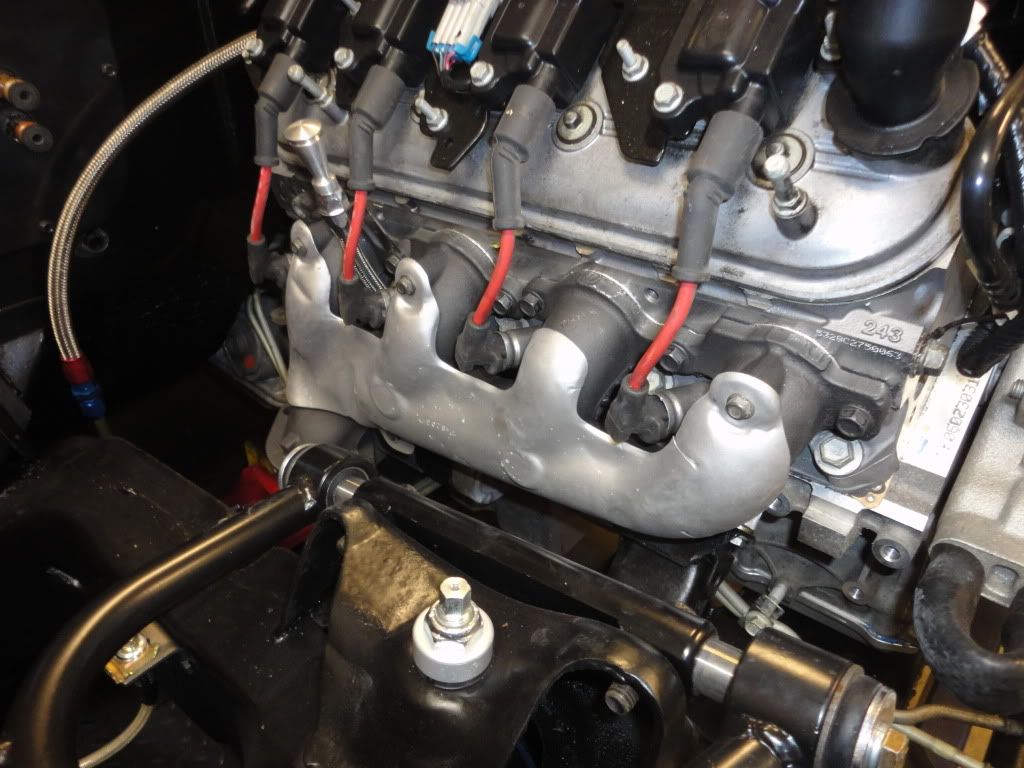
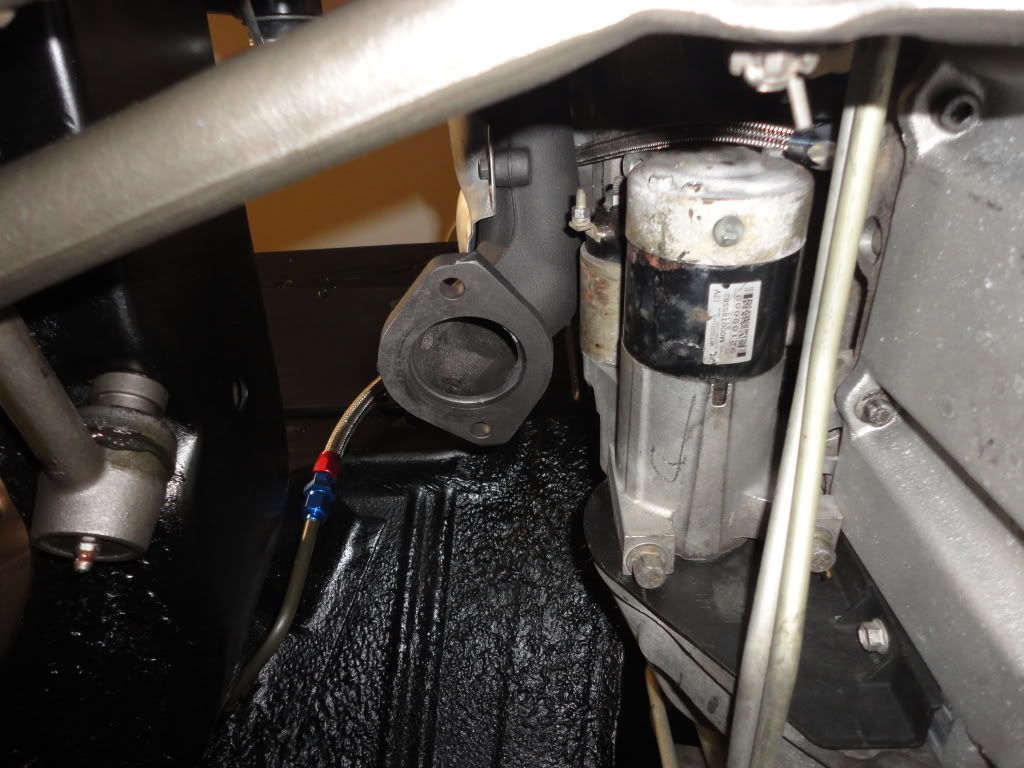
I bought a set of 2010 Camaro exhaust manifolds to try out on the car.....test fit them today and it seems thgey were made for the car......Now.....I have a cpp 500 series steering box which is slightly smaller than a stock box.......so......if you are doing a swap like this...adjust accordingly.......picks from both sides.....
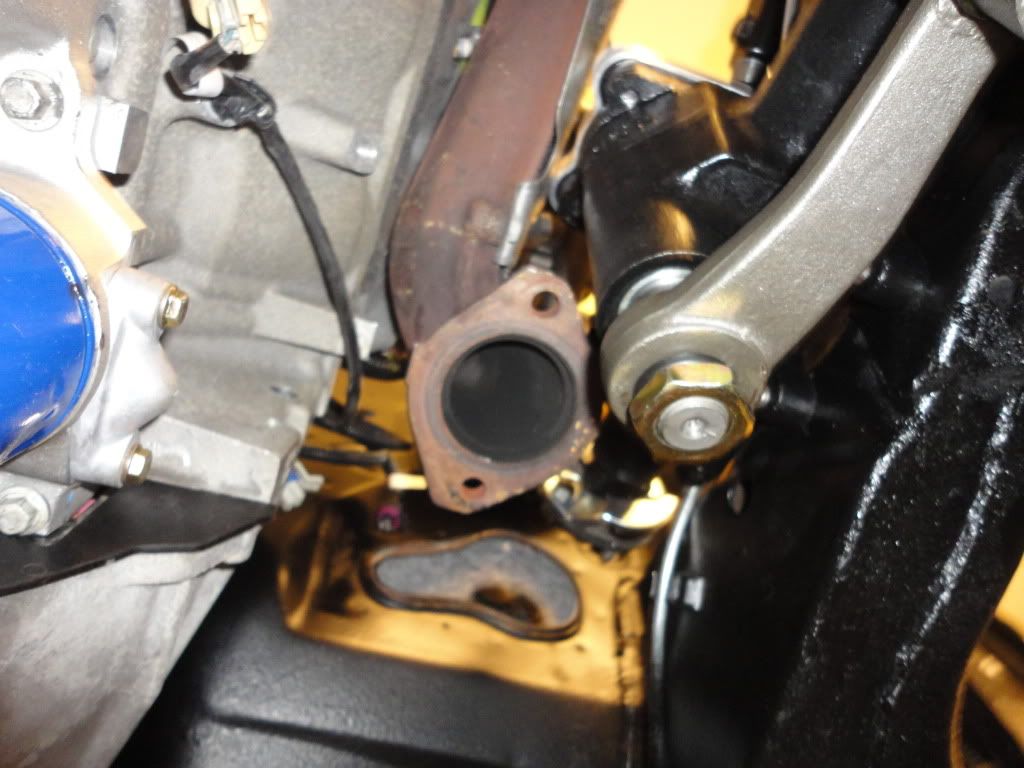
Passenger side first....
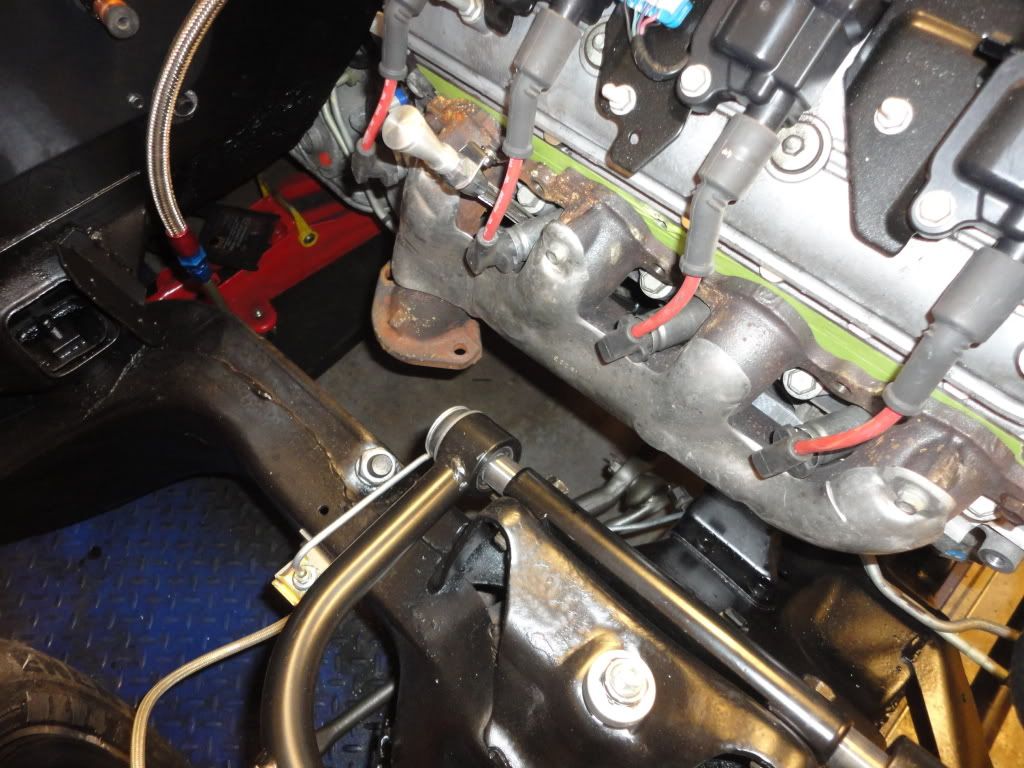
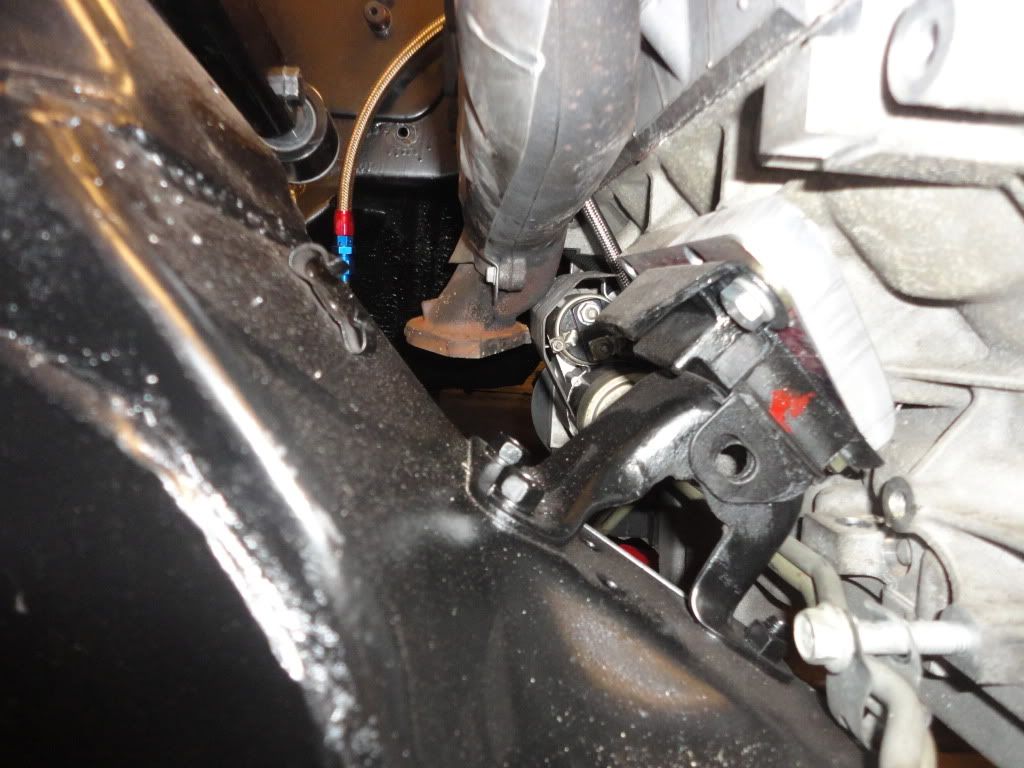
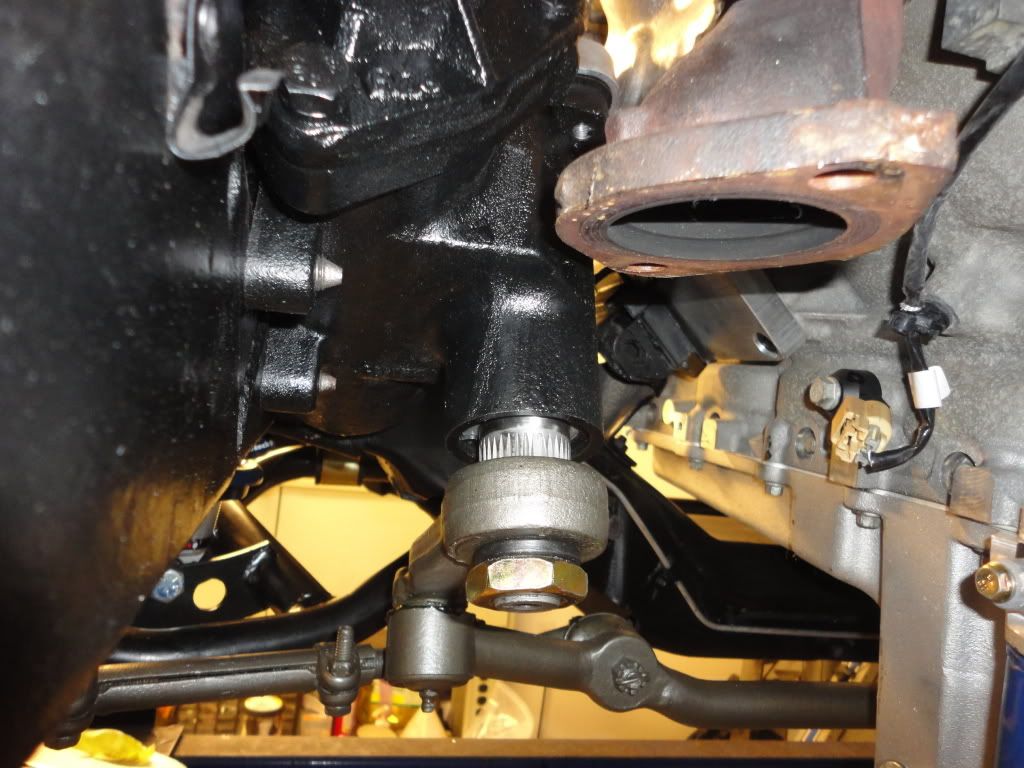
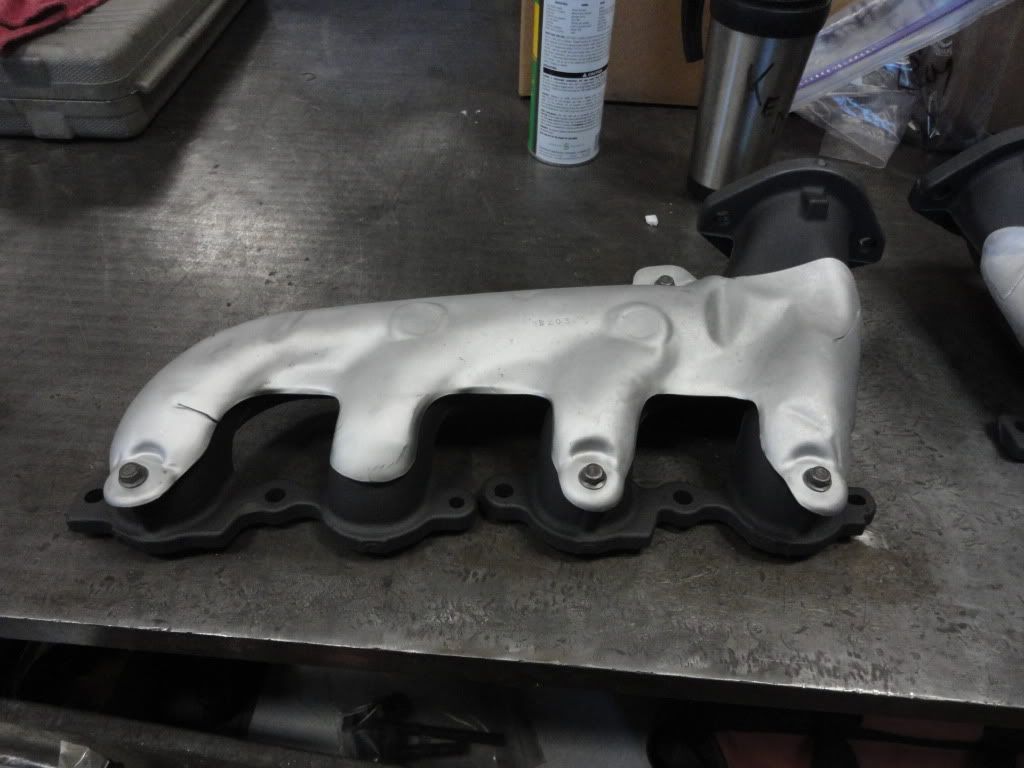
Drivers Side.....I'm gonna remove that aluminum cover from the box....It just takes up room......
<img src="http://i13.photobucket.com/albums/a251/kwhizz/Impala%20Convert/DSC06195.jpg">
Passenger side first....
Drivers Side.....I'm gonna remove that aluminum cover from the box....It just takes up room......
<img src="http://i13.photobucket.com/albums/a251/kwhizz/Impala%20Convert/DSC06195.jpg">
03-06-2012, 08:58 PM
#119
TECH Fanatic
Thread Starter
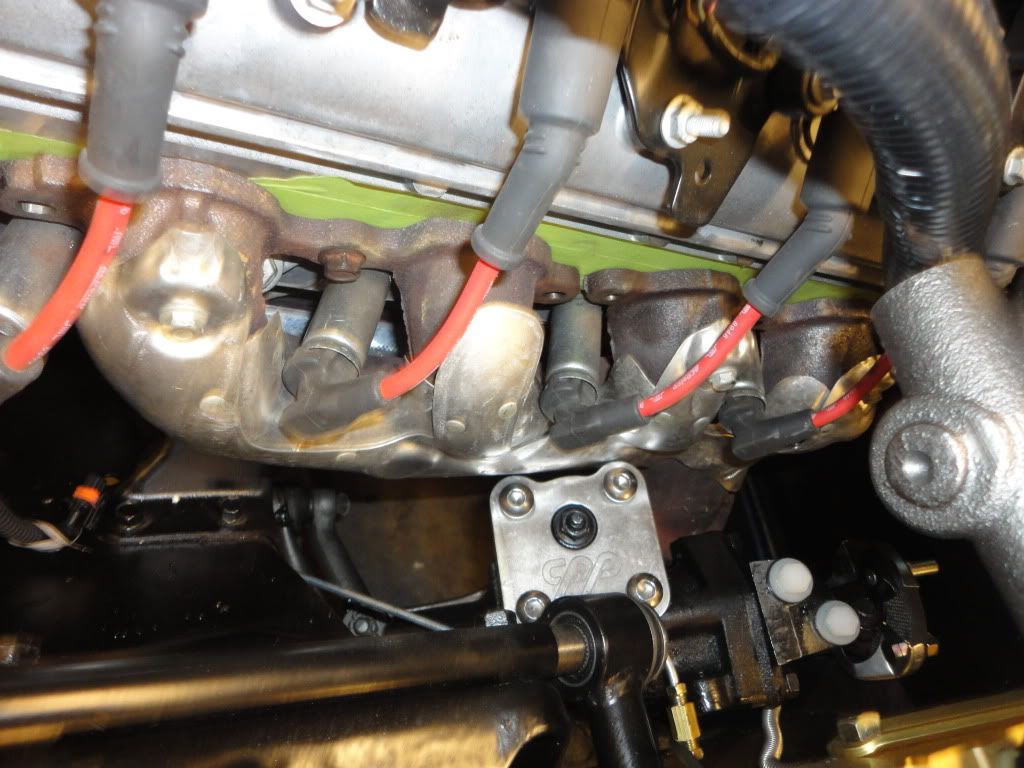
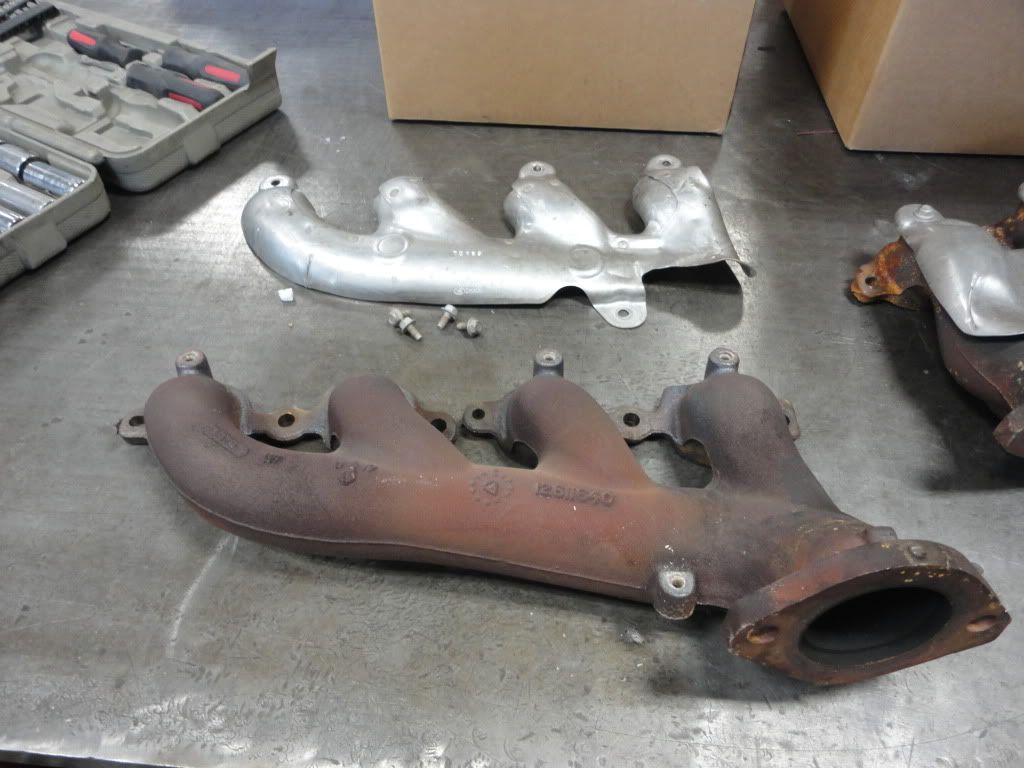
So.....After looking at those surface rusted manifolds....I decided to give them the Mike Angelo/Grady Burch treatment..... Took them down to the shop and after removing the heat shields.....I glass beaded the castings....

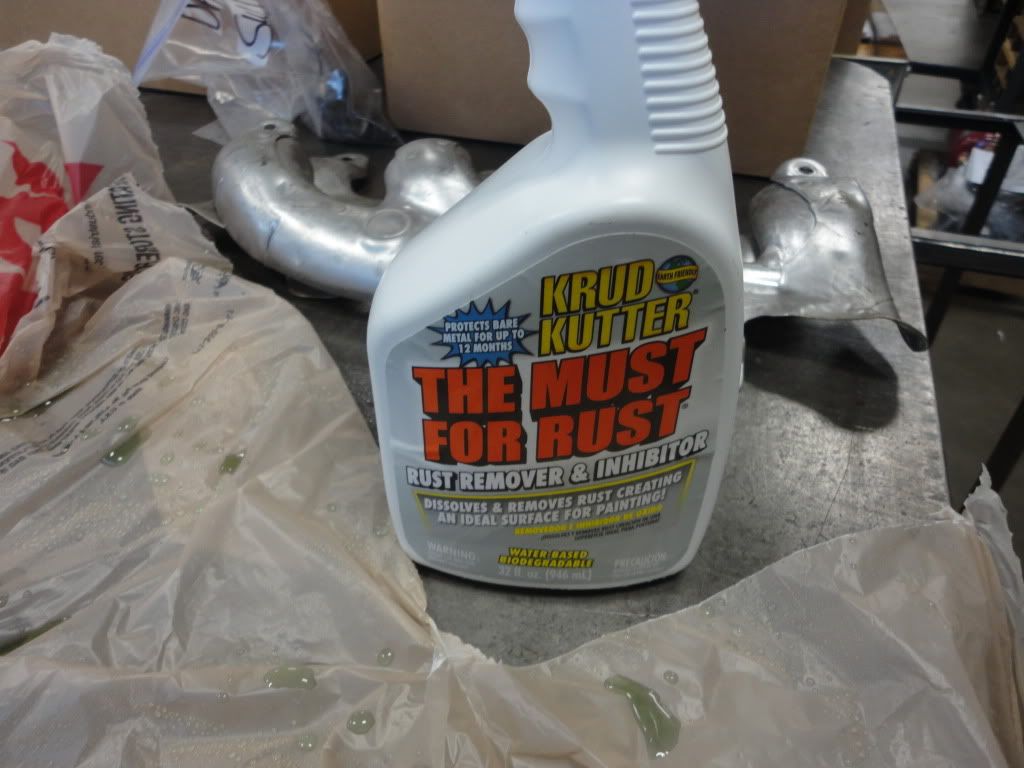
Then you hit them with Krud Kutter which has Phosphoric Acid in it and blow dry with compressed air...
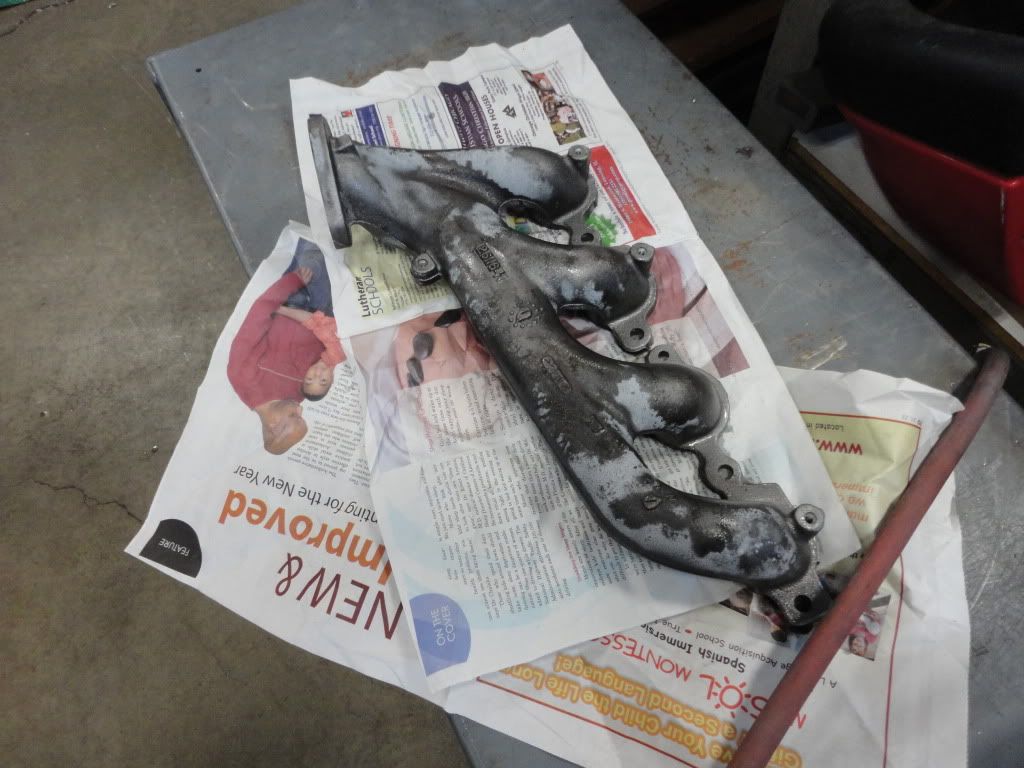
Then spray them with Slip Plate......

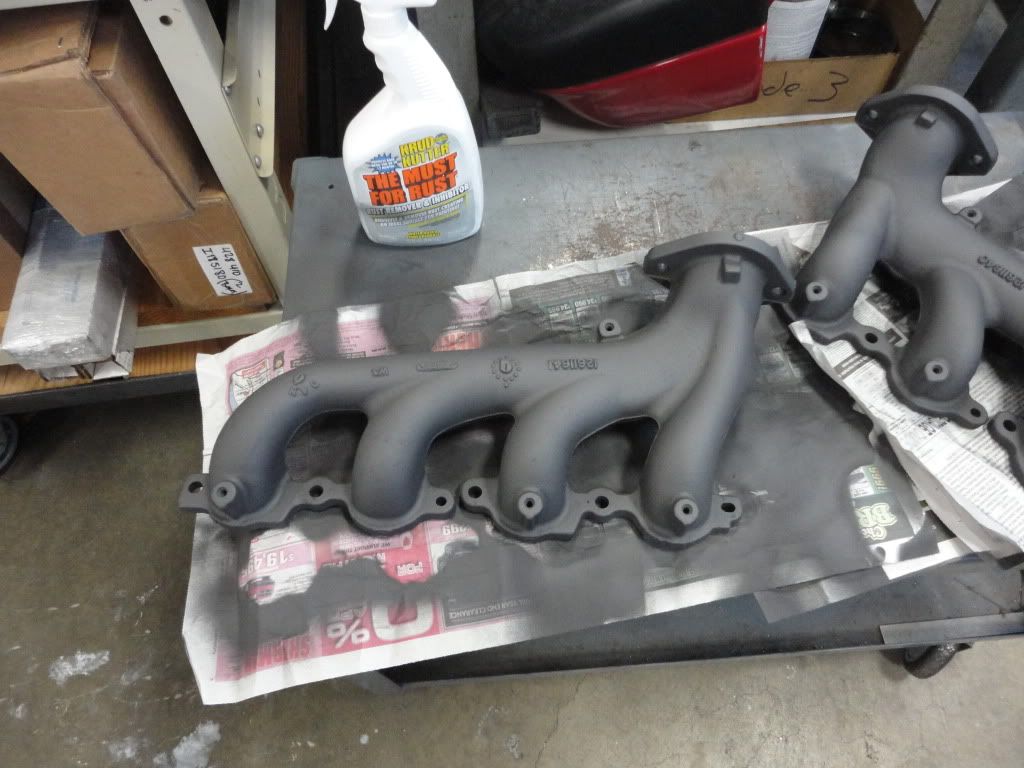
Let them dry and they are just like Nu.............Yawk!!
I did this process on the Biscayne 4 years ago and they still look like new
Then you hit them with Krud Kutter which has Phosphoric Acid in it and blow dry with compressed air...
Then spray them with Slip Plate......
Let them dry and they are just like Nu.............Yawk!!
I did this process on the Biscayne 4 years ago and they still look like new
03-06-2012, 09:08 PM
#120
TECH Fanatic
Thread Starter
I got a call that the driveshaft was finiashed so I stopped and picked it up (shortened 2 3/4" from stock)
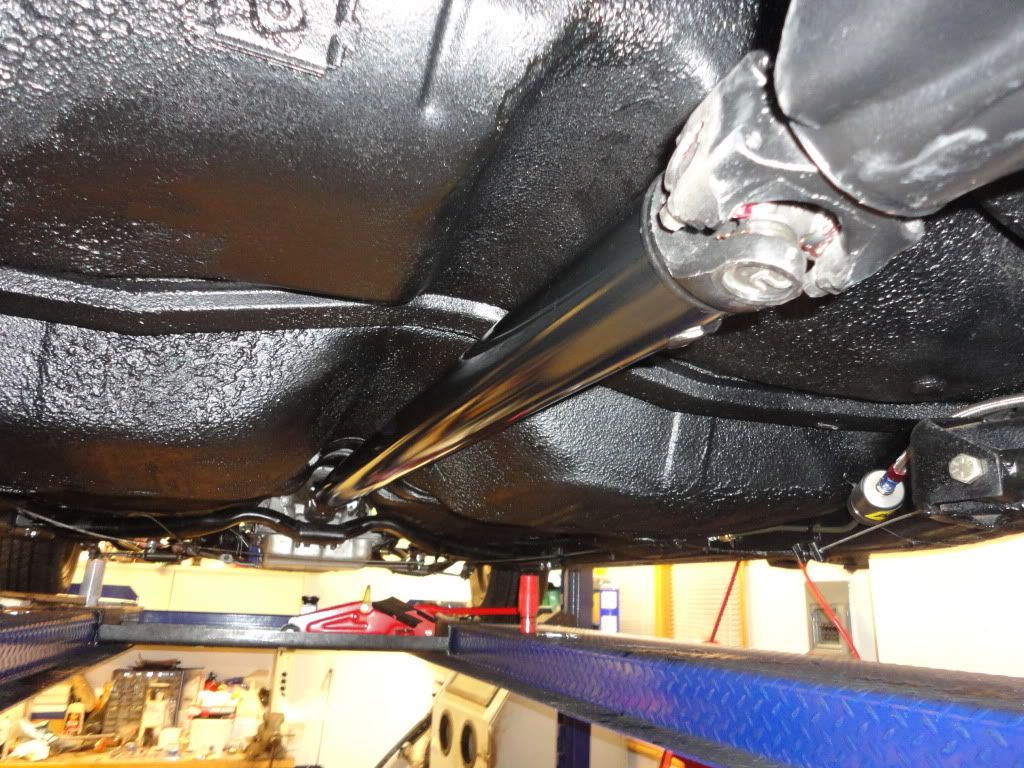
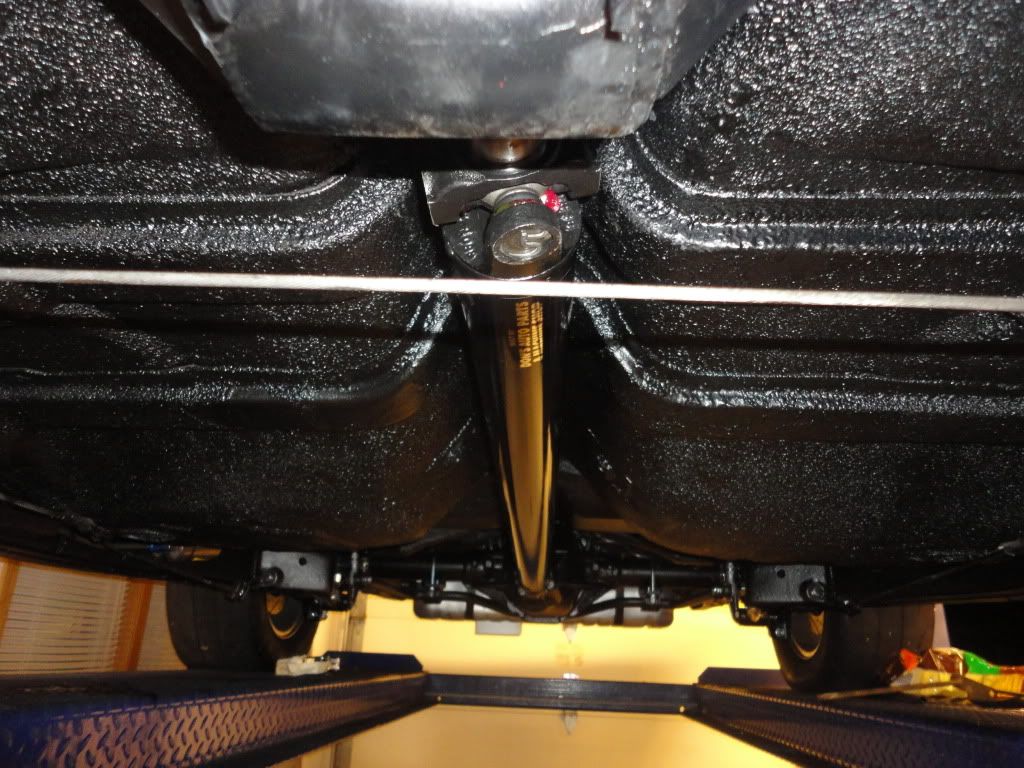
Also got the manifolds installed...
Also got the manifolds installed...