

turbo 5.3 s10 build

 10-12-2011, 07:05 AM
#84
Yes you can run your Steam Crossover to it.....but you still need to allow coolant around the thermostat.....
A trick I used on a 34 ford with an LS1 is to Drill a hole inside the thermostat housing as far towards those plugs as I could get which allows the coolant a passage. Used a 1/4" drill bit and it works like a champ. Just need to get some coolant through that wall in the pump.
A trick I used on a 34 ford with an LS1 is to Drill a hole inside the thermostat housing as far towards those plugs as I could get which allows the coolant a passage. Used a 1/4" drill bit and it works like a champ. Just need to get some coolant through that wall in the pump.
10-12-2011, 08:15 AM
#85
Alright thanks alot I never even thought about that. I just didn't want to take those plugs out and run a u hose. It'll look kinda like **** like that haha.
Couldn't I run the npt adaptor right above the thermostat? That way the coolant crossover can feed the thermostat coolant. I might just drill it a 1/4" anyway like you said.
Drilled a hole like you said. Should be good now
Couldn't I run the npt adaptor right above the thermostat? That way the coolant crossover can feed the thermostat coolant. I might just drill it a 1/4" anyway like you said.
Drilled a hole like you said. Should be good now
10-18-2011, 02:29 PM
#87
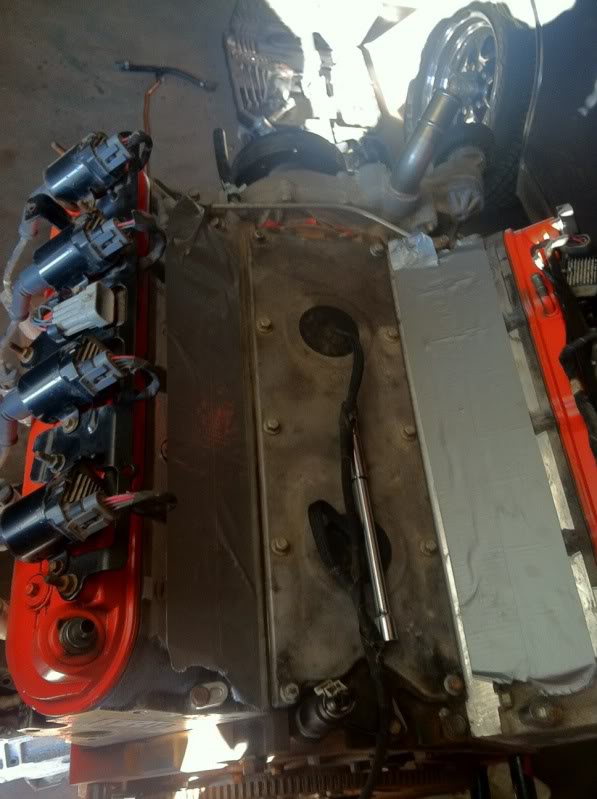
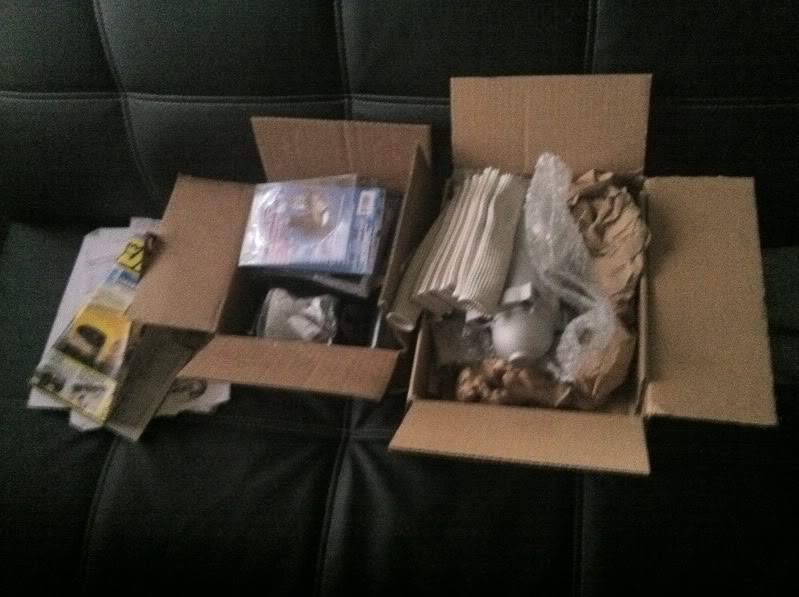
Here's the old coolant lines I fabbed up for the ls1 intake to fit. It didn't fit too good and I didn't want any leaks.

Here's the new ls6 rear plugs and crossover
Can't wait to get this!!! Only $100 with my employee discount

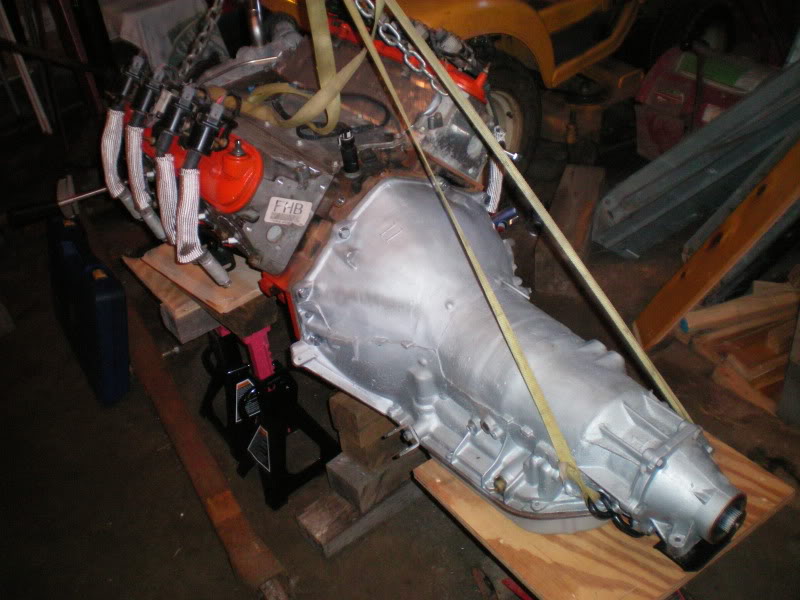
Sooooo the engine is complete. Now I have to save up some money for the tranny, crossmember, and motor mounts so no updates for about another month and a half. Then I gotta swap out the old 2.2 for this beast. Should be fun.
Sold my cutlass today. Should have a tranny soon
Here's the new ls6 rear plugs and crossover
Can't wait to get this!!! Only $100 with my employee discount
Sooooo the engine is complete. Now I have to save up some money for the tranny, crossmember, and motor mounts so no updates for about another month and a half. Then I gotta swap out the old 2.2 for this beast. Should be fun.
Sold my cutlass today. Should have a tranny soon
10-27-2011, 08:07 PM
#88
Launching!
Join Date: Feb 2010
Posts: 237
Likes: 0
Received 0 Likes
on
0 Posts

set that bitch in there already lol jk. My brother and i are getting ready to do his 90 s10 and im courious to see if your manifolds work out. If yours dont work out im goin to buy the Ls header flanges @ summit and make a log type. He is doing rust repair now lol, screw that **** haha. So soon as we start the power end of things i will put pics up/
 10-27-2011, 09:47 PM
#90
Lol I'm going as fast as possible!! But hopefully I can drop everything in within the next Month because before money was the only thing holding me back. You got a build thread going? And for bonestock 442, thank you. All you gotta do is heat up the barbs and water pump with propane or even acetalyn if you can and grab a pair of vise grips and a hammer and slowly twist it back and forth and hit them with a hammer. Hope that helps. Put alot of muscle into it haha
the th400 is getting built right now by a local shop and should be done in a couple weeks. hopefully this weekend i can order my tranny mount, motor mounts, crankshaft spacer, and longer bolts and possibly get started on taking the 2.2 and tranny out.
well, got most of the **** ripped out and harness torn apart. in the next couple days i need to buy a torx bit for the stupid bumper to take the whole front off, power steering lines off, fuel lines off, shifter off, then the motor mounts and tranny mount then i can take it all out.
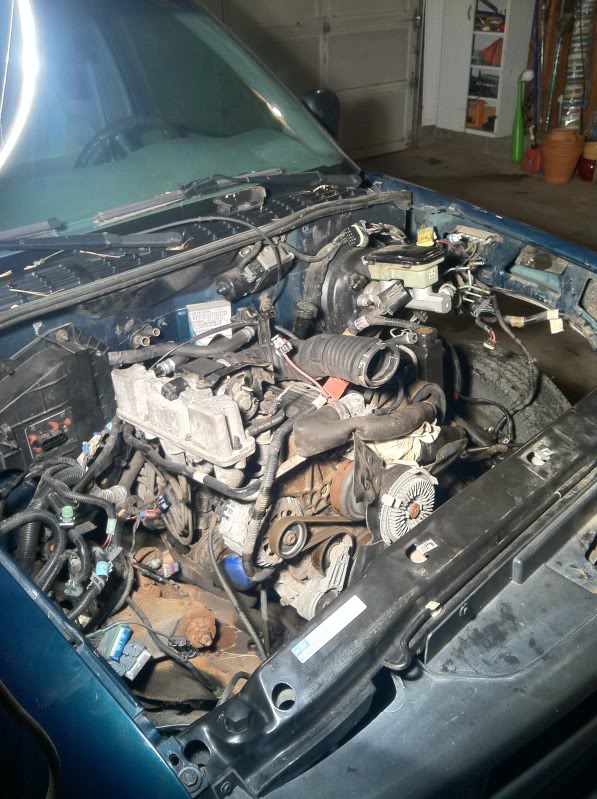
have a next update hopefully in a couple days
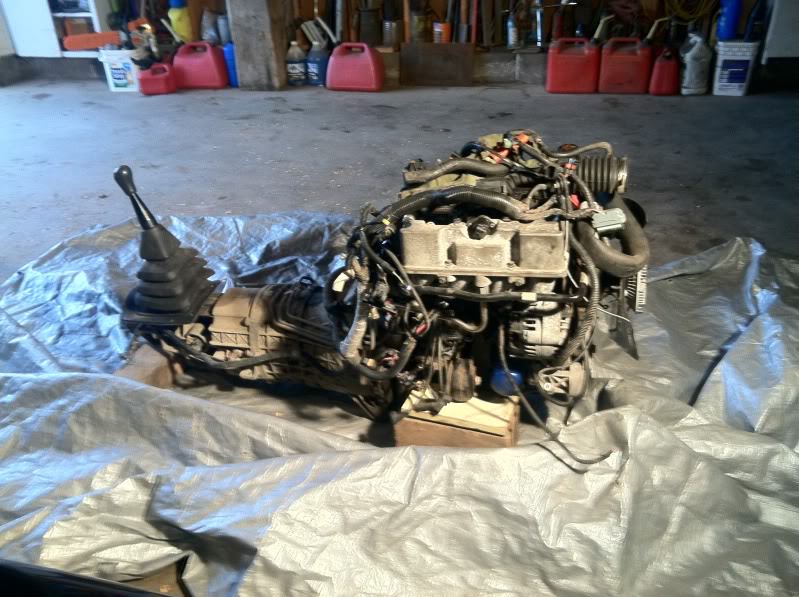
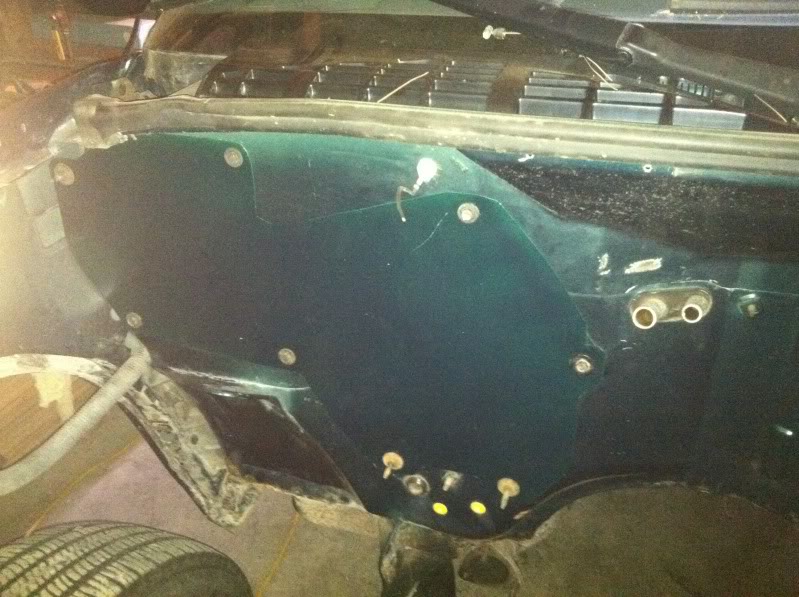
got the engine and tranny out today. within the next week ill be making the hvac block off cover, removing the stock fuel system, cleaning frame and undercoating all of it, blocking off the manual shifter hole, painting floor in the cab and possibly figuring out which parts of the wiring harness i need for my headlights, blinkers, tail lights and all the cab wiring. hopefully get all this done before my tranny is finished and all my parts come to mount everything. stay tuned

the old 2.2 and 5 speed trans
the th400 is getting built right now by a local shop and should be done in a couple weeks. hopefully this weekend i can order my tranny mount, motor mounts, crankshaft spacer, and longer bolts and possibly get started on taking the 2.2 and tranny out.
well, got most of the **** ripped out and harness torn apart. in the next couple days i need to buy a torx bit for the stupid bumper to take the whole front off, power steering lines off, fuel lines off, shifter off, then the motor mounts and tranny mount then i can take it all out.
have a next update hopefully in a couple days
got the engine and tranny out today. within the next week ill be making the hvac block off cover, removing the stock fuel system, cleaning frame and undercoating all of it, blocking off the manual shifter hole, painting floor in the cab and possibly figuring out which parts of the wiring harness i need for my headlights, blinkers, tail lights and all the cab wiring. hopefully get all this done before my tranny is finished and all my parts come to mount everything. stay tuned
the old 2.2 and 5 speed trans
11-06-2011, 06:52 PM
#92
Haha thanks kory but I don't think it'll be any faster than your frame job. I'm still debating on doing just the front part of the frame firewall forward or if I should kick it in the *** and do it all. It's not too rusty so I'm not sure yet.
11-06-2011, 07:46 PM
#93
TECH Apprentice
iTrader: (7)

Join Date: Apr 2005
Location: New Berlin Wi
Posts: 309
Likes: 0
Received 0 Likes
on
0 Posts
Just do the whole thing if you can. The truck will hopefully never be farther apart than it is now. I removed the cab, painted under it put it back on. Then I removed the box and did the same. I currently have the box off upside down in the garage. I'm replacing the front spar that runs crossways under the floor. it was really rusted and mostly missing. what a pita. hopefully yours is in better shape than mine was.
Kory
Kory
11-07-2011, 05:27 PM
#94
damn man you did work! im not going to go that far as to pick up the cab and box because my frame really isnt bad at all i might just go over it from underneath with the wirebrush then undercoat/paint it. i pretty much did the front because it was super dirty and greasy, which i dont think anyone likes, and because its going to be seen alot when people look into my engine bay and with a clean engine its always nice to have a clean frame.
speaking of painting, today i got the front crossmember/frame firewall forward wirebrushed with a 3" grinder, washed with bleach (i know, but i didnt have any degreaser), and undercoated/painted. also decided to do the floor boards in the interior because the old carpet was STILL wet from god knows when so they were kinda rusty but not too bad.

interior after undercoating
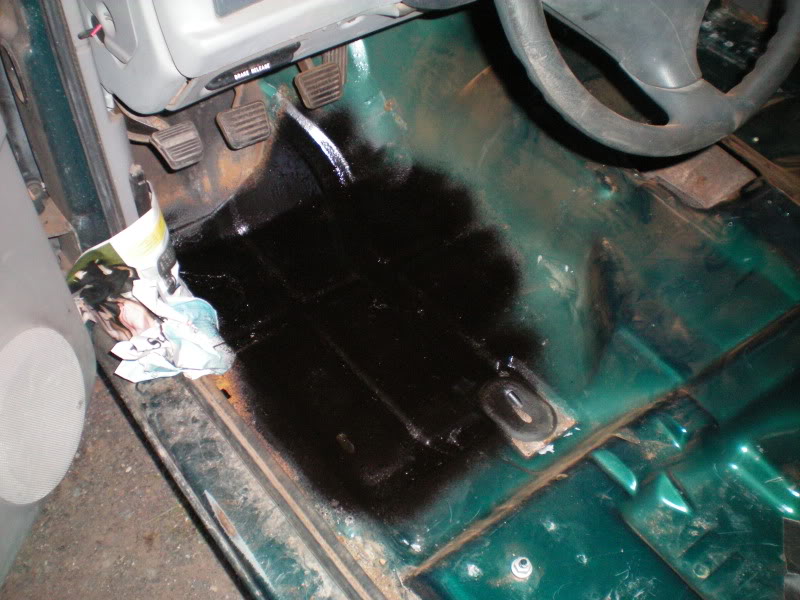
i think the GM color match paint is pretty dang accurate, this is right after painted so it looks a little dark than it will dry

more updates possibly tomorrow morning for more surface rust removal/painting on the sides of the truck and then fuel system/exhaust removal after that.
speaking of painting, today i got the front crossmember/frame firewall forward wirebrushed with a 3" grinder, washed with bleach (i know, but i didnt have any degreaser), and undercoated/painted. also decided to do the floor boards in the interior because the old carpet was STILL wet from god knows when so they were kinda rusty but not too bad.
interior after undercoating
i think the GM color match paint is pretty dang accurate, this is right after painted so it looks a little dark than it will dry
more updates possibly tomorrow morning for more surface rust removal/painting on the sides of the truck and then fuel system/exhaust removal after that.
11-10-2011, 02:35 PM
#96
Made a HVAC block off cover the other day out of some 24 or 26 gauge sheet metal and painted it up
Also got all my parts in today. The motor mounts, tranny mount, coil insulators, starter, proportion valve, crankshaft spacer and the longer bolts.
I'll be putting the prop valve in tomorrow and mock up the insilulaters
so lets just start off by saying ALOT of things went wrong and basically only 2% of things went the right way. got my th400 done last week so its time to get **** done. first of all, when i put the tranny next to the engine i realized the engine was missing a hole for the tranny to bolt to so i had to drill and tap a hole for that, no biggy. then once i tried to bolt in another tranny bolt it scraped against the tranny and wouldnt go in so i grinded the tranny down and it fit in, not so bad. after i got that out of the way, i realized the 7/16" bolts for the torque converter would not fit in the converter holes so i drilled them out. after that, they were too long so i had to shorten all of them. then, last but not least, the flywheel holes didnt reach the TC holes to i had to elongate them. FINALLY everything bolted up between the engine and tranny, now its time to drop it all in.
this look like the right width between the torque converter and flywheel? about a 1/4"
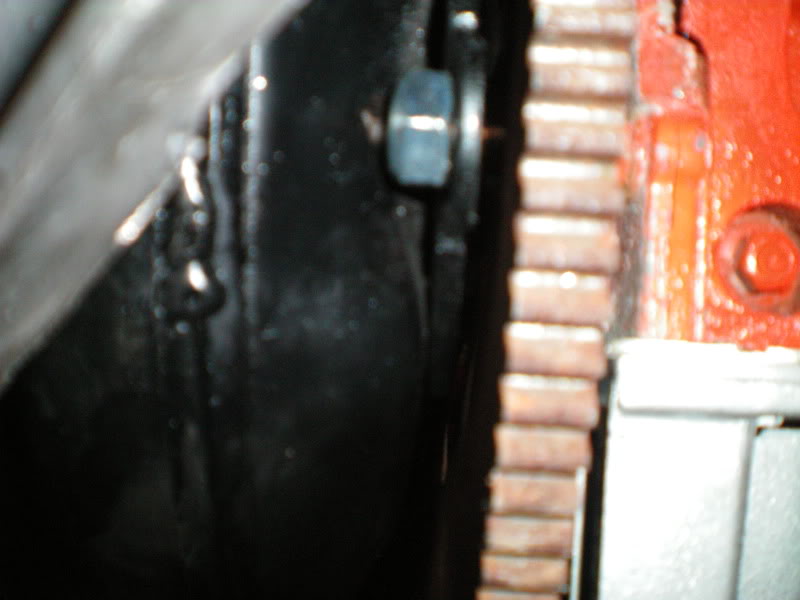
lookin good huh? not really...
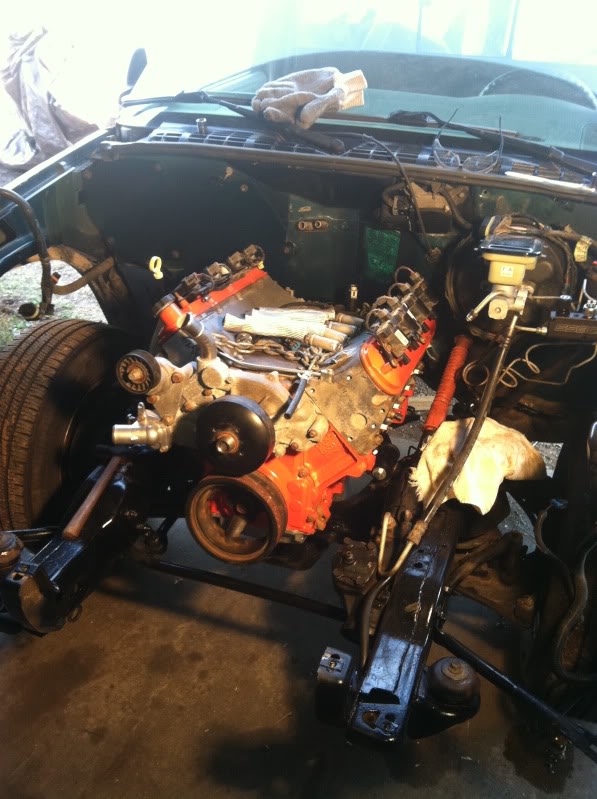
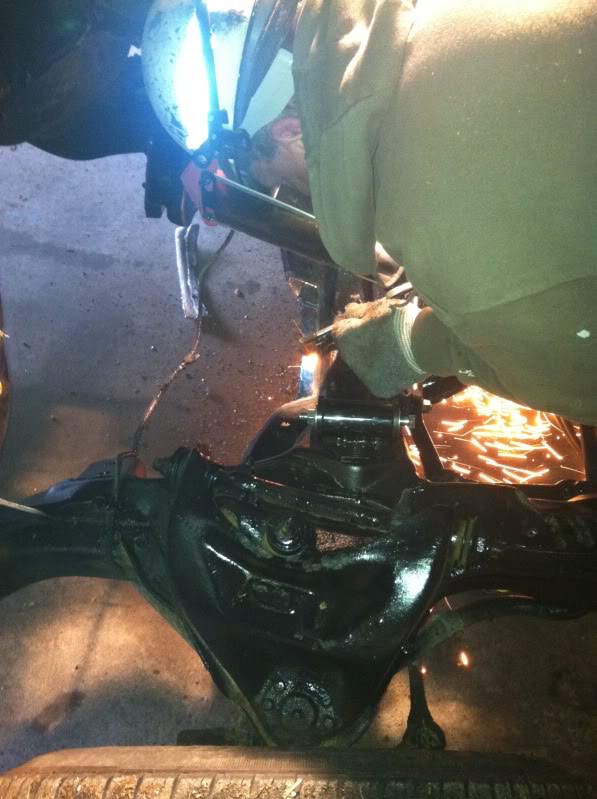
turns out we had to notch the crossmember in order to fit the engine and tranny in. after that the tranny mount wouldnt fit with the tranny crossmember so now we gotta cut all that out and unbolt it even though its a pain in the *** and fabricate a new one for it. and for the person who asked me if the flipped manifolds will work, the answer is no. passenger side, no problem it will fit fine. drivers side on the other hand will either hit the steering shaft or break booster no matter which manifold you put on. it didnt work facing downward nor did it work facing upward. now i need to either buy swap manifolds or make a new one from scratch for the drivers side. so for the guy earlier that asked me about running the crossover underneath the bellhousing, that is probably what im going to do now.
my dad using the oxyacetalyn to cut the notch out for the crossmember. it fits AMAZING now that we notched it and clearance is very good even with the mounts all the way back.
thats all for now stay tuned for an update in the next few days or so.
Also got all my parts in today. The motor mounts, tranny mount, coil insulators, starter, proportion valve, crankshaft spacer and the longer bolts.
I'll be putting the prop valve in tomorrow and mock up the insilulaters
so lets just start off by saying ALOT of things went wrong and basically only 2% of things went the right way. got my th400 done last week so its time to get **** done. first of all, when i put the tranny next to the engine i realized the engine was missing a hole for the tranny to bolt to so i had to drill and tap a hole for that, no biggy. then once i tried to bolt in another tranny bolt it scraped against the tranny and wouldnt go in so i grinded the tranny down and it fit in, not so bad. after i got that out of the way, i realized the 7/16" bolts for the torque converter would not fit in the converter holes so i drilled them out. after that, they were too long so i had to shorten all of them. then, last but not least, the flywheel holes didnt reach the TC holes to i had to elongate them. FINALLY everything bolted up between the engine and tranny, now its time to drop it all in.
this look like the right width between the torque converter and flywheel? about a 1/4"
lookin good huh? not really...
turns out we had to notch the crossmember in order to fit the engine and tranny in. after that the tranny mount wouldnt fit with the tranny crossmember so now we gotta cut all that out and unbolt it even though its a pain in the *** and fabricate a new one for it. and for the person who asked me if the flipped manifolds will work, the answer is no. passenger side, no problem it will fit fine. drivers side on the other hand will either hit the steering shaft or break booster no matter which manifold you put on. it didnt work facing downward nor did it work facing upward. now i need to either buy swap manifolds or make a new one from scratch for the drivers side. so for the guy earlier that asked me about running the crossover underneath the bellhousing, that is probably what im going to do now.
my dad using the oxyacetalyn to cut the notch out for the crossmember. it fits AMAZING now that we notched it and clearance is very good even with the mounts all the way back.
thats all for now stay tuned for an update in the next few days or so.
11-24-2011, 04:25 PM
#97
TECH Regular
Join Date: Jun 2011
Location: Milwaukee, Wi.
Posts: 420
Likes: 0
Received 0 Likes
on
0 Posts
What manifolds have you all used? You might be able to move the steering shaft over half inch at the firewall and maybe get a smaller shaft. What about getting a smaller master cylinder? Look through summit. It was 91blowthru who had the crossover under the bellhousing. He has some pretty good pics of his setup.
11-24-2011, 08:34 PM
#98
Just the truck manifolds it hits the shaft a little but I could fix that but it also hits the brake booster so Im not sure if any other manifolds would work. I'm possibly thinking about doing a rear mount set up like originally planned but I'm not sure yet. Another option would be to have my friend build me a header but he might not be that good
11-24-2011, 08:37 PM
#99

switch to hydroboost, or ABS electric high power booster, so that you can mount the master to the firewall or go with manual brakes, with the corvette style M/C and eliminate the booster?