
79 Cutlass Wagon, 5.3 G machine


 11-30-2011, 07:07 PM
#102
On The Tree
Thread Starter
Join Date: Aug 2010
Location: Eagle Mountain, Utah
Posts: 143
Likes: 0
Received 0 Likes
on
0 Posts
Finally some more progress...
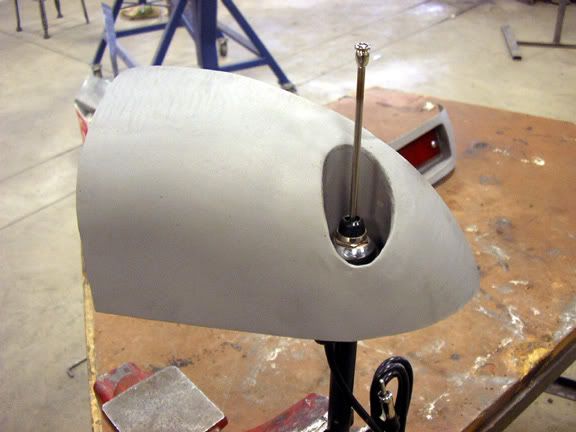
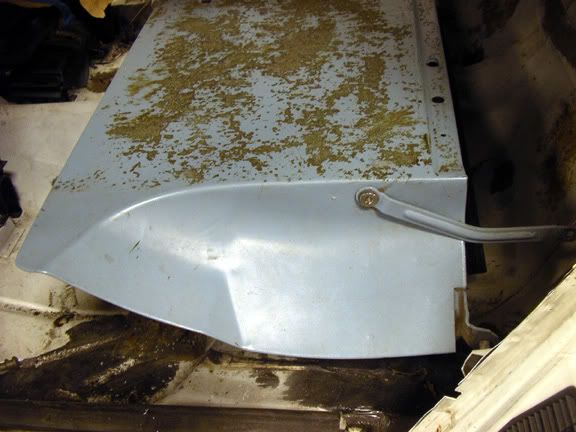
First off, another class assignment. We learned about frenching, and for our assignments we had to make a panel and french a tail light and antenna. We were graded on just going through the process, not finishing it to paint ready. Here's mine and my light is in the background. It was a fun assignment but it's not as pretty as I would do to a real car, I knocked it out quickly to get back to my car...
First off, another class assignment. We learned about frenching, and for our assignments we had to make a panel and french a tail light and antenna. We were graded on just going through the process, not finishing it to paint ready. Here's mine and my light is in the background. It was a fun assignment but it's not as pretty as I would do to a real car, I knocked it out quickly to get back to my car...
11-30-2011, 07:11 PM
#103
On The Tree
Thread Starter
Join Date: Aug 2010
Location: Eagle Mountain, Utah
Posts: 143
Likes: 0
Received 0 Likes
on
0 Posts
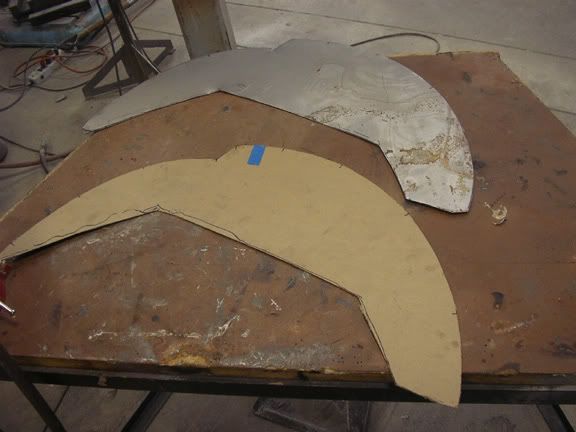
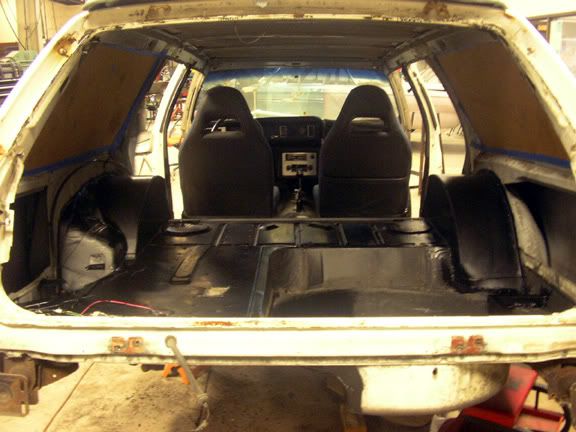
I wanted a fairly large tub, big enough to stuff a 13" tire at full suspension squat. The main problem with doing this to a wagon is the back seat. I want to keep mine totally functional in the up and down position. This required some creativity and some trial and error. Finally on the 3rd cardboard design I got everything to work out. I started with a "chip board" pattern and flat 18ga sheet metal to come up with the sides.
Using the pullmax I raised the edge to a 90 degree angle
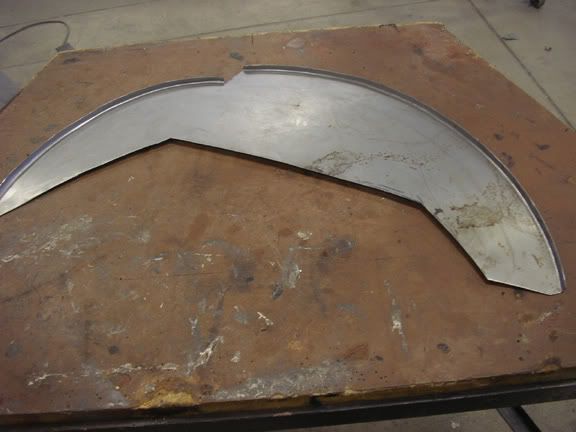
and using the slip roller bent the top.
Using the pullmax I raised the edge to a 90 degree angle
and using the slip roller bent the top.
11-30-2011, 07:14 PM
#104
On The Tree
Thread Starter
Join Date: Aug 2010
Location: Eagle Mountain, Utah
Posts: 143
Likes: 0
Received 0 Likes
on
0 Posts
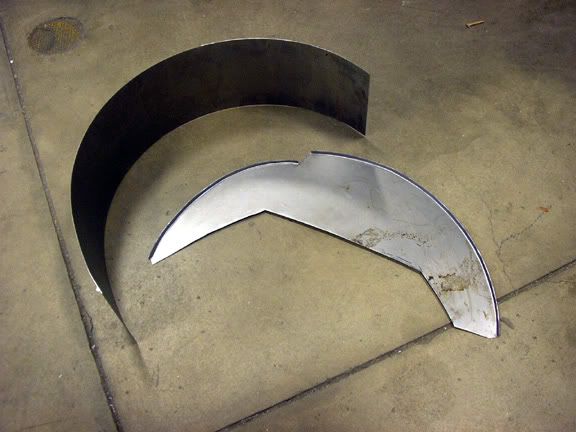
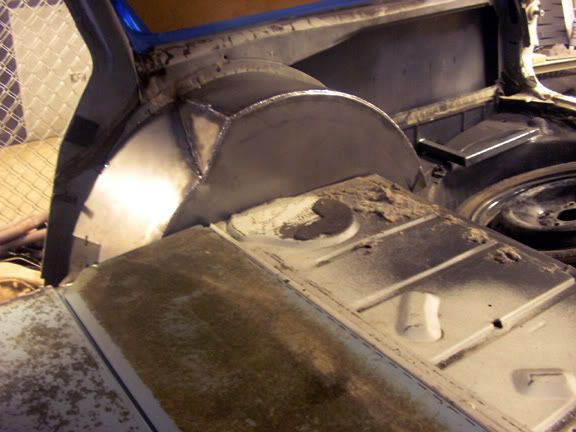
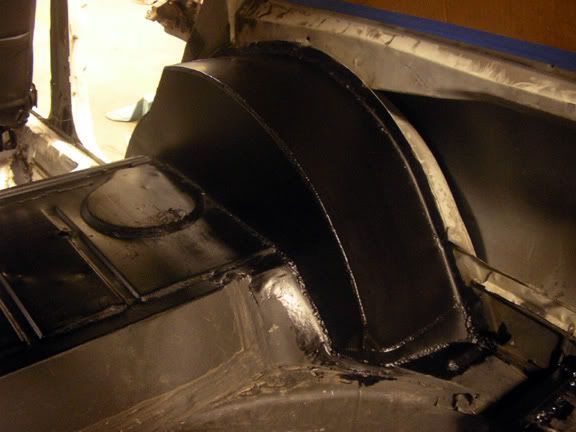
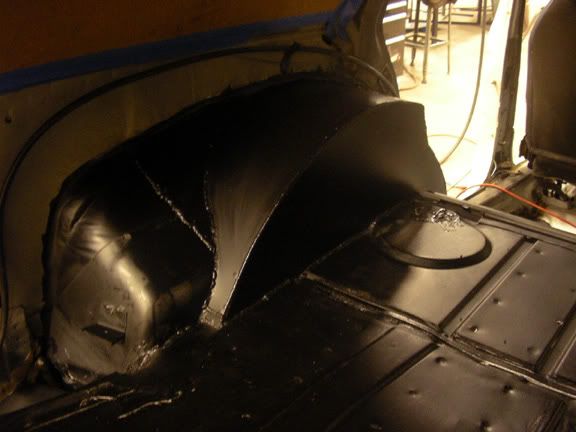
Here's the final product, panels welded with screws holding them in place. They are slightly different side to side because the gas filler neck is inside the wheel well on the driver's side.
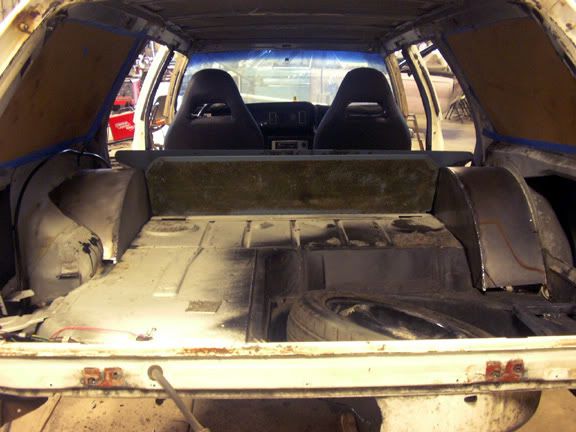
Notice the notch I had to create to allow clearance for the back of the seat.
[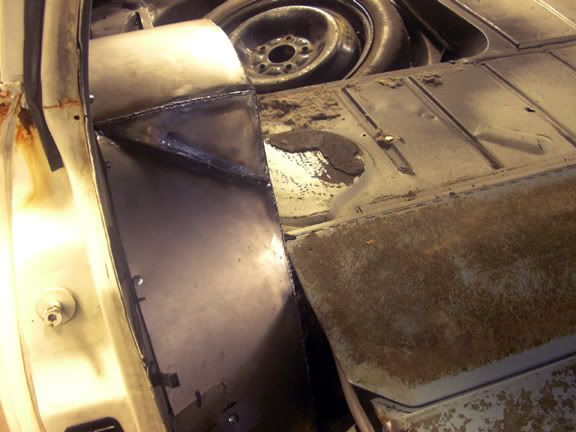

Notice the notch I had to create to allow clearance for the back of the seat.
[
11-30-2011, 07:15 PM
#105
On The Tree
Thread Starter
Join Date: Aug 2010
Location: Eagle Mountain, Utah
Posts: 143
Likes: 0
Received 0 Likes
on
0 Posts
Now I have to modify the seat back just a bit, the hinge bars run into the wheel wells so I need to move them inward about 1-1.5". More to come on that...
 12-08-2011, 05:39 PM
#107
On The Tree
Thread Starter
Join Date: Aug 2010
Location: Eagle Mountain, Utah
Posts: 143
Likes: 0
Received 0 Likes
on
0 Posts
Progress updates...
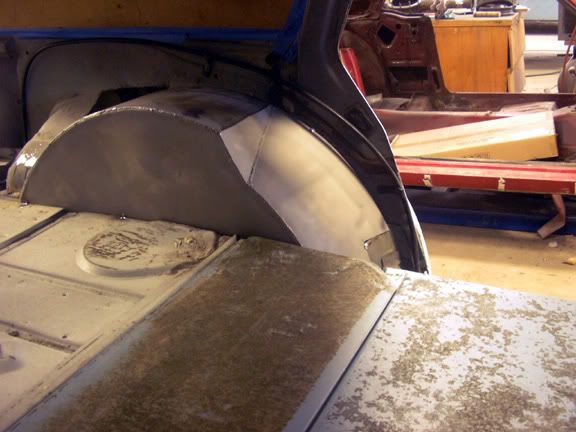
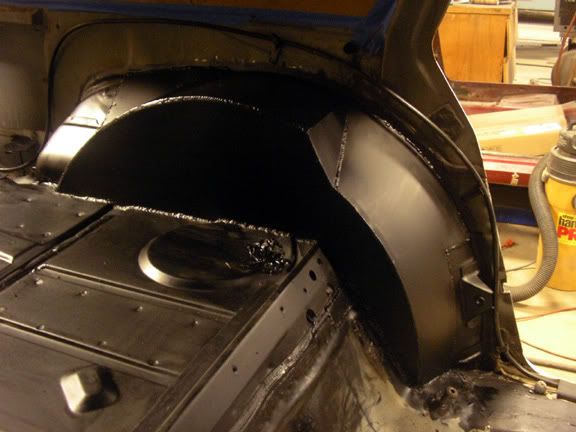
First off the final shots of the wheels tubs. After welding I used a DA with a 220 grit pad to clean them up and then coated the cargo area with Por-15. Eventually I'll cover the area with some bed liner type material so I can still load messy junk back there.

First off the final shots of the wheels tubs. After welding I used a DA with a 220 grit pad to clean them up and then coated the cargo area with Por-15. Eventually I'll cover the area with some bed liner type material so I can still load messy junk back there.
12-08-2011, 05:48 PM
#108
On The Tree
Thread Starter
Join Date: Aug 2010
Location: Eagle Mountain, Utah
Posts: 143
Likes: 0
Received 0 Likes
on
0 Posts
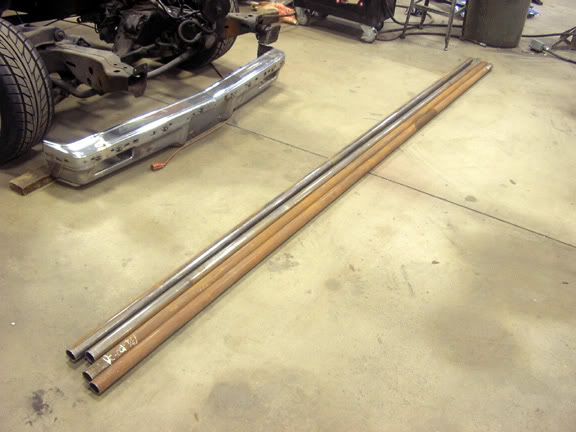
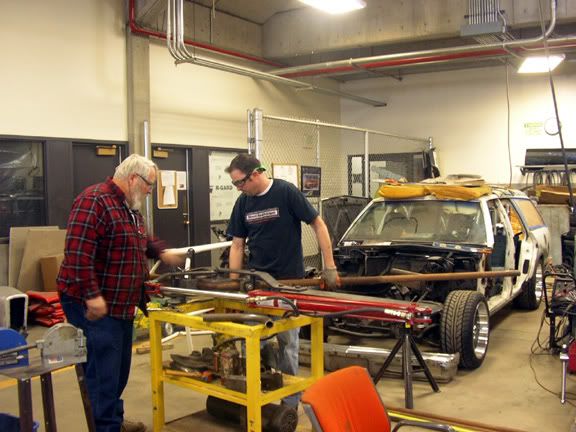
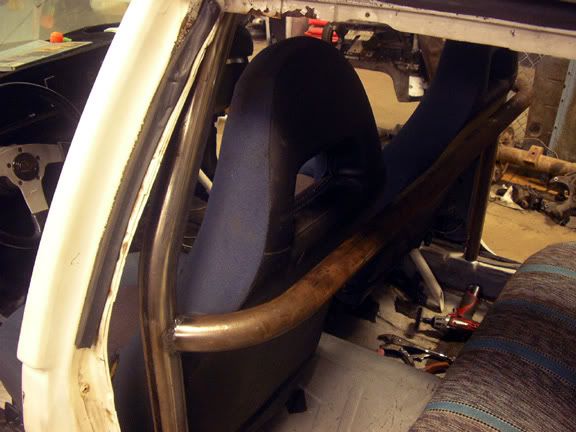
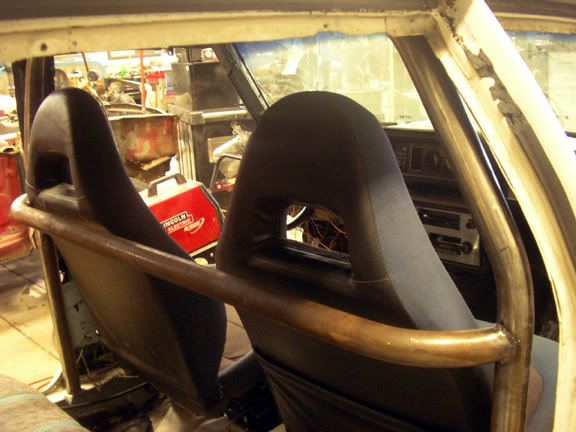
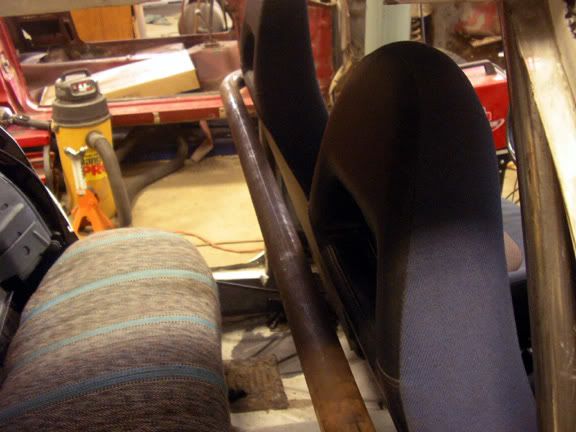
Tuesday I started on the roll bar. Previously I picked up some 1 3/4" .120 wall tubing from the local metal supplier. They came in 24ft lengths @ $53 ea and I had them cut to 12 ft lengths. After some measuring my professor helped me start bending the main hoop. Using the PVC mockup we were able to bend the curves to match the design perfectly without needing to remove the bar from the machine for test fits. It turned out great and fit nice and snug. Next order of business was the hoop cross bar. This was bent to allow a pretty wide range of movement for the seats.
 01-23-2012, 10:23 PM
#110
On The Tree
Thread Starter
Join Date: Aug 2010
Location: Eagle Mountain, Utah
Posts: 143
Likes: 0
Received 0 Likes
on
0 Posts
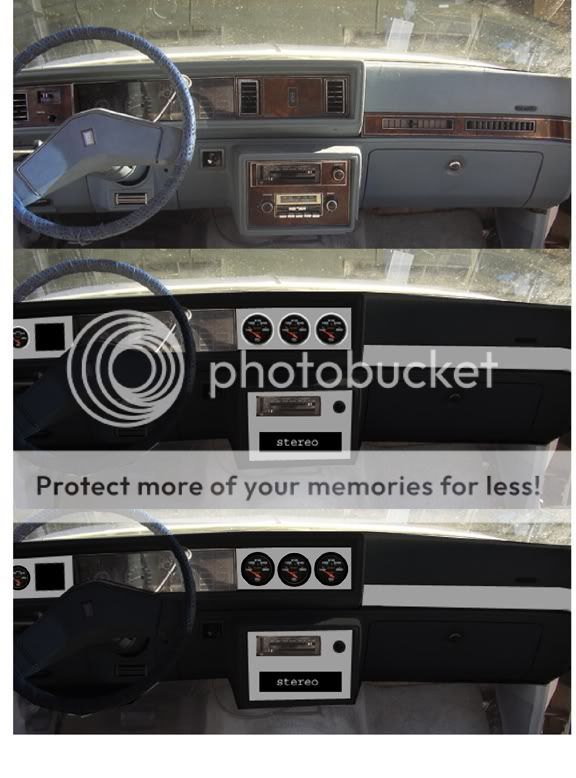
Lots of updates- first some dash planning. Pro-Comp gauges have the same font that my factory cluster has...
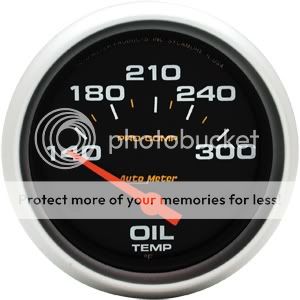
They only come in 2 5/8" rather than the Sport-comp 2 1/6" so I can only fit 3 across instead of the 4 I originally planned. They also don't have the Diff temp gauge in this line but I can live without it. I'm willing to bet even if I road course the car I won't overheat the rear axle so I probably won't need to keep an eye on it. So here's a very quick photoshop mockup of my dash...
Mods will include a new black complete dash cover, adding the 160 speedo, painting all factory gauge needles red, deleting all dash vents except lower heater and windshield defrost, and all fakie wood grain areas replaced with brushed aluminum. I also have a Grant steering wheel with brushed aluminum spokes. Three center gauges will be Water temp, Oil temp, and Trans temp. Gauge on the left will be a brake pressure gauge. Shift light 3 3/8" tach will go on top of the dash in the left corner by the windshield pillar. On the dual pillar pods will be an a/f gauge along with a digital gear indicator like Ken Block's rally car.
Only thing to decide now is the color of the gauge rings. The Autometer dealios come with a silver bezel, but I'm leaning towards painting them black, see bottom photo. Thoughts?
01-23-2012, 10:25 PM
#111
On The Tree
Thread Starter
Join Date: Aug 2010
Location: Eagle Mountain, Utah
Posts: 143
Likes: 0
Received 0 Likes
on
0 Posts
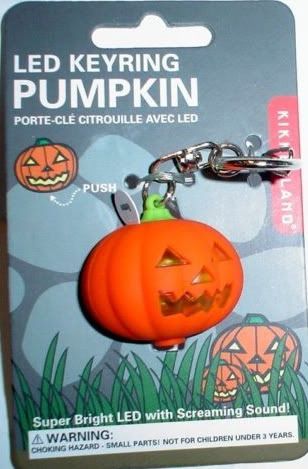
I found and bought this guy wasting time on ebay today. It lights up and screams at you, perfect for the Pumkinator motif. If it's large enough I'll hang it from the rear view mirror as my new g-force-o-meter for video viewers, if not I'll keep it as a fun key chain.
01-23-2012, 10:29 PM
#112
On The Tree
Thread Starter
Join Date: Aug 2010
Location: Eagle Mountain, Utah
Posts: 143
Likes: 0
Received 0 Likes
on
0 Posts
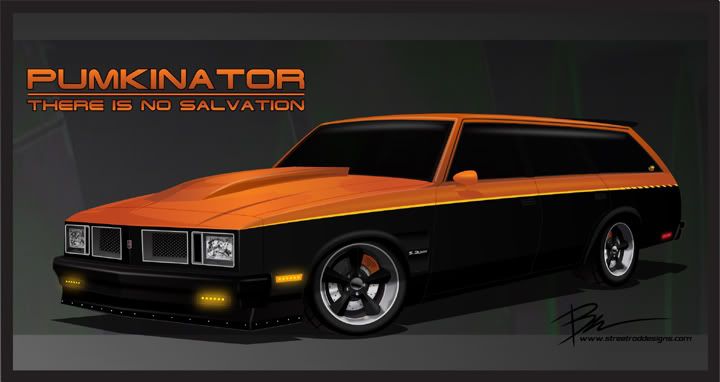
I took a quick breather recently to update my wagon's concept rendering. Added the brake ducts in the front bumper, the fender vents, factory mirrors, tucked the rear bumper, a new graphic to the side, and of course the new wheels.
I also changed some plans for the front turn signals for two reasons. First, the lenses on my light buckets were only manufactured for two years and they're a bit banged up. Finding nice ones has yeilded pretty much a big zee-ro. I've also been struggling on how to come up with a cost effective ram air hood system and everything I dream up will take too much work time and/or $. So today I removed the turn signals from the light bezels and I liked what I saw.
The turn signal holes will become a ram air inlet with two tubes merging into one near the throttle body. I'm still working out the air filters. I ordered some 6.25" wide combination white daytime driving light/ amber turn signal LED lights today. The holes I made in the bumper are about 8.5" wide, so using the brackets that come with the lights I will mount them "floating" in the center of the holes, and as the air flows through it will still be plumbed for brake cooling. Although it now sort of looks like an strange S10, I think it was a good compromise and a good final design. Let me know what you think, thanks!
01-23-2012, 10:33 PM
#113
On The Tree
Thread Starter
Join Date: Aug 2010
Location: Eagle Mountain, Utah
Posts: 143
Likes: 0
Received 0 Likes
on
0 Posts
This past Friday I went by the junk yard to grab some parts I scouted out earlier in the week. I definitely scored some great deals.
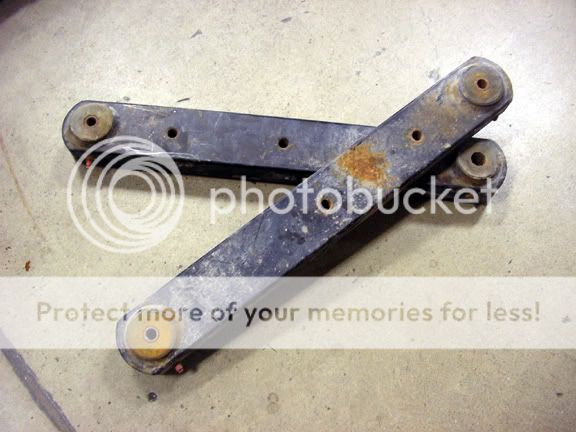
First off I'd like to thank the previous owner of this early 90s Camaro for installing Edelbrock rear lower control arms before the car made it to the wrecking yard. New price is $205 from Summit, only $10 (!) for the pair from the wrecking yard. Fighting a rusted bolt and 3 very tight ones was absolutely worth the effort.
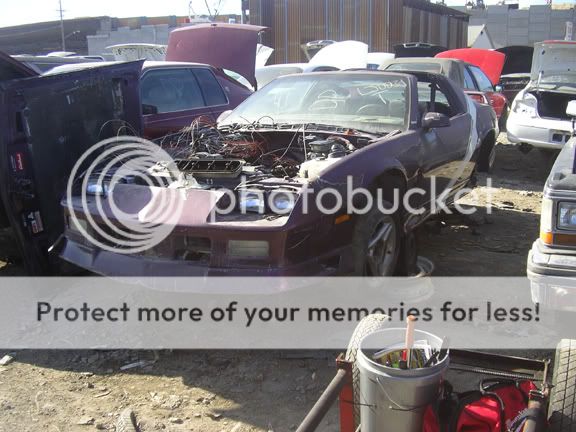
They have a little surface rust and the paint is beat up but other than that they're in great shape, no dents or other issues mechanical issues.
First off I'd like to thank the previous owner of this early 90s Camaro for installing Edelbrock rear lower control arms before the car made it to the wrecking yard. New price is $205 from Summit, only $10 (!) for the pair from the wrecking yard. Fighting a rusted bolt and 3 very tight ones was absolutely worth the effort.
They have a little surface rust and the paint is beat up but other than that they're in great shape, no dents or other issues mechanical issues.
01-23-2012, 10:33 PM
#114
On The Tree
Thread Starter
Join Date: Aug 2010
Location: Eagle Mountain, Utah
Posts: 143
Likes: 0
Received 0 Likes
on
0 Posts
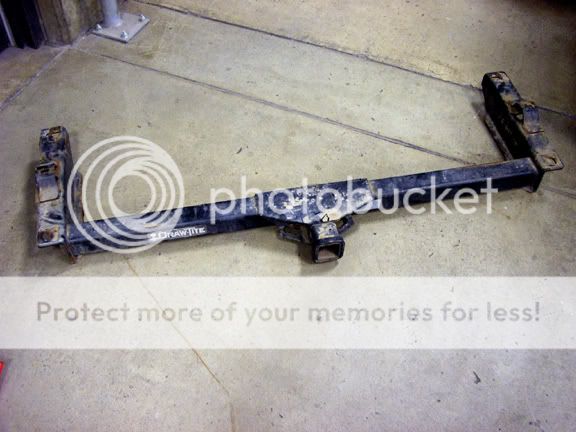
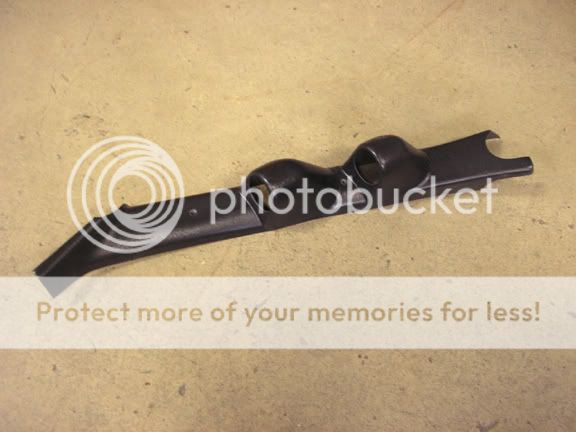
Next up is this trailer hitch I pulled from a 78-79ish Elcamino. I checked Draw Tight's website to get an idea for what a new one is worth, but they don't make the g-body hitch anymore with the larger 2" receiver, they only list a whimpy class 2 with the small 1 1/4" receiver. I made out ok with this too, only $25 and except for paint it's in great shape. My Nova is set up to flat tow with a tow bar so it'll be perfect for that or towing a small trailer or car on a tow dolly. Although the hitch has a decent tongue weight rating I doubt my lowered suspension would like towing something bigger too much.
Plans are to modify the mounts so it's directly behind the bumper rather than underneath. I'll cut a square hole and use a custom ball mount with an SCCA style tow hook attached for racing and of course a ball when towing.
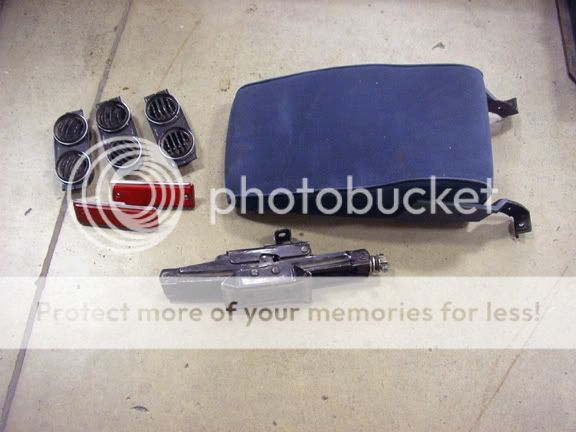
Got some miscellaneous stuff too. The seat back/ arm rest is from the back seat of an Astro Van. I'll use it in the front between the buckets, and build a simple base so I can have one of my kids sit up front. It'll fold down as an armrest when not being used as a seat back. The vents are from a 79 Pontiac LeMans. I'll have them set up for heating the front and the rear, they're pretty cool because they swivel 360 deg to direct air flow. I grabbed a couple rear marker lights from the El Camino, mine are a little hammered. The jack will fit nicely in my modified spare tire well, and the low profile height will work perfectly with the lowered stance of the car. $10 for everything here.
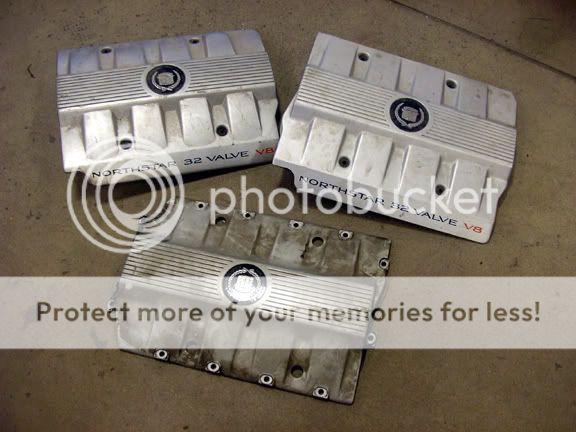
These Caddy engine covers caught my eye as the 2010 Camaro cover I bought just won't look right on the truck intake. Two are plastic and one aluminum, and I thought I might modify them a little. For $10 total for all three I figured it wasn't a big loss if I cut them up and it didn't work out so I went ahead and grabbed them. The runners on the truck intake don't look so bad but everything sticking out of the top looks terrible. I'm thinking to trim down the aluminum one to just the center rectangle to cover the top of the intake, then cut one side off each plastic one to cover the coil pack areas. We'll see how it goes...
Plans are to modify the mounts so it's directly behind the bumper rather than underneath. I'll cut a square hole and use a custom ball mount with an SCCA style tow hook attached for racing and of course a ball when towing.
Got some miscellaneous stuff too. The seat back/ arm rest is from the back seat of an Astro Van. I'll use it in the front between the buckets, and build a simple base so I can have one of my kids sit up front. It'll fold down as an armrest when not being used as a seat back. The vents are from a 79 Pontiac LeMans. I'll have them set up for heating the front and the rear, they're pretty cool because they swivel 360 deg to direct air flow. I grabbed a couple rear marker lights from the El Camino, mine are a little hammered. The jack will fit nicely in my modified spare tire well, and the low profile height will work perfectly with the lowered stance of the car. $10 for everything here.
These Caddy engine covers caught my eye as the 2010 Camaro cover I bought just won't look right on the truck intake. Two are plastic and one aluminum, and I thought I might modify them a little. For $10 total for all three I figured it wasn't a big loss if I cut them up and it didn't work out so I went ahead and grabbed them. The runners on the truck intake don't look so bad but everything sticking out of the top looks terrible. I'm thinking to trim down the aluminum one to just the center rectangle to cover the top of the intake, then cut one side off each plastic one to cover the coil pack areas. We'll see how it goes...
01-23-2012, 10:36 PM
#115
On The Tree
Thread Starter
Join Date: Aug 2010
Location: Eagle Mountain, Utah
Posts: 143
Likes: 0
Received 0 Likes
on
0 Posts
Now for some new goodies.
I got this dual gauge pod from gbodyparts.com. They had the best price I could find at $50 including shipping. Seemed a bit steep for a mass produced thermoformed thin piece of plastic, but I guess you gotta pay if you wanna play. My interior is currently totally stripped out but mocking it up where it will go it looks like it won't be a perfect fit for my car, for sure one of the screw holes doesn't line up at all and not so sure everything else will exactly either. Maybe the wagons have different pillars? Either way I don't think it will take much to make it fit well.
Bunch of stuff from Speedway motors- My car is stock with light blue seat belts so I picked up a black retractable seat belt that will be for the jumper seat up front, an aluminum radiator hose extension tube tapped for a drain or gauge, some aluminum hood pins, a pair of circle track spindle savers, and a 9" to g-body rear axle bracket kit with the multi position LCA mounts and the brake caliper brackets, and finally my tubing notcher kit.
The fan in the upper left is from Roush Yates, it's a circle track item that is typically used to either cool the brakes or the driver. Despite being small and running off 12 volts it really cranks! I've removed all the factory big-n-ugly g-body HVAC housing and will build a custom heating system that will all be tucked under the dash, more on that as I get more parts for it in.
Next to the fan is a pair of "euro style" (woohoo, now I can pretend my car is a BMW) LED Daytime Running Lights. Cool thing is they also have built in amber turn signals so these will get mounted in the holes I created in the front bumper.
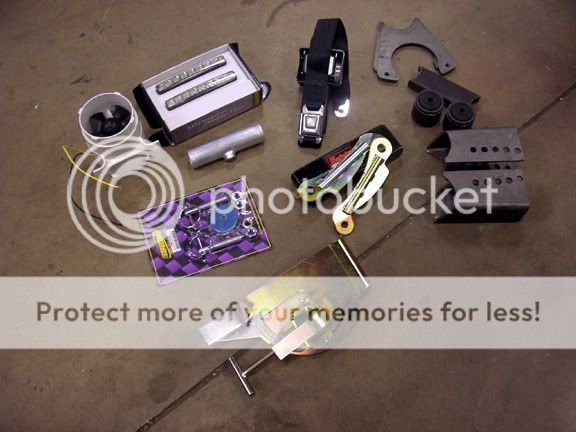
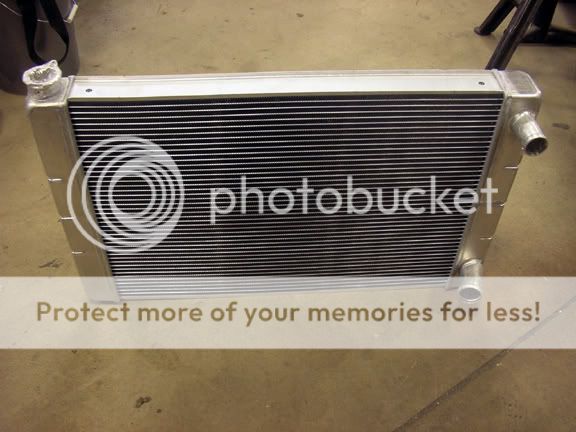
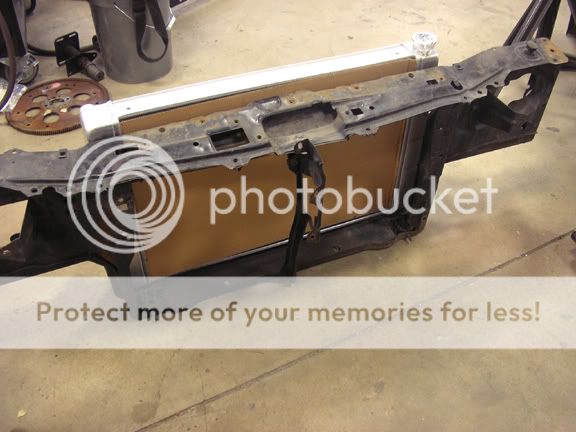
I also got this radiator from Speedway. It's 31" wide and has a "double pass" flow. With 3- 1" tubes they say it cools like a 5 core traditional radiator, and I liked this one because the inlet and outlet are both on the passenger side, just like on the LS water pump. This should help clean up the engine bay a bit. Unfortunately it's taller than the factory radiator so I'll need to modify the radiator support to make it fit.
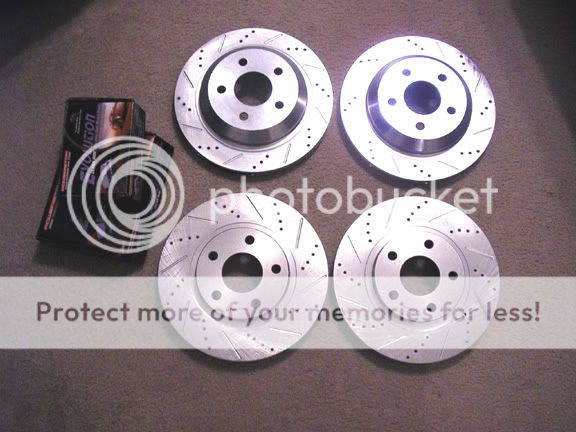
I picked up these LS F-body rotors and ceramic pads as a kit form ebay. Joe at Bulldawg said he's had some success with these and suggested for the price they can't be beat. I'm sure they're cheap-junk Chinese parts, but so is the stuff you buy at the auto parts store anymore and this kit at $180 was way cheaper than anything local. Remember this is a budget build.
I got this dual gauge pod from gbodyparts.com. They had the best price I could find at $50 including shipping. Seemed a bit steep for a mass produced thermoformed thin piece of plastic, but I guess you gotta pay if you wanna play. My interior is currently totally stripped out but mocking it up where it will go it looks like it won't be a perfect fit for my car, for sure one of the screw holes doesn't line up at all and not so sure everything else will exactly either. Maybe the wagons have different pillars? Either way I don't think it will take much to make it fit well.
Bunch of stuff from Speedway motors- My car is stock with light blue seat belts so I picked up a black retractable seat belt that will be for the jumper seat up front, an aluminum radiator hose extension tube tapped for a drain or gauge, some aluminum hood pins, a pair of circle track spindle savers, and a 9" to g-body rear axle bracket kit with the multi position LCA mounts and the brake caliper brackets, and finally my tubing notcher kit.
The fan in the upper left is from Roush Yates, it's a circle track item that is typically used to either cool the brakes or the driver. Despite being small and running off 12 volts it really cranks! I've removed all the factory big-n-ugly g-body HVAC housing and will build a custom heating system that will all be tucked under the dash, more on that as I get more parts for it in.
Next to the fan is a pair of "euro style" (woohoo, now I can pretend my car is a BMW) LED Daytime Running Lights. Cool thing is they also have built in amber turn signals so these will get mounted in the holes I created in the front bumper.
I also got this radiator from Speedway. It's 31" wide and has a "double pass" flow. With 3- 1" tubes they say it cools like a 5 core traditional radiator, and I liked this one because the inlet and outlet are both on the passenger side, just like on the LS water pump. This should help clean up the engine bay a bit. Unfortunately it's taller than the factory radiator so I'll need to modify the radiator support to make it fit.
I picked up these LS F-body rotors and ceramic pads as a kit form ebay. Joe at Bulldawg said he's had some success with these and suggested for the price they can't be beat. I'm sure they're cheap-junk Chinese parts, but so is the stuff you buy at the auto parts store anymore and this kit at $180 was way cheaper than anything local. Remember this is a budget build.
01-23-2012, 10:37 PM
#116
On The Tree
Thread Starter
Join Date: Aug 2010
Location: Eagle Mountain, Utah
Posts: 143
Likes: 0
Received 0 Likes
on
0 Posts
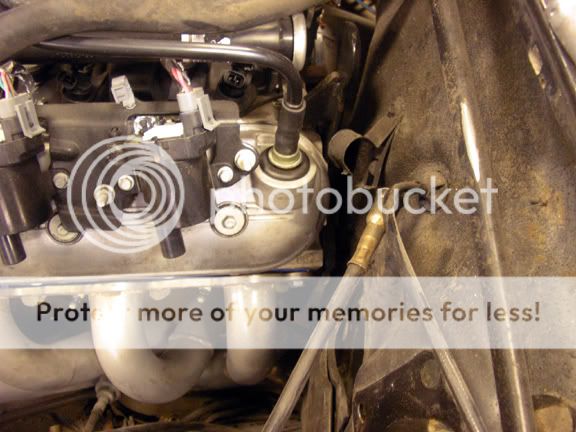
Here's a few shots of the motor mock-up. In the photo it's pushed back about an inch from the stock location. I think I can slightly modify the firewall and get another 1/2" back out of it.
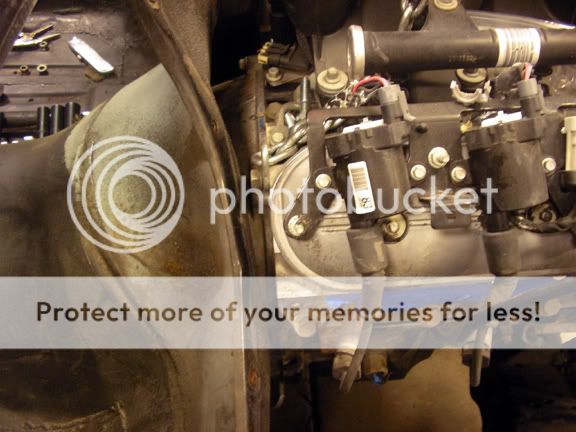
Driver's side...
Passenger side...
Here you can see the factory Tahoe oil pan is way too low. Joe from Bulldawg Muscle Cars is sponsoring my car a bit with a few parts, the GM muscle car LS oil pan kit is one of these items. I should have it in a couple days, thanks Joe!!

Driver's side...
Passenger side...
Here you can see the factory Tahoe oil pan is way too low. Joe from Bulldawg Muscle Cars is sponsoring my car a bit with a few parts, the GM muscle car LS oil pan kit is one of these items. I should have it in a couple days, thanks Joe!!
01-23-2012, 10:42 PM
#117
On The Tree
Thread Starter
Join Date: Aug 2010
Location: Eagle Mountain, Utah
Posts: 143
Likes: 0
Received 0 Likes
on
0 Posts
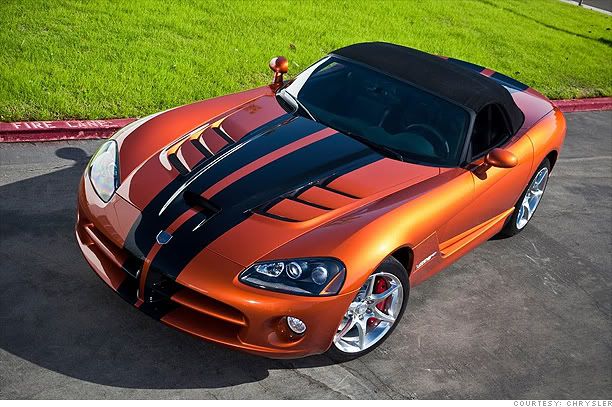
I made a trip to the local Sherwin Williams auto paint store today for supplies. While there I got pricing on the paint I want. Officially it's called "Toxic Orange" and is used on 2010+ Challengers, Chargers and Vipers. It's also called Mango Tango with the same paint code and used under that name on the more docile cars and Jeeps. We compared a paint chip to satin black and it all matches well. I was hoping for less wallet damage, but between primer and paint even with a student discount I'm looking at right around $1000. Ouch! Oh well, gotta be done. I better get a few more renderings whipped out...
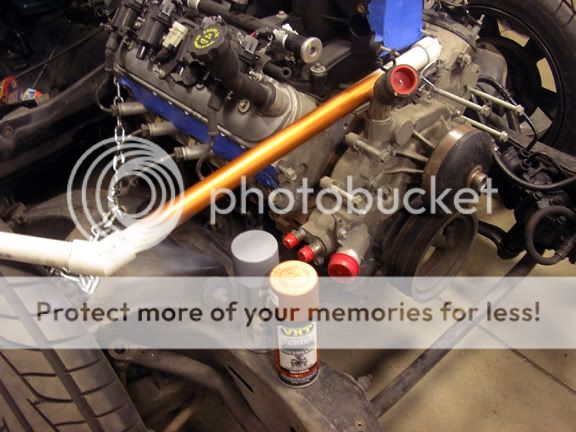
VHT recently came out with a "Burnt Copper" high heat engine paint. Here I sprayed it on some pvc pipe to see how close it matches the paint cap. It's a real nice burnt orange, but I think it may be off a bit from the Toxic Orange body paint. I forgot to take it with me today so I'll run it by on Thursday to compare to the paint chip. If it's not close enough I can always get some high heat additive and use a little Toxic orange for the motor.
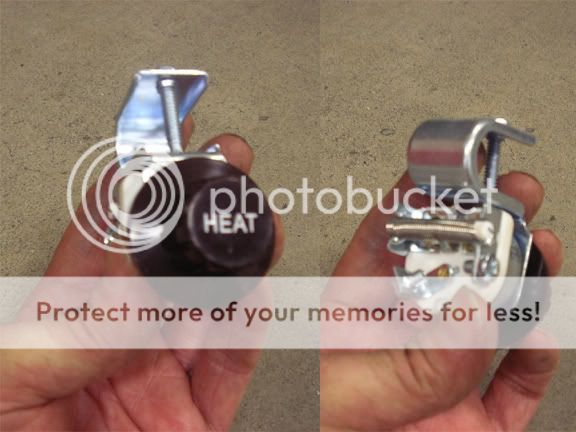
I bought this heat switch from ebay for my home-made heater system. It has has 4 positions, has the resister built in to the switch, and is illuminated. Only problem is it looks a little old school and cheapish and in the ebay photo it looked black but is actually brown. I think next time I'm at the junkyard I'll look at some of the more modern switch ***** they have and may be able to adapt it to this housing. Sorry for the blurry photo, my camera is like my eyes, can't see anything up close, lol!
VHT recently came out with a "Burnt Copper" high heat engine paint. Here I sprayed it on some pvc pipe to see how close it matches the paint cap. It's a real nice burnt orange, but I think it may be off a bit from the Toxic Orange body paint. I forgot to take it with me today so I'll run it by on Thursday to compare to the paint chip. If it's not close enough I can always get some high heat additive and use a little Toxic orange for the motor.
I bought this heat switch from ebay for my home-made heater system. It has has 4 positions, has the resister built in to the switch, and is illuminated. Only problem is it looks a little old school and cheapish and in the ebay photo it looked black but is actually brown. I think next time I'm at the junkyard I'll look at some of the more modern switch ***** they have and may be able to adapt it to this housing. Sorry for the blurry photo, my camera is like my eyes, can't see anything up close, lol!
01-23-2012, 10:44 PM
#118
On The Tree
Thread Starter
Join Date: Aug 2010
Location: Eagle Mountain, Utah
Posts: 143
Likes: 0
Received 0 Likes
on
0 Posts
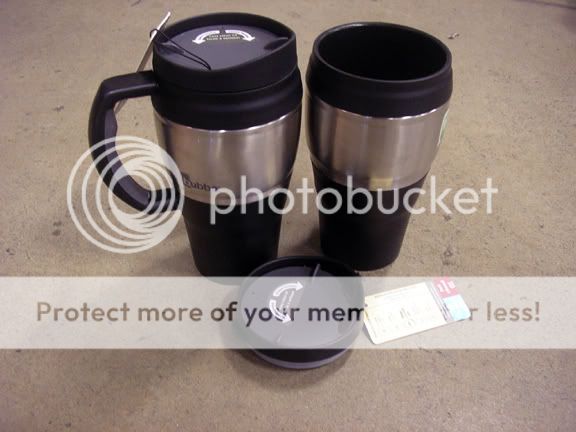
I've been looking all over for some cup holders to build into the center console and recently found these tucked in the corner of the Walmart automotive section. I wanted some stainless showing and it had to be big enough to fit a 20 oz. bottle of soda-pop and a large convenience store fountain drink. These will do after some slight modification. They were also the least expensive thing I could find at just under $6 each.
I also got in my brake pressure gauge. I bought this one off ebay too because the font matches the rest of my gauges. Crazy thing is it comes with fittings for high pressure nylon tubing but no actual tubing. That's kinda dumb. I looked in the Speedway catalog and saw they have long braided lines specifically for gauges so I'll have to grab one of those.
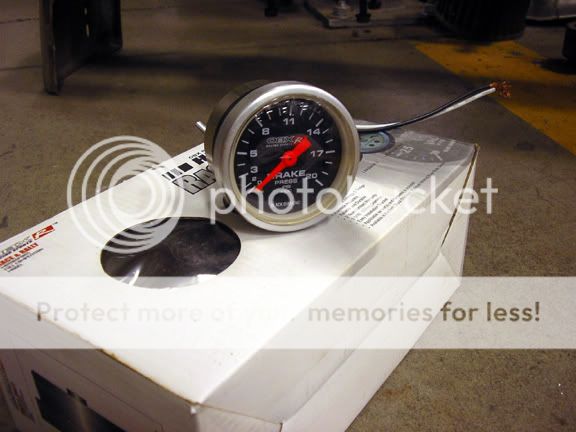
I also got in my brake pressure gauge. I bought this one off ebay too because the font matches the rest of my gauges. Crazy thing is it comes with fittings for high pressure nylon tubing but no actual tubing. That's kinda dumb. I looked in the Speedway catalog and saw they have long braided lines specifically for gauges so I'll have to grab one of those.
01-23-2012, 10:46 PM
#119
On The Tree
Thread Starter
Join Date: Aug 2010
Location: Eagle Mountain, Utah
Posts: 143
Likes: 0
Received 0 Likes
on
0 Posts
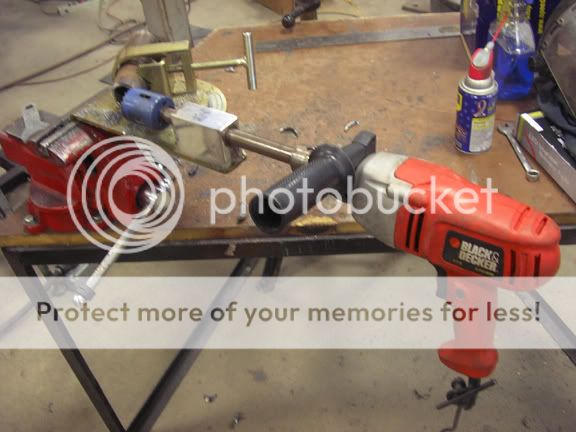
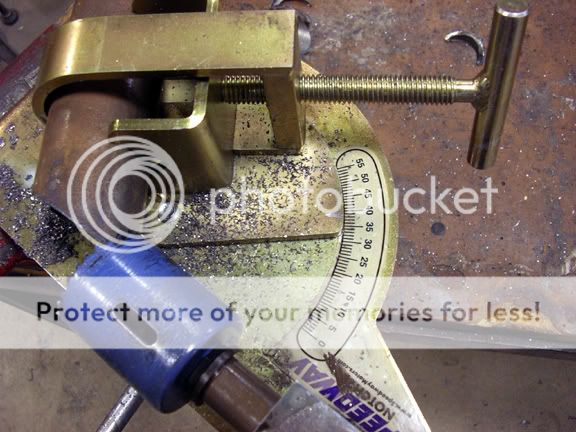
Here are some shots of the Speedway tubing notcher. It's ultra simple and very easy to use. Only 2 complaints- the numbers are a sticker. Human error shows it's placed about 2 degrees off, but that's easy enough to compensate for when measuring. But also, just the fact that it's a sticker and the WD-40 I use to lube the saw as its cutting soaked right into it. I know eventually it'll peel off so at some point I need to get the dremel tool out and grind all the marks permanent.
Cutting the tubing this way went so well. The first few cuts were off slightly but still weldable. After I got a good feel for how to use it resulted in some real nice snug fitment. I LIKE IT! One of the best $100 I've spent.
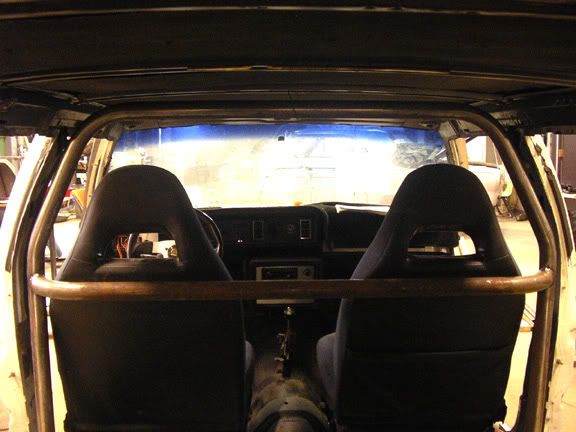
Here's the mock up of the cage so far. The back half is all welded as a unit as is the main hoop. I started on the front bars today and by Thursday I should have all the sections in the car and welded together. Because of pipe limitation I decided to triangulate the braces instead of doing an x brace. Should still be pretty stiff. I've decided to paint it Krylon aluminum with a satin clear to match the silver accents on the black and orange interior. The photo shows it in bare metal.
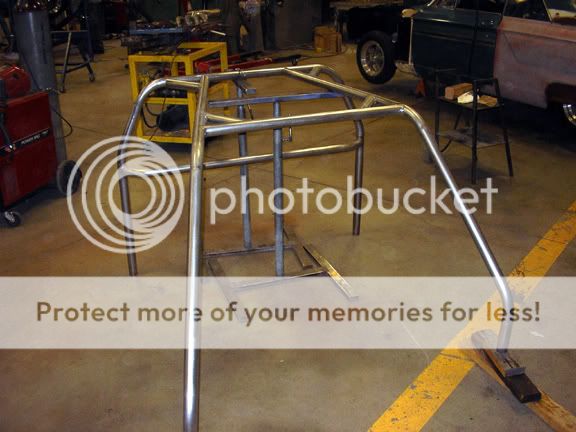
I should have the rotisserie to the school by Friday so early next week I'll have the frame out and then the fun really begins!
Cutting the tubing this way went so well. The first few cuts were off slightly but still weldable. After I got a good feel for how to use it resulted in some real nice snug fitment. I LIKE IT! One of the best $100 I've spent.
Here's the mock up of the cage so far. The back half is all welded as a unit as is the main hoop. I started on the front bars today and by Thursday I should have all the sections in the car and welded together. Because of pipe limitation I decided to triangulate the braces instead of doing an x brace. Should still be pretty stiff. I've decided to paint it Krylon aluminum with a satin clear to match the silver accents on the black and orange interior. The photo shows it in bare metal.
I should have the rotisserie to the school by Friday so early next week I'll have the frame out and then the fun really begins!