

Goodbye 4-Banger, Hello LS2 – Miata Build
 03-18-2012 | 10:10 PM
#162
Thread Starter
11 Second Club
Joined: Sep 2011
Posts: 390
Likes: 1
From: The Burnie, MD
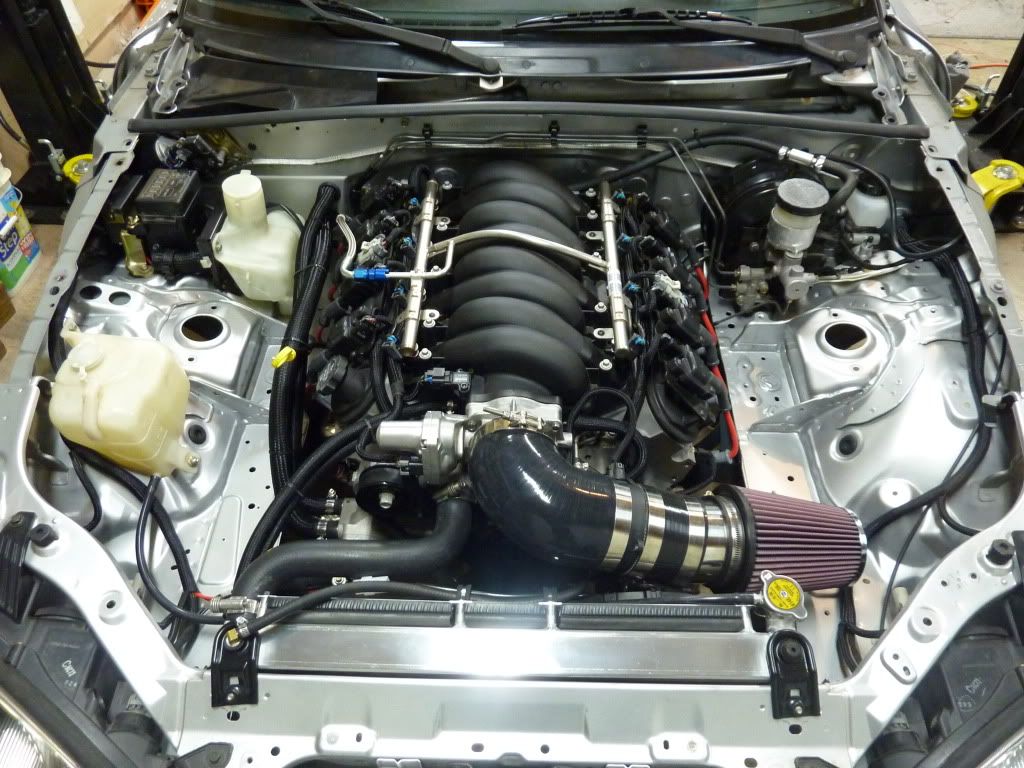
Now that the LS2 swap is done I was able to log a few miles in the car with the HP Tuners scanner running. Everything looked pretty good with the exception of the IAT (intake air temp). With ambient air temps at only 70* I was getting IAT's up to 120* and above while cruising. Way too hot...and since it's still winter, things would only get worse.
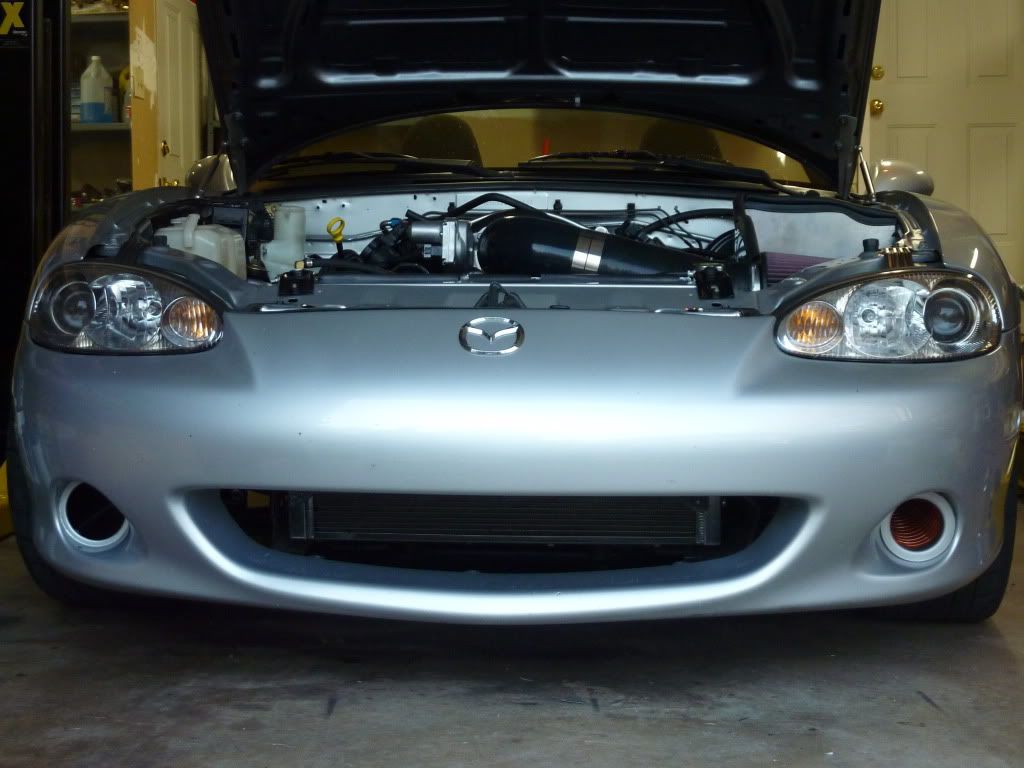
Here's a shot of what it looked like before I started the cold air project. You can see the air filter and MAF sitting right behind the radiator fan.
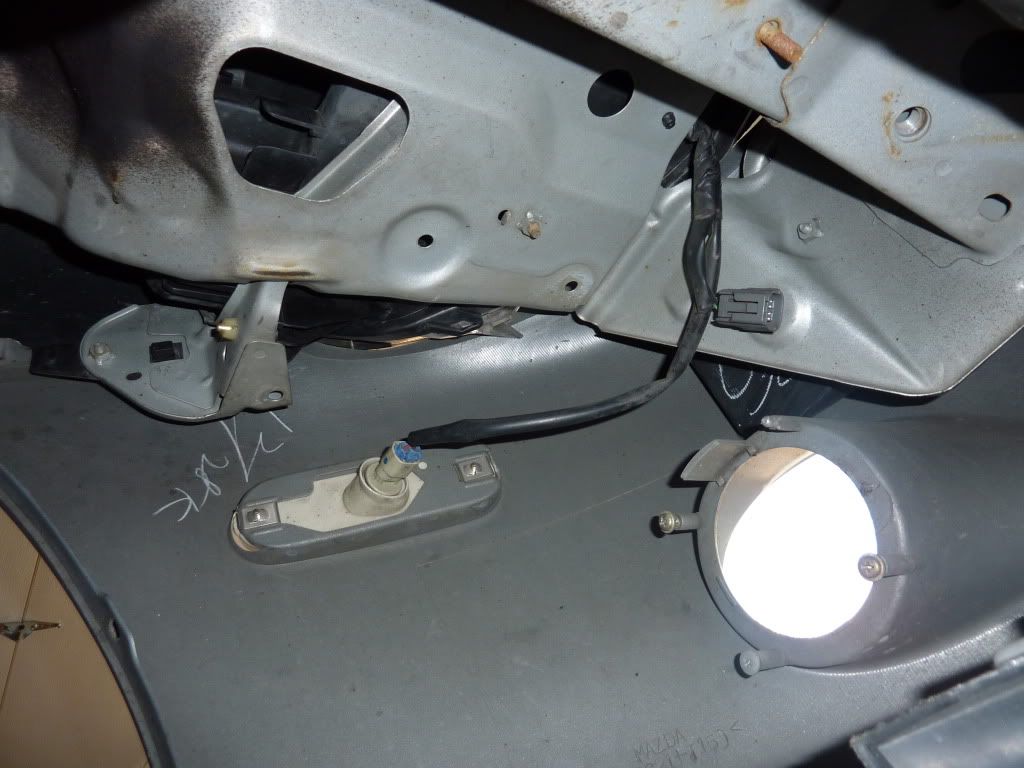
After some brainstorming I decided I could ditch my fog lights and use the hole on the drivers side to feed fresh air through some brake ducting to a custom cold air box behind the headlight. I took some measurements of the fog light hole and the space behind the headlight to figure out what I needed and found some parts that fit my needs.
Parts list:
1/8" Edge grip seal: http://www.mcmaster.com/#catalog/118/3468/=gnrvcr
3" Brake duct flange (x2): http://www.aircraftspruce.com/catalo...uctflanges.php
3" x 2' Brake ducting: http://www.aircraftspruce.com/catalog/appages/scat.php
1/8" x 12" x 24" Aluminum sheet: http://www.onlinemetals.com/merchant...=76&top_cat=60
The fog light hole is only .25" larger than the brake duct flange but the outer lip of the brake duct flange is exactly the same size as the fog light recess.

Here you can see the back of the fog light and the stock Mazda air box inlet. The silicone brake ducting will connect the two together.
Time to start constructing the air box. I started out by making a template out of an old corrugated plastic sign. I used this because of it's rigidity and it's fairly easy to cut into whatever shapes I need. Here's what the template looked like.
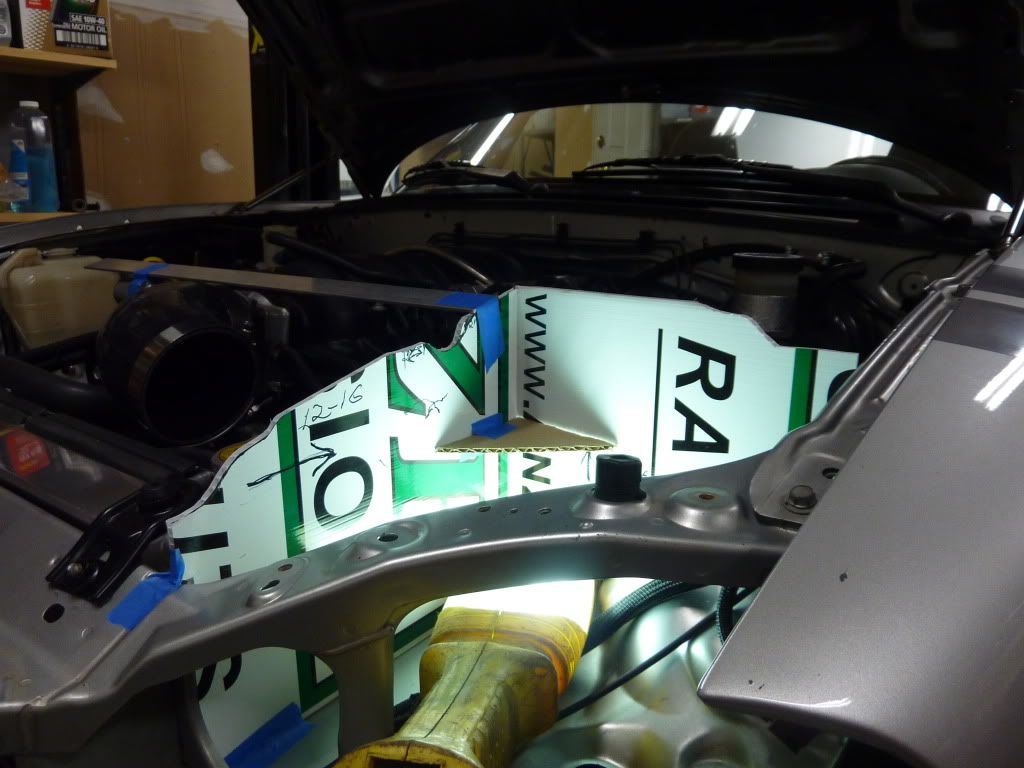
After a few hours of taking measurements through the headlight hole and contouring the plastic to the shape of the hood I laid it out on the aluminum sheet and outlined it.
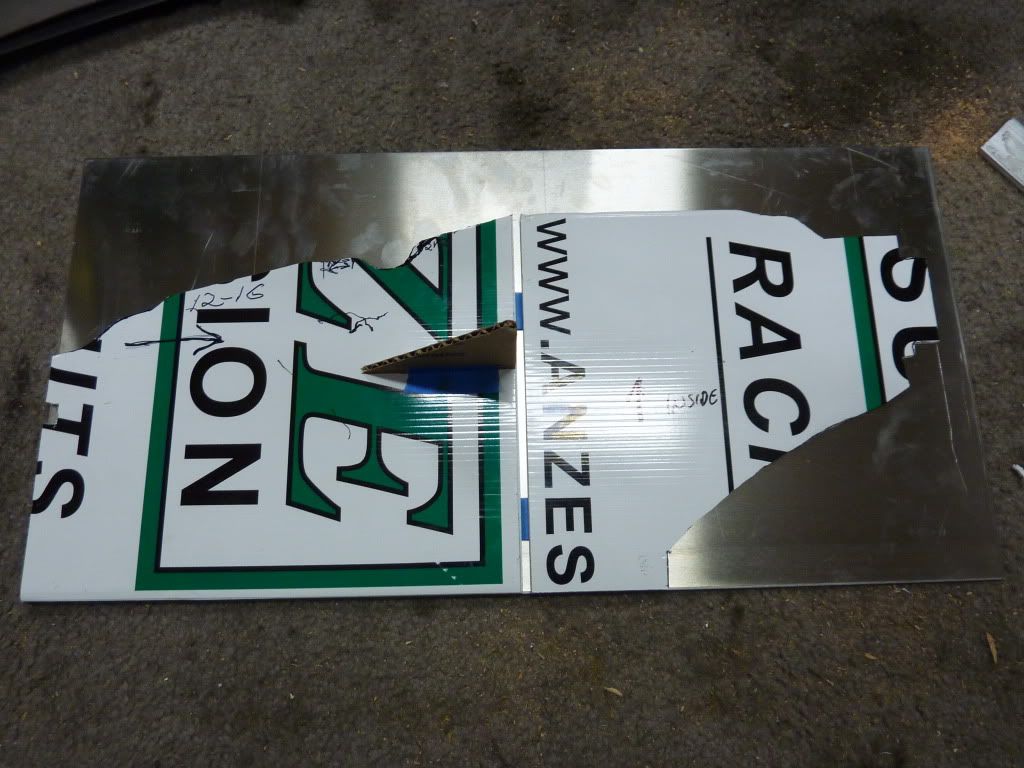
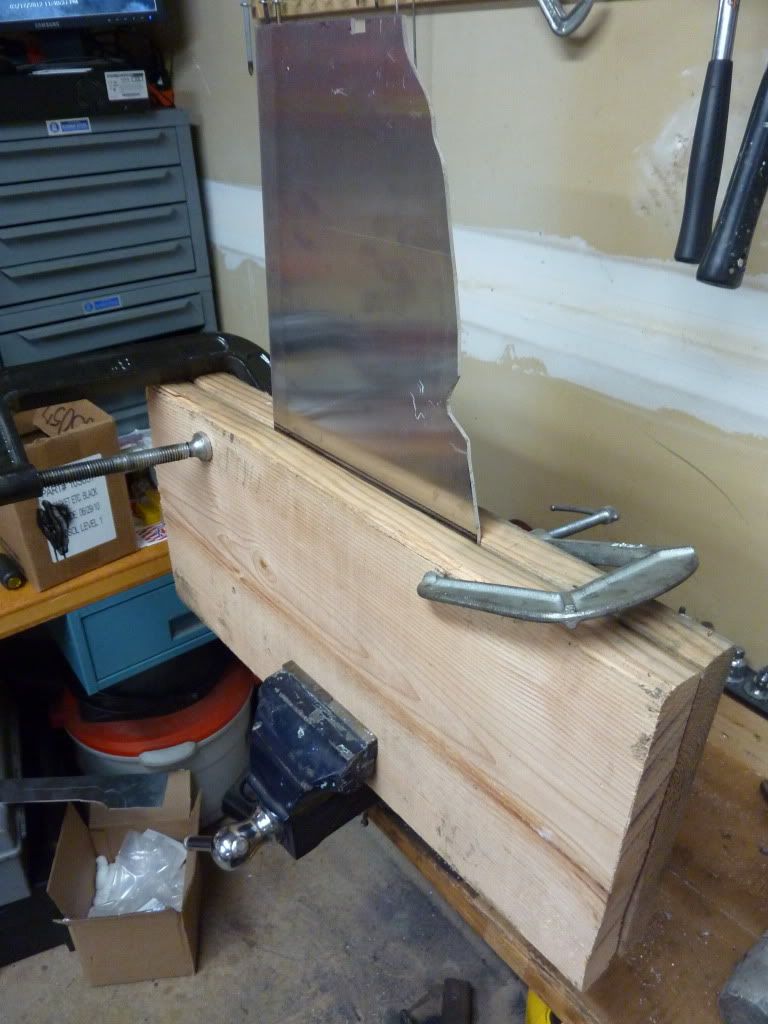
Now that everything is outlined on the aluminum sheet all I have to do is fold the aluminum where the 2 templates came together...sounds easy right? Well it turns out that 6061 aluminum isn't the most flexible aluminum out there, not to mention it was 1/8" thick which was overkill. I made up this ghetto sheet break in my vice to try get my 90* bend. After about 15 minutes of tugging and and hammering on the sheet it hadn't even budged. I had pretty much given up for the night (midnight) and decided to see if I could get any tips on what to do from a Google search. I few people recommended a process called "annealing aluminum". What you do is rub a bar of soap on the section of the aluminum you need to bend then heat the aluminum up until the soap residue turns all crusty brown. Once this is done the aluminum is supposed to bend with ease. To say the least I was skeptical but nevertheless I ran back out to the garage (1:30am) and tried it and sure enough it folded over much easier.
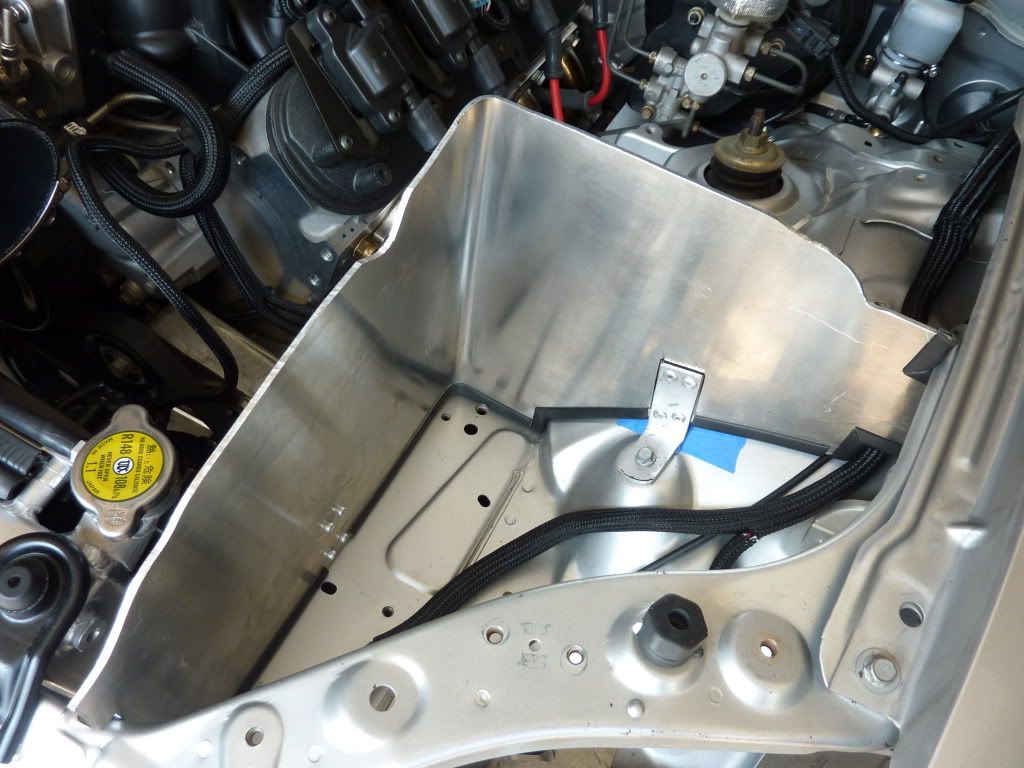
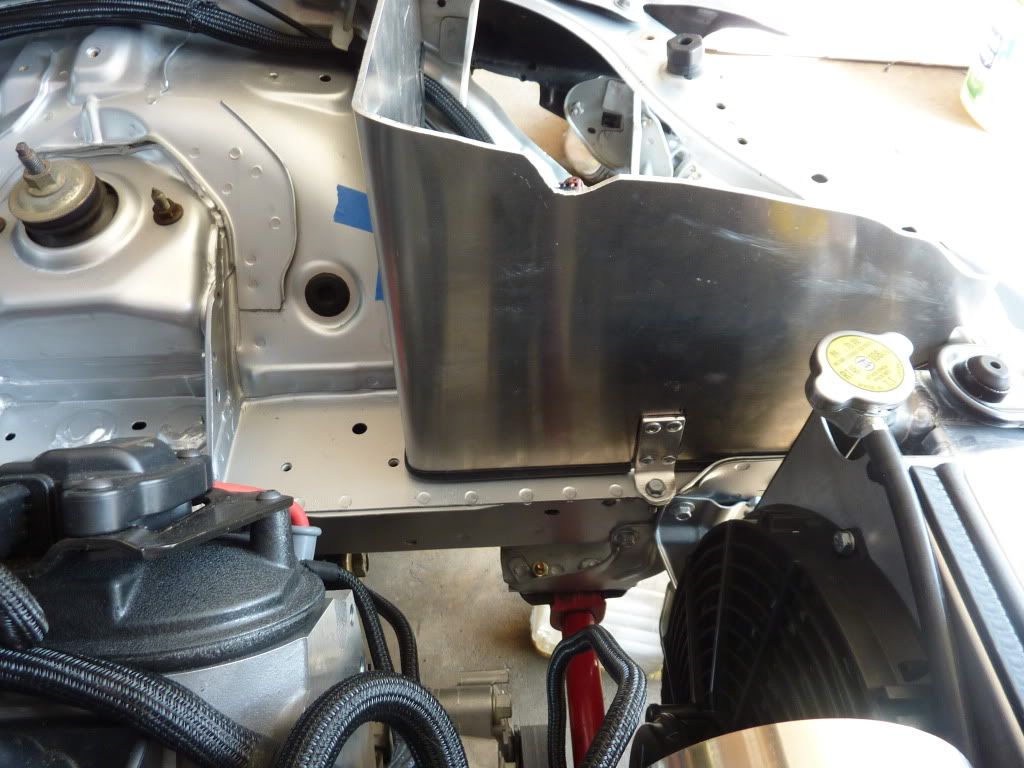
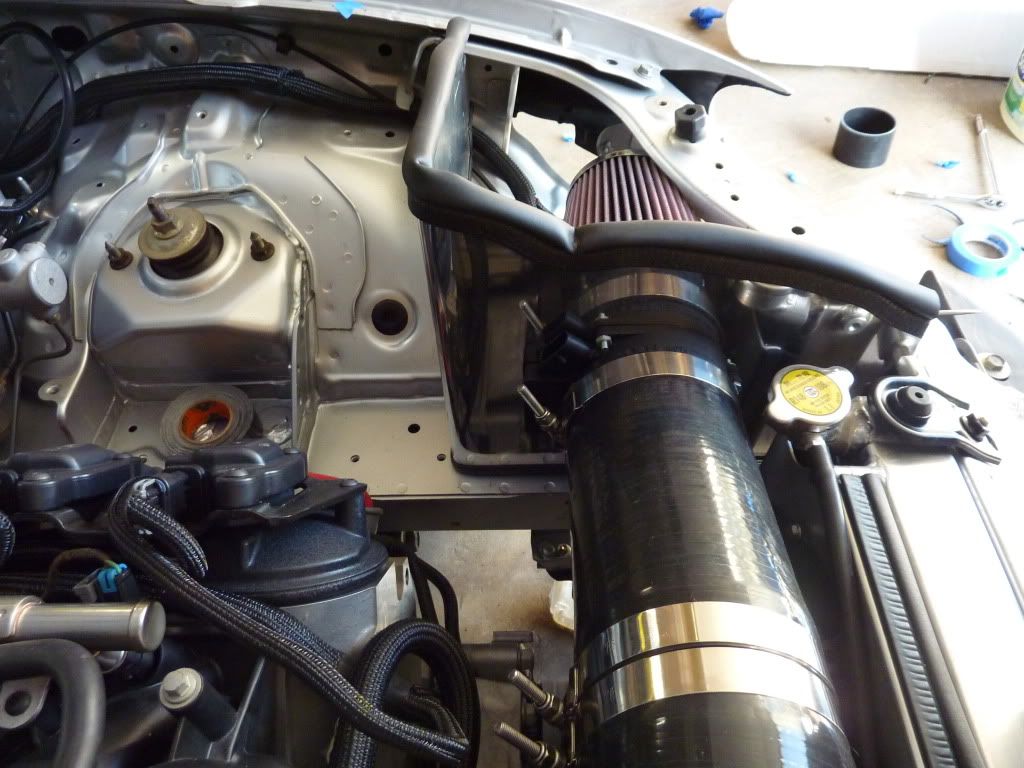
I was able to use 2 existing threaded holes to mount the air box. I bent some 1/8" x 1" aluminum stock (more annealing fun) and riveted it to the box. I used some door molding from the local auto parts store around the bottom of the air box to keep it from scratching the paint up. Here's a couple pics of how the air box is mounted.
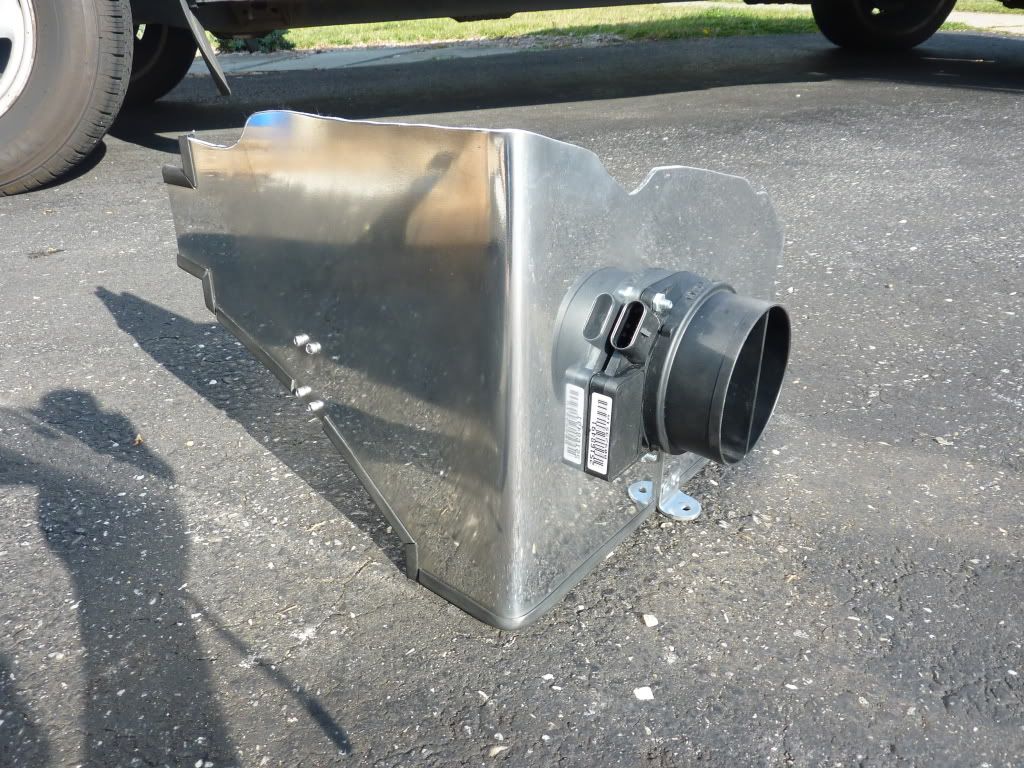
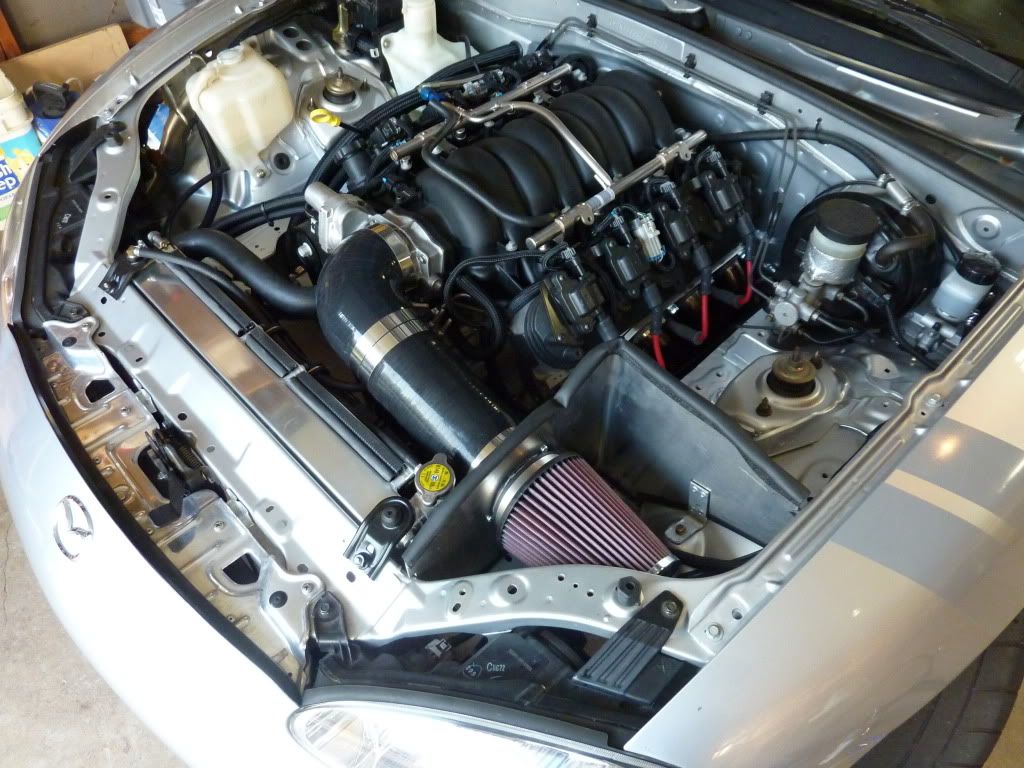
Next I cut a 4" hole where the MAF would mount to the box. The 90mm MAF has 3 mounting holes on it. I used these 3 holes to mount it directly to the outside of the cold air box. After a little polishing compound here's what it looked like.
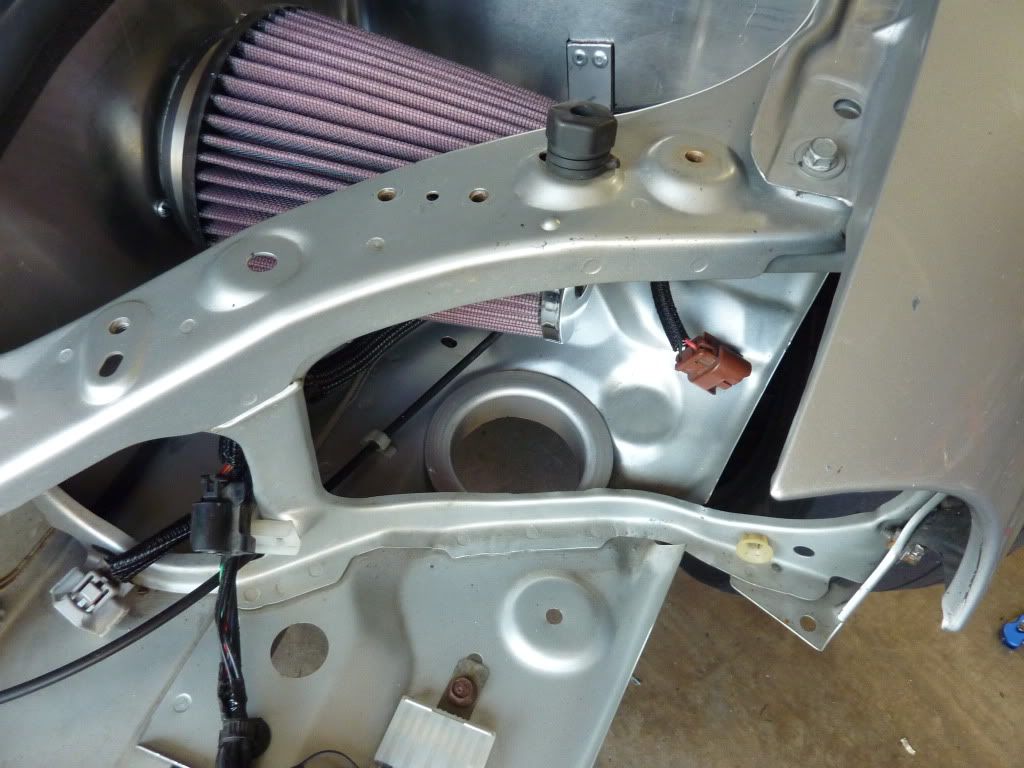
Here's a shot of where the fresh air comes into the box. I had to modify the stock hole a little to fit the 3" brake duct flange. I only used about 15" of brake ducting between the fog light and here.
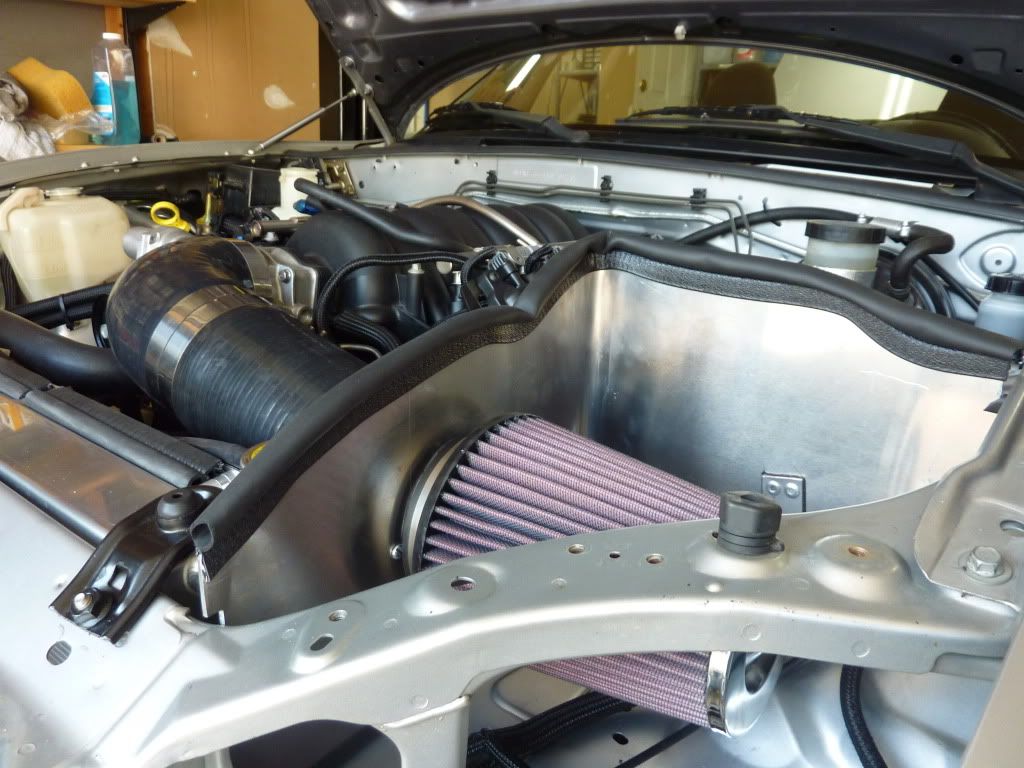
After adding the edge grip seal along the top of the box to keep hot radiator air out here's the final product.
I took it for a drive down the main street where there are plenty of traffic lights to see how it would do. Ambient temp was again about 70*. Sitting at the traffic lights the IAT's would make it up to about 95* with the fans running, but as soon as I got moving they quickly came back down to withing a few degrees of ambient. Before the cold air box they would never come back down below about 115*. I'm very pleased with the results
Here's a shot of what it looked like before I started the cold air project. You can see the air filter and MAF sitting right behind the radiator fan.
After some brainstorming I decided I could ditch my fog lights and use the hole on the drivers side to feed fresh air through some brake ducting to a custom cold air box behind the headlight. I took some measurements of the fog light hole and the space behind the headlight to figure out what I needed and found some parts that fit my needs.
Parts list:
1/8" Edge grip seal: http://www.mcmaster.com/#catalog/118/3468/=gnrvcr
3" Brake duct flange (x2): http://www.aircraftspruce.com/catalo...uctflanges.php
3" x 2' Brake ducting: http://www.aircraftspruce.com/catalog/appages/scat.php
1/8" x 12" x 24" Aluminum sheet: http://www.onlinemetals.com/merchant...=76&top_cat=60
The fog light hole is only .25" larger than the brake duct flange but the outer lip of the brake duct flange is exactly the same size as the fog light recess.
Here you can see the back of the fog light and the stock Mazda air box inlet. The silicone brake ducting will connect the two together.
Time to start constructing the air box. I started out by making a template out of an old corrugated plastic sign. I used this because of it's rigidity and it's fairly easy to cut into whatever shapes I need. Here's what the template looked like.
After a few hours of taking measurements through the headlight hole and contouring the plastic to the shape of the hood I laid it out on the aluminum sheet and outlined it.
Now that everything is outlined on the aluminum sheet all I have to do is fold the aluminum where the 2 templates came together...sounds easy right? Well it turns out that 6061 aluminum isn't the most flexible aluminum out there, not to mention it was 1/8" thick which was overkill. I made up this ghetto sheet break in my vice to try get my 90* bend. After about 15 minutes of tugging and and hammering on the sheet it hadn't even budged. I had pretty much given up for the night (midnight) and decided to see if I could get any tips on what to do from a Google search. I few people recommended a process called "annealing aluminum". What you do is rub a bar of soap on the section of the aluminum you need to bend then heat the aluminum up until the soap residue turns all crusty brown. Once this is done the aluminum is supposed to bend with ease. To say the least I was skeptical but nevertheless I ran back out to the garage (1:30am) and tried it and sure enough it folded over much easier.
I was able to use 2 existing threaded holes to mount the air box. I bent some 1/8" x 1" aluminum stock (more annealing fun) and riveted it to the box. I used some door molding from the local auto parts store around the bottom of the air box to keep it from scratching the paint up. Here's a couple pics of how the air box is mounted.
Next I cut a 4" hole where the MAF would mount to the box. The 90mm MAF has 3 mounting holes on it. I used these 3 holes to mount it directly to the outside of the cold air box. After a little polishing compound here's what it looked like.
Here's a shot of where the fresh air comes into the box. I had to modify the stock hole a little to fit the 3" brake duct flange. I only used about 15" of brake ducting between the fog light and here.
After adding the edge grip seal along the top of the box to keep hot radiator air out here's the final product.
I took it for a drive down the main street where there are plenty of traffic lights to see how it would do. Ambient temp was again about 70*. Sitting at the traffic lights the IAT's would make it up to about 95* with the fans running, but as soon as I got moving they quickly came back down to withing a few degrees of ambient. Before the cold air box they would never come back down below about 115*. I'm very pleased with the results

 03-21-2012 | 08:18 AM
#165

That rear end will last through the life of 3 LS powered swaps, one after another after another. Even if he used 315 wide tires & stuck the launches on a drag strip. It is the half shafts that are the first area of weakness in the Miata LS swap IRS assembly. In regards to this swap, the half shafts are upgraded & of good quality & should also not be an issue, unless there is wheel hop on the launch. The CTS mounting does address wheel hop stability, but, on VHT & sticky tires, it is a possibility. CV's are fine & ususally only get damaged in the event that a broken half shaft creats a condition that then damages the CV.
I have 8+ yrs experience w/ LS swapped Miatas & can say that the rear end IRS assembly provided in the kit that MX6.0 is using is the best I've seen. The CTS housing & mounting is a better solution than the Ford 8.8 that I use.
Last edited by LS1-450; 03-21-2012 at 08:24 AM. Reason: Added second paragraph
 03-23-2012 | 08:44 PM
#168
Teching In
Joined: Sep 2010
Posts: 44
Likes: 0
I just got a chance to set down and read the whole thread and I would have to say you have done a very clean job installing the LS setup, it looks as if it was a factory option. You have shown some great skills in this project and I would have to wounder, just what do you do for a living? Your build is top notch. I'm very close to finishing mine and thought Mine looked good, but after seeing your attention to detail, it makes me feel like I didn't go far enough with mine.
Riggs.
Riggs.
03-24-2012 | 06:26 PM
#171
Thread Starter
11 Second Club
Joined: Sep 2011
Posts: 390
Likes: 1
From: The Burnie, MD
With the exception of the starter blanket mishap the car has been flawless. I'm still waiting on my coilovers to come in before I can get my alignment done and make the drive out to the tuner. Since It's not really tuned yet I've been keeping it under 4K rpm....but wow, the combination of the acceleration and the sound of the exhaust is intoxicating
Things that still need to be done:
- Have a local exhaust shop fix the exhaust: The exhaust looks and sounds great but it hangs down too far. Right now I have to use 2x12's to get out of the garage. There's plenty of room in the tunnel to tuck the exhaust up out of the way so I'm sure they can do something to fix it.
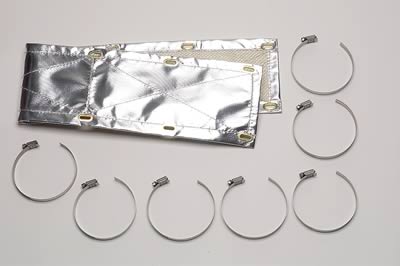
- Add heat shielding under the car: I need to add some shielding above the muffler and around the fuel filter. The floor of the trunk gets so hot you cant even touch it. I'm either going to use some sheet aluminum or something like THIS to keep radiant heat off the car.
- Dyno/Street tune: I think I've found a place a couple hours away to do the tuning. I have the HPT software but nowhere near the knowledge to do the final tuning.
- Suspension: Once the new coilovers come in I need to shave my polyurethane bushings. The polyurethane is a few years old and is binding on the control arms. Shaving some of the poly material down will stop the binding and let the suspension do it's job. I'm also going to add zerk fittings to every poly bushing so I don't have to completely dismantle the suspension to re-grease.
I took a short video of it idling but the echo inside the garage made the audio quality terrible. I'll be sure to make a good video of how it sounds.

 04-13-2012 | 08:33 PM
#173
Thread Starter
11 Second Club
Joined: Sep 2011
Posts: 390
Likes: 1
From: The Burnie, MD
Just a couple updates.
Suspension: Installed the new Xida coilovers this week. While I had everything apart I "trimmed" and re-greased all of the polyurethane bushings. No more binding! I also added 6mm zerk fittings to every bushing to make sure everything stays lubed up. The car feels a million times better.
Speedometer: Still running without the Dakota Digital converter box with no problems. Roughly 800 miles now and it's reading dead accurate to my GPS.
Had the chance to use the SCCA scales today at the DC Pro. With a 1/2 tank of gas it tipped the scales at 2390lbs. Before the conversion it weighed in at 2230 with the turbo, intercooler, ect.. I'm comfortable with gaining 160lbs in exchange for an extra 250+rwhp :rofl:
I also took a couple practice starts in the car (I'm not competing in it). It wasn't fast but it sure was fun smoking the tires all the way through the 200ft lights
I still need to get the alignment fine tuned and get the dyno tuning done but the car has been flawless so far. I've had a couple chances to really open it up in 3rd and 4th gear (when I get traction), the car is just stupid fast.
04-13-2012 | 09:26 PM
#174
VERY nice work! What spring rates did you get with the Xidas? On mine, Emilio sent 650-front and 450-rear. The rears were way too soft....wheel-hop galore, and tires rubbing the upper inner fenders when I'd really get into it. Going with 550 on the rears really helped tighten things up, without being too harsh. Just something to consider.

 05-17-2012 | 09:01 AM
#179
Thread Starter
11 Second Club
Joined: Sep 2011
Posts: 390
Likes: 1
From: The Burnie, MD
Thanks!
I've logged about 1500 miles so far and it's still running flawlessly. With the warmer weather the tires are holding 2nd gear a little better and 3rd is no longer a concern. Hopefully the fresh set of tires fixes grip in 2nd.
I used 2 clamp-on heat shields on the exhaust in the back where it's close to the gas tank/fuel filter and it seems to have almost completely gotten rid of the fuel smells. It's also keeping radiant heat off the trunk and diff.
I'm finally getting the alignment, new tires and dyno tuning done this weekend Cant wait to see what numbers it pulls on the dyno.
I've logged about 1500 miles so far and it's still running flawlessly. With the warmer weather the tires are holding 2nd gear a little better and 3rd is no longer a concern. Hopefully the fresh set of tires fixes grip in 2nd.
I used 2 clamp-on heat shields on the exhaust in the back where it's close to the gas tank/fuel filter and it seems to have almost completely gotten rid of the fuel smells. It's also keeping radiant heat off the trunk and diff.
I'm finally getting the alignment, new tires and dyno tuning done this weekend
Cant wait to see what numbers it pulls on the dyno.