

Goodbye 4-Banger, Hello LS2 – Miata Build


 02-04-2012, 04:43 PM
#123
11 Second Club
Thread Starter
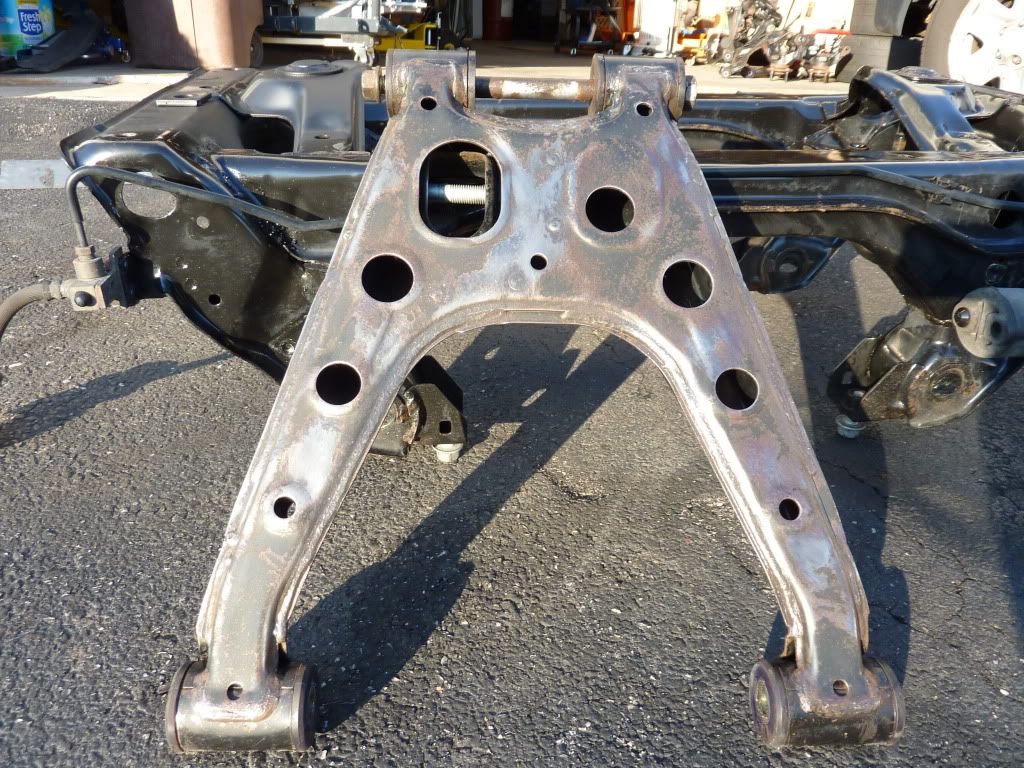
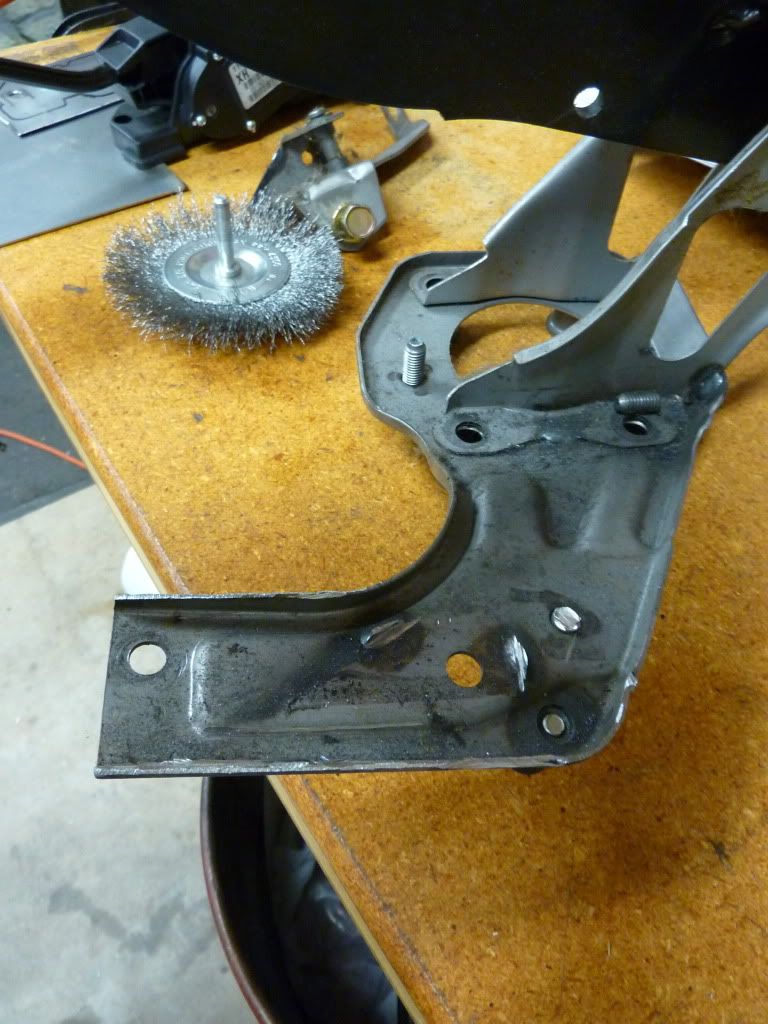
I spent some time cleaning up the suspension parts and rear subframe. After some time with a wire brush and a couple coats of fresh paint it looks better than new.


02-04-2012, 05:00 PM
#124
11 Second Club
Thread Starter
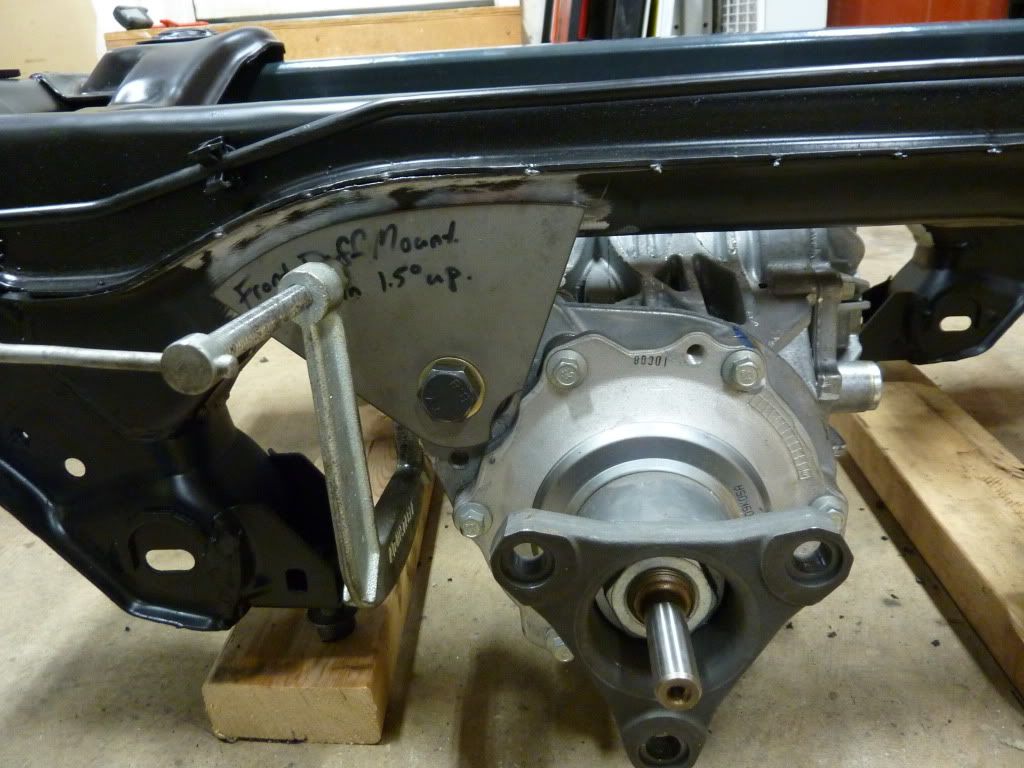
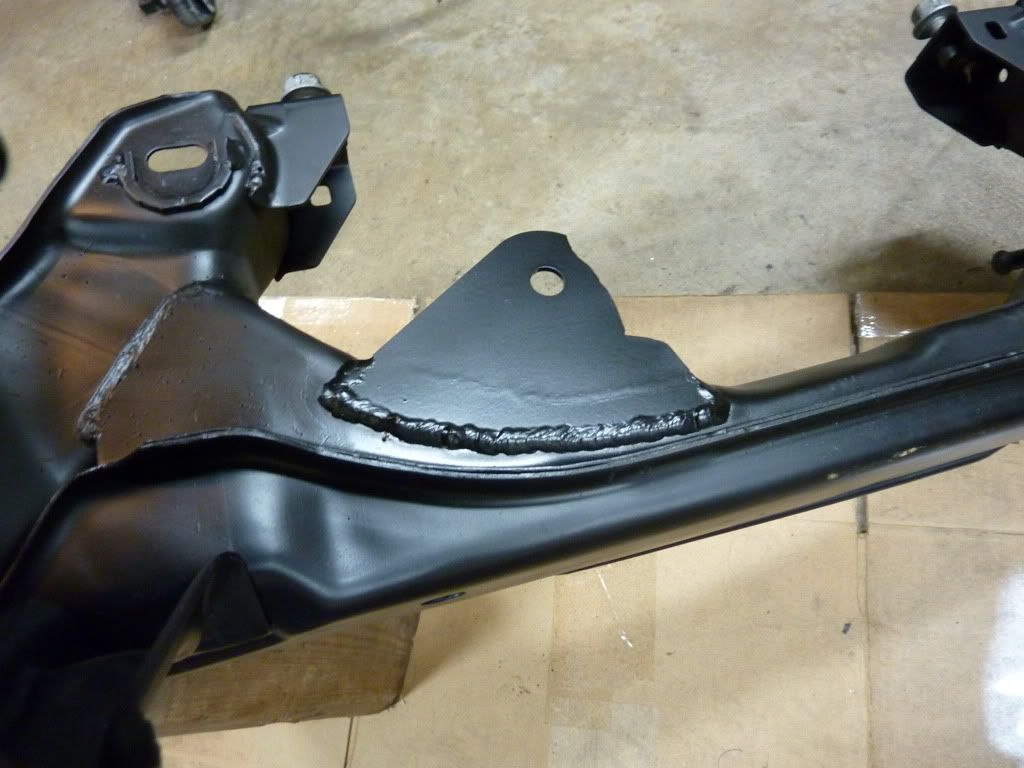
Worked on getting the diff mounted in the rear subframe today. The first thing I did was level out the subframe on the floor. Once I got it level I angled the diff up 1.5* from horizontal then clamped it in place.
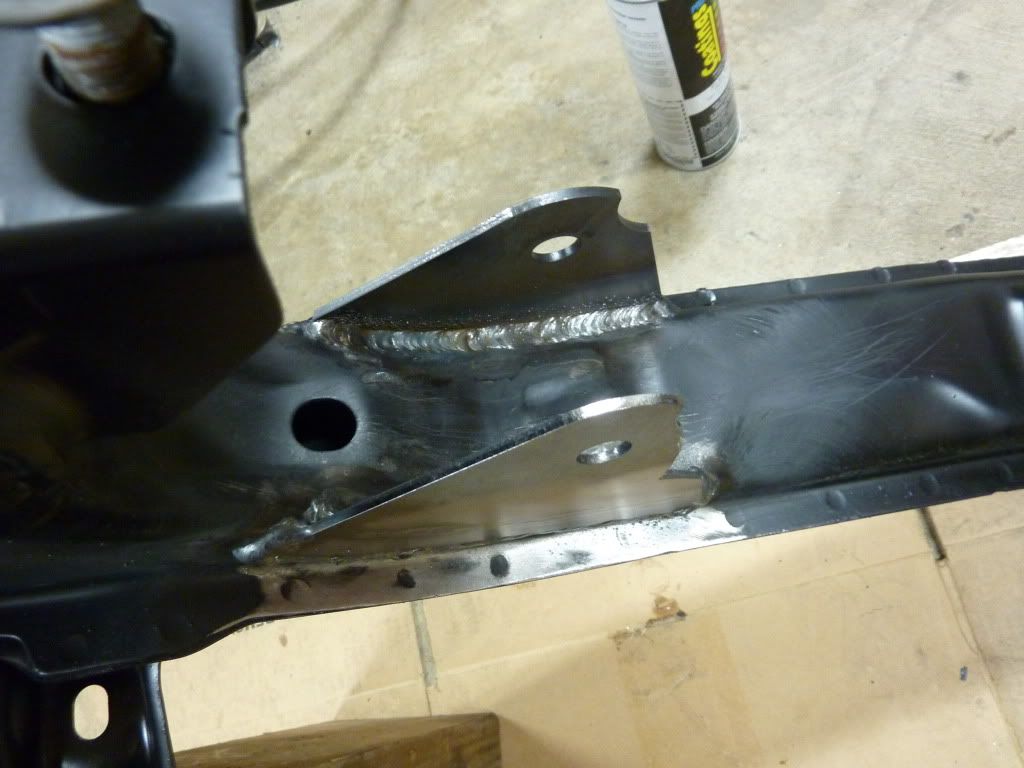
Once I got everything where I wanted it I tac welded the mounting plates in place. Then I removed the diff and finished welding.
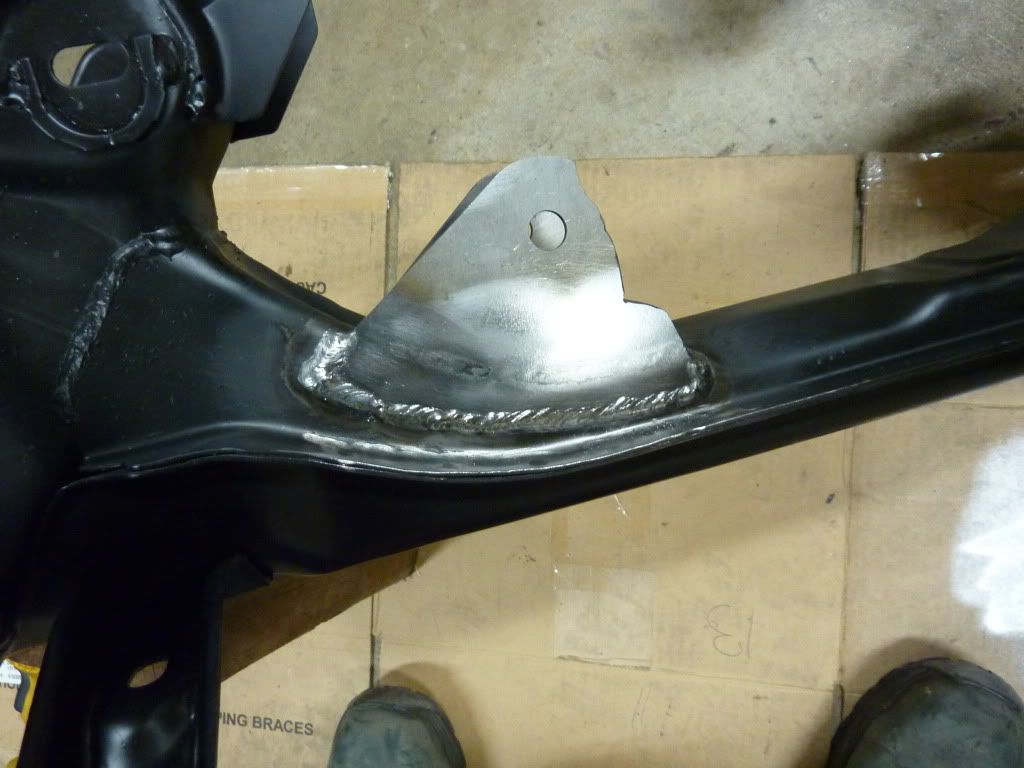
I also welded the inside of the plates. If anything in the rear end fails it's not going to be these welds
After hitting it with the wire brush again, it looks like this thing rolled right off Mazda's assembly line!
Once I got everything where I wanted it I tac welded the mounting plates in place. Then I removed the diff and finished welding.
I also welded the inside of the plates. If anything in the rear end fails it's not going to be these welds
After hitting it with the wire brush again, it looks like this thing rolled right off Mazda's assembly line!
02-06-2012, 04:08 PM
#125
11 Second Club
Thread Starter
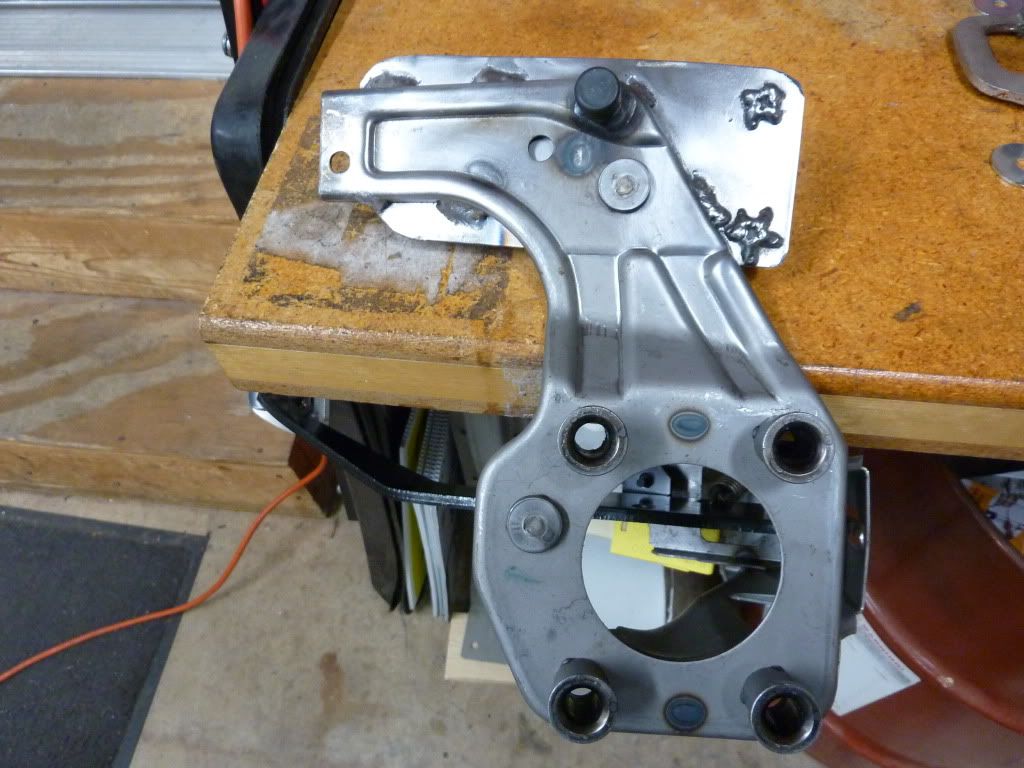
Got around to mounting the new DBW gas pedal. First I ground off the 2 welds that held on the throttle stop and cruise control arm. Then I used a cut-off wheel to remove the 2 ears that held the pedal return spring so that the metal lip was even all the way around the bracket.
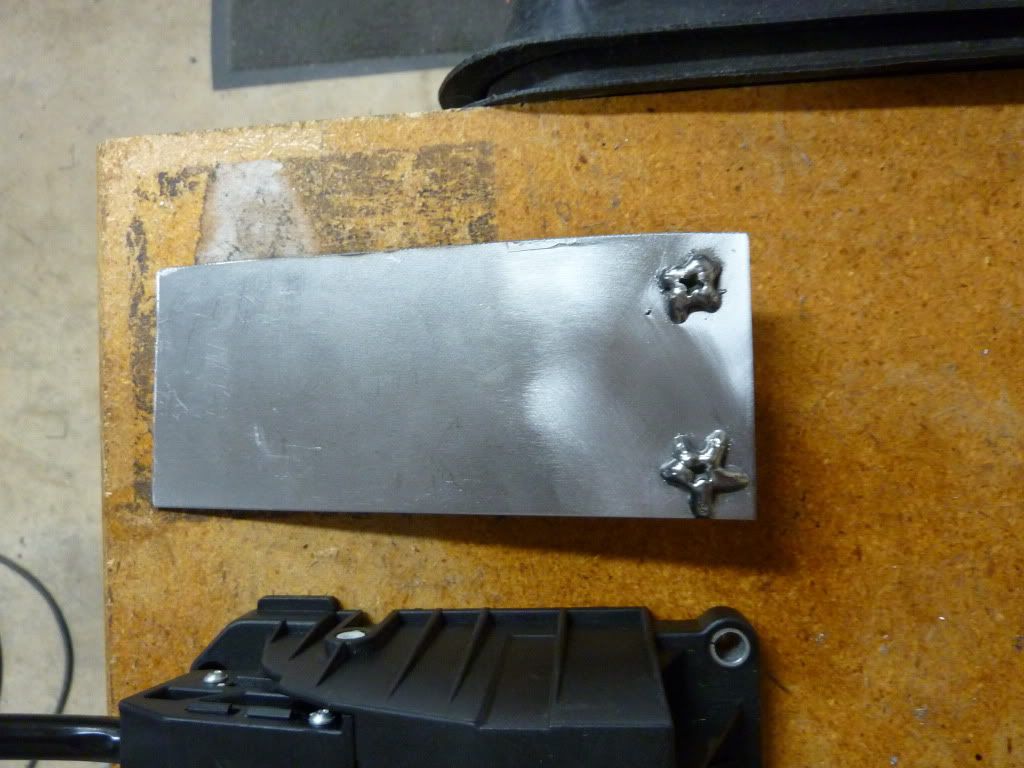
I made a plate slightly larger than the base of the new gas pedal out of 16 gauge metal. Then I clamped the pedal to the plate and drilled the 2 holes at the top of the pedal. I welded two 6mmx25mm bolts through the bottom of the plate to act as studs for mounting the gas pedal.
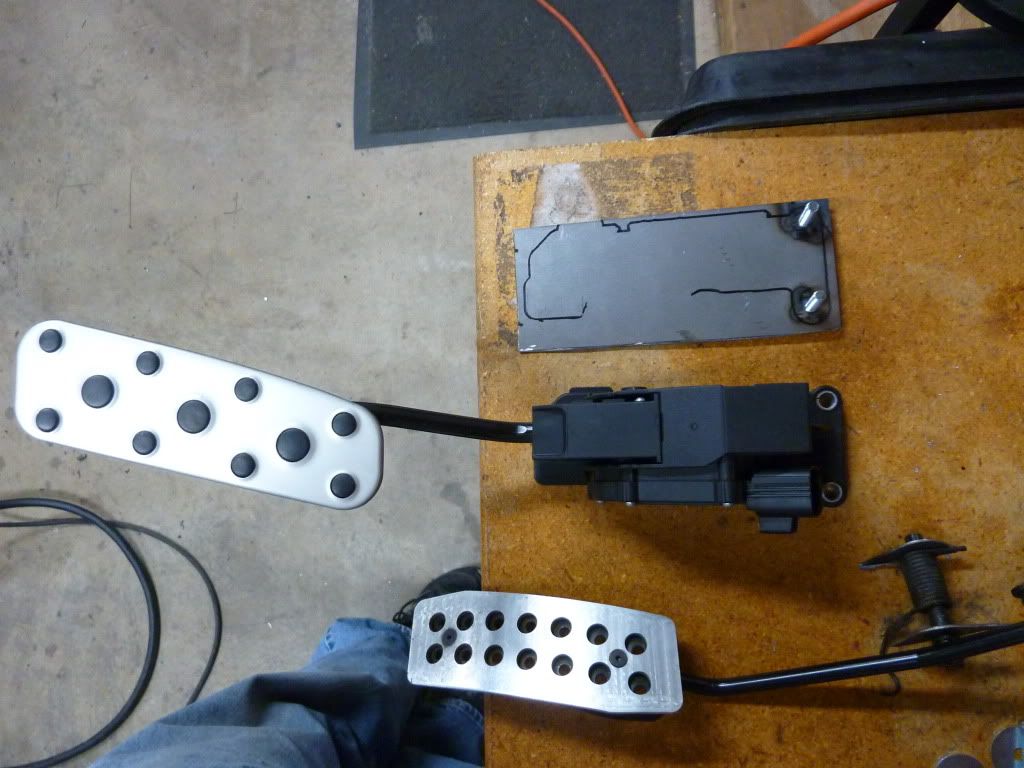
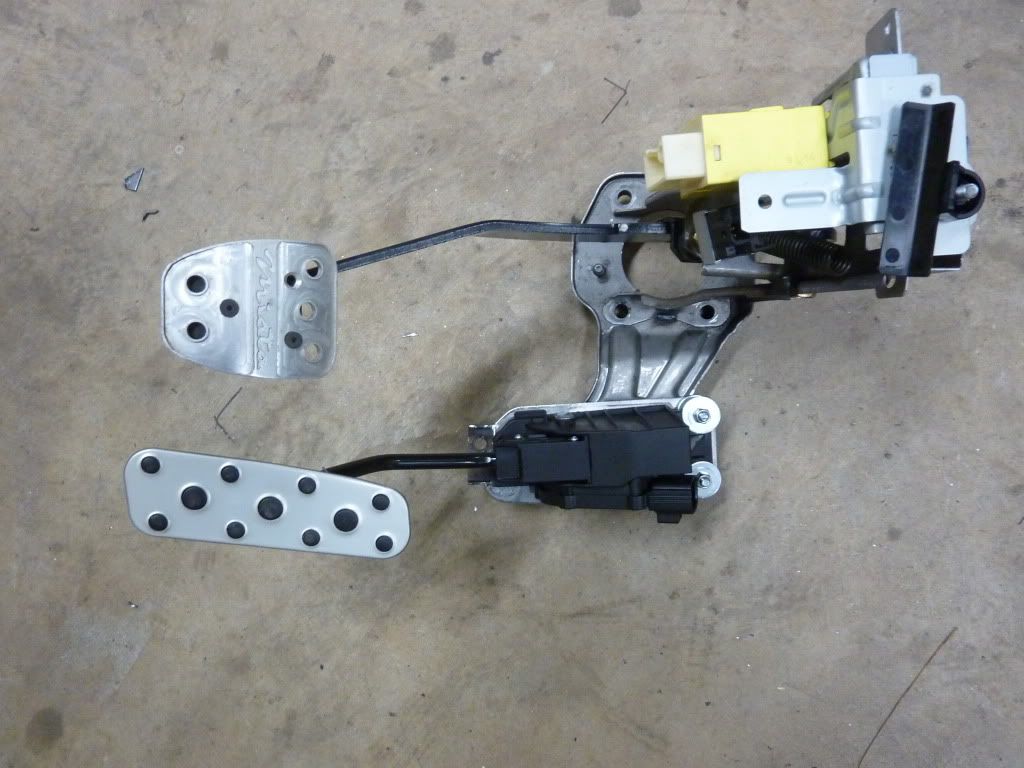
Next I mounted the pedal back on the plate and found a good position for it. The stock Miata pedal was about 2" to the right and 1.5" down from the brake pedal. The GTO pedal has a pivot point in the center of the pedal so I wanted to make sure the pivot ended up next to the brake pedal to allow me to side step the gas while on the brakes.
Once I was happy with the placement I welded it up and attached the new gas pedal. It ended up being a little closer to the brake than the mazda gas pedal was
I made a plate slightly larger than the base of the new gas pedal out of 16 gauge metal. Then I clamped the pedal to the plate and drilled the 2 holes at the top of the pedal. I welded two 6mmx25mm bolts through the bottom of the plate to act as studs for mounting the gas pedal.
Next I mounted the pedal back on the plate and found a good position for it. The stock Miata pedal was about 2" to the right and 1.5" down from the brake pedal. The GTO pedal has a pivot point in the center of the pedal so I wanted to make sure the pivot ended up next to the brake pedal to allow me to side step the gas while on the brakes.
Once I was happy with the placement I welded it up and attached the new gas pedal. It ended up being a little closer to the brake than the mazda gas pedal was
02-07-2012, 09:03 AM
#126


Very nice work. Thanks for the updates.
Regarding the CTS differential; can't see all of how it mounts. Where is there a second mounting point? Looks like it may be a better set up than a Ford 8.8 in regards to wheel hop reduction. Will depend on how the second mounting point is arranged. Am curious to see. Thanks
My 8.8 is wheel hop proof, but, only after several modifications to keeping her stable.
02-07-2012, 10:00 AM
#127
11 Second Club
Thread Starter
I'll take a shot of where the rear mounts up when I get home. But yea it shouldn't have any problems with wheel hop. I swapped out the stock rubber front bushing for a poly bushing too.
02-07-2012, 06:05 PM
#128
11 Second Club
Thread Starter
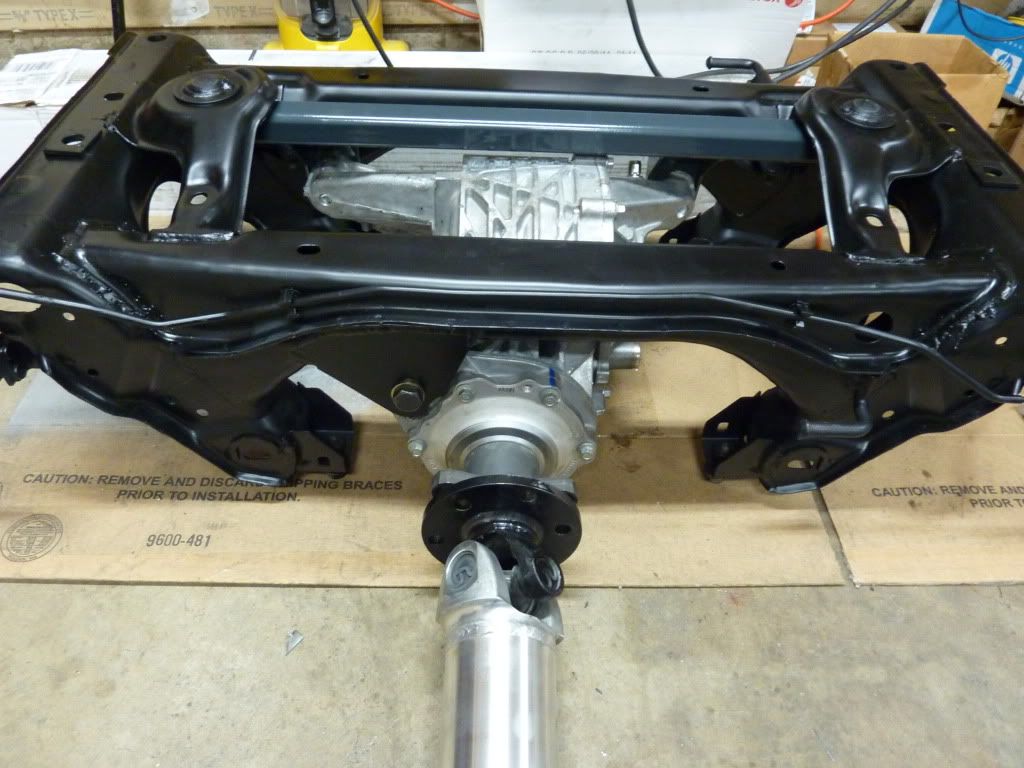
Here's a couple better pics of how the rear mounts to the stock subframe. The gray bar going above the diff that bolts to the back of it is the V8R adapter. It attaches to the subframe by the same studs as the Mazda rear did. All of the bushings are poly.

02-07-2012, 10:08 PM
#130
Yah, that's a better set up than the 8.8.
Comparing the two (Ford 8.8, GM CTS), the horizontal bushing studs on the CTS are supported @ both ends. Along w/ the ridgid front mount is a solid platform. On an 8.8, even w/ a Cobra pumping cover that ridgidly mounts the diff to the frame, because the 8.8 bushing studs are not supported @ one end, the stud (& bushing) moves around more easily. We ended up tying the two non supported stud ends together w/ a cross beam (to take the load off of the aluminum pumpkin) & then to the frame on each side. This kept the studs from moving around & eliminated wheel hop.
For those who don't know (on an 8.8), the studs that the bushings mount to hang down from the underside of the car; just like on a Miata. So, the end of the studs are un-supported.
02-17-2012, 09:09 PM
#132
11 Second Club
Thread Starter
I've been slacking on updating the thread but I've made lots of progress.
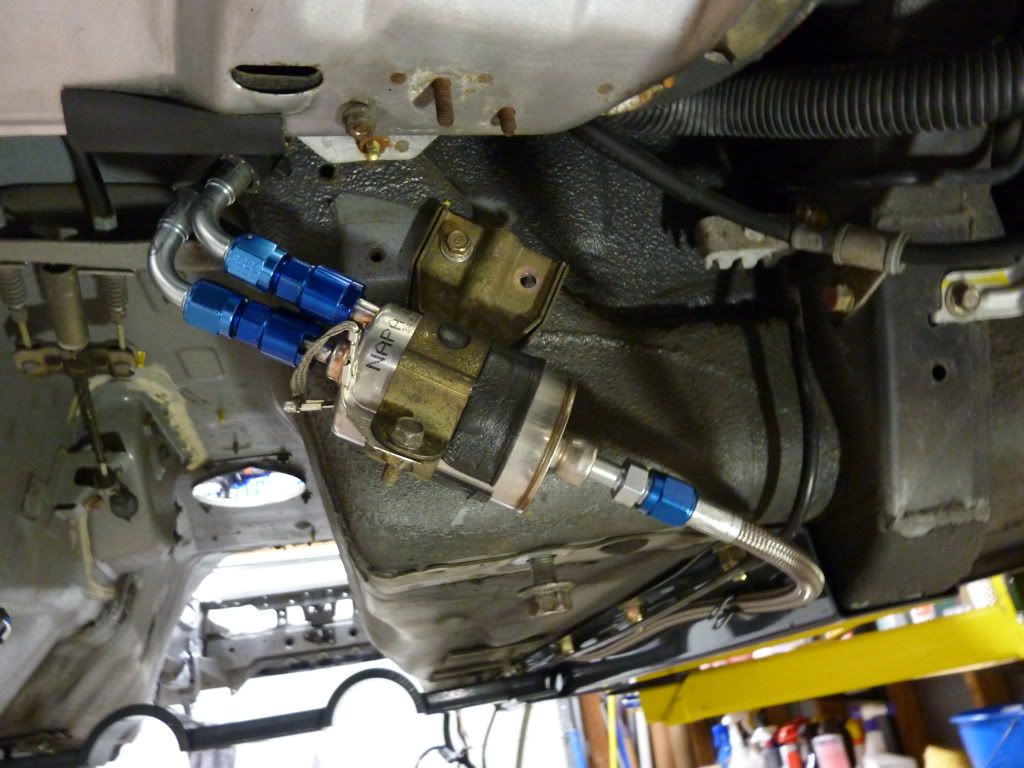
Finished up the fuel pump install and routed all the lines. I wasn't crazy about re-using the stock plastic line for a return so I ended up using a second 2' braided line just like the feed. Removed the regulator and cut off the tube where it bolted on then extended the hose down near the bottom of the tank.
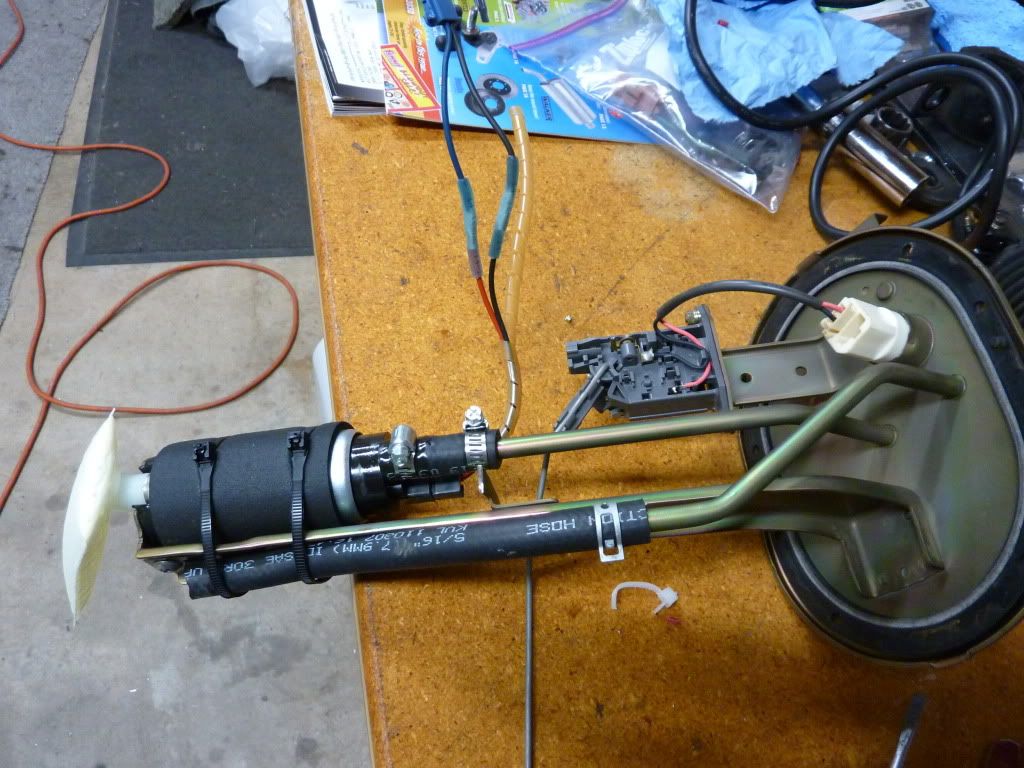
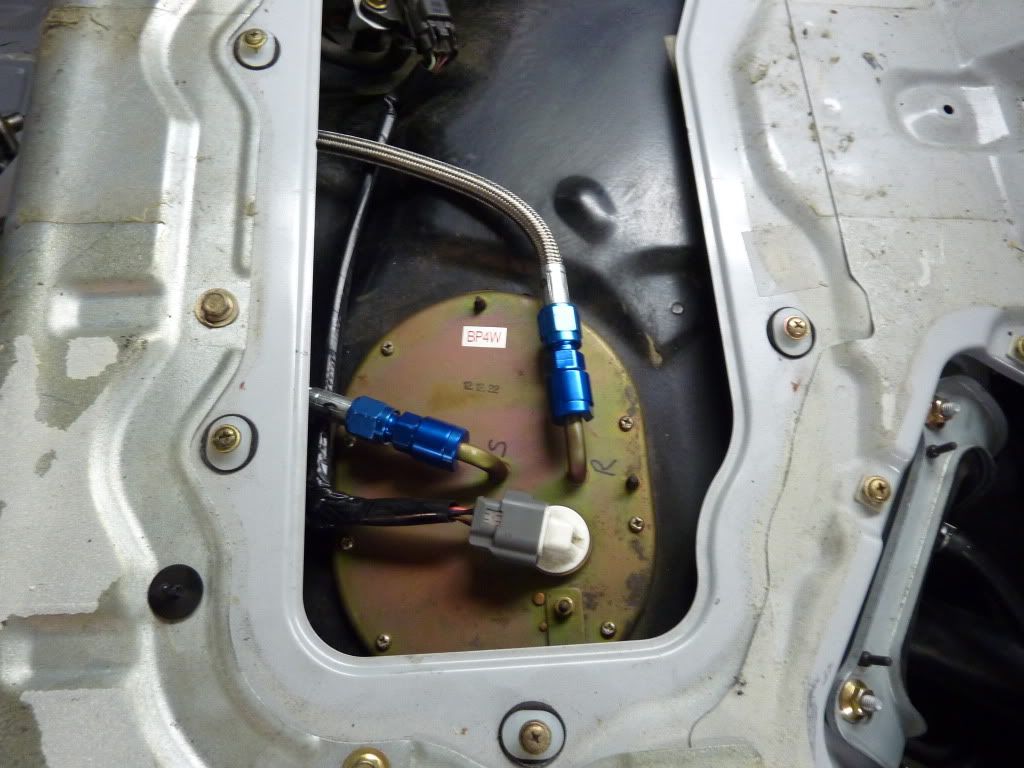
Replaced the bracket that came with the fuel filter/regulator and installed it in the heavier duty Mazda bracket.
Finished up the fuel pump install and routed all the lines. I wasn't crazy about re-using the stock plastic line for a return so I ended up using a second 2' braided line just like the feed. Removed the regulator and cut off the tube where it bolted on then extended the hose down near the bottom of the tank.
Replaced the bracket that came with the fuel filter/regulator and installed it in the heavier duty Mazda bracket.
02-17-2012, 09:16 PM
#133
11 Second Club
Thread Starter
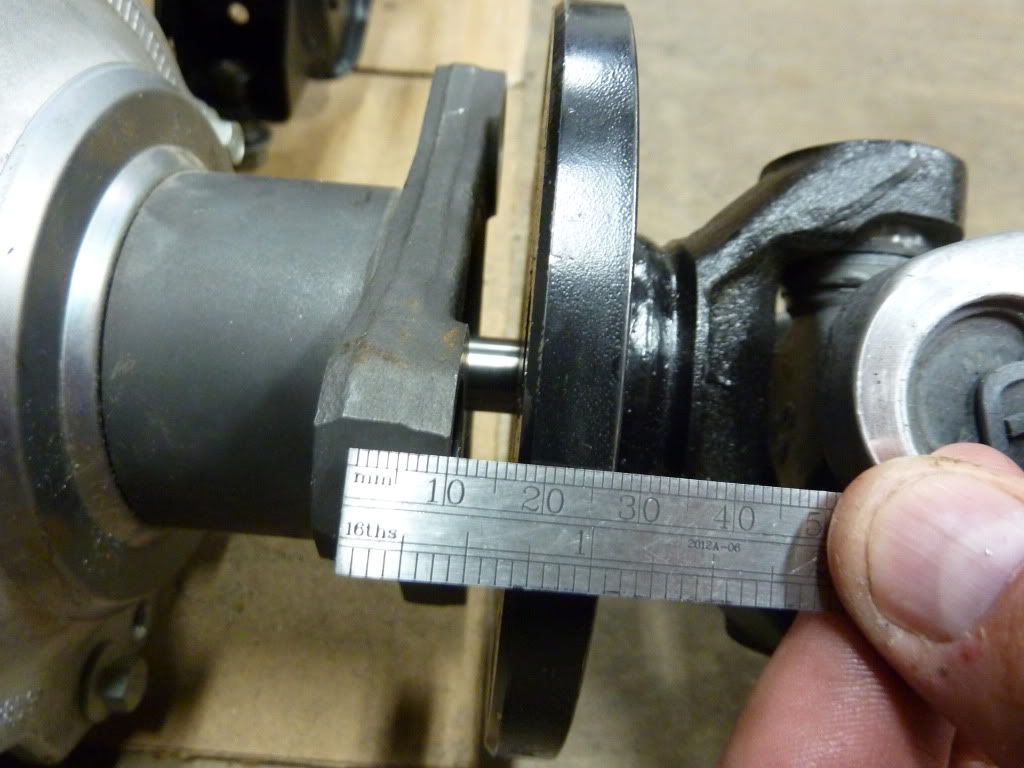
Had a small issue with the face of the driveshaft adapter not sitting flush with the rear. The driveshaft was the correct length and the pin on the rear wasn't abnormally long so it was determined that there was some extra material inside the adapter from the casting process. I chopped .2" off the tip of the diff pin and now it fits like a glove.
02-17-2012, 10:04 PM
#134
11 Second Club
Thread Starter
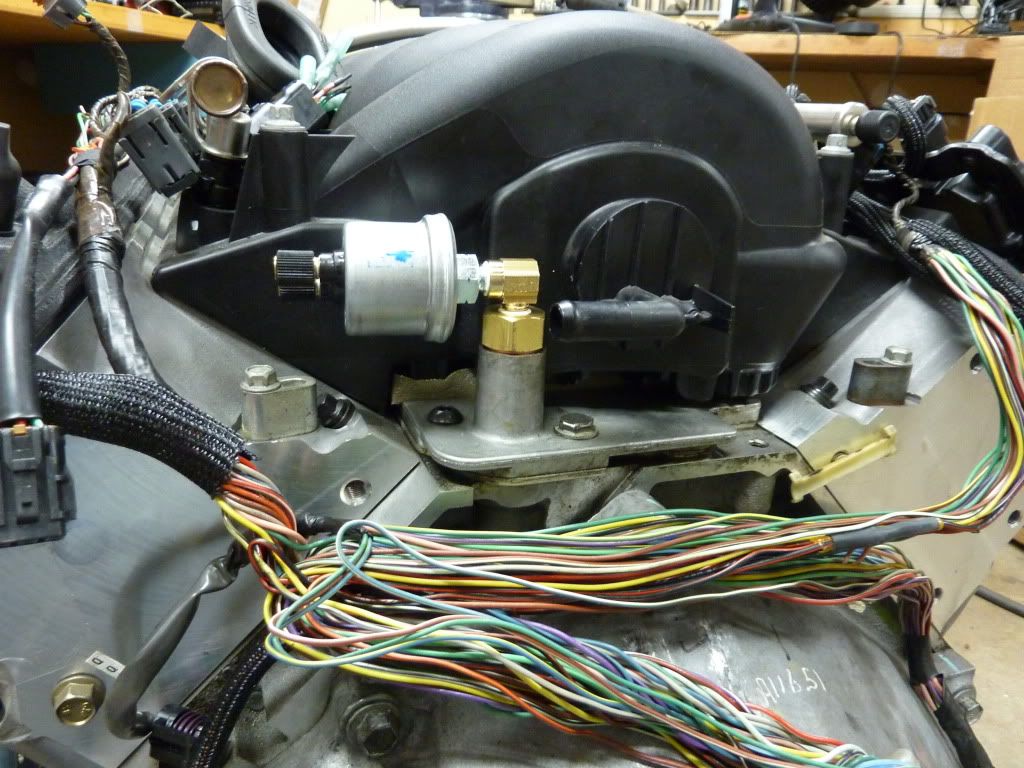
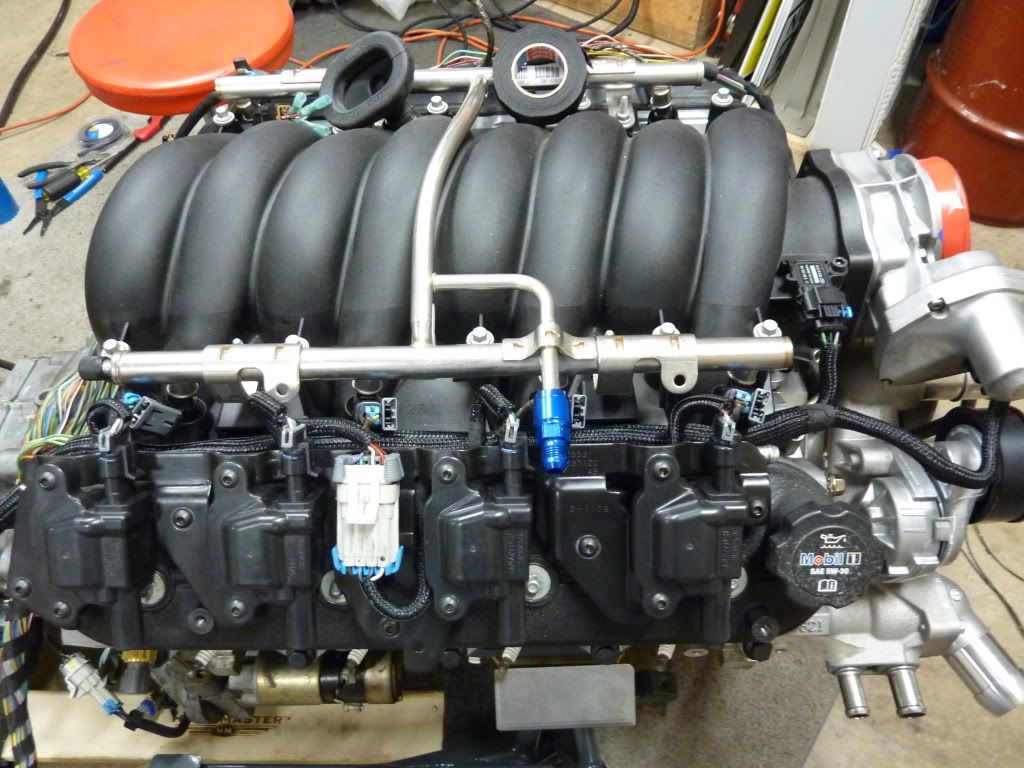
I got a dual oil pressure sender for a real oil pressure gauge and to keep the Mazda on/off gauge functional. Only problem was the dual pressure sender was a larger diameter and wouldn't fit next to the intake. I got a 90* 1/8 NPT fitting to turn it sideways and keep it hidden behind the intake.
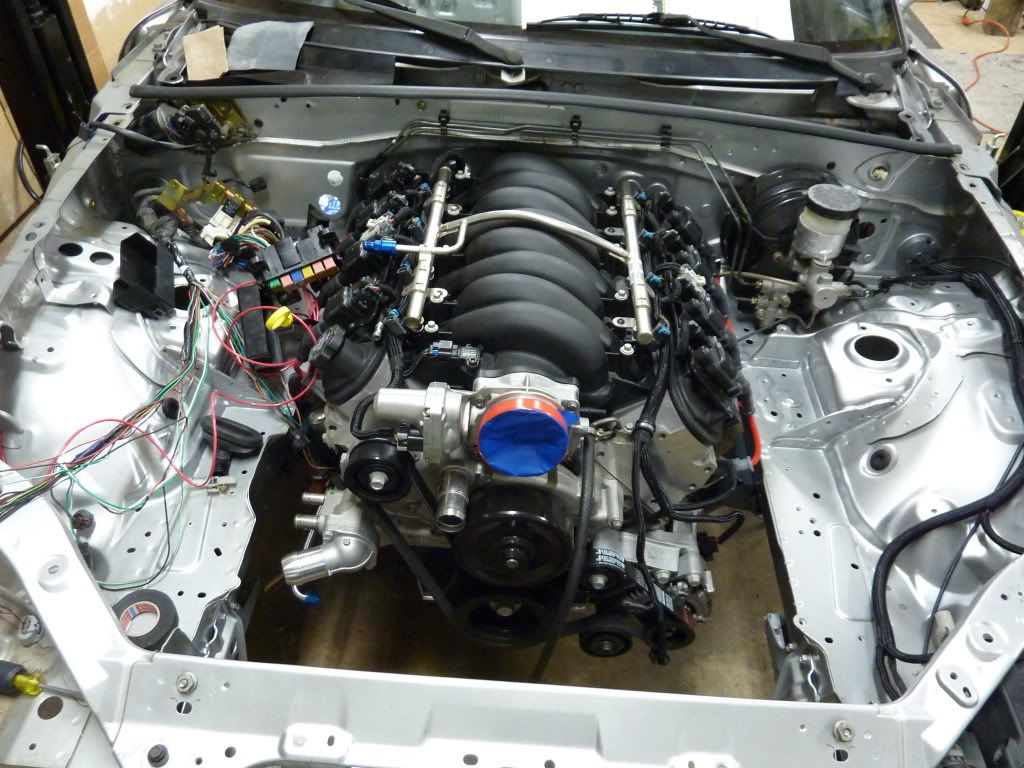
The Tech-Flex loom really cleans the wiring up. I also took up any extra slack in the harness and removed any unused connectors. I also replaced the corroded bolts that were holding the coils and coil bracket with some black allen head bolts. All the little details are starting to pay off
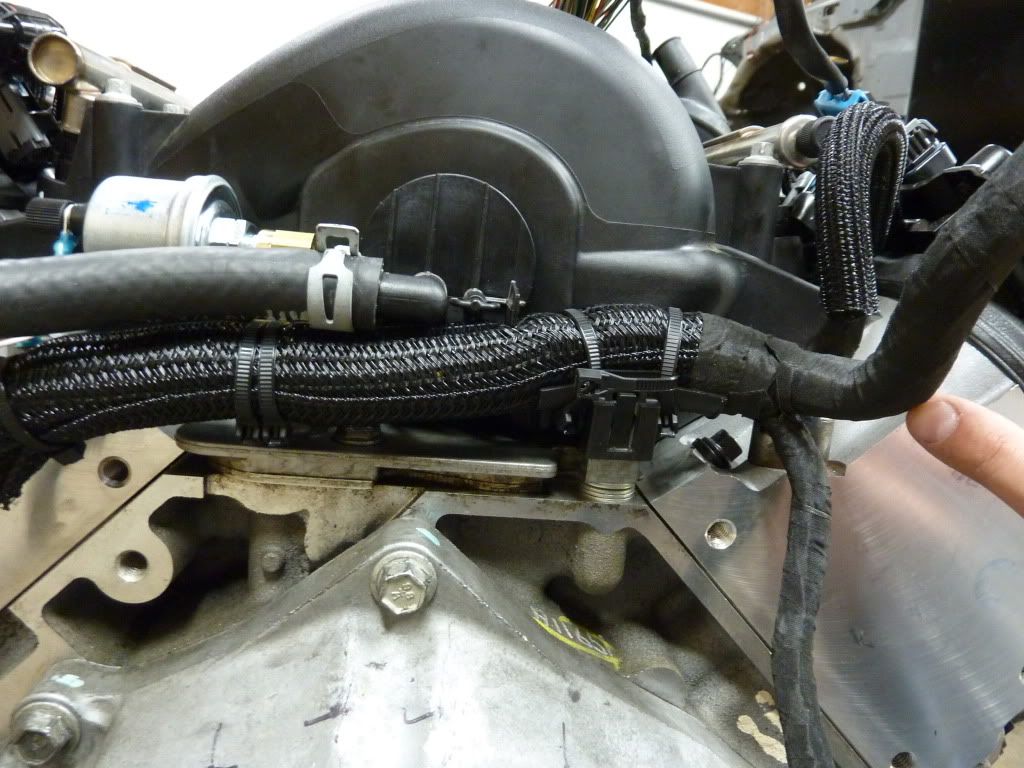
I made a little bracket to hold the harness close to the back of the intake. Right where my finger is pointing is where the harness goes through the fire wall. Same place the Mazda engine harness came through. The other section of harness that goes down toward the bellhousing is going to transmission the connections.
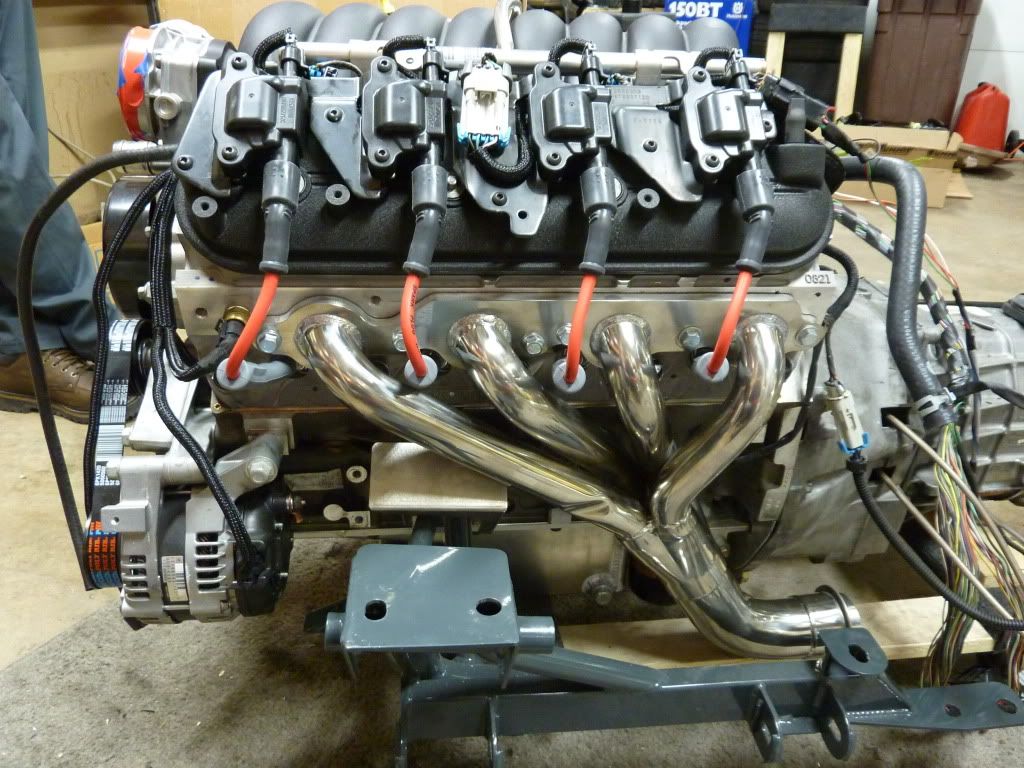
Installed the headers and plug wires. Looks so much better now.
Installed the engine and started working on the wiring in the engine bay. Here's a shot of the drivers side completed after I removed the a/c relay, fan relay and the old diagnostic port. Looks WAY cleaner than before.
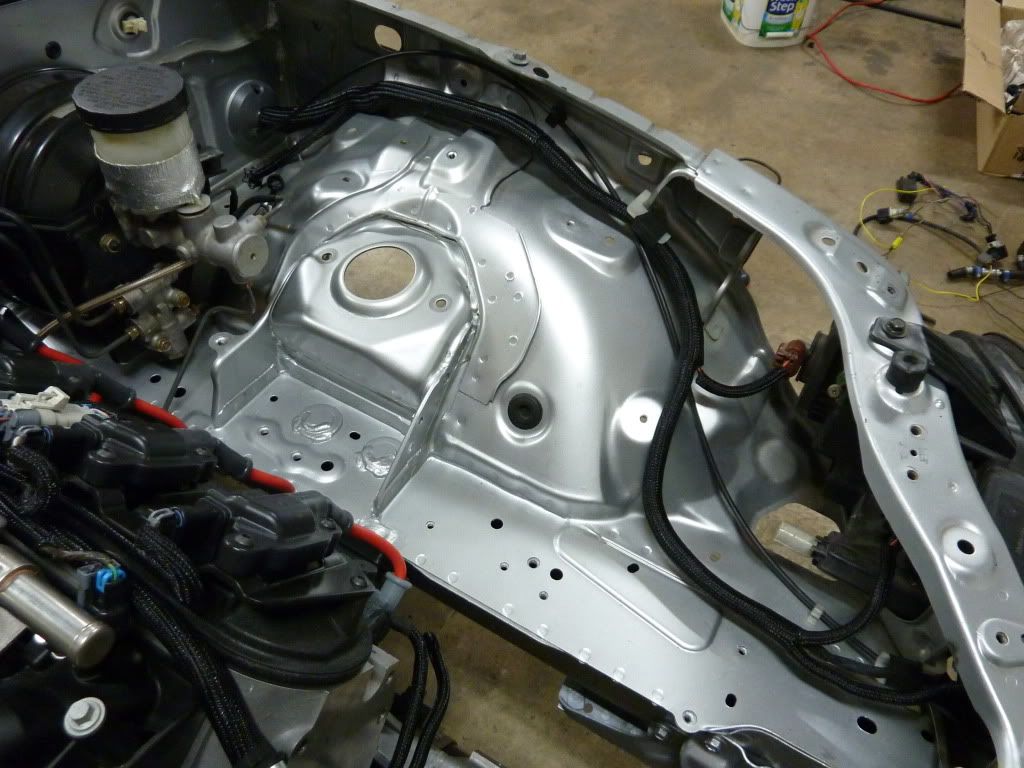
One more shot of the engine bay as I left it tonight. Still need to work on the passenger side wiring.
The Tech-Flex loom really cleans the wiring up. I also took up any extra slack in the harness and removed any unused connectors. I also replaced the corroded bolts that were holding the coils and coil bracket with some black allen head bolts. All the little details are starting to pay off
I made a little bracket to hold the harness close to the back of the intake. Right where my finger is pointing is where the harness goes through the fire wall. Same place the Mazda engine harness came through. The other section of harness that goes down toward the bellhousing is going to transmission the connections.
Installed the headers and plug wires. Looks so much better now.
Installed the engine and started working on the wiring in the engine bay. Here's a shot of the drivers side completed after I removed the a/c relay, fan relay and the old diagnostic port. Looks WAY cleaner than before.
One more shot of the engine bay as I left it tonight. Still need to work on the passenger side wiring.

 02-18-2012, 10:18 PM
#137
11 Second Club
Thread Starter
An Ebay seller named furryletters sells it in 10' sections for FAR less than what it costs normally. The loom is pretty easy to work with. Just make sure you cut it with something hot to keep the ends from fraying. Heating up a razor blade with a small propane torch worked well for me.
02-19-2012, 07:27 AM
#138

which headers are those?
I just checked your google docs list and didn't see them.
BTW, I love google docs and have a similar file for all my projects
I just checked your google docs list and didn't see them.
BTW, I love google docs and have a similar file for all my projects
Last edited by jakeb; 02-19-2012 at 07:35 AM.
02-19-2012, 11:22 AM
#139
11 Second Club
Thread Starter
The headers were part of the exhaust package from Flyin Miata. They are 1.5" primaries..I'm sure they'll be a choking point but it'll have to do until there's another bolt on option.
02-23-2012, 08:05 PM
#140
Very nice project 
I bought am 02 Miata to do the same with but when my L98 in the vette went out I decided to do the swap in the vette. I have also said "The Miata is the modern day Cobra" and scared the crap out of disbelievers in the stock Miata.
Is there a video yet?
I bought am 02 Miata to do the same with but when my L98 in the vette went out I decided to do the swap in the vette. I have also said "The Miata is the modern day Cobra" and scared the crap out of disbelievers in the stock Miata.
Is there a video yet?