

Goodbye 4-Banger, Hello LS2 – Miata Build
 11-13-2011, 06:57 PM
#81

Can save yourself time & aggravation later buy upgrading the stock front anti-sway bar mounts while they're easily accessible. Just in case you don't know where they are; just above the cats head there is one on the underside of the uni-body rail.
 11-14-2011, 10:39 AM
#82
11 Second Club
Thread Starter
Thanks for the tip. I saw that FM makes a V8 bar which has an offset in the middle that gives some extra clearance in front of the crank pulley. I'd rather not go to a heavy solid bar so I'm going to see where the motor ends up before I make any decisions on that.
I seem to recall the NB's have more room in front than the NA's but I'm not sure if it's enough to run the stock bar location.
I seem to recall the NB's have more room in front than the NA's but I'm not sure if it's enough to run the stock bar location.
11-14-2011, 11:16 AM
#83
Thanks for the tip. I saw that FM makes a V8 bar which has an offset in the middle that gives some extra clearance in front of the crank pulley. I'd rather not go to a heavy solid bar so I'm going to see where the motor ends up before I make any decisions on that.
I seem to recall the NB's have more room in front than the NA's but I'm not sure if it's enough to run the stock bar location.
I seem to recall the NB's have more room in front than the NA's but I'm not sure if it's enough to run the stock bar location.
It's not for space, it's for strength. Your stock mounts will fail once the engine & suspension mods are done & the car is driven hard. When they fail, they get flimsy. If you look @ them by eye, they will look fine, but in actuality, they have fatigued to the point where they move under load. Will drive you crazy trying to figure out why your steering & alignment has suddenly gone to ****, once they fatigue.
11-15-2011, 05:35 PM
#84
TECH Fanatic
iTrader: (5)
Join Date: Sep 2008
Location: Salem/Keizer
Posts: 1,120
Likes: 0
Received 0 Likes
on
0 Posts

Speaking of $800 oil pans. I had a little issue with my pan. I went to install it and noticed it wouldn't sit flat on the block. When one end was flush the opposite corner was 3/16" off, requiring about 15lbs to bring it down flat. I spoke with FM/V8R and they are taking care of it. Just something else to watch out for. With the pan only torqued to 18ft/lb I wouldn't wanna take any chances with leaks.
11-16-2011, 07:05 AM
#85
11 Second Club
Thread Starter

I'm guessing it's just a difficult section on the pan to weld without causing any warpage.
11-16-2011, 07:18 AM
#86

Thanks for the tip. I saw that FM makes a V8 bar which has an offset in the middle that gives some extra clearance in front of the crank pulley. I'd rather not go to a heavy solid bar so I'm going to see where the motor ends up before I make any decisions on that.
I seem to recall the NB's have more room in front than the NA's but I'm not sure if it's enough to run the stock bar location.
I seem to recall the NB's have more room in front than the NA's but I'm not sure if it's enough to run the stock bar location.
11-18-2011, 04:59 PM
#87
11 Second Club
Thread Starter
Made some more progress over the last couple days. Got most of the interior stripped out. Still need to work on some of the wiring harnesses and get the rest of the carpeting out before I can start cutting and welding on the car.
I'm picking up a buddies welder tomorrow. I plan on seam welding some parts of the unibody to stiffen it up some.
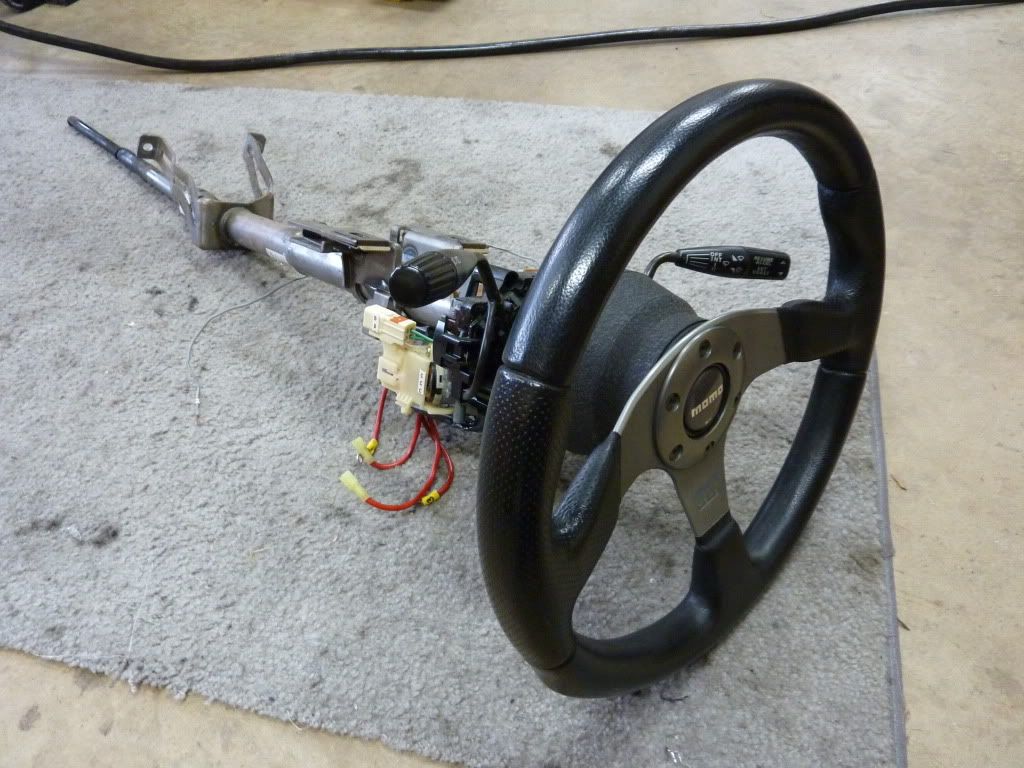
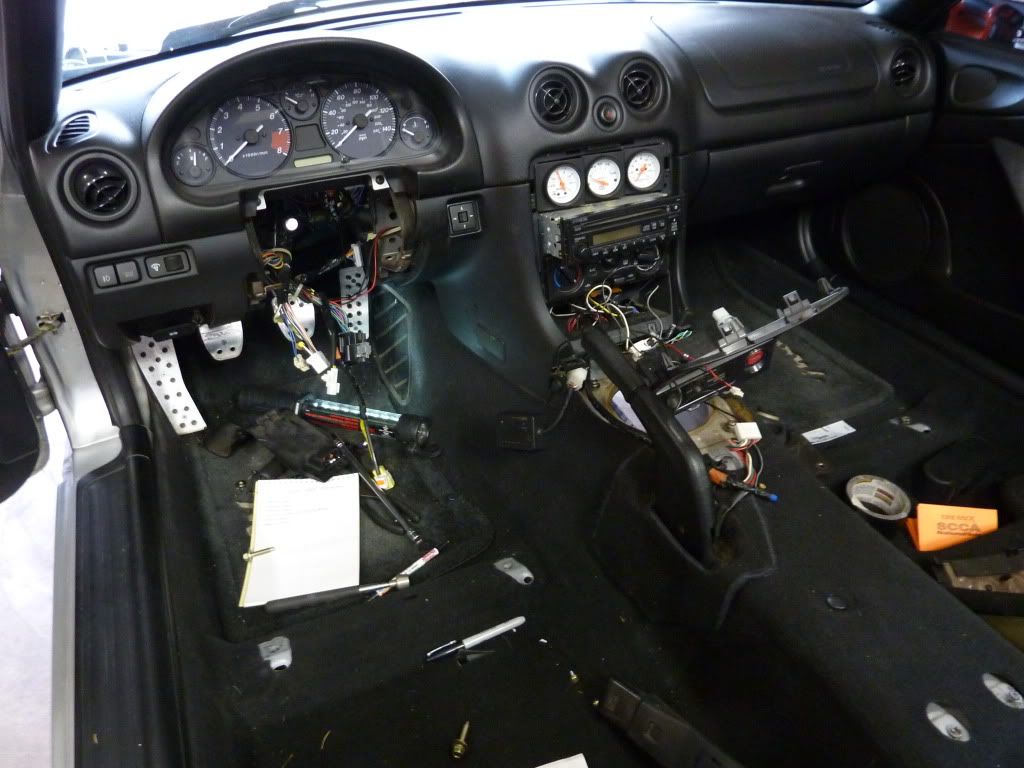
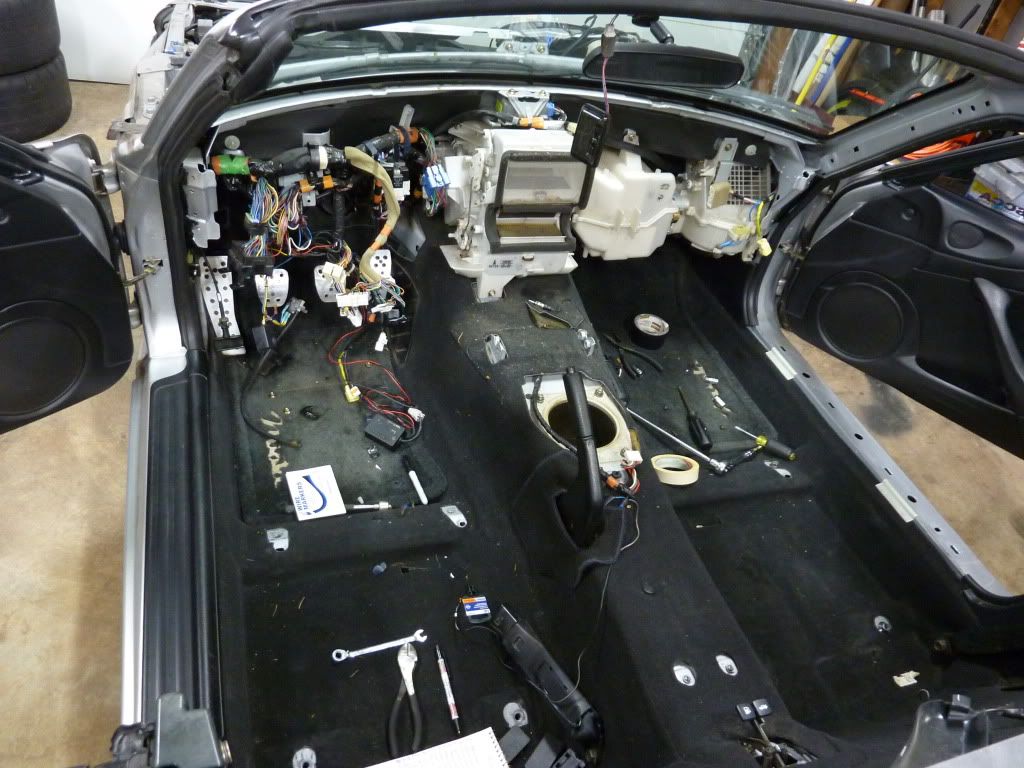
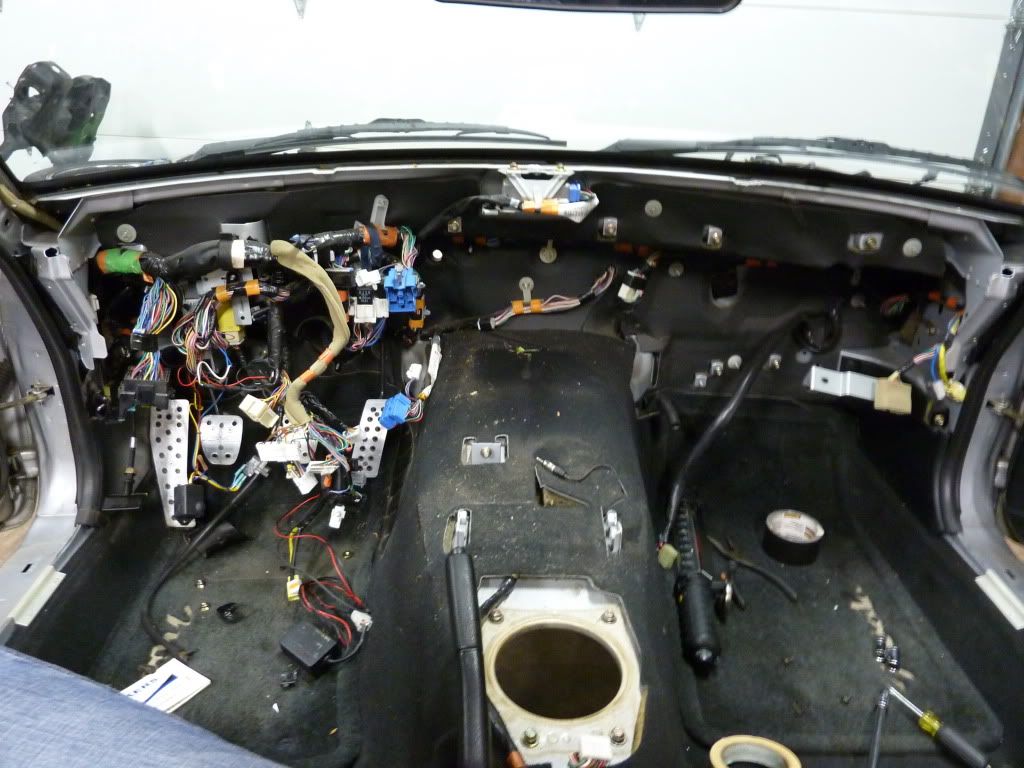
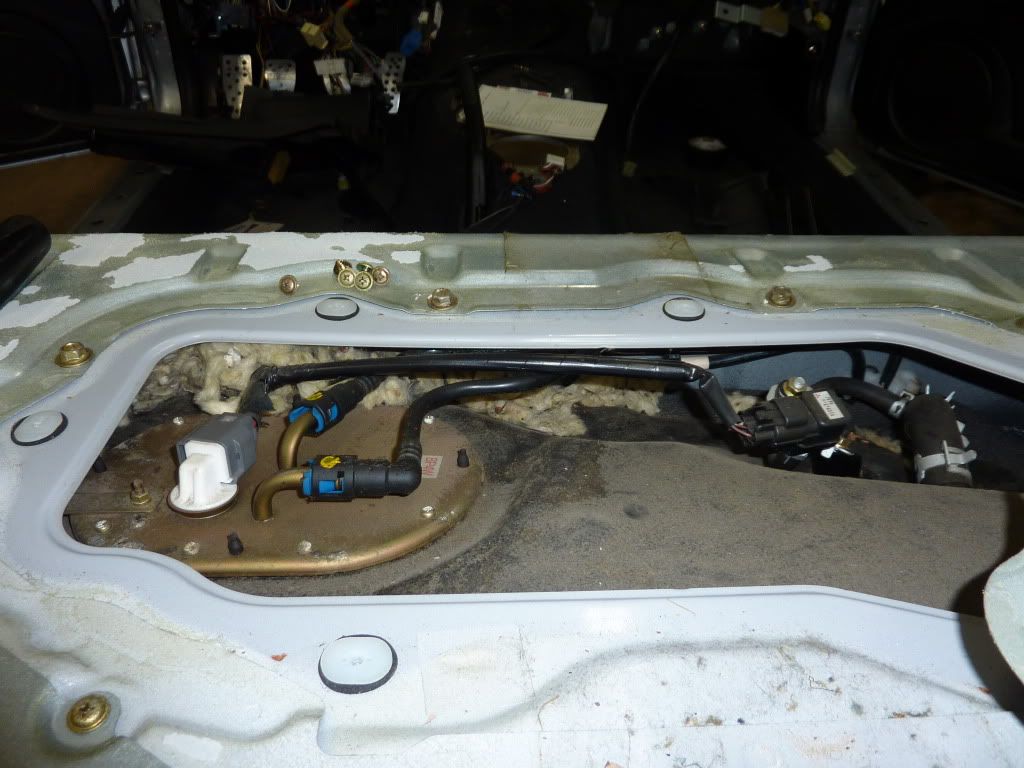
Looks like a mouse took up residence next to my gas tank at some point using some of my interior insulation as a bed
I'm picking up a buddies welder tomorrow. I plan on seam welding some parts of the unibody to stiffen it up some.
Looks like a mouse took up residence next to my gas tank at some point using some of my interior insulation as a bed
11-25-2011, 06:47 PM
#88
11 Second Club
Thread Starter
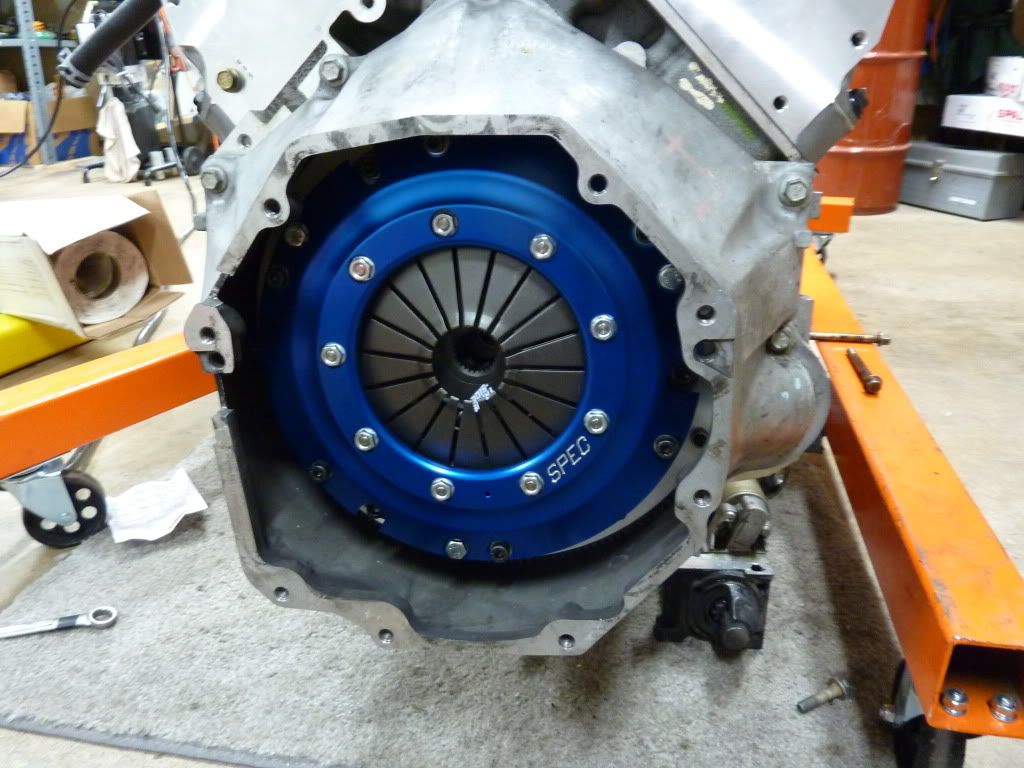
I took a little break from the rats nest under my dash and worked on finishing up my engine.
Finally got the oil pan mounted. The new pan fit much better than the last one. Brought it down off the engine stand and removed the Monster 28lb flywheel and installed the 11lb Spec flywheel. Then I mounted up the clutch/pressure plate.
I measured the throwout bearing clearances and it came out to just over 1/16". Didn't need to use the 1/8" shim provided.
Transferred the fittings from the old slave cylinder to the new slave in order to mount up the FM clutch master kit.
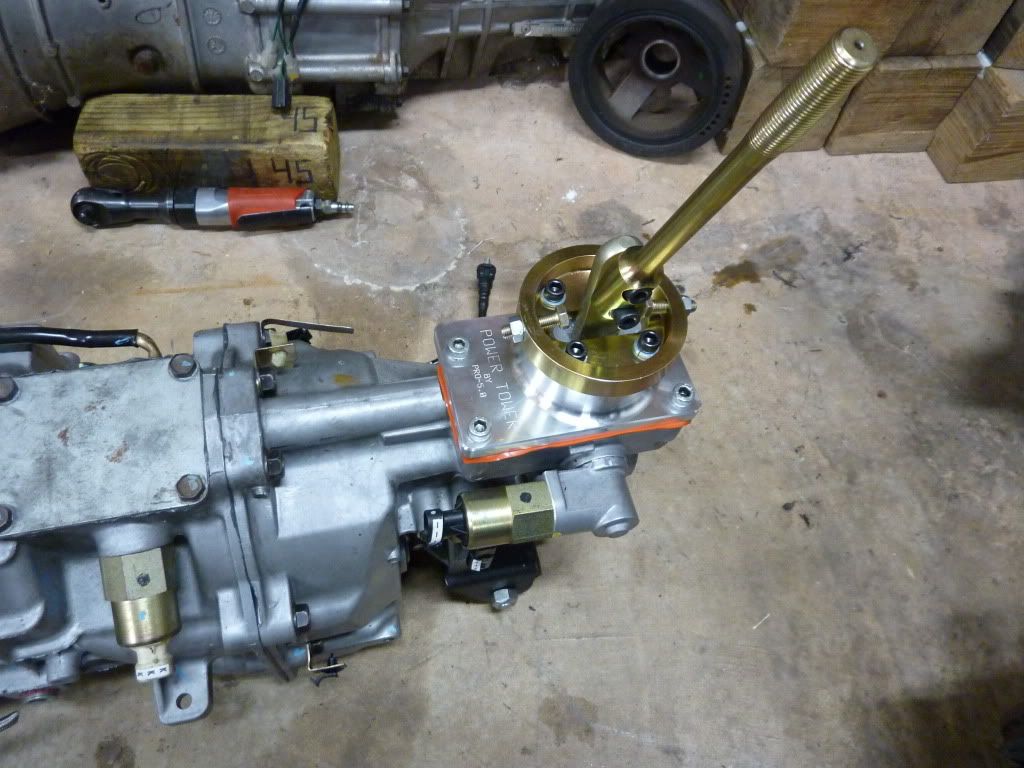
And lastly I installed a new Pro 5.0 short shifter since the Billet Products GTO shifter wouldn't work with my setup.
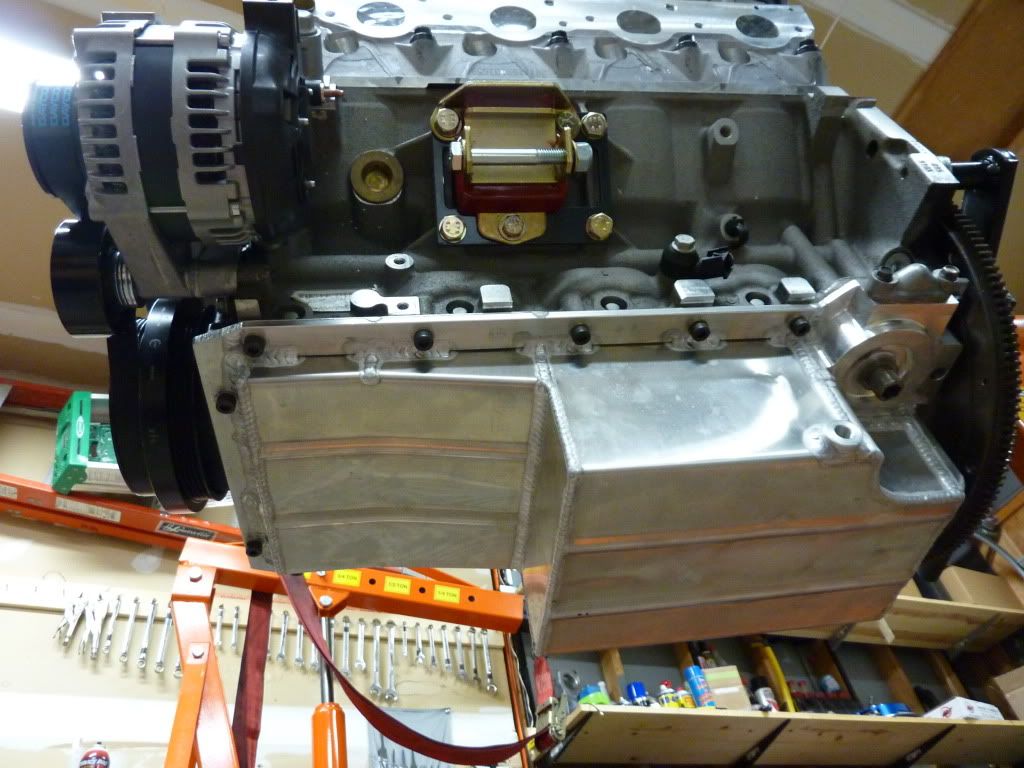
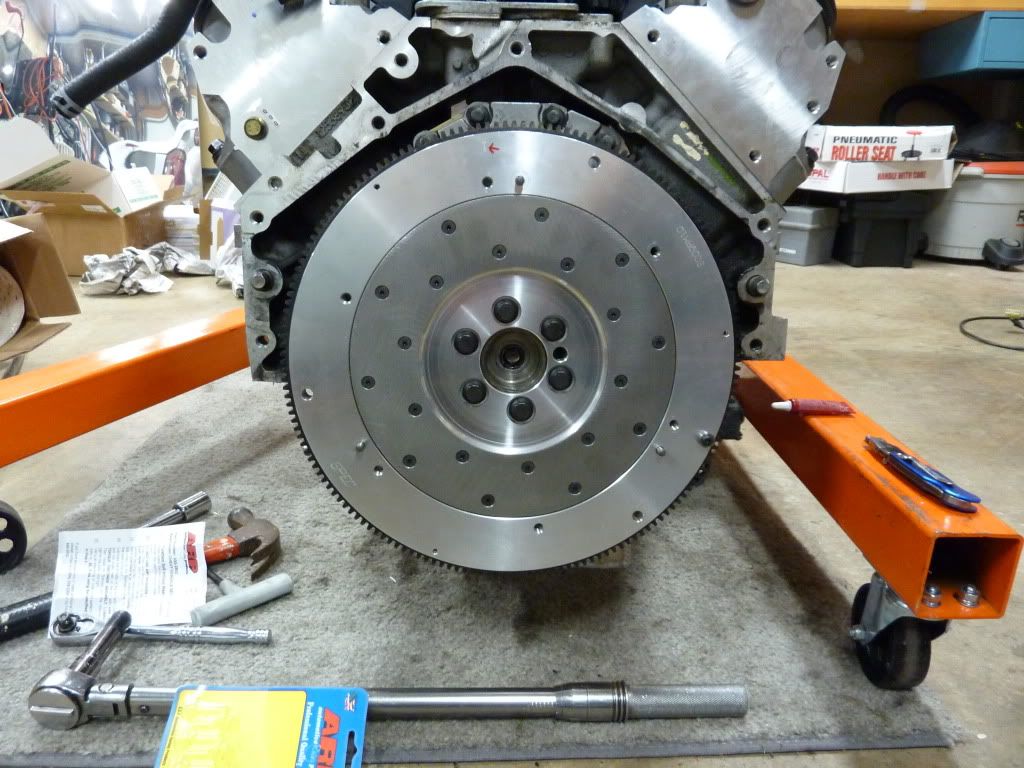
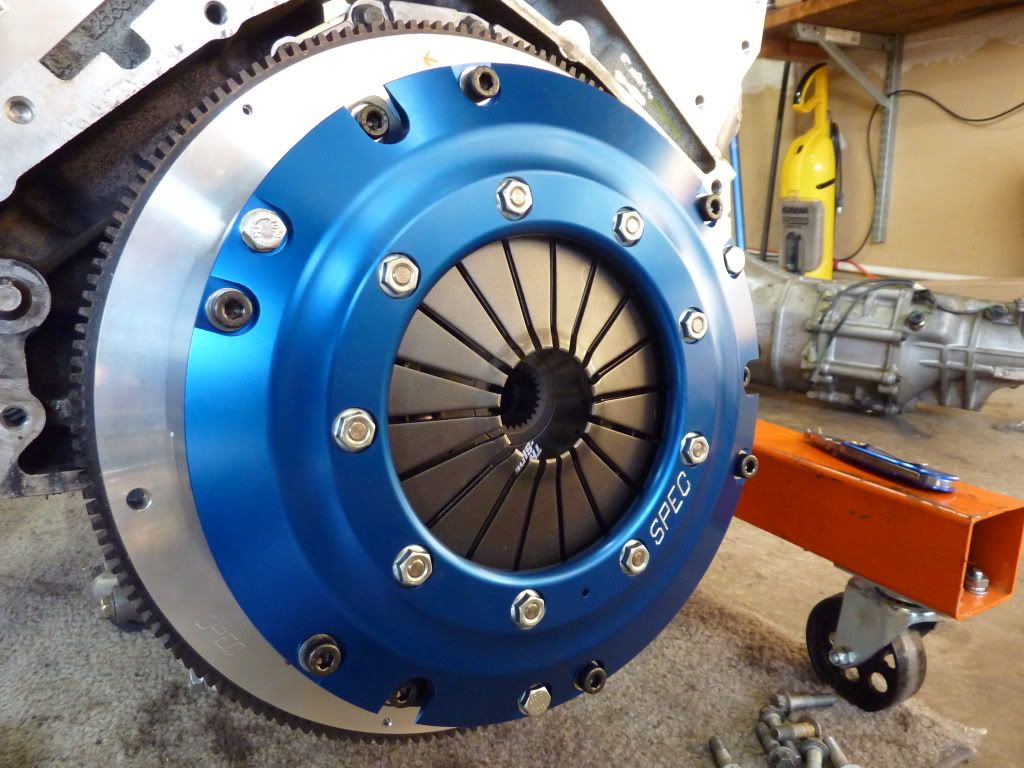
Finally got the oil pan mounted. The new pan fit much better than the last one. Brought it down off the engine stand and removed the Monster 28lb flywheel and installed the 11lb Spec flywheel. Then I mounted up the clutch/pressure plate.
I measured the throwout bearing clearances and it came out to just over 1/16". Didn't need to use the 1/8" shim provided.
Transferred the fittings from the old slave cylinder to the new slave in order to mount up the FM clutch master kit.
And lastly I installed a new Pro 5.0 short shifter since the Billet Products GTO shifter wouldn't work with my setup.
Last edited by MX6.0; 11-25-2011 at 06:54 PM.
11-27-2011, 01:49 PM
#89
11 Second Club
Thread Starter
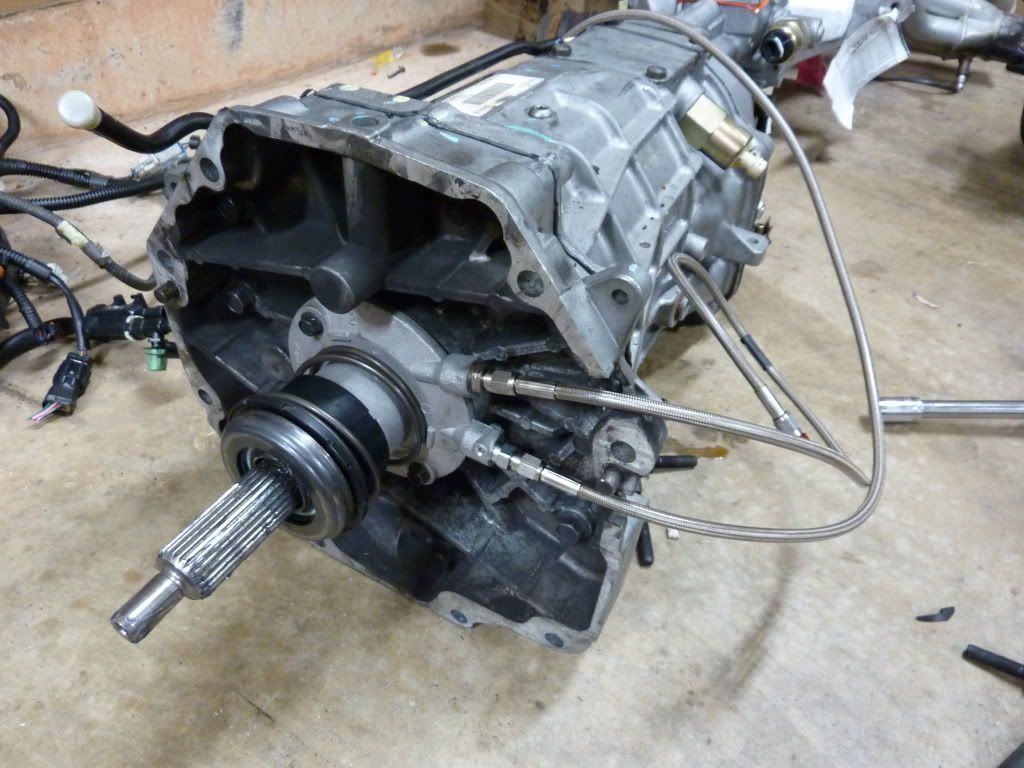
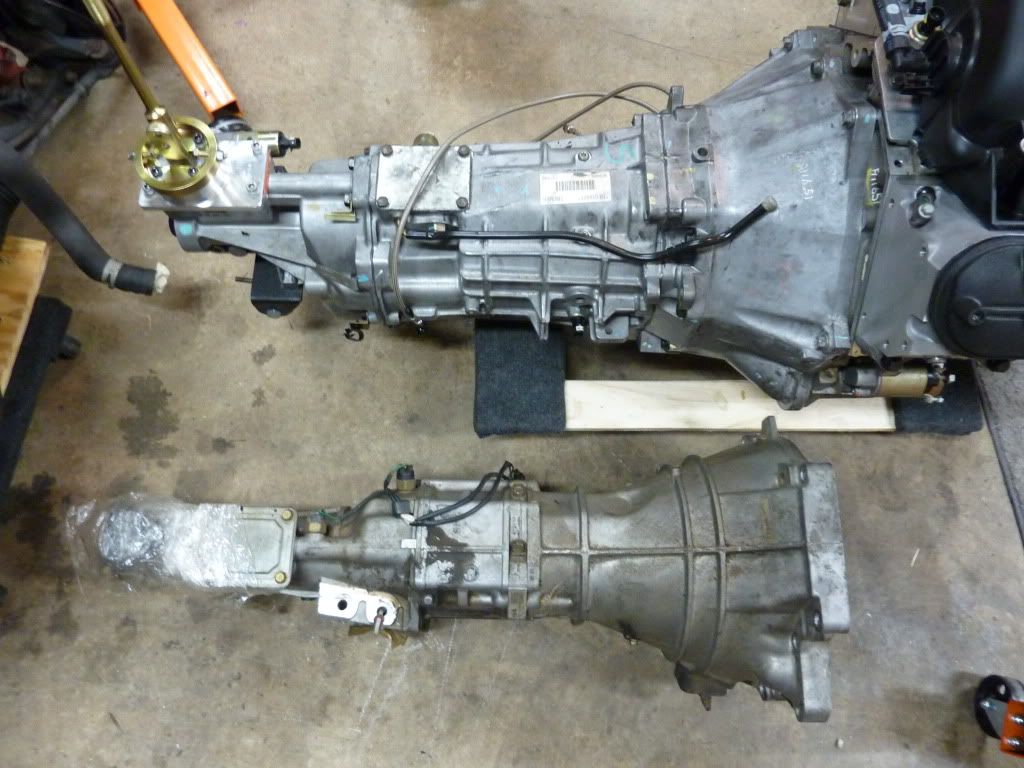
Got the chance to weigh both transmissions while they were off the car. Looks like most of the weight gain from the LS swap will be from the T56 alone.
GTO T56 = 138.5lbs
99 Miata 5 speed = 79.5lbs
Difference of = 59lbs
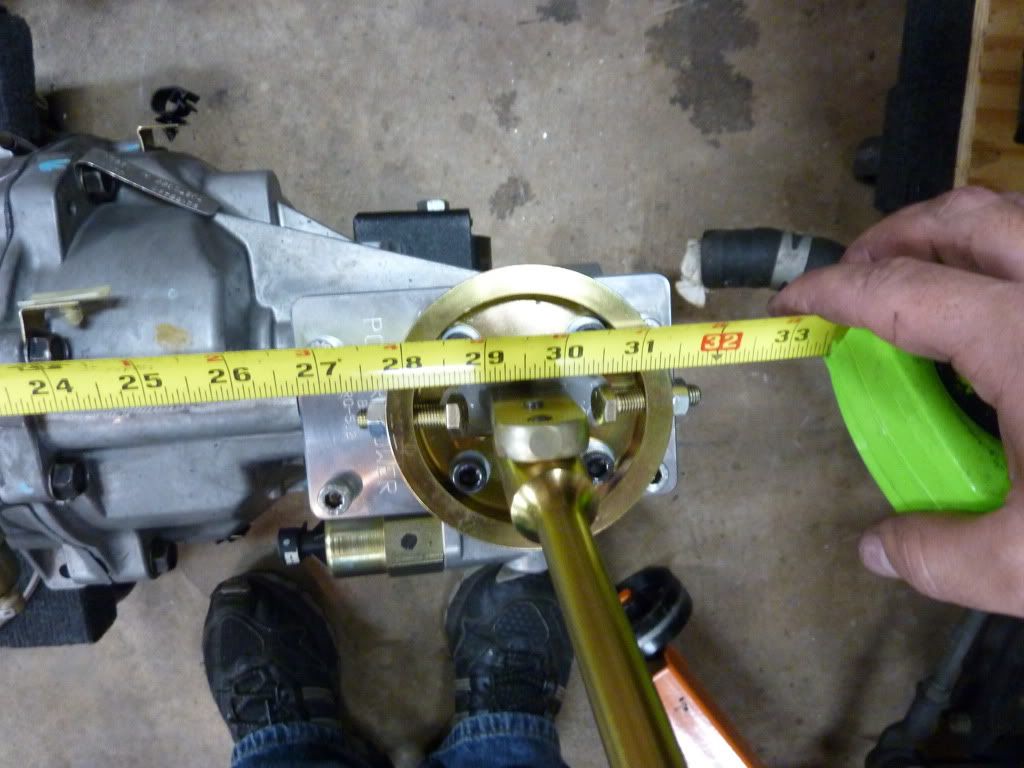
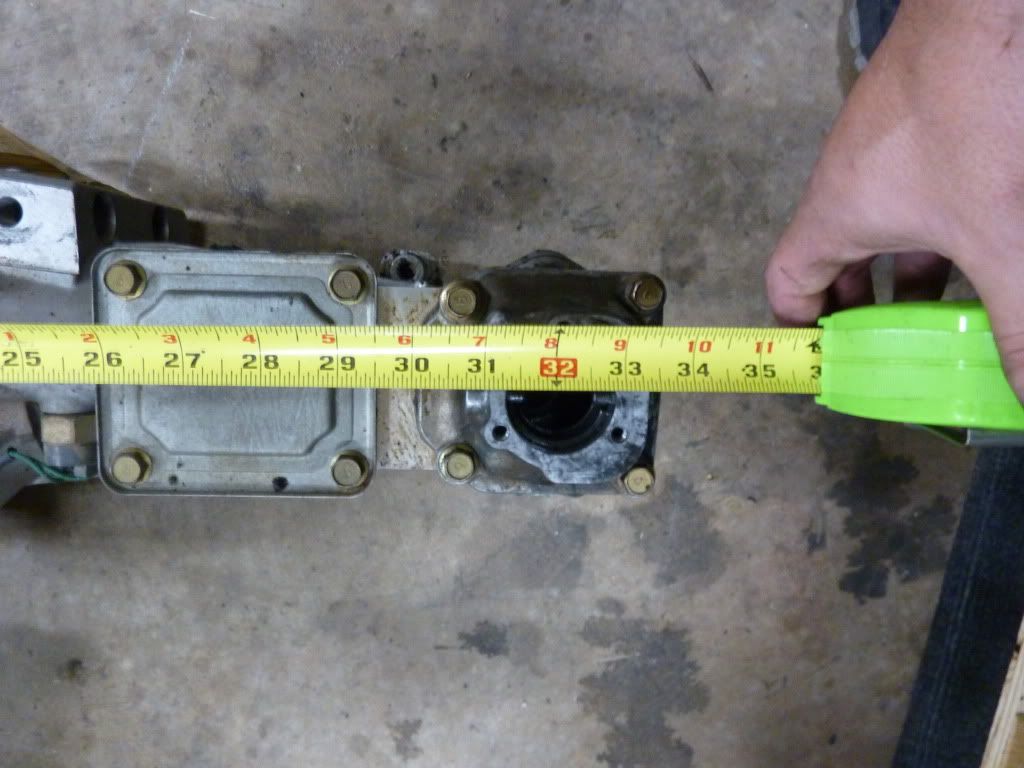
And a quick measurement from the rear of the bellhousing to the center of the shifter of each tranny shows the Miata 5 speed is 2.5" longer, meaning that the LS motor will be further back in the engine bay than the 4 cyl.
T56
99 Miata 5 speed
GTO T56 = 138.5lbs
99 Miata 5 speed = 79.5lbs
Difference of = 59lbs
And a quick measurement from the rear of the bellhousing to the center of the shifter of each tranny shows the Miata 5 speed is 2.5" longer, meaning that the LS motor will be further back in the engine bay than the 4 cyl.
T56
99 Miata 5 speed
11-27-2011, 01:55 PM
#90
11 Second Club
Thread Starter
Had to do some trimming on the flywheel cover plate to get it to fit right. I'm not sure if the GTO and F-body bell housings are different or not but it definitely wasn't a direct fit....nothing a dremel couldn't fix.

11-28-2011, 01:50 PM
#92
TECH Fanatic
iTrader: (5)
Join Date: Sep 2008
Location: Salem/Keizer
Posts: 1,120
Likes: 0
Received 0 Likes
on
0 Posts
Looking good, Mike! It probably goes without saying that I'm jealous of how far along you've gotten on your swap.....but I'll say it anyway....I'm jealous!
Great updates, BTW!
Great updates, BTW!
12-01-2011, 07:32 AM
#95
11 Second Club
Thread Starter
I ordered a few more parts today. The FM exhaust went on sale so I jumped on that deal! Here's what it looks like (not my car, obviously)

I also got a caliper so I can accurately measure the throwout bearing clearance. Once I get that measured again I'm gonna get back to the rats nest under the dash.
I also got a caliper so I can accurately measure the throwout bearing clearance. Once I get that measured again I'm gonna get back to the rats nest under the dash.
01-04-2012, 08:19 PM
#96
11 Second Club
Thread Starter
I took a couple weeks off for the holidays but I've made some more progress recently.
I was able to sell the turbo 1.8 locally which is a huge help with my budget.
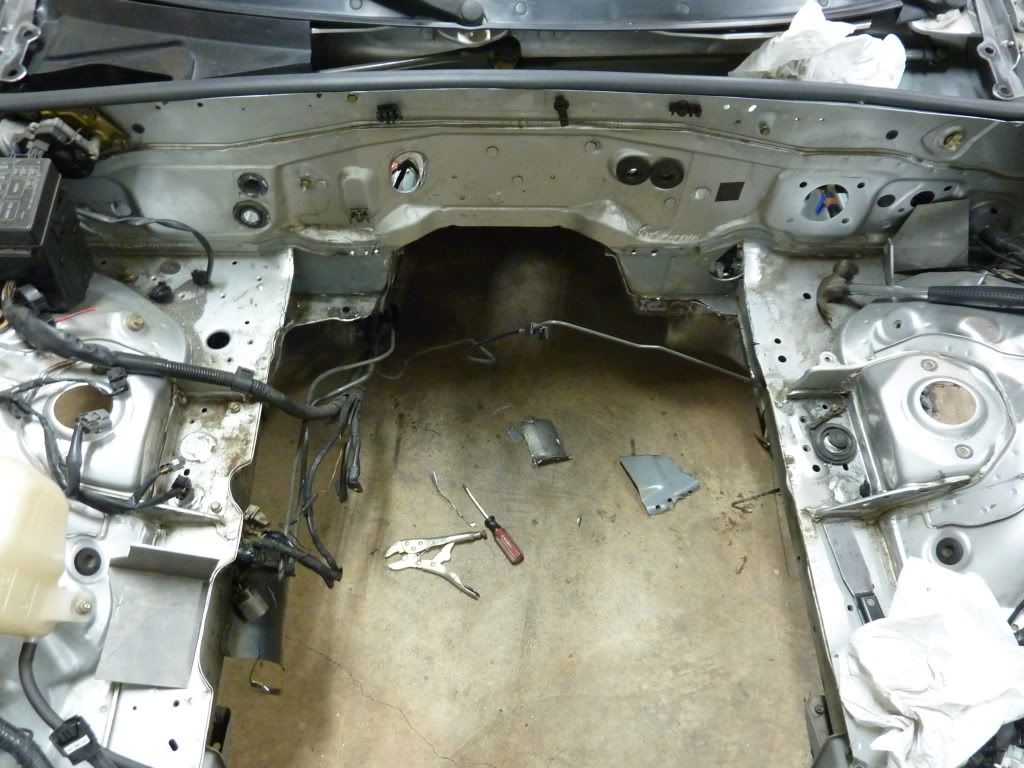
I cut the braces near the rear of the engine bay out to make room for the rear of the heads. This is what the transmission tunnel looked like before it was widened.
Here's a shot of the modified tranny tunnel. Nothing has been welded at this point. Just test fitting the engine.
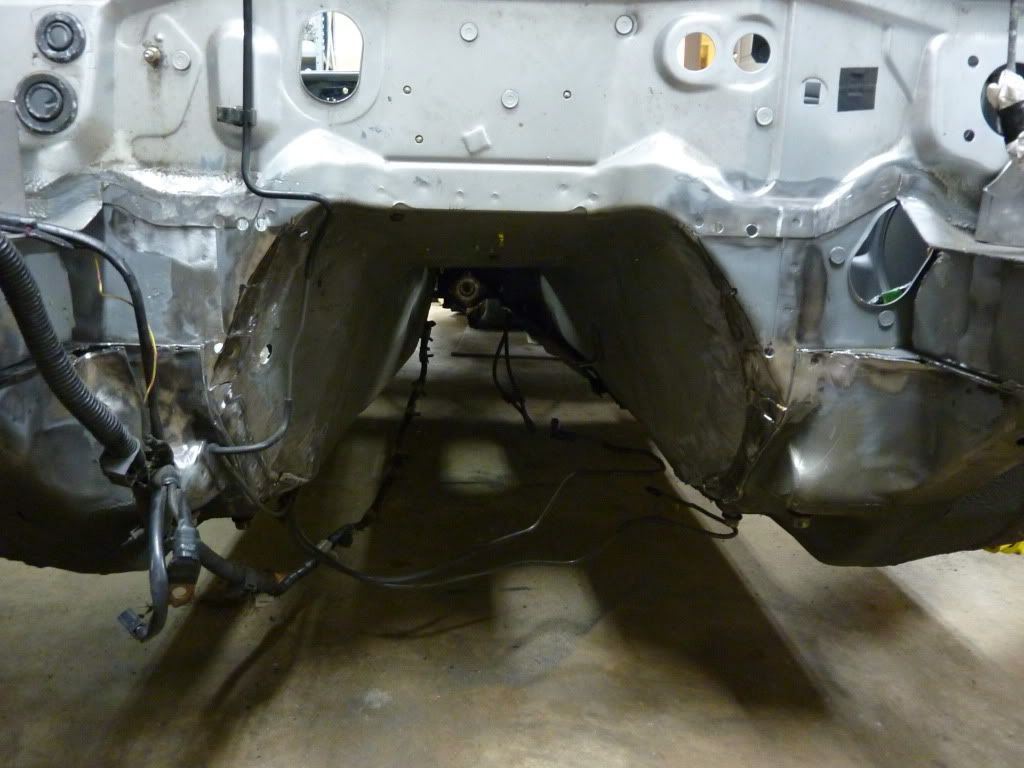
Removed the braces in the interior that strengthen the transmission tunnel and firewall. These will be welded back in once the transmission tunnel is widened. The T56 bellhousing is about 1.5" wider on each side than the miata 5 speed.

Here's the passenger side modified. It's close. Just need to massage a couple areas with the BFH then I can start welding.

And the drivers side. Plenty of room on this side.

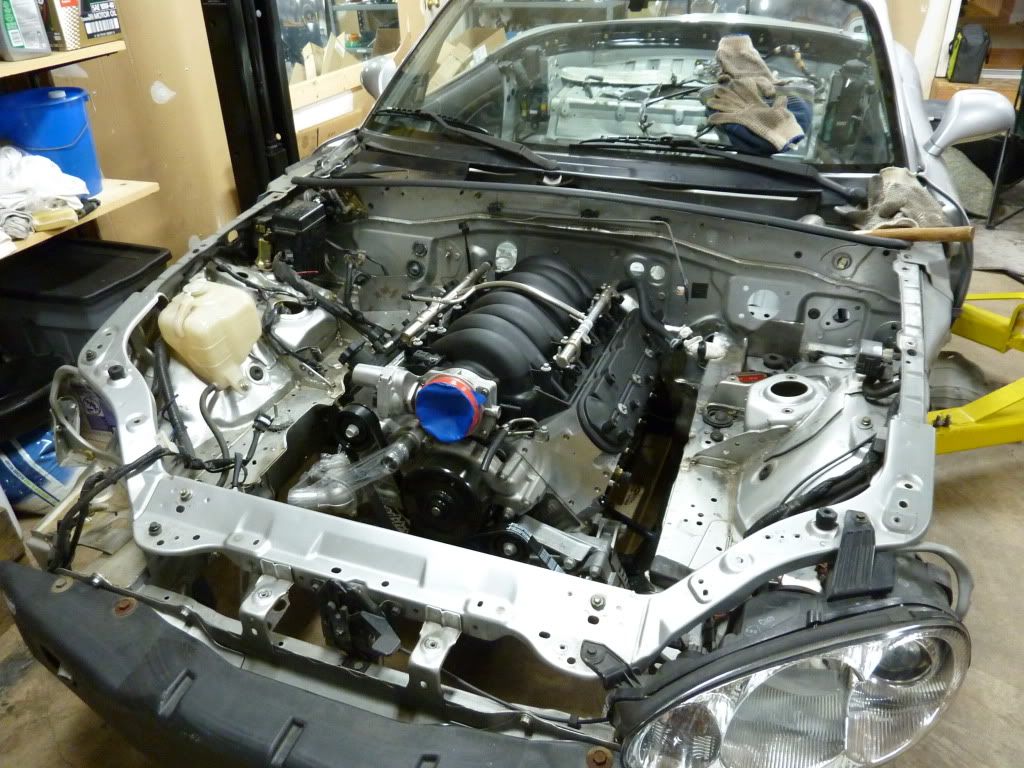
Here's a shot of the engine all bolted in!
I was able to sell the turbo 1.8 locally which is a huge help with my budget.
I cut the braces near the rear of the engine bay out to make room for the rear of the heads. This is what the transmission tunnel looked like before it was widened.
Here's a shot of the modified tranny tunnel. Nothing has been welded at this point. Just test fitting the engine.
Removed the braces in the interior that strengthen the transmission tunnel and firewall. These will be welded back in once the transmission tunnel is widened. The T56 bellhousing is about 1.5" wider on each side than the miata 5 speed.
Here's the passenger side modified. It's close. Just need to massage a couple areas with the BFH then I can start welding.
And the drivers side. Plenty of room on this side.
Here's a shot of the engine all bolted in!
01-06-2012, 03:40 PM
#97
11 Second Club
Thread Starter
Removed the rest of the existing fuel lines all the way back to the fuel filter. Do yourself a favor and run the car empty before you start the swap. Draining 3/4 of a tank of gas this way takes forever.
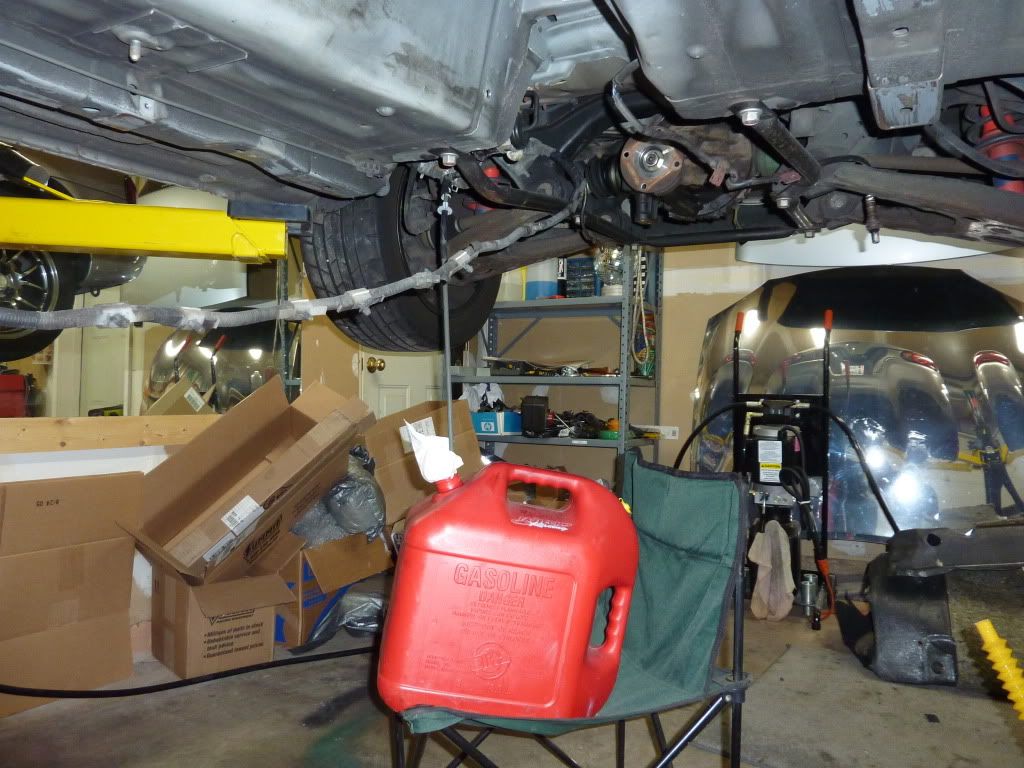
While the gas was draining I worked on the frame rails. Over the years the frame rails were all smooshed and bent up so I hammered them back into shape so the new frame rail reinforcements would bolt over them.
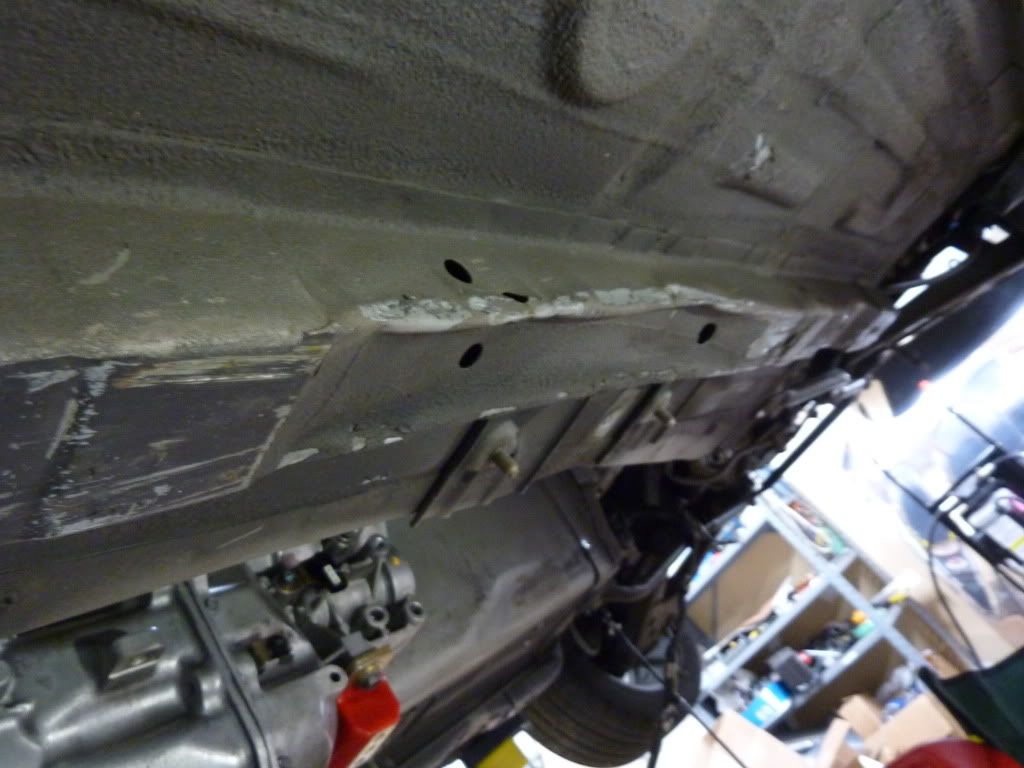
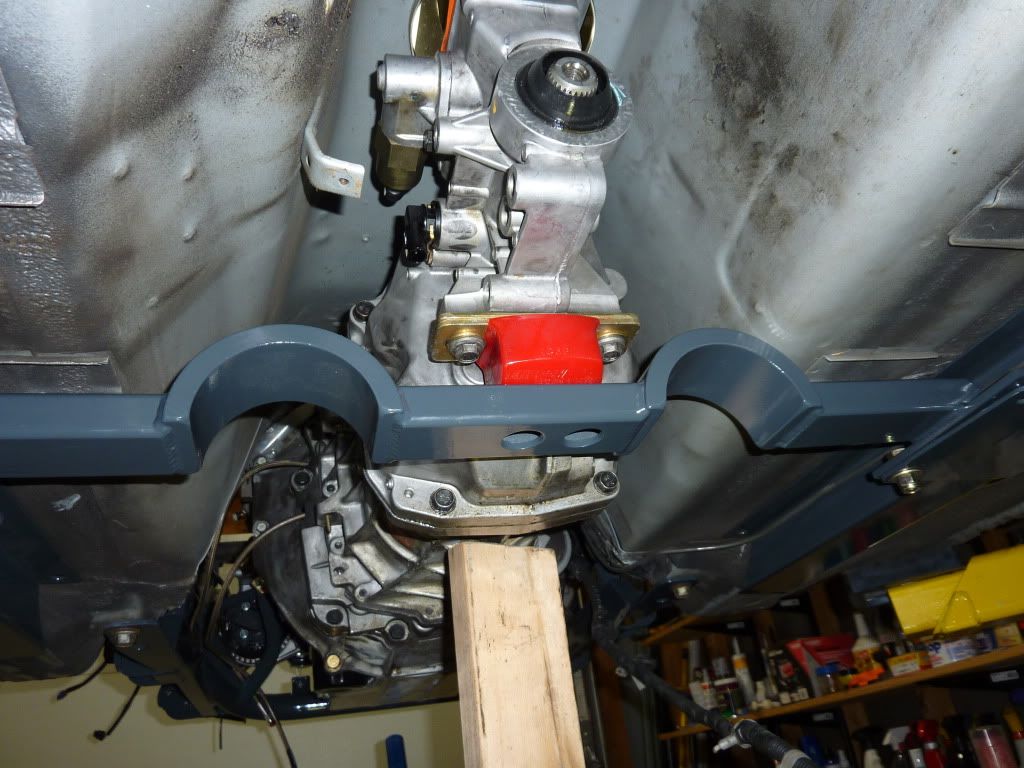
I bolted on the tranny mount and crossmember and aligned the frame rails so they were even on both sides.
While the gas was draining I worked on the frame rails. Over the years the frame rails were all smooshed and bent up so I hammered them back into shape so the new frame rail reinforcements would bolt over them.
I bolted on the tranny mount and crossmember and aligned the frame rails so they were even on both sides.
01-14-2012, 04:47 PM
#98
11 Second Club
Thread Starter
Made some more progress over the past couple days.
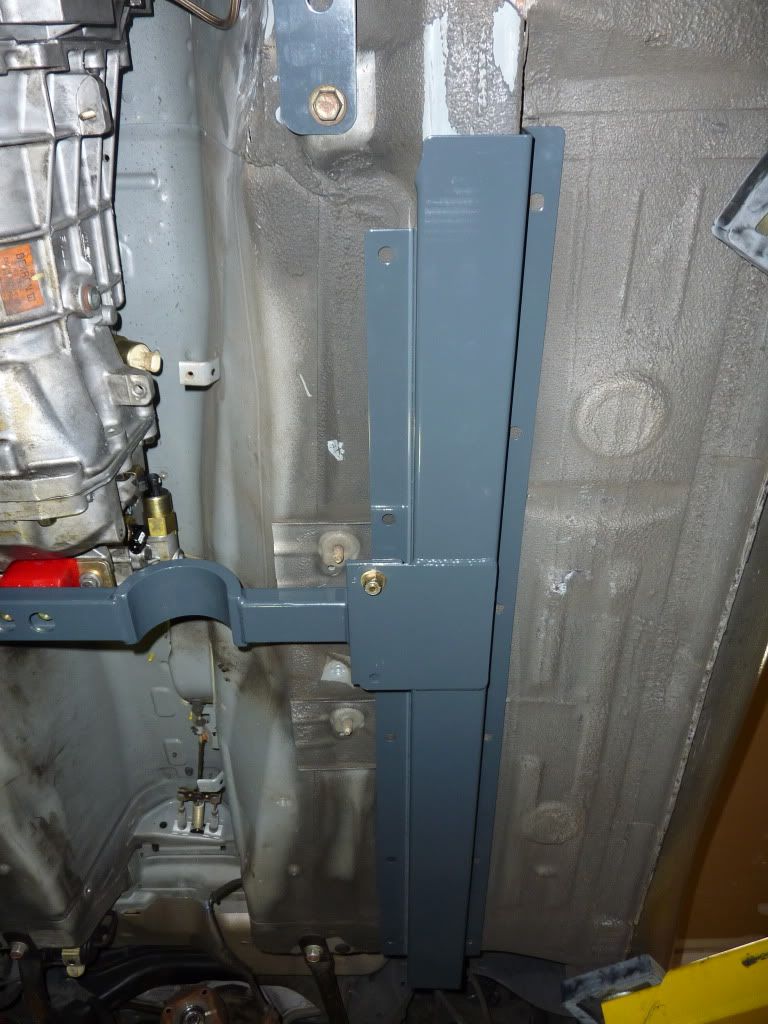
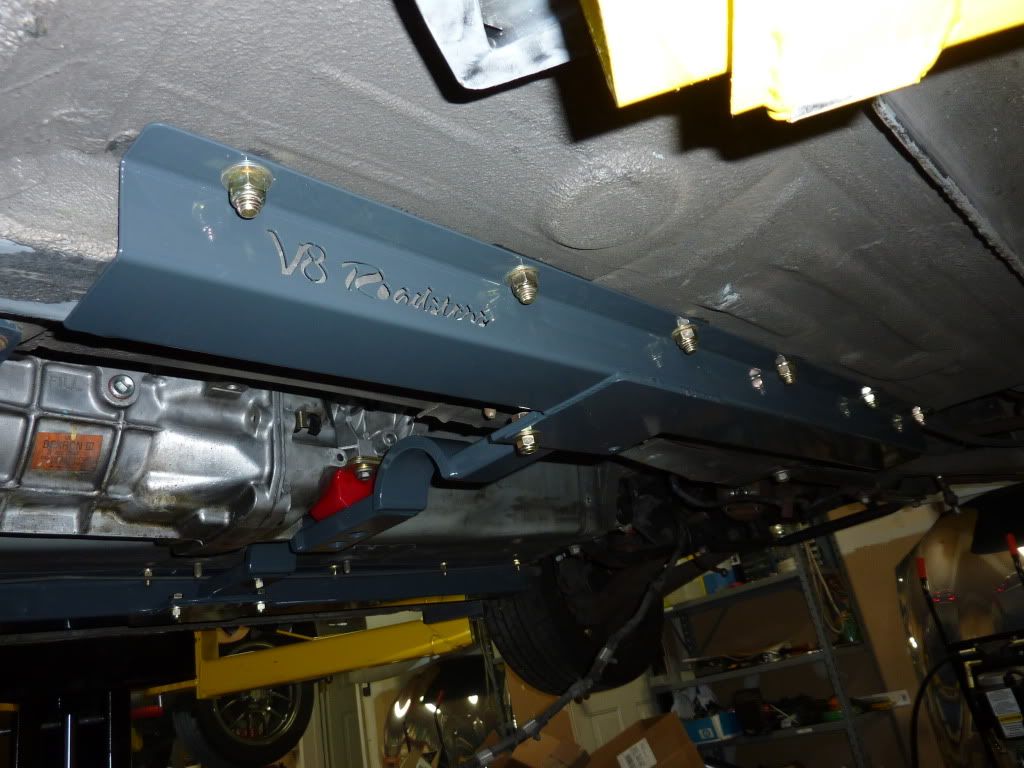
Got the frame rails all bolted in.
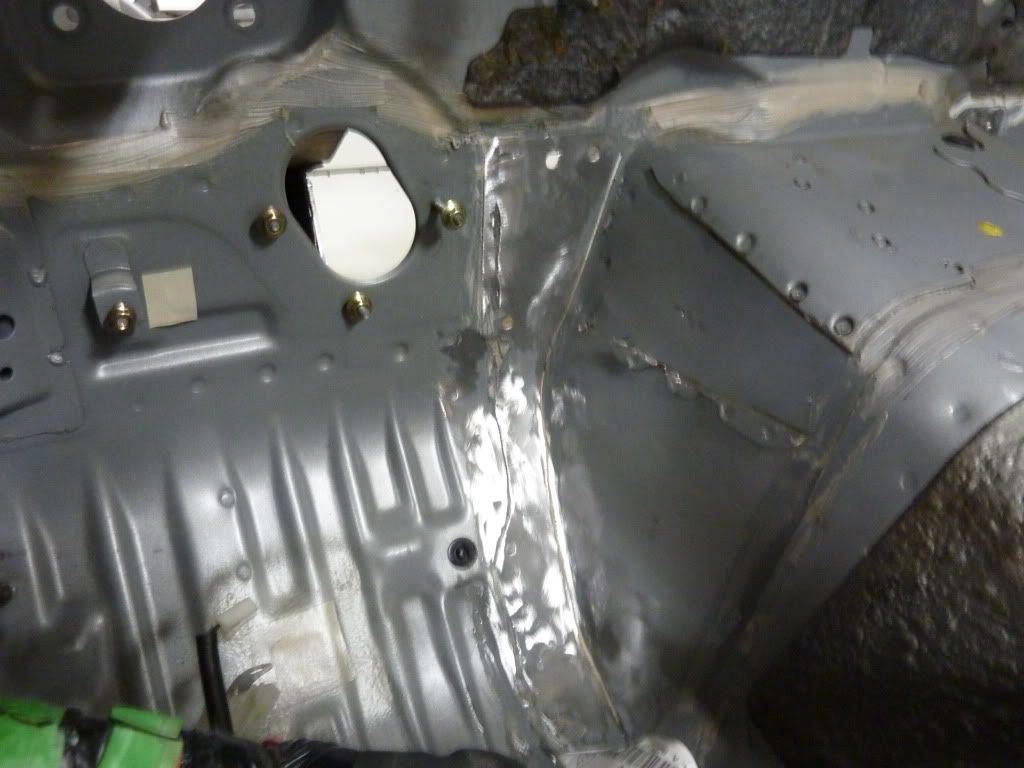
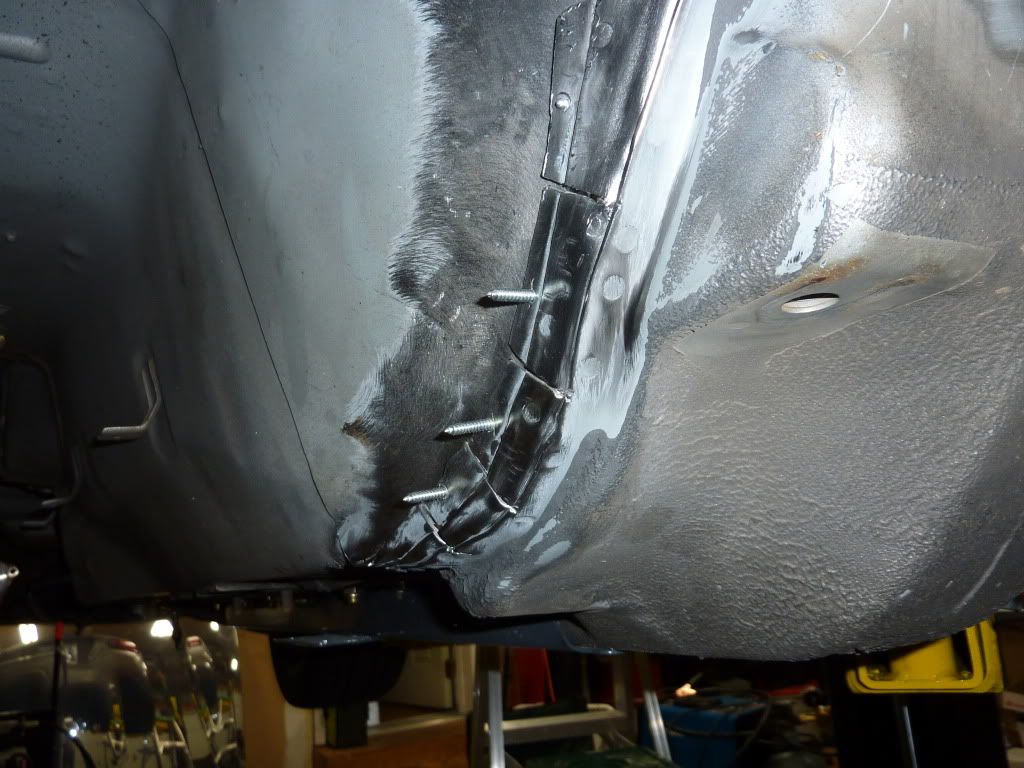
The engine test fit went fine, so I started prepping the tranny tunnel for welding. I used screws to close the gap between the transmission tunnel and the portion of fire wall that was folded over.
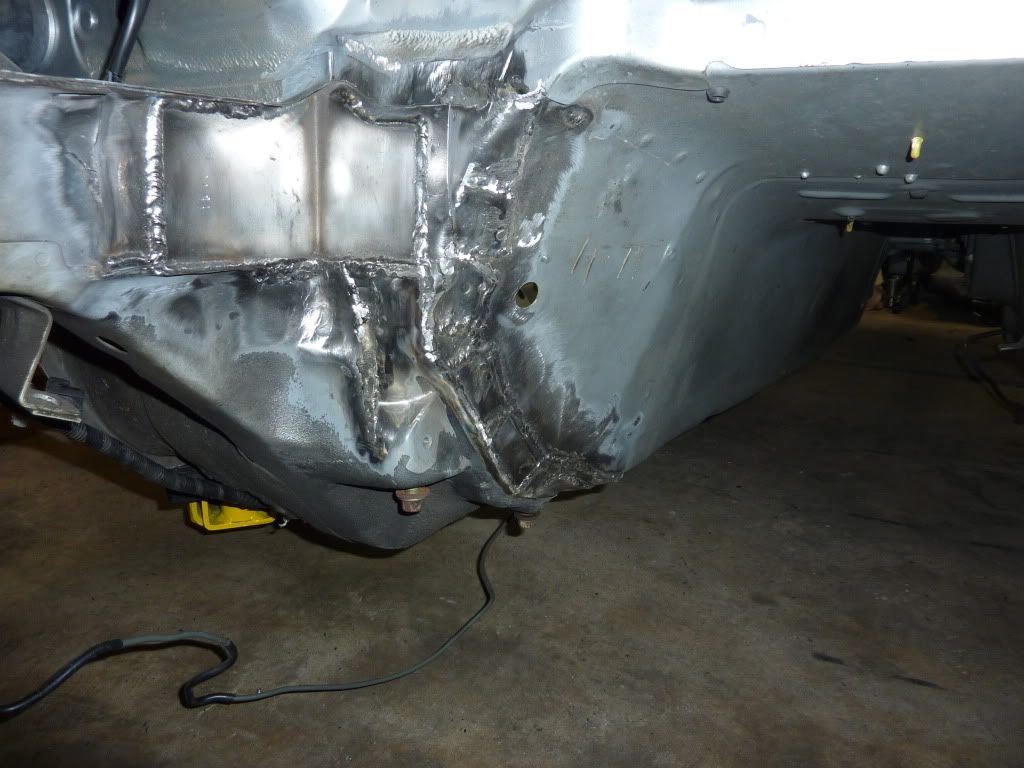
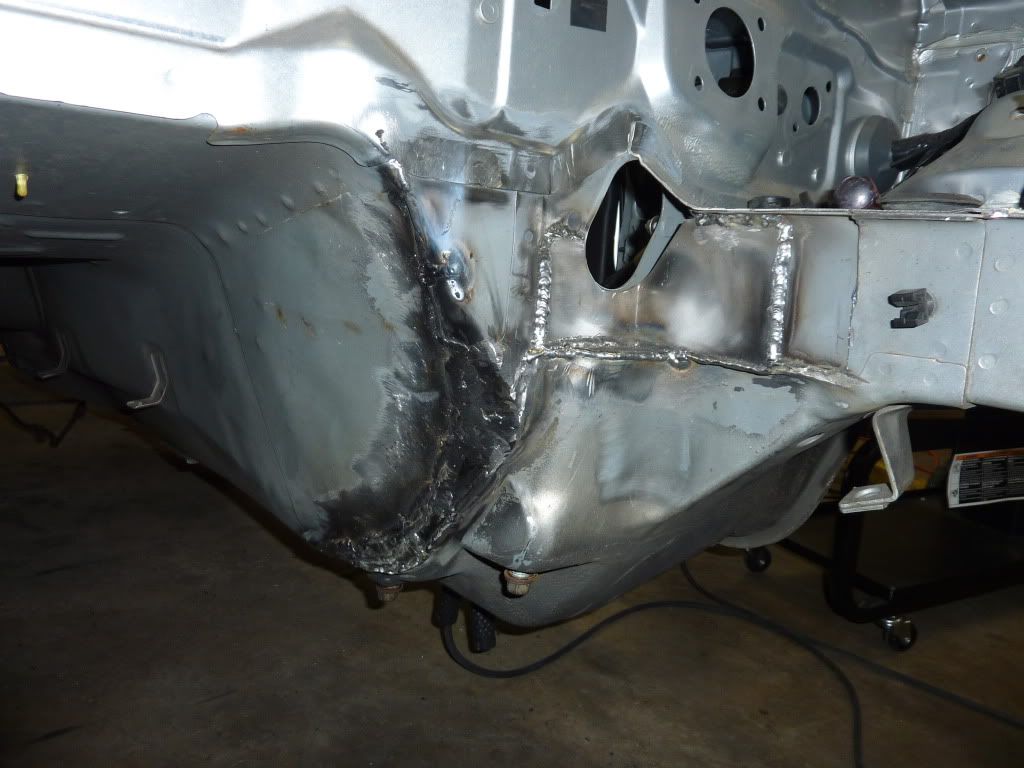
After a few hours of welding the engine bay is done. Looks a little rough right now but after some seam sealer and fresh paint it'll look as good as new.
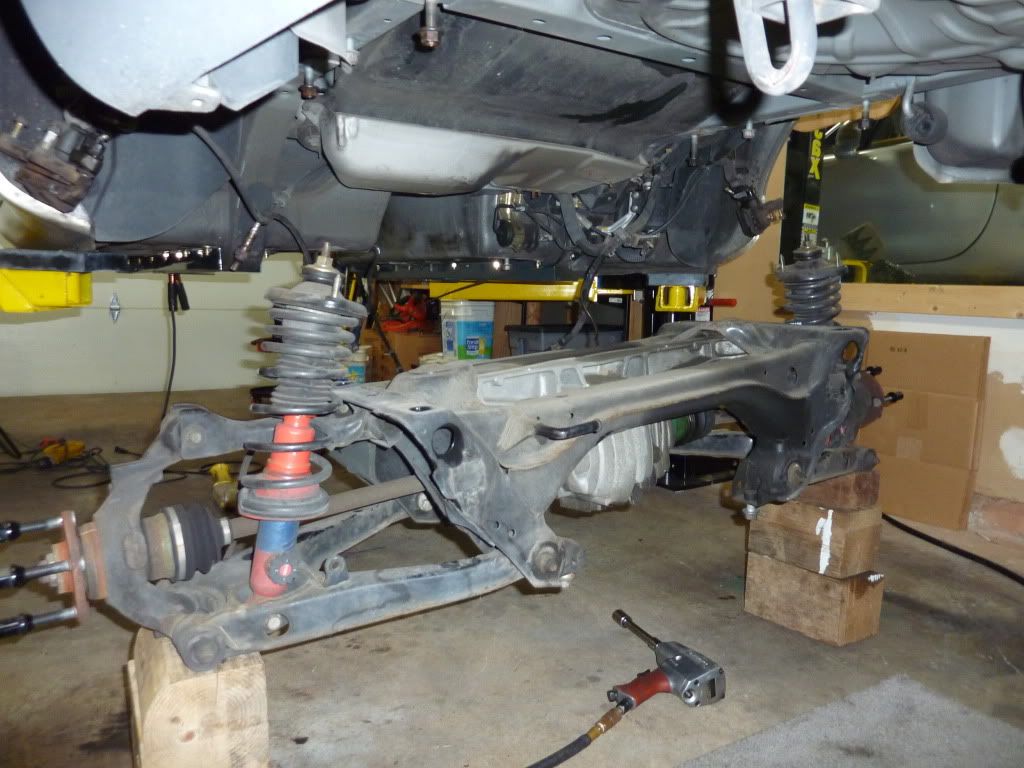
I ran out of gas for the welder so I removed the rear subframe then removed the diff and axles.
I couldn't find any place local that could make me a spray can of the factory paint color so I ordered some from here http://www.paintscratch.com/
Hopefully it works out ok.
Also ordered the rest of the V8 Roadsters rear end parts including the aluminum drive shaft and 550ft/lb axles.
Got the frame rails all bolted in.
The engine test fit went fine, so I started prepping the tranny tunnel for welding. I used screws to close the gap between the transmission tunnel and the portion of fire wall that was folded over.
After a few hours of welding the engine bay is done. Looks a little rough right now but after some seam sealer and fresh paint it'll look as good as new.
I ran out of gas for the welder so I removed the rear subframe then removed the diff and axles.
I couldn't find any place local that could make me a spray can of the factory paint color so I ordered some from here http://www.paintscratch.com/
Hopefully it works out ok.
Also ordered the rest of the V8 Roadsters rear end parts including the aluminum drive shaft and 550ft/lb axles.
01-16-2012, 09:58 AM
#100
After a few hours of welding the engine bay is done. Looks a little rough right now but after some seam sealer and fresh paint it'll look as good as new.
http://i974.photobucket.com/albums/a...s/P1010416.jpg
http://i974.photobucket.com/albums/a...s/P1010415.jpg
http://i974.photobucket.com/albums/a...s/P1010416.jpg
http://i974.photobucket.com/albums/a...s/P1010415.jpg
Yah, an LSX Miata is the modern "Cobra," IMO (also, better). Good thing about a Focus swap would be that it is unique & would stay that way because companies will probably never offer kits for 'em.