

Goodbye 4-Banger, Hello LS2 – Miata Build

 IMO, the clutter is worth it. I've got mine set up exactly as noted in the reply, as to avoid high RPM slippage. For the idler between the crank & alternator, used a small diameter idler pulley left over from a BRP cold side kit. It's like 2" in diameter.
 11-07-2011, 01:21 PM
#62

Sorry, I don't have any pics. The pulleys can be spaced using washers &/or metal sleeves that can be found @ the local hardware store. May have to do some grinding of bolt heads here & there for clearance.
11-07-2011, 02:49 PM
#63
11 Second Club
Thread Starter
Thanks 450!
Just mocked up the lower idler pulley. I just happened to have the perfect sized steel sleeve laying around to space it out. Now I just have to find a longer bolt and a ribbed tensioner pulley.
Just mocked up the lower idler pulley. I just happened to have the perfect sized steel sleeve laying around to space it out. Now I just have to find a longer bolt and a ribbed tensioner pulley.
11-09-2011, 04:13 PM
#64
11 Second Club
Thread Starter
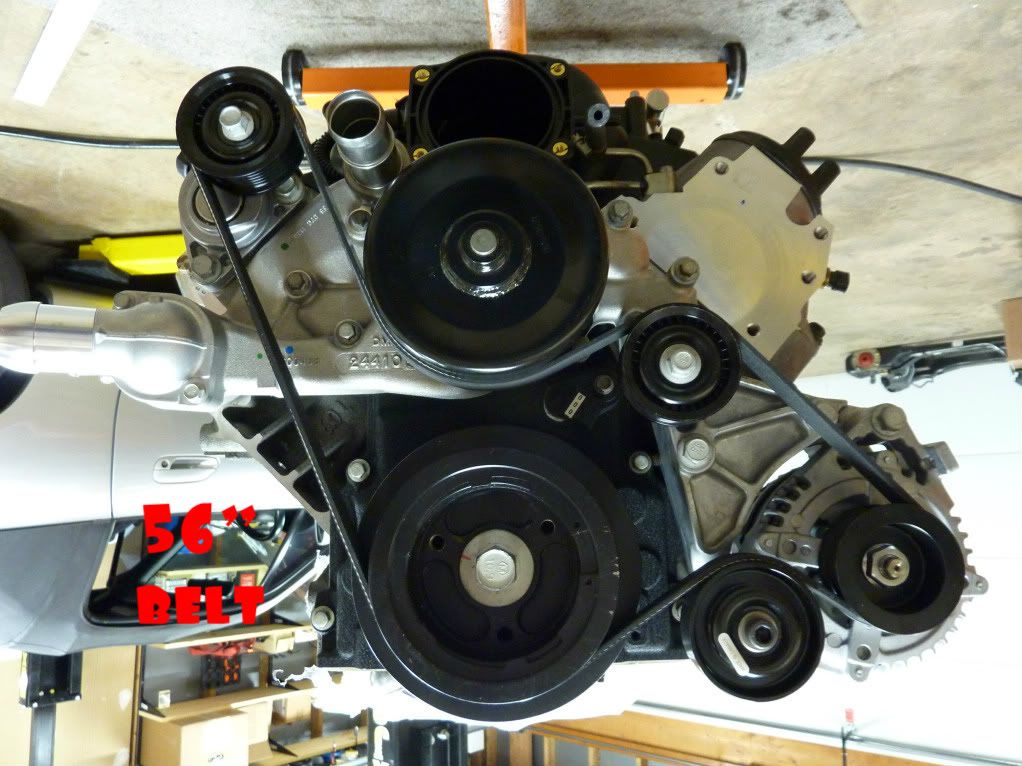
Got the pulleys and belt all figured out. Here's the parts I used:
-Goodyear Gatorback ribbed tensioner pulley - 49021
-10 x 130mm x 1.5 long bolt
-smooth idler pulley from GM accessory kit - 12568996
-Dayco 56" belt - 5060560
For the ribbed tensioner pulley I needed to find something that would center the 130mm bolt in the middle of the pulley. I ended up using a 10mm nut and rounded off the points around the outside to get it to the same diameter as the inside of the pulley, then pressed it in. Next I used assorted washers to get the pulleys all lined up. The tension seems about perfect.
Last edited by MX6.0; 11-09-2011 at 04:37 PM.
11-09-2011, 09:14 PM
#65
11 Second Club
Thread Starter
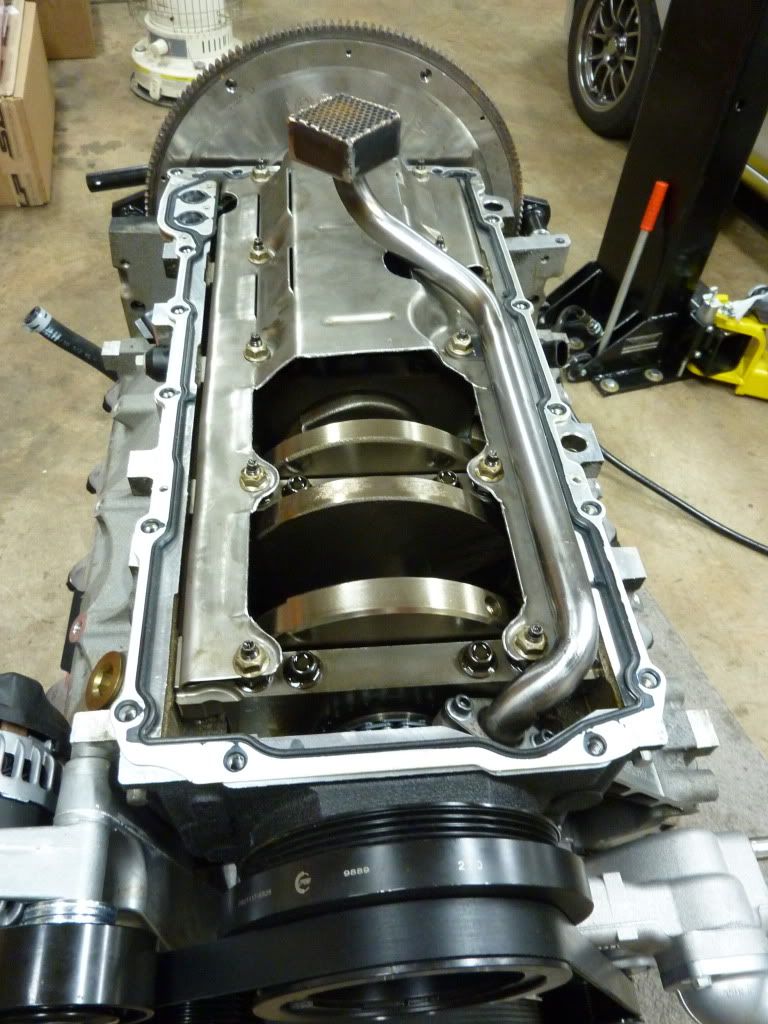
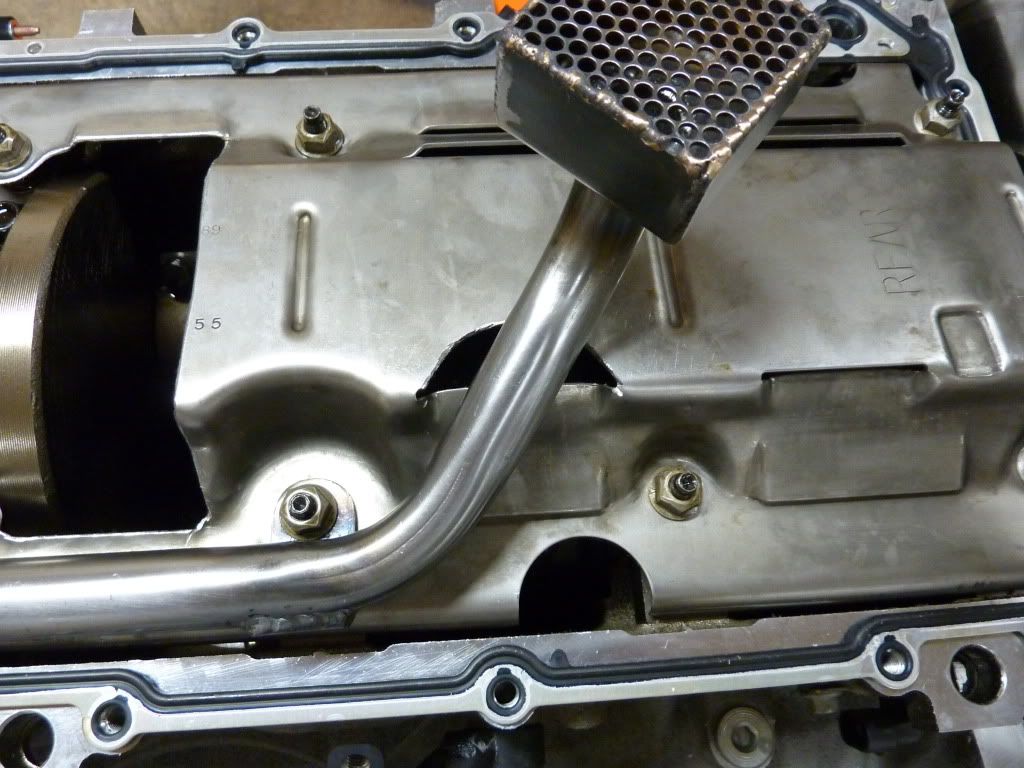
-Modified the stock windage tray to fit the new oil pan. Also had to tweak the pick-up tube to have sufficient clearance between the pick-up screen and the bottom of the pan. Sitting right at 1/4" now.
-Installed the motor mounts
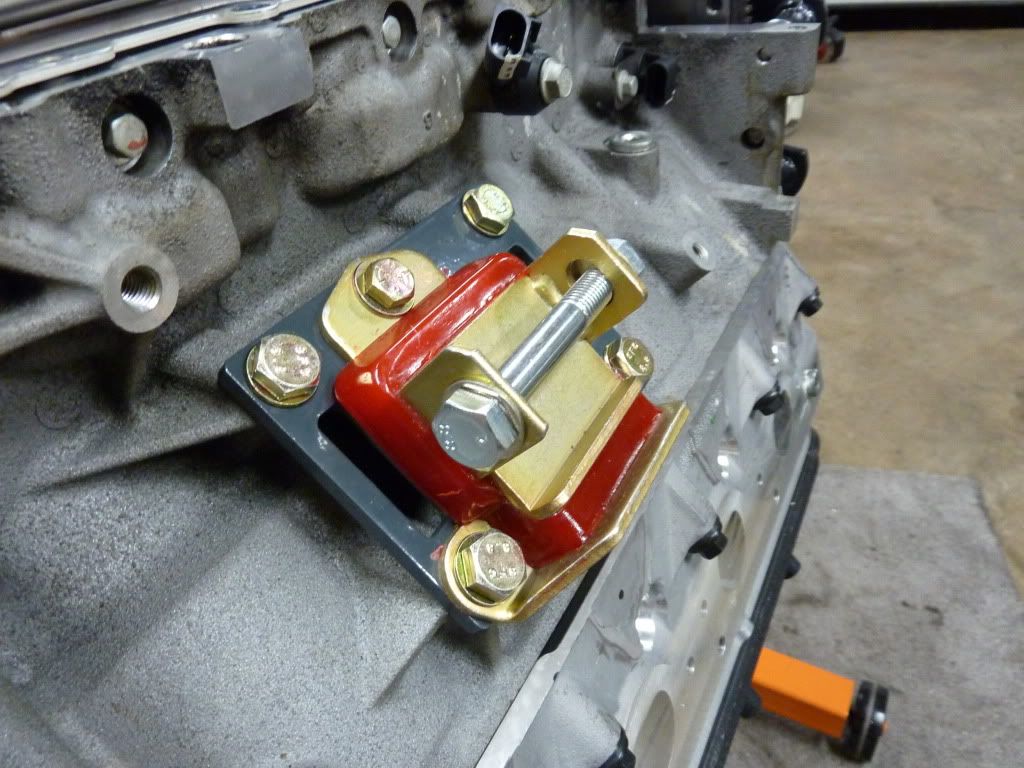
-Installed the motor mounts
 11-10-2011, 10:58 AM
#68
Got the pulleys and belt all figured out. Here's the parts I used:
-Goodyear Gatorback ribbed tensioner pulley - 49021
-10 x 130mm x 1.5 long bolt
-smooth idler pulley from GM accessory kit - 12568996
-Dayco 56" belt - 5060560
For the ribbed tensioner pulley I needed to find something that would center the 130mm bolt in the middle of the pulley. I ended up using a 10mm nut and rounded off the points around the outside to get it to the same diameter as the inside of the pulley, then pressed it in. Next I used assorted washers to get the pulleys all lined up. The tension seems about perfect.
http://i974.photobucket.com/albums/a...g?t=1320876383
Nice job. That is head & shoulders above the limited wrap that would have resulted on the crank, alt & water pump pulleys, had you chosen not to add the pulleys. There will now be zero high RPM slip.
Now...get ready for your information to turn into some vendors' kit. It's why I usually don't provide such information publicly.
11-11-2011, 12:22 PM
#69
11 Second Club
Thread Starter
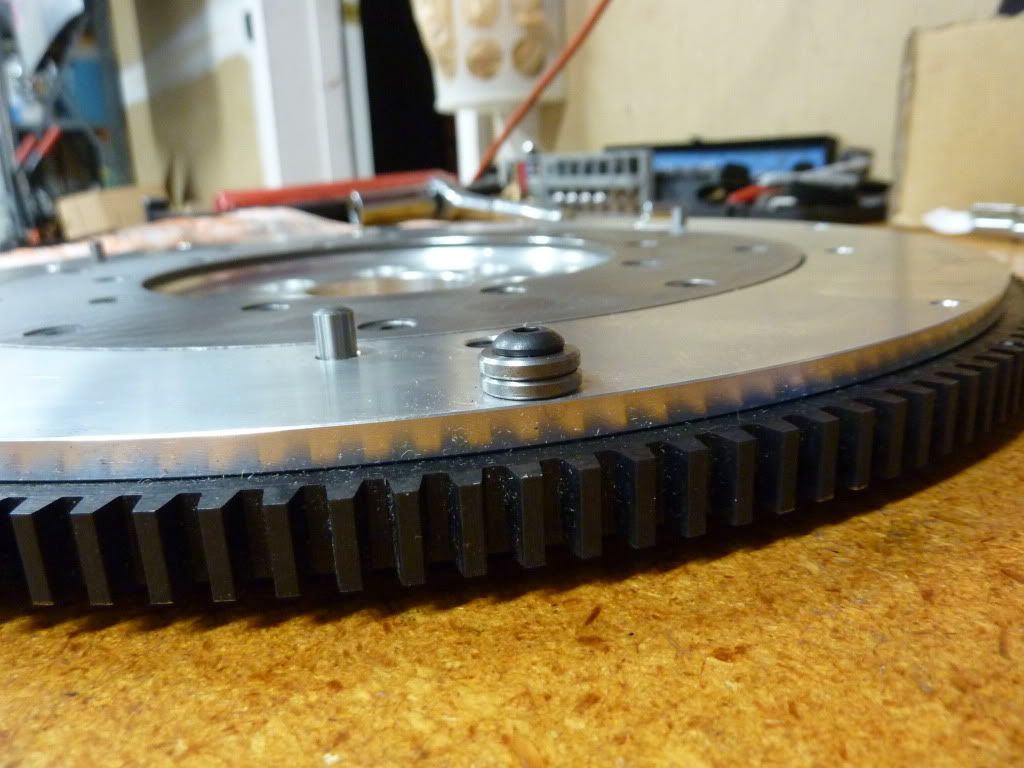
The clutch showed up today!
Compared to the Monster Stage 3 that was on there, this will save me 16.5lbs in rotating mass. Not to mention the inertia difference since it has a smaller diameter.

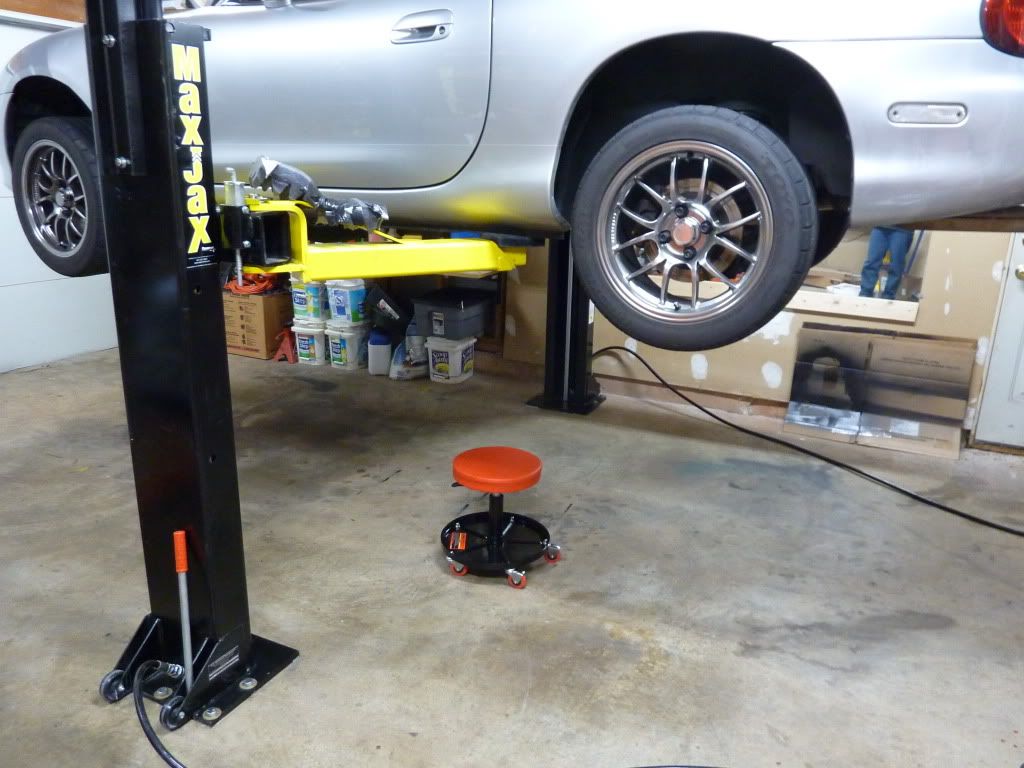
Also stopped by Harbor Freight to get a little rolling stool to use under the car.
Compared to the Monster Stage 3 that was on there, this will save me 16.5lbs in rotating mass. Not to mention the inertia difference since it has a smaller diameter.
Also stopped by Harbor Freight to get a little rolling stool to use under the car.
 11-11-2011, 01:53 PM
#73
TECH Fanatic
iTrader: (5)
Join Date: Sep 2008
Location: Salem/Keizer
Posts: 1,120
Likes: 0
Received 0 Likes
on
0 Posts

Yeah....definitely have it checked. When I ordered my clutch kit from V8R, Shandelle said that they stopped using Spec and Fidanza due to quality issues. He didn't go into a whole lot of detail, other than to say that they had been experiencing failures and manufacturing issues.....so that's something to consider. Based on that conversation....if it were me....I'd have the balancing verified by a machine shop.
11-11-2011, 05:20 PM
#74
11 Second Club
Thread Starter
Yeah....definitely have it checked. When I ordered my clutch kit from V8R, Shandelle said that they stopped using Spec and Fidanza due to quality issues. He didn't go into a whole lot of detail, other than to say that they had been experiencing failures and manufacturing issues.....so that's something to consider. Based on that conversation....if it were me....I'd have the balancing verified by a machine shop.
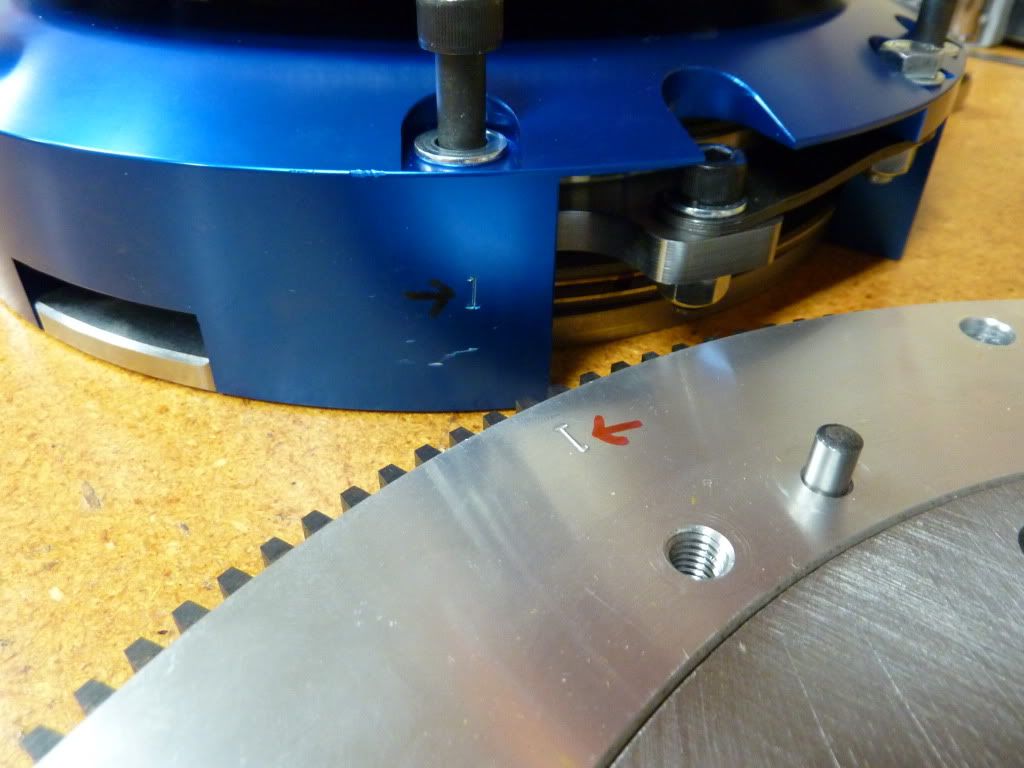
There are also corresponding "1" marks on the flywheel and pressure place to ensure they go back together the same way they were taken apart.
Thanks for the advice!
 11-11-2011, 05:28 PM
#75
TECH Fanatic
iTrader: (5)
Join Date: Sep 2008
Location: Salem/Keizer
Posts: 1,120
Likes: 0
Received 0 Likes
on
0 Posts
My clutch setup is completely different than yours. I'm using a lightened cast iron flywheel, and a totally different disk than yours. Sorry I can't be of more help.
11-11-2011, 05:35 PM
#76
11 Second Club
Thread Starter
For the radiator I decided to go with the FM Crossflow for a couple reasons. It's well developed and has some testing behind it. Plus it was designed for an easy installation in a Miata. I'm sure there are cheaper solutions out there but to me the price difference wasn't worth the extra research time and fabrication to make something else fit.
11-11-2011, 07:39 PM
#77
TECH Fanatic
iTrader: (5)
Join Date: Sep 2008
Location: Salem/Keizer
Posts: 1,120
Likes: 0
Received 0 Likes
on
0 Posts
For the radiator I decided to go with the FM Crossflow ..... I'm sure there are cheaper solutions out there but to me the price difference wasn't worth the extra research time and fabrication to make something else fit....
 11-12-2011, 11:07 PM
#78
11 Second Club
Thread Starter
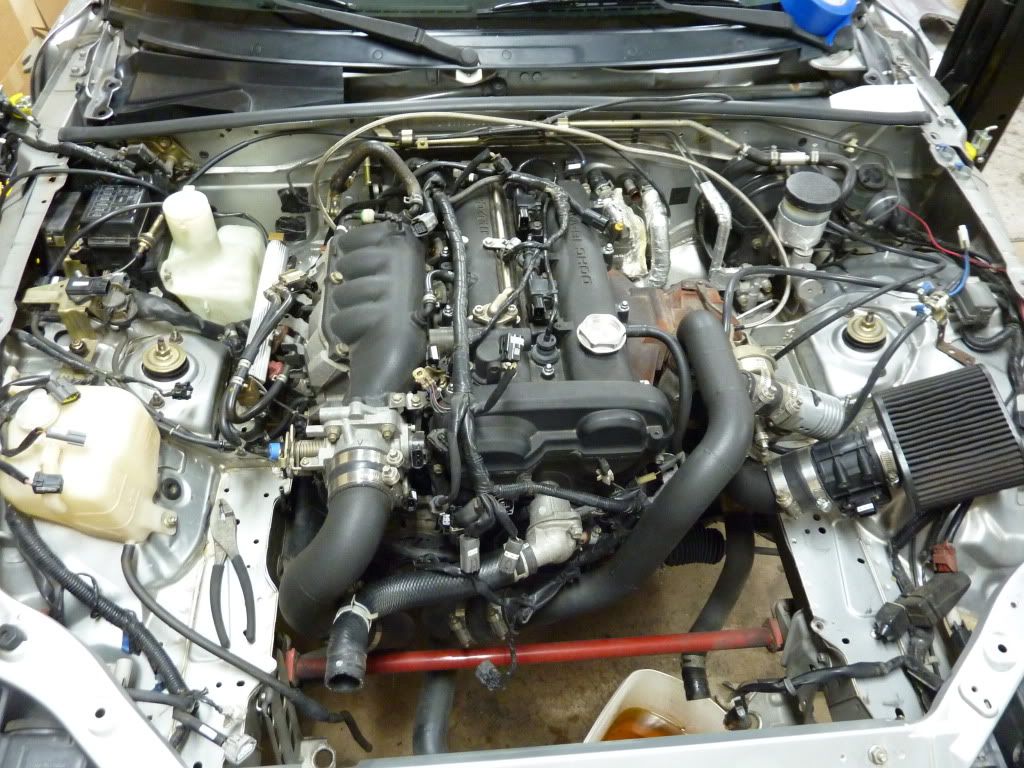
Speaking of $800 oil pans. I had a little issue with my pan. I went to install it and noticed it wouldn't sit flat on the block. When one end was flush the opposite corner was 3/16" off, requiring about 15lbs to bring it down flat. I spoke with FM/V8R and they are taking care of it. Just something else to watch out for. With the pan only torqued to 18ft/lb I wouldn't wanna take any chances with leaks.
11-12-2011, 11:08 PM
#79
11 Second Club
Thread Starter
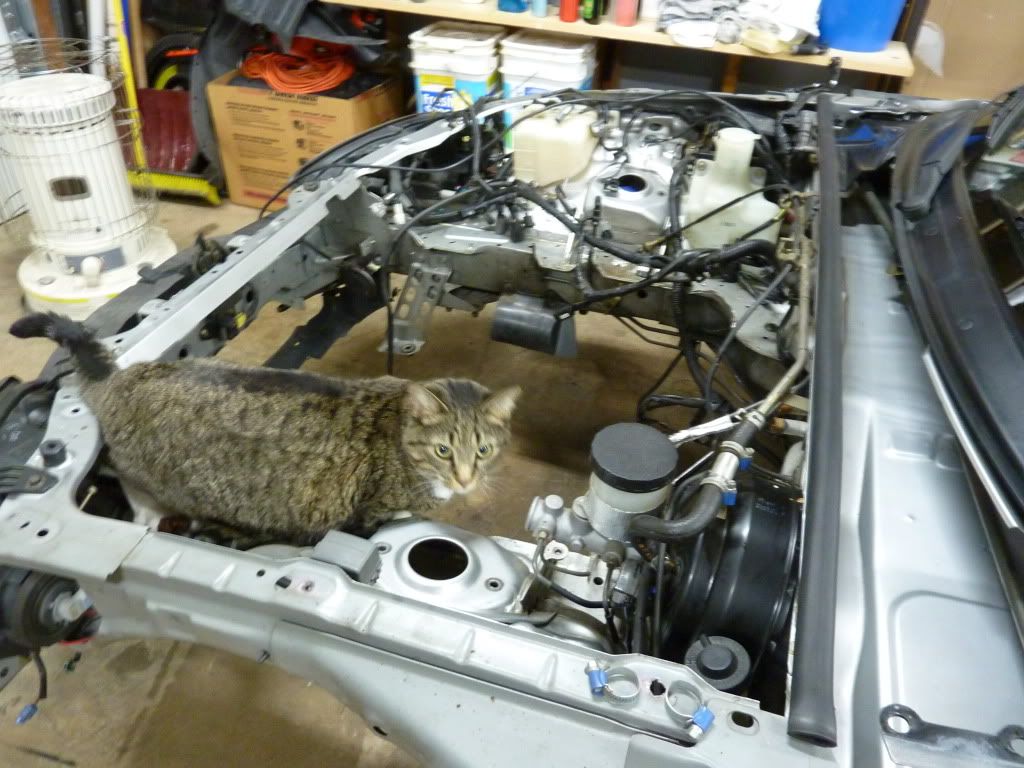
I finally started tearing the car apart today. First I removed the fenders and bumper.
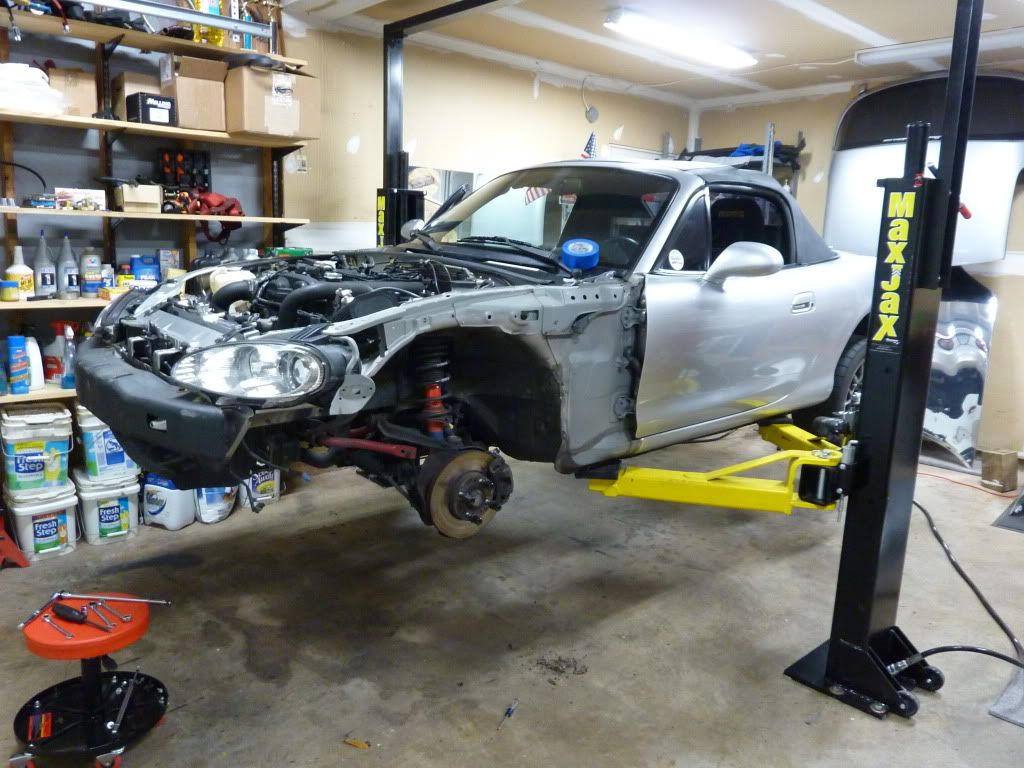
Then started labeling all of the electrical connections with wire markers. Also wrote down the location of each connector with the corresponding wire tag.
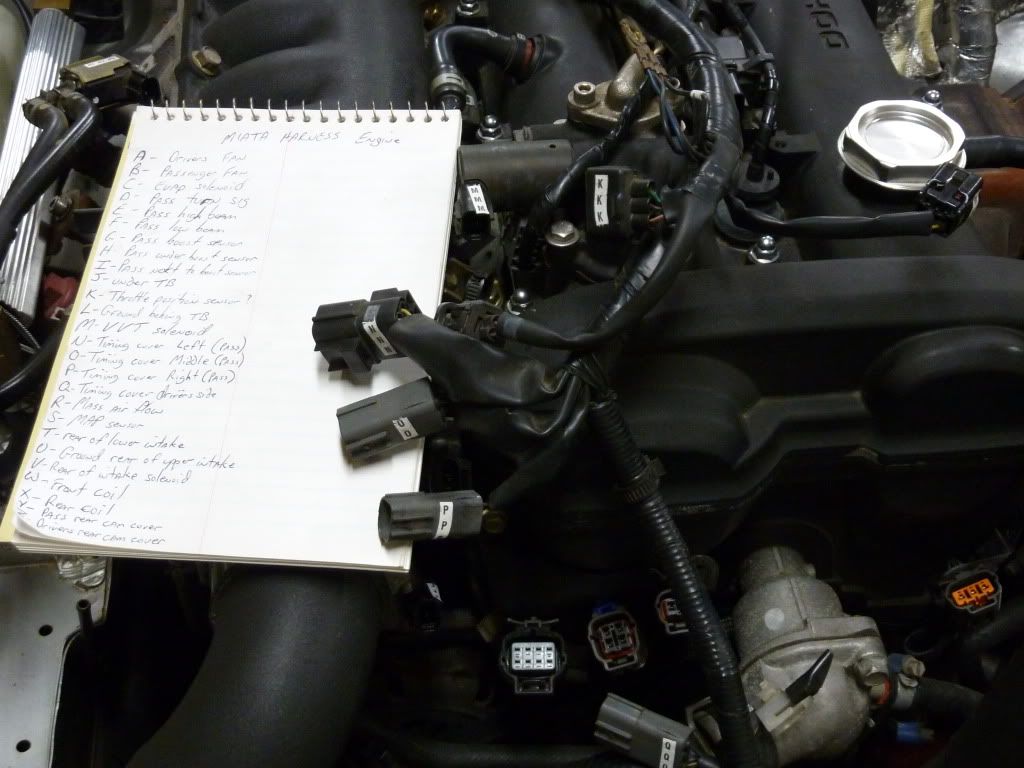
This is as far as I got tonight. Shooting to get the engine dropped out tomorrow.
Then started labeling all of the electrical connections with wire markers. Also wrote down the location of each connector with the corresponding wire tag.
This is as far as I got tonight. Shooting to get the engine dropped out tomorrow.
11-13-2011, 05:37 PM
#80
11 Second Club
Thread Starter
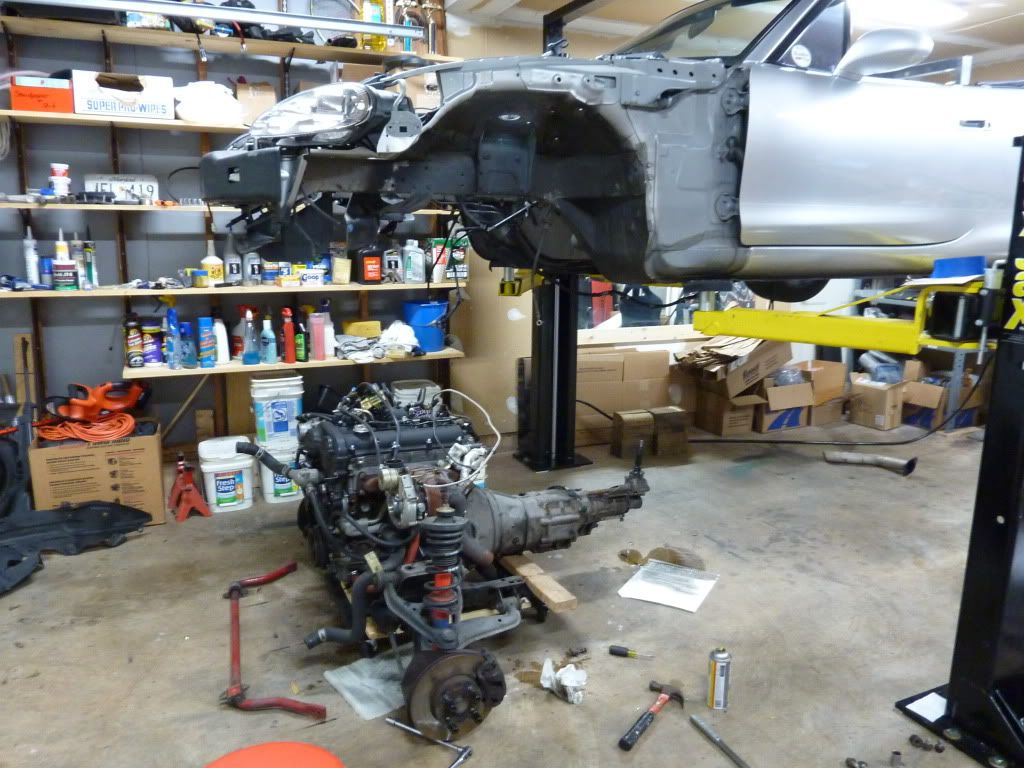
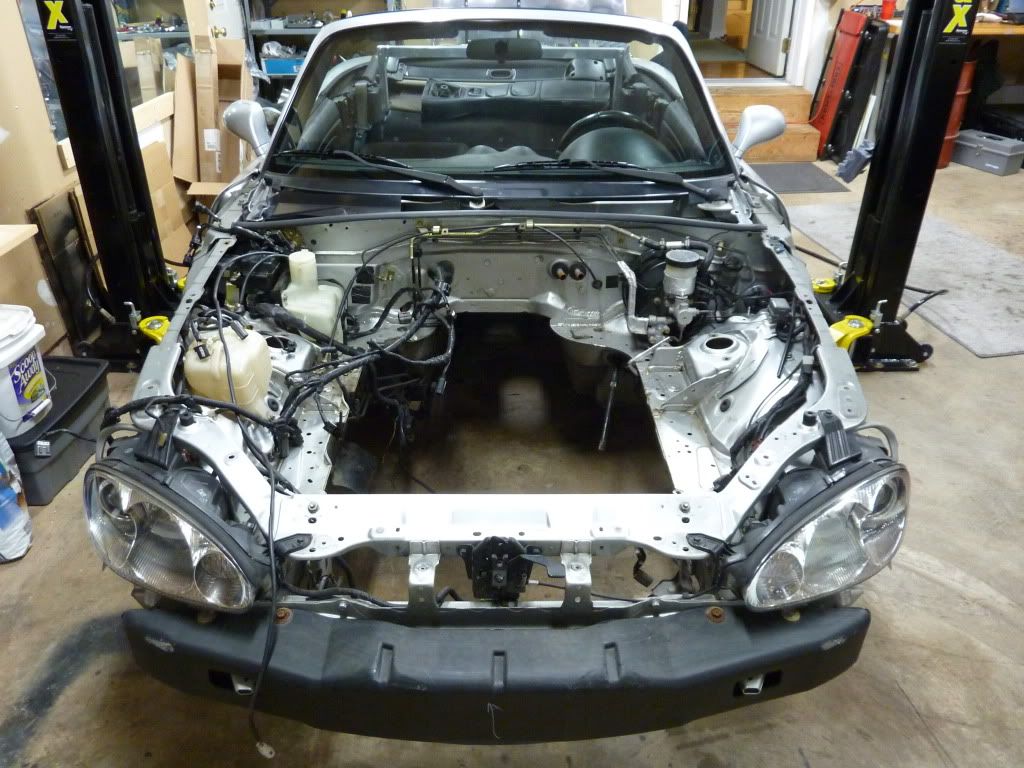
Made some more progress on the car today. Got the engine dropped out. Next step is removing the dash so I can get all of the engine harnesses pulled back through the firewall.
Monster likes what she sees.
Monster likes what she sees.