

Goodbye 4-Banger, Hello LS2 – Miata Build
 01-16-2012, 02:04 PM
#101
11 Second Club
Thread Starter
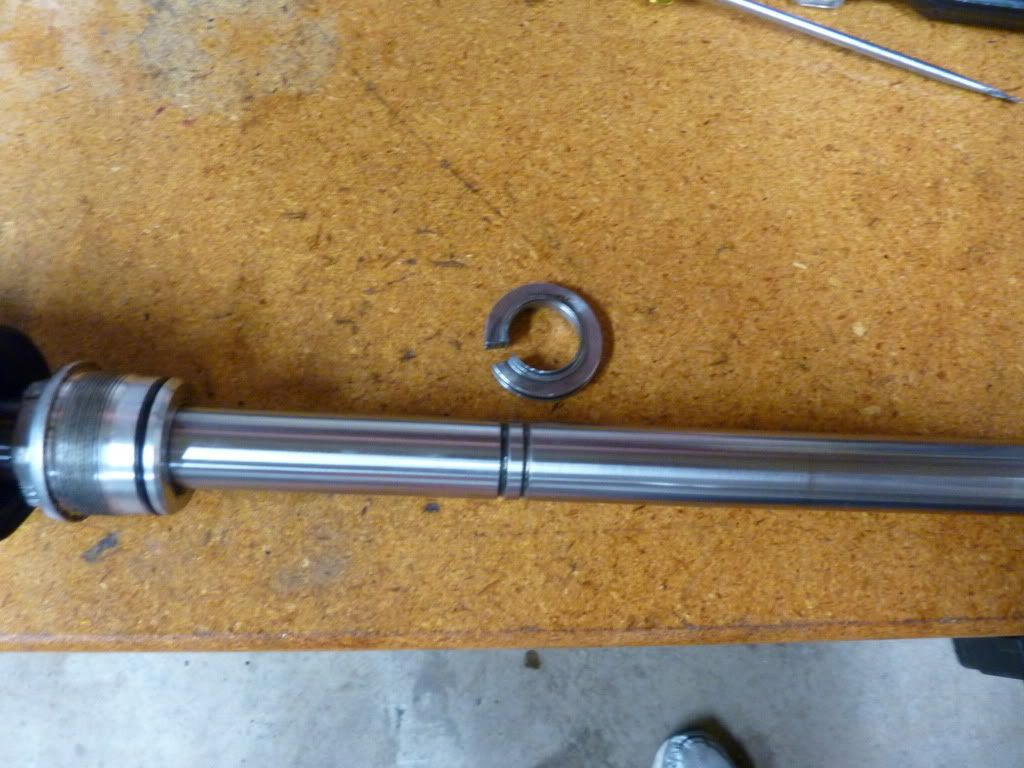
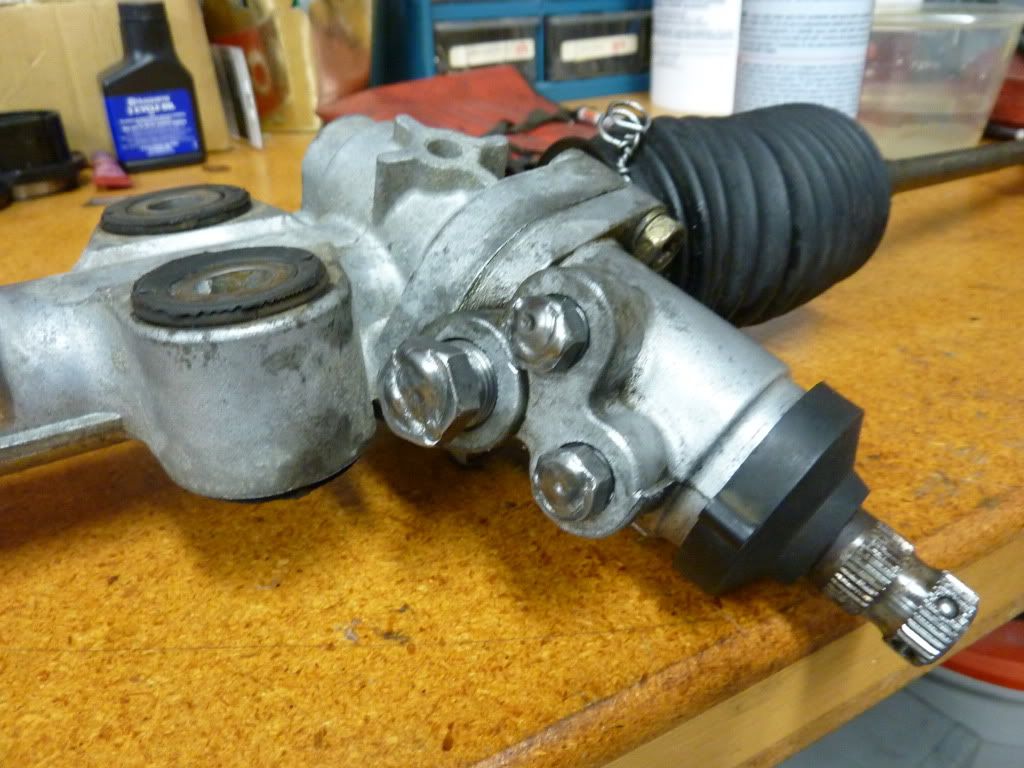
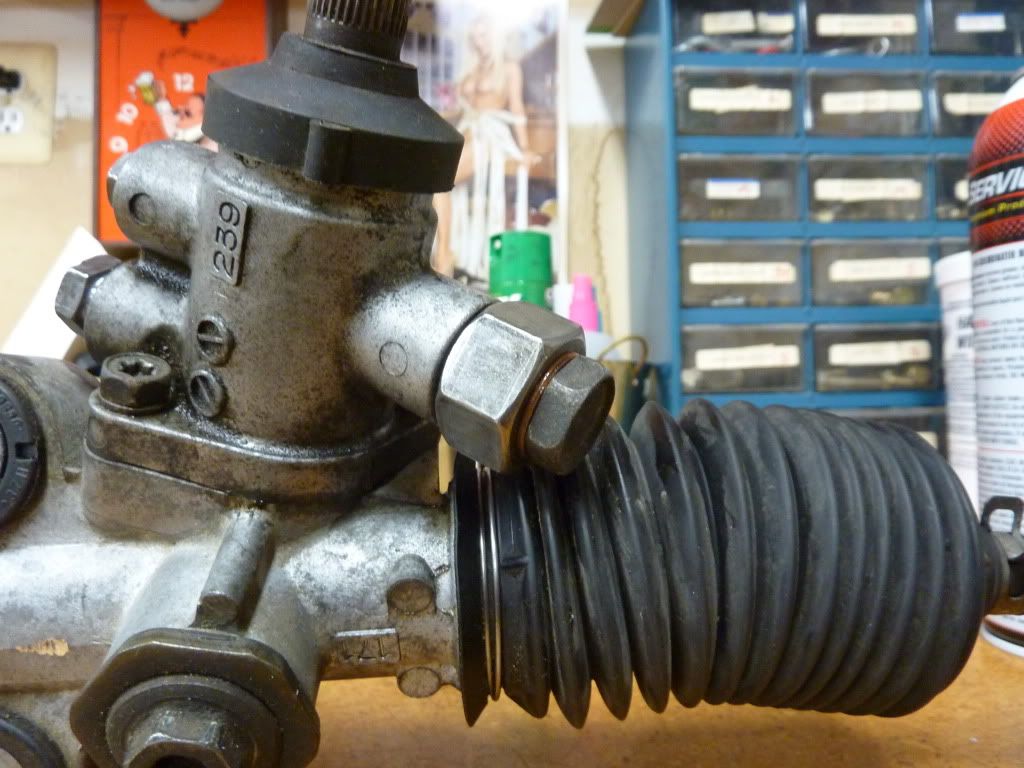
I took some time today to de-power the power steering rack the right way. For years I had been running with the hydraulic lines looped together. This worked fine but I figured while I had the car apart I'd remove the seals from inside the rack and plug up all of the fittings.
The first pic is of the seal that needed to be cut from the rack.
The last 3 pics show the fittings that were plugged. Since there is no longer any hydraulic pressure inside the rack, the main purpose of the fittings is to keep dirt out and grease in.

The first pic is of the seal that needed to be cut from the rack.
The last 3 pics show the fittings that were plugged. Since there is no longer any hydraulic pressure inside the rack, the main purpose of the fittings is to keep dirt out and grease in.
 01-22-2012, 08:11 PM
#102
11 Second Club
Thread Starter
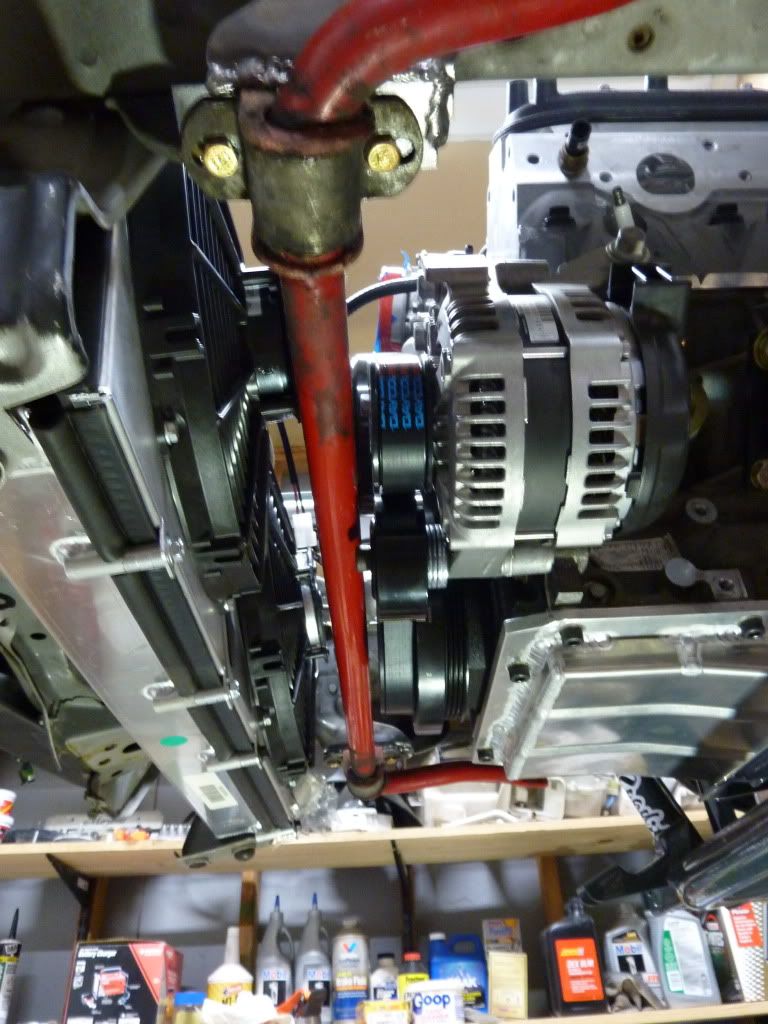
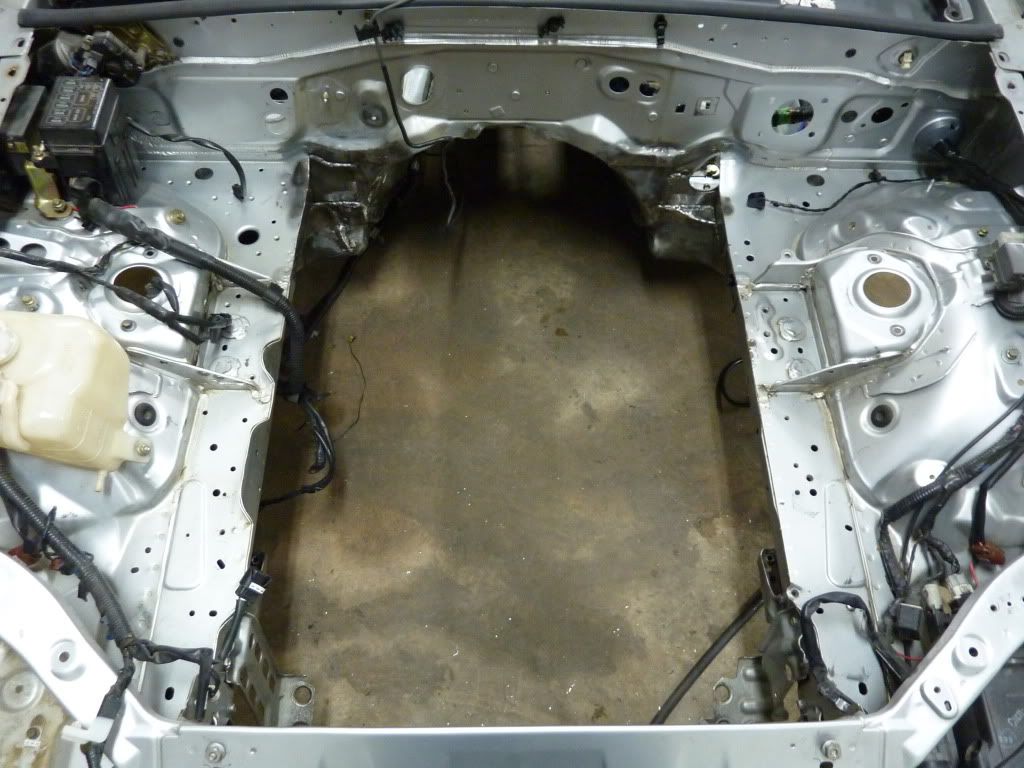
I mounted the engine/subframe back in the car to finish test fitting things.
The first thing I did was work on the radiator mounts. I unbolted them and moved it forward so the rear mounting hole was now bolted to the front hole. Then installed the radiator with just the 1 bolt holding it in. Leaving only 1 bolt holding it allowed me to rotate the mount to get the front of the radiator to the right height. Once I got the radiator where I wanted it I removed it carefully without moving the mounts from their position. I then welded the front of the mount in place and tightened the rear bolt.
Here's a shot of the clearance between the radiator and the front support. After some modification to the OEM top radiator bracket I was able to bolt it in using the stock rubber bushings.
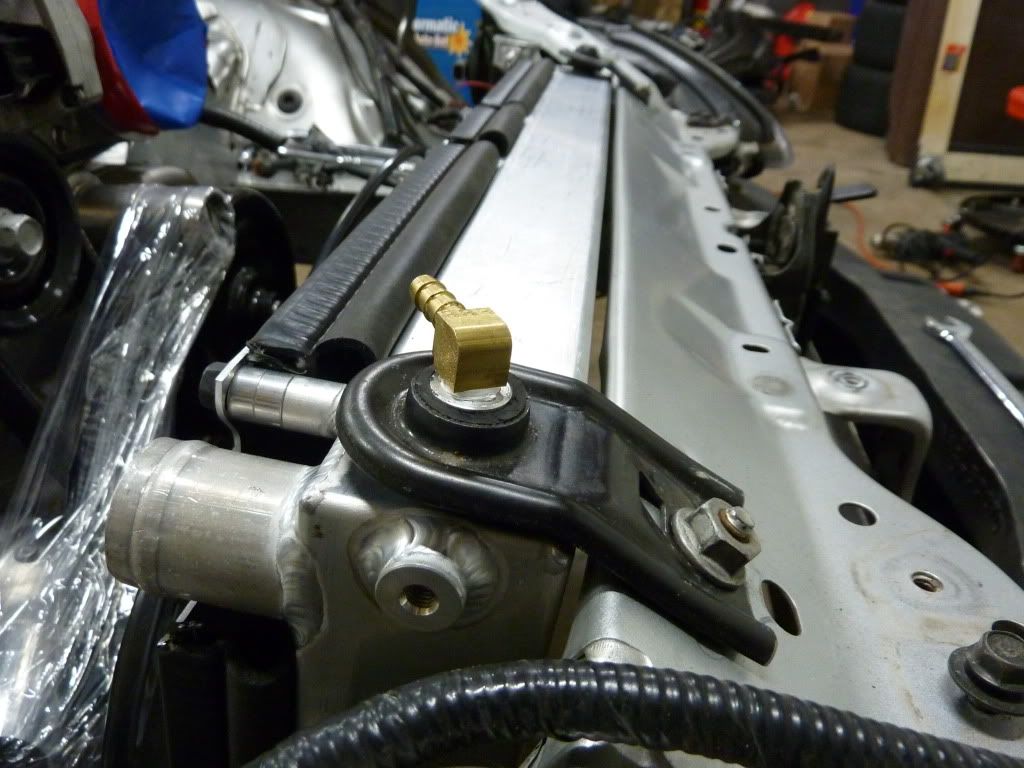
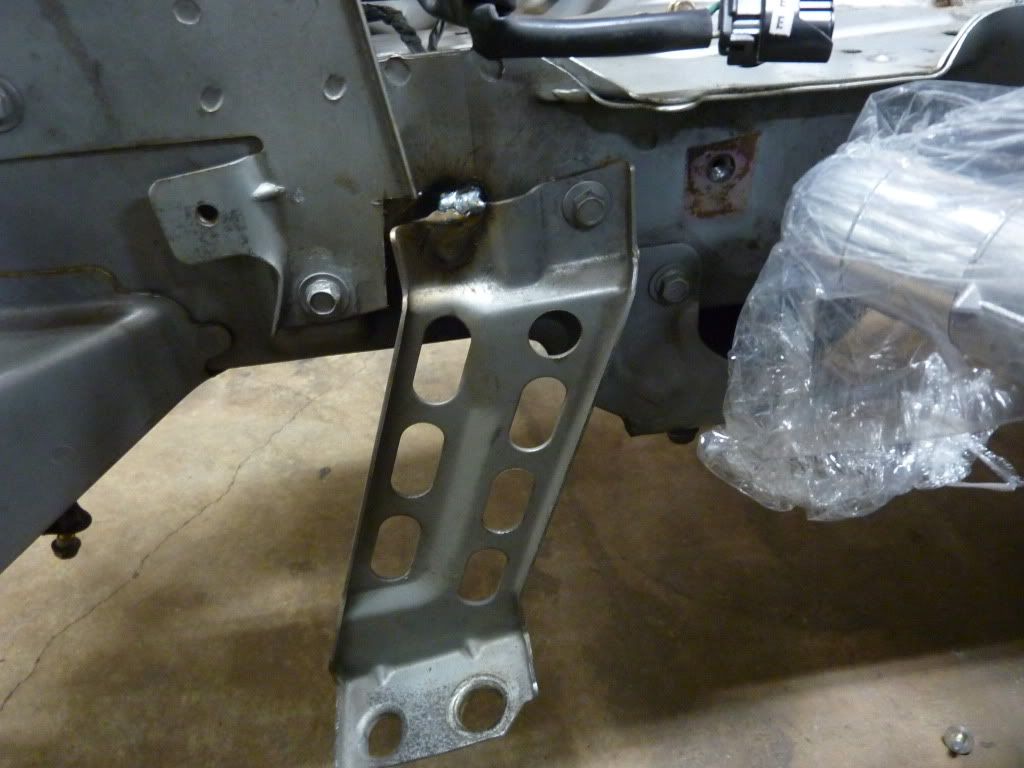
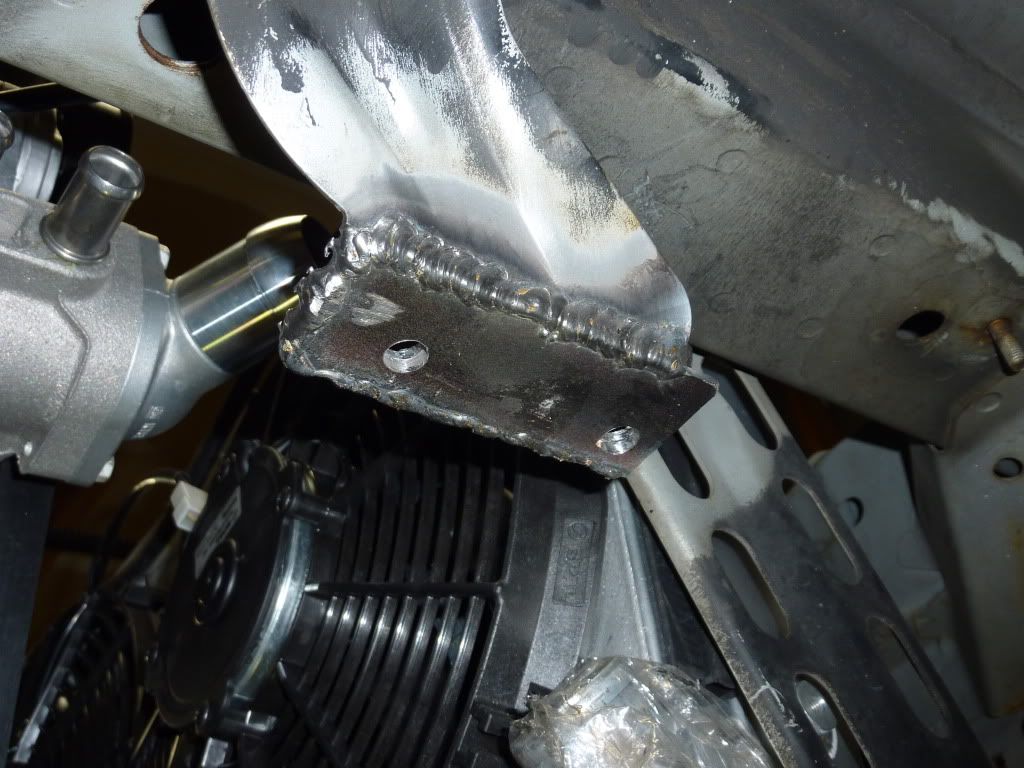
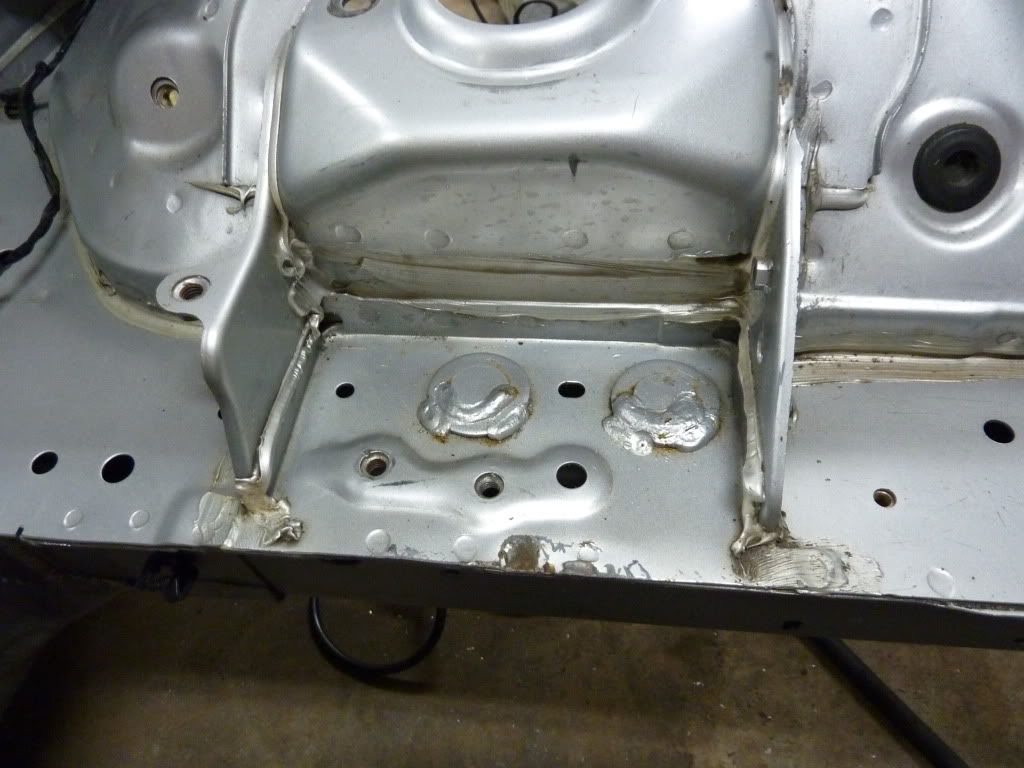
Now that the radiator was done I started on the sway bar. After holding it up in place I noticed that it was only about 1/4" too far back to clear the front of the pulleys. If I could move the mounting points of the sway bar 1/2" forward I could keep my 1.125" swaybar. I used a 1.5" x 4" piece of 1/8" steel plate and welded it to the existing swaybar mount. This would allow me to drill new holes 1/2" forward of the existing holes without weakening the mount.
Here it is all bolted in place. Plenty of space left to get the belt on and off.
The first thing I did was work on the radiator mounts. I unbolted them and moved it forward so the rear mounting hole was now bolted to the front hole. Then installed the radiator with just the 1 bolt holding it in. Leaving only 1 bolt holding it allowed me to rotate the mount to get the front of the radiator to the right height. Once I got the radiator where I wanted it I removed it carefully without moving the mounts from their position. I then welded the front of the mount in place and tightened the rear bolt.
Here's a shot of the clearance between the radiator and the front support. After some modification to the OEM top radiator bracket I was able to bolt it in using the stock rubber bushings.
Now that the radiator was done I started on the sway bar. After holding it up in place I noticed that it was only about 1/4" too far back to clear the front of the pulleys. If I could move the mounting points of the sway bar 1/2" forward I could keep my 1.125" swaybar. I used a 1.5" x 4" piece of 1/8" steel plate and welded it to the existing swaybar mount. This would allow me to drill new holes 1/2" forward of the existing holes without weakening the mount.
Here it is all bolted in place. Plenty of space left to get the belt on and off.
 01-23-2012, 05:52 AM
#104
Staging Lane

Join Date: Oct 2008
Posts: 62
Likes: 0
Received 0 Likes
on
0 Posts
Great project. I have wanted to do this swap to my mom's Miata since I bought my 98 Z/28 when it was new.
Thanks for sharing all the parts & costs involved in the process. Keep up the great work.
Thanks for sharing all the parts & costs involved in the process. Keep up the great work.
 01-23-2012, 06:19 AM
#106
11 Second Club
Thread Starter
Thanks for the awesome input... Very informative. Sounds like you really know you're sports cars. Seriously though, it's not like the thread topic was misleading. If you don't like the car why even bother looking? Just to be a dick?
Last edited by MX6.0; 01-23-2012 at 08:56 AM.
01-23-2012, 06:26 AM
#107
11 Second Club
Thread Starter
01-23-2012, 08:20 AM
#108

I mounted the engine/subframe back in the car to finish test fitting things.
I used a 1.5" x 4" piece of 1/8" steel plate and welded it to the existing swaybar mount. This would allow me to drill new holes 1/2" forward of the existing holes without weakening the mount.
http://i974.photobucket.com/albums/a...s/P1010436.jpg
I used a 1.5" x 4" piece of 1/8" steel plate and welded it to the existing swaybar mount. This would allow me to drill new holes 1/2" forward of the existing holes without weakening the mount.
http://i974.photobucket.com/albums/a...s/P1010436.jpg
2 for 1, lol. By welding the plate to the bottom of the anti sway bar bracket, you reinforced the area on the bracket that fails. The 90* bends where you welded the plate on are where they fatigue & then begin to "sway" side to side. The weld strengthened the area. Would still suggest putting rectangular tubing inside the bracket large enough to touch side to side & top to bottom & tack weld next to where the stock brackets bolt to the frame (bolts can snap).
Looks great. You were able to install the bottom of the radiator & anti sway bar much higher than most. Well done.
 01-26-2012, 08:54 PM
#109
11 Second Club
Thread Starter
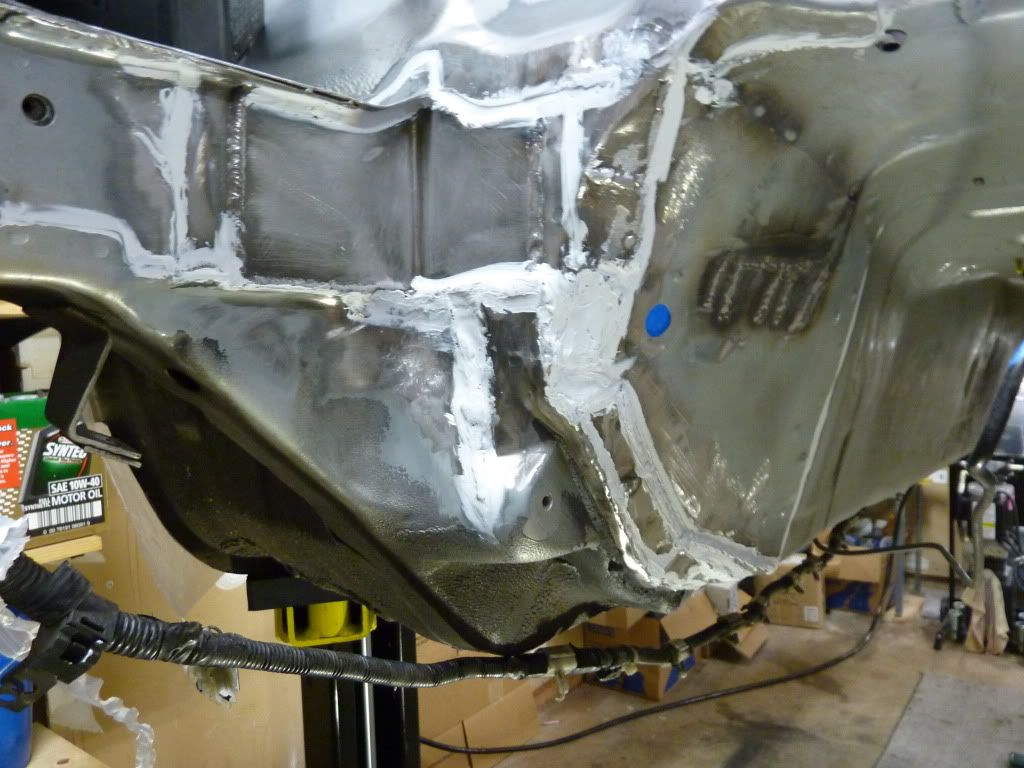
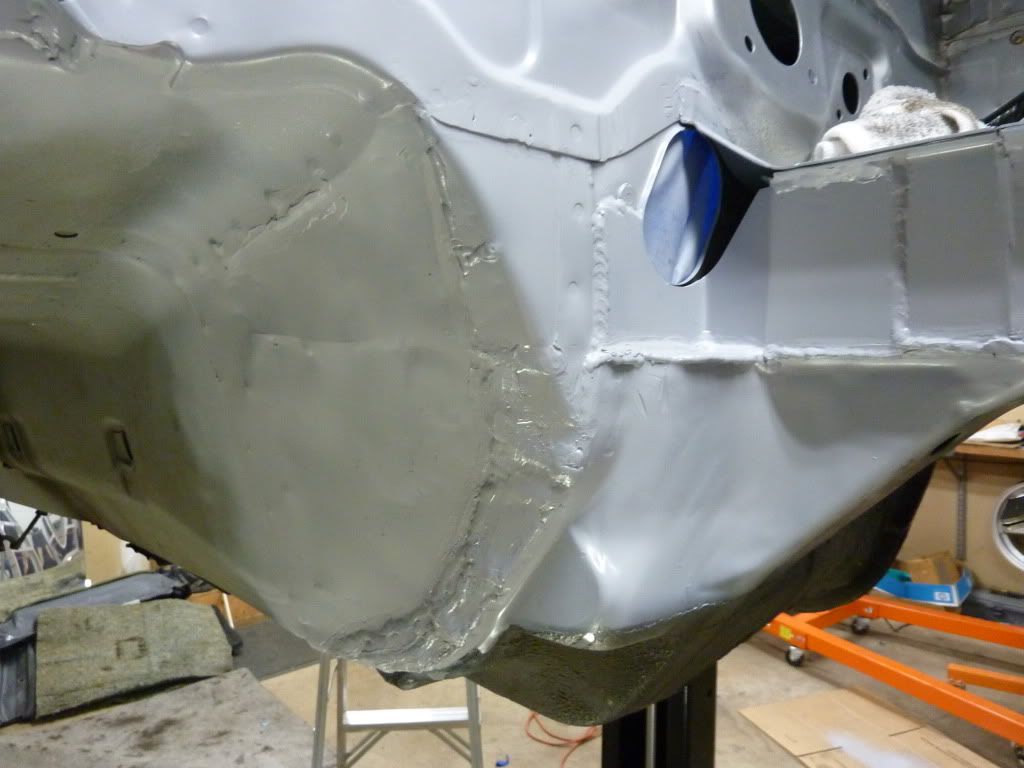
Finally finished welding everything in the engine bay and behind the dash.

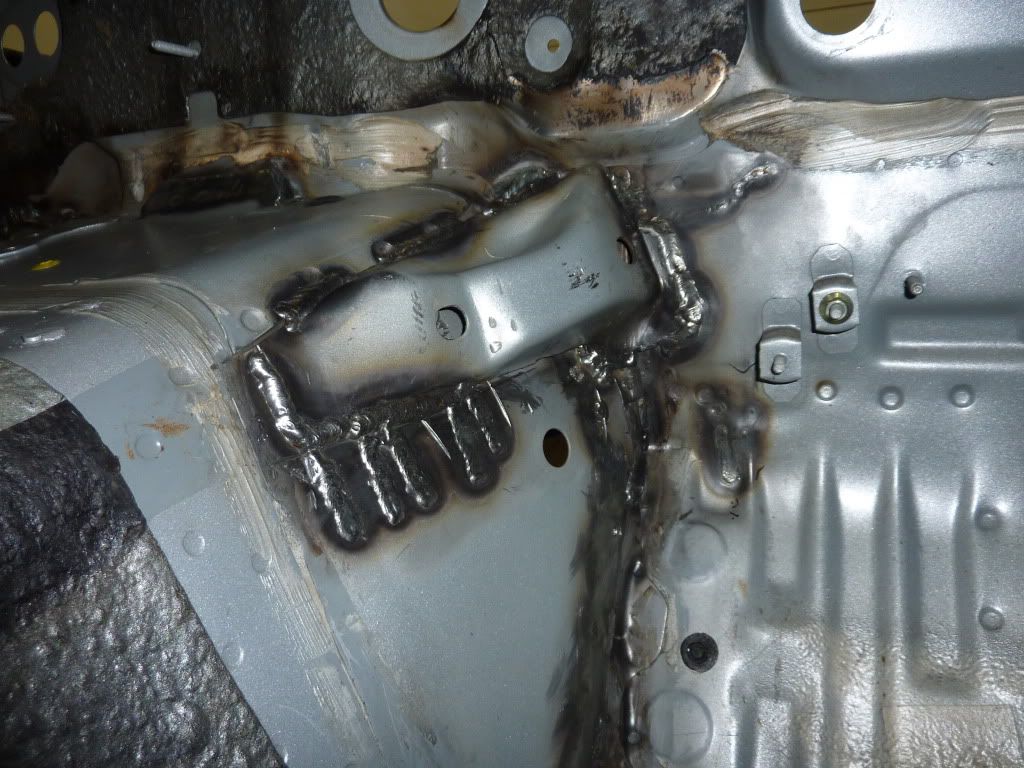
I had some clearance issues with the top of the bell housing and the firewall. From the 90* angle, I made a 1" cut up and another 1" cut back and then folded the top and bottom pieces together. Then I used some 16 gauge steel and made some small triangle pieces to fill in the sides. The top is 3" wide, the bottom is 4" wide. I think it turned out pretty nice and it should give me plenty of clearance.
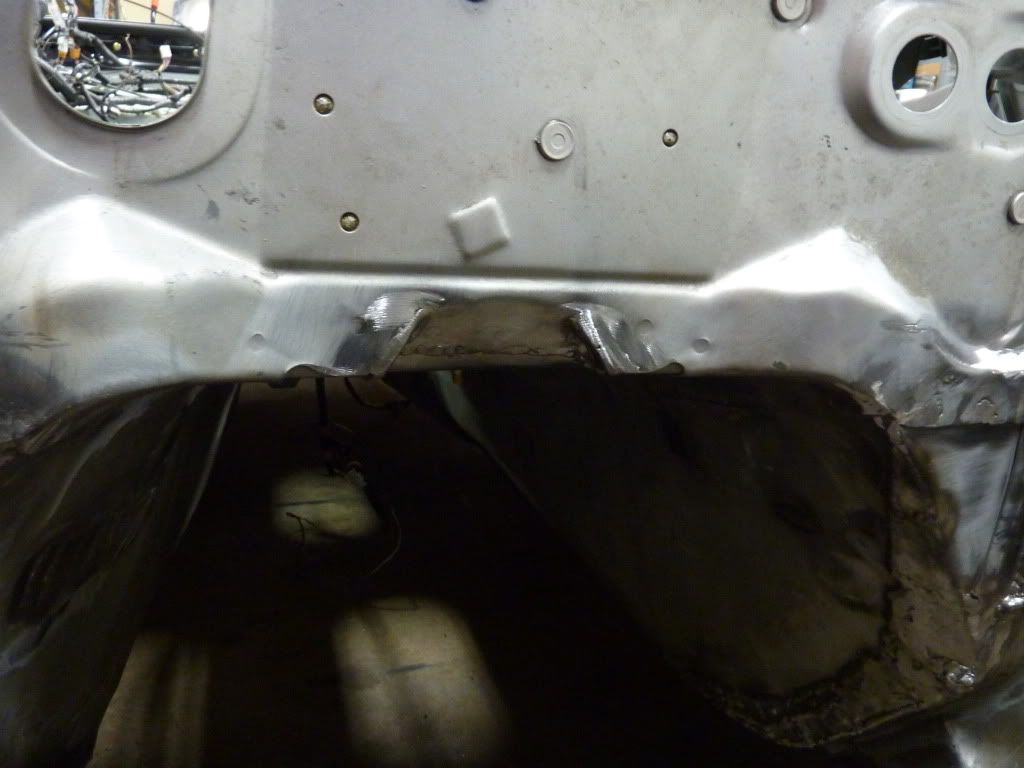
I had some clearance issues with the top of the bell housing and the firewall. From the 90* angle, I made a 1" cut up and another 1" cut back and then folded the top and bottom pieces together. Then I used some 16 gauge steel and made some small triangle pieces to fill in the sides. The top is 3" wide, the bottom is 4" wide. I think it turned out pretty nice and it should give me plenty of clearance.
01-26-2012, 09:13 PM
#110
Launching!
Join Date: Feb 2007
Location: Phoenix,AZ
Posts: 263
Likes: 0
Received 0 Likes
on
0 Posts
A miata is more of a sports car than an F-body.. It actually turns in its stock form.
Awesome thread. The service manager at my shop is a huge miata nut, I keep showing this thread to him to hopefully inspire a cool swap into his 1992.
Awesome thread. The service manager at my shop is a huge miata nut, I keep showing this thread to him to hopefully inspire a cool swap into his 1992.
01-26-2012, 09:17 PM
#111
11 Second Club
Thread Starter
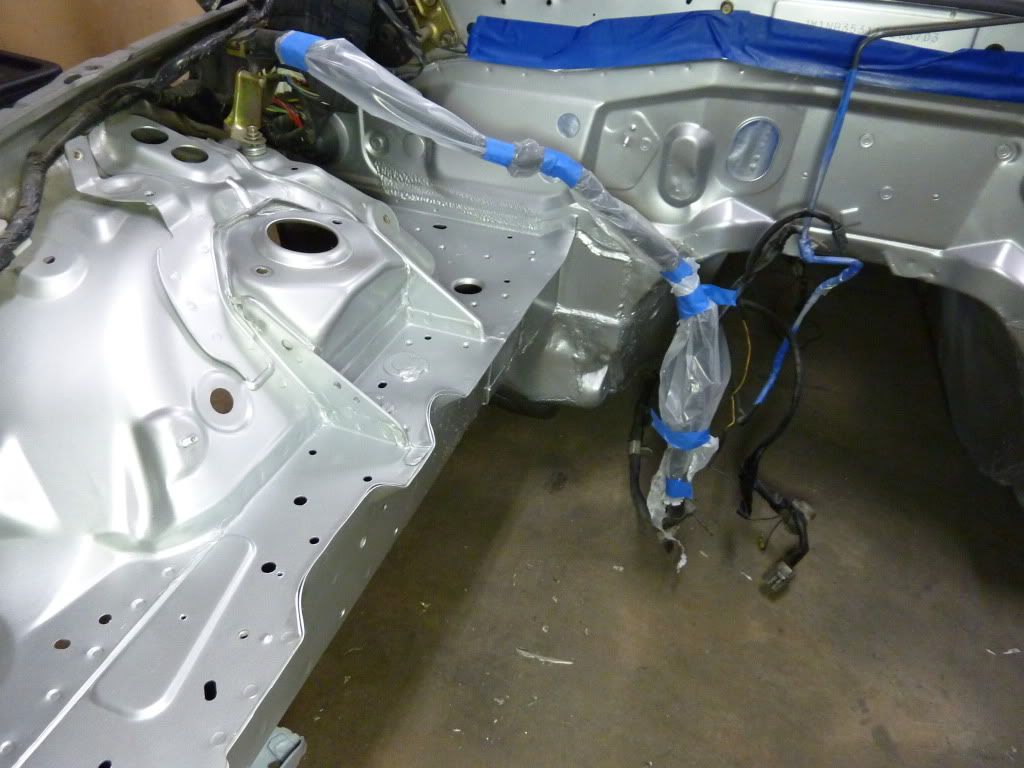
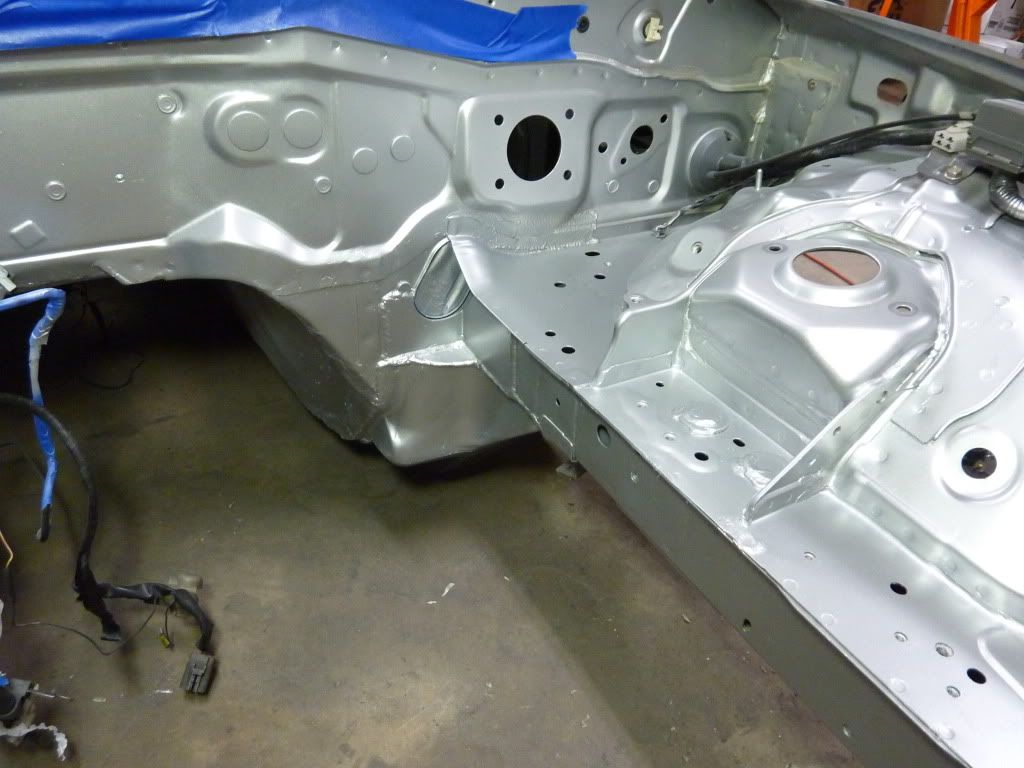
Vacuumed all of the metal filings out of the interior and engine bay to start prepping for paint. I don't plan on doing the whole engine bay. Probably just the horizontal sections and the areas that were welded.
Here's an area that I might touch up. Although the car has spend 90% of the time in the garage, it's managed to get some surface rust in a few spots. Mazda was also pretty sloppy with the seam sealer.
I put seam sealer around the interior braces. Thank god I don't have to look at those welds anymore.
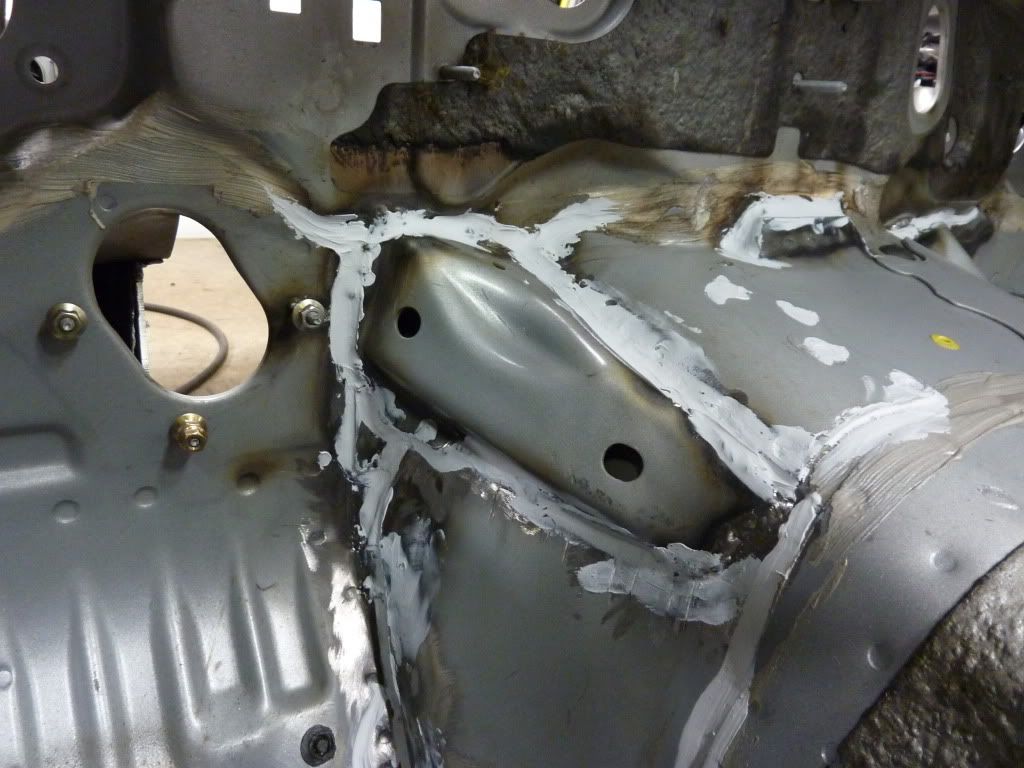
I also put seam sealer around these little holes behind the seats. There must have been $5 worth of change jammed in there.
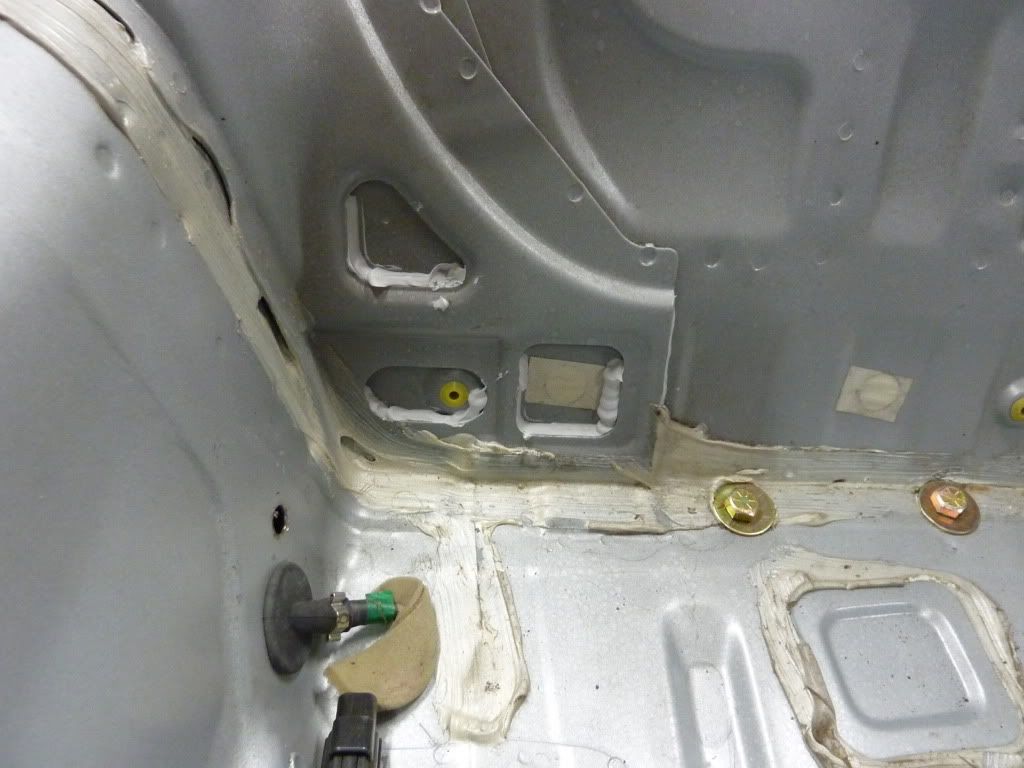
Here's an area that I might touch up. Although the car has spend 90% of the time in the garage, it's managed to get some surface rust in a few spots. Mazda was also pretty sloppy with the seam sealer.
I put seam sealer around the interior braces. Thank god I don't have to look at those welds anymore.
I also put seam sealer around these little holes behind the seats. There must have been $5 worth of change jammed in there.
01-26-2012, 09:42 PM
#112
TECH Fanatic
iTrader: (5)
Join Date: Sep 2008
Location: Salem/Keizer
Posts: 1,120
Likes: 0
Received 0 Likes
on
0 Posts

It's funny how all the ****-talkers love to voice a negative opinion about the Miata...just for the sake of being a blowhard. I work with a couple of guys like that. I got to hear all the BS about my Miata (Gay car, Ricebox, Chick's car...blah, blah, blah....) while mine was going together.
Funny thing happened though: One of the **** talkers took ONE ride with me once the car was done, and swore he'd never do it again...it was definitely priceless LOL
The other guy refuses to get in the car with me, and I get to tell him on a semi-regular basis what a ***** he is.

The best part; all the ****-talking has ceased.
If the Miata is a "wannabe" sportscar, then what in the hell is a "real" one??
Oh...wait...it's not a Mustang (chicks car) or a Corvette (but it handles like one and is faster(now) and lighter.). Hmmm....looks like I had better re-think this whole Miata thing....
And YES, I agree....awesome build thread!!
Last edited by salemetro; 01-26-2012 at 09:47 PM.
01-29-2012, 01:33 PM
#114
11 Second Club
Thread Starter
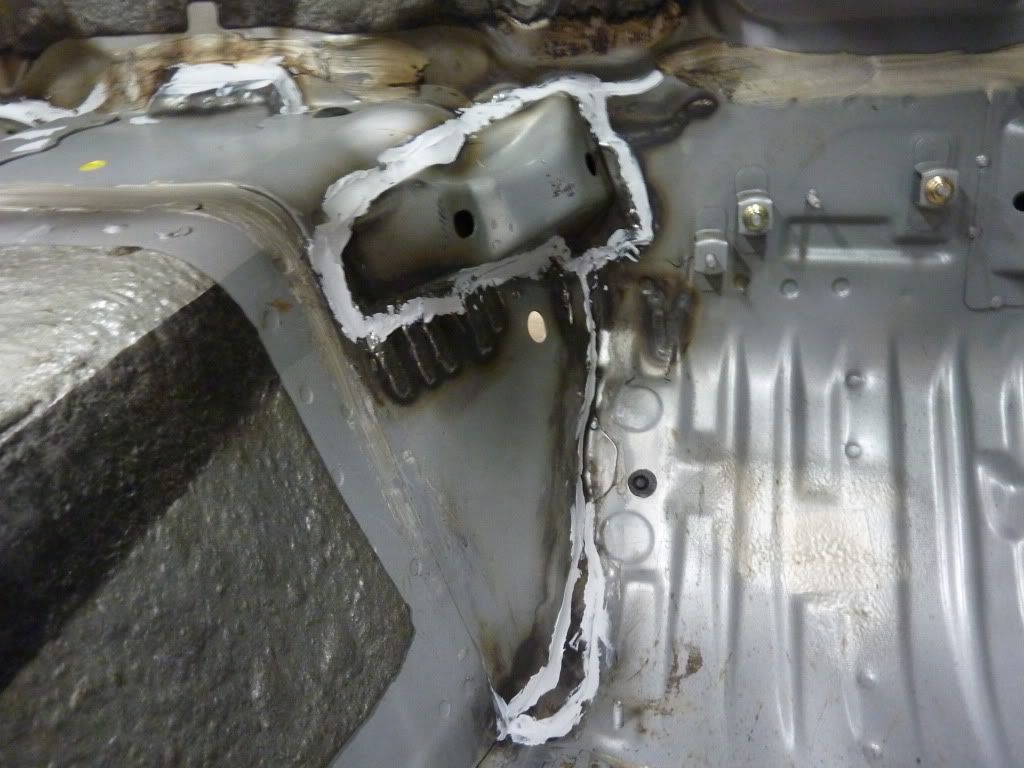
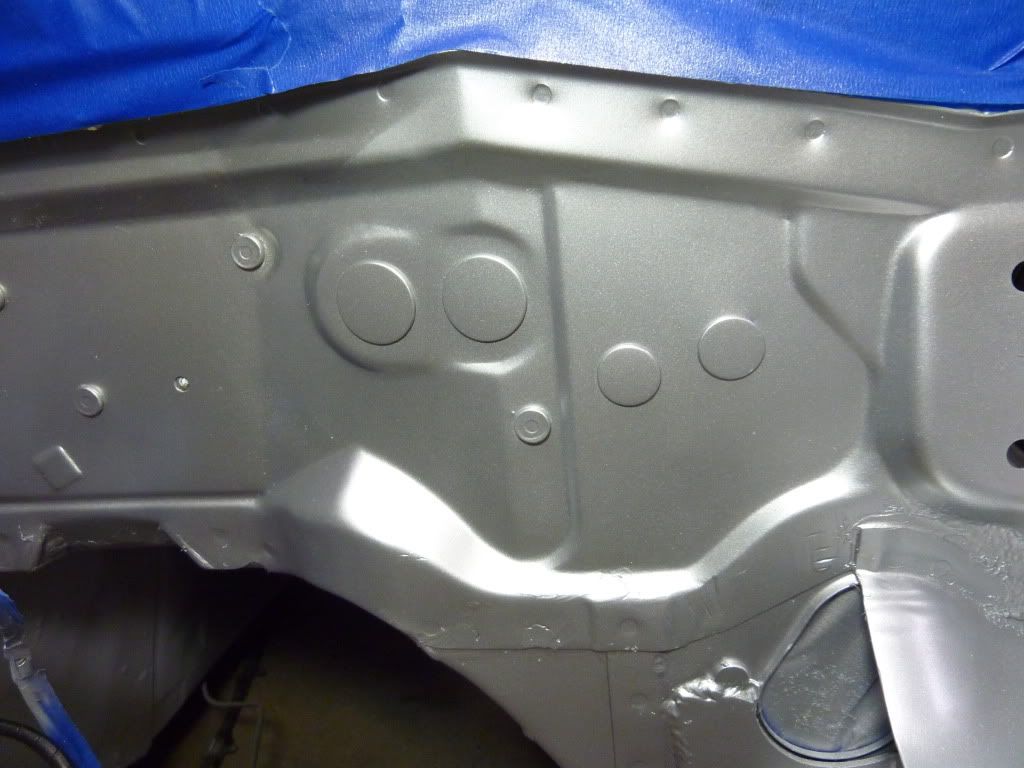
I'm working on painting everything up this weekend. Mazda went a little crazy with the seam sealer around the upper shock mounts so I cleaned them up a bit.
Here's a shot of one of them before I did anything.

Here it is after cleaning up the excessive seam sealer and smoothing things out a bit with new seam sealer.
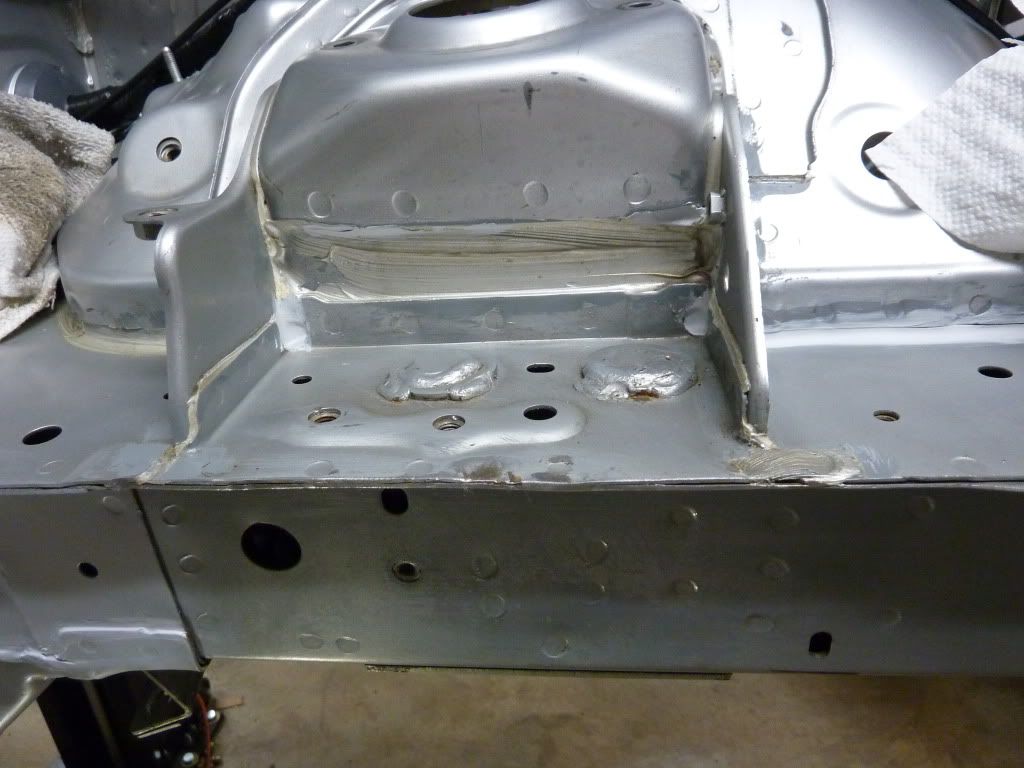
And here it is after some fresh paint. I think it turned out 10 times better than it originally did.
Here's a shot of one of them before I did anything.
Here it is after cleaning up the excessive seam sealer and smoothing things out a bit with new seam sealer.
And here it is after some fresh paint. I think it turned out 10 times better than it originally did.
01-29-2012, 01:48 PM
#115
11 Second Club
Thread Starter
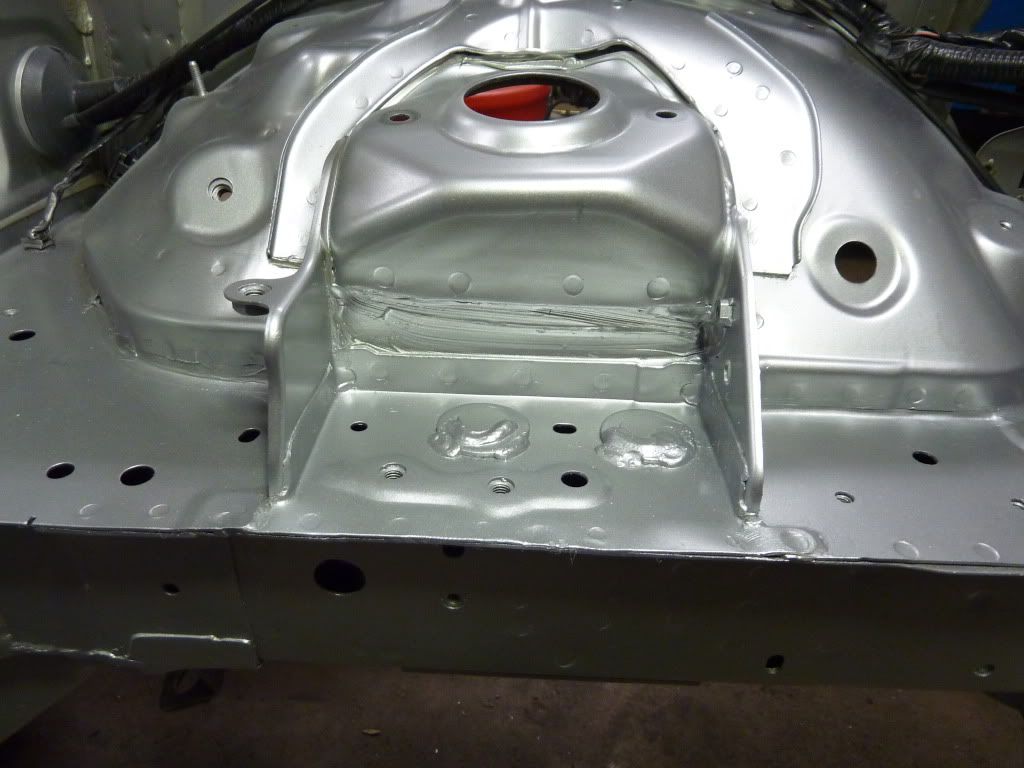
I added seam sealer to the areas where I removed the old sealer and to the areas where I wanted to smooth out (hide) my welds
Then I primed all the areas where bare metal and seam sealer were visible.
And here's the finished product. The spray can paint I got from Paintscratch.com seems like it's a pretty close match.
I used electrical blank-off plates to clover up the unused holes in the firewall. 2 for the old heater hoses, 2 for the old throttle cable and cruise control, and 1 for the hole I made for the additional turbo related wiring. I was originally looking for some sort of rubber grommet to put in there but I think these metal plates turned out better.

 01-30-2012, 12:01 PM
#118
11 Second Club
Thread Starter
The lift has more than paid for itself. I raise the car up so I can paint everything easier, it made welding underneath much easier, any work done under the car is made 10 times easier with the lift.
After test fitting the engine/transmission a hand full of times I couldn't imagine doing it without the lift.
After test fitting the engine/transmission a hand full of times I couldn't imagine doing it without the lift.
